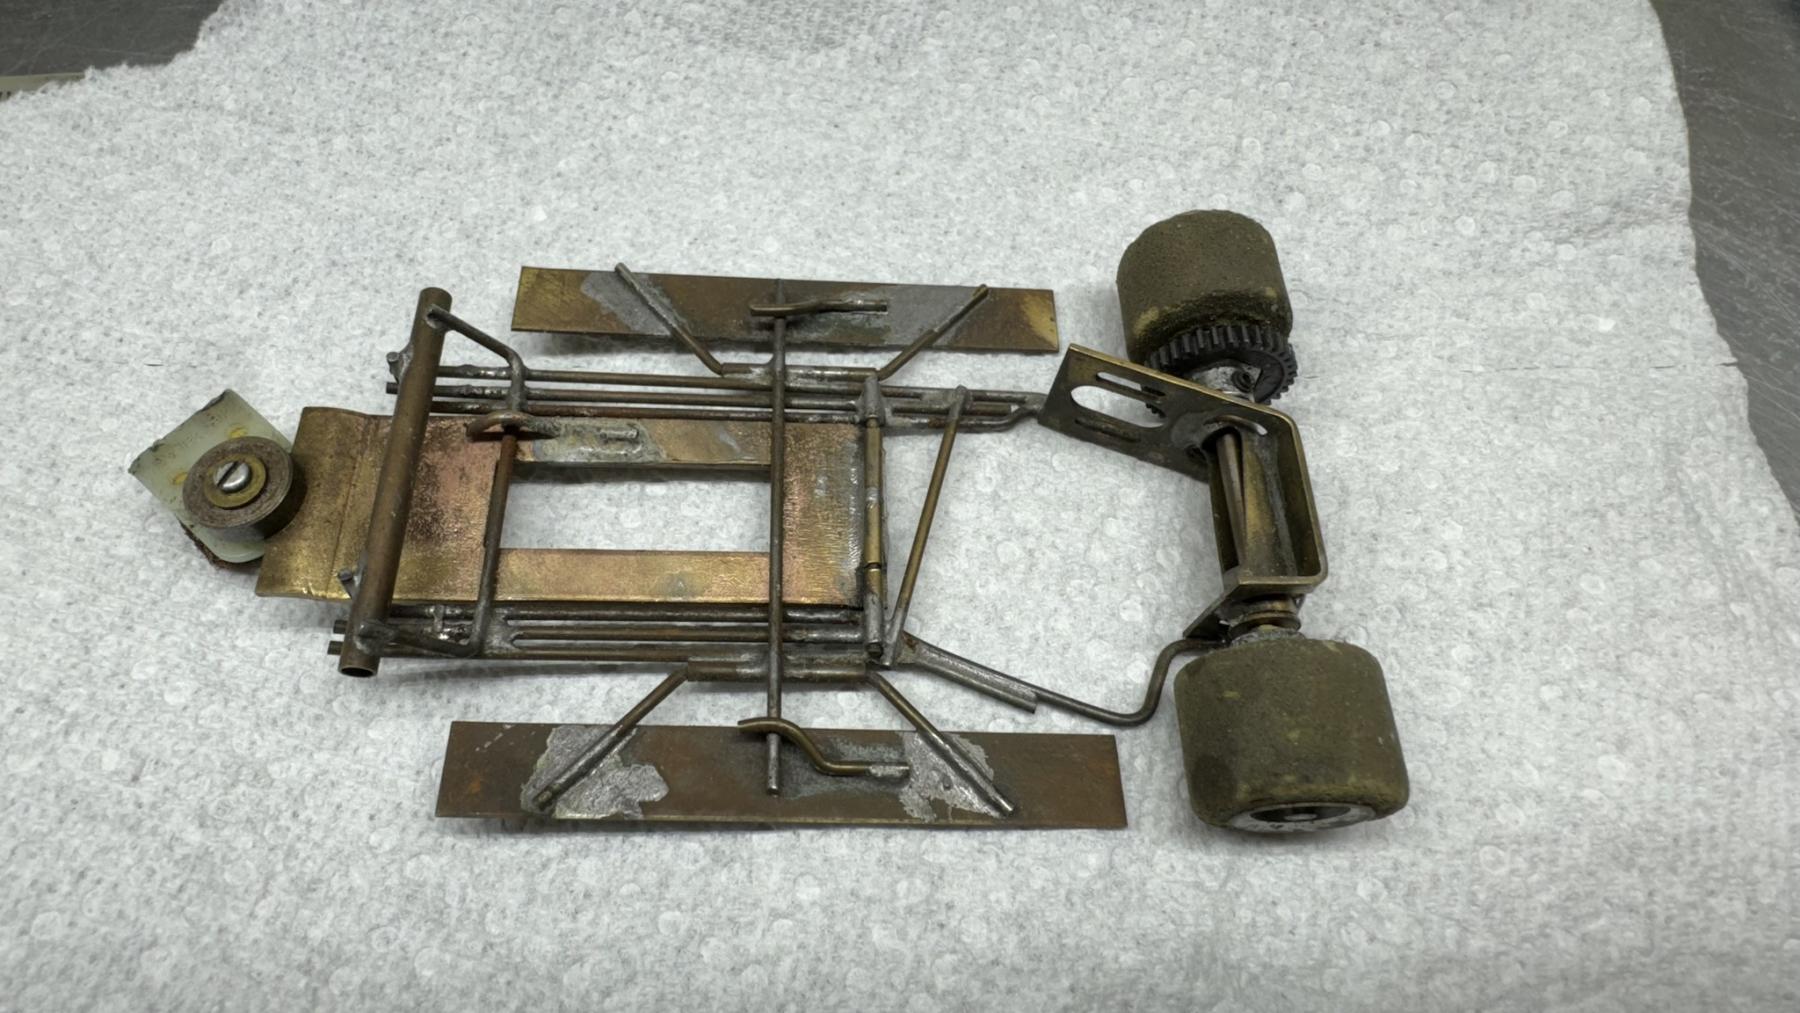

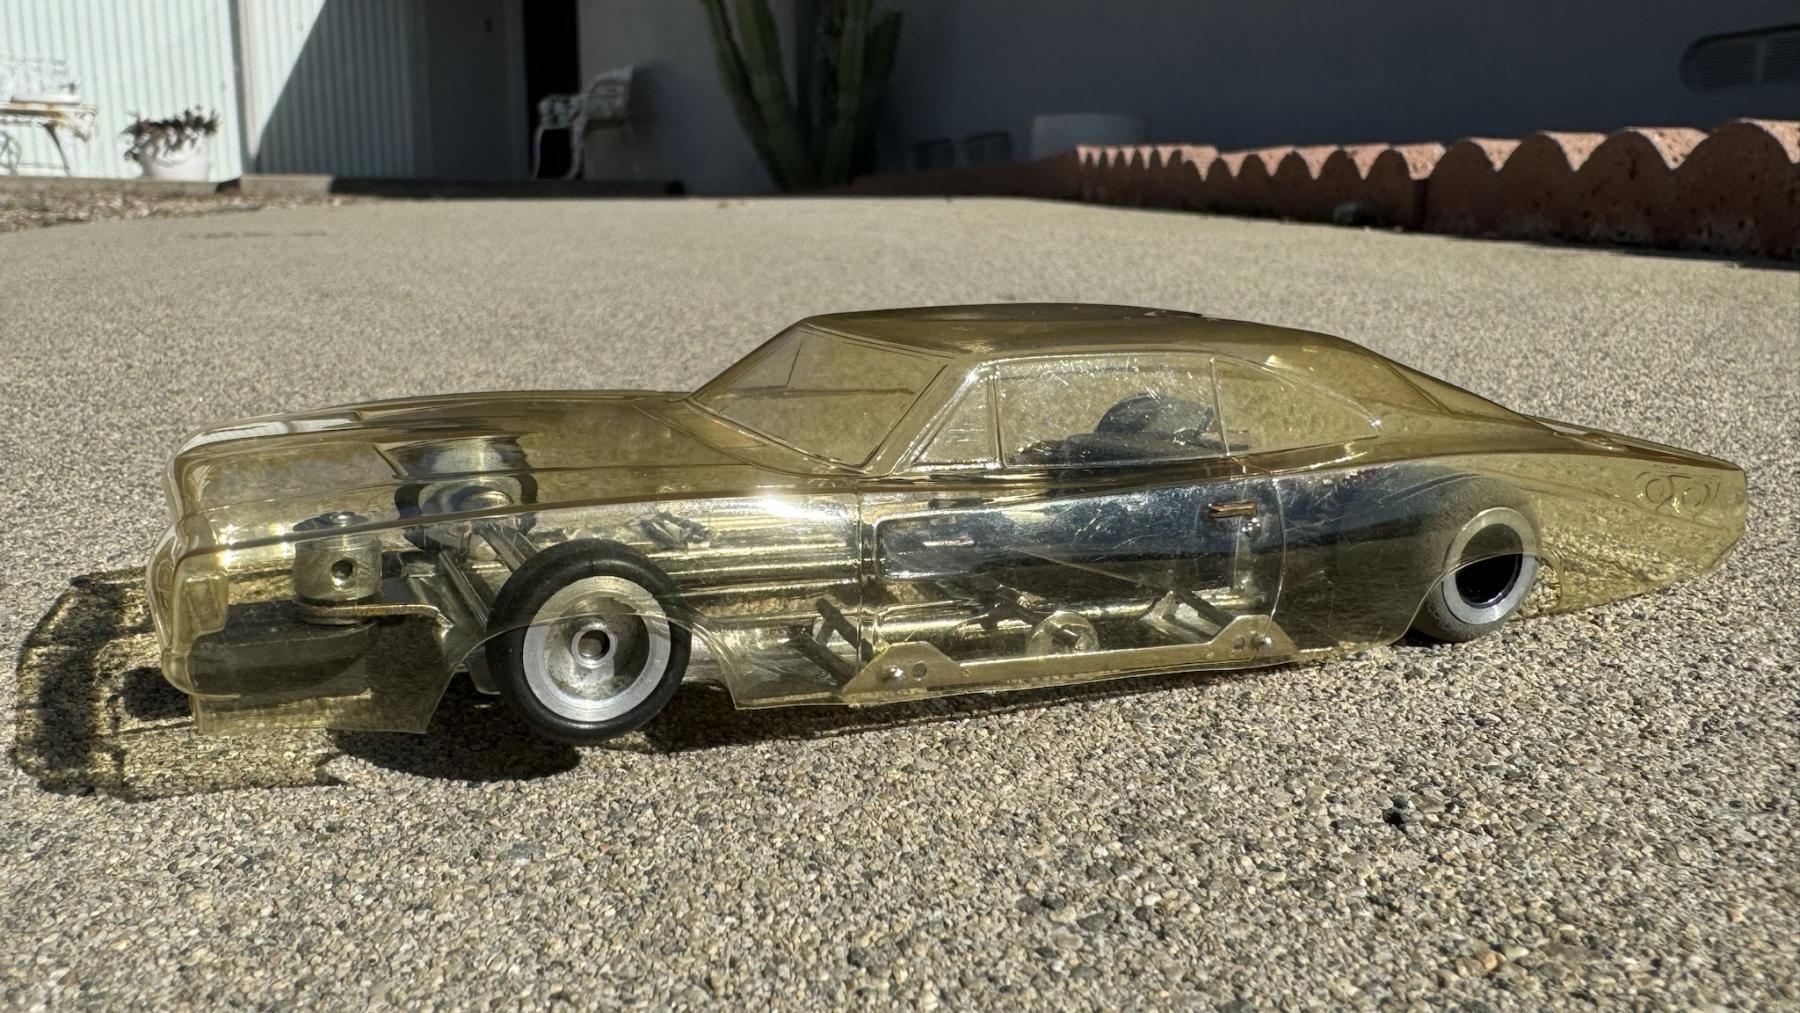
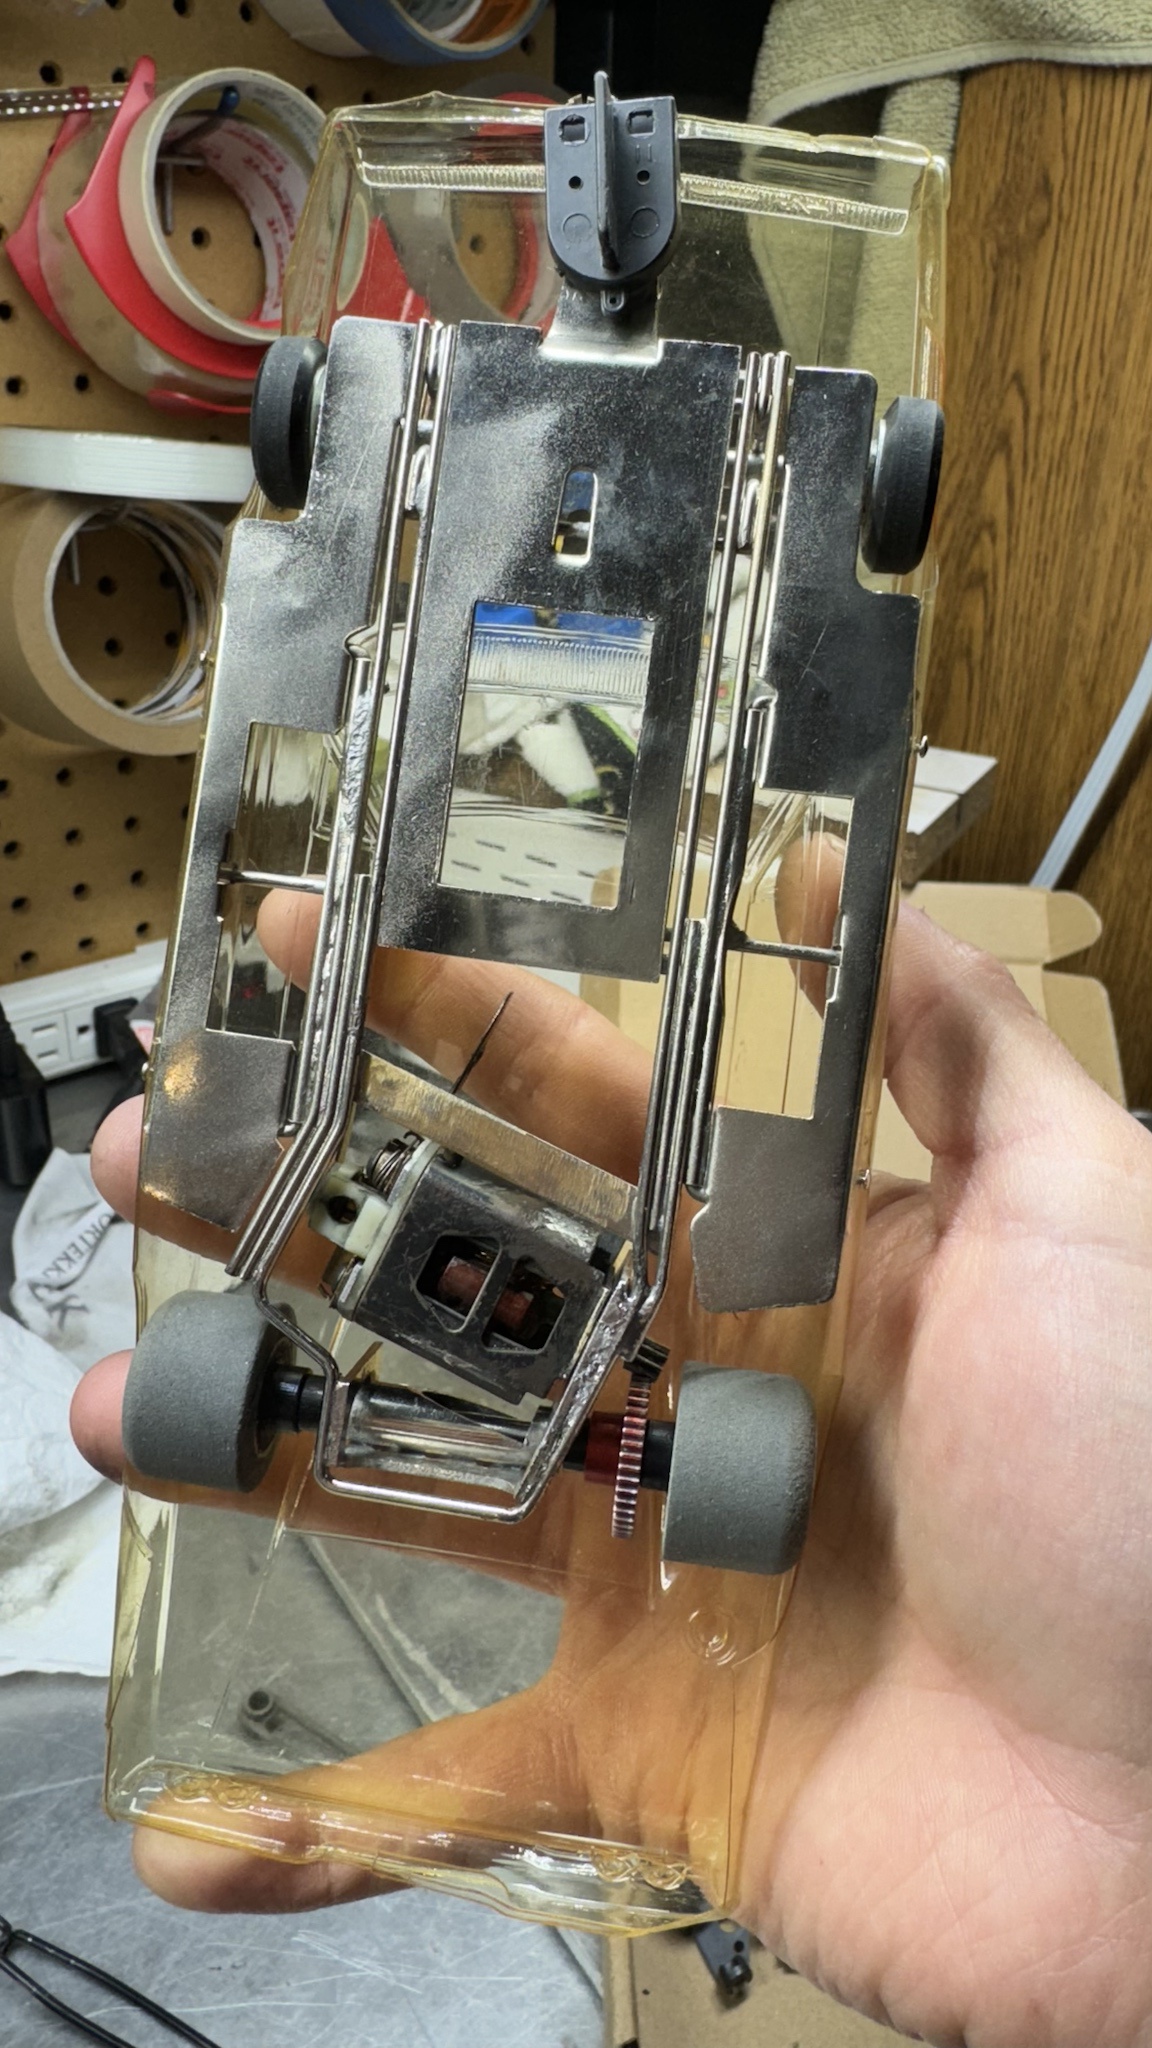
Been hanging on to this body for a while. fits this chassis almost perfect. its pretty brittle and thin though.


|

Race Leader

Posted 20 February 2025 - 01:44 PM
Age scrubs away speed!

Posted 20 February 2025 - 02:19 PM
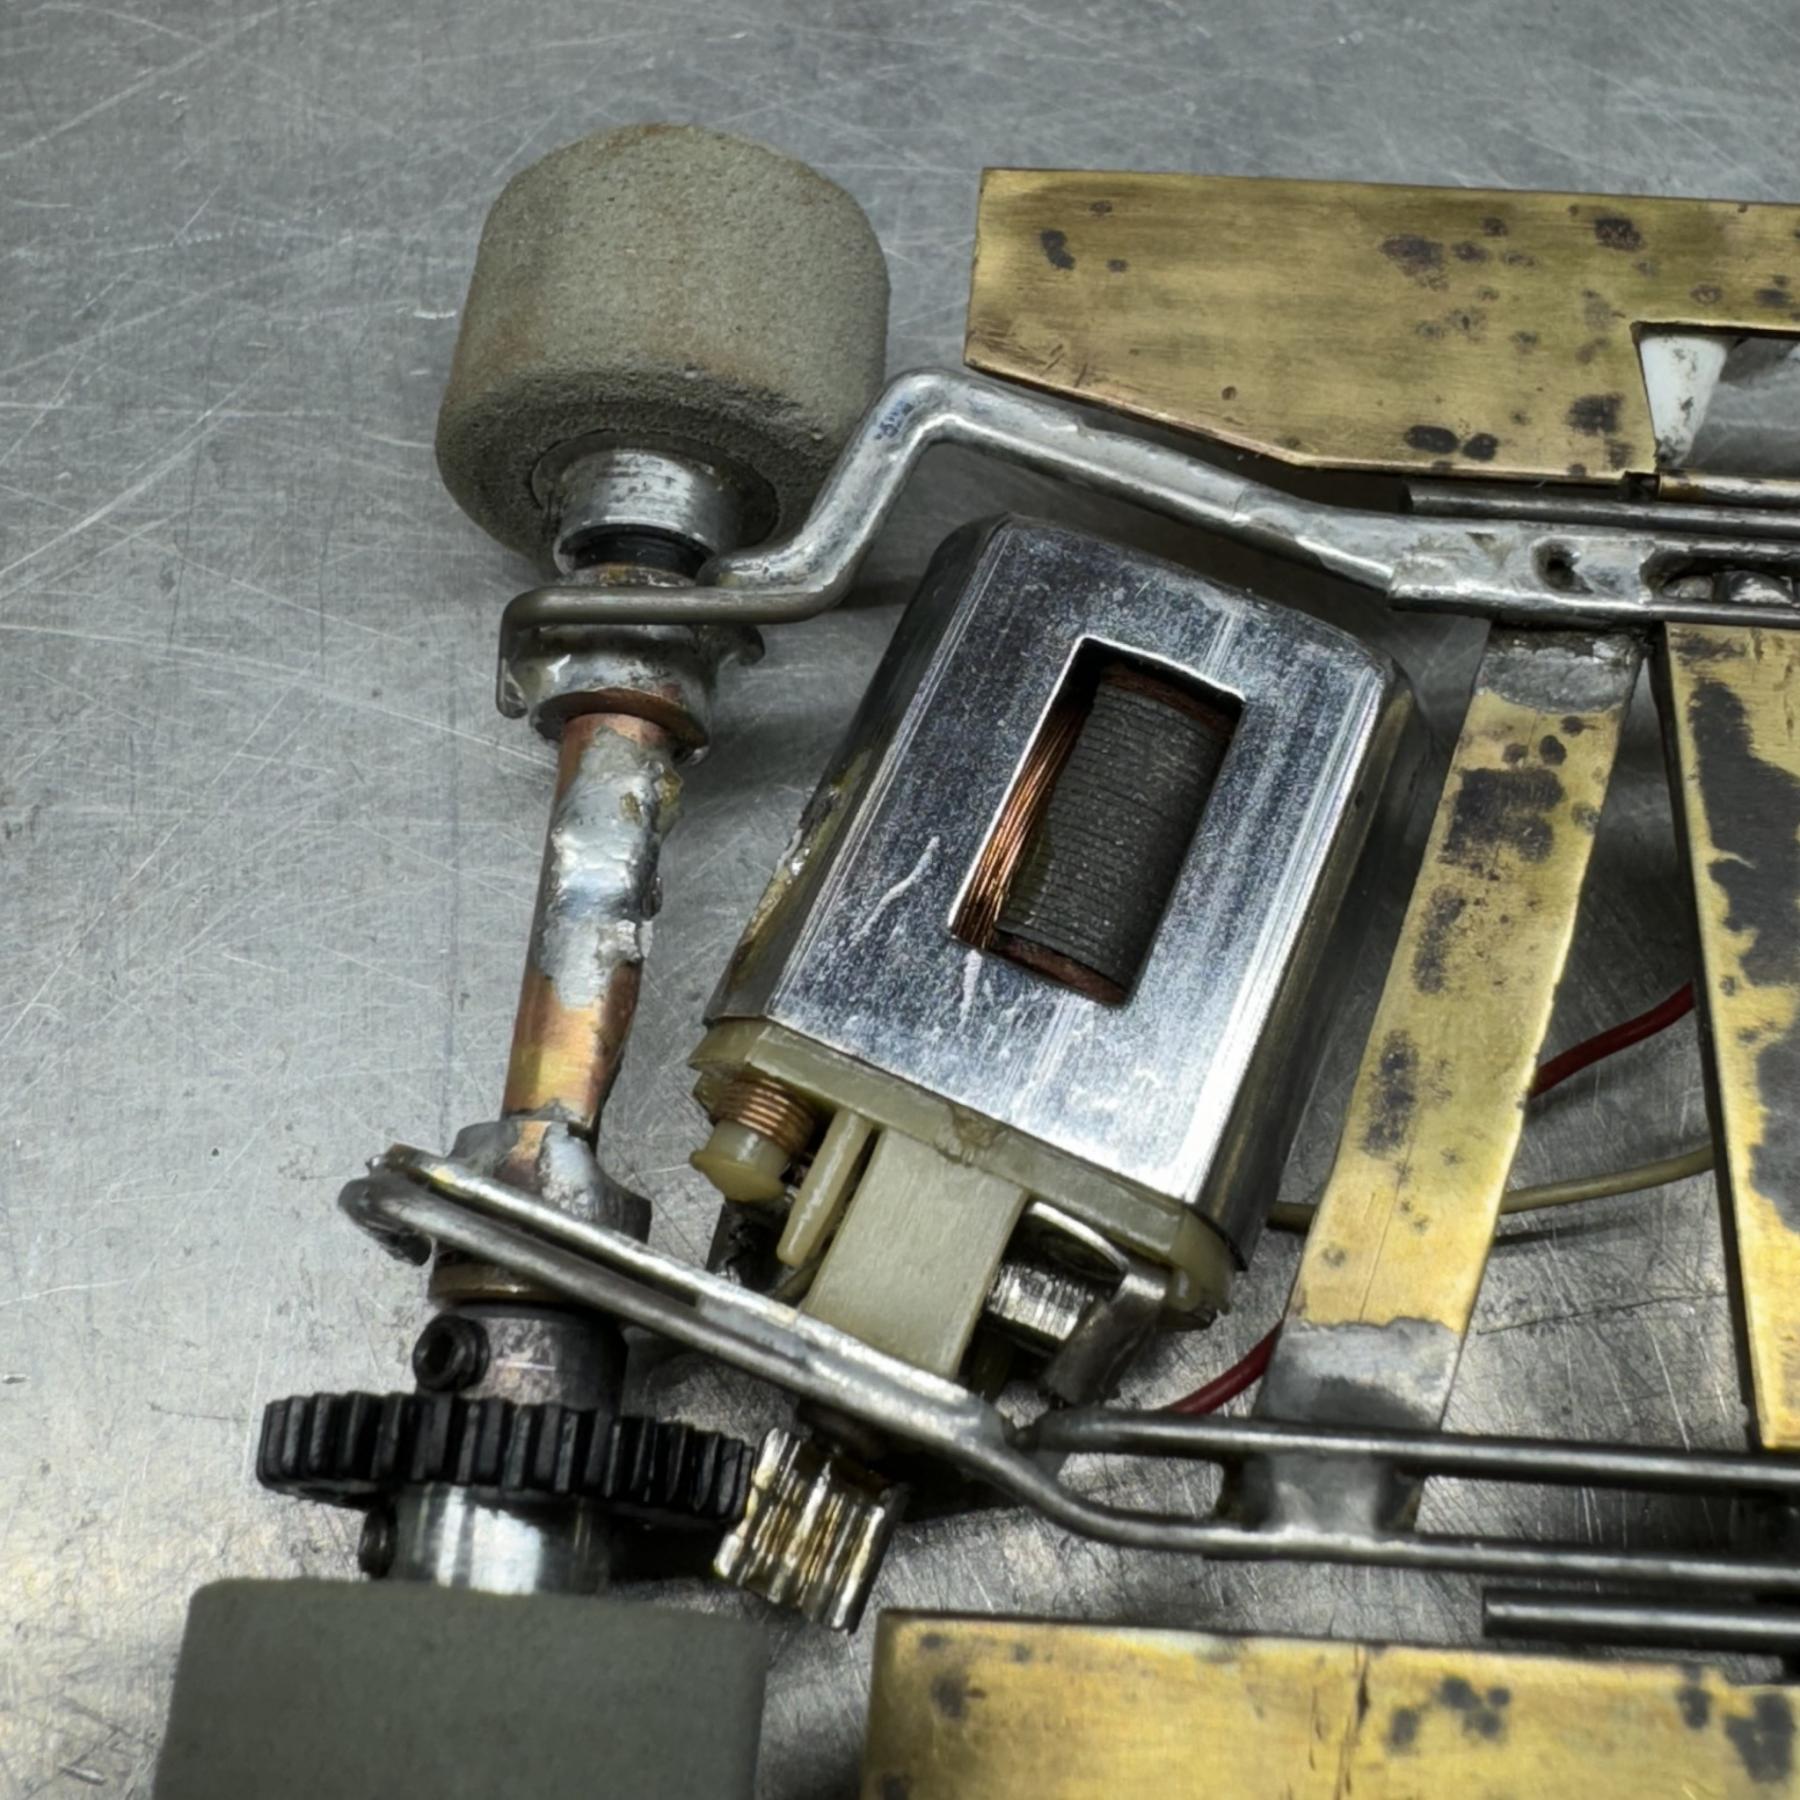
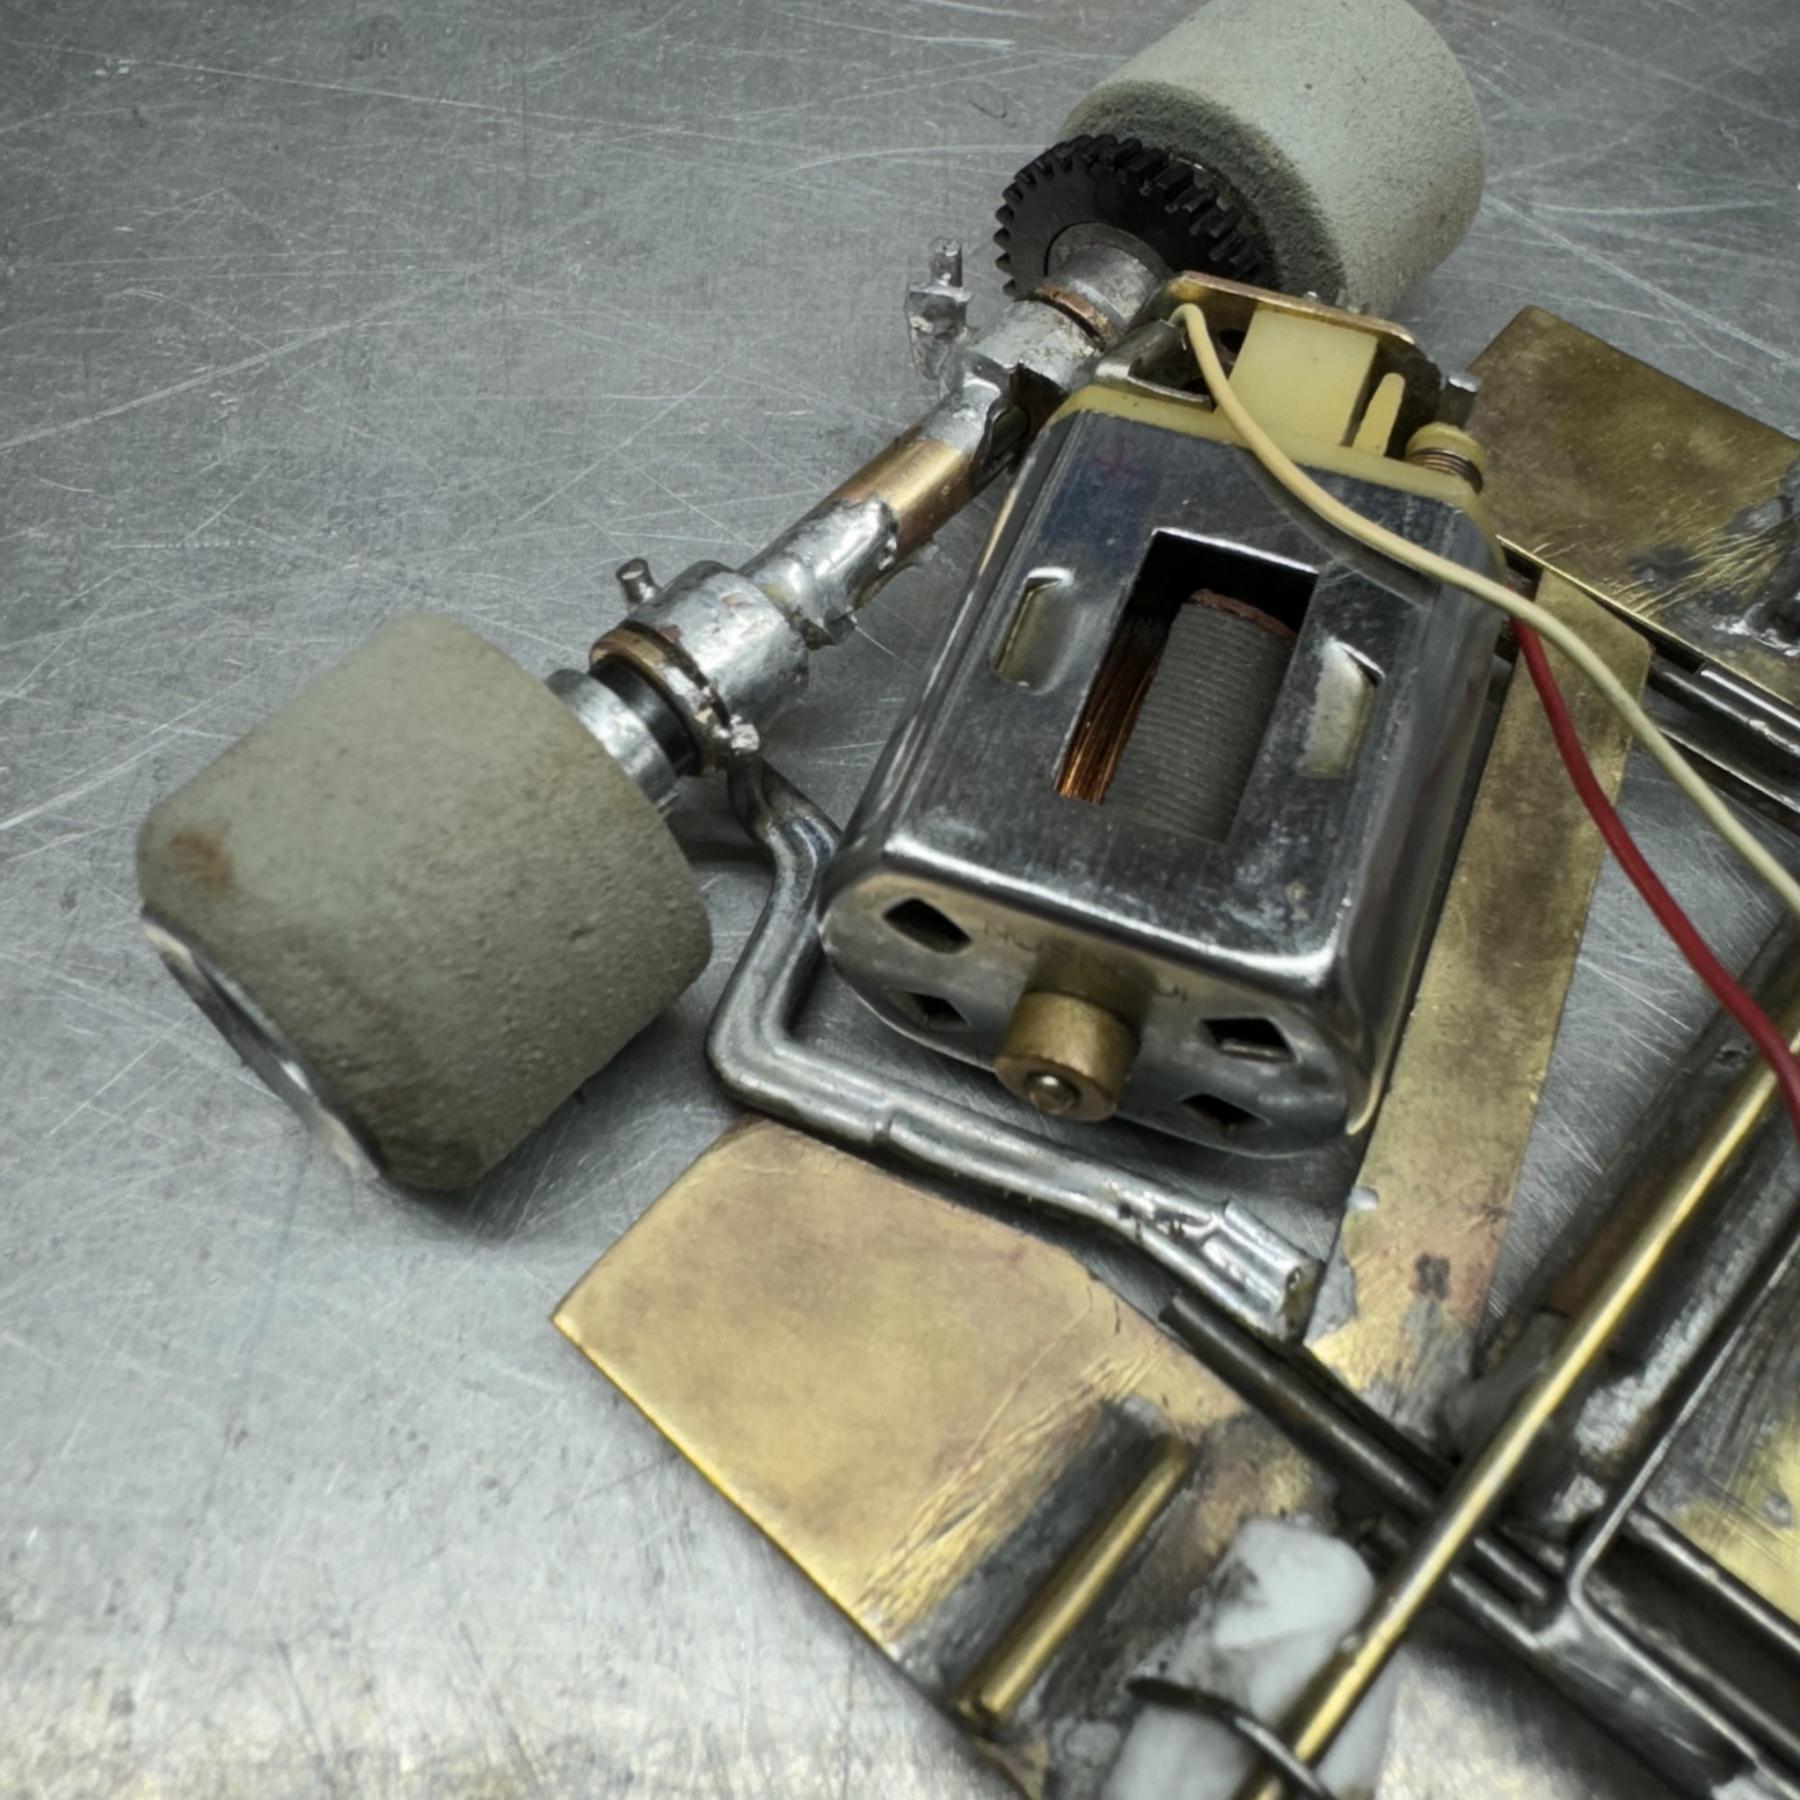
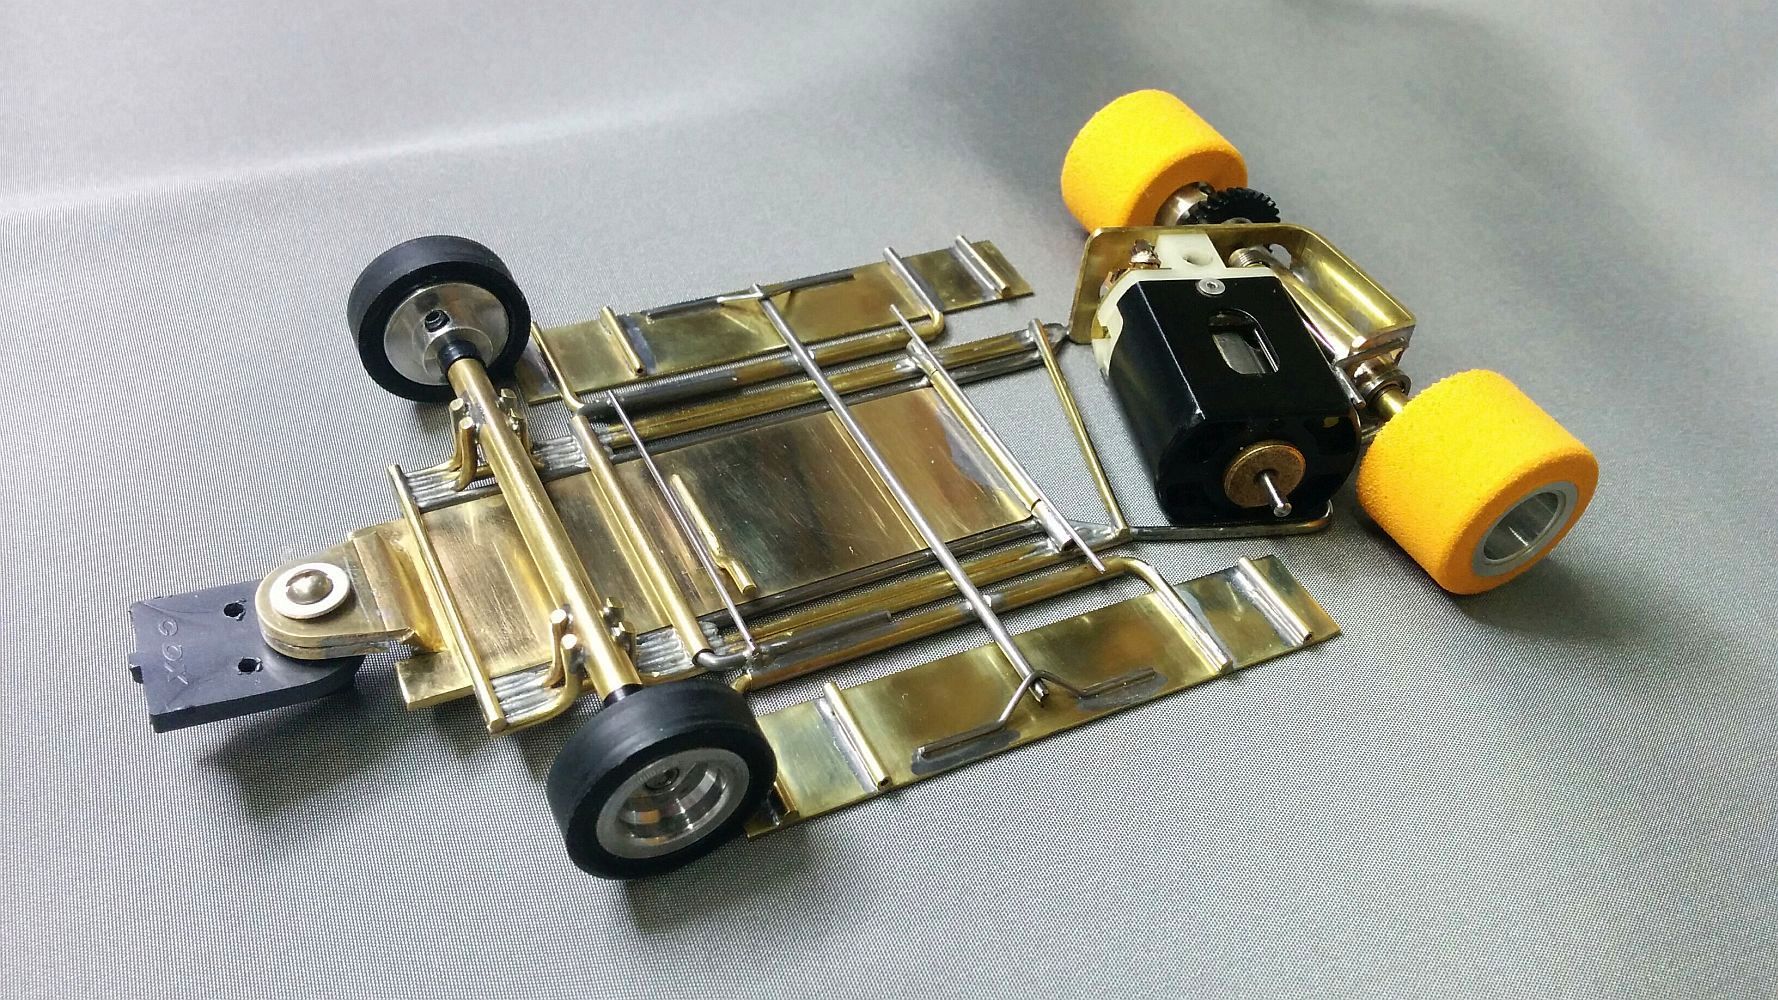
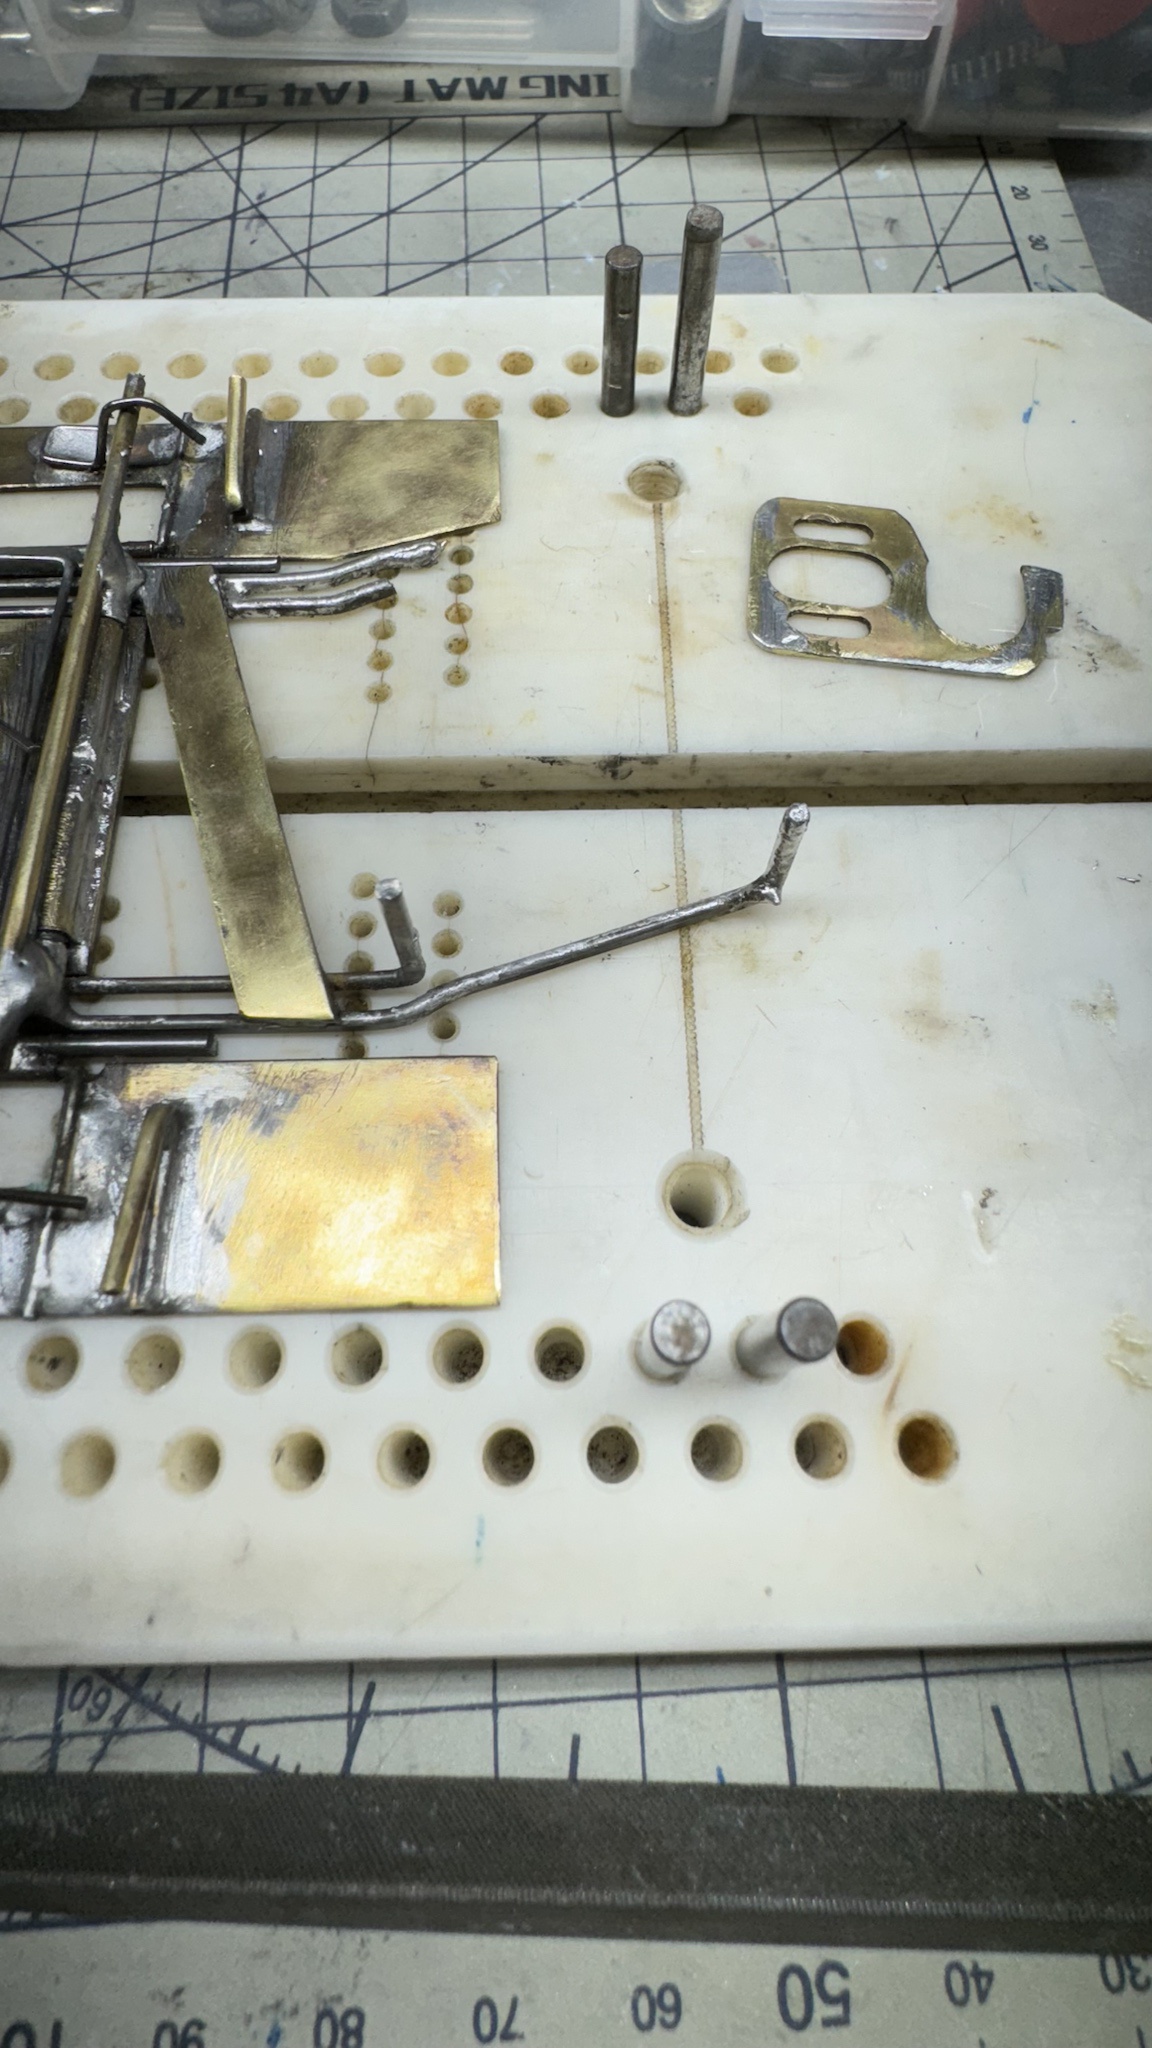
That chassis appears to be an early Ferret chassis or kit someone built. The soldering looks far better & less globby than the factory soldering did. I ran similar Phaze III chassis, made by Ferret, as my weekly race car from 1970-75 at Modelville Hobby. We ran scale bodies on them from Lancer, Dynamic, & Kirby. Some were open cockpit, some were coupes. We never ran any threaded axles during this timeframe. Your chassis cleaned up nice. 

Posting Leader

Posted 20 February 2025 - 08:51 PM
Nice job Mark, and perfect body for that roller.
I would assume the 4 outer brass rails where meant to be bent up at 90 degrees to solder to the front of the front axle tube once w.b. and height are set.
There are other ways to strengthen this joint, here are some I found.

Race Leader
Posted 20 February 2025 - 09:08 PM


Race Leader
Posted 21 February 2025 - 08:15 AM
Nice job Mark, and perfect body for that roller.
I would assume the 4 outer brass rails where meant to be bent up at 90 degrees to solder to the front of the front axle tube once w.b. and height are set.
There are other ways to strengthen this joint, here are some I found.
post-4696-0-32254900-1453488398.jpg
Posting Leader
Posted 21 February 2025 - 11:30 AM
Hey Mark, I was looking at ways to use the 4 rails that are on your post 1 chassis.
They looked unfinished to me so I went on a hunt. You can see there are different ways to tie them into the front axle.
Posting Leader

Posted 21 February 2025 - 01:55 PM
I think I would try to find out any history on the chassis. Might be of significance. Looks like it cleaned up OK. And the body seems to fit. Buterate bodies like enamel, so I would find a dark color to paint it, and leave everything else as is.
Hint ) If you know someone who works in a body shop, ask him for a little flex agent. Two drops in one ounce of enamel model paint will keep the paint flexible on the body, and if you are lucky, it will give back some flexibility to the body. Also, avoid taping the body. The old trick of painting the windows with Vaseline will work if you spray on the paint in light coats.
I think what you have done with this car is great!
Race Leader
Posted 21 February 2025 - 07:25 PM
I have lots of one shot sign painting enamel. I’ll probably use some to airbrush it. just not sure what to reduce it with so it doesn’t attack the body. the one shot is super thick out of the can.I think I would try to find out any history on the chassis. Might be of significance. Looks like it cleaned up OK. And the body seems to fit. Buterate bodies like enamel, so I would find a dark color to paint it, and leave everything else as is.
Hint ) If you know someone who works in a body shop, ask him for a little flex agent. Two drops in one ounce of enamel model paint will keep the paint flexible on the body, and if you are lucky, it will give back some flexibility to the body. Also, avoid taping the body. The old trick of painting the windows with Vaseline will work if you spray on the paint in light coats.
I think what you have done with this car is great!
Race Leader
Posted 21 February 2025 - 07:28 PM
Hey Mark, I was looking at ways to use the 4 rails that are on your post 1 chassis.
They looked unfinished to me so I went on a hunt. You can see there are different ways to tie them into the front axle.
Posting Leader

Posted 21 February 2025 - 08:23 PM
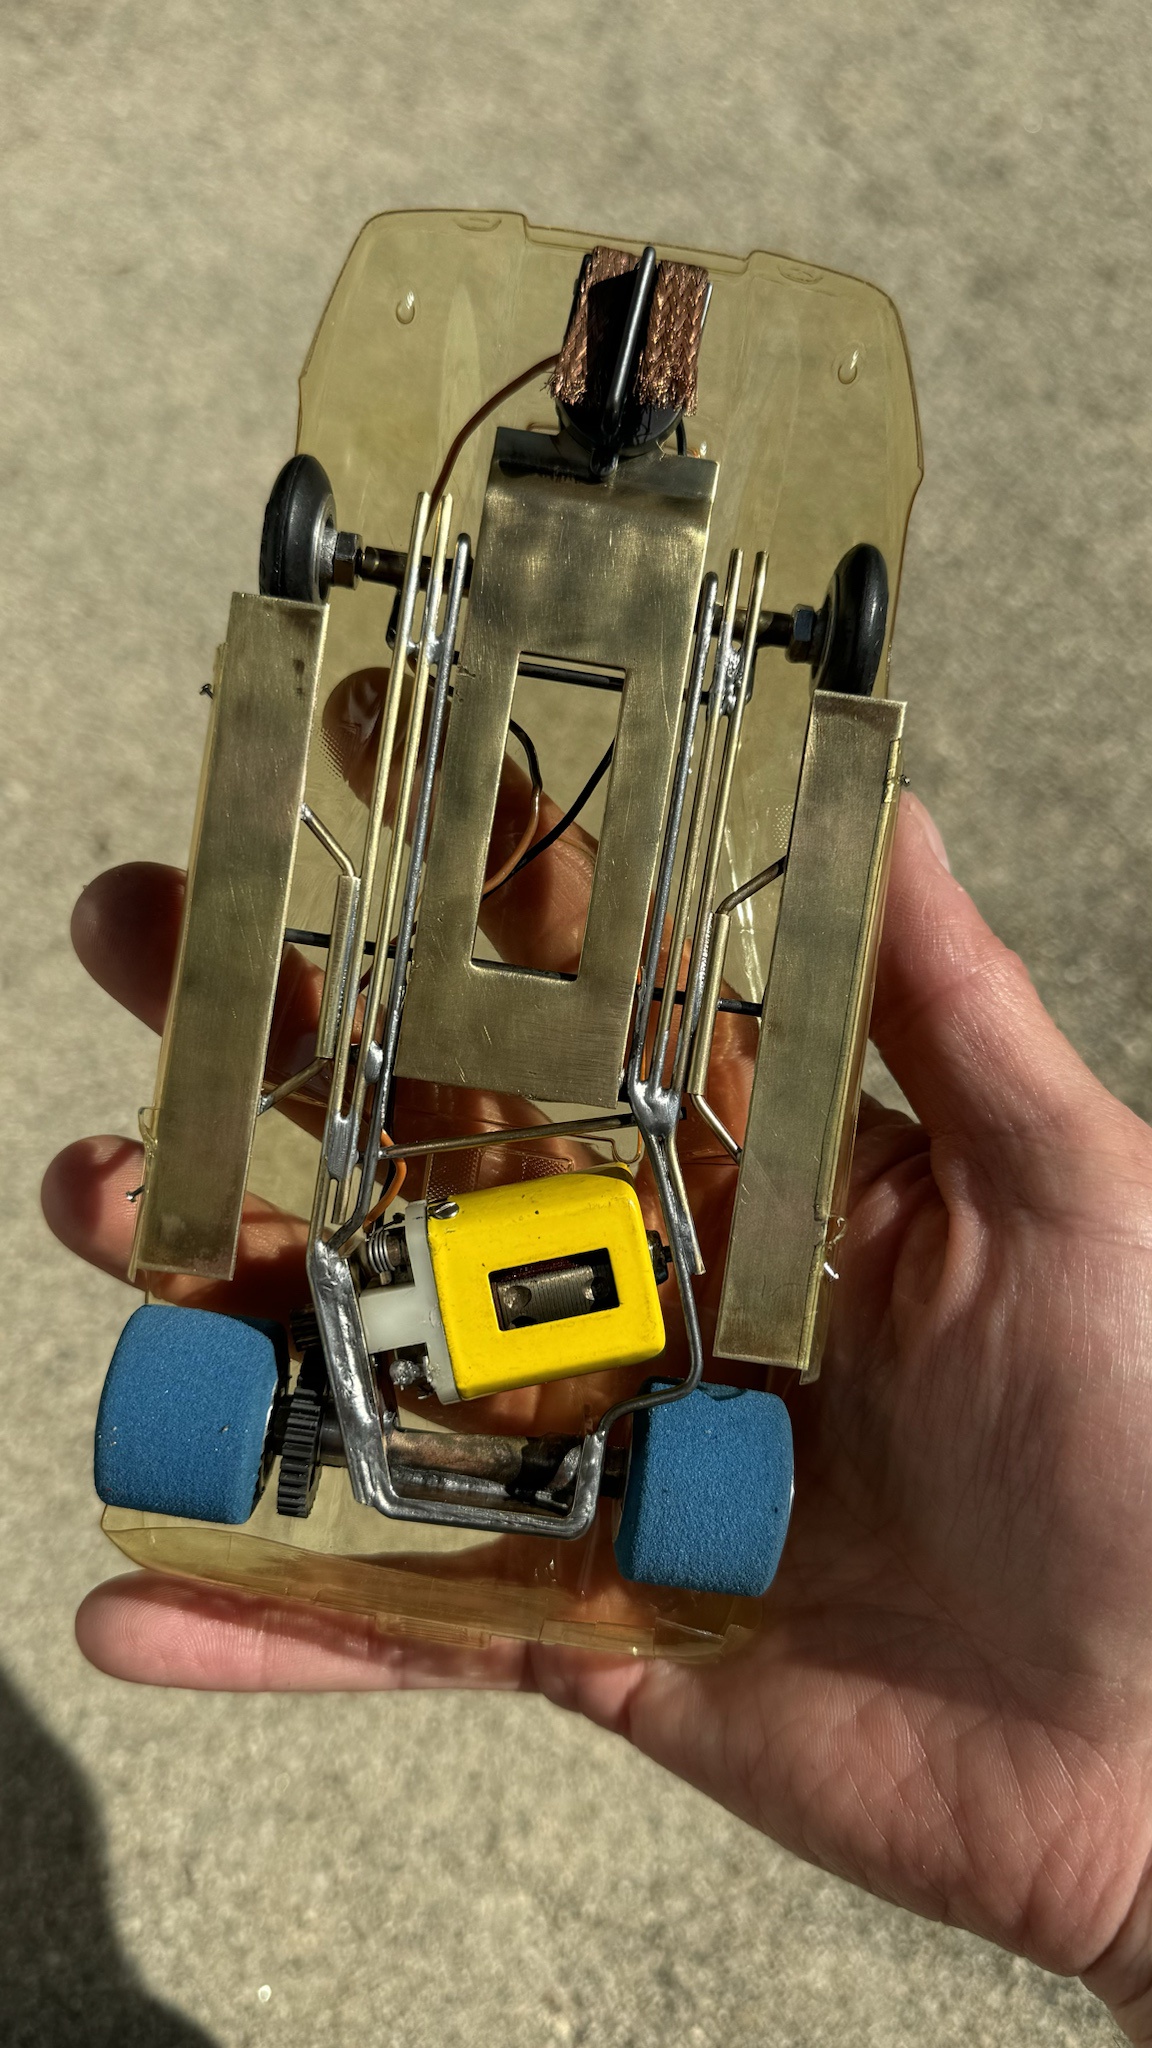
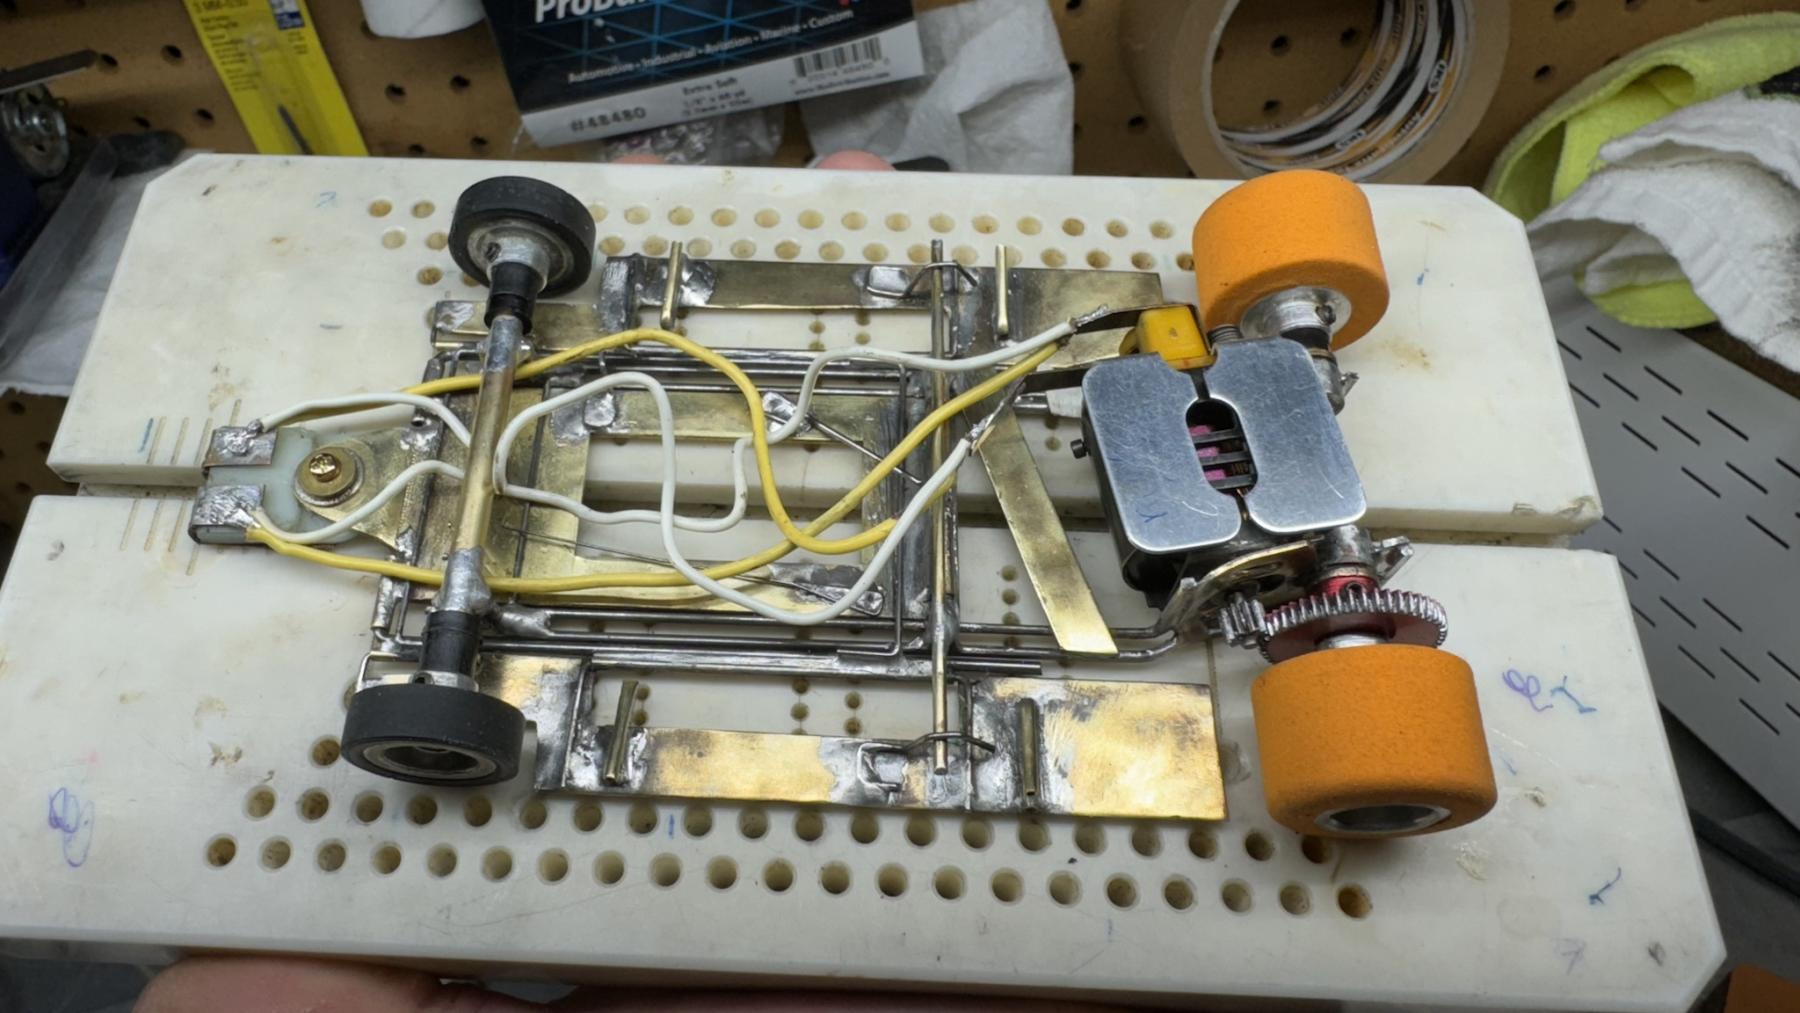
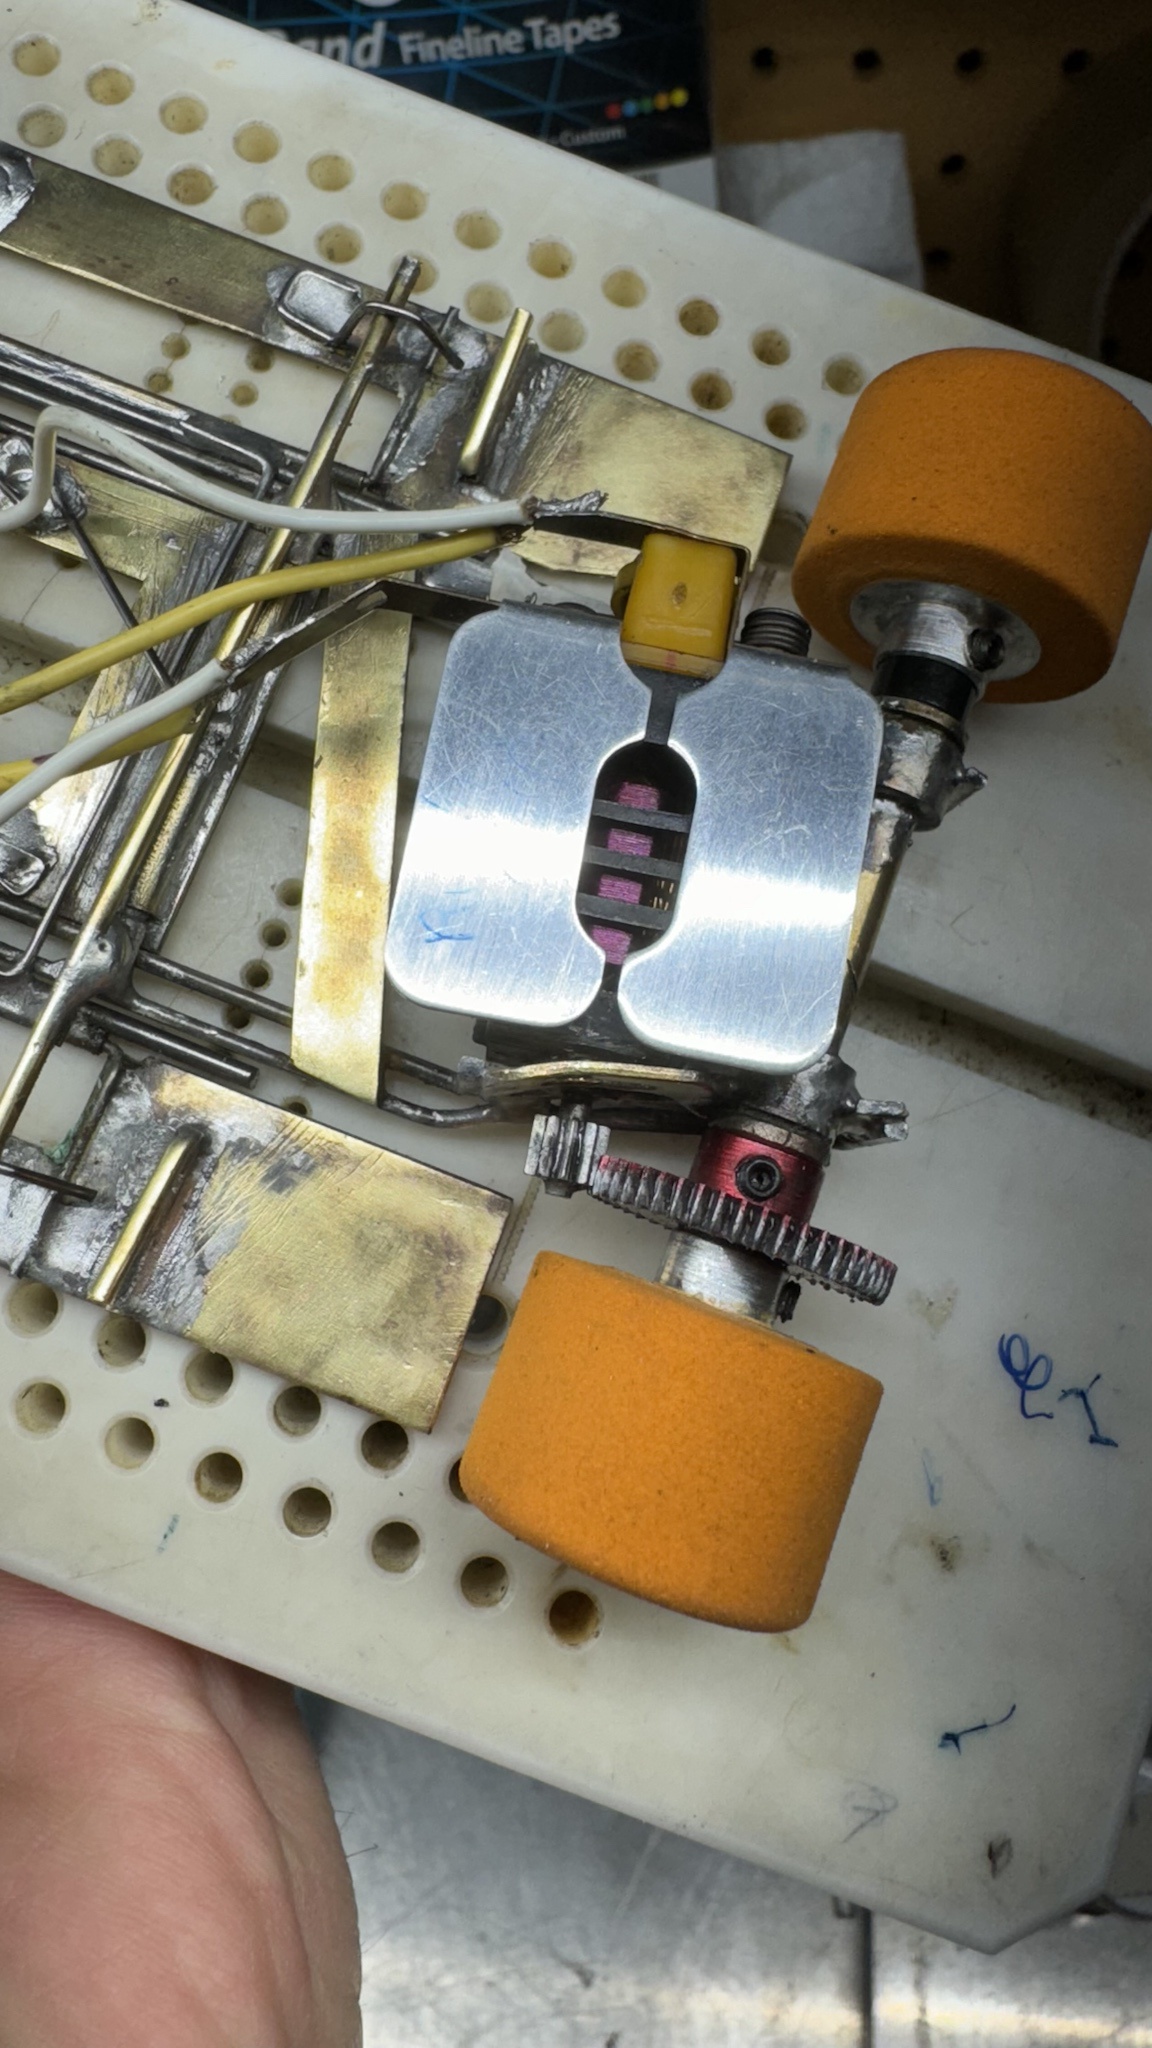
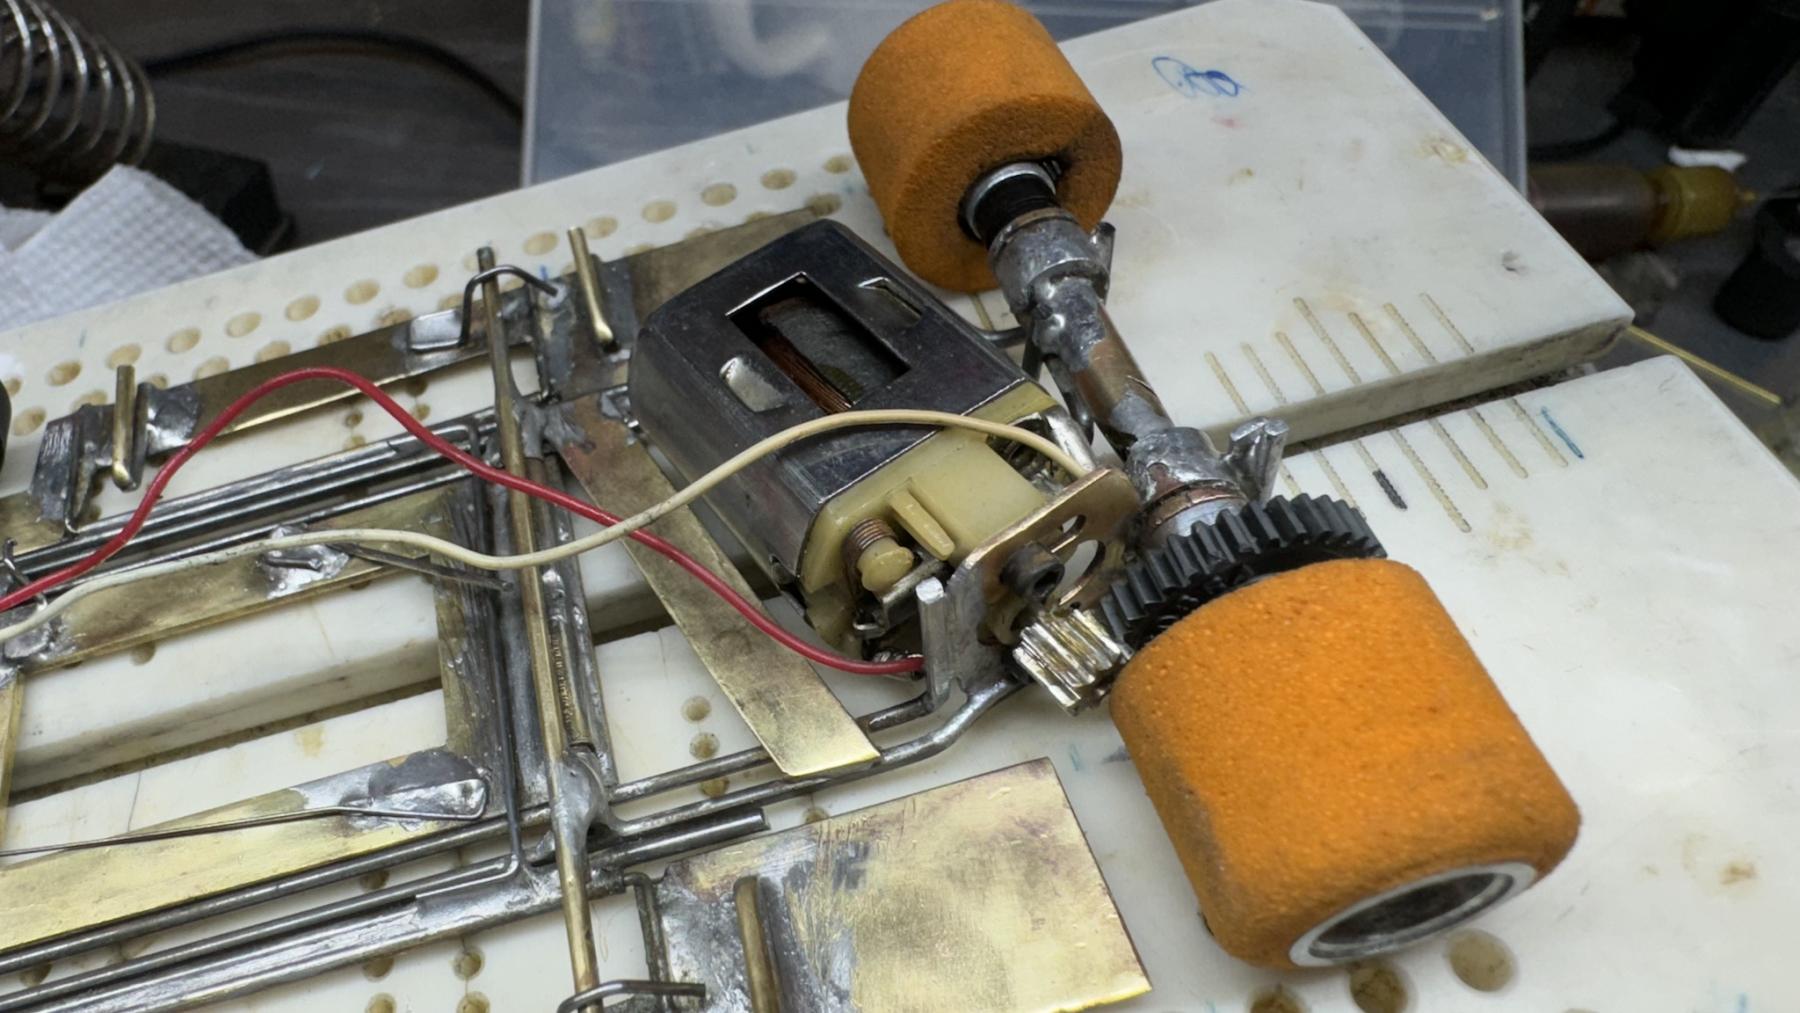
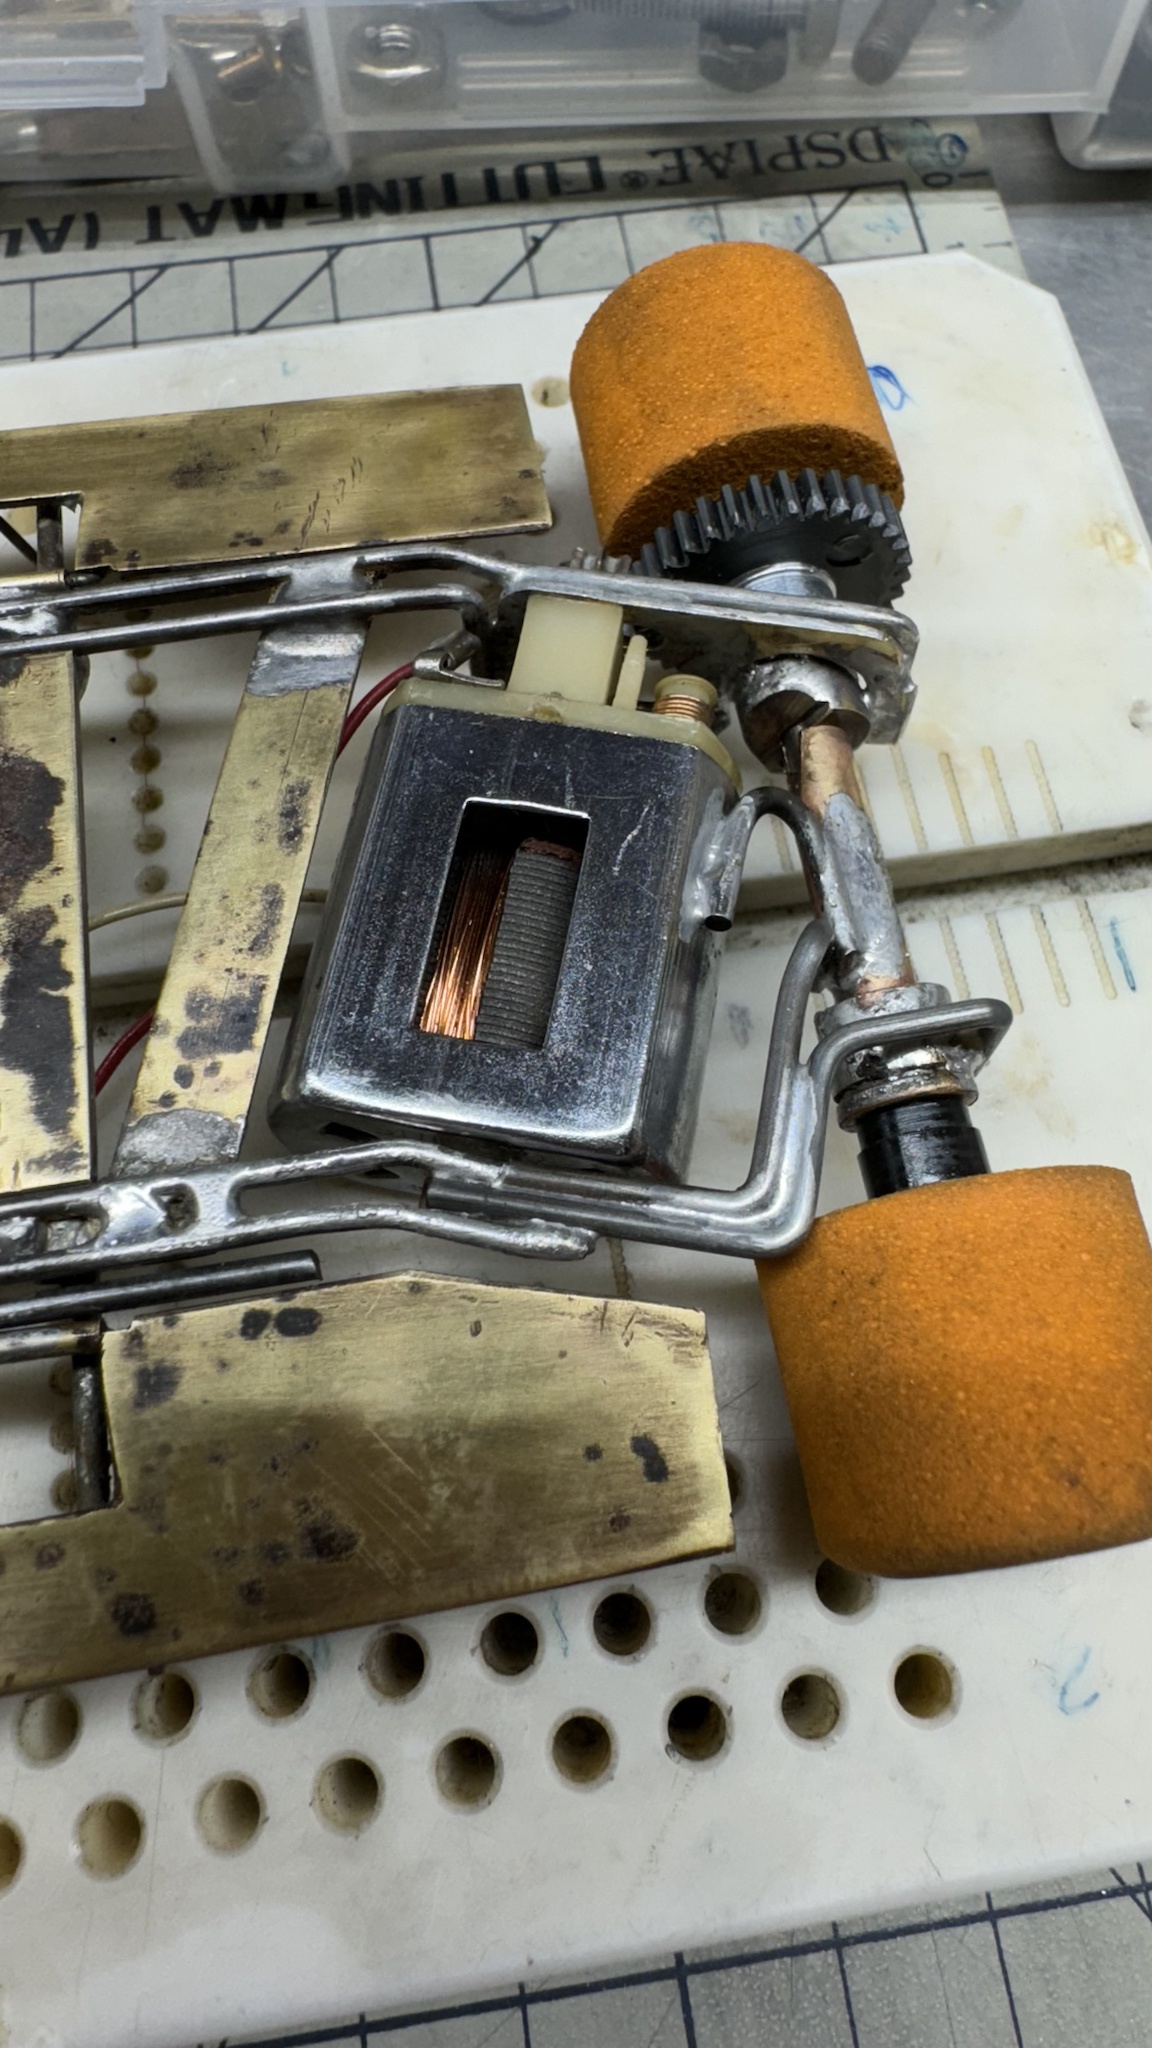
Yeah it’s kinda spindly how it is now. didnt get to test it too much since the yellow motor has almost no brakes. also the chassis with elephant ear motor was working quite nice but sometimes I have a issue with motors seeming to bog then just accelerate out of nowhere. well that happened coming out of the straight and I wall shot’d pretty hard and bent the rear end. maybe I’ll fix the motor box sooner than I thought!
Sounds like the gearing is not correct. Always better with these old cars to gear for RPM's not speed.
Mike Katz
Scratchbuilts forever!!
Race Leader
Posted 22 February 2025 - 12:02 AM


Age scrubs away speed!
Posted 22 February 2025 - 10:30 AM
Nice restoration Mark! You got plenty of room to move the right side of the motor box when you want. With that RGEO jig, you're nearly a scratchbuilder. One nice thing about that jig is it has enough versatility to build both 1/24 & 1/32 chassis.
Posting Leader
Posted 22 February 2025 - 12:23 PM
Nice save Mark. 
Race Leader
Posted 22 February 2025 - 02:26 PM
Nice restoration Mark! You got plenty of room to move the right side of the motor box when you want. With that RGEO jig, you're nearly a scratchbuilder.
Race Leader
Posted 22 February 2025 - 02:28 PM
Posting Leader
Posted 22 February 2025 - 03:15 PM
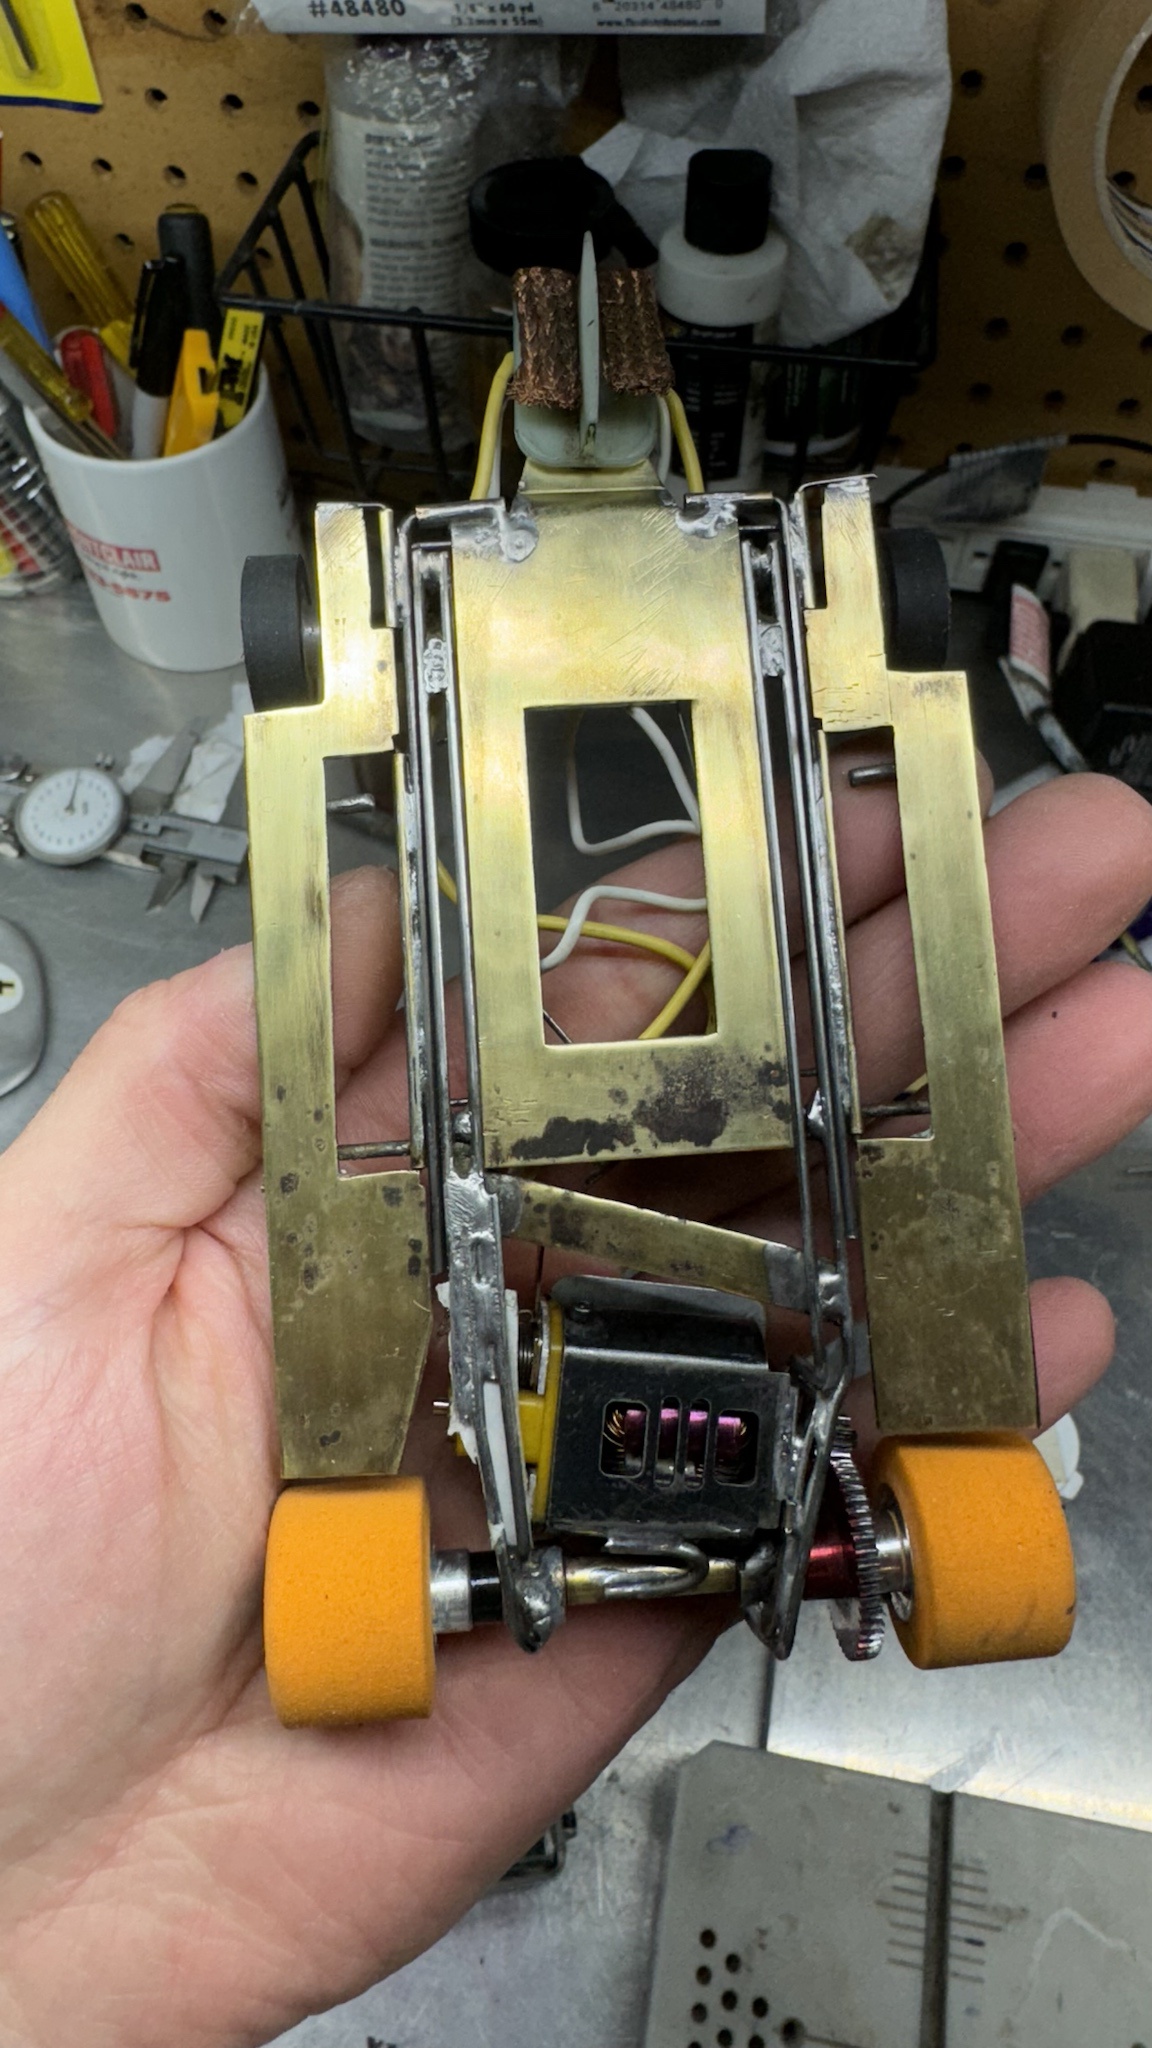
Kinda messed up and made motor box extend back too far to where tires almost hit. easy fix if I feel like it.
Just a thought, since I am not familiar with the rules of the class during this era. Were tires that wide allowed yet? I'm thinking they could only be as wide as the main part of the wheel, and not extend over the axle/set screw part. Like in the photos in post #4. If they can only be the .750 inch wide limit typical of the 1970s, that solves your contact problem.
A great body for this chassis would be the Lola T-70 Mk III B coupe. Or the Ferrari 512 S/M coupe. Maybe early Lancer? With a low rear spoiler it should be a blast on a king. Just know that old solder joints are not as stout as they were when they were fresh, so expect to be doing some repair.
Race Leader
Posted 27 February 2025 - 02:31 PM
Builder

Posted 27 February 2025 - 02:53 PM
Paul Wolcott
Race Leader
Posted 03 March 2025 - 06:47 PM