Jump to content


Photo

Cox Chaparral 2E (salvage)


  • Please log in to reply
67 replies to this topic

#1 Jean-Michel Piot

Jean-Michel Piot

    Plastic surgeon

  • Full Member
  • PipPipPipPipPip
  • 654 posts
  • Joined: 16-March 08
  • Gender:Male
  • Location:Paris (France)

Posted 13 November 2008 - 05:45 AM

Hello All.

Hopefully during the next week-end (in two days) the first Chaparral 2E of the serie I'm currently restoring will be completed. A second one will soon be as-well.

I will send pictures then, as well as pictures taken during the restoration, step by step.

Before that, today, here is were I started and where I am now. Yes, it's the same car ... Difficult enough to find one ...

It all started by an ebay auction ...


2E_001.jpg

2E_0012.jpg

2E_002.jpg

2E_003.jpg

2E_almost_completed.jpg
(Bud)light is right!


#2 Tex

Tex

    Grand Champion Poster

  • Full Member
  • PipPipPipPipPipPipPipPip
  • 9,244 posts
  • Joined: 07-July 06
  • Gender:Male
  • Location:Denton, TX

Posted 13 November 2008 - 07:38 AM

DOOD! Now THAT is MAGIC! :shok:
Richard L. Hofer

Remember, two wrongs don't make a right... but three lefts do! Only you're a block over and a block behind.

#3 TSR

TSR

    The Dokktor is IN

  • Full Member
  • PipPipPipPipPipPipPipPip
  • 42,299 posts
  • Joined: 02-February 06
  • Gender:Male
  • Location:Marxifornia

Posted 13 November 2008 - 09:16 AM

No magic, just lots of hard work. :)

Philippe de Lespinay


#4 Jean-Michel Piot

Jean-Michel Piot

    Plastic surgeon

  • Full Member
  • PipPipPipPipPip
  • 654 posts
  • Joined: 16-March 08
  • Gender:Male
  • Location:Paris (France)

Posted 13 November 2008 - 09:25 AM

Without waiting 2 days, after all, the first steps...

Restoring the chassis is quite easy. The method given by the Dokktor is excellent. So I used it for my genuine poor old 2E and the one of Don Siegel you will see in the first picture below (not Don... the car !).

As seen before, the body had been painted green and then it turned white again on the last previous picture, thanks to a bath in the brake fluid that helped to strip down the green paint and former grey primer (or had it been painted grey and thereafter green ?).

It was then time to repair the body, with polystirene cement, epoxy mastic and... epoxy resin with which I covered the front section from underneath.

I indeed wanted to strenghten a little the body repairs and have parts stay together in the correct position. The cement would not had been enough, the body was not only crached but also twisted, so I had to maintain the body with my hands and check-out the alignment with the eyes while the resin was hardening (hope you will understand my poor english).

There was a bad crack on the top of the left front wing. OK, I admit all the cracks were bad, but this one was just in the middle of an area that was supposed to simulate the numerous holes made in the wings.

Recreating this surface after cementing and putting some putty would definitively not had been easy.

So I decided to first repair, put the putty where it was needed, even in the false holes area and ... to drill the holes !

As this area should be dark blue, it was a good way not to have to simulate the holes with flat black ... ;)

C1.jpg

C2.jpg

C3.jpg

C4.jpg

C5.jpg
(Bud)light is right!

#5 bosmeck

bosmeck

    Race Leader

  • Moderator
  • PipPipPipPipPip
  • 647 posts
  • Joined: 06-April 07
  • Gender:Male
  • Location:TX

Posted 13 November 2008 - 11:04 AM

Magnificent JM :)


I love the detail work and the side pods are brilliant !

Once again, great work JM


This is a great site! :shok:
Chris Clark

#6 Jean-Michel Piot

Jean-Michel Piot

    Plastic surgeon

  • Full Member
  • PipPipPipPipPip
  • 654 posts
  • Joined: 16-March 08
  • Gender:Male
  • Location:Paris (France)

Posted 13 November 2008 - 12:50 PM

Just as the body, the interior also had to be repaired with epoxy mastic. Not difficult.

broken_interior.jpg

interior_repaired.jpg

I chose to glue it to the body at this early step (and not after painting the body) because I did not want to have the vertical panel behind the seats being devided in two. For that reason, I put some putty there (see the arrow).

interior_glued.jpg

Now, as for the lower lateral air scoops, I sculpted one in plastic.

Side_pod_1.jpg

Side_pod_2.jpg

Then I created holes, put some epoxy mastic and just had to put the sculpted part on the whole.

side_pod_3.jpg

Side_pod_4.jpg

Side_pod_5.jpg

By the way, as I had several 2E to build or restore (2 genuine at that time, including mine, now there's a third one in my workshop, as well as three copies), and because this sculpted part is the same, no matter if on the right or left side, I only made one and then reproduced it with silicon moulds and resin (just as other genuine parts that I had, thanks to the fact that Don Siegel let me work on his car).


GG1.jpg

GG2.jpg
(Bud)light is right!

#7 Howmet TX

Howmet TX

    On The Lead Lap

  • Full Member
  • PipPipPipPip
  • 363 posts
  • Joined: 12-April 07
  • Gender:Male
  • Location:London, UK

Posted 13 November 2008 - 01:00 PM

Fantastic work, JM! Sorry to be a little tasteless, but how much do you reckon all that lovely Cox stuff piled up on your bench is worth? Especially after your amazing restorations.
The mind boggles.....

John Dilworth


#8 TSR

TSR

    The Dokktor is IN

  • Full Member
  • PipPipPipPipPipPipPipPip
  • 42,299 posts
  • Joined: 02-February 06
  • Gender:Male
  • Location:Marxifornia

Posted 13 November 2008 - 01:16 PM

I am so pleased that at least ONE great modeler found it suitable to follow my recommendations on how to properly restore a Cox chassis and other magnesium parts... :)

Philippe de Lespinay


#9 bosmeck

bosmeck

    Race Leader

  • Moderator
  • PipPipPipPipPip
  • 647 posts
  • Joined: 06-April 07
  • Gender:Male
  • Location:TX

Posted 13 November 2008 - 02:05 PM

I am so pleased that at least ONE great modeler found it suitable to follow my recommendations on how to properly restore a Cox chassis and other magnesium parts... :)


I tried it your way and it did not work for me. I must have done it wrong?!?
Chris Clark

#10 TSR

TSR

    The Dokktor is IN

  • Full Member
  • PipPipPipPipPipPipPipPip
  • 42,299 posts
  • Joined: 02-February 06
  • Gender:Male
  • Location:Marxifornia

Posted 13 November 2008 - 02:09 PM

Yes! :laugh2:
IT WORKS GREAT.

Philippe de Lespinay


#11 bosmeck

bosmeck

    Race Leader

  • Moderator
  • PipPipPipPipPip
  • 647 posts
  • Joined: 06-April 07
  • Gender:Male
  • Location:TX

Posted 13 November 2008 - 02:24 PM

Yes! :laugh2:
IT WORKS GREAT.


"In the first case, use “Scrub-Free” bathroom cleaner that has an acid less harmful to the magnesium than the one in lemon
juice. Spray or dip the parts in a tank filled with the stuff, use a toothbrush (NOT a metal wire brush!!!) for very heavy white deposits.
Wait about 30 seconds and rinse in very hot water. Dry with compressed air. You may then polish rim edges or whatever cosmetics you wish to apply, then
coat the parts with a clear urethane spray. Future Floor Polish will work but not as well as an actual spray coating."

I bought this “Scrub-Free bathroom cleaner" and I did what you said "wait about 30 seconds and rinse in very hot water" this simply did nothing - I kept repeating this for some time hoping things will start to happen and they simply did not. What was I doing wrong?

"You may then polish rim edges or whatever cosmetics you wish to apply". What "cosmetics" are we talking about here?


Glass-beading is the best way - I wish I had that set up - I do you use lemon and that seems to work well but you have to be very carefull.
Chris Clark

#12 Jairus

Jairus

    Body Painter Extraordinaire

  • Subscriber
  • PipPipPipPipPipPipPipPip
  • 10,174 posts
  • Joined: 16-February 06
  • Gender:Male
  • Location:Salem, OR

Posted 13 November 2008 - 02:49 PM

Boy, he has gotta love those Chaparrals.... ;)

Jairus H Watson - Artist
Need something painted, soldered, carved, or killed? - jairuswtsn@aol.com

www.slotcarsmag.com

www.jairuswatson.net
http://www.ratholecustoms.com
Check out some of the cool stuff on my Fotki!


#13 Jean-Michel Piot

Jean-Michel Piot

    Plastic surgeon

  • Full Member
  • PipPipPipPipPip
  • 654 posts
  • Joined: 16-March 08
  • Gender:Male
  • Location:Paris (France)

Posted 13 November 2008 - 02:56 PM

The value ? :unsure:

I prefer not to think of it, otherwise I would stop playing with those toys ... :fool:

No, seriously, of course I have an idea, especially considering the rarity factor of a magnesium frame Cox 2E. But not so many people would accept to pay the real amount that could correspond to all the time spent.

Though I essentialy build for my own pleasure.

Nevertheless, the rarity of the cox 2E is the reason why, eventhough my genuine one works fine, for real fun I will use a copy that should at the end look very close if not identical to the genuine ones.
(Bud)light is right!

#14 mcseitz

mcseitz

    Race Leader

  • Full Member
  • PipPipPipPipPip
  • 809 posts
  • Joined: 17-February 06
  • Gender:Male
  • Location:Winston-Salem, NC

Posted 13 November 2008 - 03:05 PM

I like stories like this one with a happy ending.

Great Job!
Marcus Seitz

#15 TSR

TSR

    The Dokktor is IN

  • Full Member
  • PipPipPipPipPipPipPipPip
  • 42,299 posts
  • Joined: 02-February 06
  • Gender:Male
  • Location:Marxifornia

Posted 13 November 2008 - 04:36 PM

Glass-beading is the best way - I wish I had that set up - I do you use lemon and that seems to work well but you have to be very careful.

Chris,
The lemon juice or Scrub-Free method is a poor method compared to the media blasting and painting with clear polyurethane. I only put it in that story as a poor man back up to the blasting. What jean-Michel did was to follow the blasting/painting instructions, that's what I was talking about. :)

Philippe de Lespinay


#16 Jean-Michel Piot

Jean-Michel Piot

    Plastic surgeon

  • Full Member
  • PipPipPipPipPip
  • 654 posts
  • Joined: 16-March 08
  • Gender:Male
  • Location:Paris (France)

Posted 13 November 2008 - 04:40 PM

Among the parts I reproduced in resin, there is also the rear wing and the big side scoops...

some_repro_parts.jpg

I also wanted to create a special part at the back of the head-rest, because the meshing there is surrounded by an edge.

special_head_rest.jpg

other_repro_parts.jpg

On my own 2E models (the one almost completed and the 3 copies) I wanted to modify the shape of the meshing because on the real car there are no "S" curves but only straight lines.

modifs_meshing.jpg

I also engraved some lines, as you will see in the two following pictures.

And then the grey primer for the whole body but the big air scoops (they will receive a very special treatment, as you will see) ...

Grey_primer.jpg

And the white one, with indications of the supplementary engraved lines:

engraved_lines_and_primer.jpg

You may notice that there is no holes in Don Siegel's car because he preferred to keep the body more close to the genuine parts. So he was OK for additions, not for removing or drilling the genuine parts.

Next step will be the way I painted the radiators and air scoops, for the lower and internal part to stay flat black, while above it will be white with a perfect junction to the body and to the radiators ...
(Bud)light is right!

#17 Jean-Michel Piot

Jean-Michel Piot

    Plastic surgeon

  • Full Member
  • PipPipPipPipPip
  • 654 posts
  • Joined: 16-March 08
  • Gender:Male
  • Location:Paris (France)

Posted 13 November 2008 - 04:45 PM

Chris,
The lemon juice or Scrub-Free method is a poor method compared to the media blasting and painting with clear polyurethane. I only put it in that story as a poor man back up to the blasting. What jean-Michel did was to follow the blasting/painting instructions, that's what I was talking about. :)


Philippe, I totally agree with you and am thankfull that you indicated this method !

I will show other pictures of the frame.

Moreover, in the numerous chassis I restored, there were few areas that gave evidence that your pinkish effect is indeed faithfull to the original parts.
(Bud)light is right!

#18 Jean-Michel Piot

Jean-Michel Piot

    Plastic surgeon

  • Full Member
  • PipPipPipPipPip
  • 654 posts
  • Joined: 16-March 08
  • Gender:Male
  • Location:Paris (France)

Posted 13 November 2008 - 05:24 PM

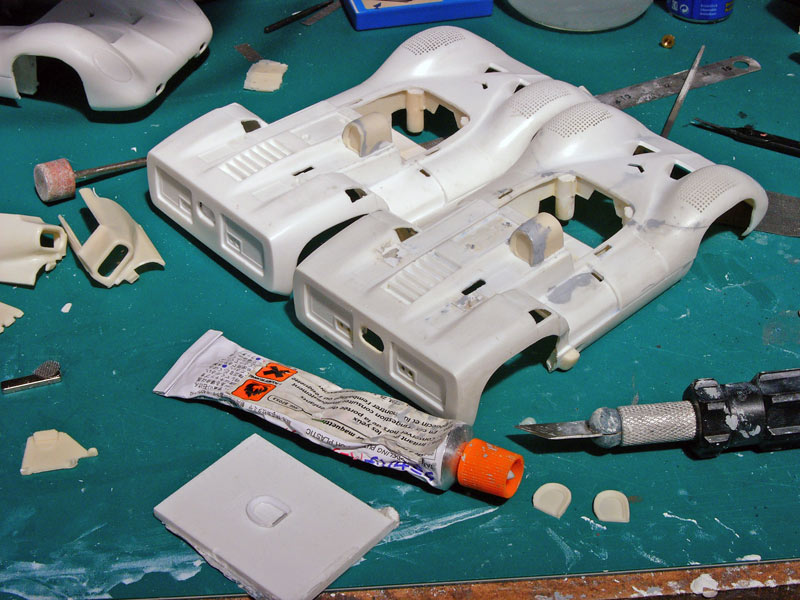
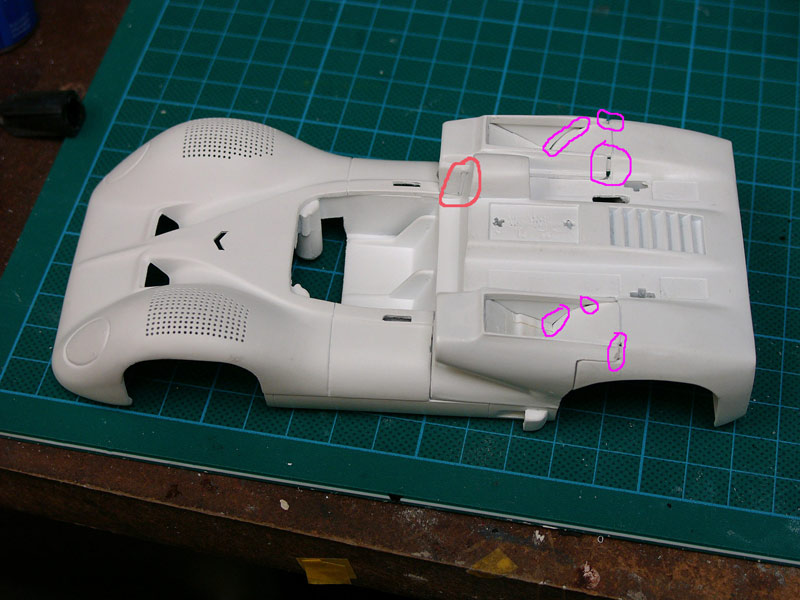
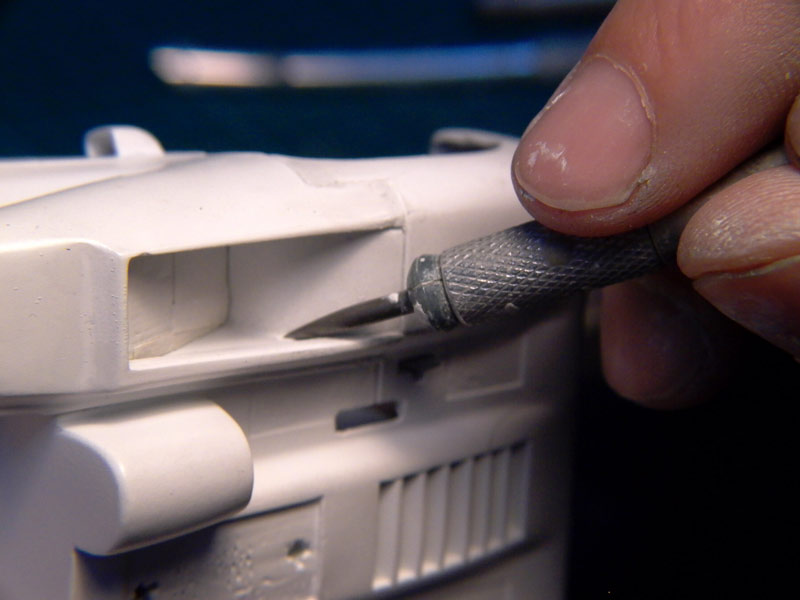
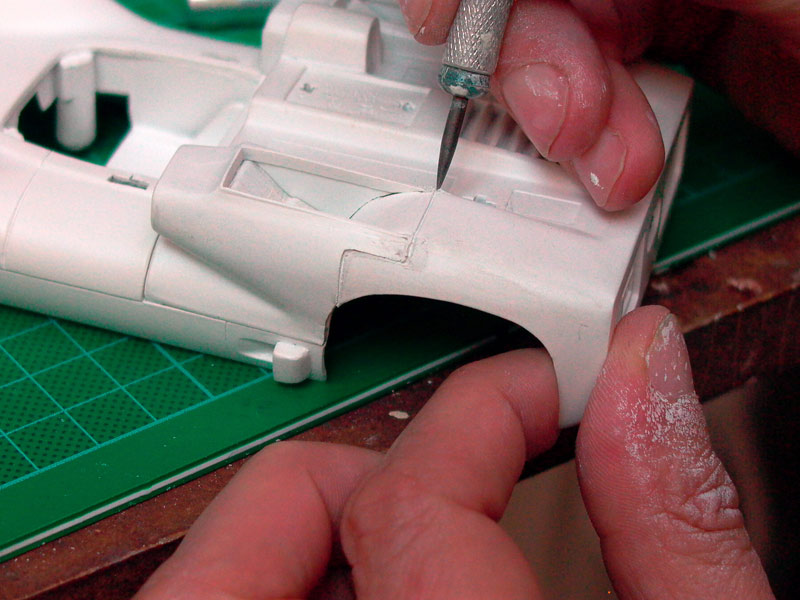
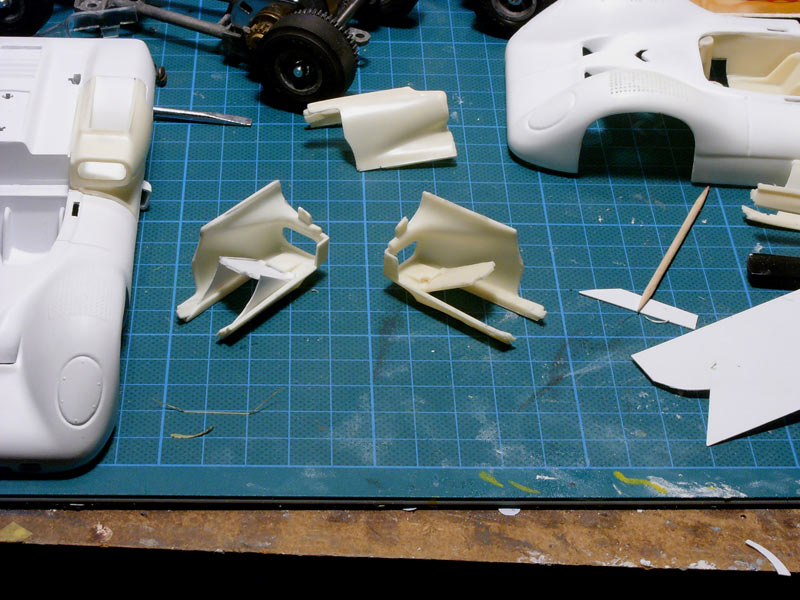
Now, the process I imagined for the scoops and about which I have to confess that I'm rather proud of ...

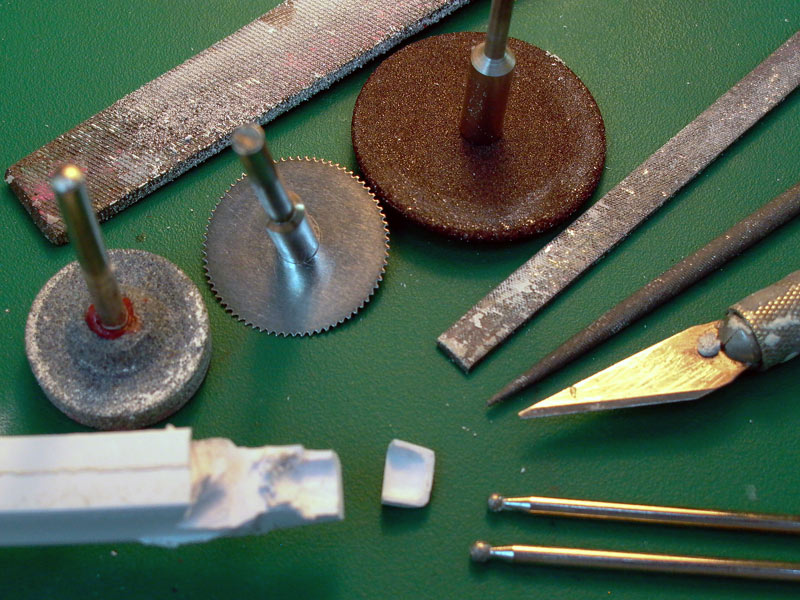
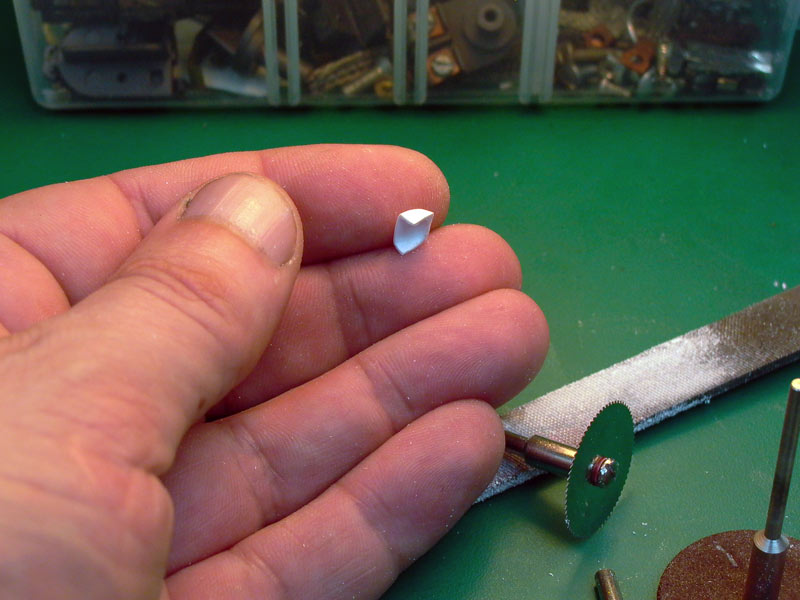
You simply have to cut small parts in thin plasticard and use mastic and masking tape on purpose.

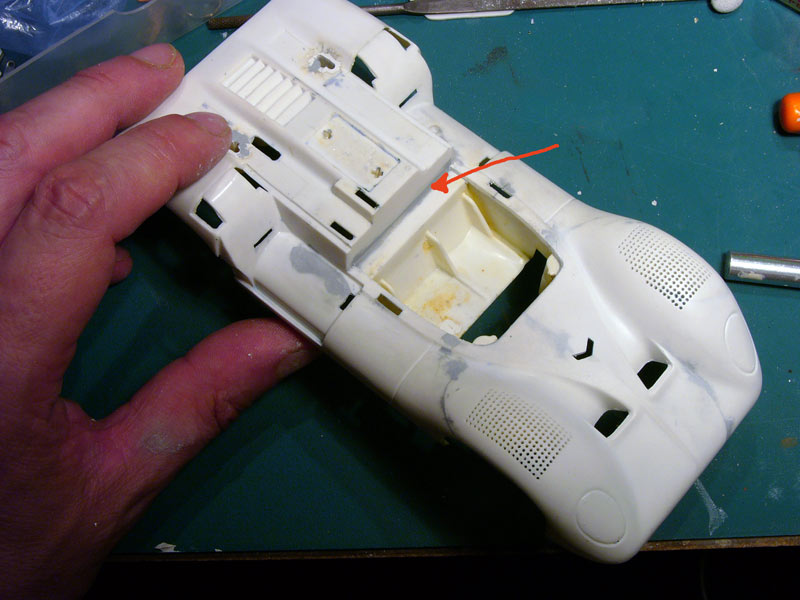
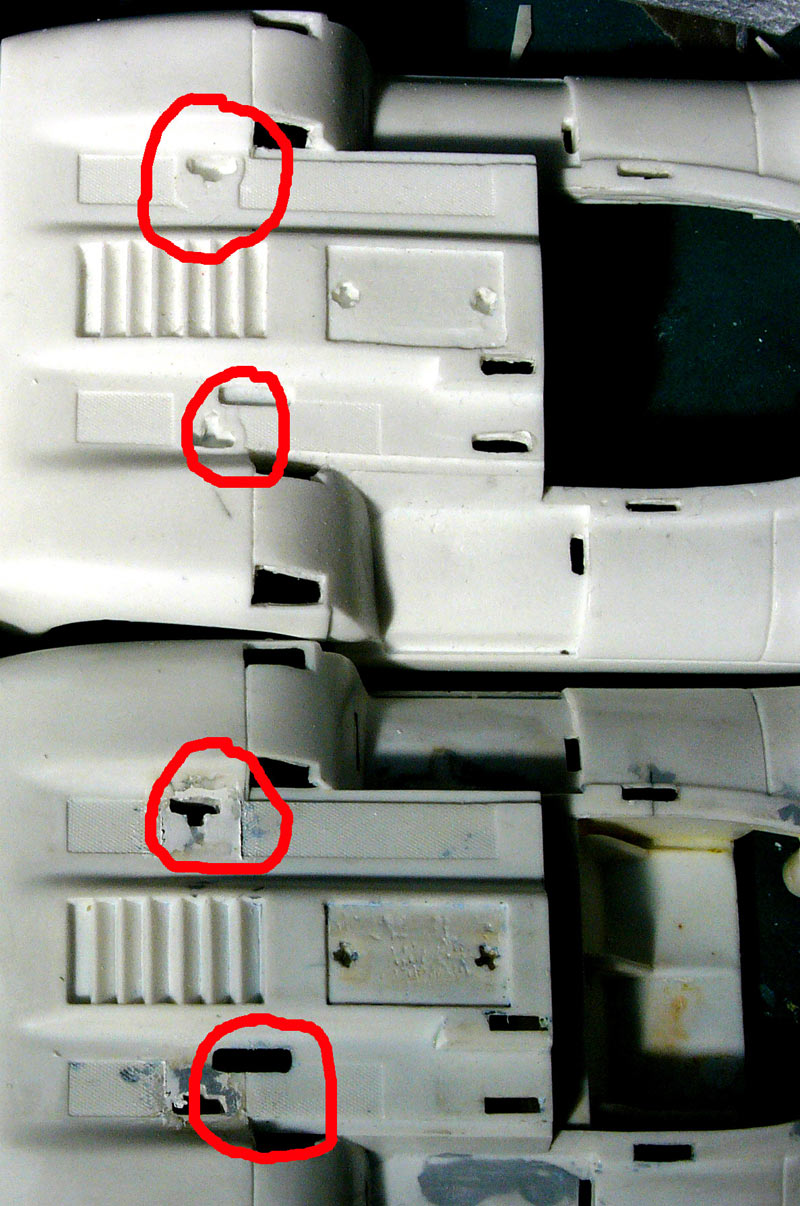
Those "triangular" additional parts will ensure that the upper part (above the radiators) has no communication with the part below the radiator.

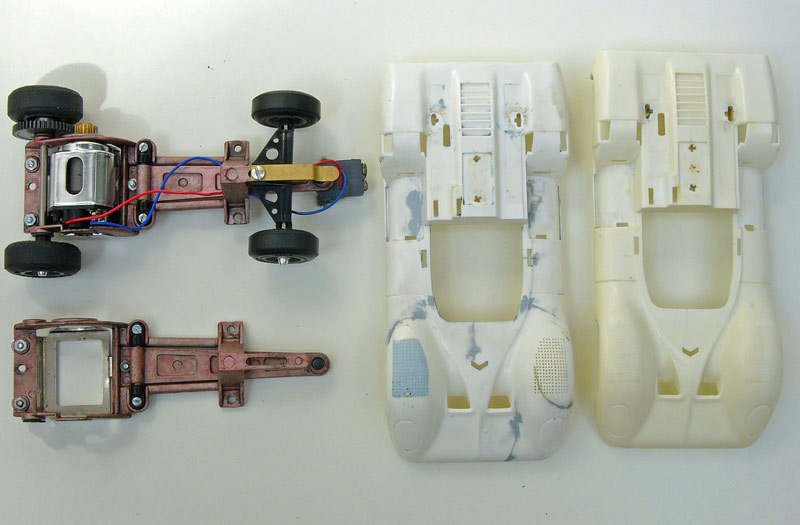
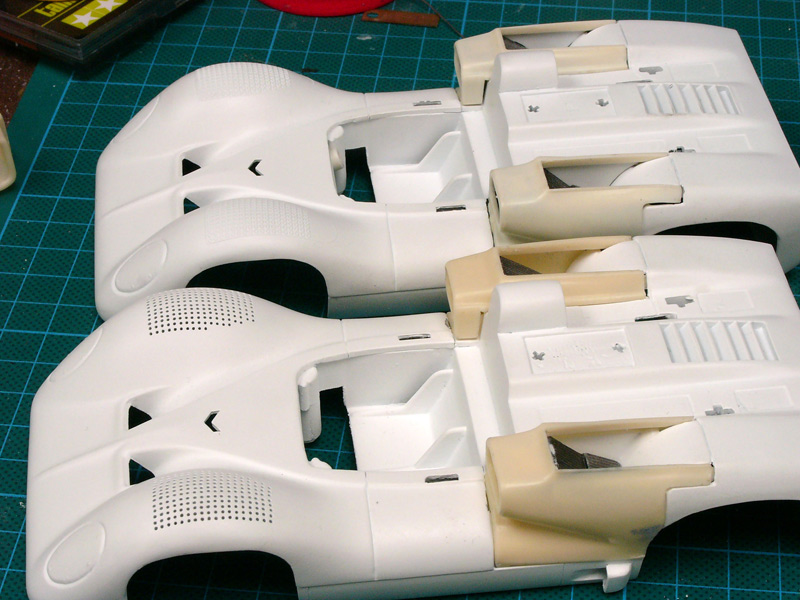
Let's see that with the pictures taken on either Don's car or first of mine :

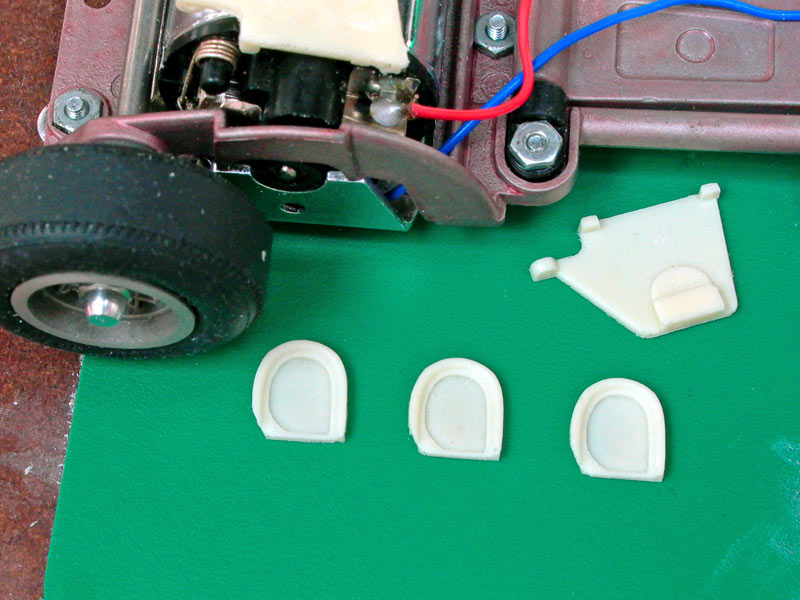
First of all the thin parts that will be glued to the sides of each radiator and to the upper side of the scoops.

Additional_parts_for_scoops.jpg


Additional_parts_scoop_glue.jpg

Side_viw_interior_scoop.jpg

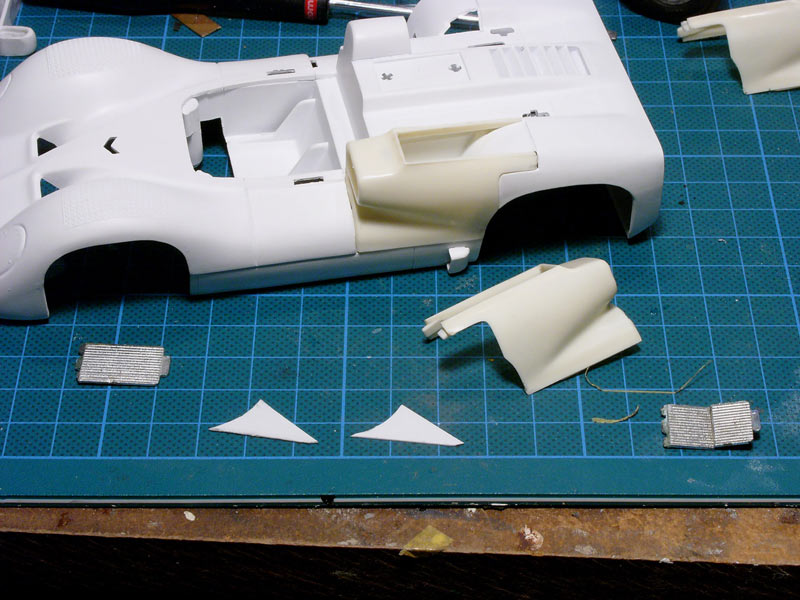
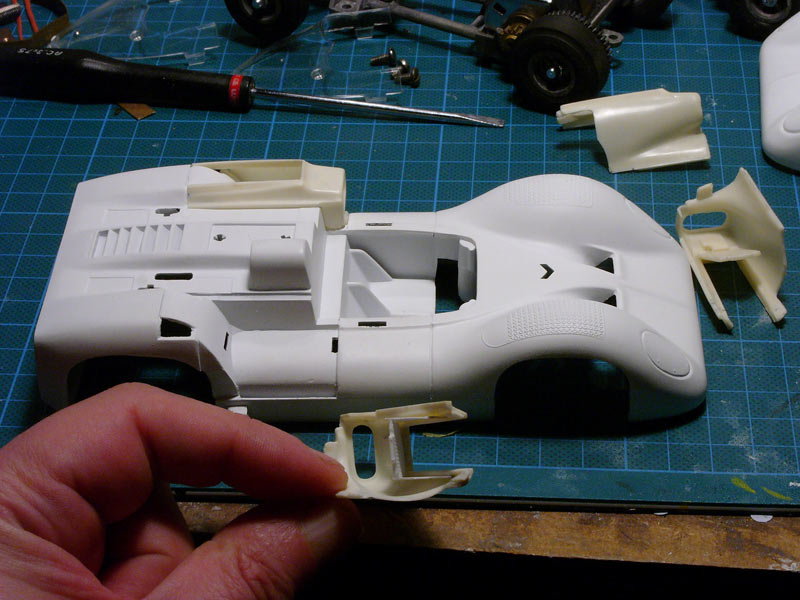
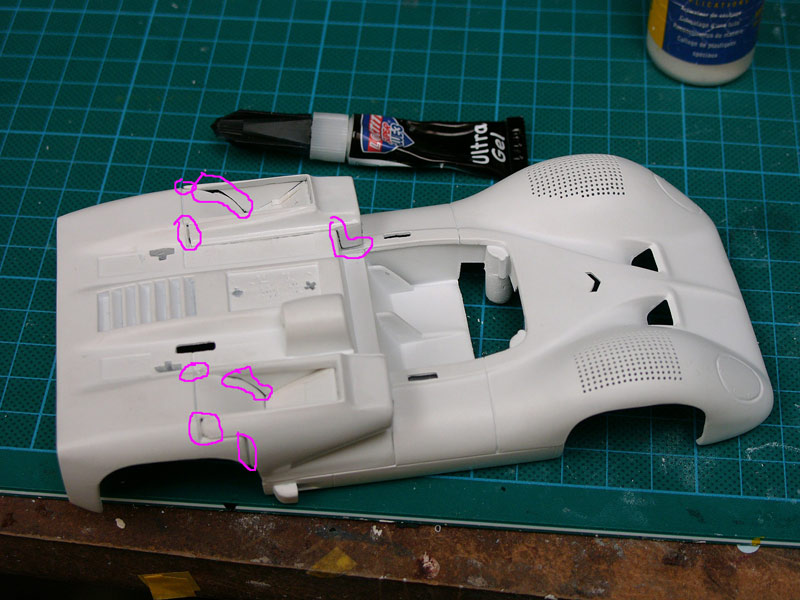
We try it in position but with no glue:

Scoops_in_position.jpg

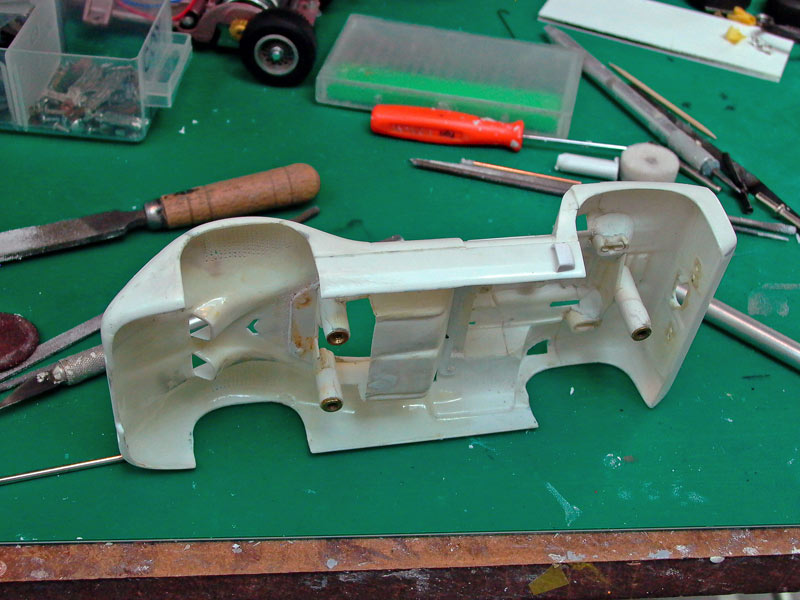
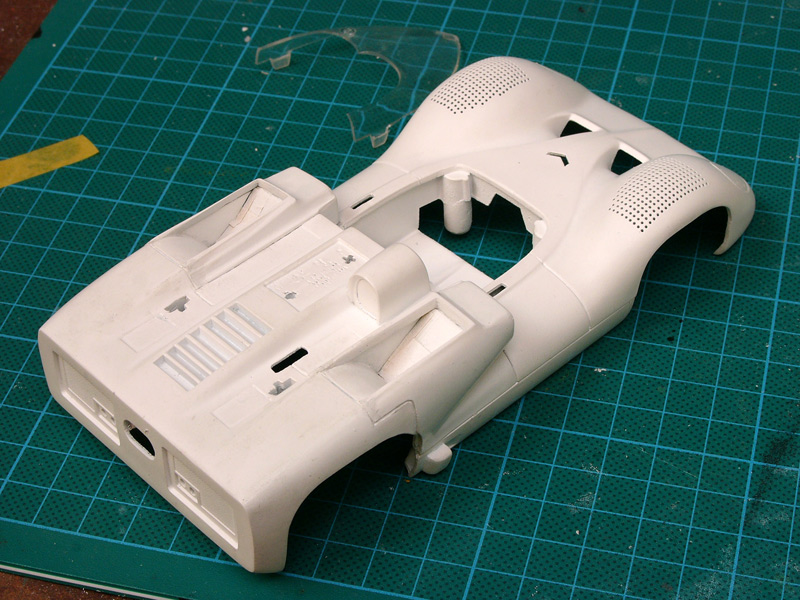
One everything optimized I put the scoops off.

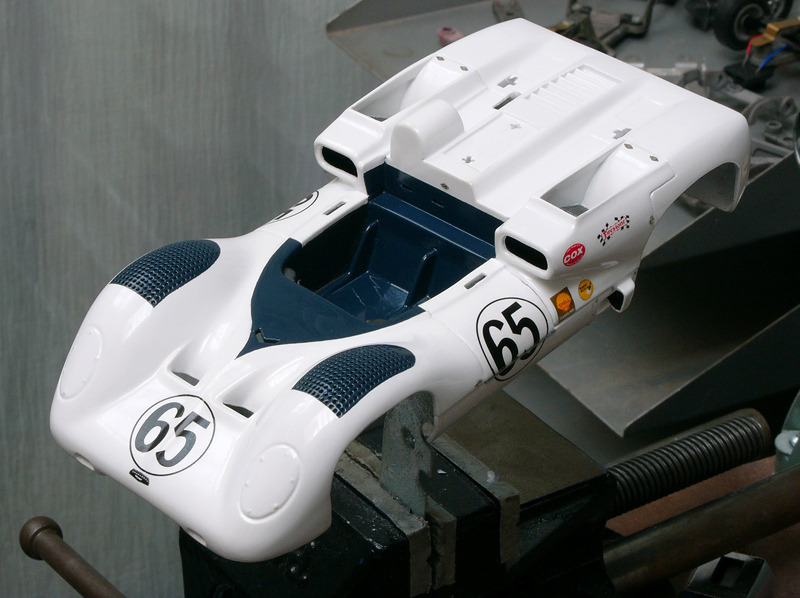
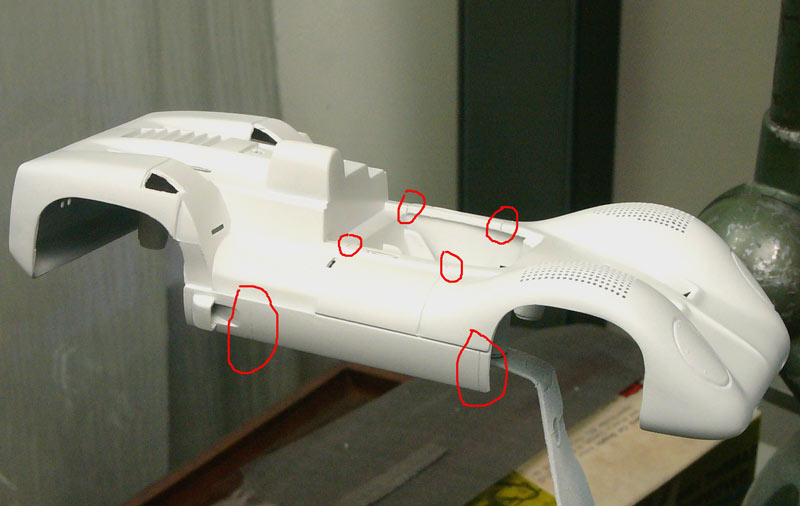
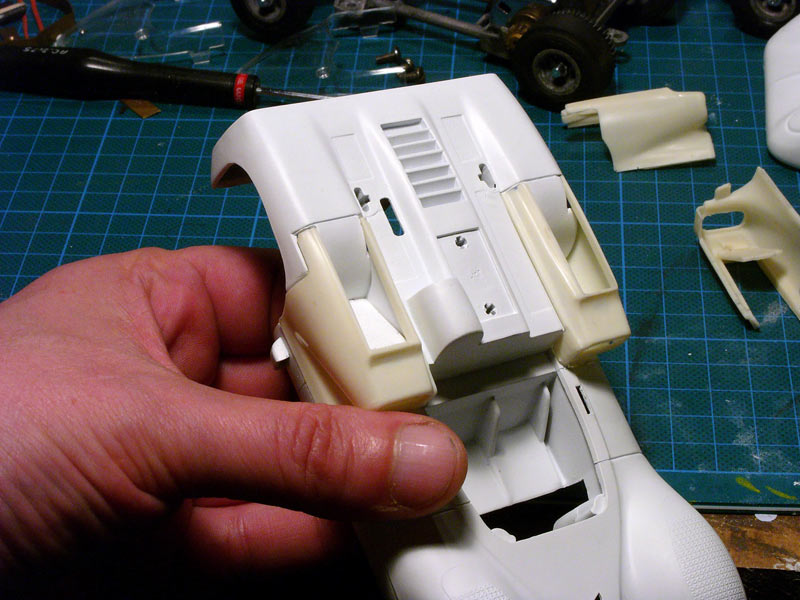
I do not show the way I painted the radiator, not difficult (I wanted something realistic, not chromed). You also have to use masking tape on the upper side of the radiator to protect it during the phases of painting and warnish.

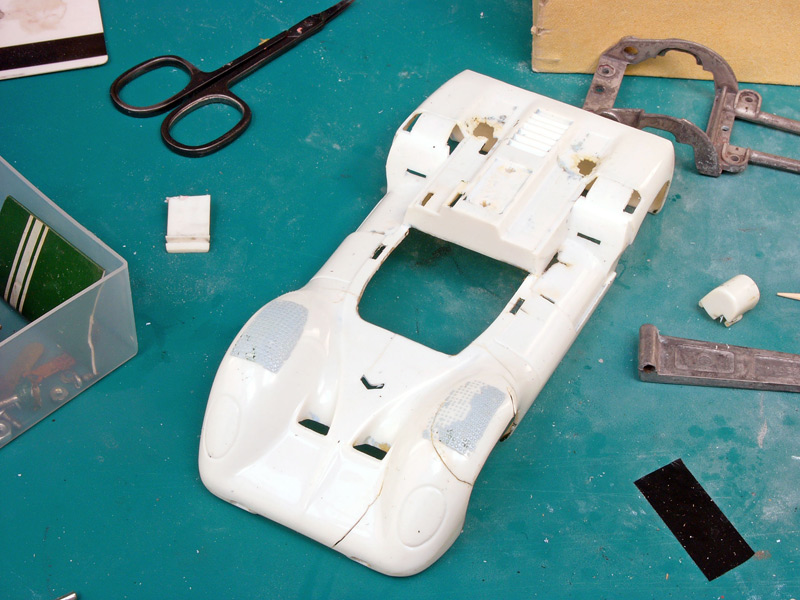
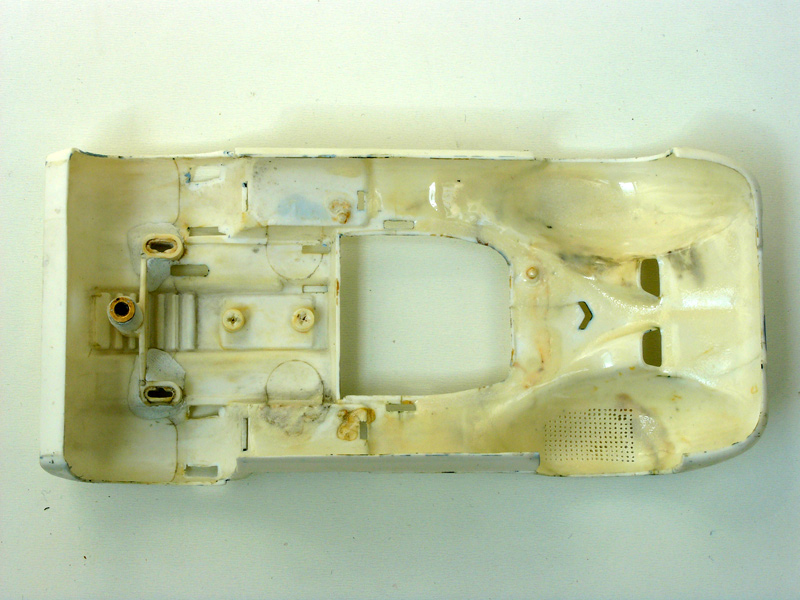
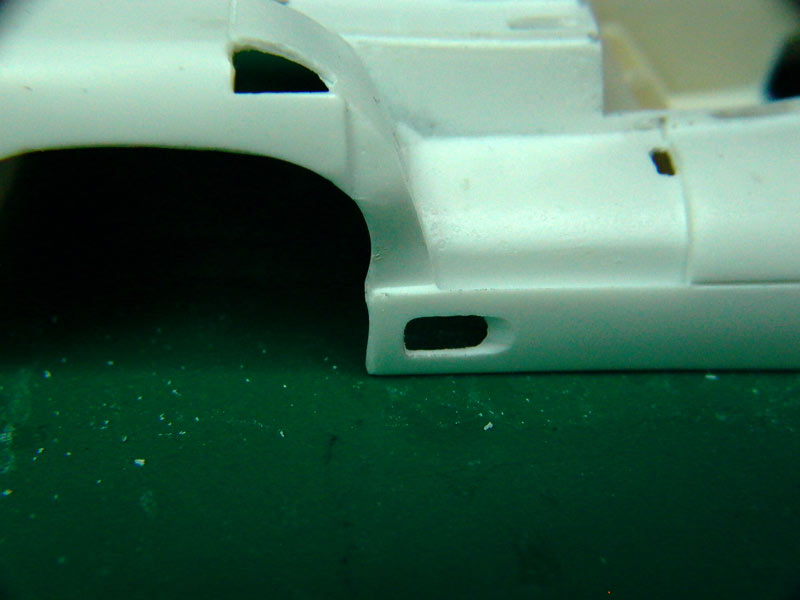
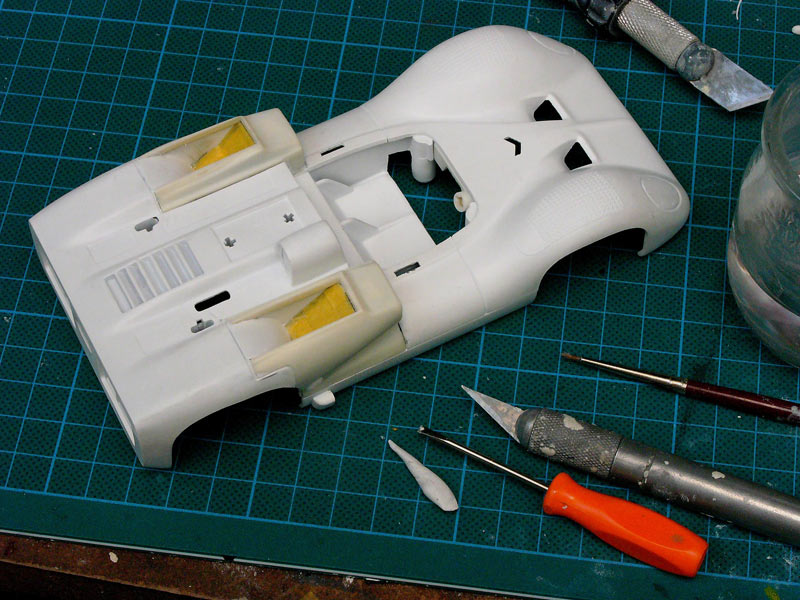
But here the way I paint the interior in black and, once the paint dry, I use masking tape to ensure that the white primer and thereafter white paint, varnish, etc, will not go into the lower cavity.

black_paint_inside_scoop.jpg

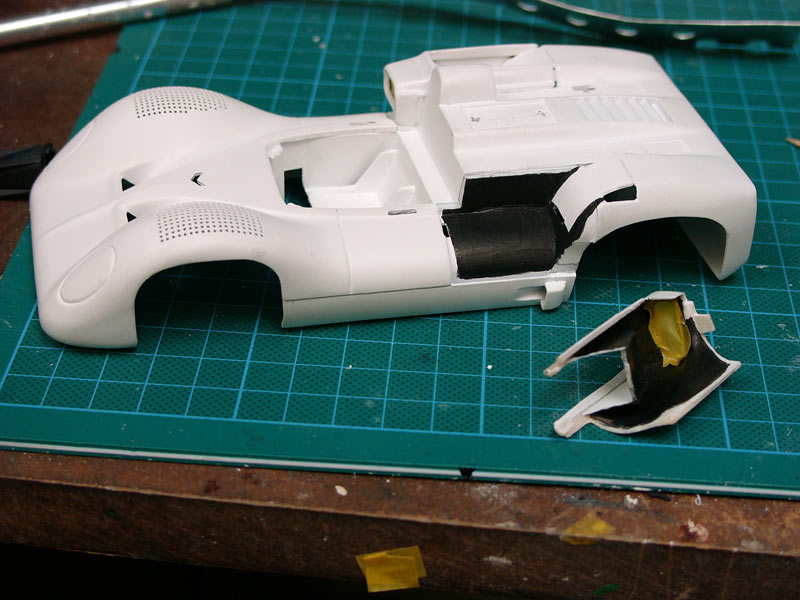
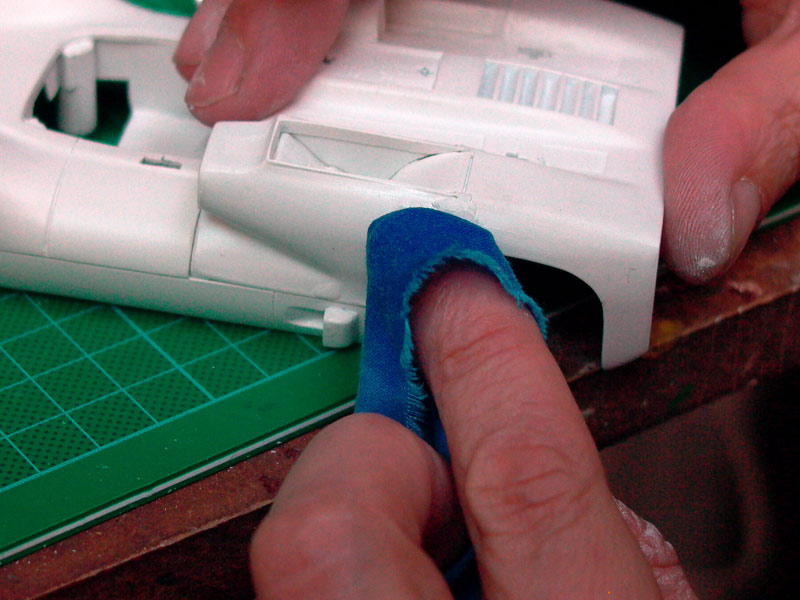
The next step is to cement the scoop, use some epoxy mastic to integrate the scoops perfectly into the body, with a seal for the additional thin triangular parts with the rear wing.

upper_part_of_the_scoops.jpg

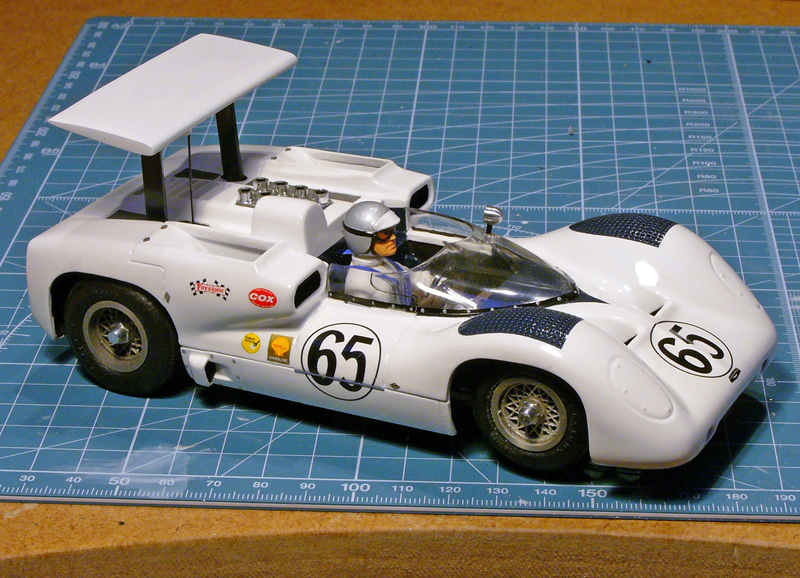
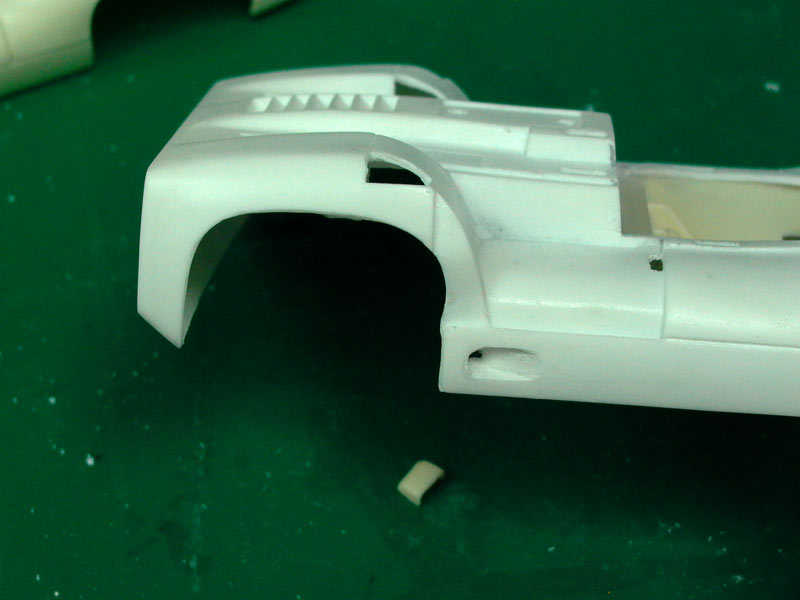
I will show you the next steps of painting, decalcing, warnishing, but right now, here is the result when, after all this, you finally remove the masking tape... :D

once_masking_put_off.jpg

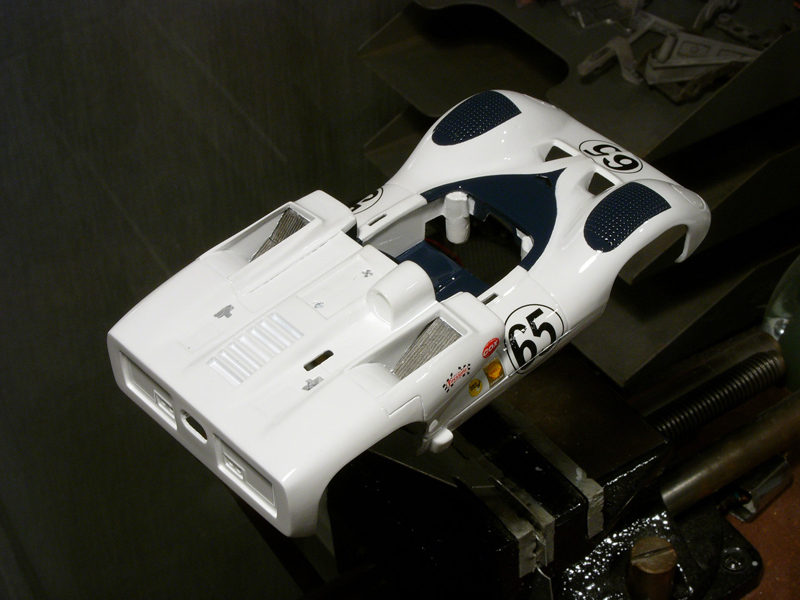
Of course, as for the lower part, the entry of air scoops, it remained flat black. I simply add to remove the masking tape from the outside (it comes off easily, its only masking tape).

Black_interior.jpg
(Bud)light is right!

#19 Horsepower

Horsepower

    **Numb Thumbs**

  • Full Member
  • PipPipPipPipPipPipPip
  • 4,343 posts
  • Joined: 16-February 06
  • Gender:Male
  • Location:Chicago

Posted 13 November 2008 - 05:50 PM

I'm going to stop coming here.I feel so inferior. :unsure:
JM-What an amazing transformation! :shok: This kind of dedication to the details and the hobby itself should be on the cover of major magazines, along with Jairus, Bosmeck DC 65X, Steve O. and a bunch of others here. Just awesome stuff! Thanks for giving us mortals all the construction details. :)
Gary Stelter
 
My life fades, the vison dims. All that remains are memories... from The Road Warrior

#20 Jairus

Jairus

    Body Painter Extraordinaire

  • Subscriber
  • PipPipPipPipPipPipPipPip
  • 10,174 posts
  • Joined: 16-February 06
  • Gender:Male
  • Location:Salem, OR

Posted 13 November 2008 - 06:05 PM

Very nice work Jean!
You do a modeler proud... :D

Jairus H Watson - Artist
Need something painted, soldered, carved, or killed? - jairuswtsn@aol.com

www.slotcarsmag.com

www.jairuswatson.net
http://www.ratholecustoms.com
Check out some of the cool stuff on my Fotki!


#21 Jean-Michel Piot

Jean-Michel Piot

    Plastic surgeon

  • Full Member
  • PipPipPipPipPip
  • 654 posts
  • Joined: 16-March 08
  • Gender:Male
  • Location:Paris (France)

Posted 13 November 2008 - 06:07 PM

Merci beaucoup :blush:
(Bud)light is right!

#22 yomama

yomama

    Mid-Pack Racer

  • Full Member
  • PipPipPip
  • 151 posts
  • Joined: 31-December 06

Posted 13 November 2008 - 07:18 PM

A true master at work, well done my friend!
Cal Naughton, Jr.

#23 Howmet TX

Howmet TX

    On The Lead Lap

  • Full Member
  • PipPipPipPip
  • 363 posts
  • Joined: 12-April 07
  • Gender:Male
  • Location:London, UK

Posted 14 November 2008 - 02:49 AM

A wonderful master class! Thanks J-M. You mentioned engraving lines... could you show us the tool and method you use for that?

John Dilworth


#24 Jean-Michel Piot

Jean-Michel Piot

    Plastic surgeon

  • Full Member
  • PipPipPipPipPip
  • 654 posts
  • Joined: 16-March 08
  • Gender:Male
  • Location:Paris (France)

Posted 14 November 2008 - 04:19 AM

You mentioned engraving lines... could you show us the tool and method you use for that?


I simply use a plastic band of those old Dymo machines for making labels (where the letters are embossed in the plastic) and a dry-point.

The Dymo plastic band is self-adhesive and due to its thickness it can be used as a ruler for the dry-point ...

Of course you start very gently but after the dry-point has passed two or three times you can then go harder.

After the line is engraved you just remove the Dymo plastic band and there it is.

I will take picture during the week-end if this is not clear enough.
(Bud)light is right!

#25 Jean-Michel Piot

Jean-Michel Piot

    Plastic surgeon

  • Full Member
  • PipPipPipPipPip
  • 654 posts
  • Joined: 16-March 08
  • Gender:Male
  • Location:Paris (France)

Posted 14 November 2008 - 05:13 AM

Because the stage of making the seals of the air scoops is very important and needs meticulousness, I'd like to revert to it in details.

Here is a picture before any sealing and even before the masking of the air vent and radiator. It shows that the radiators are painted before (it was not visible in the previous pictures).

Revenir.jpg

Once the masking tape applied and the air scoops cemented, I sprayed a white primer.

Then I do the seals with 2 components epoxy mastic, like Milliput or Tamiya (the kind of which has to be worked with wet instruments before drying, as it becomes harder than plastic once dry and would be too difficult to file or sand afterwards).

The way to use those products is explained in the joint notice, so here I will just let the images speak.

zones_a_jointer.jpg

zone_a_jointer_2.jpg

jointage_lateral.jpg

seal_for_rear_part_of_scoop.jpg

lissage_joint_interne.jpg

gravure_joint.jpg

lissage_pinceau_et_eau.jpg

After the finishing with wet brush, you just allow the whole thing to dry ... You will then be ready for the very classical steps of sanding the primer and painting (no need to detail how to sand and apply the 2 white coats of paint).

You_allow_to_dry.jpg
(Bud)light is right!


Electric Dreams Online Shop