Jump to content


Photo

1/32 Lotus 79


  • Please log in to reply
11 replies to this topic

#1 Robert Blaschke

Robert Blaschke

    Backmarker

  • Full Member
  • PipPip
  • 94 posts
  • Joined: 06-May 08
  • Gender:Male
  • Location:CT, USA

Posted 14 October 2009 - 02:03 PM

I know 1/32 kit building is'nt scratch building but I know this is were the builders are.
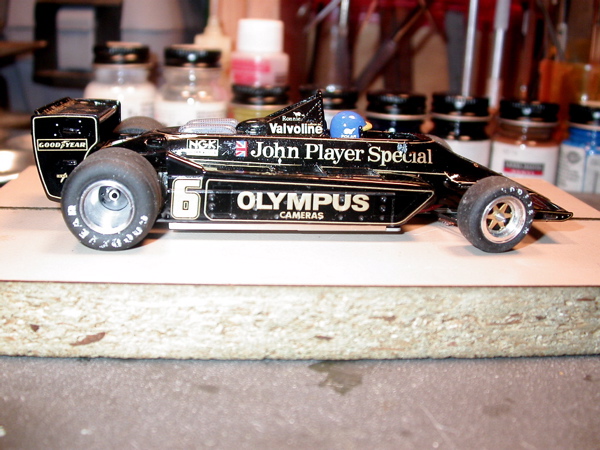
The kit is OSTORERO Lotus 79 John Player Special.
This kit is well designed and has been a blast to build except front the front suspension.
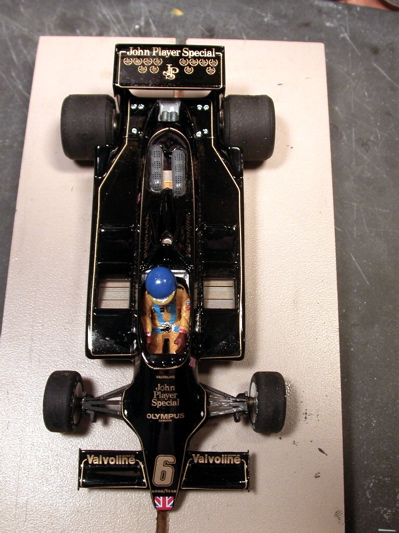
The chassis is pretty straight forward bend and solder type with separate front suspension.
Special care was taken soldering all the bend joints in the hope of strengthening the chassis for racing.
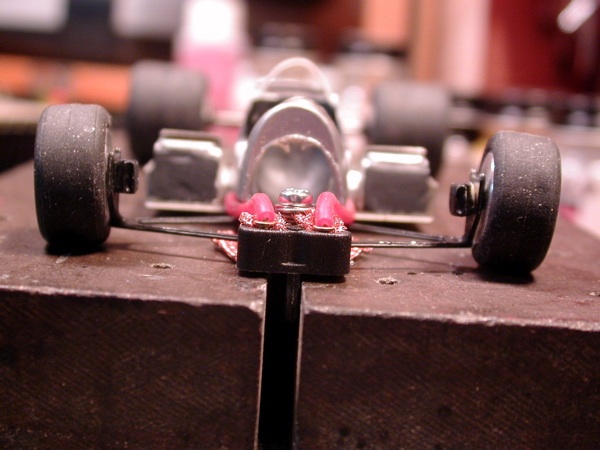
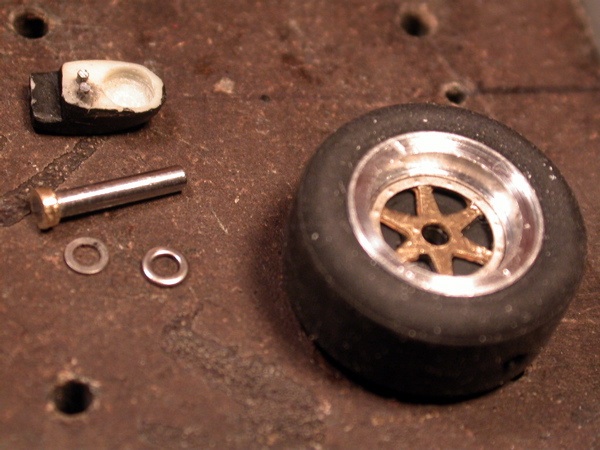
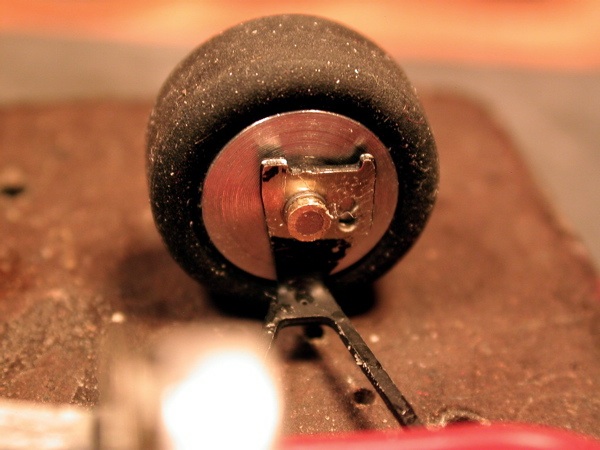
Axle stubs (.0625) are held in place by resin parts resembling air duct coolers for the brakes.
The stubs have a lot of play. Both up and down and side to side. The front wheels are held on with set screws.
The result is front tires that shudder like mad on the track.
I did reduce the most of the side play using six HO arm spacers left over from my 80's HOPRA days, but the axle stubs still move too much. The hole in the suspension is a bit oversize @.0635.
I'm thinking the only way to fix this is to modify the front suspension parts and use a solid axle.
Maybe this kit was to be a shelf queen and not a racer.
I'll try to post some photo's later.
Any ideas are most welcome.
My other question would be regarding the gears. Crown gear looks like brass and the pinion is metal.
The crown gear is eating the pinion. If the crown gear isn't brass is it bronze?
All the best, build on!
Robert

Lotus_79_Side.jpg

Lotus_79_Top.jpg

L79_Chassis.jpg

L79_Front_Tyre.jpg

Thats_Me.jpg


#2 MG Brown

MG Brown

    Grand Champion Poster

  • Administrator
  • PipPipPipPipPipPipPipPip
  • 7,966 posts
  • Joined: 16-February 06
  • Gender:Male
  • Location:The Cumberland Plateau

Posted 14 October 2009 - 02:27 PM

Is there enough material in the suspension to drill out the hole and insert a sleeve?
That's thirty minutes away. I'll be there in ten.


#3 Robert Blaschke

Robert Blaschke

    Backmarker

  • Full Member
  • PipPip
  • 94 posts
  • Joined: 06-May 08
  • Gender:Male
  • Location:CT, USA

Posted 14 October 2009 - 07:33 PM

I just added some photos. The pictures should help clarify my description of the design issues.
There may be enough room, the tricky part will be removing the cast resin brake cooling ducts.
The suspension is @.025 thick or the same thickness as a 60's Monogram slot car kit brass chassis.
Ducts are attached with 5 min. epoxy.
The suspension is quite thin, so great care will have to be used no matter how the problem is solved.

#4 MG Brown

MG Brown

    Grand Champion Poster

  • Administrator
  • PipPipPipPipPipPipPipPip
  • 7,966 posts
  • Joined: 16-February 06
  • Gender:Male
  • Location:The Cumberland Plateau

Posted 14 October 2009 - 10:00 PM

What a shame to have this problem with such a beautiful and iconic F1 car.
That's thirty minutes away. I'll be there in ten.


#5 Prof. Fate

Prof. Fate

    a dearly-missed departed member

  • Member at Peace
  • PipPipPipPipPipPipPipPip
  • 6,580 posts
  • Joined: 20-February 06
  • Gender:Male
  • Location:Salt Lake City, UT

Posted 15 October 2009 - 12:50 PM

Hi

Rovert, don't apologize. I have some of these kits,not this one, and I am semi-convinced that they are for collecting UNBUILT, or if built, display models. A lot of excellent kits out there display a lack of "race car practical" engineering.

And as a kit, in that a number of good racers over the years have out of frustration had me build these kits for them, I suspect that your street cred as a "builder" is good enough for ME.

I would mod the front this way. I would use a 1/16th wire single piece axle that at the ends, uses a series of sleeves to space up to fit the wheels. Paint the piece black and it won't be too distracting.

Well, I say that as a modeler, as a racer, I would actually do a simple straight full size cross asle, with a sleeve at one end to cap one wheel, and set screw the other allowing them to freewheel. And sacrifice the appearance.

Fate
Rocky Russo
3/6/48-1/1/12
Requiescat in Pace

#6 TSR

TSR

    The Dokktor is IN

  • Full Member
  • PipPipPipPipPipPipPipPip
  • 42,304 posts
  • Joined: 02-February 06
  • Gender:Male
  • Location:Marxifornia

Posted 15 October 2009 - 01:02 PM

Robert,
I have seen the factory-built RTR models and they did not appear to have that issue... ???
Either way, a solid axle looks like it would resolve the problem. :)

Philippe de Lespinay


#7 Robert Blaschke

Robert Blaschke

    Backmarker

  • Full Member
  • PipPip
  • 94 posts
  • Joined: 06-May 08
  • Gender:Male
  • Location:CT, USA

Posted 15 October 2009 - 02:13 PM

Thank you for the sound advice.
Slot cars like real cars are made to have fun with.
I put my restored COX 2E on the track when the track is clear.
This morning I did pop off the brake air ducts and decided to try a solid straight axle using 1/16" dia brass rod.
If all worked well I would use piano wire or a drill blank.
The front wheels worked great. Cool! Problem solved yes! Problem solved? NO.
The upper suspension attached to the underside of the body is in the way.
Even with out the upper suspension I'm not really sure there is enough room to make a cut out with enough space for the axle to rotate freely with out cutting the body in two. It would be real close.
If I were at least 85% sure there was enough room for the straight axle, I would put on the safety glasses and power up the Dremel.
One thing about slot car racers is that we usually find a solution to these kind of things.

#8 gascarnut

gascarnut

    Posting Leader

  • Full Member
  • PipPipPipPipPipPipPip
  • 3,938 posts
  • Joined: 16-February 06
  • Gender:Male
  • Location:Irvine, CA

Posted 15 October 2009 - 03:06 PM

If it were my car, I would solder the two stub axles solidly to the suspension uprights and then let the wheels rotate on the stationary stub axles. This would mean finding a way to retain the wheel on the stub axle, but that shouldn't be too much of an issue.

It still won't be very strong, but you do at least stand a chance of having front wheels that are aligned and rotate properly.

I remember assembling an Osterero Lotus 38 for a friend and it has the same pathetic design. Fortunately, the owner of the car did not want to run it much.
Dennis Samson
--------------------------
Scratchbuilding is life
Life is scratchbuilt

Samson Classics

#9 Robert Blaschke

Robert Blaschke

    Backmarker

  • Full Member
  • PipPip
  • 94 posts
  • Joined: 06-May 08
  • Gender:Male
  • Location:CT, USA

Posted 21 October 2009 - 10:15 PM

JPS Lotus 79 front axle stub modification complete.

jpfront.jpg

I decided to make new axle stubs from 1/16" piano wire and 3/32" brass tubing.
The brake duct mounting tabs broke off when I disassembled the suspension so I added new ones with piano wire.
jpparts.jpg
jpstub.jpg
The holes in the front wheels was easily enlarged by inserting the piano into the wheel hole and rotating the wheel until it spun freely.
One .010 washer was used between the stub and suspension upright and one between the upright and the front wheel.
With very little side play the front wheels turn perfectly and the car now handles well.

The JPS Lotus 79 is nearly finished, all thats left is touching up the paint and a few more decals.
I will post pictures of the completed car as soon as the project is finished.
Thanks again for the great ideas.

#10 havlicek

havlicek

    OCD Rewinder

  • Subscriber
  • PipPipPipPipPipPipPipPip
  • 11,198 posts
  • Joined: 20-August 07
  • Gender:Male
  • Location:NY

Posted 22 October 2009 - 06:06 AM

Nice fix!

-john
John Havlicek

#11 Howmet TX

Howmet TX

    On The Lead Lap

  • Full Member
  • PipPipPipPip
  • 363 posts
  • Joined: 12-April 07
  • Gender:Male
  • Location:London, UK

Posted 22 October 2009 - 07:11 AM

Just a thought... but if you were able to loosen up the tight fitting piano wire stubs just by spinning the wheel a little, might there not be a tendency for the process to continue and leave you with sloppy wheels again after a bit of running?
Lining the wheels with a bit of 1/16" i.d. tube might be an idea, perhaps?

John Dilworth


#12 Robert Blaschke

Robert Blaschke

    Backmarker

  • Full Member
  • PipPip
  • 94 posts
  • Joined: 06-May 08
  • Gender:Male
  • Location:CT, USA

Posted 22 October 2009 - 08:23 AM

I here you man.
A set screw secures the wheel to the stub, so there is no movement.
I probably would have made the stubs a bit longer and made the front wheels independent but the front wheel track got too
wide with the wheel retainer between the suspension upright and wheel. The retainer holding the wheel on looked huge.
The original stub was real loose in the 1/16"i.d. tube.
The place where I could see a potential problem was in the suspension upright itself. As far as I could tell there was not enough metal there to add a 3/16"o.d.-1/16"i.d. brass sleeve.
I may try to sleeve the suspension upright on the next one, before I solder it to the chassis and bend the suspension upright into place.


Electric Dreams Online Shop