Jump to content


Photo

Some general questions...


  • Please log in to reply
12 replies to this topic

#1 strummer

strummer

    On The Lead Lap

  • Full Member
  • PipPipPipPip
  • 405 posts
  • Joined: 28-August 19
  • Gender:Male
  • Location:OR

Posted 03 March 2020 - 09:58 AM

I don't know if this is the proper forum, but since these questions came to me while reading some of these fascinating threads, I'll ask here. If not the right spot moderators,  please move.


Why do I often see the word "correct" spelled with a "K"?...as in "Korrect"?


What is the reason for epoxying the armatures? And how is this done? Is it brushed on, or dipped?


I'm guessing the standard "size" for axles in 1/24 is 5-40(?); If so, a nut/cap made in "5-56" would be exclusively for the Cox tapered axle?


In the model railroading world (where I came from) all DC analog stuff is 12 volts; it's been that way for years. So how is it you guys will sometimes use a 9V or even 6V motor? I suspect a lower voltage motor would turn faster, but don't you then run a high risk of burning it up? How do you get around that? Or do you just let it burn up, and then re-build?


Thanks.


Mark in Oregon


Mark Mugnai


#2 dc-65x

dc-65x

    Grand Champion Poster

  • Subscriber
  • PipPipPipPipPipPipPipPip
  • 7,015 posts
  • Joined: 14-February 06
  • Gender:Male
  • Location:Captain Rick: The only vintage slot car nut in SW Oregon?

Posted 03 March 2020 - 10:41 AM

Hi Mark,


Philippe De Lespinay used the term "Korrect"  when describing the correct way something should be done to be truly vintage.


I will find a thread I did on how I epoxy vintage armatures. It was done to keep from throwing a winding off the armature at high speed. It also locks the armature laminations together before it is drill balanced. Otherwise the laminations can shift ruining the arm.


Cox tapered axles take a 2-56 cap nut.


A lower voltage (resistance) motor suchas the 6 volt versions of Pittman motors run faster on the normal 12 volt power supplies. As you suspect they would also tend to run a bit hotter and be more likely to fail over time.


  • strummer likes this

Rick Thigpen
Check out Steve Okeefe's great web site at its new home here at Slotblog:
The Independent Scratchbuilder
There's much more to come...


#3 dc-65x

dc-65x

    Grand Champion Poster

  • Subscriber
  • PipPipPipPipPipPipPipPip
  • 7,015 posts
  • Joined: 14-February 06
  • Gender:Male
  • Location:Captain Rick: The only vintage slot car nut in SW Oregon?

Posted 03 March 2020 - 10:56 AM

Here is some info on drill balancing:


OK, it was time to balance the armature. Now I can share my mistakes with everyone. I don't know what I'm doing but I'm having fun trying. I'm sad that I destroyed an irreplaceable vintage armature. I wish I hadn't... I didn't mean to... in hindsight it seems obvious why I did... but now you won't... so build one of these smile.gif .
 
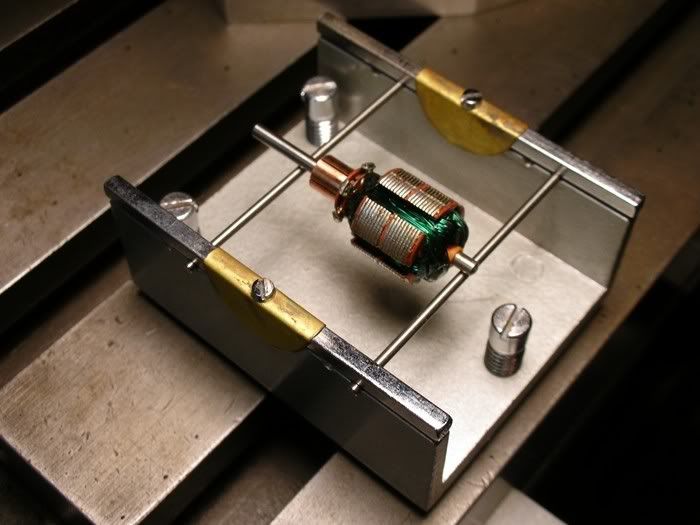
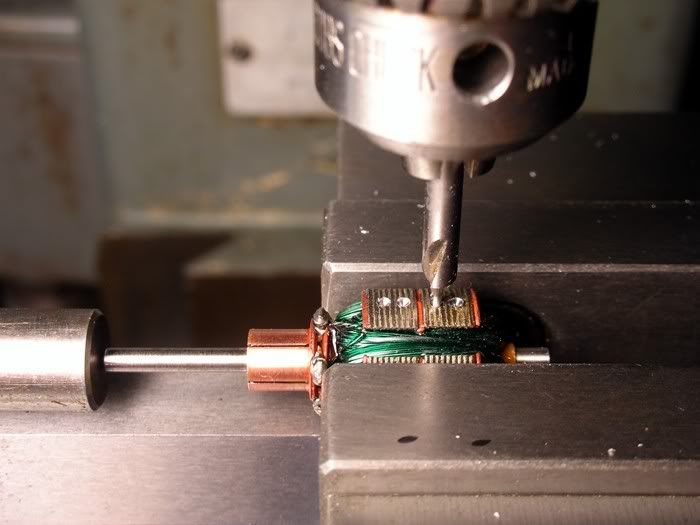
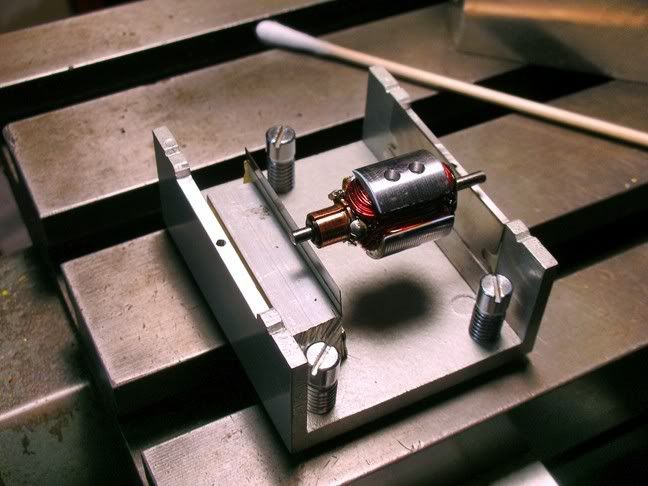
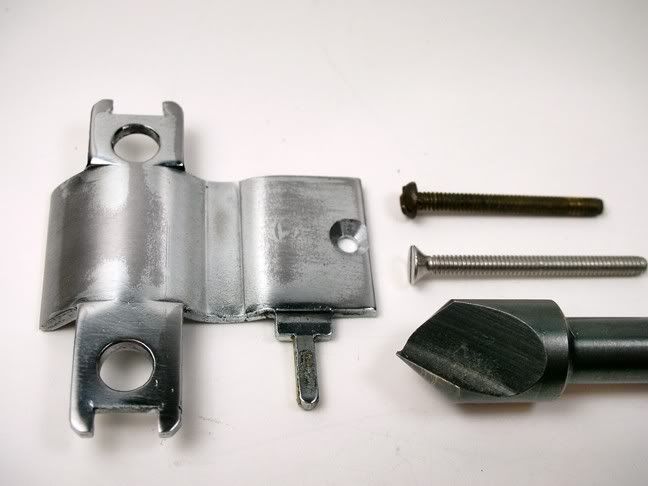
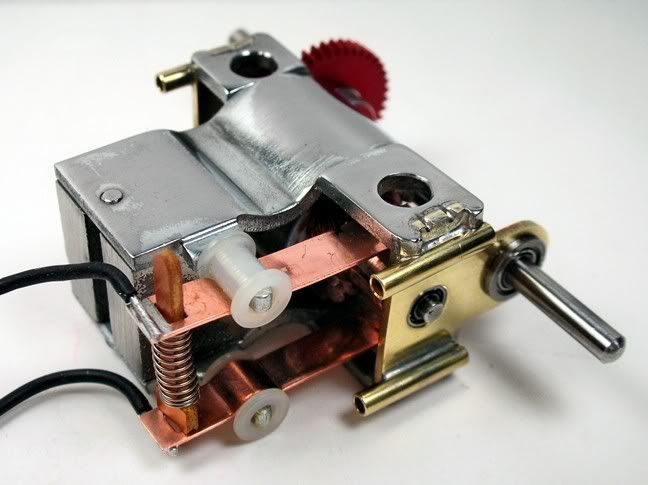
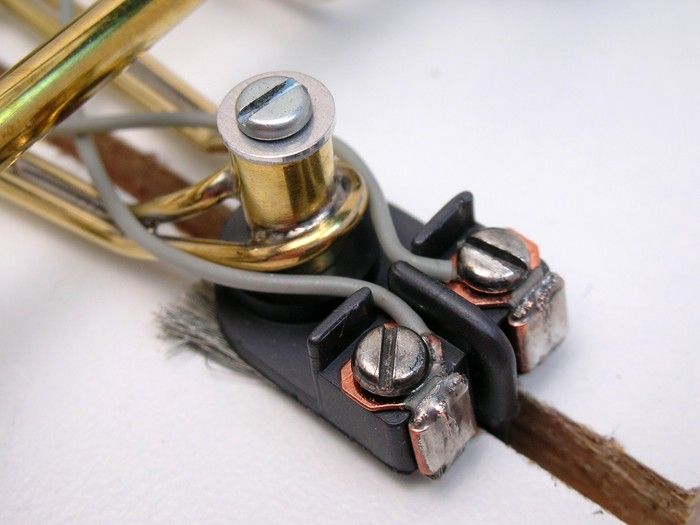
Here's the sad story. I examined the armature and it looked like it had been factory epoxied. First mistake. So I preceded to static balance it. I used my vintage Tradeship balancer:
 
AristocraftPower009.jpg
 
When I touched the drill down YIKES!
 
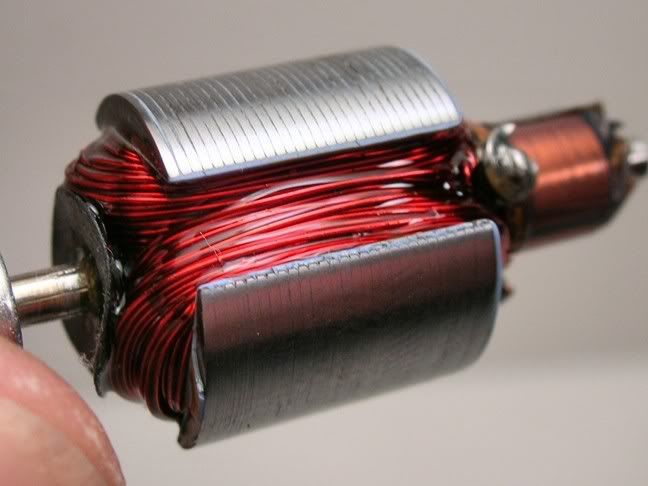
The armature laminations shifted and the arm was toast. Whatever the factory coated the windings with it was not encapsulated with epoxy (mistake number one). See the attempted balancing hole on the far right. I'll get to the other carnage in a minute:
 
AristocraftPower026.jpg
 
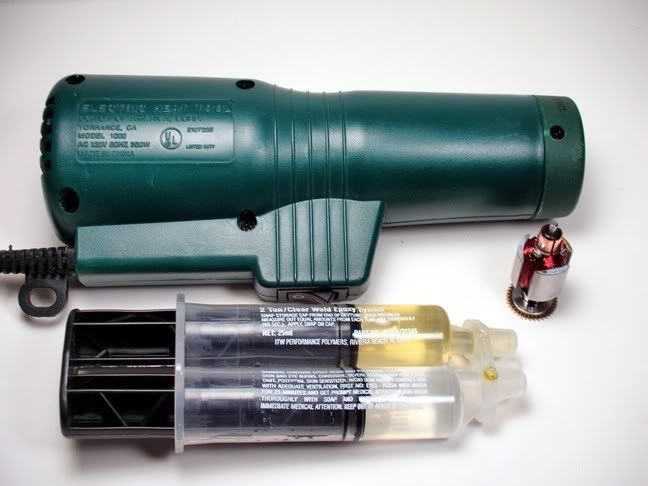
Well, that didn't work. Time to really epoxy the armature. I used Devcon 2 Ton Epoxy to coat the windings. I mean I piled it on blink.gif . I held the armature shaft in a pin vise to help control it in the process. I used a small heat gun to heat the epoxy. This get is thin at it really flows and gets sucked down into the windings. I remember Ron talking about using a vacuum chamber to cause this to happen and that's the best way. But man, I mean I really gooped tons of epoxy on and when I heated it with the heat gun it just sucked down and disappeared! REALLY!
 
OK, another mistake I've made. I went crazy with the heat gun on my Fly Weight GP Car project. If a little heat is good, a lot of heat must be better... wrong. I heated that arm until the sucker started smoking :shok: . Mistake... that changed the properties of the epoxy and the first time I ran the car the epoxy got soft and came flying off and locked up the motor. Moral of the story, just get the epoxy hot enough to flow. Hold the arm comm up and let any excess flow off the back. If you get excess flowing off just spin the arm against your finger to wipe any excess away and your good to go.
 
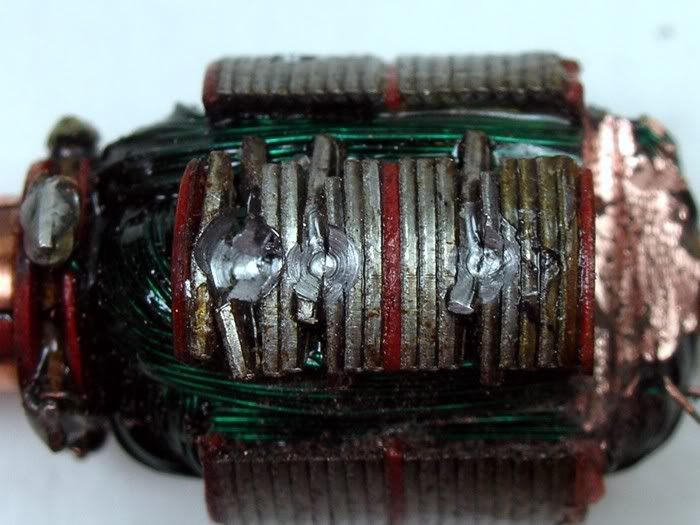
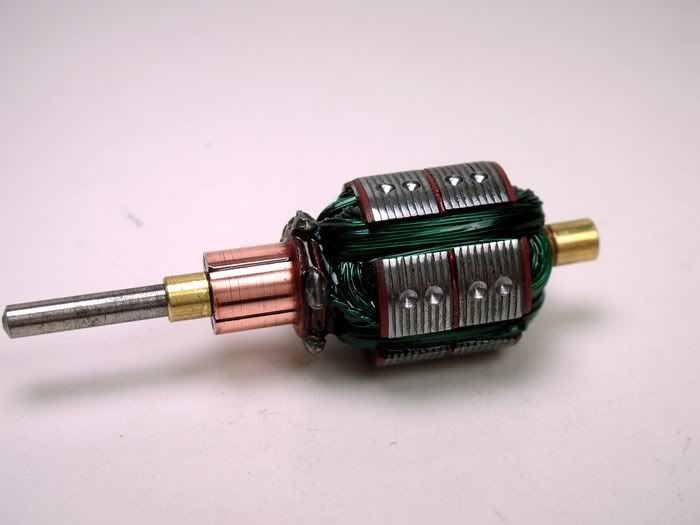
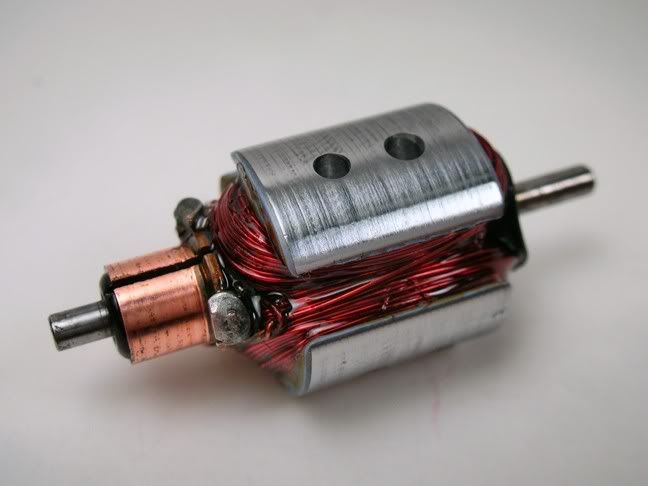
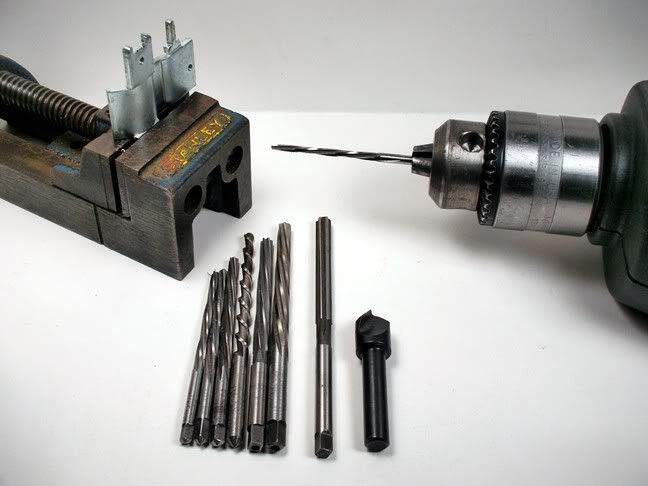
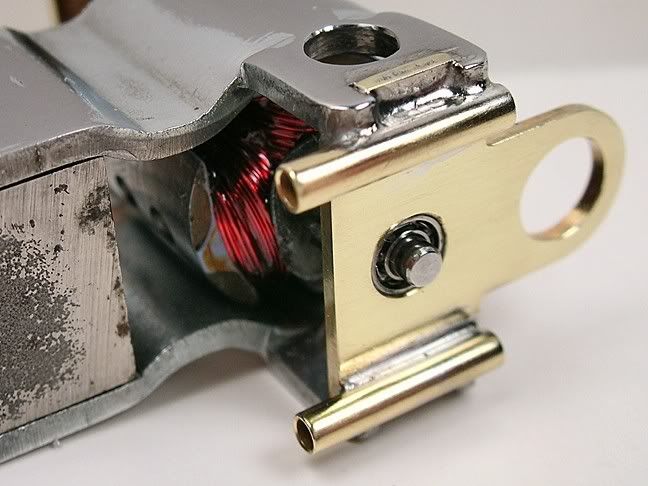
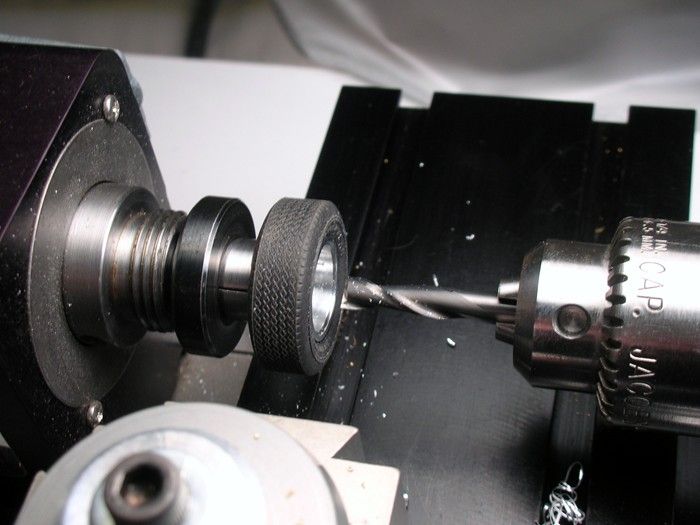
I epoxied the destroyed arm and another new one. I decided to practice drilling on the destroyed one (the two holes on the left side of the arm in the picture above). I use the same drill I've been using on Mabuchi three-pole arms. Another mistake blush.gif . It was to big in diameter for the thin five-pole armature. Check out the thin web on the five-pole arm:
 
AristocraftPower022.jpg
 
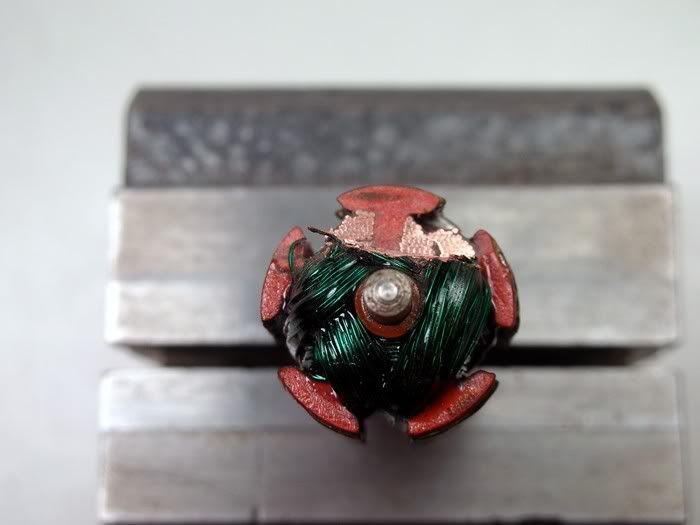
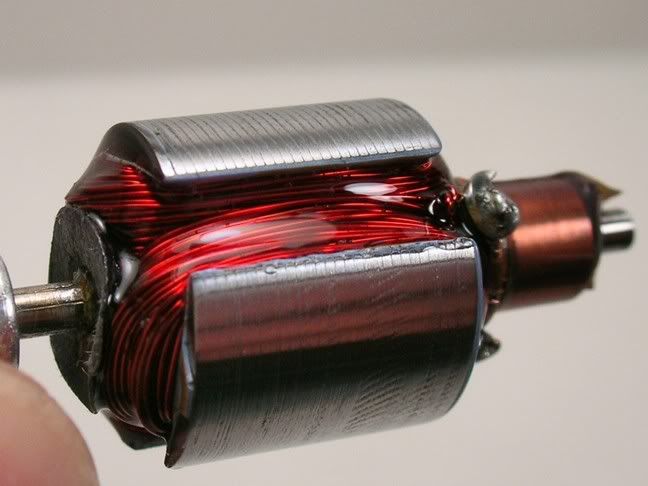
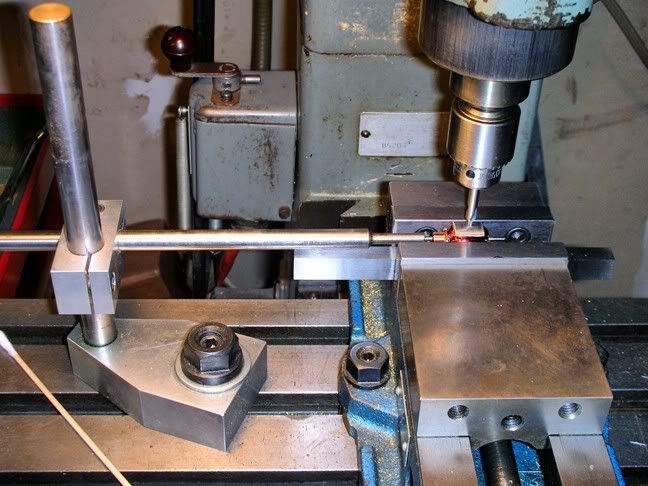
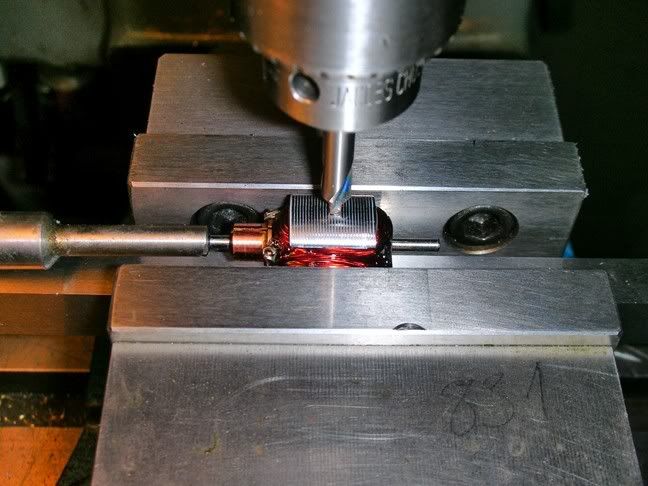
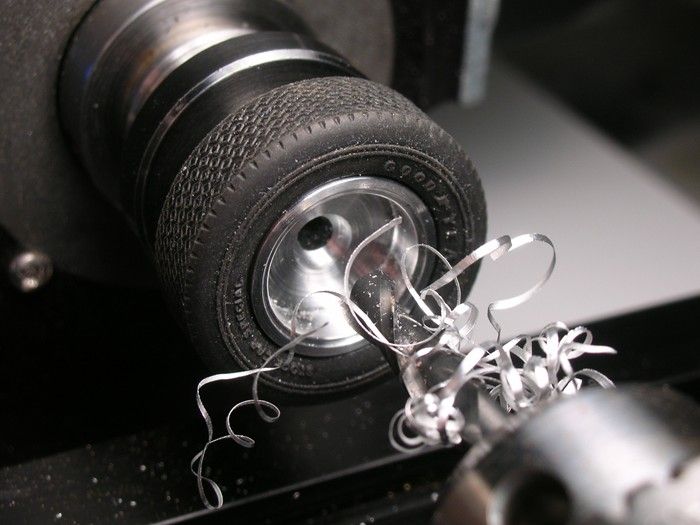
Time to use small holes:
 
AristocraftPower028.jpg
 
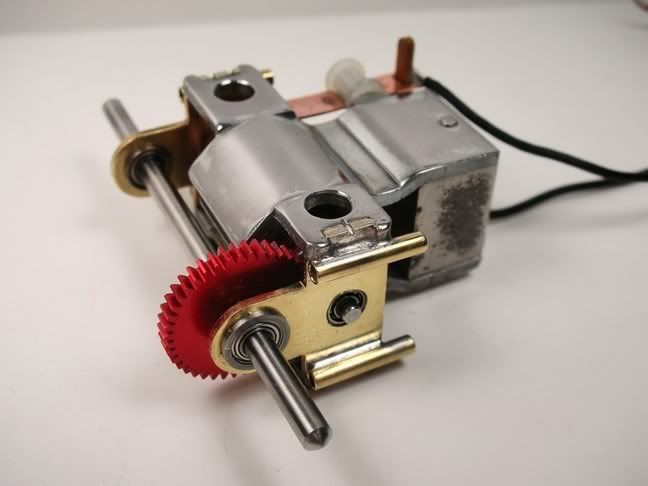
Success. Look at how deep I got away with on that hole. You can see it just starting to break through at the 12 o'clock.
 
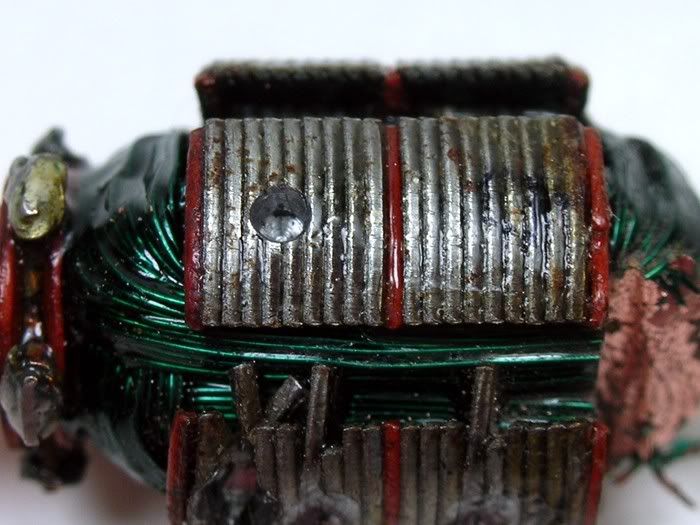
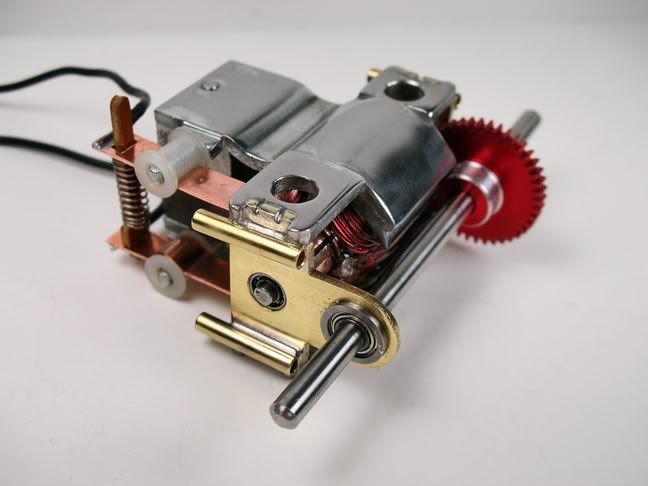
The moral of my newbie story is to epoxy the arm and drill small diameter, shallow holes into this five-pole arm. Hindsight is indeed 20-20. Here's the success story:
 
AristocraftPower012.jpg
 
AristocraftPower013.jpg
 
Onward...


  • Peter Horvath, Samiam, Geary Carrier and 1 other like this

Rick Thigpen
Check out Steve Okeefe's great web site at its new home here at Slotblog:
The Independent Scratchbuilder
There's much more to come...


#4 dc-65x

dc-65x

    Grand Champion Poster

  • Subscriber
  • PipPipPipPipPipPipPipPip
  • 7,015 posts
  • Joined: 14-February 06
  • Gender:Male
  • Location:Captain Rick: The only vintage slot car nut in SW Oregon?

Posted 03 March 2020 - 11:09 AM

Here is some info on using epoxy on a vintage arm:
 

Here's the unbalanced armature:
 
ramxl500motor007.jpg
 
First I added some more epoxy to the light factory job. I used 2-Ton epoxy and a heat gun to get it to flow:
 
ramxl500motor008.jpg
 
Here the armature is coated with epoxy. It's just sitting on top of the windings. I hit it with the heat gun a little to get it thinned out and flowing. The down side to this is it also caused the epoxy to start setting up quickly . . . so you have to work fast:
 
ramxl500motor010.jpg
 
Here it is after the heat gun. All the epoxy is suck down into the windings . . . at least a little. biggrin.gif :
 
ramxl500motor011.jpg
 
The finished armature:
 
ramxl500motor018.jpg
 
It was way out of balance on the old razor blades so I started drilling holes in the heavy pole:
 
ramxl500motor014.jpg
 
Here's my setup. I do have a small secondhand milling machine. It's quite handy for this. I made a stop so the armature could be returned to the same position after checking for balance:
 
ramxl500motor012.jpg
 
ramxl500motor013.jpg
 
I decided to use the pole pieces from an old Ram 426 I had (I don't know why really, but it seemed like a good idea at the time!). I wanted to modify them like Bob Braverman did in his Pittman 705 hop-up article. He drilled out the holes as shown in the bottom piece in the picture. This was supposed to concentrate the massive iron magnet magnetism over the armature and reduce weight. I just think it looks cool:
 
ramxl500motor015.jpg
 
I couldn't figure out an easy to hold the pole pieces in my mill without making some sort of fixture so out came the taper pin reamers again. You just use one size after the next until you're close. Then I finished the holes off with a 3/16" reamer and countersink for neatness. It only took about 5 minutes per hole:
 
ramxl500motor016.jpg
 
The reworked end plate on the left and stock on the right. The axle bearing hole was opened up to 1/4":
 
ramxl500motor017.jpg
 
The last thing to do before reassembly is change out the round head screw for a countersunk type. That way I can mount the motor lower to the track:
 
ramxl500motor019.jpg
 
I decided to solder the motor back together instead of trying to re-stake the end plates or using epoxy or Loctite. At the same time I added 3/32" tubes to both reinforce the solder joints and to serve as mounting points for my 1/16" pin tube frame:
 
ramxl500motor021.jpg
 
The finished motor:
 
ramxl500motor023.jpg
 
ramxl500motor024.jpg
 
ramxl500motor022.jpg
 
Now, what in the heck am I going to put it in? biggrin.gif
 
Onward!


  • Rob Voska and Peter Horvath like this

Rick Thigpen
Check out Steve Okeefe's great web site at its new home here at Slotblog:
The Independent Scratchbuilder
There's much more to come...


#5 Steve Okeefe

Steve Okeefe

    The Independent Scratchbuilder

  • Administrator
  • PipPipPipPipPipPip
  • 1,139 posts
  • Joined: 16-February 06
  • Gender:Male
  • Location:State of Independence

Posted 03 March 2020 - 11:32 AM

Hi Mark,


You asked about axles...


5-40 threaded axes were "the standard" for 1/24 cars in the early to mid 60s.  Except for the occasional 1/16" "pinhole" front wheels, pretty much all "Ready-to-Run" (RTR) cars and kit cars used them.  Almost all scratch built racers were equipped with them too.


Before that (early 60s) you might see 1/8" plain axles used with press-on wheels, or 3/32" axles threaded 3-48 to be used with similarly threaded wheels, but these were relatively rare.


Around 1965-66, the American Russkit company (among others) began marketing wheels with collars fitted with 4-40 threaded set screws, to be used with plain 1/8" axles.  This setup proved to be superior to 5-40 axles and threaded wheels (not the least of which was because you could use drill blanks for axles - very strong!)  By 1967-68 just about everyone was using set screw wheels.


Other companies (K&B and Champion of Chamblee for example) marketed proprietary "taper-loc" wheels, consisting of a collet arrangement that would lock onto plain 1/8" axles, but these never became very popular with racers.


In mid-late1969, pro racers began switching to 3/32" plain axles and 3/32" set screw wheels.  These were lighter (but still strong enough) and allowed cars to go faster by lowering center-of-gravity (C.G.) and reducing rotating mass (1/8" axles are heavy compared to 3/32" axles). 


Today you will see cars with either 1/8" or 3/32" axle and set screw wheels depending on the class of racing they fit into.  Vintage replica / restoration / inspired-by builders will use whatever size and mounting method is historically correct (AKA "Period-Korrekt")


Hope this helps!  :D


  • Samiam and strummer like this

Steve Okeefe


I build what I likes, and I likes what I build


#6 strummer

strummer

    On The Lead Lap

  • Full Member
  • PipPipPipPip
  • 405 posts
  • Joined: 28-August 19
  • Gender:Male
  • Location:OR

Posted 03 March 2020 - 11:41 AM

Hi Mark,


1. Philippe De Lespinay used the term "Korrect"  when describing the correct way something should be done to be truly vintage.


2. I will find a thread I did on how I epoxy vintage armatures. It was done to keep from throwing a winding off the armature at high speed. It also locks the armature laminations together before it is drill balanced. Otherwise the laminations can shift ruining the arm.


3. Cox tapered axles take a 2-56 cap nut.


4. A lower voltage (resistance) motor suchas the 6 volt versions of Pittman motors run faster on the normal 12 volt power supplies. As you suspect they would also tend to run a bit hotter and be more likely to fail over time.


Jeez Rick, you do nice work.  :shok:   :good:


1. Okay.


2. Thank you for taking the time to explain all that. 


In the model railroading world, we/they simply (for the most part) replace a motor; I can't get over how you guys rebuild these things. Very, very impressive.


I suppose the reason is that these motors run at very high speeds; whereas in railroading, a good deal of time may be spent at very low voltage/rpm.


3. Thanks.


4.  So they will run "hot" but not necessarily burn up...(?)


Okay, I (think) I'm clear on all this; please stand by for the next round...which will no doubt be forthcoming at some point!


Thanks again.


Mark (also) in Oregon


Mark Mugnai

#7 strummer

strummer

    On The Lead Lap

  • Full Member
  • PipPipPipPip
  • 405 posts
  • Joined: 28-August 19
  • Gender:Male
  • Location:OR

Posted 03 March 2020 - 11:48 AM

Steve


Wow, that's a lot of info; thanks!


So if:


"By 1967-68 just about everyone was using set screw wheels."; does that mean the free-wheeling type like what's on my Cox Chaparral is actually an "inferior" design?


So many "variables" in 1/24...  :shok:


Mark in Oregon


Mark Mugnai

#8 Martin

Martin

    Posting Leader

  • Full Member
  • PipPipPipPipPipPipPip
  • 4,300 posts
  • Joined: 22-February 09
  • Gender:Male
  • Location:US

Posted 03 March 2020 - 12:26 PM

Great answers Steve and Rick. 

Great questions Mark.

Even with set screw front wheels is it better to have them spin independent. One method is to solder a washer on one end of the drill blank axle then leave the set screw out of the that wheel so it spins free. 


So called pin wheels were popular also. This is a method where the wheel has a small (1/16) hole and rides on 1/16'' piano wire axle.


Cox method is great, but they are not drill blanks. Not really a problem as the hard body takes the hit first, protecting the axle from bending.


  • strummer likes this
Martin Windmill

#9 dc-65x

dc-65x

    Grand Champion Poster

  • Subscriber
  • PipPipPipPipPipPipPipPip
  • 7,015 posts
  • Joined: 14-February 06
  • Gender:Male
  • Location:Captain Rick: The only vintage slot car nut in SW Oregon?

Posted 03 March 2020 - 12:33 PM

Hi Martin,


Mark here's an example of what Martin is talking about:


These are the additional parts I used on the car:
 
Lotus19Special120.jpg
 
Cox guide and super soft braid, Weldun gears, some ball bearings for the rear axle, our cloned Russkit standard width rear wheels for the front and mondo big K&B front tires :shok: . The sidewall detail of these "Stock Car Special" Goodyear's looks a lot like their "Blue Streak Sports Car Specials" tires used in the day. This is the look I'll be going for with my wheels, tires and wheel inserts:
 
lotus19special-4.jpg
 
I decided to make the fronts turn independently on the 1/8" axle. I want to be able to remove them without having to unsolder a retainer so I decided to lock one wheel on the axle with its set screw and let the one wheel and axle turn together. I soldered a retainer on the other end of the axle and that wheel spins freely by itself. So the wheel inserts will still fit down flush inside the wheel I cut a counterbore with Mr. Sherline:
 
Lotus19Special125.jpg
 
Check out that sidewall detail. That sure looks better than foam fronts to my eyes wub.gif ... it will probably won't handle as good though unsure.gif
 
Lotus19Special124.jpg
 
Lotus19Special127.jpg
 
Lotus19Special128.jpg
 
Here's the Cox guide, Supersoft braid, and Superflex lead wire all hooked up...
 
Lotus19Special130.jpg
 
... and the sweet-meshing Weldun 64P gears and ball bearings installed:
 
Lotus19Special133.jpg
 
Lotus19Special132.jpg
 
All finished with assembly:
 
Lotus19Special134.jpg
 
Lotus19Special140.jpg
 
Lotus19Special142.jpg
 
I need to get the wheel inserts cut to fit and any other cosmetic stuff ready before the dreaded painting begins... :laugh2:
 
Onward...


  • Peter Horvath and strummer like this

Rick Thigpen
Check out Steve Okeefe's great web site at its new home here at Slotblog:
The Independent Scratchbuilder
There's much more to come...


#10 Steve Okeefe

Steve Okeefe

    The Independent Scratchbuilder

  • Administrator
  • PipPipPipPipPipPip
  • 1,139 posts
  • Joined: 16-February 06
  • Gender:Male
  • Location:State of Independence

Posted 03 March 2020 - 12:44 PM

Steve


Wow, that's a lot of info; thanks!


So if:


"By 1967-68 just about everyone was using set screw wheels."; does that mean the free-wheeling type like what's on my Cox Chaparral is actually an "inferior" design?


So many "variables" in 1/24...  :shok:


Mark in Oregon


Mark,


No, not at all, just a variation on the theme!


At the risk of piling on too much information, you might note those Cox free-wheeling type wheels are front wheels only, and are mounted on 1/8" diameter axles (regardless of how the wheels are retained).


Variables, yes!  The list of variables in 1/24 is almost endless.


Cox had their own set of variables.  Some of their ideas for products (like gears and pickup guides) became very, very popular with racers.  Other ideas (like proprietary tapered axles and wheels, with 2-56 cap nut retainers)... not so much.


As Martin suggests, independently rotating front wheels are very common today (because they work) and can be had to fit any common size plain axle (1/16", 3/32", 1/8" or even metric 3mm).


And the list goes on and on... :D


  • strummer likes this

Steve Okeefe


I build what I likes, and I likes what I build


#11 Martin

Martin

    Posting Leader

  • Full Member
  • PipPipPipPipPipPipPip
  • 4,300 posts
  • Joined: 22-February 09
  • Gender:Male
  • Location:US

Posted 03 March 2020 - 01:20 PM

...and on.

I had thought these where on some Pactra cars?

Attached Images

  • unnamed.jpg

Martin Windmill

#12 strummer

strummer

    On The Lead Lap

  • Full Member
  • PipPipPipPip
  • 405 posts
  • Joined: 28-August 19
  • Gender:Male
  • Location:OR

Posted 03 March 2020 - 01:32 PM


Hi Martin,


Mark here's an example of what Martin is talking about:


These are the additional parts I used on the car:
 
Lotus19Special120.jpg
 
Cox guide and super soft braid, Weldun gears, some ball bearings for the rear axle, our cloned Russkit standard width rear wheels for the front and mondo big K&B front tires :shok: . The sidewall detail of these "Stock Car Special" Goodyear's looks a lot like their "Blue Streak Sports Car Specials" tires used in the day. This is the look I'll be going for with my wheels, tires and wheel inserts:


Check out that sidewall detail. That sure looks better than foam fronts to my eyes wub.gif ... it will probably won't handle as good though unsure.gif
 
Lotus19Special124.jpg


Here's the Cox guide, Supersoft braid, and Superflex lead wire all hooked up...
 
Lotus19Special130.jpg
 
 
Onward...


Good Lord...  :shok:   :clapping:


Those beautiful tires you mention; upon closer inspection, they are the same ones that came with my "Franken-Porsche" I've been posting about. Of course, my examples are old and not as clean-looking as yours. Guess I'd better go to eBay and look around.


You mentioned both "Supersoft braids" and "Superflex" wires: where can one get those? The wire I have been using isn't overly stiff, but not as flexible as I'd like; same goes for the braids...


You guys are awesome; thank you!


Mark in Oregon


Mark Mugnai

#13 strummer

strummer

    On The Lead Lap

  • Full Member
  • PipPipPipPip
  • 405 posts
  • Joined: 28-August 19
  • Gender:Male
  • Location:OR

Posted 03 March 2020 - 02:05 PM


Mark,


No, not at all, just a variation on the theme!


At the risk of piling on too much information, you might note those Cox free-wheeling type wheels are front wheels only, and are mounted on 1/8" diameter axles (regardless of how the wheels are retained).


Variables, yes!  The list of variables in 1/24 is almost endless.


Cox had their own set of variables.  Some of their ideas for products (like gears and pickup guides) became very, very popular with racers.  Other ideas (like proprietary tapered axles and wheels, with 2-56 cap nut retainers)... not so much.


As Martin suggests, independently rotating front wheels are very common today (because they work) and can be had to fit any common size plain axle (1/16", 3/32", 1/8" or even metric 3mm).


And the list goes on and on... :D


Thank you Steve


Now I'm really confused.  My Chaparral came to me with an incorrect threaded rear axle; it now has the "Korrect"  :D  "free wheeling" type on the rear as well. (You may remember this being discussed in the thread I started about that project.) Yet above you say that "...Cox free-wheeling type wheels are front wheels only..."


Please explain, if you don't mind...thanks!


Mark in Oregon


Mark Mugnai


Electric Dreams Online Shop