Jump to content


Photo

Going slower, but looking cool while you're doing it


  • Please log in to reply
11 replies to this topic

#1 choc-ice

choc-ice

    Rookie Keyboard Racer

  • Full Member
  • Pip
  • 20 posts
  • Joined: 27-May 11
  • Gender:Male
  • Location:England

Posted 28 May 2011 - 04:02 PM

Fantastic to see this thread. A few months ago I started my own scratchbuild using 3D CAD and rapid prototype methods.

I'm a mechanical design engineer by day, but after I got a Scalextric set for our kids my interest in slot cars got fired up again. I'm no model maker but I've designed plenty of things more complicated than a slot car - how hard can it be? ;)

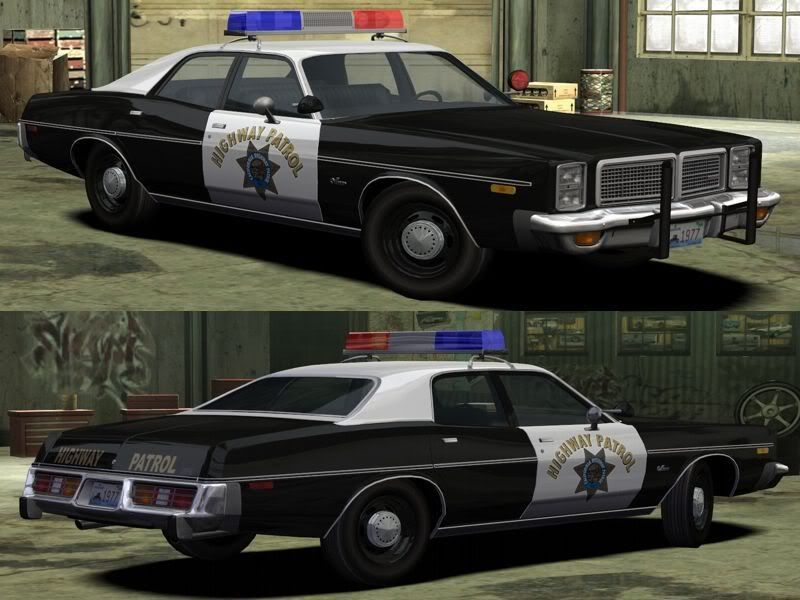
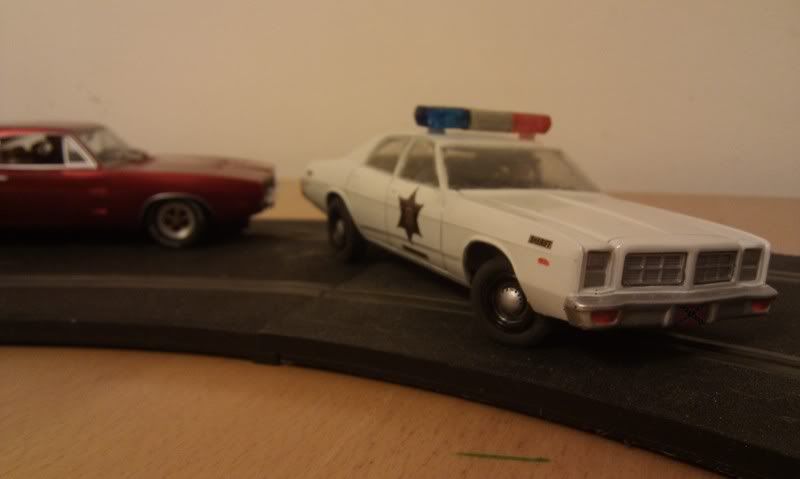
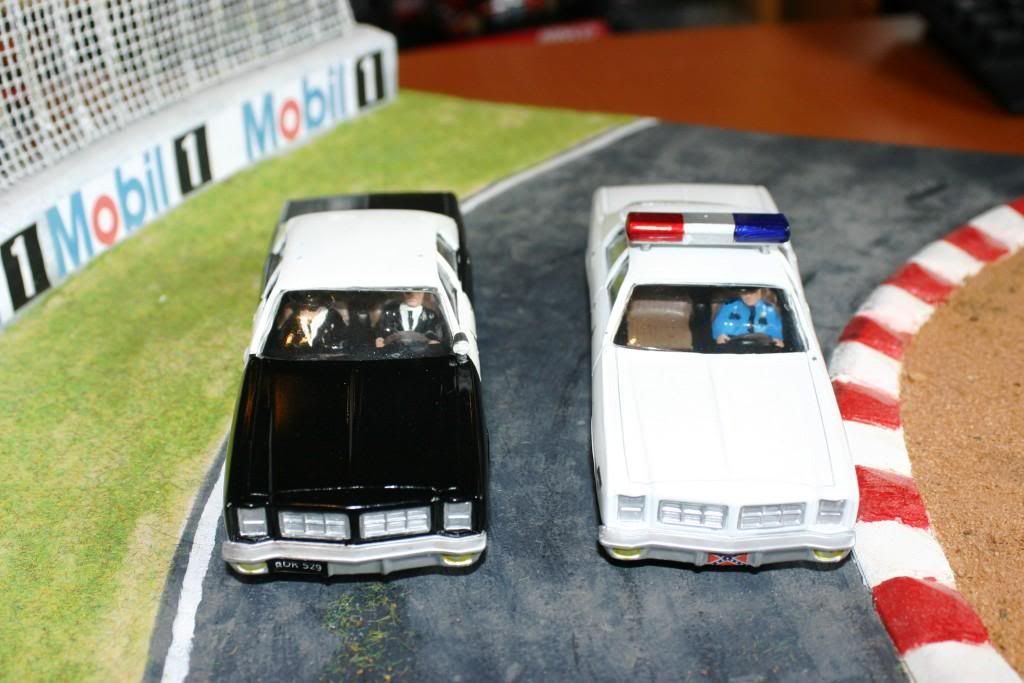
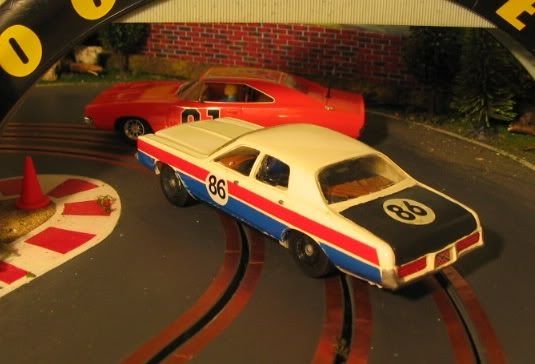
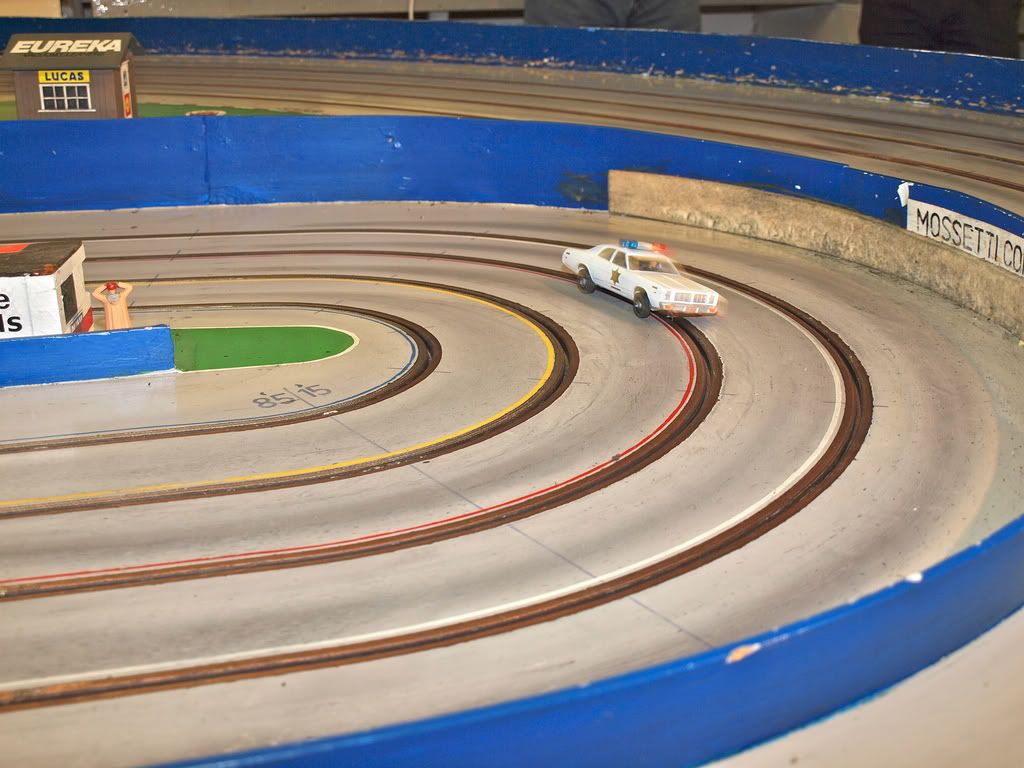
The competition to make a fast car is as fierce as in any other sport or hobby, but that's not what I'm looking for. You'll perhaps agree that your favourite car isn't necessarily the fastest, it can be something else which gives that special grin on your face as you put it on the track. I wanted to make something that was in the car chases on TV when I was a kid - a good sized American car, lots of tail slides, out of control at 40mph... for anyone who grew up with 1970s and early '80s TV, you know what it was like.

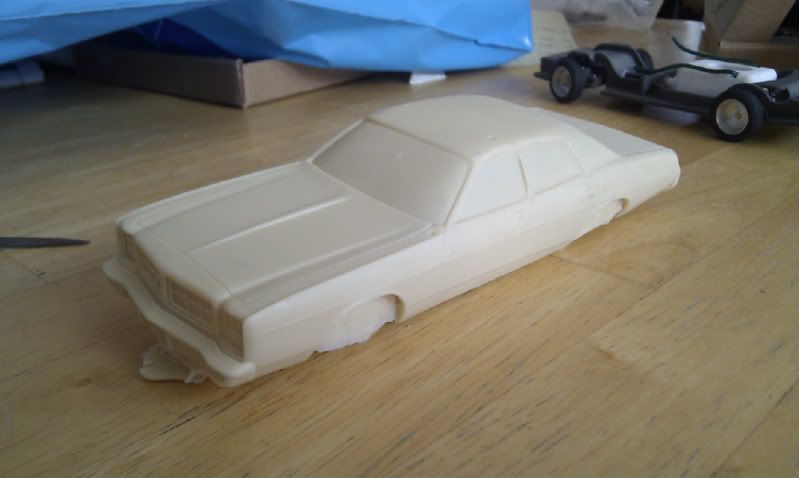
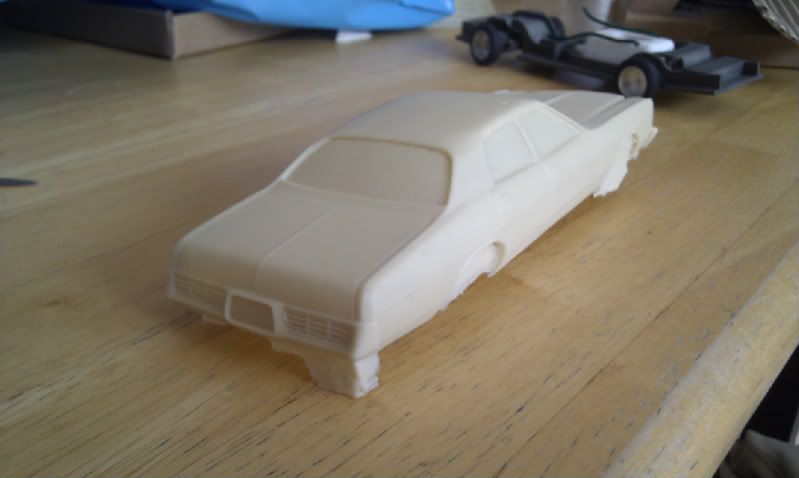
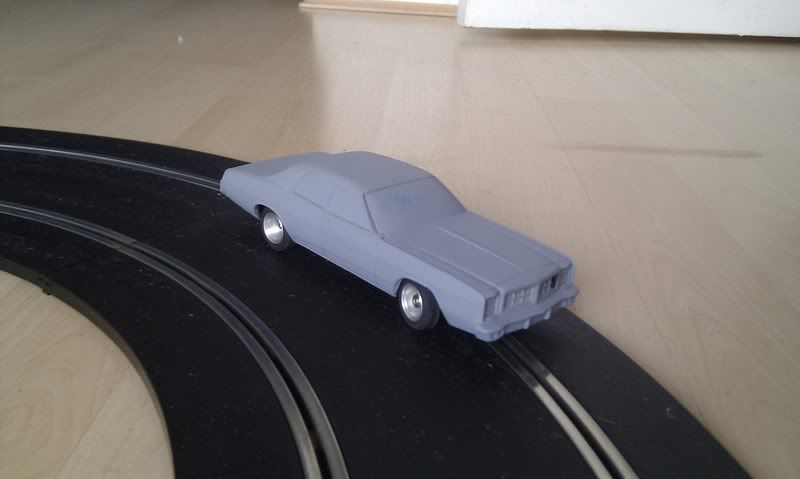
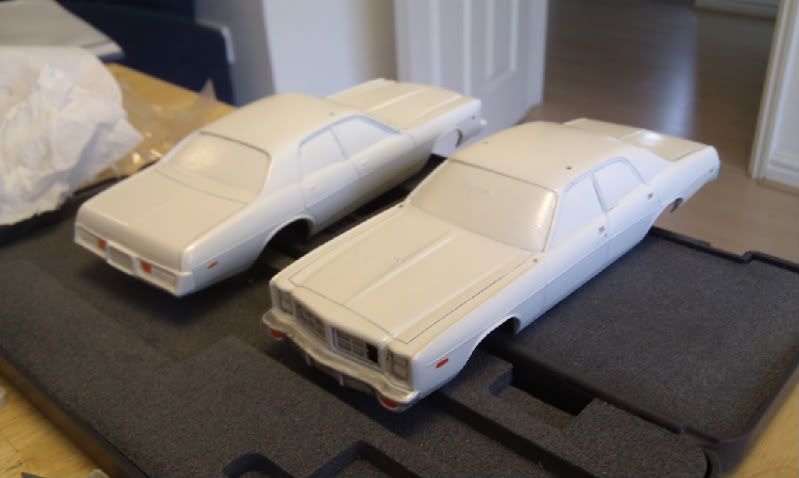
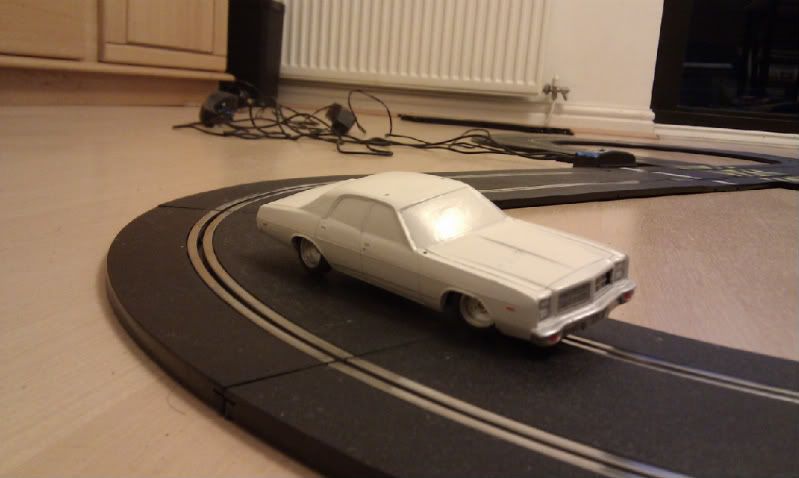
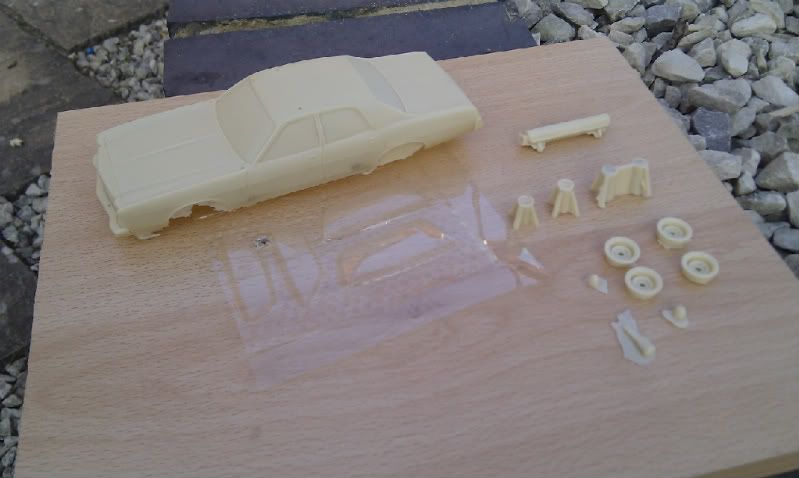
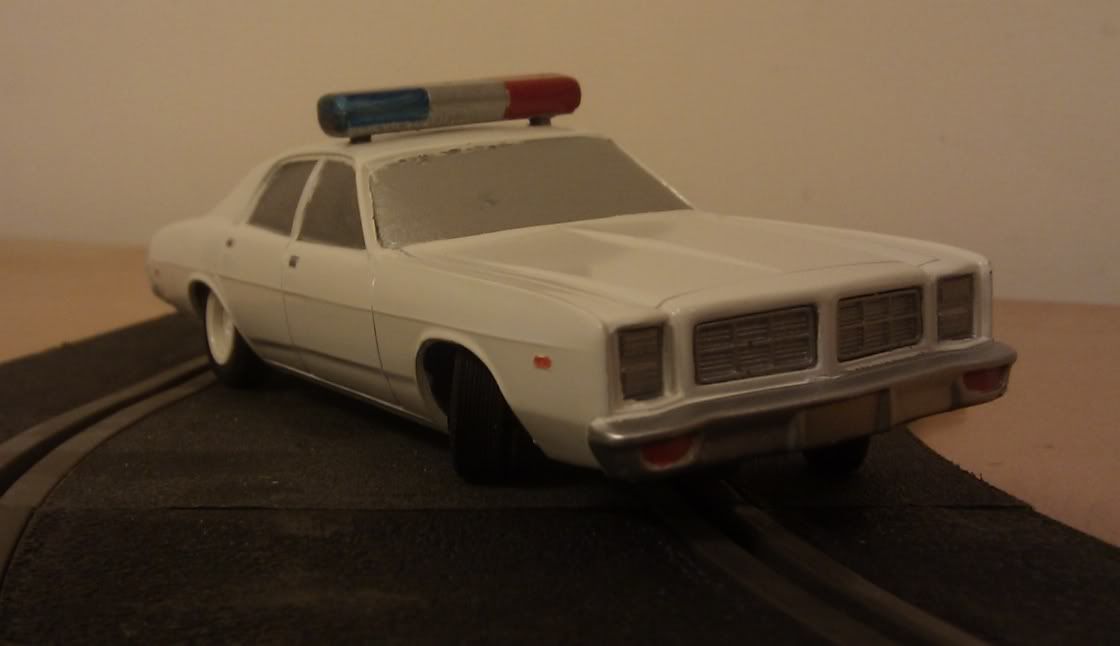
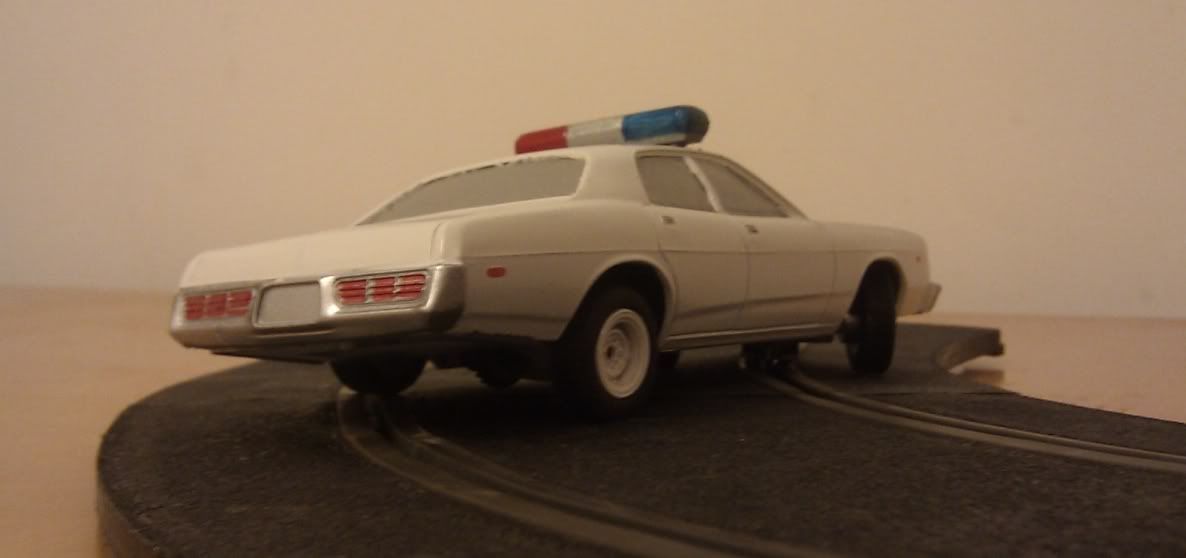
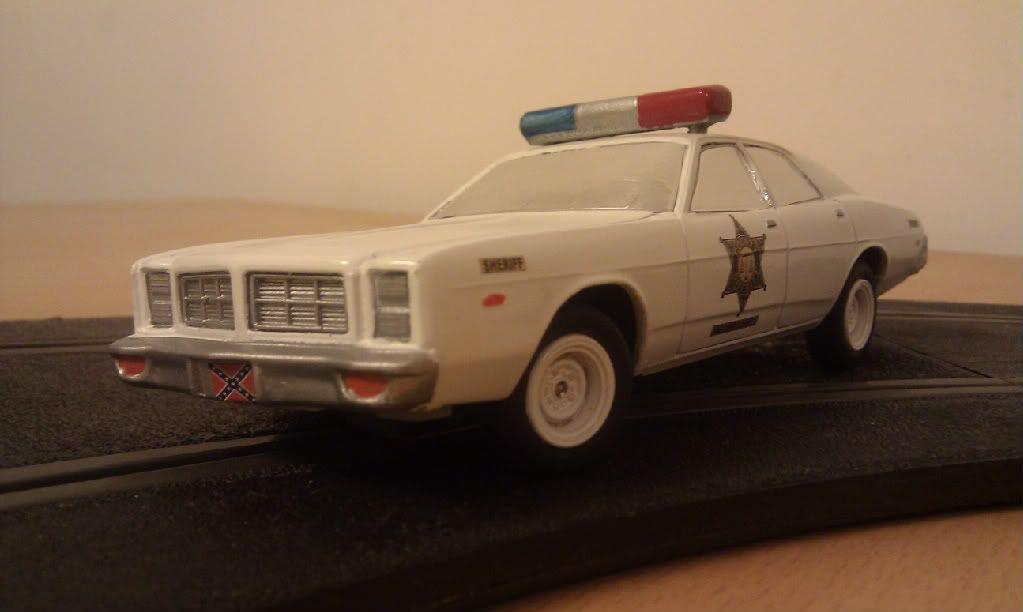
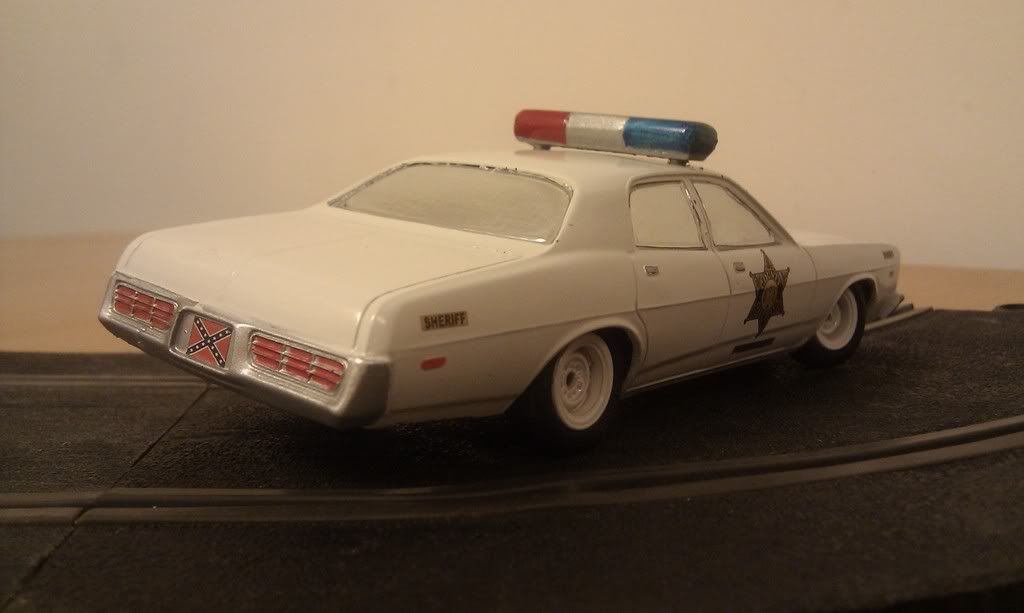
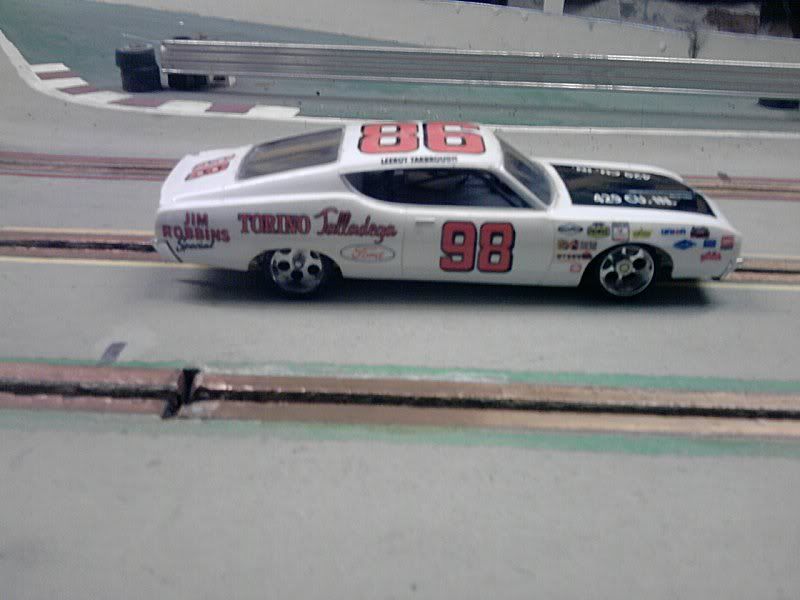
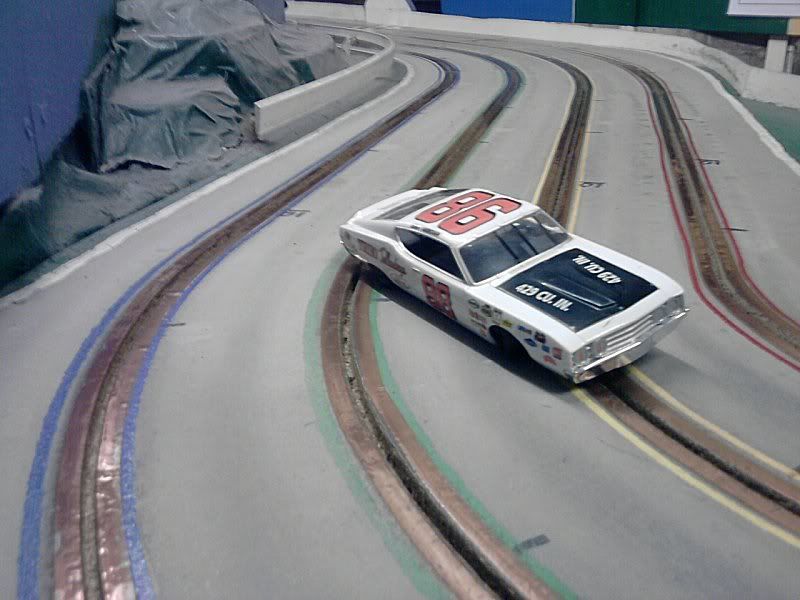
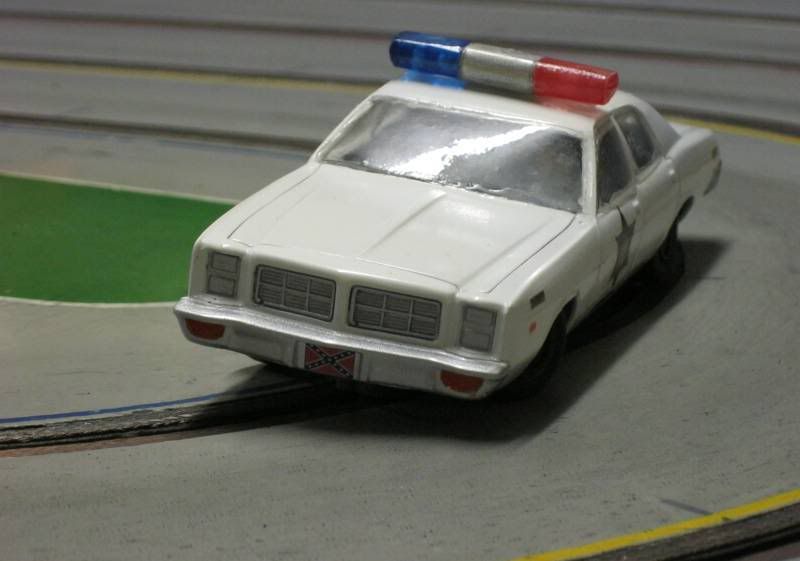
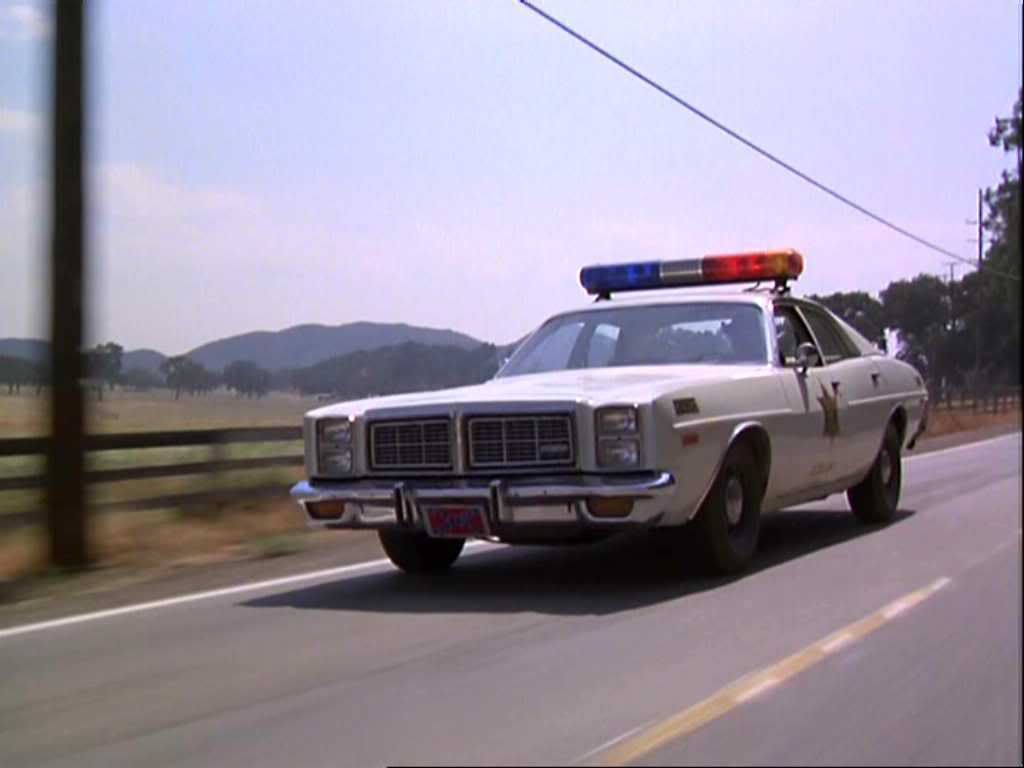
To the car. I love the shape of the '77 Dodge Monaco; it's got a fine history in TV and films, looks a good shape and nobody does one at the moment.

Posted Image

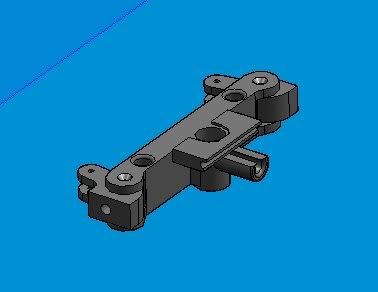
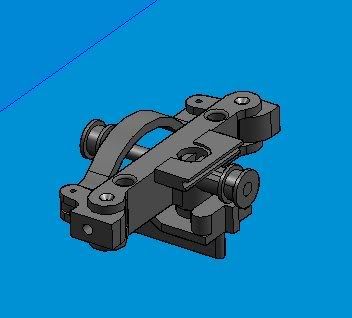
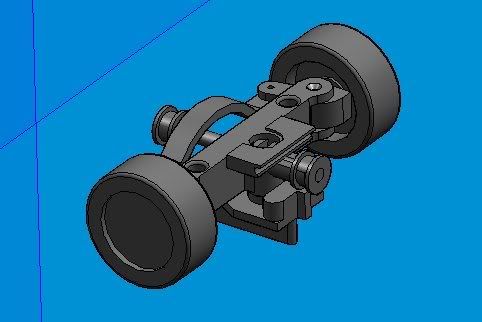
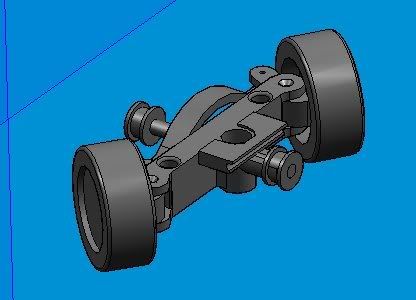
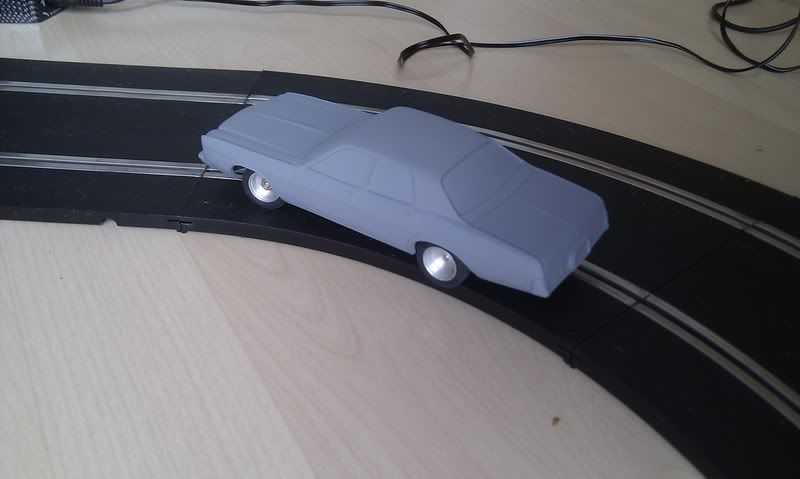
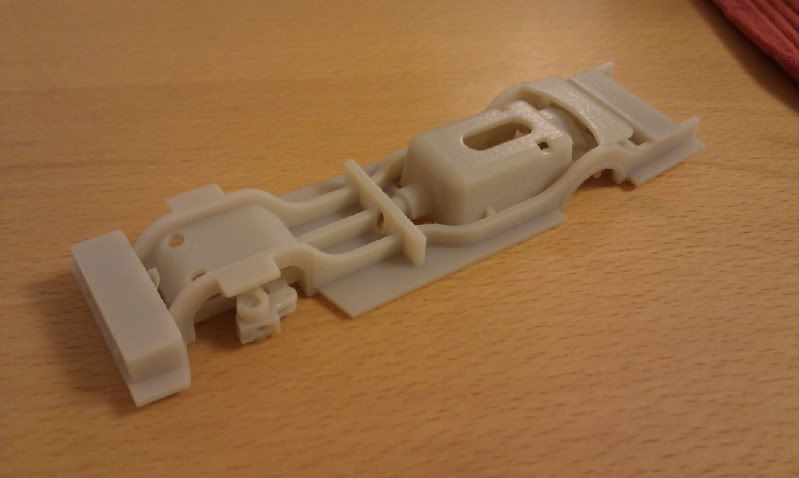
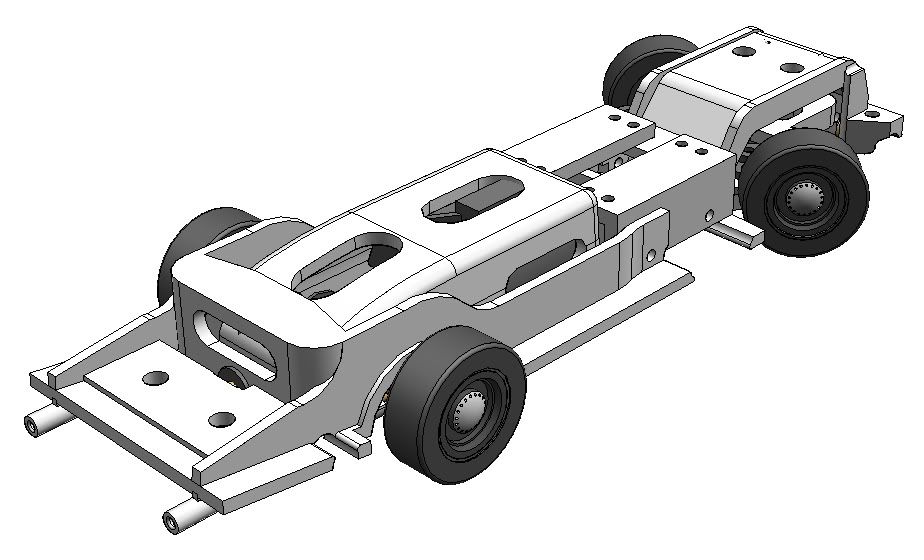
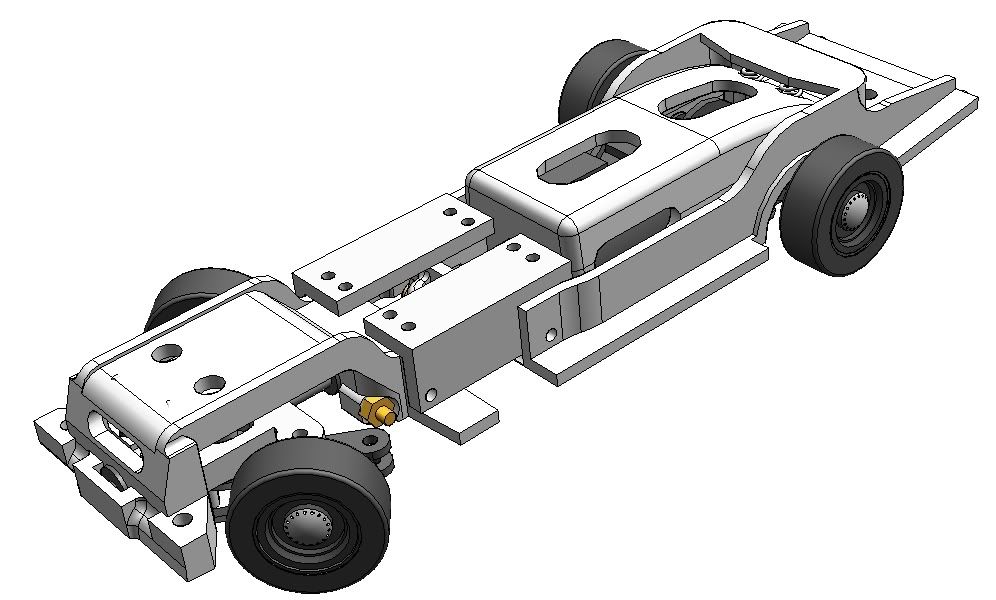
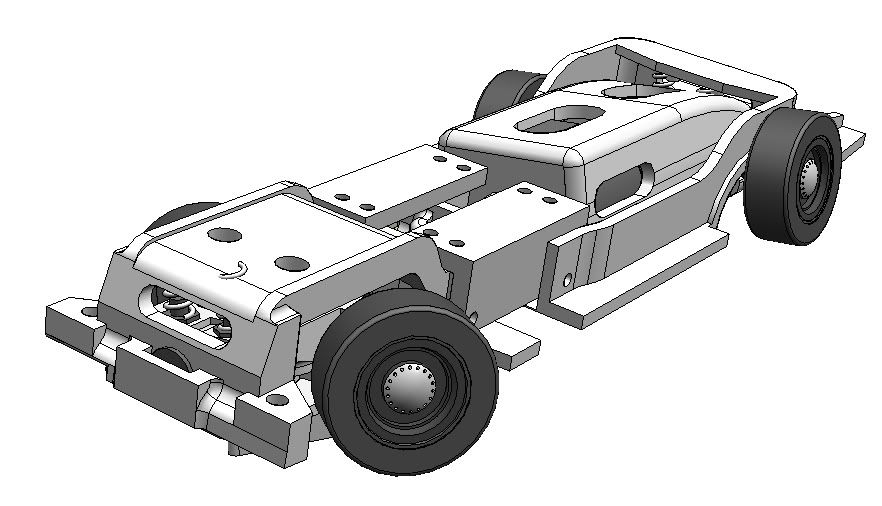
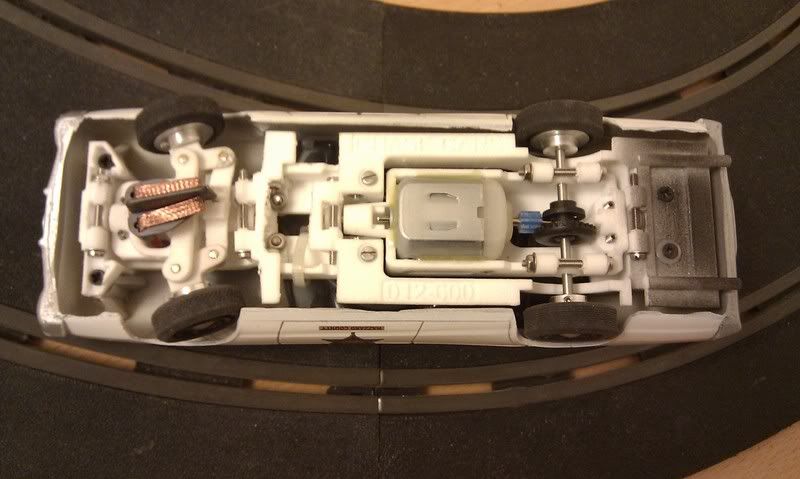
Now for the specification – it should have suspension that lets it lean realistically in a curve. The roll centre of a solid rear axle is easy to find, we'll make the roll centre of the front suspension at the same height so it doesn't have a roll gradient.

It should have steering, this is essential when doing huge power slides and even just when on tight corners. I just think it looks fantastic, so you'll have to humour me. You don't mind?

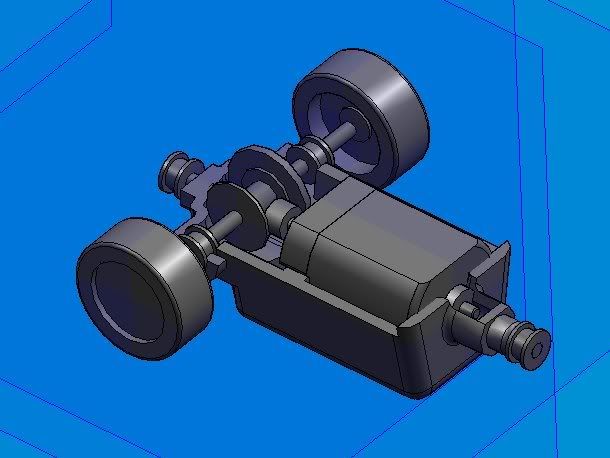
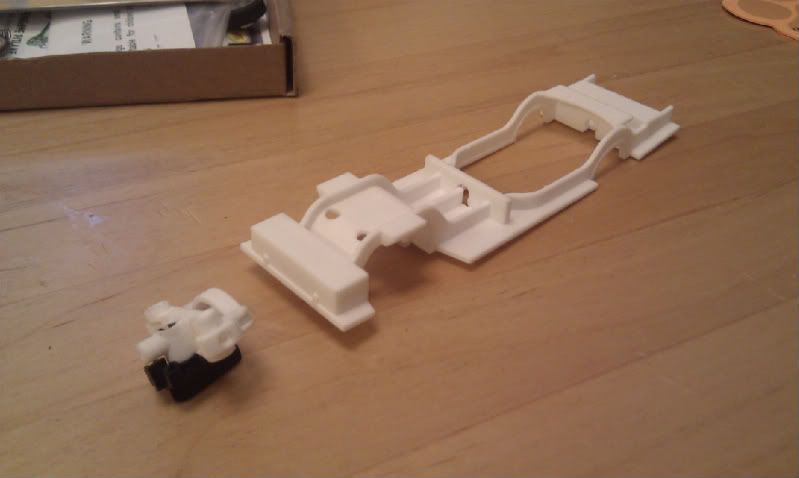
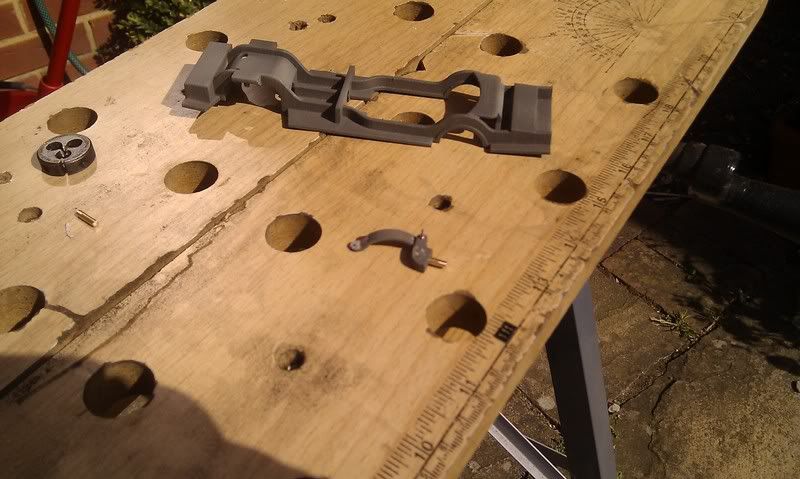
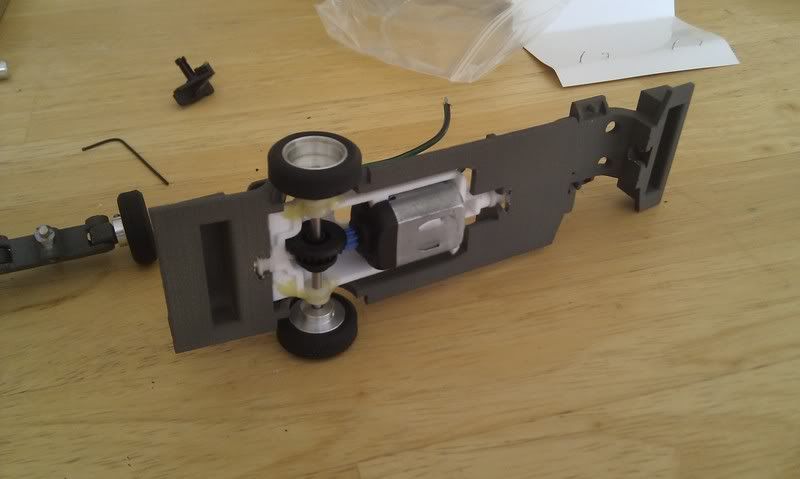
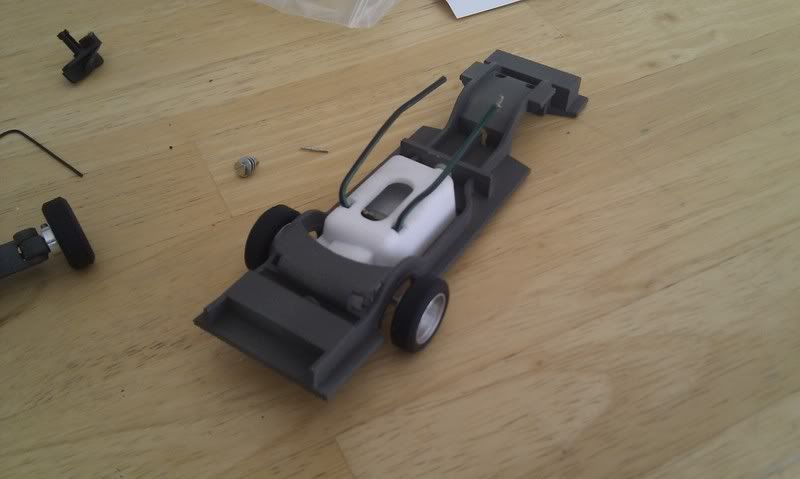
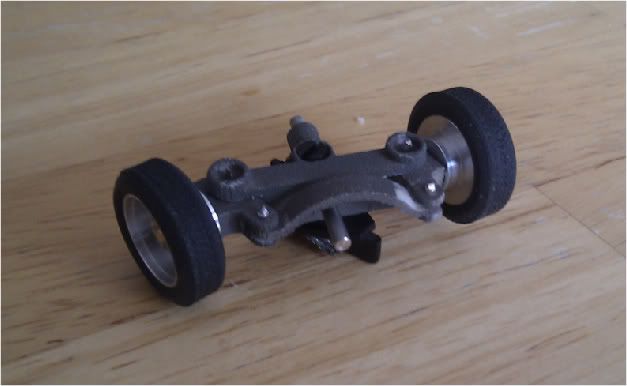
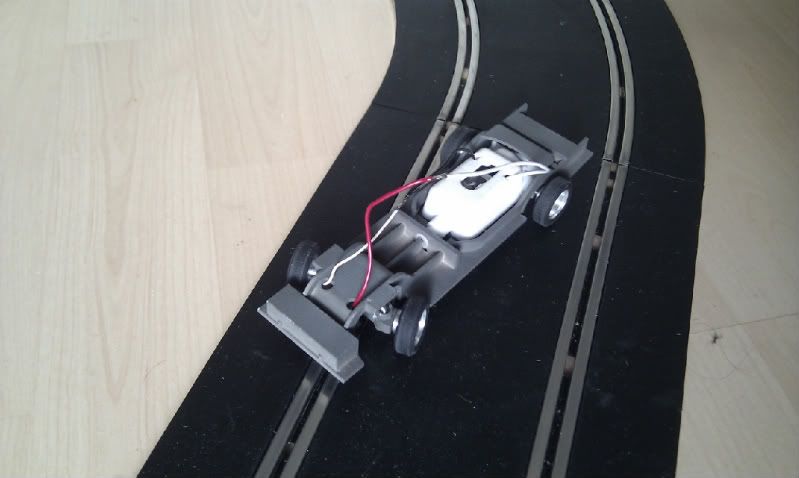
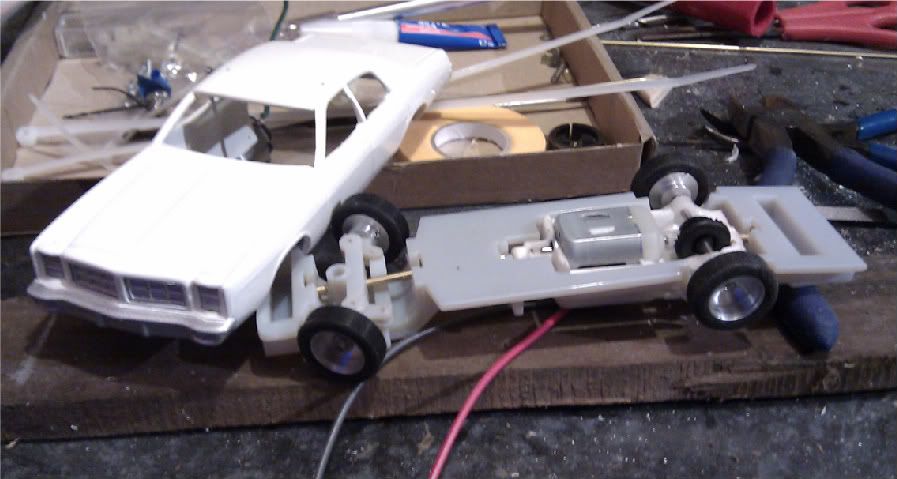
Let's get going with the design proper. I can do the chassis and body but I'll reuse a motor, rear axle and perhaps a guide blade. That means they should be the first things to model up and everything else will fit around it. To hell with that – I want to get going with the body!

I use Solid Edge almost every day, it's pretty rubbish but at least I can use it at lunchtimes. For 12 years before I used ProEngineer which was much more powerful, if I had a copy I'd much prefer to model things using that, but you use the tools you have around you. First tool is some graph paper.

I went to http://www.the-blueprints.com/ and found a 1977 Dodge Monaco, but beware when using these sites because the plan view doesn't always line up with the side view. How I laughed when I found that out Posted Image

Using my friendly copy of PaintShop Pro, I resized the picture so it printed out 2:1, then I transferred it onto graph paper (see how high-tech and modern this is?). Then I could get the outline shape measured with more accuracy, and I could sketch it in Solid Edge.

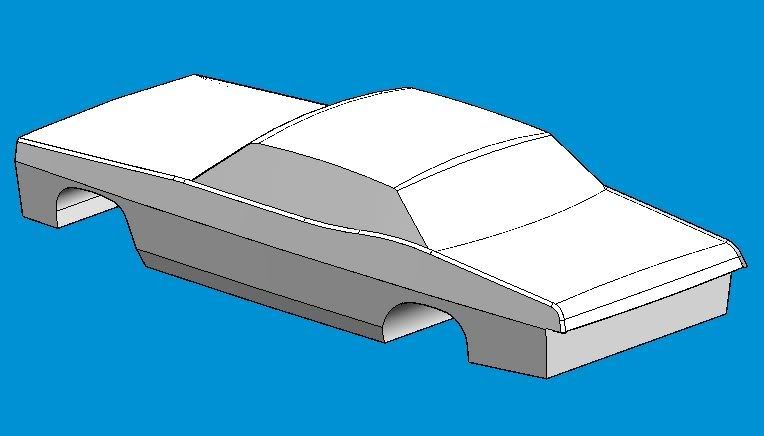
I started by doing a plan view, because the car is tapered front and back, then I sketched the side profile.
Posted Image

I put some shape to the sides
Posted Image

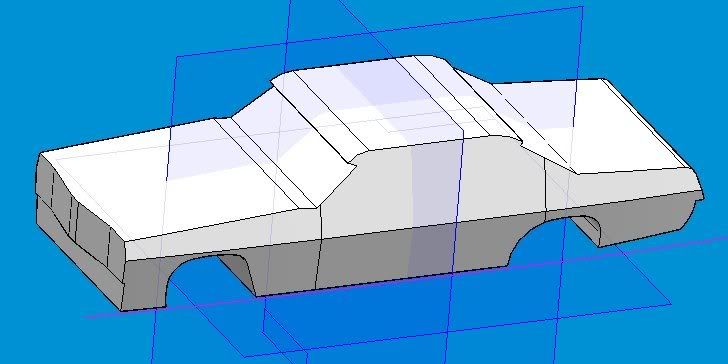
Then made it hollow (shelled), and put a few more features on
Posted Image

Verdict? Looks awful!

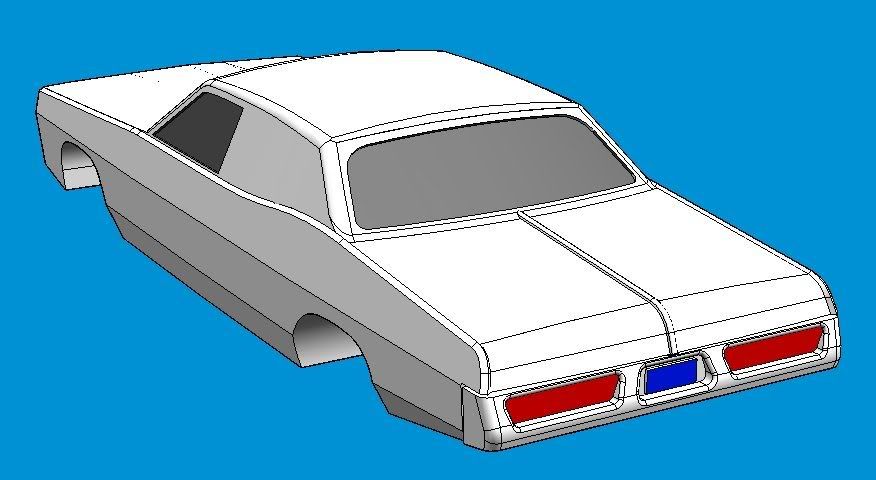
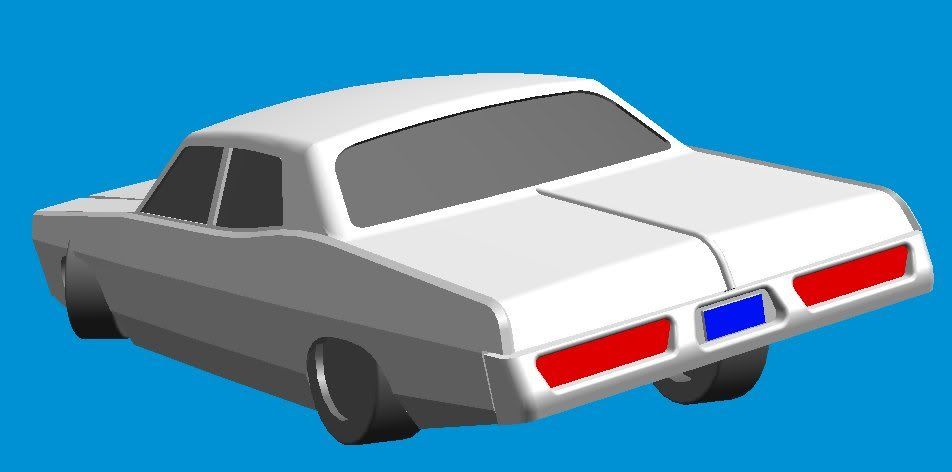
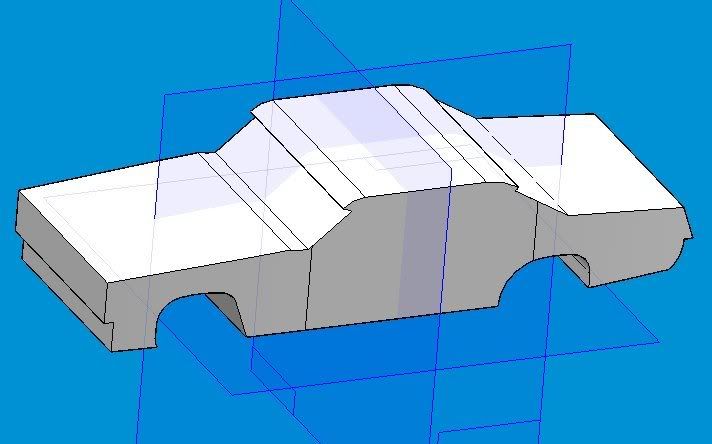
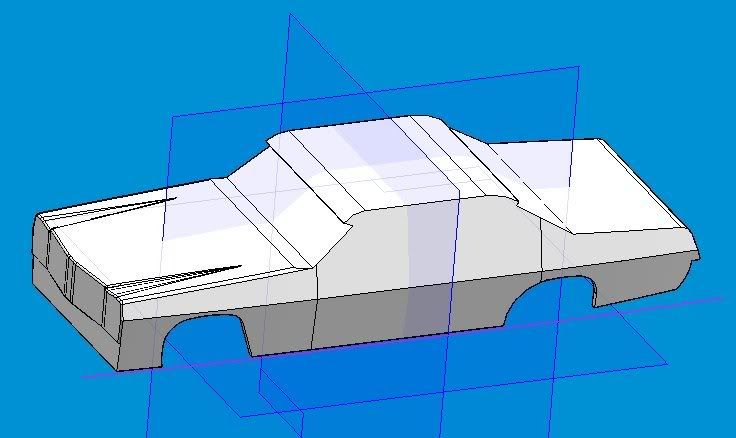
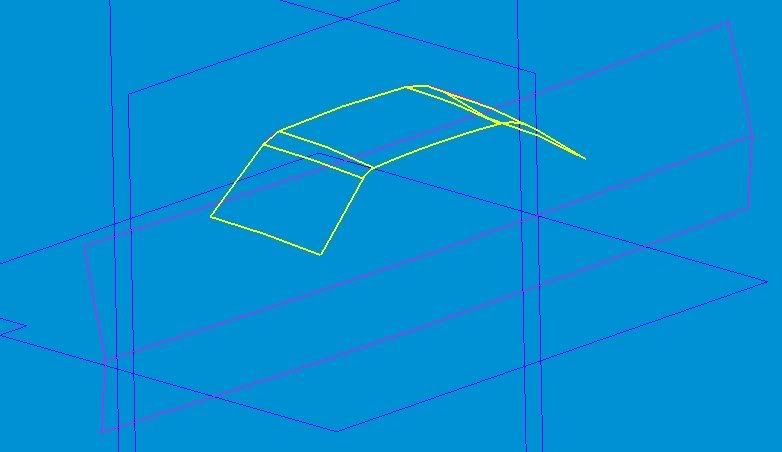
I tried a few different methods, but the place to start seems to be the front and rear screens, then the roof. The rest is comparatively simple. The screens are bounded by 3D curves, so it's time to get started with Solid Edge's surfacing capabilities which are quite limited.

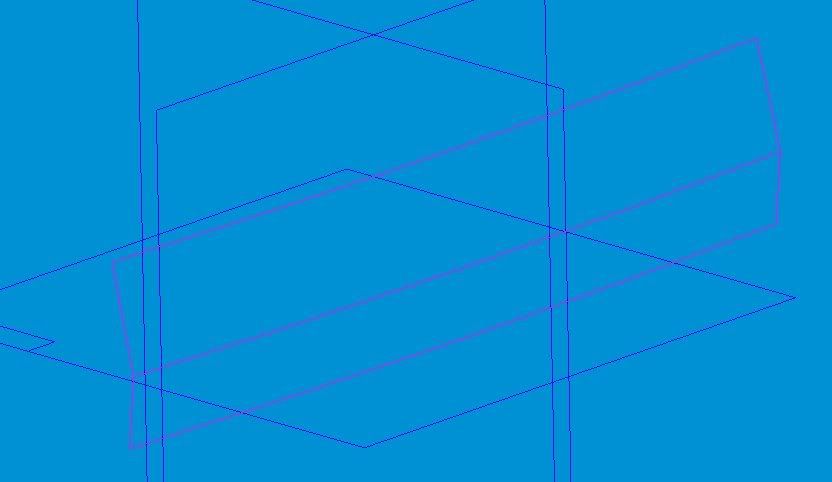
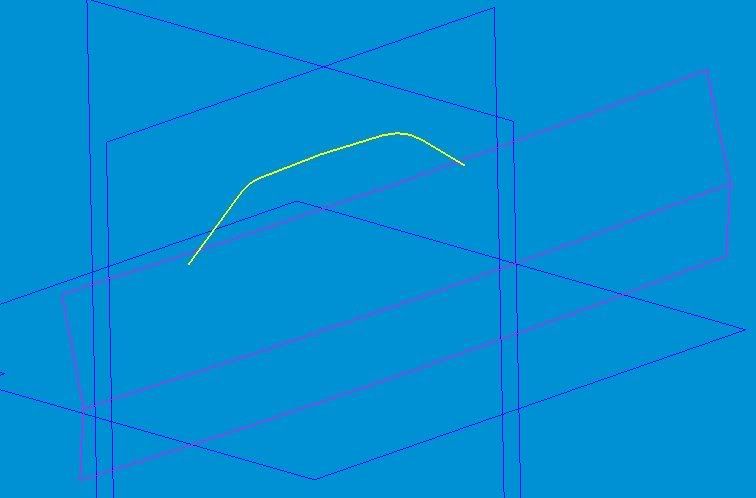
Let's start with a trajectory which is curved in plan view, and the side profile of the car (waistline above the wheelarches) in its path
Posted Image

Now we'll put the roof in
Posted Image

Now extrude the roof out to the side
Posted Image

This isn't going anywhere... it still looks rubbish.

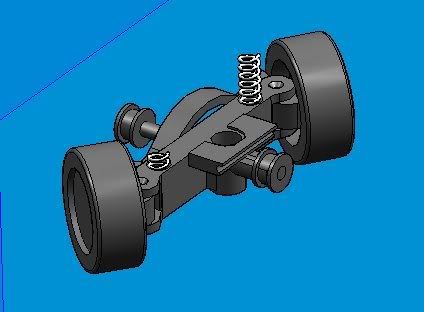
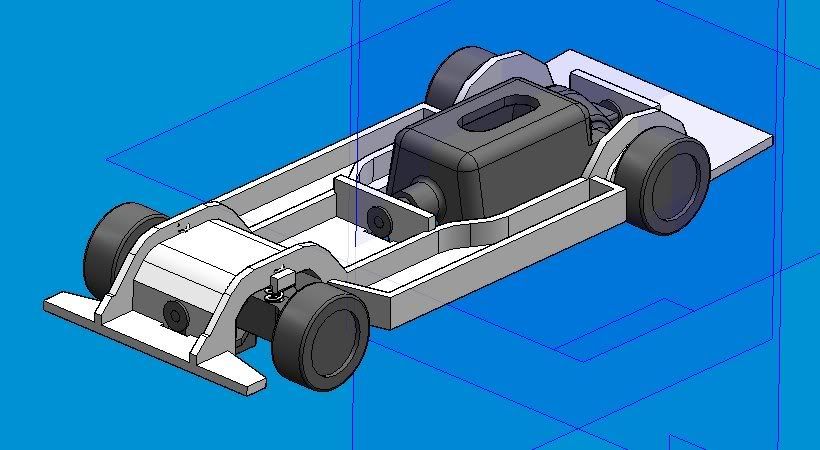
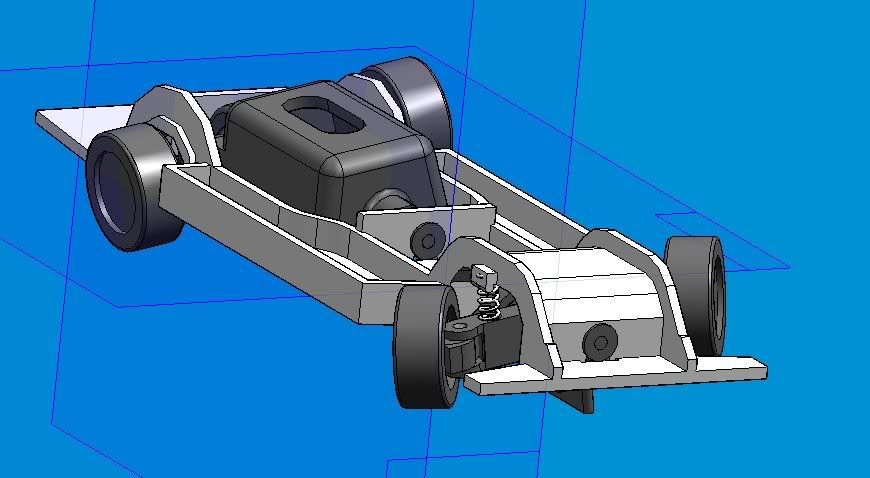
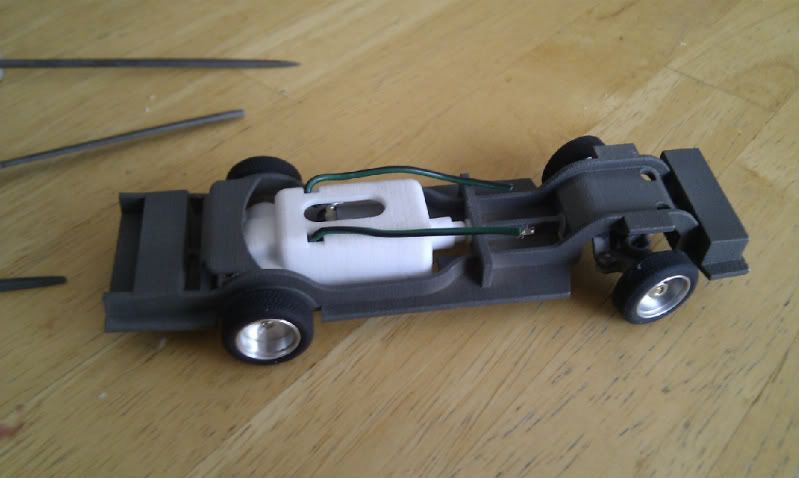
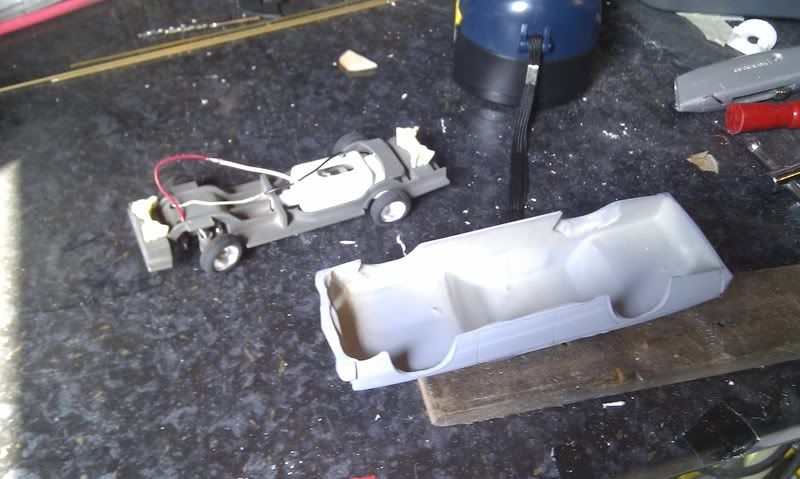
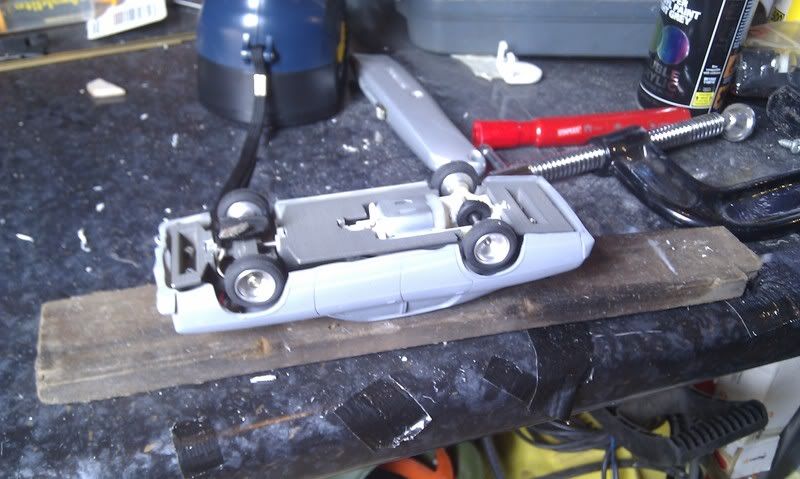
Shall we see where the chassis bits go?
Gareth Jones


#2 choc-ice

choc-ice

    Rookie Keyboard Racer

  • Full Member
  • Pip
  • 20 posts
  • Joined: 27-May 11
  • Gender:Male
  • Location:England

Posted 28 May 2011 - 04:03 PM

Front axle first! I'll have a metal axle which allows the whole assembly to pivot, it's not real suspension but it'll let the body roll around as I want it to. After lots of thinking and other opinions taken (because it's better to use someone else's good idea than a rubbish one of your own) I decided to use trail steer rather than linking the guide blade to the steering arms. This means I can use a standard guide blade.
Posted Image

A 2mm pivot should be strong enough to let the suspension roll, with a 1mm pin to pivot the hubs on. The back end of the hubs point to the middle of the rear axle for proper Ackerman steering.
Posted Image

Nylon bushes (from a long dead Scalextric car from my youth) will let the axle pivot, and the steering arm needs to clear the guide blade for full movement. The advantage of 3D CAD is you can try different steering positions easily to check for interference.
Posted Image

Posted Image

I'd always imagined using a spring like an antiroll bar, simple, cheap, easy to adjust, what's not to like? Unfortunately when it came to packaging the whole lot in it was a nightmare so I plumped for coil springs. I modelled one compressed and one extended to check it was feasible.
Posted Image

Rear axle next. The idea is that the axle and motor will be held together, and the whole lot will pivot. This is an upside-down view, the motor is the old Mabuchi from the long dead Scalextric Porsche 911
Posted Image

I'd thought the chassis would be a few small sections which would then attach to posts from the bodyshell, this would be simpler to produce. But once I'd drawn them up, the torsional stiffness looked dreadful so I went for a more conventional chassis instead. Tall box sections make for more stiffness if you remember your second moment of area calculations from Maths. Better to start off strong and whittle parts away than have to add bits I thought.

I took a keen interest in chassis design when I did my HND in Automotive Engineering so I'm aware of the limitations of a ladder frame, but it's not all bad.

Posted Image

Want to see it lean in a corner? Posted Image

Posted Image

All the time this was going on I was making reeeeeally slow progress on the bodyshell. Others could do it - look at this brilliant cop car!
Posted Image

Over the next week the daily progress followed a similar path
10 Have a go at getting the bodyshell modelled correctly in Solid Edge at lunchtime in work.
20 Try a bit more in the evening when my better half has finished with the laptop.
30 Fail. The software says it can't trim a surface, or something similarly frustrating. Consider throwing my shoe at the laptop in anger.
40 Go to bed, figure out some other way of doing it.
50 Goto 10

After some advice, I loaded Blender onto my laptop at home, opened it up and found I knew nothing. I had a look for a tutorial but couldn't follow it as I didn't know where the commands were! Looks like I need the "numpty level" tutorial to start with.

My options are therefore:
i) Persevere with Solid Edge
ii) Get hold of a student version of Pro Engineer. As long as it can do an export as iges / stl file I can still get a prototype made
iii) Take up a kind offer for someone with talent to make a master bodyshell by hand.
iv) Model it in Blender. I'd be starting from zero, but I've been using ProEngineer, Solid Edge, SDRC for years so the thinking bit should be fine, it's just the interface.
v) Buy a 1:25 kit from the US and get it laser scanned then scaled to 1:32.

Then, some success!
Posted Image

Posted Image

Posted Image
Gareth Jones

#3 choc-ice

choc-ice

    Rookie Keyboard Racer

  • Full Member
  • Pip
  • 20 posts
  • Joined: 27-May 11
  • Gender:Male
  • Location:England

Posted 28 May 2011 - 04:04 PM

Posted Image

The following morning I found out there was a 1:32 scale Dodge Monaco made in the '80s. I knew about the 1:25 kits, but finding there was one in the right scale was a bit of a shock!

If I keep going with the 3D model of the body it would be more expensive, probably worse detail and take longer. Or I could use the 1:32 bodyshell and make resin casts from it - cheaper, quicker and probably better. Hmmmmmm

I had to narrow the suspension quite a bit to fit the Penelope Pitlane wheels, this meant moving the springs to a different position on the front crossmember otherwise they'll be too close together. I want to use the same springs on front and rear.

I sent the chassis out for quote to a few companies and eventually settled on iMaterialise You upload the CAD model and it generates a price on the screen. You can change the material, how many you want any surface finishes, and it spits out the price. From there you can pay just like any other site, it's very slick indeed.
Posted Image

Doing all the parts separately was quite expensive, so I put them all together with thin support structures and the whole lot came out at just over the cost of the chassis on its own. There's no point making this if it's not affordable, so I'm quite pleased with the result so far, couldn't wait for it to arrive!

The parts arrived, woo-hoo!

Or at least some parts arrived. The main chassis parts are there but still no axles, and no motor pod either so it looks like it fell out of the file during the translation.

Want to see how it looks?
Posted Image

I pulled the front crossmember out, gave a gentle cut with a scalpel and the steering linkage and front hub all came out nicely. The Scalextric guide blade is a snug fit so I'll open the hole up a little with a drill. The surface finish is quite powdery so it needs a paint, quick rub down then varnish to be smooth enough for one surface running over another.

Posted Image

The holes for the axles to allow the suspension to pivot are a bit snug, but I'd rather be able to gently file for clearance than have to glue bits in. Springs fit ok but seem a bit stiff, I'll hunt around for some softer ones for the full "wallowing in a corner" effect.

Time to get some paint on and see how the steering feels. At the same time the bodyshell was being prepared for moulding by someone who's good at it (not me)

Tools outside, making the most of the sunshine. 3/32" brass to make the front stub axle and a die nut, and I'm not afraid to use them!

Posted Image

It's 3/32 rod that allows the front and rear axles to pivot, so they fit in standard bushes. The roll centre is at the same height for front and rear, which is where the roll centre would be for a real car like this with a solid rear axle.

I made the motor end up. Axle in first, the support for the nylon bushes looks a bit feeble so I'll get some epoxy in there, and make a note to improve the next one. Wires soldered to the motor and it clicks firmly into place. Ask me why the wires are too short, go on, I dare you to ask me :blush:
Posted Image

Penelope Pitlane wheels and Ninco classic tyres give the right size for a typical '70s American sedan

Springs on, it feels great but I'll only know if the rate is correct when I get the bodyshell on and get it on the track. They're easy to change anyway

Posted Image

At last, the front end is done! There's not as much clearance around the hubs as I'd hoped so steering lock is a bit limited, but that's an easy fix.
Posted Image

And with some standard nylon bushes, in it goes.
Posted Image

Then the bodyshells arrived


Posted Image

Posted Image

Posted Image

To say I'm pleased with them is an understatement....
Gareth Jones

#4 choc-ice

choc-ice

    Rookie Keyboard Racer

  • Full Member
  • Pip
  • 20 posts
  • Joined: 27-May 11
  • Gender:Male
  • Location:England

Posted 28 May 2011 - 04:05 PM

After the pinion on my motor wasn't meshing properly I changed the motor, the wires on this one weren't long enough either so it's still got the eyelets from an old Scalextric car into the guide blade. On the track for the first time and..... nothing.

Fiddle around with the braids, still nothing. Back on the track and it coughed into life, then nothing again. Turned out to be a break in the wire where it goes into the eyelet, so a dig into my box of dead cars found another wire. Onto the track and it works! The track isn't always making good contact so it's tricky to get a smooth lap in, but the first impressions are it's very easy to drift with those Ninco classic tyres.

The steering works well, it's not always easy to see in fast corners but you can really tell when you hang the tail out which is just the effect I was after. One advantage of the track contacts being a bit ropey is that it came out of a corner and the straight was dead, this is how it looked Posted Image
Posted Image

Bodyshell on next!

Body mounts on. These are resin so I cut them to length, drilled and mounted them to the chassis then blobbed some glue to hold them in place. Note the welding kit under the bench in case I need to take drastic action
Posted Image

Posted Image

The glue has dried, so let's give it a go on the track. Steering right...
Posted Image

And steering left. It's just like doing your driving exam again
Posted Image

Let's get the power down and see how long we can hold the tail out. Drifting around a right hander
Posted Image

And around to the left. Yes, it's just like taking my driving exam again
Posted Image

I took these shots when the car is stationary; I'm not good enough to slide the car with my left hand, nor take a photo with it. And digital cameras take an indeterminate time between pressing the button and taking the picture.... However it looks like the car isn't leaning enough in a turn, you can hardly see it lean at all.

Some paint on:
Posted Image

I took the front springs out of the Dodge one evening for some more track testing and with ballast it does roll, but not as much as I'd like. I think I need more clearance on the rear too, the front end can roll over 15 degrees but the rear will only do about 10.

Looks good when it rolls. All four wheels are on the ground here, that's just suspension movement.
Posted Image

Size is right, here it is next to Starsky's Torino
Posted Image Reduced: 51% of original size [ 1552 x 2592 ] - Click to view full imagePosted Image

I ordered prototype chassis number 2, this has got more clearance around the hubs for better steering lock and it's made from ABS plastic done by a 3D printer. This gives much better surface finish so the hubs don't need any work (by me!) to get them smoother. However I could keep the cheaper SLS and use a nylon washer between hub and front crossmember instead...

The other advantage is all the holes come out at much tighter accuracy; the SLS chassis needed a drill run through to clean all the powder out but the ABS one is clean straight off the printer.

Posted Image

I'm very impressed, but the cost is almost twice that of an SLS chassis. Worth doing to investigate the technology, and it gives me a second chassis to get testing

If it's all good, I can finalise the design changes I've made to the chassis which are:
1. Make the motor pod have better clips for the bearings
2. Change the motor mounts to make it easier to remove the motor
3. Move the springs inboard
4. Add clearance around the axle gear
5. Make the motor pod a little longer because the datasheet I used from Mabuchi has a different shaft to all the slot car motors
6. Make the wheelbase adjustable
7 to 25 just loads of other stuff. Not bad for something that worked ok first time out....

A few more pics....

The resin parts including windows
Posted Image

Posted Image

New soft springs are fitted, it's like Uncle Buck's car now...

Looks like the new springs and spring mounts allow for lots of travel.
Youtube 1

Axle tramp - we don't want no stinking traction here, we want a live axle trying to jump out of the car. Amazingly you can't sense the axle moving when you drive, but it does show how soft the springs are
Youtube 2

On the track, slowed down
Youtube 3

So how does it drive?

It handles nicely, I chose an inline motor to give more even weight distribution and to make it slide rather than grip, the motor, gears and axles would look familiar if you’d taken apart an early ‘80s Scalextric Porsche.

The car drives very smoothly with the steering front end but it’s tremendous fun to push it harder and harder through corners to see how far you can get it to lean. I’ve been inside real cars like this and it’s seasickness on four wheels, but watching from the outside is just like seeing a ‘70s American car chase on TV. Starsky’s Scalextric Torino is ultimately much faster with its zippy motor and magnet, but if you watch the TV series it’s bouncing around every corner and lurching into outrageous tail slides at 40mph. It’s not going to set the fastest lap but it’s a real hoot to drive, which was my aim.
Gareth Jones

#5 choc-ice

choc-ice

    Rookie Keyboard Racer

  • Full Member
  • Pip
  • 20 posts
  • Joined: 27-May 11
  • Gender:Male
  • Location:England

Posted 28 May 2011 - 04:06 PM

I made a real mess of the windows so did another bodyshell, keeping the resin in place and painting it silver. Roof light went on, as did the wheel inserts.
Posted Image

Posted Image

Total weight of the first prototype was 92 grammes, that's about 31g for the body and 61 for the chassis. Quite heavy compared to most slot cars, but when you consider how big the car is, I think a Pioneer or Scalextric Charger is around 90g too. Of course they have a detailed interior and I don't, but you can't see that when it's on the track. In fact I hardly look at the body at all, just the front wheels and the gap between tyre and wheelarches; it's almost hypnotic!

Graphics on
Posted Image

In hot pursuit
Posted Image

Posted Image

I think I've made the star a touch too big, and the rear licence plate should be a proper plate, not the confederate flag. Both my fault on the artwork.

Make sure the sound it turned down on your computer
Gareth Jones

#6 68Caddy

68Caddy

    The Direktor

  • Full Member
  • PipPipPipPipPipPipPipPip
  • 10,546 posts
  • Joined: 17-March 07
  • Gender:Male
  • Location:CA, by the beach of course

Posted 28 May 2011 - 06:57 PM

I have to say that is way cool Gareth. Love the movement of the cruiser, you sure went all the way out. ;)
Thanks for sharing


Nesta
- Gabriel
Nesta Szabo

In this bright future you can't forget your past.
BMW (Bob Marley and the Wailers)

United we stand and divided we fall, the Legends are complete.
I'm racing the best here at BP but Father time is much better then all of us united.
Not a snob in this hobby, after all it will be gone, if we keep on going like we do, and I have nothing to prove so I keep on posting because I have nothing to gain.
It's our duty to remember the past so we can have a future.

Pistol Pete you will always be in my memory.

#7 pockets3113

pockets3113

    Mid-Pack Racer

  • Full Member
  • PipPipPip
  • 132 posts
  • Joined: 18-November 10
  • Gender:Male
  • Location:TX

Posted 30 May 2011 - 01:54 AM

I had a friend that had one of these when we were growing up,the body roll looks just about right from what my fuzzy memories recall and yepp it was seasickness on wheels(oh wait that mighta been all the little brown bottles on the dirt roads).Hell of a fine job on all the details.
Clinton McCord
"Thanking Obama for killing Bin Laden is like going into McDonalds and thanking Ronald McDonald for the hamburger. It's the guy cooking the burger that should get credit, not the clown."

#8 choc-ice

choc-ice

    Rookie Keyboard Racer

  • Full Member
  • Pip
  • 20 posts
  • Joined: 27-May 11
  • Gender:Male
  • Location:England

Posted 31 May 2011 - 12:32 AM

I had a friend that had one of these when we were growing up,the body roll looks just about right from what my fuzzy memories recall and yepp it was seasickness on wheels(oh wait that mighta been all the little brown bottles on the dirt roads).Hell of a fine job on all the details.

Yeah, but I bet it looked cool from the outside :D

Wonder if they used to give the stunt drivers seasickness pills?
Gareth Jones

#9 choc-ice

choc-ice

    Rookie Keyboard Racer

  • Full Member
  • Pip
  • 20 posts
  • Joined: 27-May 11
  • Gender:Male
  • Location:England

Posted 04 June 2011 - 01:23 PM

What's been happening over the last couple of weeks?

I'm glad you asked - I took the car to a slot car festival and had a huge laugh around the Circuits To Scale Pioneer track. Everyone who drove the car had a huge grin even though we weren't setting any lap records. It's just as fast down the straight as the Pioneer cars but slower around the corners, I think because there was so much grip that I couldn't get the tail to slide, very unlike how the car is on plastic Scalextric track.

A few things came out of the testing - the springs really need to be easily adjustable to suit different track surfaces, the steering linkage needs to be stronger because we managed to break it, the guide blade should be lower to avoid de-slotting so easily and the kingpins should be bigger than 1mm because they're starting to wear the hubs.

This is on top of all the other modifications like more clearance around the guide wires, adjustable wheelbase, better retention of the nylon bushes etc.

Want to see how it looks now? Posted Image
Posted Image
I couldn't resist adding some tailpipes. You'll have to humour me, sorry.

Posted Image
The wheelbase adjustment is in the L brackets along each side. I've made them bolt through the side and the top to give better stiffness. This should make it much easier to fit under other slot car or model kit bodies

Posted Image
Suspension leaning nicely, as anyone who saw (and drove) the car will testify.

I need to sort out how tightly I can nest the parts to get the chassis made, then I'll order 2 for testing. After that, we're into production! Bodyshells are being made now with clear resin or vac formed police lights.
Gareth Jones

#10 choc-ice

choc-ice

    Rookie Keyboard Racer

  • Full Member
  • Pip
  • 20 posts
  • Joined: 27-May 11
  • Gender:Male
  • Location:England

Posted 08 October 2011 - 05:18 AM

Time for an update, bodyshell first

The resin shells look good, and now I've got the correct wheel centres made up (resin cast from a 3D print) and an interior too. The driver couldn't have a crash helmet, it needs to have a proper Sheriff's hat!
Posted Image

Some other people have used the bodyshell on a standard chassis too
Posted Image

This one is from a Dukes of Hazzard episode where Deputy Enos races a patrol car
Posted Image

And going the other way, here's a Torino which was put on the leaning and steering chassis
Posted Image

Posted Image

The chassis has been developed further and a few have been made
Posted Image

One of the cars was used around a friend's track last month, here's how it looks
Posted Image

Posted Image

Posted Image

One of the guys shot some video when it was there with a great onboard camera
http://www.youtube.c...yer_profilepage

You can see some detailed build instructions and some info about a forthcoming bodyshell on the website: www.chase-cars.com
Gareth Jones

#11 munter

munter

    Checkered Flag in Hand

  • Full Member
  • PipPipPipPipPipPip
  • 1,049 posts
  • Joined: 11-April 08
  • Gender:Male
  • Location:Napier, New Zealand

Posted 08 October 2011 - 01:35 PM

Thanks Choc-ice
I enjoyed reading and viewing your thread.
I expect you are well pleased....and you should be.
regards

John Warren
Slot cars are my preferred reality


#12 Phil Smith

Phil Smith

    Posting Leader

  • Member at Peace
  • PipPipPipPipPipPipPip
  • 3,582 posts
  • Joined: 03-November 07
  • Gender:Male
  • Location:Irving, TX

Posted 08 October 2011 - 10:59 PM

That's impressive work. That's just too cool! :good:
Phil Smith
???-2/31/23
Requiescat in Pace


Electric Dreams Online Shop