Cox Chaparral 2D project...
#1
Posted 11 October 2011 - 05:15 PM
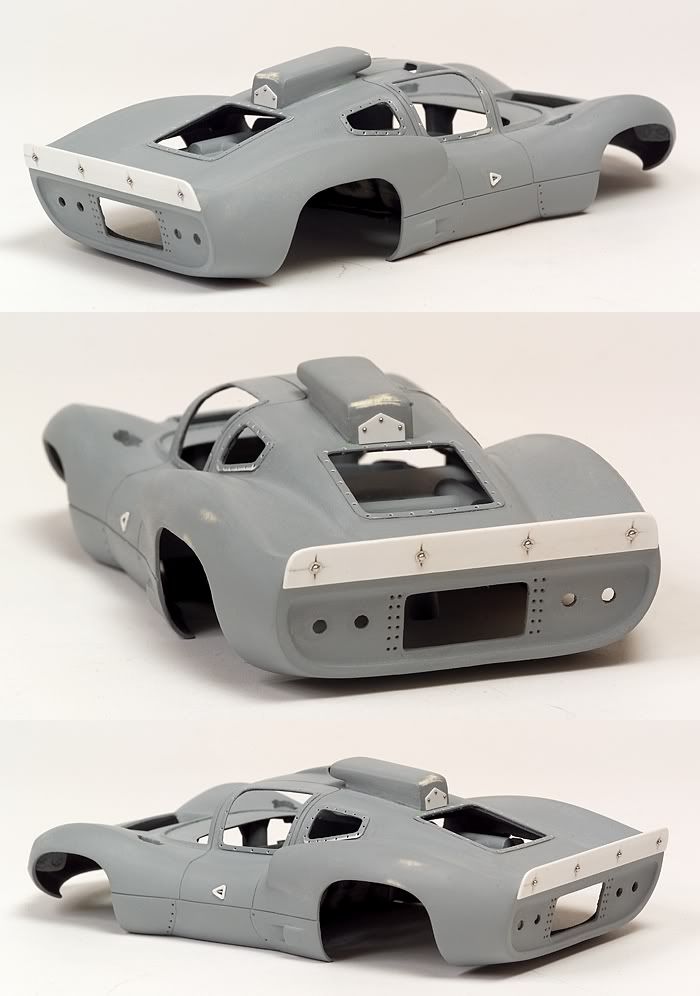
The first thing I wanted to do with this car was to lower the car to a better stance. In order to that you have to cut the interior down (check photos) along with the posts. The good news about dropping the interior is that the wires from the motor fit better under the interior. I'm not using the original headlights so I have filled in the holes. I'll use a more realistic set of lights. I also fitted the black wrap for the windows. These will be fitted with rivets later. The body is not done yet but half way there. More details will be added. The chassis will be sand blasted along with the wheels. This car should look pretty good when it's done.
#2
Posted 11 October 2011 - 05:42 PM
Paul Wolcott
#3
Posted 11 October 2011 - 06:21 PM
Remember, two wrongs don't make a right... but three lefts do! Only you're a block over and a block behind.
#4
Posted 11 October 2011 - 06:50 PM
I'll say!This car should look pretty good when it's done.
It's got "the look" already.
Rick Thigpen
Check out Steve Okeefe's great web site at its new home here at Slotblog:
The Independent Scratchbuilder
There's much more to come...
#5
Posted 11 October 2011 - 11:59 PM
My life fades, the vison dims. All that remains are memories... from The Road Warrior
#6
Posted 12 October 2011 - 08:59 AM
Gary, I was thinking the same thinking the same thing. My finished cars should look so good!His "raw" material looks better than all my finished work!
Rick Thigpen
Check out Steve Okeefe's great web site at its new home here at Slotblog:
The Independent Scratchbuilder
There's much more to come...
#7
Posted 12 October 2011 - 10:55 AM
Still lots to do with the body. Lots of little details to be added before painting. This will not be a accurate representation of the car but I will try to get close. Some of it will be exaggerated but not too over the top. The body was a bit of a mess when I started and I wish I had shot some photos of it.
Thanks again, lads, and I'll get some more photos up soon.
#8
Posted 14 October 2011 - 01:54 PM
Building the rear spoiler. All I did here was use a piece of styrene and cut it down to size. Sanded the edges down cut four slits even across. I found some old round small etched hood hinges with holes in the middle and placed rivets in the middle of them. I then lined them up and glued them into place and then cleaned up the back of the spoiler. I've added scratched built door handles which I'll remove and add to the finished body later. You can see I've already started to clean up the body some more and I will do more clean up later before painting.
Please keep in mind that this is not meant to be accurate and there will be some exaggeration.
More detailing to come
Onward...
#9
Posted 01 November 2011 - 06:27 PM
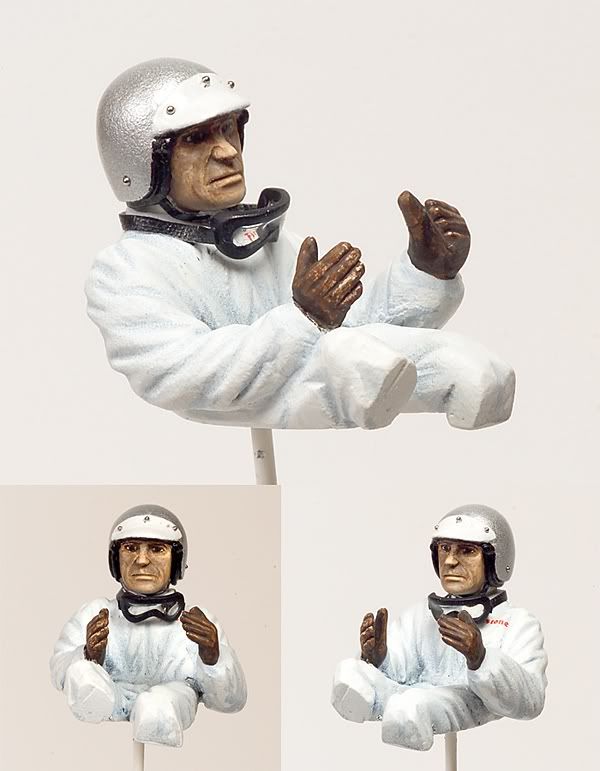
Here's some photos of the 2D interior. I wanted to do something different with the inside. I'm sure there are some problems here and fore sure it will be pointed out to me but that's okay. All I wanted to do is add some more detail and make this car a little more than just the Cox kit. Needless to say, the parts are only placement glued and still need some clean up. Once all this is done, I'll nail it down. I might add, there will be more detail added after painting which should be a lot of fun. I did re-sculpt the driver a bit to make it work better and look a little more natural.
Anyway, onward...
#10
Posted 01 November 2011 - 06:46 PM
Awesome!
Better grind those goggles off Jim's face, the 2D drivers wore theirs loose around their necks, just in case the windshield would crack and break...
Philippe de Lespinay
#11
Posted 01 November 2011 - 07:07 PM
#12
Posted 01 November 2011 - 07:42 PM
Philippe de Lespinay
#13
Posted 02 November 2011 - 08:25 AM
Thanks, mate, for the input.
#14
Posted 02 November 2011 - 01:35 PM
With kind regards,
Russell
Russell Sheldon
Cape Town, South Africa
--------------------------------------
#15
Posted 02 November 2011 - 02:22 PM
I would drop the engine but not the stacks.
What I mean is cut the heads/valve covers from the engine top and mount those to the sheet plastic 'engine cover' almost right at the valve cover mold line.
Then drill eight holes between the valve covers and mount the Webers and stacks directly on top of the 'engine cover'.
This will maintain the stacks mounting position but lower the "engine" proper somewhat. The pipes can also be cut slightly but I think those are pretty much correct as they are.
Like this:
Jairus H Watson - Artist
Need something painted, soldered, carved, or killed? - jairuswtsn@aol.com
www.slotcarsmag.com
www.jairuswatson.net
http://www.ratholecustoms.com
Check out some of the cool stuff on my Fotki!
#16
Posted 02 November 2011 - 02:54 PM
I agree, J. That's what I did today. All you can see is the valve covers and then the stacks. It still looks good. Photos soon.
Cheers, mate.
#17
Posted 03 November 2011 - 11:46 AM
I went ahead and did some changes. The engine was too high and needed to be lowered. This is just glued for placement only and will be nailed down later. The trumpets are not glued but they do line up correct.
Onward...
#18
Posted 03 November 2011 - 12:11 PM
It is looking real cool. Paint the sucker!
Philippe de Lespinay
#19
Posted 03 November 2011 - 12:40 PM
#20
Posted 04 November 2011 - 05:01 PM
The final changes. I lowered the pipes and pinned the parts. Notice the holes on the back platform. On to the body.
#21
Posted 04 November 2011 - 11:39 PM
Mike Boemker
#22
Posted 07 November 2011 - 12:42 PM
Here's some photos of the driver. It's not finished yet but it's close. There will be seat belts added.
- Frank Godbey likes this
#23
Posted 07 November 2011 - 03:01 PM
Jairus H Watson - Artist
Need something painted, soldered, carved, or killed? - jairuswtsn@aol.com
www.slotcarsmag.com
www.jairuswatson.net
http://www.ratholecustoms.com
Check out some of the cool stuff on my Fotki!
#24
Posted 09 November 2011 - 04:07 PM
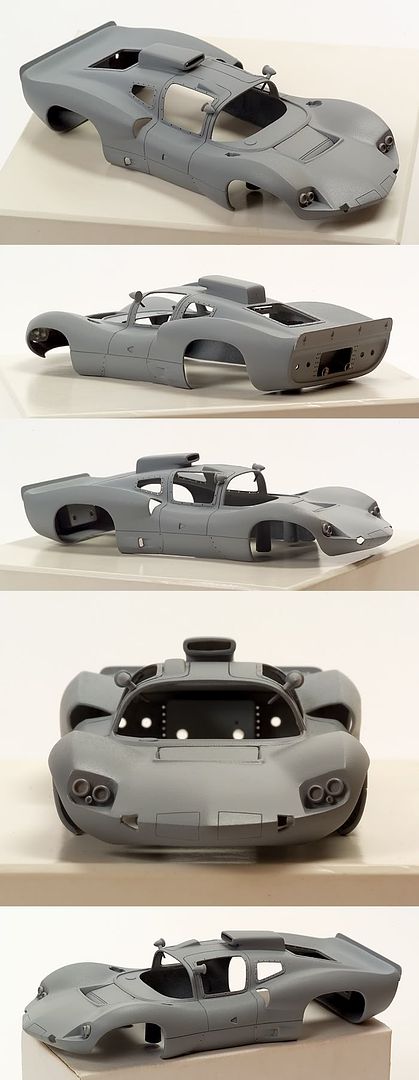
Almost finished the body. I've scratchbuilt the mirrors and the front headlights. The front headlights were too basic and needed some attention. Just a real good sanding then a nice coat of white primer and we're off. I should have some pictures of the painted interior real soon.
Onward...
#25
Posted 09 November 2011 - 04:39 PM
Philippe de Lespinay