Jump to content


Photo

TonyP Iso Plumber 3


  • Please log in to reply
4 replies to this topic

#1 Steve Okeefe

Steve Okeefe

    The Independent Scratchbuilder

  • Administrator
  • PipPipPipPipPipPip
  • 1,139 posts
  • Joined: 16-February 06
  • Gender:Male
  • Location:State of Independence

Posted 17 March 2013 - 10:59 AM

Tony P's 1975 ARCO-USRA Winner

Page 3


I mounted the front cross piece and ISO down stop a little too far forward and used the wrong size wire. I cut the sucker off and replaced it with a .055” cross piece and a .047” down stop.


Tony P ISO chassis 18.jpg


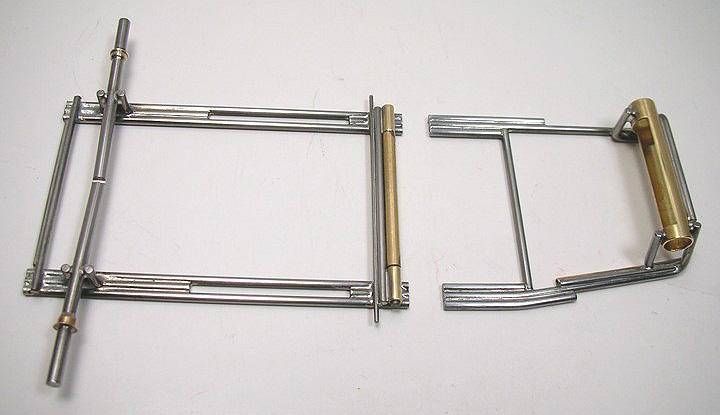
Tony emailed me and reminded me that it would be much easier to follow his advice and attach the drop arm and ISO pivot tube before the chassis is cut in half. As an ISO newbie I didn’t because one slip with the cut off wheel and all my work would have been wasted. Now that I’ve cut the chassis in half I realize it was no big deal and I should have followed Tony’s advice. I will when I build my next one!


Tony P ISO chassis 19.jpg


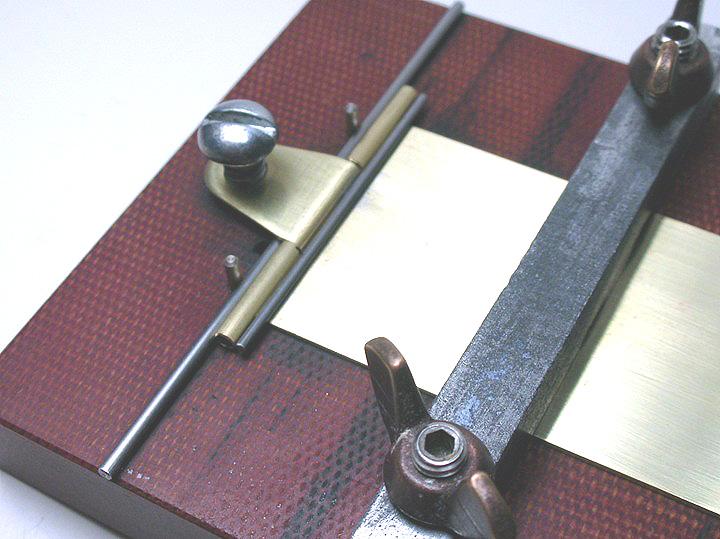
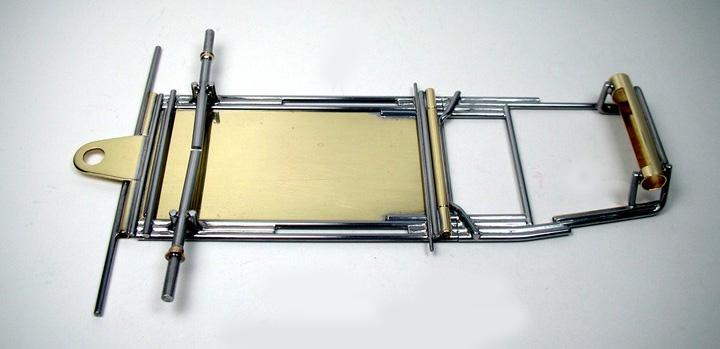
The drop arm needs to be attached to the back half of the chassis. But first I decided to add the plumber hinge tubes and bumper. This handy dandy jig is helpful. The bumper is 1/16” wire, the pivot tubes are 3/32” X .540” long and the bullet proofing wire behind the tubes is .047”. Tony may have used .030” and I couldn’t get to it to measure so I’m just guessing.


Tony P ISO chassis 20.jpg


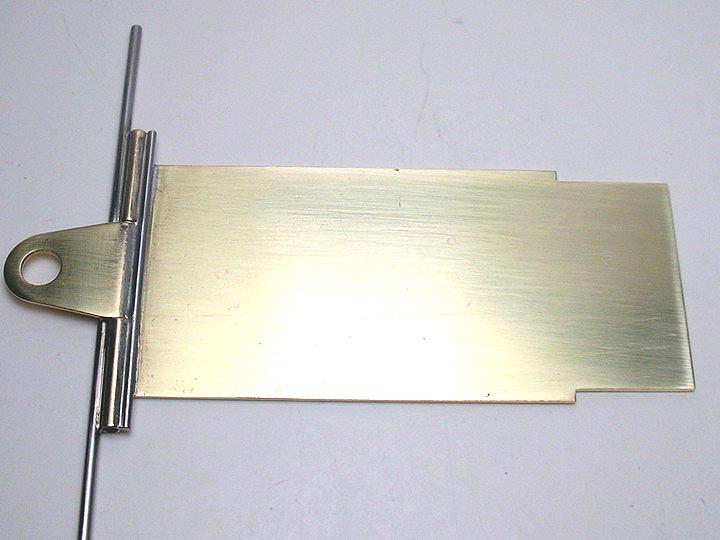
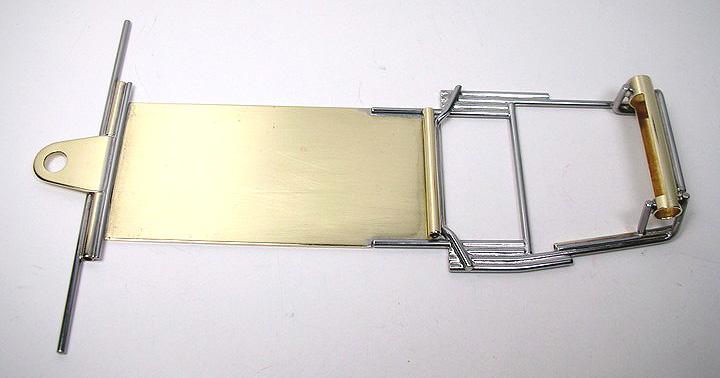
The drop arm out of the jig:


Tony P ISO chassis 21.jpg


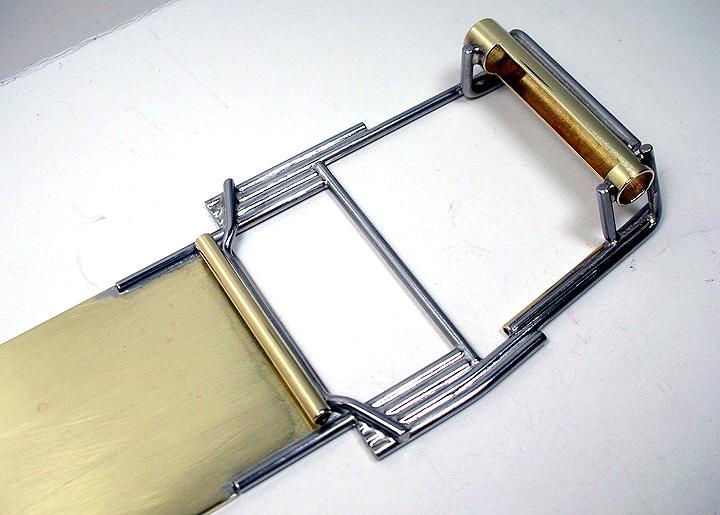
The drop arm is attached to the back half of the chassis by two 1/16” piano wire rails. The drop arm has .560” long notches cut in it to accept the rails. The ISO hinge tube needs to be attached to the drop arm but since the drop arm is only .030” thick and the rails are .062” there is a gap between the ISO pivot tube and the drop arm. Tony used a .055” piano wire brace for this. This piece is bent to reach down to the drop arm and tie everything together. Here is everything attached:


Tony P ISO chassis 22.jpg


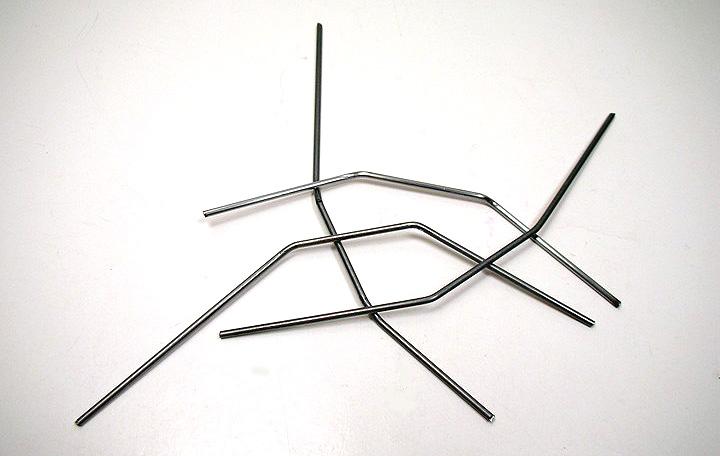
Now, I found this .055” brace somewhat challenging to make.  Challenge one through four:


Tony P ISO chassis 23.jpg


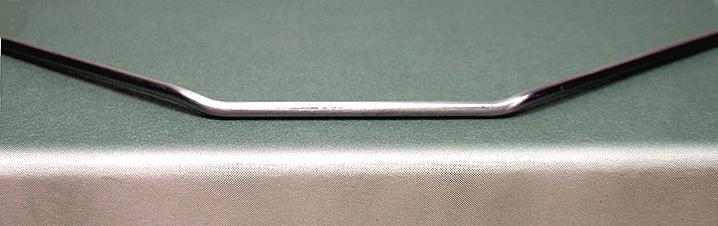
But what’s that old saying, “fifth time is a charm”? Finally a good one:


Tony P ISO chassis 24.jpg


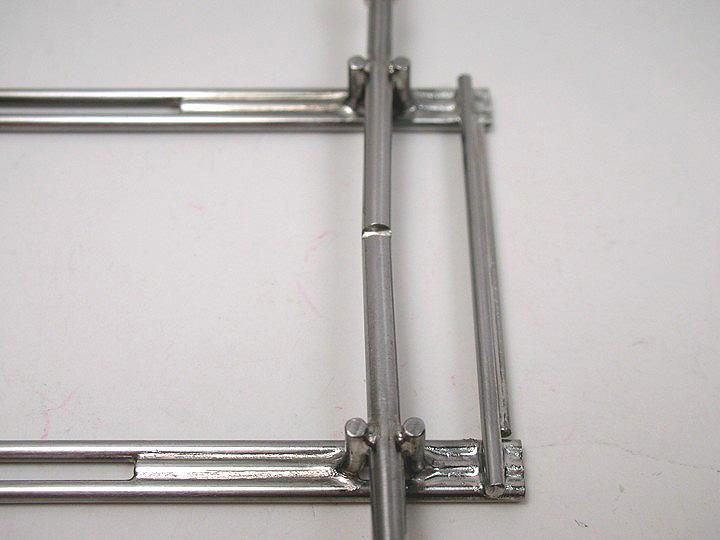
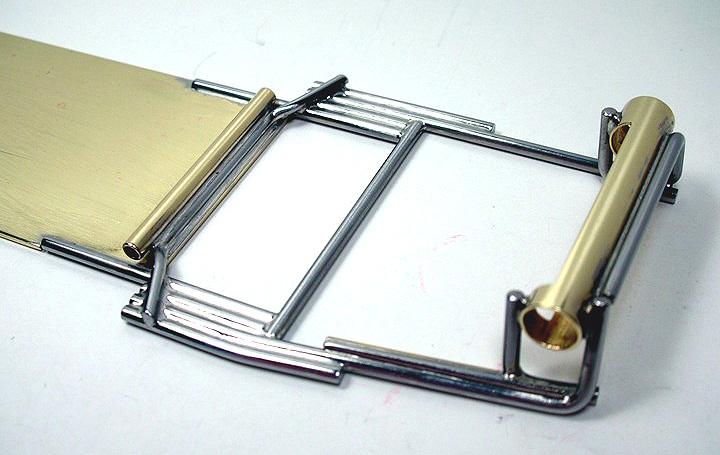
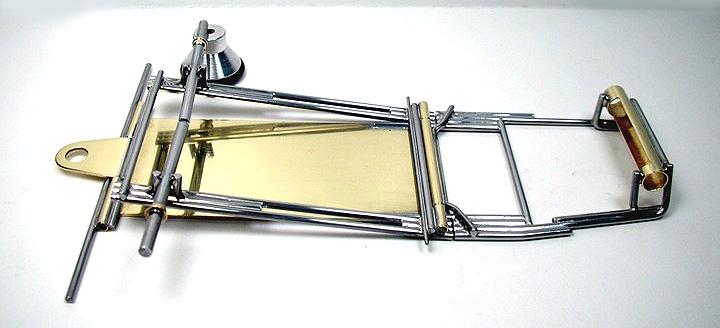
Here are some closer pictures of how everything gets tied together:


Tony P ISO chassis 25.jpg


Tony P ISO chassis 26.jpg


Tony P ISO chassis 27.jpg


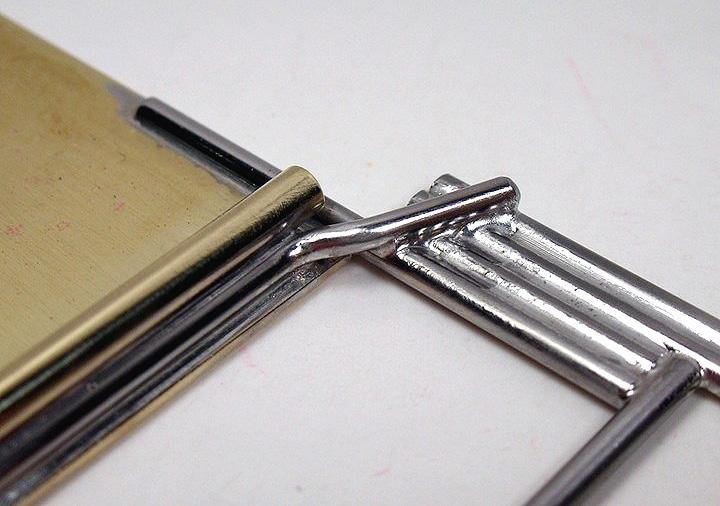
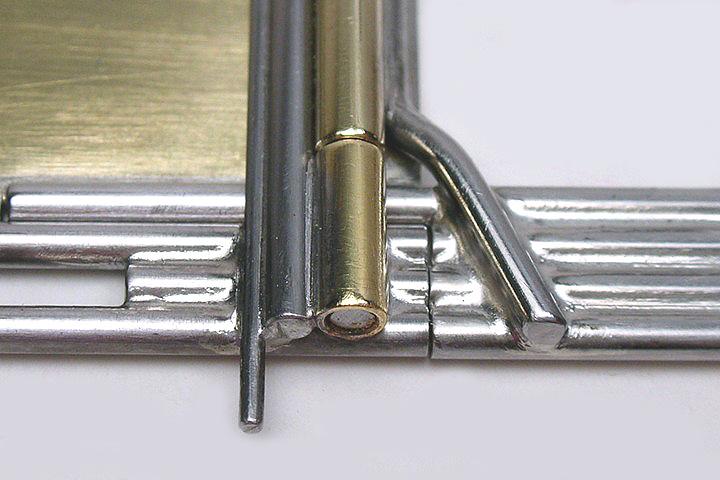
A close-up of the chassis front and rear interface:


Tony P ISO chassis 28.jpg


The chassis with the ISO front end installed:


Tony P ISO chassis 29.jpg


Tony P ISO chassis 30.jpg


Next it’s time to hang the plumber rails and pans…..  (Click here)


Steve Okeefe


I build what I likes, and I likes what I build


#2 Deltech

Deltech

    Rookie Keyboard Racer

  • Full Member
  • Pip
  • 14 posts
  • Joined: 23-April 10
  • Gender:Male
  • Location:Newhall, CA

Posted 15 June 2014 - 07:26 PM

Hi Steve,

Great work on the ISO. Do you know anyone who still sells or carrys the drop arms you are using on this project? I have drop arms but they are the newer versions with the wings. Let me know.

Thanks,

Mike D.

DelTech Racing


Mike Delgadillo

#3 Steve Okeefe

Steve Okeefe

    The Independent Scratchbuilder

  • Administrator
  • PipPipPipPipPipPip
  • 1,139 posts
  • Joined: 16-February 06
  • Gender:Male
  • Location:State of Independence

Posted 16 June 2014 - 06:17 AM

Hi Mike,


First I have to mention that this chassis build is Rick (DC-65x) Thigpen's work, not mine.  Rick also shot all the photos and wrote the article.


Regarding drop arms, I don't know of any manufacturers currently making drop arms like the one in the ISO, mostly I think because drop arms went away years ago.


There are probably some retailers who sell NOS vintage stuff that might have some, but there are several of us other vintage builders also looking for these drop arms (they are rather desireable).


It is possible (I don't really know) that RGeo may have made some replica drop arms - you might ask Rick Bennardo (not Rick Thigpen).


You may find that your best option is to cut the wings off one of the drop arms you have and go from there.


Hope that helps...


Steve Okeefe


I build what I likes, and I likes what I build


#4 Bill from NH

Bill from NH

    Age scrubs away speed!

  • Full Member
  • PipPipPipPipPipPipPipPip
  • 14,772 posts
  • Joined: 02-August 07
  • Gender:Male
  • Location:New Boston, NH

Posted 16 June 2014 - 08:41 AM

I don't recall seeing anybody offering replica drop arms like these, but maybe someone has. Jairus may have made a couple for his own use. One alternative would be to buy REHCO built chassis with Parma brass parts & remove the drop arm & pans for your own construction projects, but sources for these chassis seem to have pretty much dried up. Another alternative would be to cut the flat plate of the drop arm from .040 or .050 brass sheet, then plate it with a separate guide holder made from brass, steel, or else use one of the Slick 7 steel guide tongues. In the day, we ran .040 drop arms because the .032 ones were too flexible. Yes, you could cut the wings off those you currently have, but the ones I own (Parma & GRP) would have to be lengthened to work. :)


Bill Fernald
 
I intend to live forever!  So far, so good.  :laugh2:  :laugh2: 

#5 Deltech

Deltech

    Rookie Keyboard Racer

  • Full Member
  • Pip
  • 14 posts
  • Joined: 23-April 10
  • Gender:Male
  • Location:Newhall, CA

Posted 16 June 2014 - 11:11 AM

Hi Bill and Steve,

Thanks for the input. I thought it might be a dry well. I can probably make one with .040 brass and one of the steel guide tongues. I used to make the ISO chassis when I was with Revtech back in the 70's. I spoke with Jairus a while back and he help me get the drawings for the steel center sections for the 74 Pro Replica. I had my shop cut me a batch with the CNC to play with. I like building these classic chassis then I give them to my grand daughters to drive.

Thanks again,

Mike


Mike Delgadillo


Electric Dreams Online Shop