


Hammerhead Thingies
Page 2
Start by forming the inner rails and bracket braces from 1/16” (1.59mm) piano wire, like this:
The inner rails have bends of about 30 degrees so they go over the top of the bracket braces and are soldered to the arms of the motor bracket, ending near the top of the axle bearing tube. Use jig wheels for .790" (20.1 mm) rear wheels and be careful about getting the angle right before you cut the rail to length so it fits properly into the nosepiece. But then that’s what jigs are for, right?
Remember the bracket braces go outside the inner main rails, and do not extend to the center of the motor bracket. Leave a space for the lower motor mounting screw to go, as shown here:
After the nosepiece, this is probably the hardest part of building the center section. Get everything here straight, square and flush, and the rest of the chassis will be much easier to build!
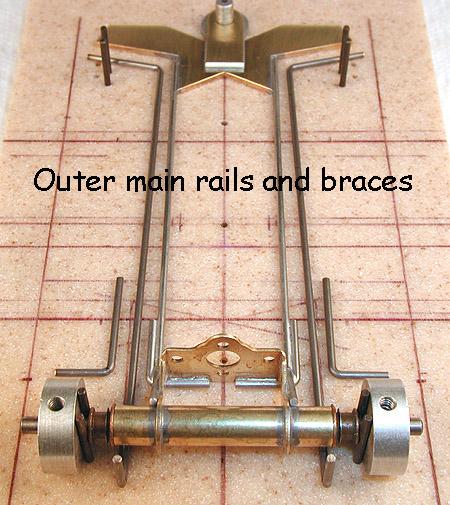
Onward to the outer main rails and braces. Shape them out of more 1/16" (1.59mm) piano wire, like this:
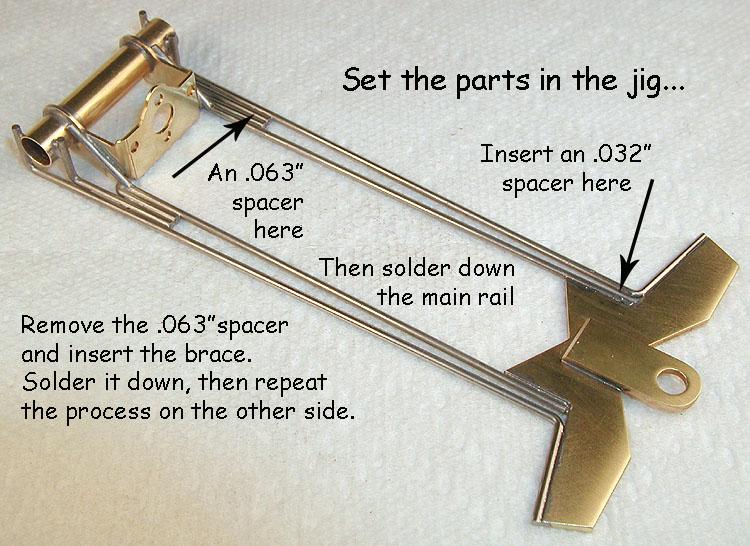
Back to the jig; put everything in place, then space the front of the main rail with a piece of .032" (0.79mm) brass scrap, and the back with a piece of .063" (1.59mm) brass rod. Solder down the main rail. Remove the spacers and insert the brace. Solder it down. Repeat the process on the other side.
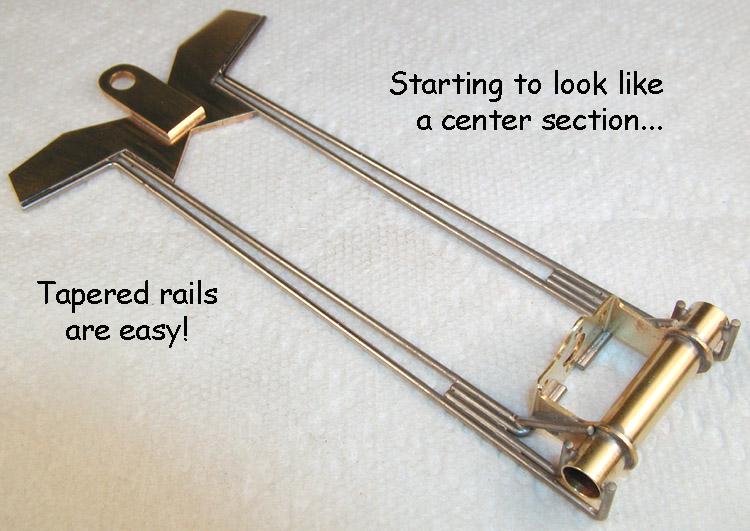
Now we've got something that looks more like a center section. Tapered rails and precise rail spacing are easy to do!
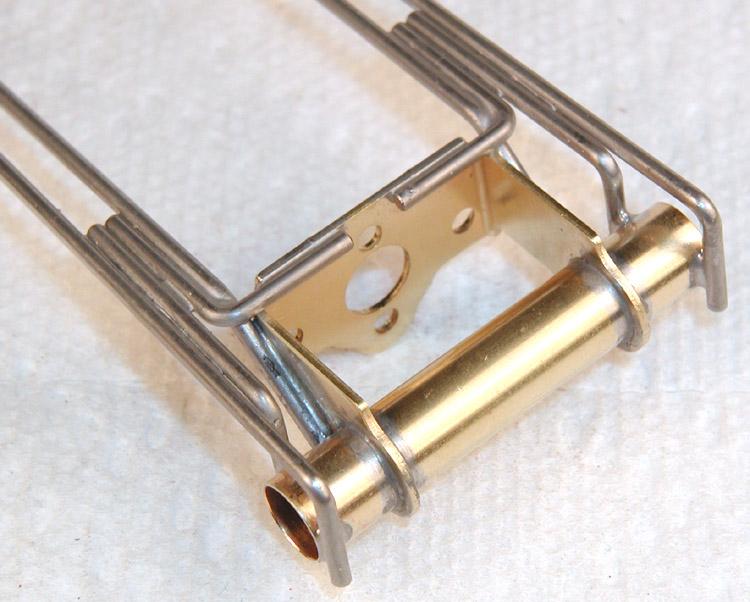
Here's a close-up of how all the main rails and main rail braces fit together:
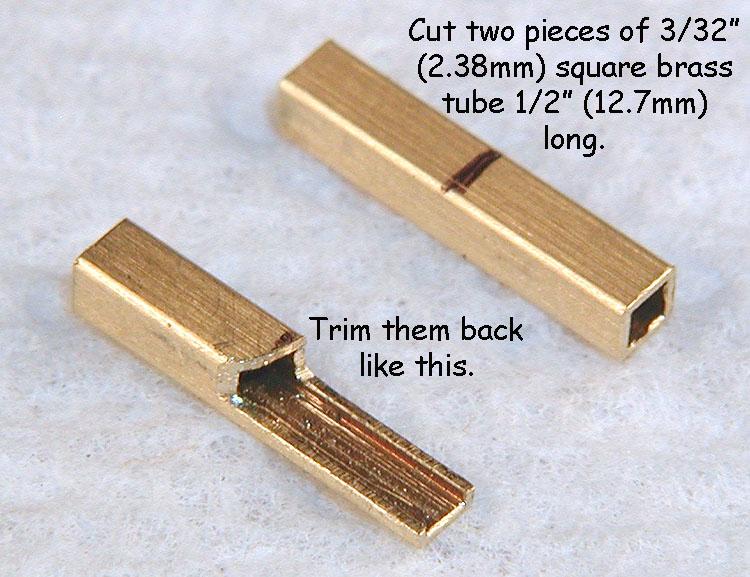
Now we do the side pan hinge tube pockets. Cut them out of 3/32" square brass tubing like this:
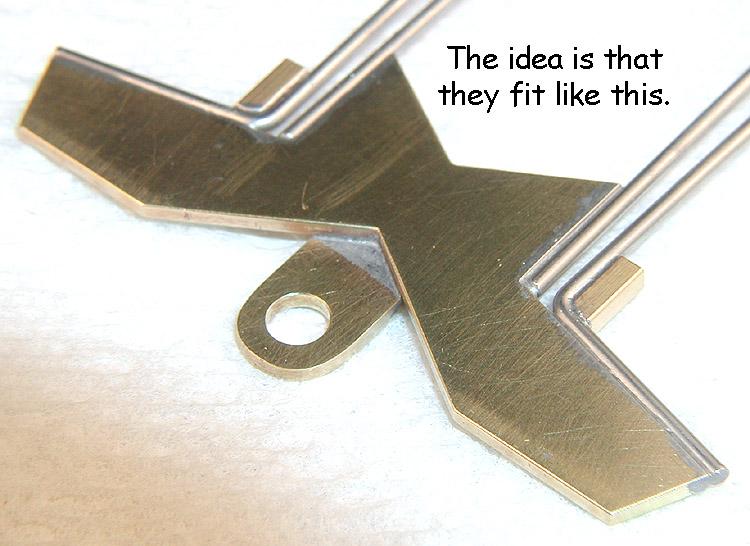
Cut them so they form fit into the outer main rail on the bottom (don't forget there's a left and a right)...
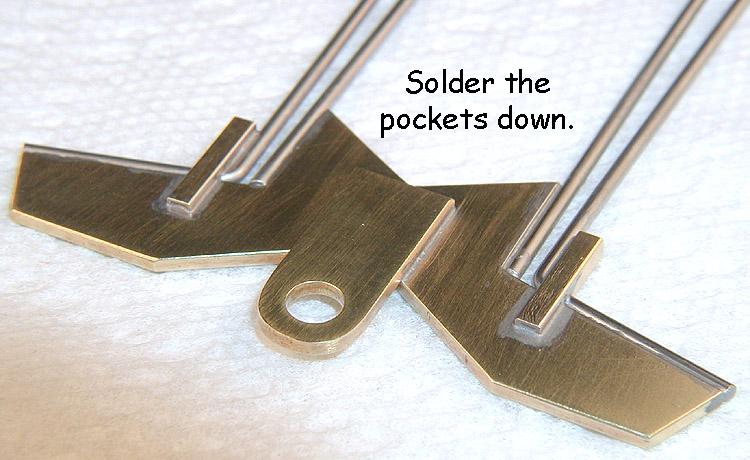
And also extend over the top of the nose piece like this. Solder them down.
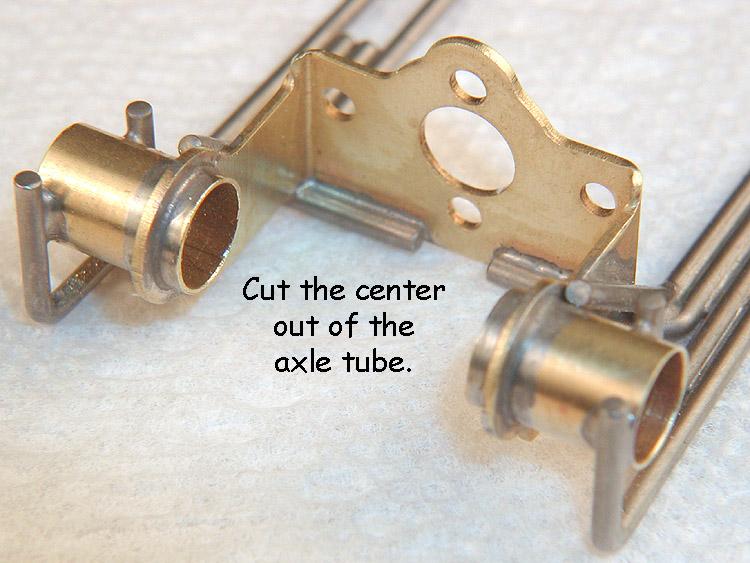
Now, cut out the center portion of the axle tube.
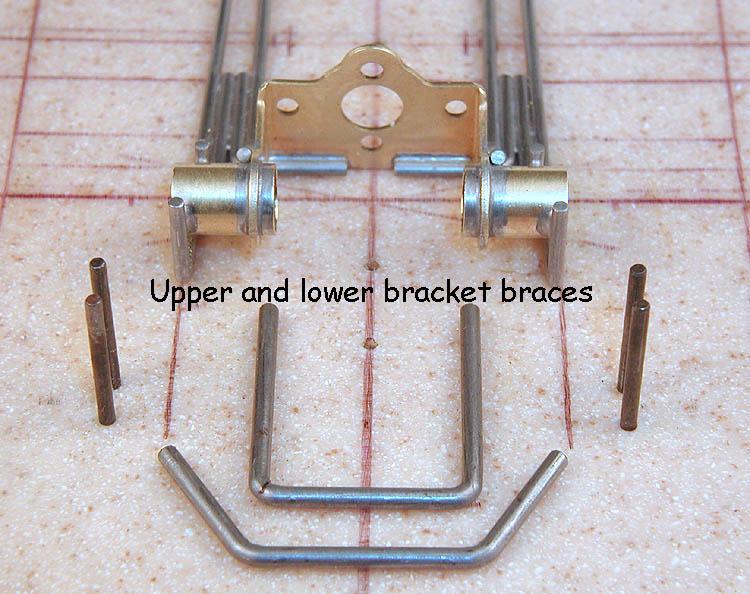
Shape the upper and lower bracket braces out of .078" (2.0mm) piano wire:
Install the lower bracket brace. Place a piece of 1/16" (1.59mm) thick brass scrap under the back end of the brace to space it up off the jig block, and push the front end of the brace up until it contacts the lower surface of the axle tube. Solder it in.
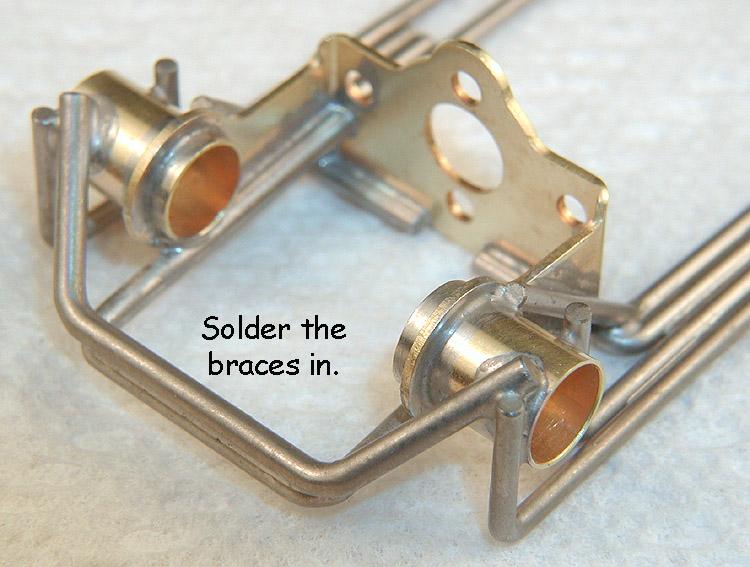
Now install the upper brace, making sure the tips contact both left and right outer main rails and the axle tubes, and the center portion contacts the full width of the lower brace.
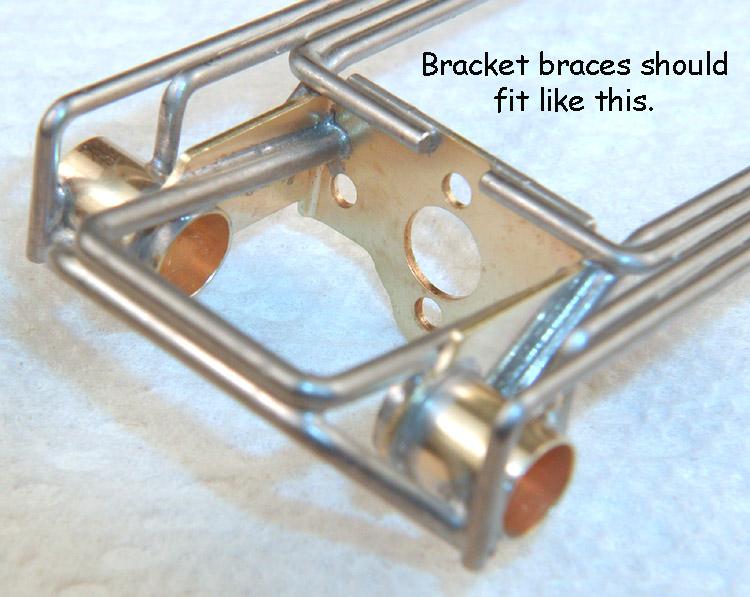
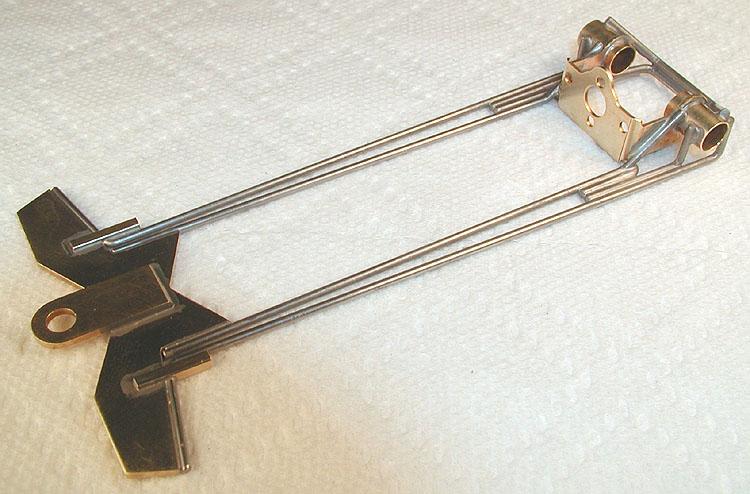
At this point the chassis center section build is complete:
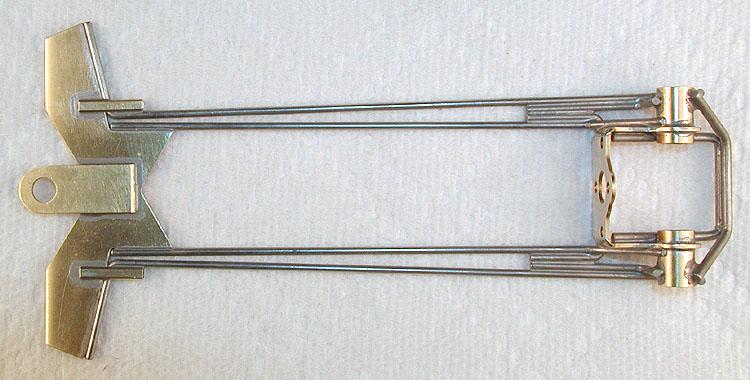
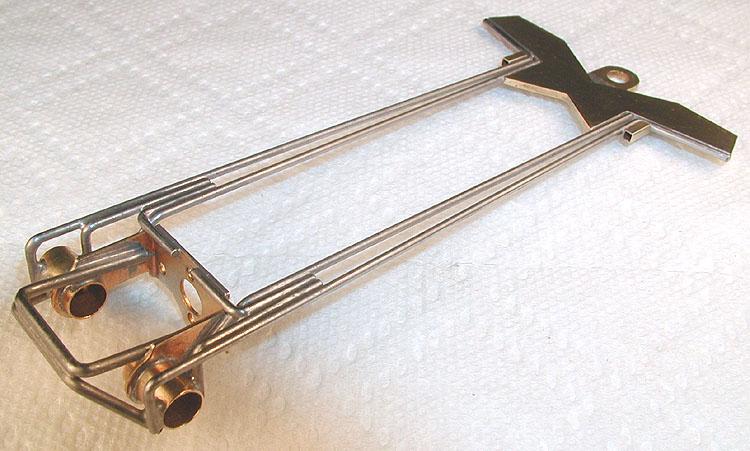

Next up, floppies... (Click here)


