Bulldog 3 build details
#1

Posted 25 December 2013 - 10:06 AM
Please point me to BD-3 instructions for the build or provide details that are unique to the BD-3 from the BD-2.
Thanks,
Mark
Mark Horne
SERG - www.slotcarenduro.club
"Racing is life... everything else is just waiting." Steve McQueen - LeMans
There are only two things in life that make me feel alive. Racing is one of them.
#2

Posted 25 December 2013 - 11:42 AM
Mark, the BD3 is very similar to the BD2 as you noted, however Richard Mack made some upgrades including the reinforced motor box, the center spin, and the cross wire in front.
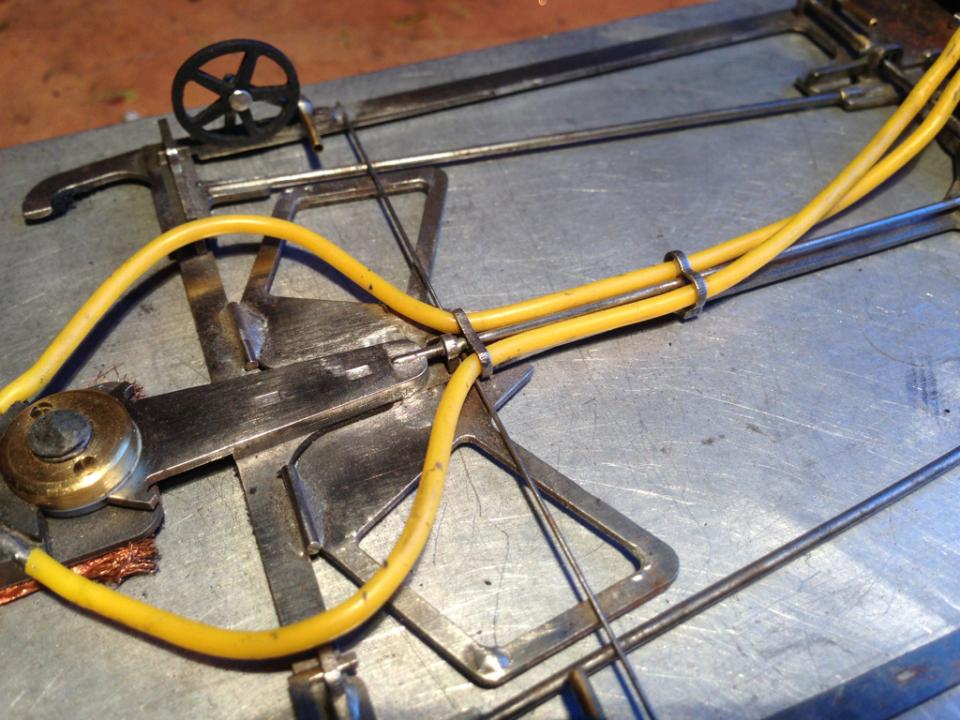
One of the tricky sequences in the build is being sure to install the small "D" shaped piece ON THE SPINE between the rear of the guide tongue and in front of the front leadwire retainer. Here is the finished installation:

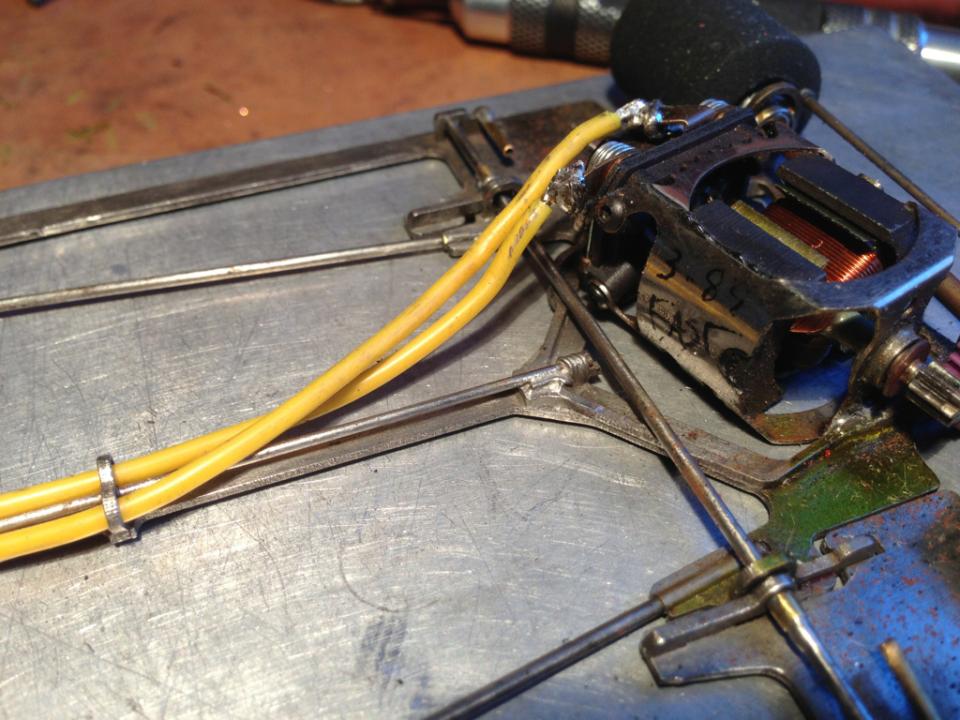
The center spine uses .032" piano wire. It's a good idea to tie-wrap the rear of the spine to the chassis:

For the front cross wire, use .018, .019 or .020" wire... not sure which size it is, but my calipers usually say .019". The trick here is to solder one side of the cross wire to the chassis through the small hole in the front wheel upright, then when you solder the other side, be sure both pans are shifted to the same direction in front. The idea is the front of the pans will shift back and forth and are tied together.
Notice the small "D" shaped piece is soldered to the spine and provides an adjustment of how much front to rear play you want in the cross wire. The "D" provides a hard stop, however the wire is so flexible that it gives some springiness, too.
George Russell
#3

Posted 25 December 2013 - 07:44 PM
- Mike K likes this
#4

Posted 25 December 2013 - 07:48 PM
It is in Slotblog's Links section, Chris. And I am able to pull it up.
Mack Slotracing
Though the homepage does carry a note that it is "in process of being rebuilt".
Gregory Wells
Never forget that first place goes to the racer with the MOST laps, not the racer with the FASTEST lap
#5

Posted 25 December 2013 - 10:11 PM
Thanks, George, that post is a big help. Seems like the rest is pretty straightforward unless there are more secrets this kit holds...
Mark Horne
SERG - www.slotcarenduro.club
"Racing is life... everything else is just waiting." Steve McQueen - LeMans
There are only two things in life that make me feel alive. Racing is one of them.
#6

Posted 26 December 2013 - 07:10 PM
George,
Why did you put the wire support at the front of the rectangles? Aren't these already part of the assembly?
Maybe not, as I haven't separated all of the parts out of the steel square on my kit.
I guess never mind.
#7

Posted 02 January 2014 - 10:24 PM
OK, I finally have it built and ran some test laps. It gets into the corner extremely well and handles as expected, very nice. A little chatter coming out of the slow flat turns. Thinking the two wedges for the pans need to go in to add a bit of rear weight.
Mark Horne
SERG - www.slotcarenduro.club
"Racing is life... everything else is just waiting." Steve McQueen - LeMans
There are only two things in life that make me feel alive. Racing is one of them.
#8

Posted 04 February 2014 - 03:20 PM
Finally was able to race this. It works very well through into and out of the turns. I aged the tires a bit before racing, just left them on the car hanging around, to find the chatter issue went away. No glue needed. I am very pleased.
Mark Horne
SERG - www.slotcarenduro.club
"Racing is life... everything else is just waiting." Steve McQueen - LeMans
There are only two things in life that make me feel alive. Racing is one of them.


