


Recently seeing some of Don Seigel's posts, I got inspired to do one (pretty much) the way we did it when I was a kid. Those were the days when a couple of hours...a couple of nights after homework during the week spent "improving" a Mabuchi bought with my paper route money, meant I could hit the local raceway (whatever it was?) and either burn up the motor...or brag to my buddies about what a rocket it was (relatively speaking). So...
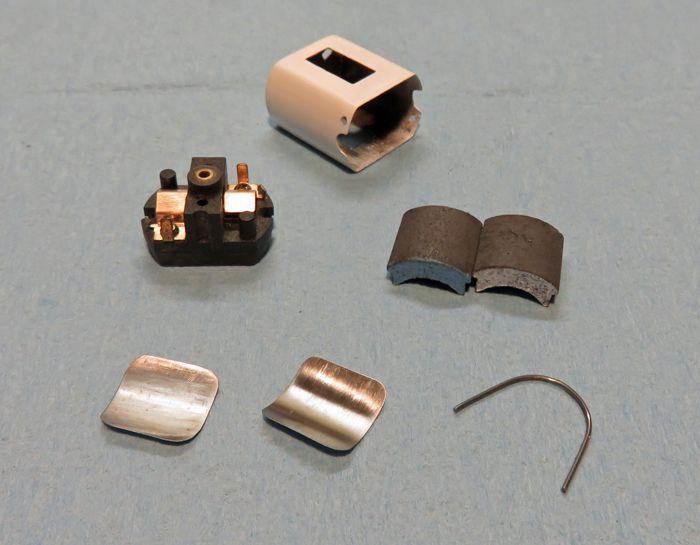
Here's the "stuff" I started with:
Nothing at all special. Some sort of Mabuchi (?) can, a set of stock Mabuchi 16D magnets, an FT16D end bell (I'm using the bushing only), a clean Tradeship Ft16D end bell, and the stock arm (which isn't a Mabuchi, but I think a Johnson judging by the plastic insulators and tail spacer...same junk). So it's "off to the races" (figuratively speaking that is)!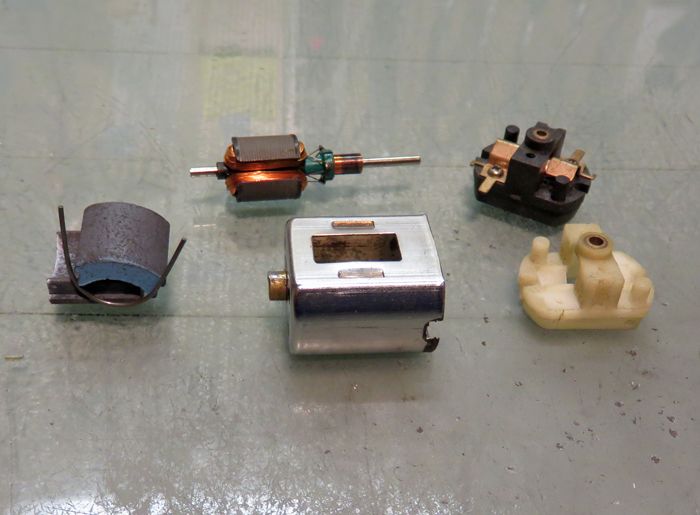
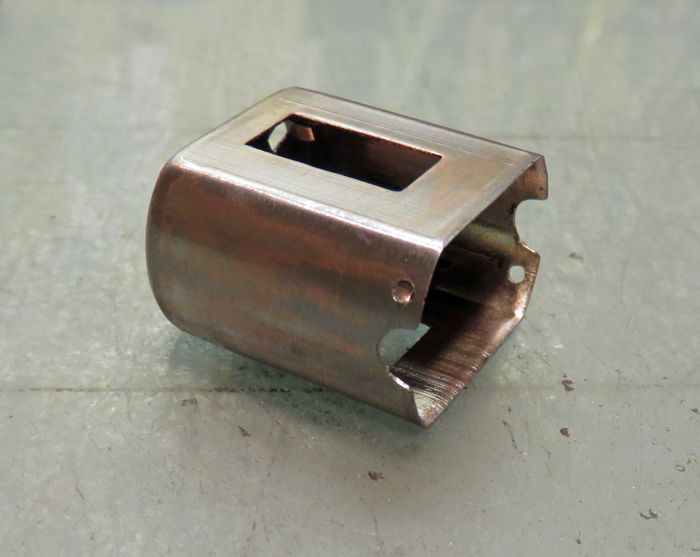
First order of business was to clean out the can (the old magnets had been epoxied-in and it was a mess. Also, the bushing had to go and a quick "have at it" with the Dremel and a round nose grinding stone from the inside removes the lip and out comes the bushing.
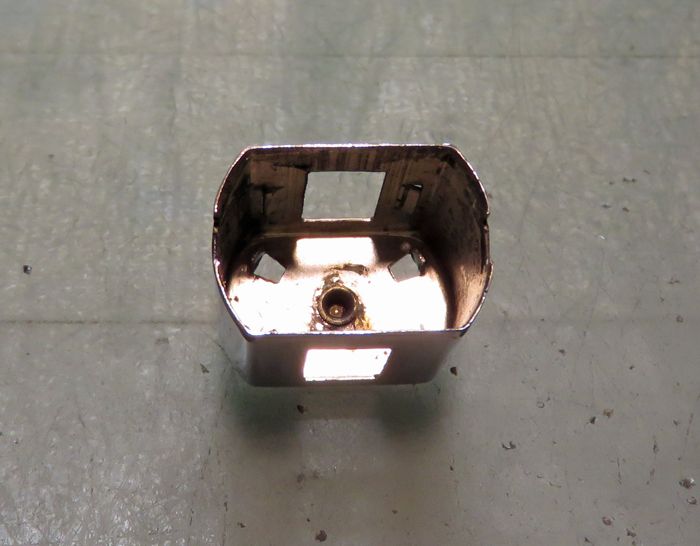
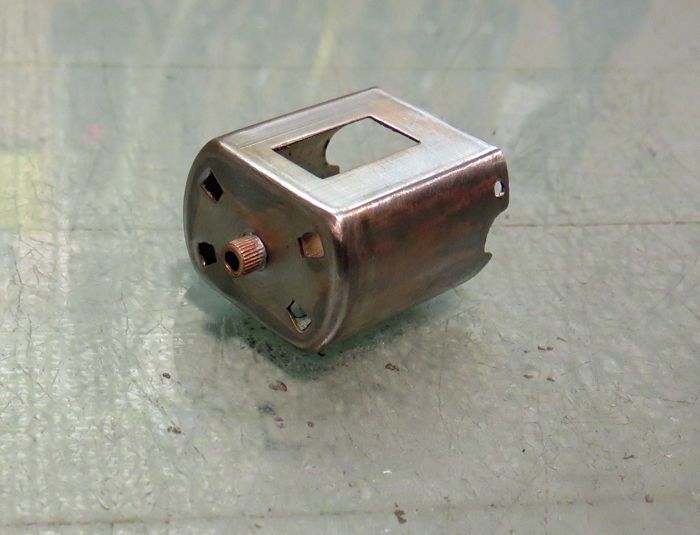
Afterwards, the can bushing was replaced with an extra end bell bushing from the white end bell (MUCH BETTER), making SURE it was aligned with the end bell bushing. The areas of the can where the tabs had broken off were ground to a radius, so the can didn't look like it was rescued from the garbage, the can was drilled for end bell retainer screws, and then sanded/stripped of it's chrome...OOOOO, it looks better already!
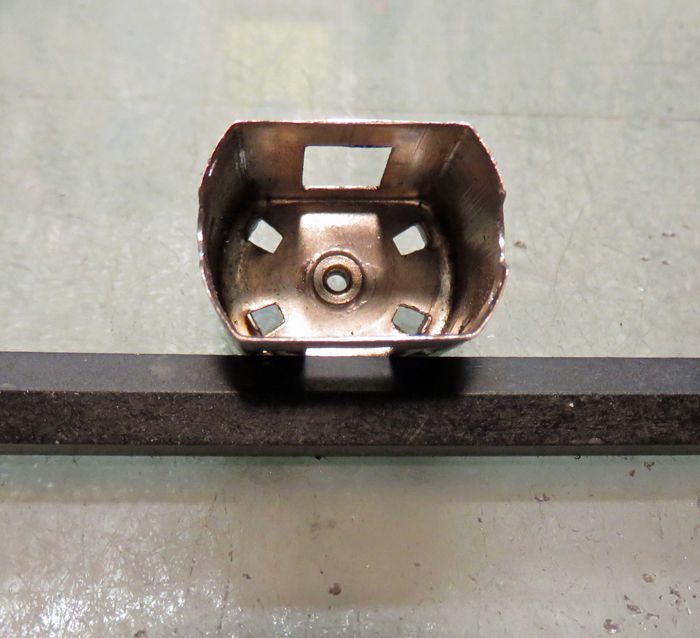
Moving forward, the stock magnets (as weak as they are) CAN be part of a total motor "package" that will definitely perform better than the stock motor by a wide margin. Here, I'm using a super clean pair and will also be installing a pair of .004" steel shims. It doesn't sound like much, but the strength of the field exerted on the arm increases exponentially as the distance between the arm and the magnets is closed/tightened. .004" per side (.008" total) will beef things up noticeably.
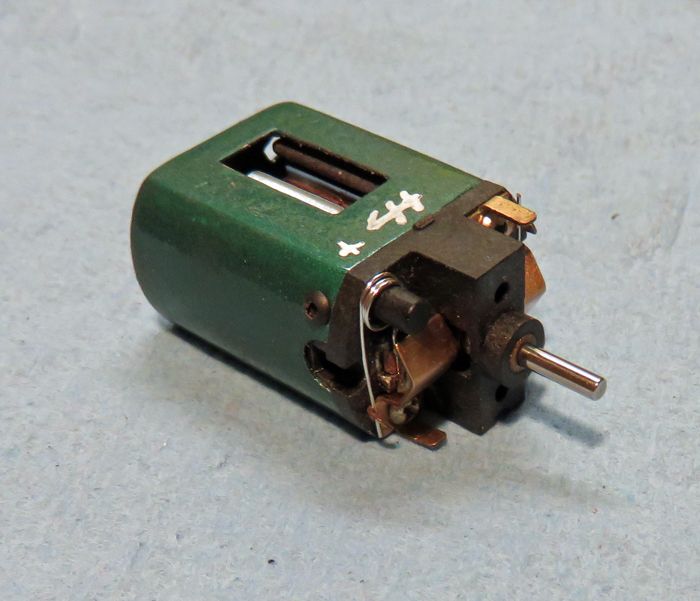
Also, here the can has been primed (it'll get wet-sanded before top-coating), the shims have been fabricated, the end bell hardware has been cleaned of a pretty fair amount of corrosion, and the can just needs top-coating (I'll use "Hammered Green"...I'm on a kick with that color lately, it's ...er...cool beans).
For the arm, the stock stack was stripped and the plastic insulators removed, after which I cut a pair of spacers for the com and tail. I won't be using the stock commutator because I just can't bear using that garbage with all the work involved in even a "simple build" like this one. Instead, I'll be using a com from a modern "D" motor arm...it's nearly the same diameter and functionally equivalent, plus it will last better. A quick trip to the powder coating department (er...my garage  ), and it'll be ready for winding. Since I'm not doing any extra protection on the end bell, this motor will get a #30 wind, which will be a good match for the stock magnets and hardware...stay tuned.
-john

 watching this "old Skool" build is every bit as exciting & interesting as your Wild motors John
 Watching with interest & taking notes.


 said (


 and makes for a solid motor.


