

Live and learn, I was wondering why I was seeing different colored cans referred to as "green" mura cans! I guess I should have asked!

Mura two-hole C-can magnets and magnet mounting clips?
Started by
mdiv
, Mar 09 2015 07:57 PM
70 replies to this topic
#26

olescratch
-

- Subscriber
-

- 976 posts Joined: 19-July 13
olescratch
- Gender:Male
- Location:Ravenna, OH
Posted 11 March 2015 - 02:33 PM
John Stewart
#27
dc-65x
-

- Subscriber
-
- 6,821 posts Joined: 14-February 06
Grand Champion Poster
- Gender:Male
- Location:Captain Rick: The only vintage slot car nut in SW Oregon?
Posted 11 March 2015 - 03:00 PM
Hi Mikey,
Here's a few links to vintage motor builds by the guys who did them in the day:
Lee Gilbert Builds A Pro Motor Part II
Build A Pro Motor
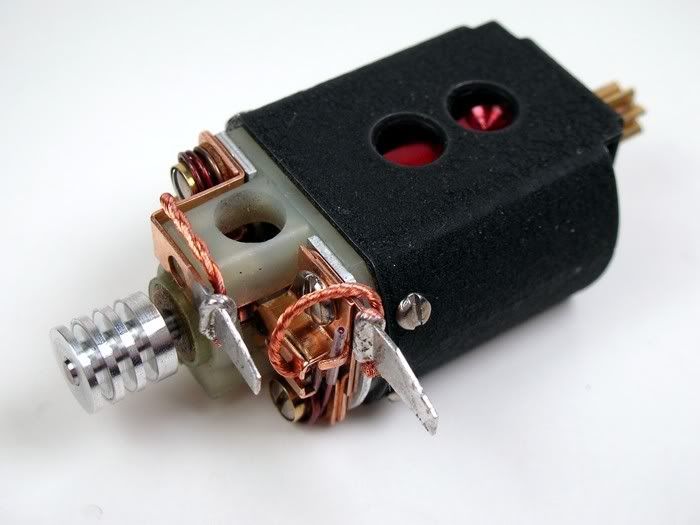
Here's a few pics of the pieces-parts of a motor similar to what I think you might be after:
Here is the Mura can is stripped of paint and a new bearing has been soldered in. I also tinned the can where it will be soldered to the frame:
Just to be a little different I countersunk the cooling holes:
I had some Champion Blue Dot magnets zapped and was lucky to have them come out perfectly matched at a gauss reading of 640. I added some .004" thick Champion shims I had cloned by the Laser Dude. I epoxied the magnets into the can with JB Weld and honed them to .525" diameter:
The tinned areas were masked off; a coat of Krylon black wrinkle paint was sprayed on, and baked at 170 degrees for an hour:
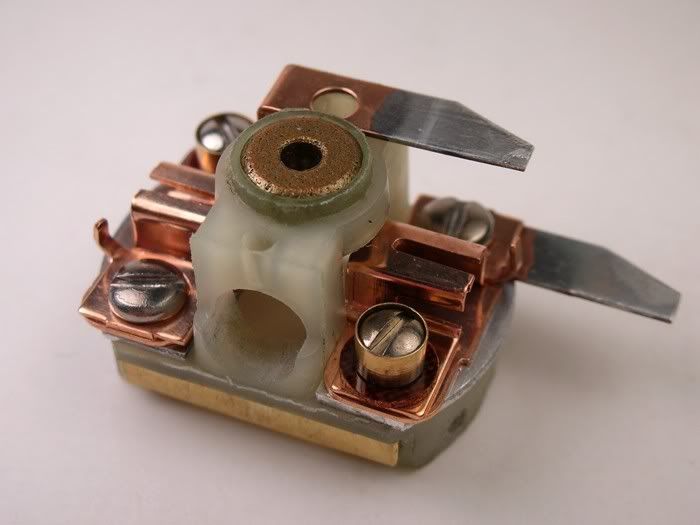
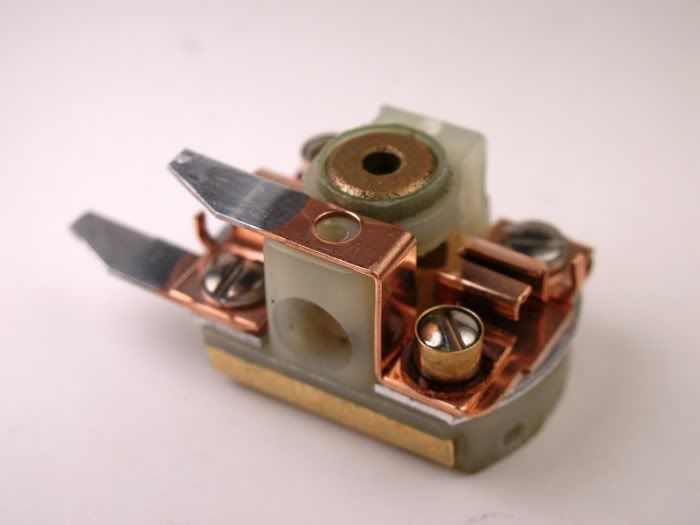
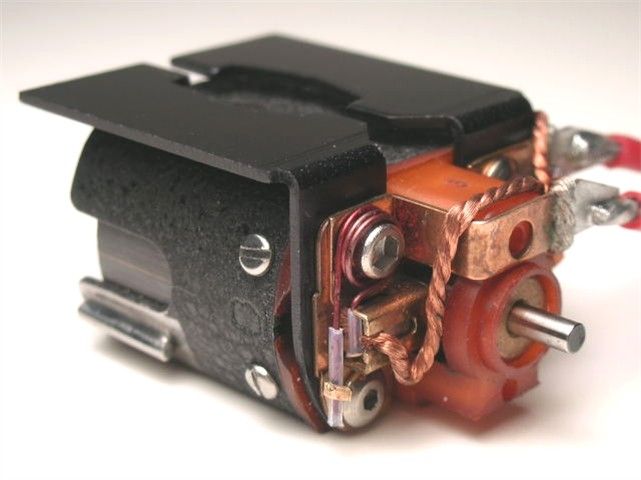
The Mura endbell is an early version that requires brass shims to center it in the can. The shims were Zap-glued to the endbell. A cooling or inspection hole has been milled into the top and bottom of the end bell. The brush hoods are notched for shunt wires. All the screws are machine screws instead of self-tapping. The spring posts have a fiber washer to insulate the brush spring from the current. Here are all the parts modified and ready to assemble:
The finished endbell:
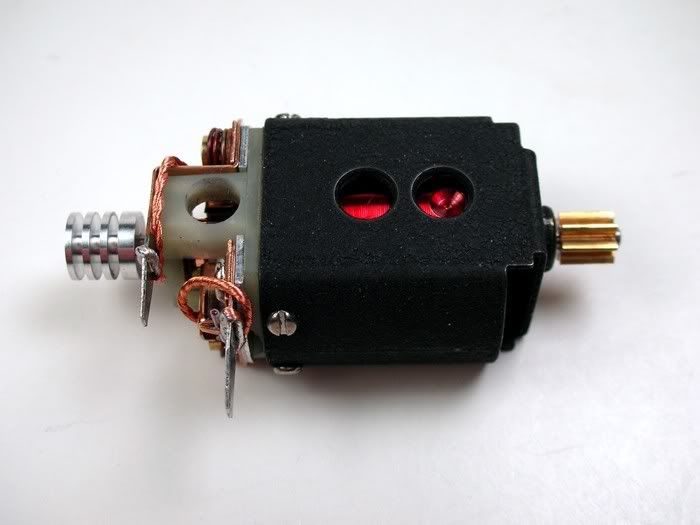
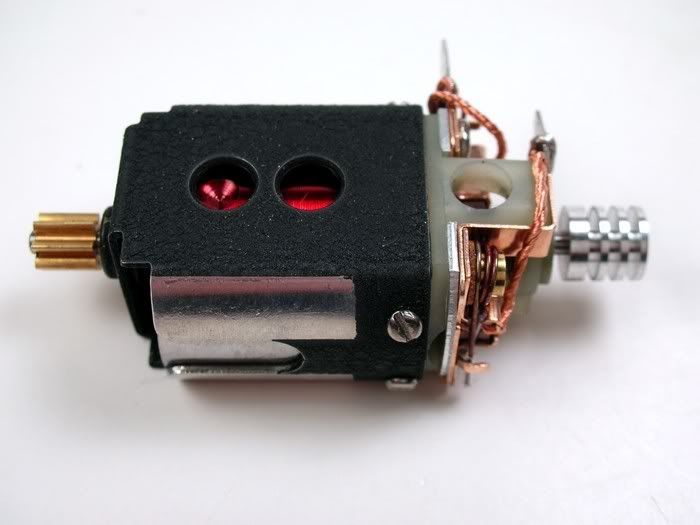
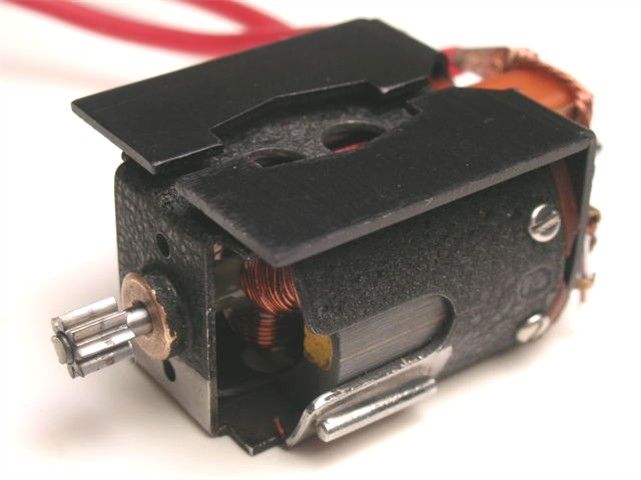
The motor was assembled with modern Champion light brush springs and my clear Teflon insulation. I broke it in on a Koford power supply using their GP7 recommendation of 1.2V, 2V, and 3V for 10 minutes each. It now draws 2.2 amps at 3 volts:
The finishing touch is my cloned comm cooler. I don't care if these things work or not, they just look, well COOL:
Final assembly is getting close...


I have some extra "comm cooler" like the one pictures if you'd like to use one.
Rick
- C. J. Bupgoo likes this
Rick Thigpen
Check out Steve Okeefe's great web site at its new home here at Slotblog:
The Independent Scratchbuilder
There's much more to come...
#28
dc-65x
-
- Subscriber
-
- 6,821 posts Joined: 14-February 06
Grand Champion Poster
- Gender:Male
- Location:Captain Rick: The only vintage slot car nut in SW Oregon?
Posted 11 March 2015 - 03:07 PM
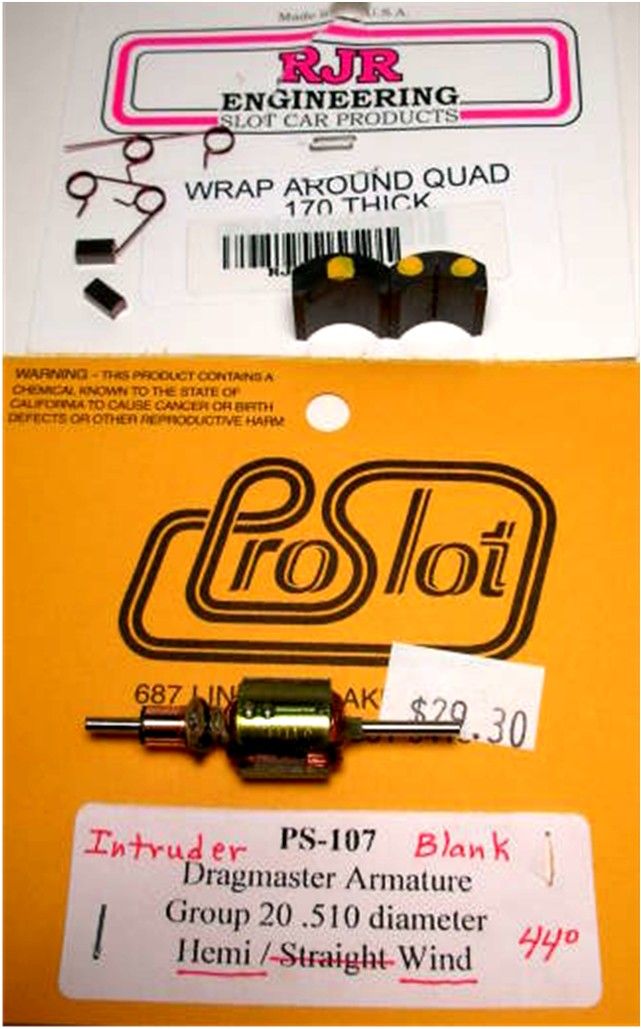
Here is a motor done with more modern arm, magnets, brushes and springs:
I've been messing with the old pro cars for awhile now and they are a blast. The old S24 and D26/27 arms in a C-can motor are quite a thrill but really, well, touchy as far as reliability.
Our raceway owner Eddie and my buddy Rodney came up with what we call the "Eddie 20" a number of years ago. Here is an example:
So it's a modern arm, magnets, brushes and springs in a vintage Mura C-can setup:
I run this motor in my replica TonyP Starship:
It's not quite as fast as an S24 but darn close and you can hammer it and hammer it and it doesn't blow up. It just "takes a lick'n and keeps on tick'n".
Just a thought......

- C. J. Bupgoo likes this
Rick Thigpen
Check out Steve Okeefe's great web site at its new home here at Slotblog:
The Independent Scratchbuilder
There's much more to come...
#29
Mbloes
-

- Subscriber
-
- 626 posts Joined: 19-April 12
Race Leader
- Gender:Male
- Location:Los Angeles, CA
Posted 11 March 2015 - 03:09 PM
Great building tips but I think PdL posted once that "they" never glued magnets in back in the day. If you are just building something that looks cool I'm sure you could just mount the magnets in with the clips and it would still work fine.
Mike Bloes
#30
dc-65x
-
- Subscriber
-
- 6,821 posts Joined: 14-February 06
Grand Champion Poster
- Gender:Male
- Location:Captain Rick: The only vintage slot car nut in SW Oregon?
Posted 11 March 2015 - 03:12 PM
It varied by the builder Mike. I seen 70's motors with the magnets glued in.....mostly Eastern examples in my limited exposure.
Rick Thigpen
Check out Steve Okeefe's great web site at its new home here at Slotblog:
The Independent Scratchbuilder
There's much more to come...
#31
Mbloes
-
- Subscriber
-
- 626 posts Joined: 19-April 12
Race Leader
- Gender:Male
- Location:Los Angeles, CA
Posted 11 March 2015 - 03:24 PM
Yeah I've got some 70's builds with everything glued up.
I just got the impression that MD's build was more of a casual deal and I was just letting him know that his armature would still turn if he just used clips to hold everything together.
Mike Bloes
#32
dc-65x
-
- Subscriber
-
- 6,821 posts Joined: 14-February 06
Grand Champion Poster
- Gender:Male
- Location:Captain Rick: The only vintage slot car nut in SW Oregon?
Posted 11 March 2015 - 03:28 PM
Got it Mike.  Maybe just a drop of Super Glue to keep them from shifting.....
Rick Thigpen
Check out Steve Okeefe's great web site at its new home here at Slotblog:
The Independent Scratchbuilder
There's much more to come...
#33
mdiv
-
- Full Member
-
- 2,359 posts Joined: 13-December 06
Posting Leader
- Gender:Male
- Location:Wall, NJ, USA
Posted 11 March 2015 - 05:20 PM
Hey guys!
Sorry it took me so long to respond...running 100mph at work can't even try to reply to anything on my phone.
Thank you Pablo for the popcorn lol! *sticks his hand in the bag..* I passed out early last night so couldn't respond...working on period hoods but I'm not sure where we're at yet. No due date on this project, it's a motor build and eventually try to put it in a period-chassis. We'll see.
Capt'n Rick thank you for all the links and pictures! These will definitely help and give inspiration at the least. I would love a comm cooler if you have extra.
John that is some good information. I knind of figured these were more modern than 72-75 but we'll play. Friday Night / Saturday looks like a good opportunity to do some test fittings.
Mike B thanks for the input - I will see how clips work and maybe some Krazy Glue. I'm interested in seeing if the death star clips will work, somehow they were shy and missed the photographer last night...
I have one question about this Can - I forgot to buy one last night but better I ask now and find out. Jerry and Jackie have D can and C can can straightening tools. They have a 2mm+/- hole going through for bushing alignment with a 2mm axle. They also have something very similar for bearing installment that has the body of a straightener but is missing the grip and is only half the size. I'm just wondering what I should pick up. They have em in both versions and are about $12.00 each. I believe the D can straightener is what I need but I just want a verify. I have the koford hood alignment tool (with 2mm axle) kit.
Now they also have a magnet setting tool that looks very interesting, I didn't see the price tag on it but....hrm...where's the smiley with the guy shrugging lol...  eh unsure will do for that!
I've read the "building race-winning C cans" article a few times over the years and I don't have all those tools, wouldn't mind picking up a few. I've got a couple hones and slugs for when I tried my hand at I-15. But...too much typing for now...must press post button...
Thank you all guys I love that you are all interested in my project to give me advice and even parts!!!
Mikey
Mike DiVuolo
C.A.R.S. Vintage Slot Car Club
"Prosecutors will be violated"
#34
SlotStox#53
-

- Full Member
-
- 4,084 posts Joined: 13-March 13
Posting Leader
- Gender:Male
- Location:TX
Posted 11 March 2015 - 07:55 PM
Always a sucker for a build containing a fast potent mill
Even though I only messed around with older Mura parts a good while back I didn't know anything about air gaps, slugs and all that kewl stuff ..just threw in an arm and if it worked got thrashed round our old wooden routed track .
Since joining the Blog and reading many a cool hot motor build I'm now ready to get serious So collect parts and build on Mikey I will be along for the ride.
On a side note I can't help but keep looking at that TonyP Starship chassis you did Rick! What a beauty
Even though I only messed around with older Mura parts a good while back I didn't know anything about air gaps, slugs and all that kewl stuff ..just threw in an arm and if it worked got thrashed round our old wooden routed track .
Since joining the Blog and reading many a cool hot motor build I'm now ready to get serious
So collect parts and build on Mikey I will be along for the ride.On a side note I can't help but keep looking at that TonyP Starship chassis you did Rick! What a beauty
#35
Bill from NH
-

- Full Member
-
- 14,314 posts Joined: 02-August 07
Age scrubs away speed!
- Gender:Male
- Location:New Boston, NH
Posted 11 March 2015 - 10:37 PM
Great building tips but I think PdL posted once that "they" never glued magnets in back in the day. If you are just building something that looks cool I'm sure you could just mount the magnets in with the clips and it would still work fine.
Mike, I was building race motors during the 70's & 80's. I always glued my magnets in & I didn't use CA glue either. <G> I usually used clear Devcon epoxy. 
Bill Fernald
I intend to live forever! So far, so good.
I intend to live forever! So far, so good.
#36
Gator Bob
-

- Banned
-
- 13,391 posts Joined: 12-April 11
Grand Champion Poster
- Gender:Not Telling
- Location:.
Posted 11 March 2015 - 10:46 PM
TonyP Starship chassis
That car ain't no 'side note'
In a conversation with Tony ... "that Starship is the coolest and my favorest slot car formally on the planet".

Bob Israelite
#37
Bill from NH
-
- Full Member
-
- 14,314 posts Joined: 02-August 07
Age scrubs away speed!
- Gender:Male
- Location:New Boston, NH
Posted 11 March 2015 - 11:08 PM
Mikey, for the Green can, you want C-can tools rather than D-can tools. The later are for working on 16D & S16D motors. If the can straighteners are steel (They should be.) I'd get one of them. None of my can straighteners have the 2mm shaft hole for bearing centering like you describe. But it sounds like those straighteners will do two jobs, can straightening & bearing centering. If they're accurately made, you're in luck. Because my can straighteners won't do the dual functions, I use a separate aluminium block that fits inside a straightened can with a centered 2mm drill blank shaft for bearing centering. My can straighteners are by JDS, a drag racing company. I forget you made my bearing centering tool, but I had to remachine it in order to make it fit.
I don't know what that magnet setting tool is. I'd have to know how it's used & see a photo before I could say if it's useful or not. RGEO used to make some such tool.
Bill Fernald
I intend to live forever! So far, so good.
I intend to live forever! So far, so good.
#38
havlicek
-

- Subscriber
-
- 11,198 posts Joined: 20-August 07
OCD Rewinder
- Gender:Male
- Location:NY
Posted 12 March 2015 - 08:24 AM
John that is some good information. I knind of figured these were more modern than 72-75 but we'll play. Friday Night / Saturday looks like a good opportunity to do some test fittings.
Absolutely! By my way of thinking, there's no reason to get caught up in details like that unless there's some specific reason to keep the motor to original spec. The only functional consideration is that the shorter magnets are optimized for an arm shorter than .500" (not that they wouldn't probably work just fine). There IS a benefit though, it wasn't unusual for builders to need to notch the tail end of the magnet closest to the rear axle in an anglewinder, as the can notch wasn't enough for clearance with angles less than 11 degrees or so....even with a clearance cut to the rear axle tube. The shorter magnets can make that unecessary. Anywho, carry on and enjoy building and running such an iconic motor!
-john
John Havlicek
#39
Mbloes
-
- Subscriber
-
- 626 posts Joined: 19-April 12
Race Leader
- Gender:Male
- Location:Los Angeles, CA
Posted 12 March 2015 - 02:08 PM
Mike, I was building race motors during the 70's & 80's. I always glued my magnets in & I didn't use CA glue either. <G> I usually used clear Devcon epoxy.
I think "back in the day" for PdL was 67 - 73.
But I understand totally.
When MD asked about magnet clips, I got the impression that he just wanted to kind of "bolt together" a motor - no alignment tools, no blueprinting, no gluing, no honing (maybe he can chime in).
My point is that he can build a nice Mura C can motor by just clipping in the magnets and inserting the arm and it will probably still run great.
I just didn't want him to get discouraged by thinking he needs to do a bunch of detailed work just to get a motor running.
- Gator Bob likes this
Mike Bloes
#40
proptop
-

- Full Member
-
- 469 posts Joined: 17-February 06
On The Lead Lap
- Gender:Male
- Location:Upstate NY
Posted 12 March 2015 - 02:54 PM
FWIW I've found that most of those early 2 hole Mura C cans are pretty straight as is.
If you don't want to throw a whole lotta $ at it, I would get the bearing / bushing alignment fixture rather than a can straightner.
Most of the newer Mura mags I've measured are .500 to .515 give or take a few thou. and work great with anything from short stack S. Wasp, and X-12 up to 15 and G20 length stacks.
I used to put the mags in, using the stock U shaped wire retaining spring clips, slide the mags back and forth until I got the arm floating in a good position and the brushes riding on the meaty area of the comm. A couple drops of super glue holds the mags in place.
Then after the glue hardens, I would wrap a layer or two of Aluminum foil duct tape around an old dead arm (stack) until it fit snugly into the set-up.
I put the can bushing on the old arm shaft, and push it into the set-up, and then after installing the endbell, this would get me to the point where the can bushing is aligned and can be soldered in place.
The only "special tool" I had back then (early 90's) was a brush hood alignment bar w/ 2mm shaft hole in it)
Tom Hemmes
Insert witty phrase here...
#41
mdiv
-
- Full Member
-
- 2,359 posts Joined: 13-December 06
Posting Leader
- Gender:Male
- Location:Wall, NJ, USA
Posted 12 March 2015 - 07:03 PM
All:
Thank you for the great information! I really appreciate it.
I'll snag a pic of the magnet setting tool soon.
The intent of this build was to just bolt her together but that was when I thought the can came with magnets installed. I see myself installing the magnets with clips and super glue. Perhaps using some relatively inexpensive tools will do the trick....I really do want to stay away from honing - I have one for .500 and have access to one at .522, but on the I15 motor that was built I didn't do the honing. I did clean up the magnet swarf which was...not enjoyable. Fun tack seems to have gone the way of the Dodo bird. 
I don't know if I need shims. At one point I had a can in a can shim that I got from Mid America when Roger had lots of parts several years ago but I think Paul English has it now LOL! Paul did you ever build up that motor? I think we did our back and forth 1.5-2 years ago LOL! It's in good hands nonetheless...
I guess to answer some questions on people's minds, the end result car will just be a play car, not raced and not competitive...I've been doing slots again as an adult for 10 years now (!!!!!) and after all is said and done, I enjoy building and then trying to get a hot lap. Jerry quipped to me once that he loves seeing people coming into his store to play. I like to play.... Alright Mikey enough existentialism, now go get your Mic and give the guys the OD of the Rocket Arm stack!!!
Coming soon{TM}!
Mikey!
Mike DiVuolo
C.A.R.S. Vintage Slot Car Club
"Prosecutors will be violated"
#42
Bill from NH
-
- Full Member
-
- 14,314 posts Joined: 02-August 07
Age scrubs away speed!
- Gender:Male
- Location:New Boston, NH
Posted 12 March 2015 - 08:01 PM
A couple tips on dealing with magnet swarf:
1.) Hone under running water. Clean with magnet putty. I think poster putty found in the stationary department of a Target or Walmart is the same stuff.
2.) In the old days, I coated my sanded magnets with tire goop. The goop collected most of the magnet dust when I wiped then down with a rag dipped in lighter fluid.
The can-in-a-can shim you mentioned was for putting Versatec magnets in an A-can (16D size).It wouldn't fit a C-can.
I'll be surprised if your Rocket arm isn't .510" OD.
Bill Fernald
I intend to live forever! So far, so good.
I intend to live forever! So far, so good.
#43
Pablo
-

- Administrator
-
- 18,363 posts Joined: 20-February 06
Builder
- Gender:Male
- Location:Cleveland, Tennessee
Posted 12 March 2015 - 08:14 PM
All good info, Mikey, I am totally onboard with what Mbloes and proptop are saying.
Goes without saying the Bill info is spot on also.
Your goal is to have it run and that's all any of us can ask for in a vintage motor.
If it handles decent, is geared well, brakes well, and scoots down the straightaway, you are good to go no matter how you get there.
Hopefully after about 5 laps it will feel warm but not smoking hot, then you have nirvana. 
Paul Wolcott
#44
mdiv
-
- Full Member
-
- 2,359 posts Joined: 13-December 06
Posting Leader
- Gender:Male
- Location:Wall, NJ, USA
Posted 12 March 2015 - 09:21 PM
Thanks Bill and Pablo!
I got rid of the swarf with poster putty I found at Staples. It was slow going so I said screw it and ran under water and just bulldozed through it with an exacto and a metric guano ton of paper towels lol.
Nirvana. Well the slot cars, they're contagious, here we are now, please race us!
Bought the magnets setting shims, they were just under $12.00. Pic in a minute
Mike DiVuolo
C.A.R.S. Vintage Slot Car Club
"Prosecutors will be violated"
#45
mdiv
-
- Full Member
-
- 2,359 posts Joined: 13-December 06
Posting Leader
- Gender:Male
- Location:Wall, NJ, USA
Posted 12 March 2015 - 09:24 PM
Here they is:
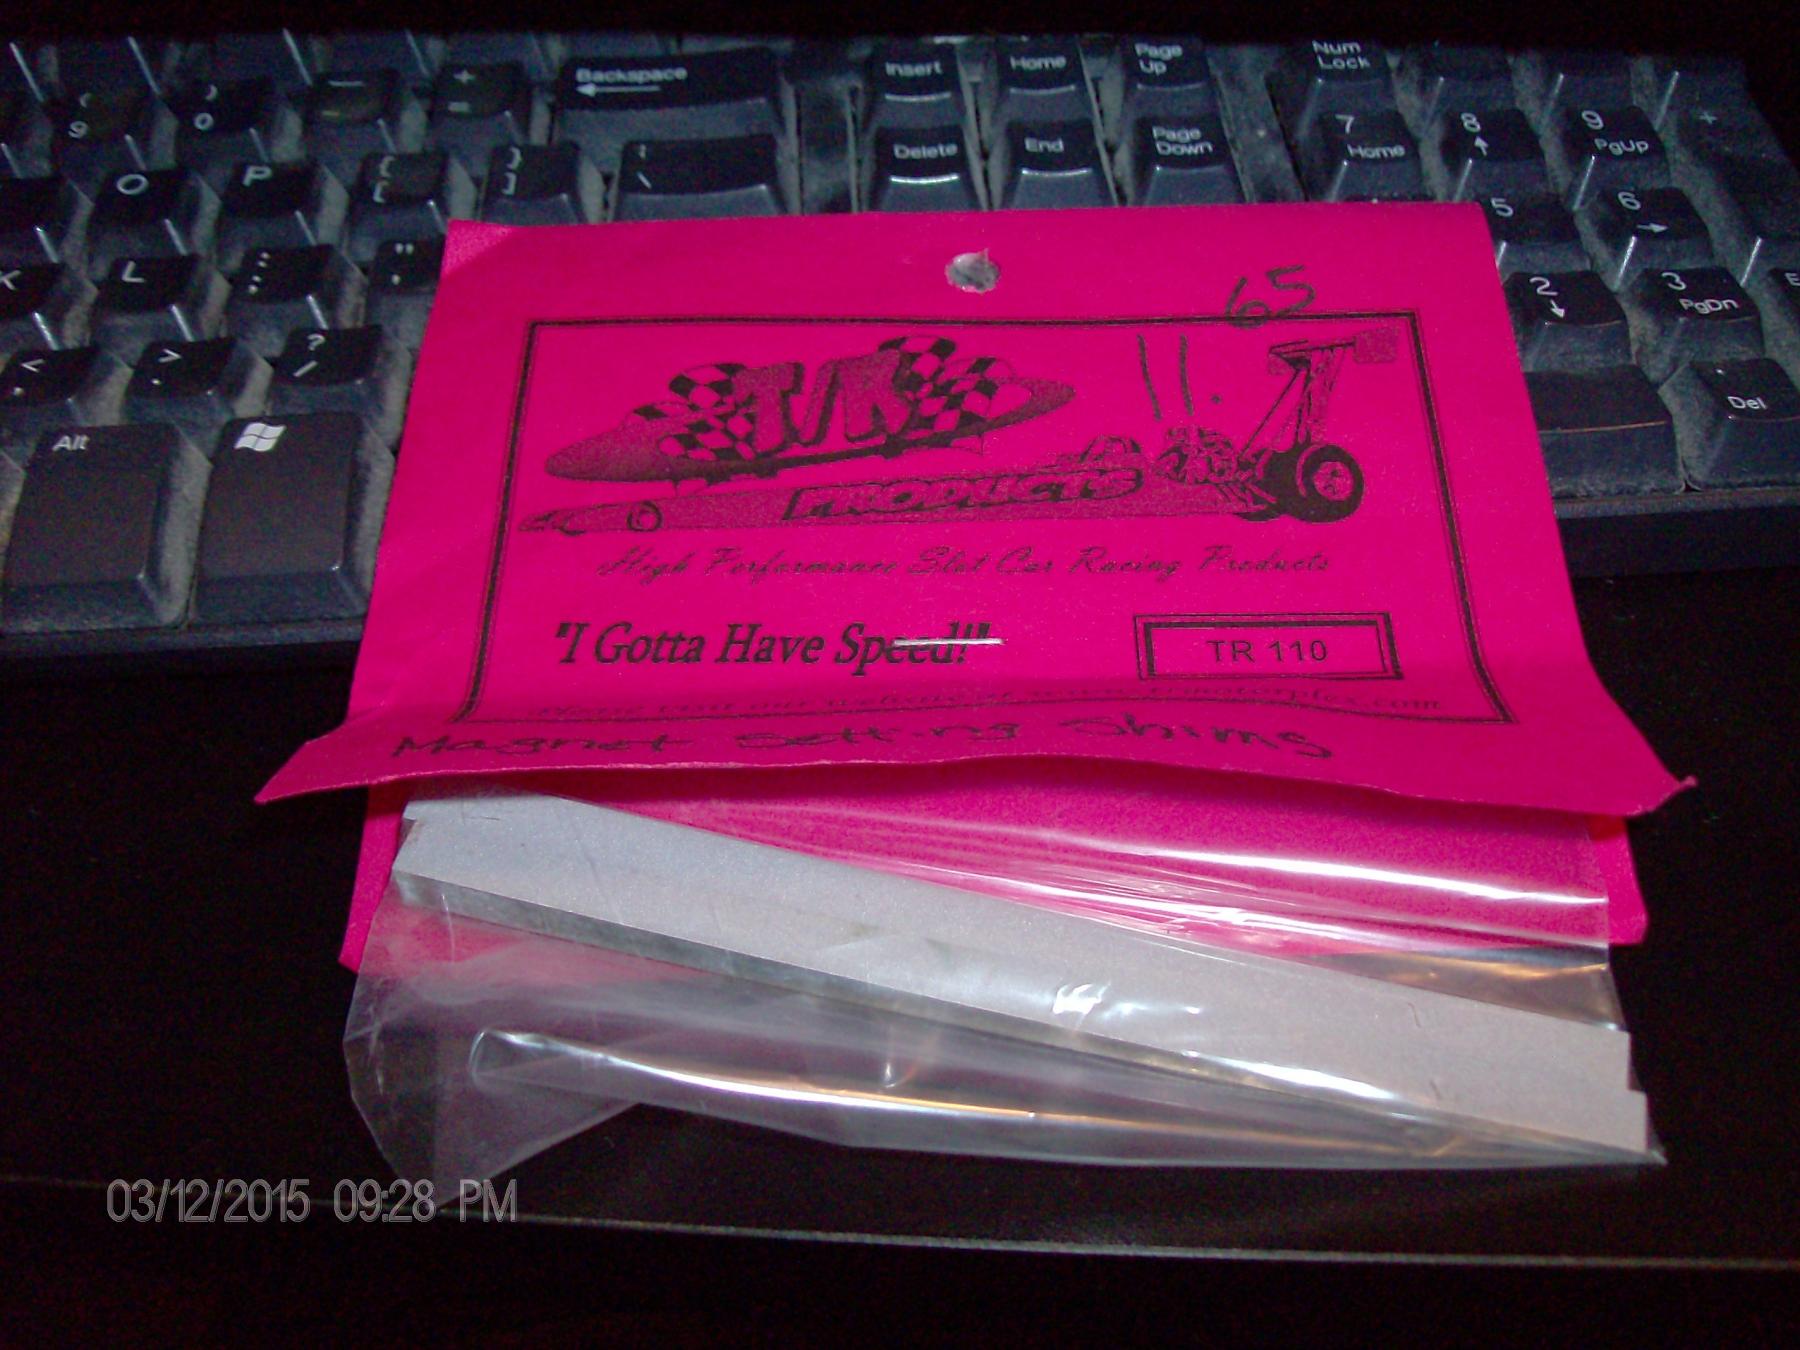
Jerry explained how they work...need a little more guidance but I got the gist of it.
~ Mikey
Mike DiVuolo
C.A.R.S. Vintage Slot Car Club
"Prosecutors will be violated"
#46
Pablo
-
- Administrator
-
- 18,363 posts Joined: 20-February 06
Builder
- Gender:Male
- Location:Cleveland, Tennessee
Posted 12 March 2015 - 09:43 PM
Go, Mikey Pre-curved magnet shims are available if you need them.
You got a lot of friends out here in cyberspace 
Paul Wolcott
#47
havlicek
-
- Subscriber
-
- 11,198 posts Joined: 20-August 07
OCD Rewinder
- Gender:Male
- Location:NY
Posted 13 March 2015 - 06:49 AM
FWIW I've found that most of those early 2 hole Mura C cans are pretty straight as is.
Yes, for most all of them, straightening is not necessary or worth the time. At this point, some of the really badly mangled ones are getting repurposed where they would have been tossed before, but otherwise it seems that getting the can bushing aligned and then set is all that's really needed. Speaking of that, lately I've been epoxying them in instead of soldering them. None of the issue with boiling out the oil and then having to recharge them.
The clips alone with some super glue (a drop or two on each magnet) is probably fine again as Tom says unless the car is in a pretty good crash.
Magnet tapers/parrallels or "setting shims" work great on cans where the edges of the magnets are close to the can cutouts and the cutouts are open. I'm not sure how they would be useful on a Green can with only the two small round holes. You could rig something to use them front-to-back (like having a machinist slice a slug into two pieces) instead of top-to-bottom.
If you're epoxying the magnets in, JB Weld works really well and won't run all over the place. I like to think that the steel powder used as filler is a good thing (the stuff is magnetic and you can actually see it attracted to the magnets if they're strong), but it probably doesn't matter. Clean the magnets' back arcs and the inside of the can sides...maybe even scuff the can interior up a little to give it better "tooth", and you'll get a very strong bond.
***Of course, using the clips and super glue is MUCH easier to be sure where the magnets need to be for centering the arm, because you can just slide the magnets around and "zap" them in place when correct. When epoxying magnets in, you need to work out a way to register their location. So you can use the clips to hold them temporarily while fiddling with them and the arm. After the epoxy is set, they can stay or not. When building the motor, I like to build the can/magnet assembly first and then trim the com and tail spacer to fit before winding. You can trim the tail spacer a bit, using an off-the-shelf arm if necessary using one of those carbide end mills with a 2mm hole things. Mr Go Fast sells them for a good price and it's probably a lifetime tool, but for one arm it's not a necessary thing.
***Another good way to get rid of magnet dust after honing is regular old Plumber's Putty. You roll it around in your hands to soften it and form it into a ball and then have at it. It's a nasty/dirty/time-consuming job no matter what you use, but you just keep at it until the putty comes out clean. The good thing is that you can get to the rear end of the can with the Green Can, unlike closed cans. Those kinds of cans take longer.
-john
John Havlicek
#48
Mark Johnson
-

- Full Member
-
- 499 posts Joined: 27-March 08
On The Lead Lap
- Gender:Male
- Location:Minneapolis
Posted 13 March 2015 - 08:37 PM
Compressed air is the ticket for magnet swarf .
#49
mdiv
-
- Full Member
-
- 2,359 posts Joined: 13-December 06
Posting Leader
- Gender:Male
- Location:Wall, NJ, USA
Posted 14 March 2015 - 12:01 PM
Good tip Mark. Was a lot of swarf. Went from .495 to .522
John your post is a great read.
John your post is a great read.
Mike DiVuolo
C.A.R.S. Vintage Slot Car Club
"Prosecutors will be violated"
#50
Bill from NH
-
- Full Member
-
- 14,314 posts Joined: 02-August 07
Age scrubs away speed!
- Gender:Male
- Location:New Boston, NH
Posted 14 March 2015 - 01:02 PM
Mikey, what's the Rocket arm's OD? It will determine whether your .522 hole is big enough or not.
JB Weld is a very good glue & it was once the "magnet glue of choice" before the Koford Black Epoxy & Skinner's Epoxy came on the market. Both withstand higher temperatures than the JB Weld. Hopefully, heat won't be an issue with this motor.
Bill Fernald
I intend to live forever! So far, so good.
I intend to live forever! So far, so good.


