Jump to content


Photo

The venerable Mabuchi 16D, in "Vintage-style"


  • Please log in to reply
36 replies to this topic

#1 havlicek

havlicek

    OCD Rewinder

  • Subscriber
  • PipPipPipPipPipPipPipPip
  • 11,198 posts
  • Joined: 20-August 07
  • Gender:Male
  • Location:NY

Posted 16 December 2016 - 08:41 AM

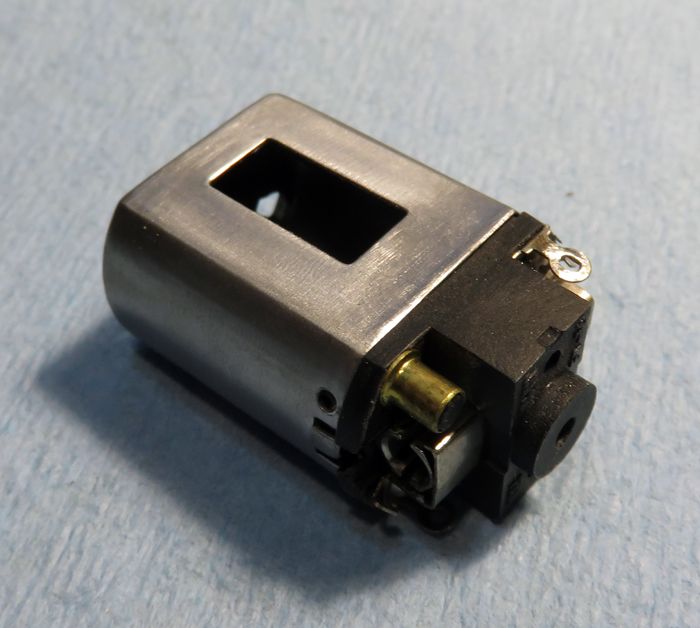
I've built a boatload of these things over the years, and documented the builds for better or for worse ;) right here. The Mabuchi can is still an excellent choice for a D motor build, even when it's not going to be 100% "correct." It's very lightweight (the can metal is much thinner than the modern D motor can metal), it's plenty strong (the old cans were formed from a single/seamless piece of metal), well-formed with pretty straight/true sides and ends, and makes for a good/strong magnetic field.  


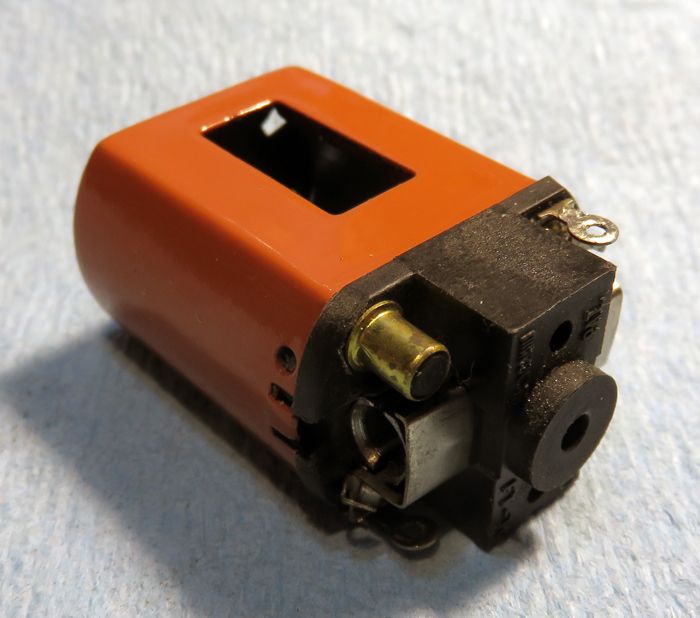
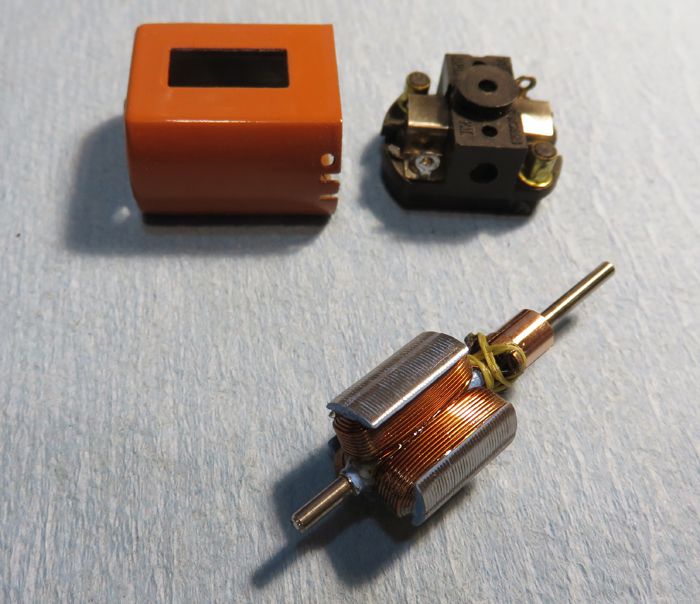
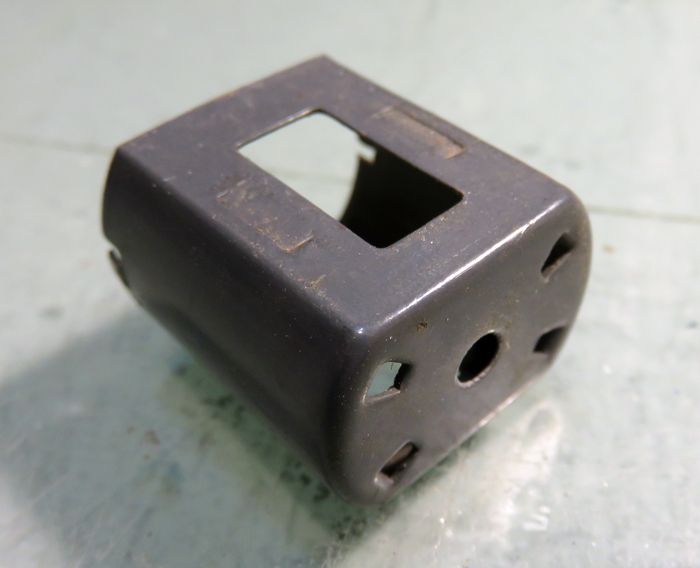
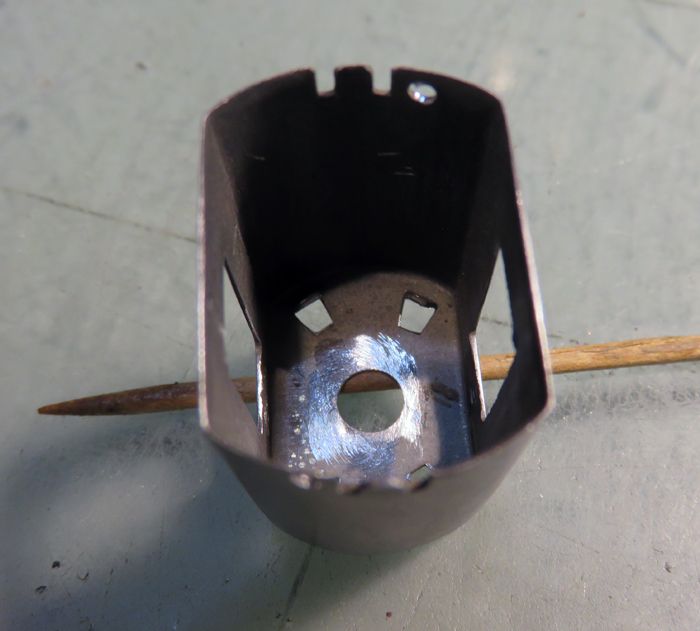
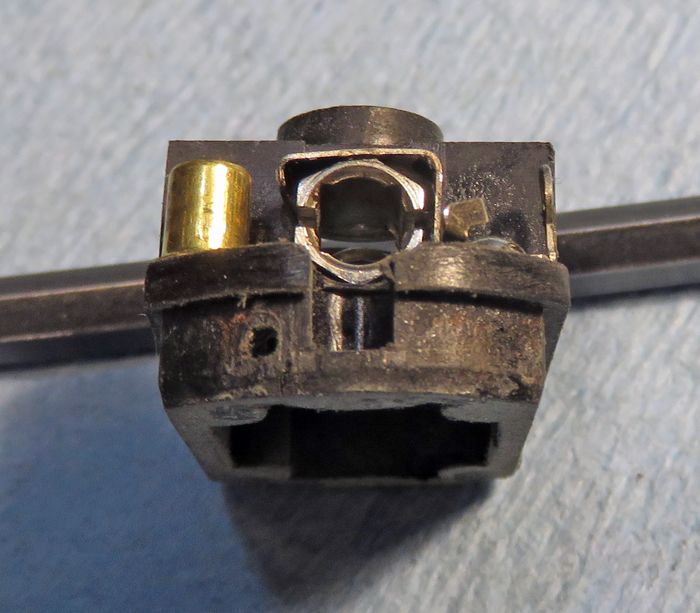
The endbells were made from garbage plastic, and there's no way of knowing that *even* a #29 wind won't result in it melting and all the nasty biz that entails. To make matters even worse, these were all endbell drive, and this one doesn't even have the "heat sinks" (Russkit 22 type). It's like they said to themselves... how can we make a toy motor not designed for anything but a really cheap/slow.. .er... "toy"! Of course, Mabuchi couldn't care less about what the tiny slot car community wanted, and what they wanted was to go faster than the guy in the next lane.

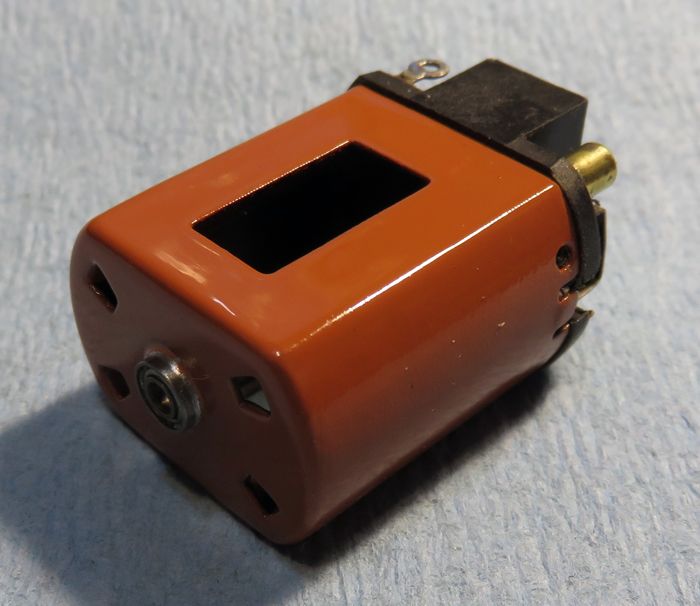
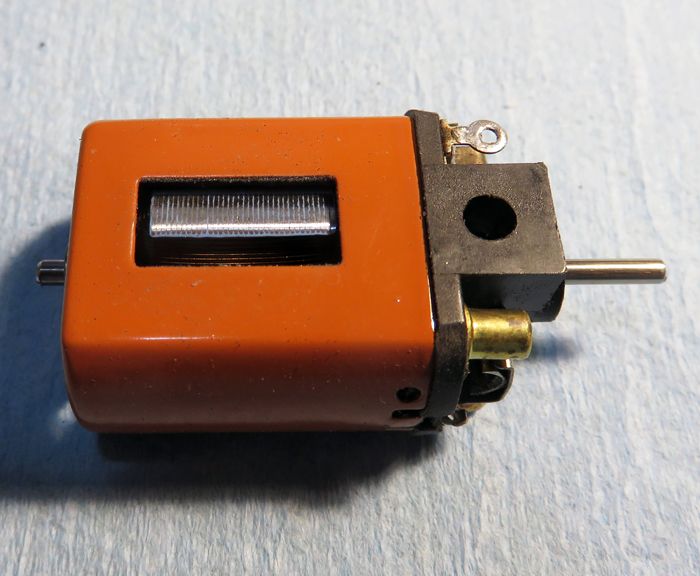
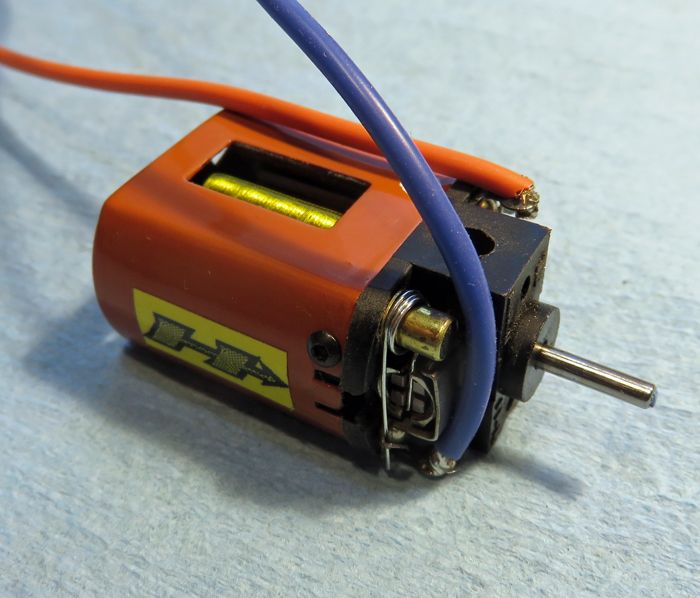
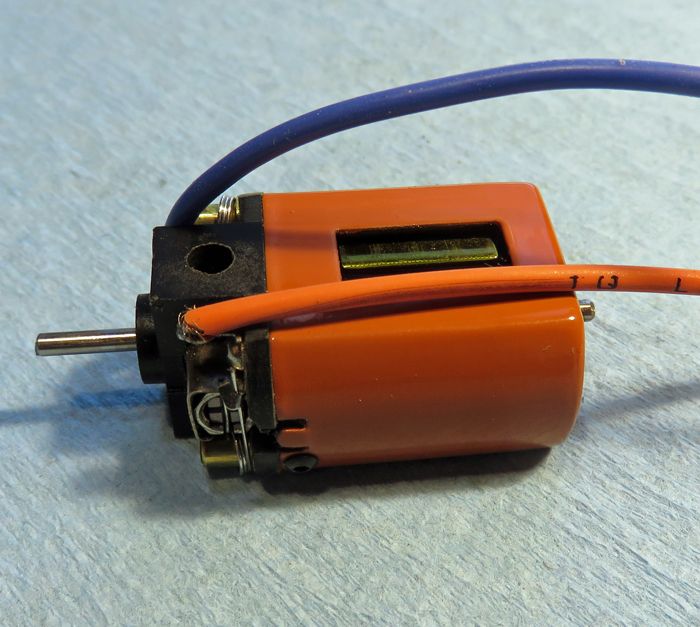
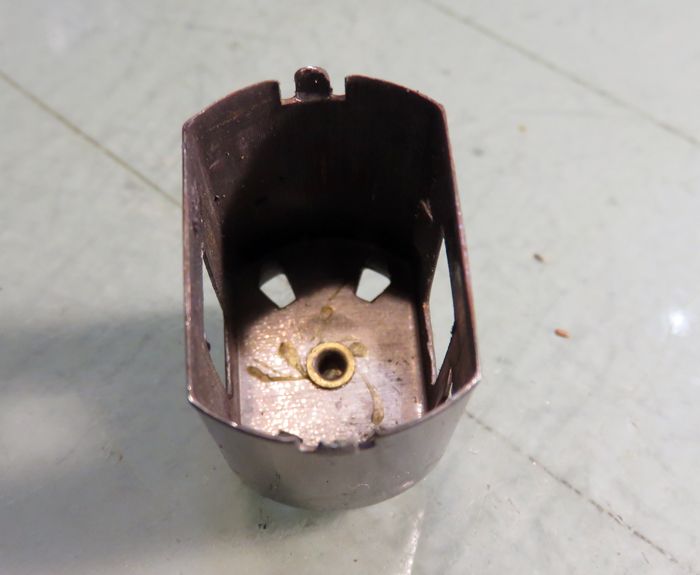
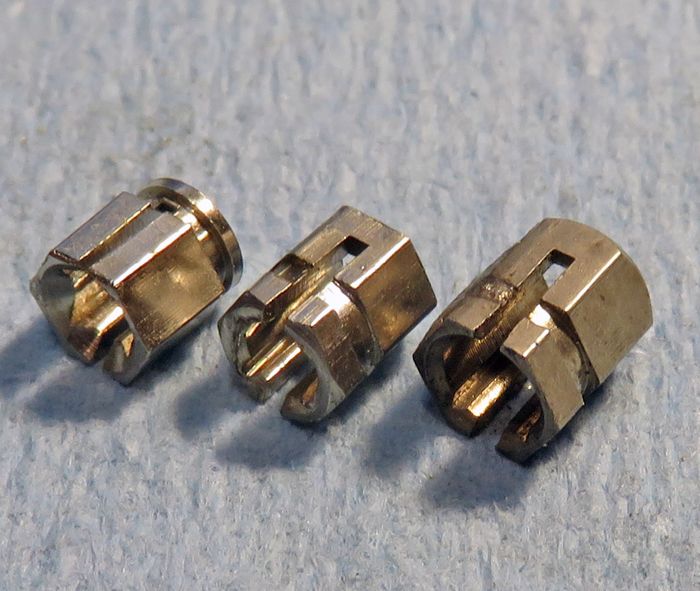
Back on the can, these ones (Russkit 22/23 type) had one big problem that could easily be fixed, that being the blind bushing. First, the bushing itself was not a good/tight fit to the shaft. Result... slop. Second, the armature didn't end-space properly. Without being very careful about setting the magnets, the arm was bound to be too far north or south, and with these things being churned out, being "very careful" with assembly wasn't what they were all about.  


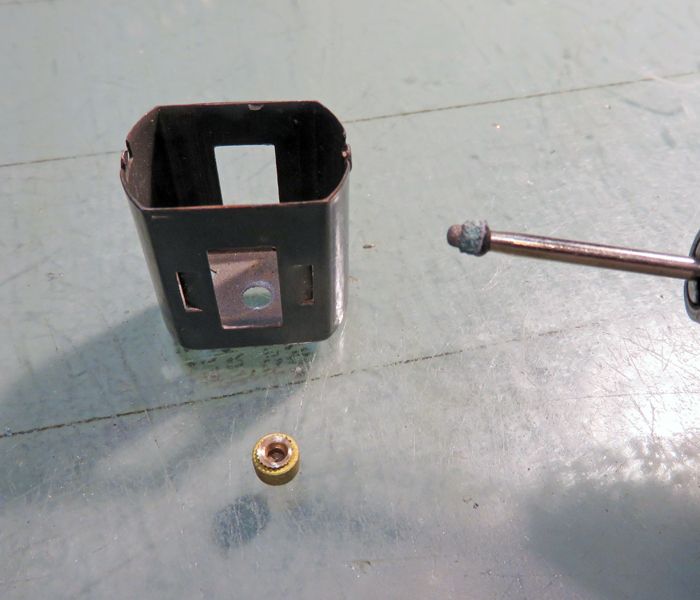
The later rotating bushing with the humongous brass bushing carrier was something of an improvement, but those had their issues as well.  Now, if you had an extra endbell with a new/unworn bushing, you could remove the blind bushing and install one of those. Today, having a clean NOS endbell is becoming pretty rare, wasting an entire endbell for the bushing seems like a painfully bad idea, but there are better options that are "in the spirit" of the time.  


For building the rest of the motor... armature, magnets, end bell etc., there are lots of other options, too. A lot of these options are "in the spirit" as well, and the resulting motor may not be 100% correct for the period, but pretty close. Steve Okeefe recently started exploring this whole "build-ethic," and I like the concept (duh!). You can do these sorts of builds with less frustration locating perfect/clean parts and avoid some of the limitations of the motor's weak areas.

The subject here leans a little further towards the "vintage" end of the "vintage style" spectrum, but it will get lots of vintage style touches. Superficially, it may look more "vintage," but it's definitely not going to be 100% correct.


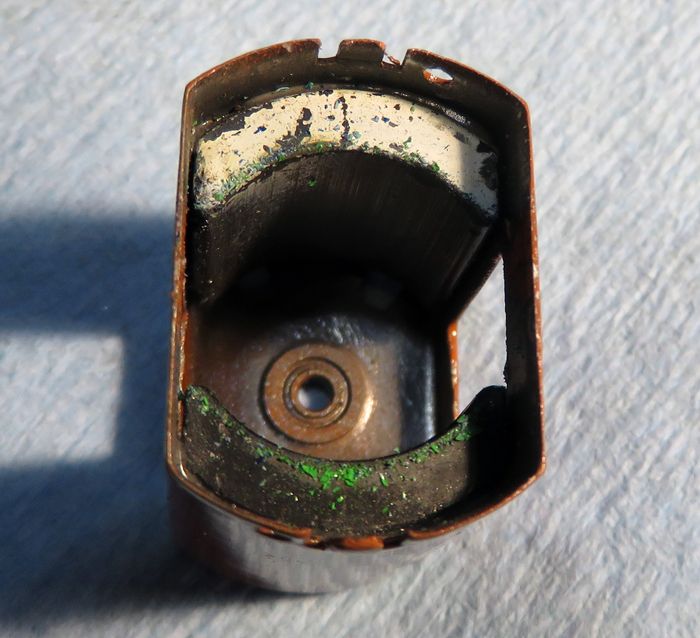
Here, it's one of the older type Mabuchis without the metal "brush tubes" or "heat sinks" as they were euphemistically called. It's a very clean example, but even here, the endbell is (of course!) still cracked right around the bushing. No matter... it will get tossed, it must get tossed!

IMG_1861_zpsxgnsaxwq.jpg
 
-john


  • olescratch and Geary Carrier like this
John Havlicek


#2 zipper

zipper

    Checkered Flag in Hand

  • Full Member
  • PipPipPipPipPipPip
  • 1,049 posts
  • Joined: 11-August 10
  • Gender:Male
  • Location:Finland

Posted 16 December 2016 - 10:19 AM

I remember how "happy" I was when having bought a couple of Revell cars they were equipped with these - and totally rusted laminations. Probably weeks on sea.


  • havlicek likes this
Pekka Sippola

#3 SlotStox#53

SlotStox#53

    Posting Leader

  • Full Member
  • PipPipPipPipPipPipPip
  • 4,084 posts
  • Joined: 13-March 13
  • Gender:Male
  • Location:TX

Posted 16 December 2016 - 11:01 AM

Hate in when the original endbell cracks right below the motor lead solder tab.  :(

Look forward to seeing another vintage style 16D, which direction you take this one and what goodies you choose for it.  :D


  • havlicek and olescratch like this

#4 havlicek

havlicek

    OCD Rewinder

  • Subscriber
  • PipPipPipPipPipPipPipPip
  • 11,198 posts
  • Joined: 20-August 07
  • Gender:Male
  • Location:NY

Posted 16 December 2016 - 05:33 PM

Okey-dokey then. A lot of this will be a rehash for anyone who's done this, or seen me do this, but here we go with my favorite Mabuchi.

First off, I do all the can work before stripping the paint. That way, when I remove the paint, I'm also removing any burrs or scratches I might have made. I also avoid screwing up a new paint job, and this one will get new paint. First thing here is to get rid of that can bushing. Looking inside the can, you can see that the bushing is retained by a rolled flange and is installed at the factory from the outside. We need to get rid of that flange, and the bushing will pop right out.

IMG_1862_zps2o6xxc8m.jpg
 
To avoid damaging the can metal as much as possible and still not have this all turn into microsurgery, when it really doesn't need to, any grinding point with a convex surface will sort of "want" to stay centered on the bushing while removing the flange. I had an old worn one that just happened to fit the bushing shaft-hole and still had enough diameter to remove the flange. The soft metal of the bushing makes this an easy job, and once the flange is gone, or even just very thing, you can pop out the bushing by grabbing it with a pair of pliers.

IMG_1863_zps6tquvj87.jpg
 
Next up, I flatten the magnet retainer tabs... onacounta they'll be in the way with the new magnets specified. If you can't manage to get them flat enough, you can always get inside the can with a small grinding point and remove any metal that may get in the way.  ere, they went down nice and flat so none of that will be necessary (I modified a set of needle nose Vise-Grips to do this).

IMG_1864_zpskon9klfq.jpg
 
Of course, the can gets drilled for end bell mounting screws. The tabs aren't at all reliable once undone, and besides, screws make the motor serviceable for multiple openings and closings. I keep the holes closer to the tabs than I used to, because the screws could interfere with some chassis rails in an inline configuration.

IMG_1865_zps6ysoq9sa.jpg
 
Last, I reamed out the old bushing hole with a tapered hand ream for the new 5mm bushing or bearing. You don't have much opening-up to do here, and with the can metal being mild steel, this doesn't take long. You do need to keep checking for fit, and go slow when you get close so the bushing or bearing is a nice snug fit with no "slop."  If you go too far, you can always open it up further for a 6mm bushing or bearing. :) 
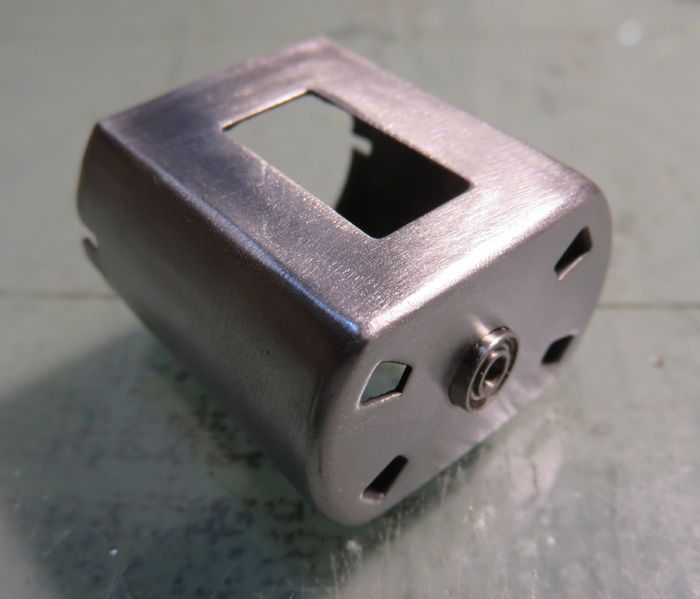
After all that, the can can get stripped. I use a Dremel flap wheel for the rough work, then finish off with a Dremel coarse abrasive buff. Neither the Chinese flap wheels or the "Scotchbrite" lookalikes are worth a darn... so save your pennies and get the Dremel stuff.
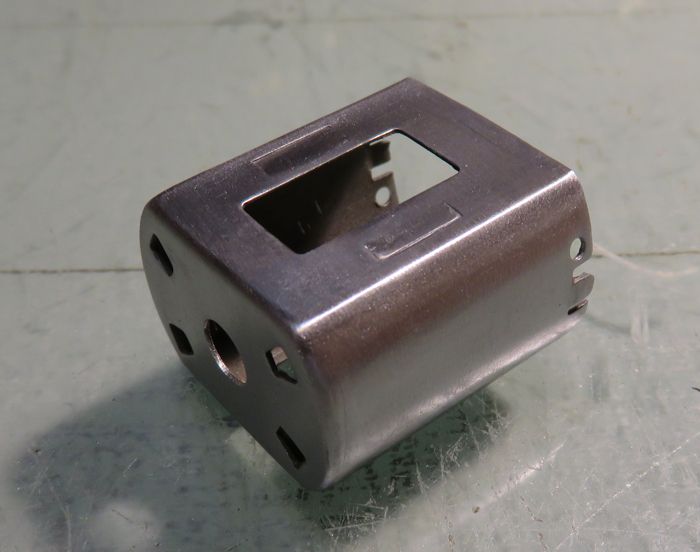
IMG_1866_zps9n0tg9xm.jpg
 
You'll also notice that, before stripping the can, I also removed any burs from reaming out the can bushing hole... on both the inside and the outside. On the inside they can prevent the new bushing or bearing from sitting flat and true. On the outside they just look nasty. :)  With the can all ready for paint, here's a peek inside to see the bushing area cleaned of any burrs (I again use a convex grinding point to try and only grind right around the hole... and lightly at that).

IMG_1867_zpsbdqgefyy.jpg
 
The can still won't get painted yet, because I have to install the bearing (here I was asked to solder it in, but epoxy can also be used. Also, I'll be installing/removing the magnets several times and when they go in "for keeps," they'll get epoxied-in. So far... easy-peasy. Just go slow and think ahead a little is all.
 
Here, I dry-fit the bearing just to make sure all is good before soldering it in

IMG_1868_zpskgbhxve1.jpg
 
-john
  • slotbaker, olescratch, C. J. Bupgoo and 1 other like this
John Havlicek

#5 havlicek

havlicek

    OCD Rewinder

  • Subscriber
  • PipPipPipPipPipPipPipPip
  • 11,198 posts
  • Joined: 20-August 07
  • Gender:Male
  • Location:NY

Posted 17 December 2016 - 08:28 AM

Next thing is to actually... and permanently, install the can bearing.  

I form a circle of thin-gauge solder around a piece of tubing that's appropriately sized for the bearing (or bushing). Then I place the bearing in the can (flange side in of course), drop the solder ring in there and put a very small drop of acid in there as well with a tiny artist briush. While holding the can with a set of forceps, I quickly heat the can from underneath with a minitorch just until the solder flows and then get away. You can do this without cooking the bearing's factory lubricant to a gritty mess. If that does happen, you can clear the bearing, but that's more unnecessary work. If the bearing or bushing isn't aligned, you just stick an old shaft or something in the assembled can with a junk end bell on there as well and reheat the solder, but most often you don't need to do this if you're careful.


Of course, you need to be diligent about neutralizing any acid residue afterwards, and a bath with baking soda/water paste using a brush inside and out, then a rinse with clean water will take care of that. Because you're using a specific amount of solder, heat ,and a bit of acid, you get repeatable and neat results, even better than tinning the can and then installing the bearing.  


Here's the result:

IMG_1869_zpsyoy7vl6e.jpg
 
-john


  • olescratch, C. J. Bupgoo and Geary Carrier like this
John Havlicek

#6 havlicek

havlicek

    OCD Rewinder

  • Subscriber
  • PipPipPipPipPipPipPipPip
  • 11,198 posts
  • Joined: 20-August 07
  • Gender:Male
  • Location:NY

Posted 17 December 2016 - 09:46 AM

Time for some endbell stuff.  


On this motor, the Hong Kong-produced Mabuchi endbell was specified for its much, much, much better material. These are sort of like the Champion FT16D endbells and have a larger bushing about the same size as the Champion, which makes installing a good bearing do-able... not a direct fit, but at least do-able. A 6mm bearing will fit if you add a sleeve made from tubing, the tubing itself has to be modified to fit the bearing, and only makes the bearing a "snap-fit" by then modifying the tubing and bearing assembly afterwards... but it's at least do-able.  


Here's what it looks like afterwards if all goes well.  :)

IMG_1871_zps8dpepygz.jpg


I was also asked to change the brush tubes (heatsinks) to the larger 36D size, which is the modern standard. Here's a picture of what's what.  


From left to right, first is the Hong Kong Mabuchi FT16D tube, and it has a notably different shape than the Japanese Mabuchi FT16D tube on the center. The 36D tube on the right is very much like the Japanese tube... but larger.  

IMG_1870_zps2nljhrvi.jpg


Since the Japanese Mabuchi 36D tube is both larger and differently shaped, the Hong Kong end bell needs to be hogged-out a little for the tubes to sit right. Then I grind a small flat on the top of the tubes (because they're taller and also to provide more surface/contact area between the tubes and the hoods), and tin the tops of the tubes and the hoods. I then add a bit more flux (not acid, I use Nokorode plaste flux) and assemble the hoods and tubes. Because the endbell is much more heat resistant, you can then reheat the tubes/hoods to flow the solder without damaging the end bell plastic... as long as you're reasonably careful.  


Here's what you get:

IMG_1872_zpsannegacv.jpg


The endbell pictured above has also been drilled to match the can, and brass post sleeves from Professor Motor installed. They protect the plastic from hot springs (although this plastic doesn't need that nearly as much as the Japanese Mabuchi endbell plastic), but also increase the diameter of the posts for a better fit with the spring coils... and the old Mabuchi springs aren't near stout enough for anything like keeping the brushes in contact with a spinning com.

I also trimmed down the edges of the endbell to be closer to flush with the can, because the older can is much thinner than the Hong Kong can these were designed for. It doesn't really matter in most cases, but it looks a little more like the two were designed to fit together. After sanding those edges, the endbell can be buffed smooth with a felt wheel and polishing compound to remove the dullness from sanding if you're so-inclined. Here I was, so I did. :D


So now, it's only down to magnets and I'll have a set-up to build an arm for.

IMG_1873_zpsqbabusex.jpg


-john


  • slotbaker, boxerdog, C. J. Bupgoo and 1 other like this
John Havlicek

#7 Steve Okeefe

Steve Okeefe

    The Independent Scratchbuilder

  • Administrator
  • PipPipPipPipPipPip
  • 1,136 posts
  • Joined: 16-February 06
  • Gender:Male
  • Location:State of Independence

Posted 17 December 2016 - 12:48 PM

Hi, John,


A neat, all-Mabuchi (so far) mashup! What's more, the can and the endbell could both arguably be called "vintage" because they are both at least 40 years old.


Regarding the (Hong Kong) endbell and the (Japanese) 36D brush tubes, I played around with this idea a few years ago and discovered that because the 36D tubes are longer than the stock (Hong Kong) tubes, when you install them in the endbell the gap between the inside surfaces (where the com has to go) is smaller.


Won't claim to be a design engineer, but it occurs to me that this will locate the brush tube too close to the inevitable arcing between the brush and the comm surface, interfering with the airflow that must carry away at least some of the heat.


I considered shortening the bush tubes, but did not follow though and just set the whole idea aside (I may have to revive it now :D ).  What are you thoughts?


  • havlicek likes this

Steve Okeefe


I build what I likes, and I likes what I build


#8 havlicek

havlicek

    OCD Rewinder

  • Subscriber
  • PipPipPipPipPipPipPipPip
  • 11,198 posts
  • Joined: 20-August 07
  • Gender:Male
  • Location:NY

Posted 17 December 2016 - 01:13 PM

Hi Steve,
 
You're right on with your thoughts/concerns here. I had to take special care to allow for ample clearance between the inside end of the brush tubes and the comm. I could have radiused those inside edges for a neater/closer fit, but it turns out that it wasn't necessary and the brush tubes aren't so far out externally that they hit the springs long legs and/or make it necessary to shorten the brushes. This certainly would have been easier using the stock tubes, and they are actually better than the Japanese ones in that they "key" better to the endbell with those grooves machined into their inside ends.

Anyway, as you noted, the brush tubes can always be shortened... but I'm a simple guy and like to keep things "dummy proof," knowing my own limitations. Really, the hardest part of all this is jigging-up the tubes to stay vertical and square while soldering.  

By the way, you reminded me with this:
 

... interfering with the airflow that must carry away at least some of the heat.

 
The one area where the Champion endbell is superior is its better airflow, both around the brush tubes and with its top and bottom "inspection/cooling holes." With these brush tubes being so much larger than the stock ones, there's very little room around them to get some air moving out of the comm area, so I have to drill the top and bottom of the endbell.. .dagnabbit!   :)  Just kidding, better to have been reminded now than later!
 
-john


John Havlicek

#9 Steve Okeefe

Steve Okeefe

    The Independent Scratchbuilder

  • Administrator
  • PipPipPipPipPipPip
  • 1,136 posts
  • Joined: 16-February 06
  • Gender:Male
  • Location:State of Independence

Posted 17 December 2016 - 01:58 PM

Given how wide that bearing lug is, those can be a fair sized holes, too!  :laugh2:


I was going to suggest you broach the holes square, just to be different, but having just checked the prices on square broaches... :shok:  Ummm... Never mind.


  • havlicek likes this

Steve Okeefe


I build what I likes, and I likes what I build


#10 havlicek

havlicek

    OCD Rewinder

  • Subscriber
  • PipPipPipPipPipPipPipPip
  • 11,198 posts
  • Joined: 20-August 07
  • Gender:Male
  • Location:NY

Posted 17 December 2016 - 03:41 PM

...yeah, that would be out of my price range, or rather "galaxy."   :D


-john


John Havlicek

#11 havlicek

havlicek

    OCD Rewinder

  • Subscriber
  • PipPipPipPipPipPipPipPip
  • 11,198 posts
  • Joined: 20-August 07
  • Gender:Male
  • Location:NY

Posted 17 December 2016 - 05:02 PM

Finally, I could install the magnets and paint the can:

An inside shot shows the magnets (in this case, the Pro Slot ones) epoxied-in to the can, yielding a perfect .590" hole... perfect for a "big diameter" arm at .560" diameter that is. You can also see the inside where the bearing is soldered-in... strong and pretty neat, too.  

IMG_1877_zps4sapyv3h.jpg
 
I can now build and wind an arm, spacing it to fit the setup so "assembly day" is as worry free as possible.

Outside, the can looks pretty vintage, and it's "all Mabuchi", but better... much better than any old "regular Mabuchi," but that's the whole point! The preference here was for orange.

IMG_1876_zpsnktm3csr.jpg

IMG_1875_zpsi7xpa3u2.jpg
 
-john
  • Samiam, C. J. Bupgoo and Geary Carrier like this
John Havlicek

#12 old & gray

old & gray

    Checkered Flag in Hand

  • Full Member
  • PipPipPipPipPipPip
  • 1,173 posts
  • Joined: 15-April 11
  • Gender:Male
  • Location:CT

Posted 18 December 2016 - 11:38 AM

I was going to suggest you broach the holes square, just to be different, but having just checked the prices on square broaches... :shok:  Ummm... Never mind.


Please do not use square holes. Sharp corners are stress concentration points and the point where cracks will start.


  • olescratch likes this
Bob Schlain

#13 havlicek

havlicek

    OCD Rewinder

  • Subscriber
  • PipPipPipPipPipPipPipPip
  • 11,198 posts
  • Joined: 20-August 07
  • Gender:Male
  • Location:NY

Posted 18 December 2016 - 03:39 PM


Please do not use square holes. Sharp corners are stress concentration points and the point where cracks will start.


No worries.  Even though these end bells are very strong, and certainly would have no issue with square holes, I did something else to increase airflow, and it's more "vintage" anyway:

IMG_1879_zps93g6wsot.jpg


For the heart of the beast, I was asked to do a #27.  This is about as perfect a #27 as I can do, and the meter tells me it's just as good electrically as it is visually.

IMG_1880_zpsshgksx5j.jpg


So there you have it.  A "vintage style" Mabuchi, where the "not 100% correct" part is mostly on the inside.  Stout magnets, a G20-equivalent wind on a .560" x .500" stack, ball bearings on both ends, and an end bell that will actually not melt into an acrid-smelling puddle.


-john


  • Jairus, MarcusPHagen, slotbaker and 5 others like this
John Havlicek

#14 Geary Carrier

Geary Carrier

    Race Leader

  • Full Member
  • PipPipPipPipPip
  • 610 posts
  • Joined: 23-April 16
  • Gender:Not Telling
  • Location:CT

Posted 18 December 2016 - 03:55 PM

John,


Purdy suite music...


Thanks,

g


  • havlicek and olescratch like this

Yes, to be sure, this is it...


#15 havlicek

havlicek

    OCD Rewinder

  • Subscriber
  • PipPipPipPipPipPipPipPip
  • 11,198 posts
  • Joined: 20-August 07
  • Gender:Male
  • Location:NY

Posted 19 December 2016 - 07:14 AM

Thanks Geary!


-john


John Havlicek

#16 Jairus

Jairus

    Body Painter Extraordinaire

  • Subscriber
  • PipPipPipPipPipPipPipPip
  • 10,174 posts
  • Joined: 16-February 06
  • Gender:Male
  • Location:Salem, OR

Posted 19 December 2016 - 01:02 PM

Sweet little motor John!  :good:


  • havlicek likes this

Jairus H Watson - Artist
Need something painted, soldered, carved, or killed? - jairuswtsn@aol.com

www.slotcarsmag.com

www.jairuswatson.net
http://www.ratholecustoms.com
Check out some of the cool stuff on my Fotki!


#17 havlicek

havlicek

    OCD Rewinder

  • Subscriber
  • PipPipPipPipPipPipPipPip
  • 11,198 posts
  • Joined: 20-August 07
  • Gender:Male
  • Location:NY

Posted 19 December 2016 - 03:59 PM

Thanks Jairus!


John Havlicek

#18 geardriven

geardriven

    Mid-Pack Racer

  • Full Member
  • PipPipPip
  • 101 posts
  • Joined: 16-September 12
  • Gender:Male
  • Location:Chicagoland suburbs

Posted 19 December 2016 - 06:36 PM

Another case of "H" Power armature porn........it appears this little powder keg will grab and hold someone's attention behind the controller.   Another "H" Power accomplishment,,,, small, efficient and well thought out....and technically quite sinister.

I can just hear the others now.......


  • havlicek likes this
Chuck Tresp

#19 havlicek

havlicek

    OCD Rewinder

  • Subscriber
  • PipPipPipPipPipPipPipPip
  • 11,198 posts
  • Joined: 20-August 07
  • Gender:Male
  • Location:NY

Posted 19 December 2016 - 08:23 PM

Thanks Chuck ;)  With a .500" long by .560" diameter stack and those stout magnets, there should be plenty of torque (and revs too) on hand here.  I don't think the motor will have any trouble at all pushing even a fairly heavy chassis with er...great vigor!  The arm is out for grinding/balancing, and will only get a slight enough grind to true the stack up, which should be only a couple of thousandths.  That will still leave just over a .030"-over hole, and maybe like .016" or so per side.


-john


  • olescratch likes this
John Havlicek

#20 geardriven

geardriven

    Mid-Pack Racer

  • Full Member
  • PipPipPip
  • 101 posts
  • Joined: 16-September 12
  • Gender:Male
  • Location:Chicagoland suburbs

Posted 20 December 2016 - 11:10 PM

Although I come from the muscle car era of the late 60s-early 70s, I do have a bit of "street rodder" in me.... So when selecting a motor color, what would be more "street rodderish" than color matching the motor to the color of the car....
Plus what better than to hide a "stealthy" type motor in a box-built AMT Slot Stars car. I would guess a lap or two and I am gonna have to answer a lot of questions.....lol

Attached Images

  • image.jpg

  • MarcusPHagen, Jencar17, havlicek and 3 others like this
Chuck Tresp

#21 havlicek

havlicek

    OCD Rewinder

  • Subscriber
  • PipPipPipPipPipPipPipPip
  • 11,198 posts
  • Joined: 20-August 07
  • Gender:Male
  • Location:NY

Posted 21 December 2016 - 03:44 PM

...all I can say is, that is one sweet looking ride!  Watch your gearing Chuck.  You don't want the motor "lugging", especially with a heavier car.  Maybe ask around to see where a good starting point is and, if the pinion choice gets nailed down, changing crowns is easy-peasy.


-john


John Havlicek

#22 geardriven

geardriven

    Mid-Pack Racer

  • Full Member
  • PipPipPip
  • 101 posts
  • Joined: 16-September 12
  • Gender:Male
  • Location:Chicagoland suburbs

Posted 21 December 2016 - 07:54 PM

I hear you on setting up a likeable gear ratio. I was thinking of starting around 5.00:1 and see what the car does.
I will have to deal with frame constraints, tire diameters (which effect the final drive) etc, etc..
Could you tell me the pinion shaft diameter? I will need to start doing my
homework and research..
Thanks
Chuck Tresp

#23 havlicek

havlicek

    OCD Rewinder

  • Subscriber
  • PipPipPipPipPipPipPipPip
  • 11,198 posts
  • Joined: 20-August 07
  • Gender:Male
  • Location:NY

Posted 22 December 2016 - 04:26 PM

PM sent!


John Havlicek

#24 havlicek

havlicek

    OCD Rewinder

  • Subscriber
  • PipPipPipPipPipPipPipPip
  • 11,198 posts
  • Joined: 20-August 07
  • Gender:Male
  • Location:NY

Posted 31 December 2016 - 02:14 PM

Got this motor assembled and it's just wonderful. I'll post some pictures tomorrow, but it screams and is smooth-as-silk..drawing only about 1.5-1.7 amps no-load with no break-in. Sure, the motor is far from "correct" for the mid-'60s and would most likely give racers a coronary back then   :D  but it's a beautiful motor for any period :)  


"Vintage-style"?... well sure it is, and also sorta close to... er... vintage!


-john


John Havlicek

#25 havlicek

havlicek

    OCD Rewinder

  • Subscriber
  • PipPipPipPipPipPipPipPip
  • 11,198 posts
  • Joined: 20-August 07
  • Gender:Male
  • Location:NY

Posted 01 January 2017 - 10:11 AM

So here's the glamor shots of this beauty:

IMG_1907_zpsmxzzloum.jpgIMG_1908_zpsf8znajzu.jpg


The deadly details (again):

-Mabuchi (Japan) early style (Russkit 22/23 type) can
-Mabuchi (Hong Kong) "160" end bell
-Precision sealed bearing on the can end
-Precision sealed bearing on the end bell (with sleeve mod)
-End bell drilled for cooling/inspection
-ProSlot Magnets
-Hand wound .014" SS springs

-End bell modified to accept 36D sized brushes

-Brass spring post sleeves

-Hand wound #27awg "large diameter" armature, precision ground and dynamically balanced


In any era, a very fast, relatively cool-running slot car motor, with all the good stuff!  My work here is done :)


-john


  • MarcusPHagen, slotbaker, Jencar17 and 4 others like this
John Havlicek


Electric Dreams Online Shop