This is something I've spoken about several times, but have not yet really fully explained with pictures...my "reverse wind". I stumbled on this idea years back when taking apart Mabuchi armatures. I thought this was something they had done, which led me to try it, but later discovered what I thought I had seen on the Mabuchis was actually not at all what it seemed.  Anyhow, my mistake in looking at those old arms still led me to try something that I have since refined a little and now use all the time.
***The idea here is that, some winds on some arms (*depends on both the wind and the space available on the arm) wind up finishing with the last turn away from the com. You can certainly just cross over the top of the stack with that last bit of the last turn, or even go diagonally back across the coil to the com with the entire last turn, and that's how it's traditionally been done. There's (of course!) nothing wrong with that, but I wanted to come up with a different approach to finishing a coil built-up with an uneven number of layers. My "solution" turned out to be simply starting the first layer at the outside of the arm stack...nearest the crown, instead of the traditional way, nearest the com or the shaft. This creates a few weird things you have to get past, not the least of which is the "voice inside your head" (*uh oh...he's hearing voices!) that's telling you..."you can't do that"! As with regular winding, starting-off is really important, but with nothing holding the wire in place, you need to figure a way to secure that first loop. ***What I do is just make the first turn cross over itself before it gets back to the top of the stack like this: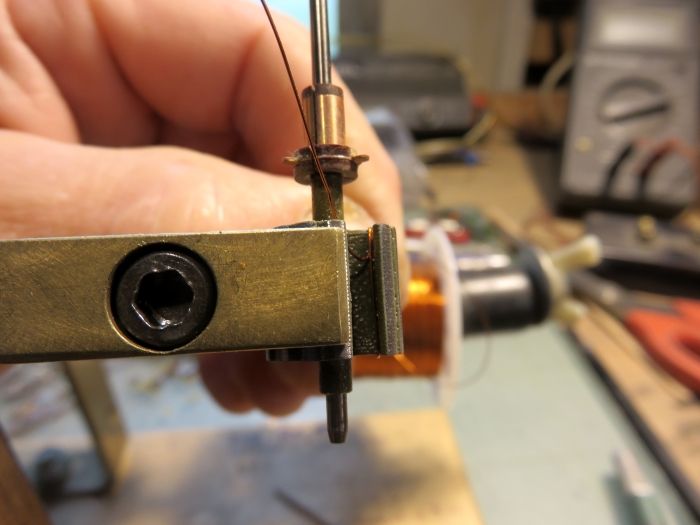
This doesn't only secure that first loop, but reverse winding solves an issue related to "regular winding", that being the tendency of the wire to want to create spaces as you move away from the com, which in turn forces you to keep pushing the wire back as you wind that first layer. Winding from the outside-in just seems to automatically make for a tighter first layer, which "can" (if you pay attention) make for a tighter finished coil. Generally, I figure that whatever makes for a tighter, more compact, neater and more "stable" (*so the coil doesn't fall apart at the end as 6, 7 or even 8 layer light gauge coils tend to do) coil is the "right" way to figure a winding pattern.
Anyway, when you get back to the com with that always-important first layer, you wind up with something like this:
If you look closely, you can see by the light reflecting off the side of the coil, that the first "clinching" loop is heading back under the layer with a gradual curve. At first when I did these things, I used to cross back under the top of the arm stack, but this makes for a sharp turn that I worried might cause a "hot spot" by stressing the wire's insulation. I later decided to cross back under the stack sides instead as "insurance". When done with that first layer, the wire is headed up right towards the com tab it will need to be attached to. After this, you just keep winding the way you normally would, but this uneven number of layers ends back at the com, which was the whole point in the first place. If you pay attention, you wind up with a nice neat coil, and a tight one to boot. You can use more tension on the whole coil than you would winding the "normal way". The end result is pretty nifty, and even with trying hard, it can be really tough to get a 65/30 end up this nice when winding from the com end of the stack first on a lot of stacks: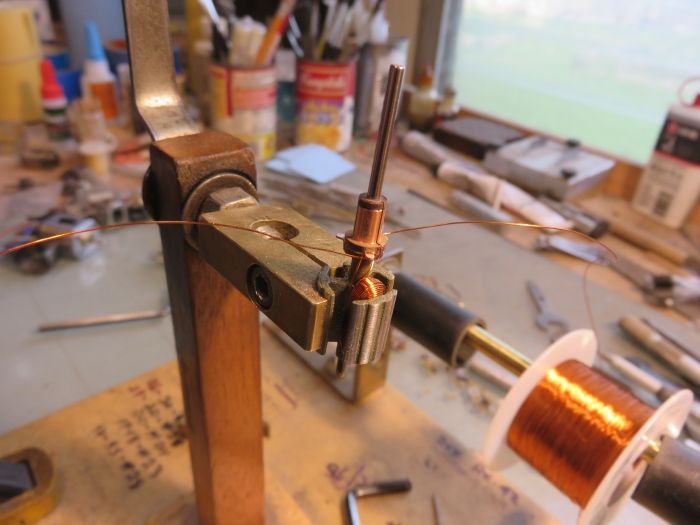
No...I don't always try to get a #30 wind looking this nice, but this arm was for pictures