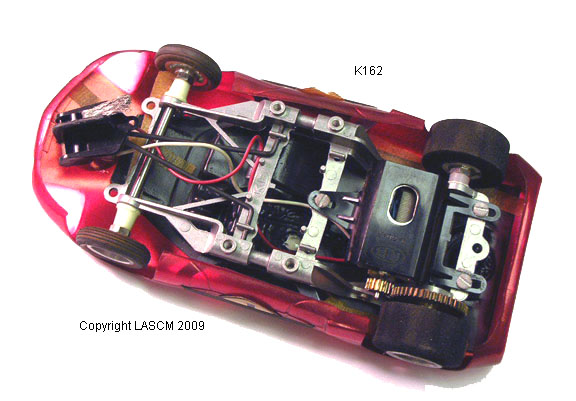
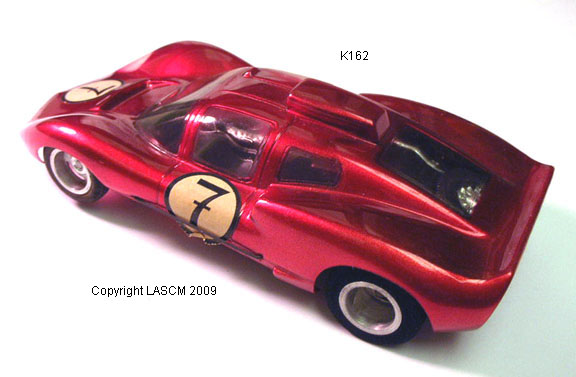
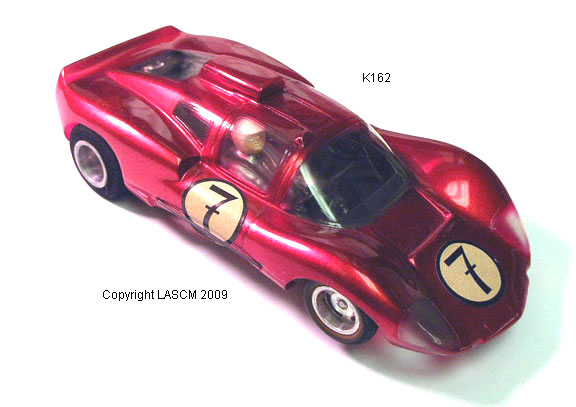
K&B Chaparral 2D
#1
Posted 28 May 2008 - 09:53 PM
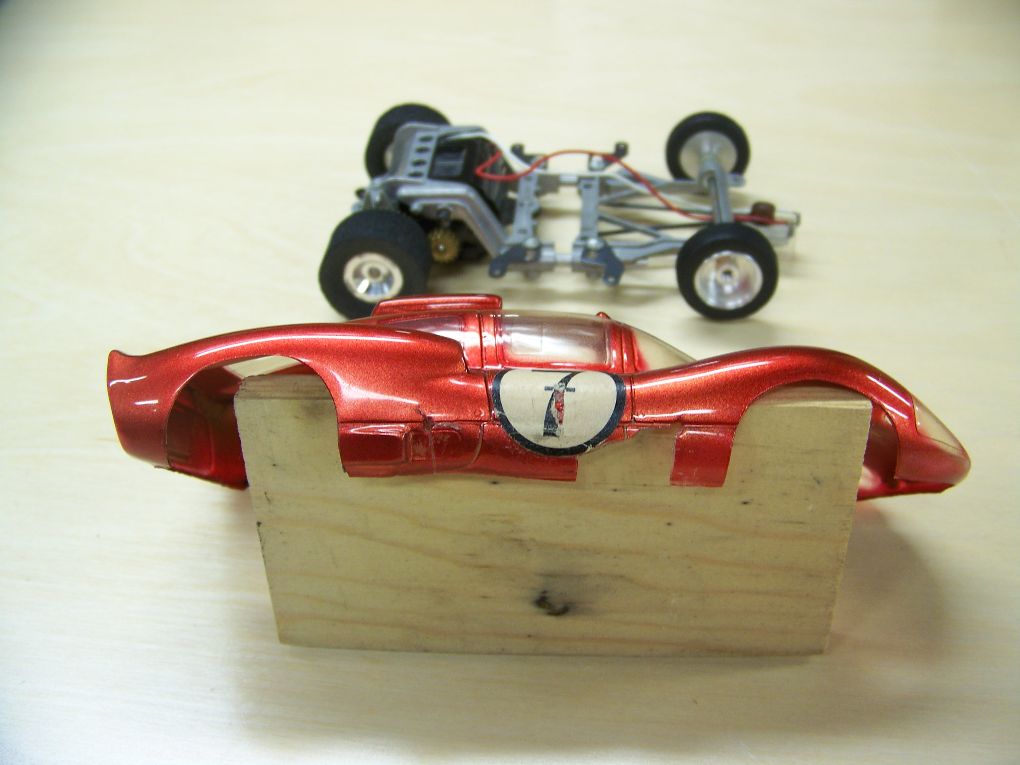
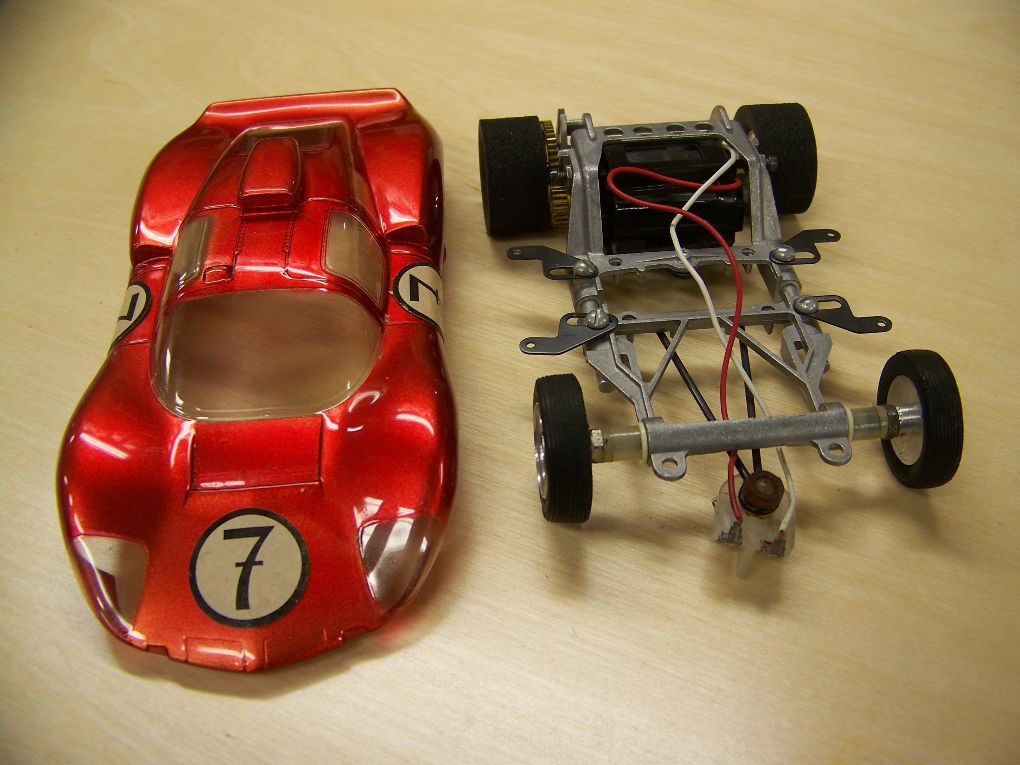
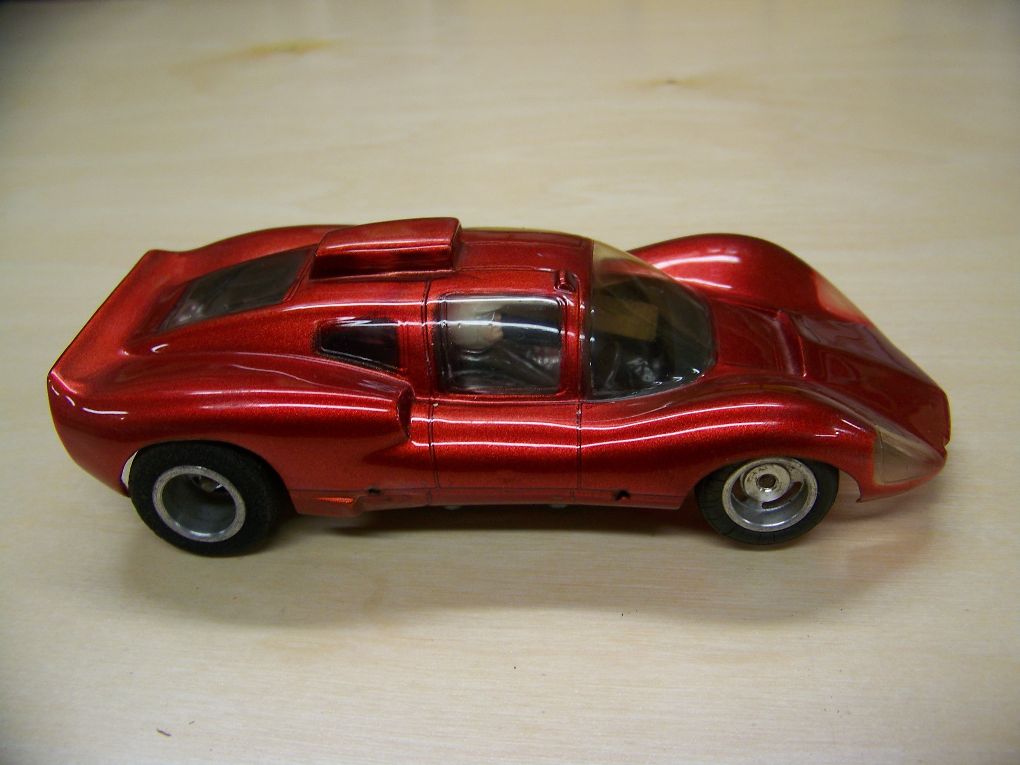
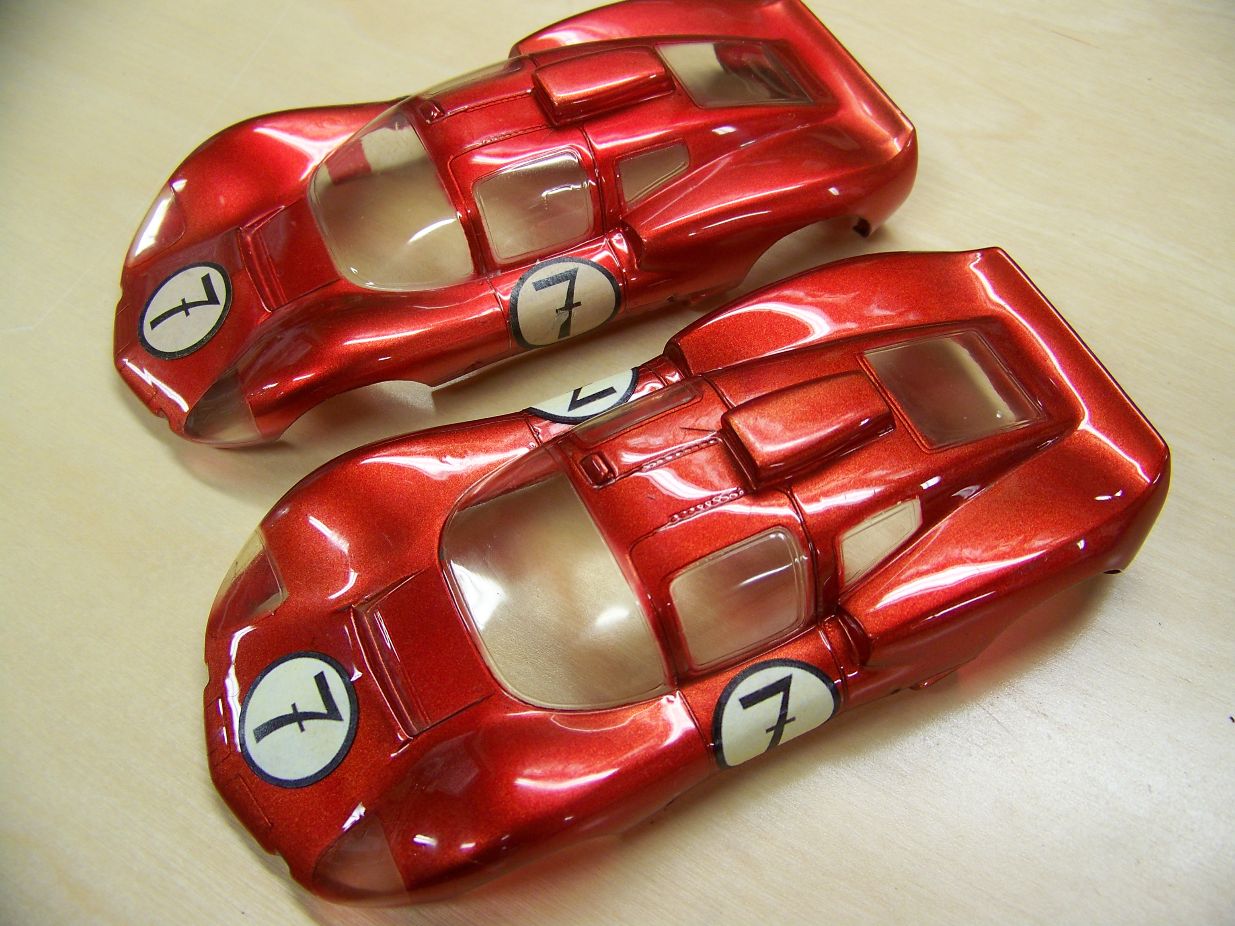
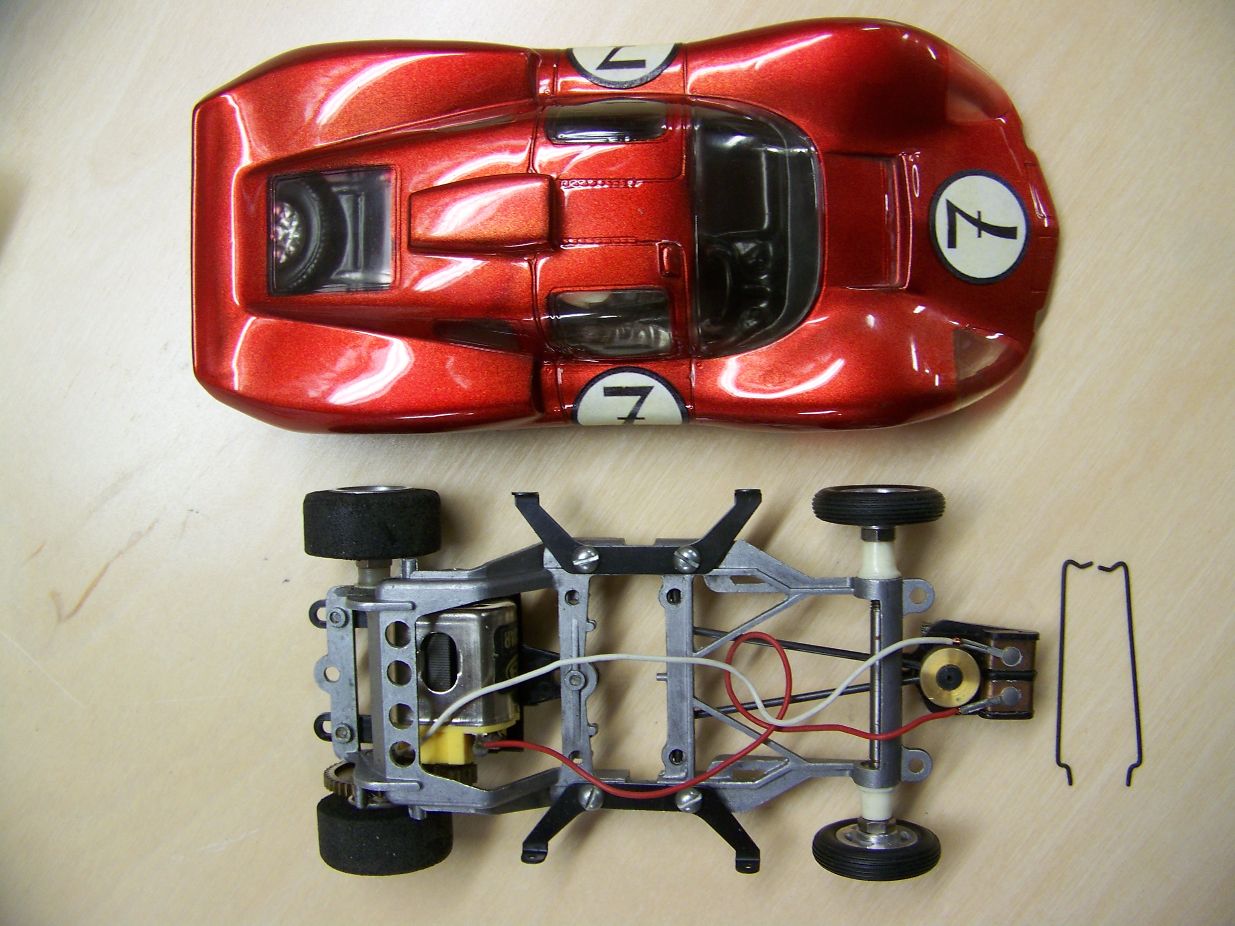
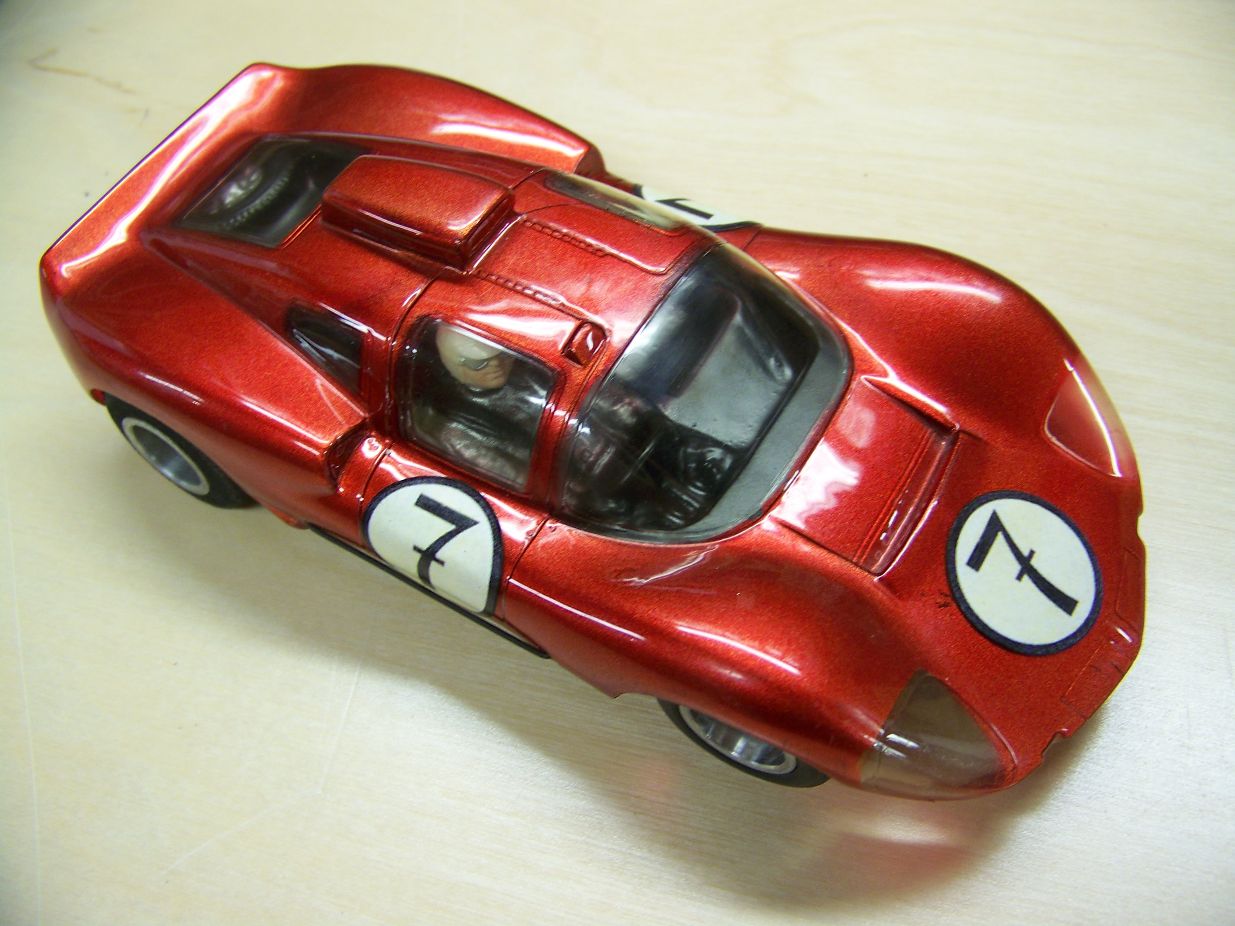
This car also comes in a very rare blue color. The "decals" are actually paper stickers with the only accurate representation on a period slot car of the famous #7 as on the Nurburgring-winning model. Of course that one was white but never mind. The body is held by two steel wire clips.
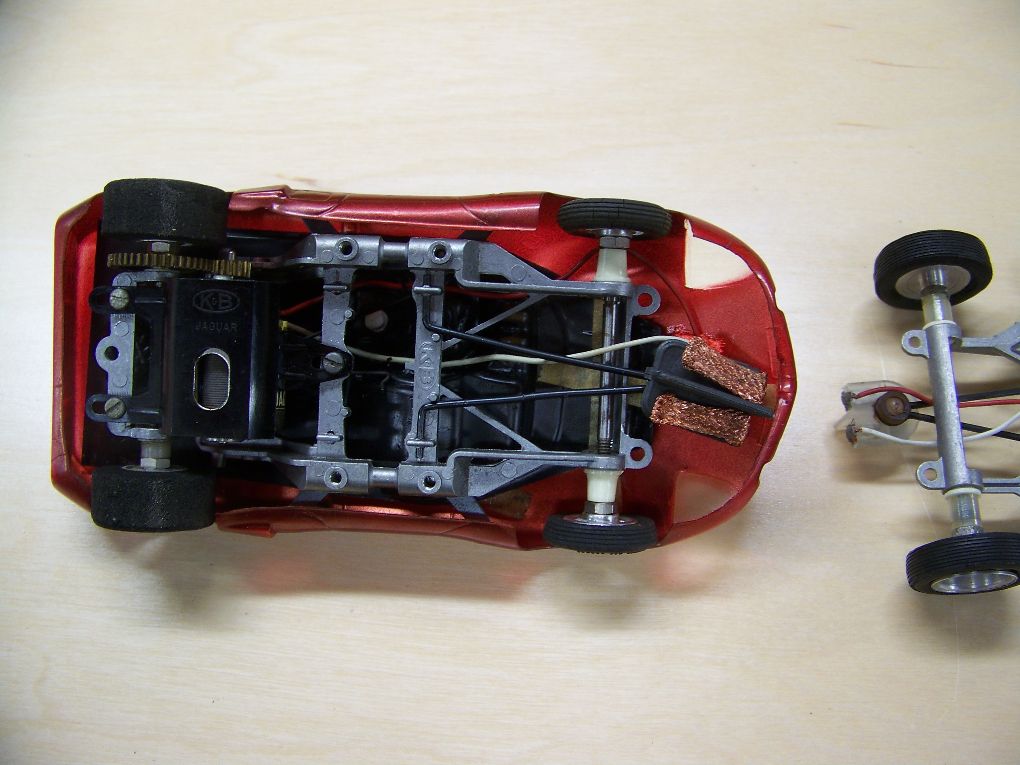
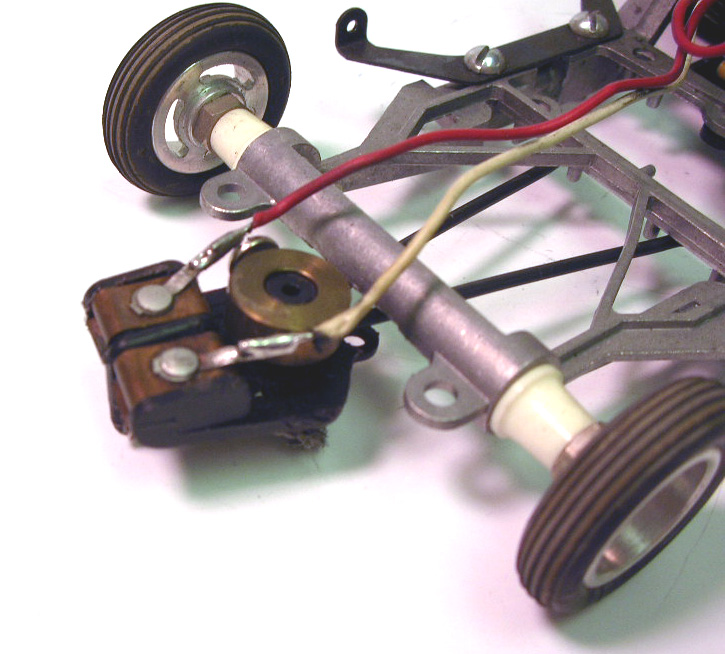
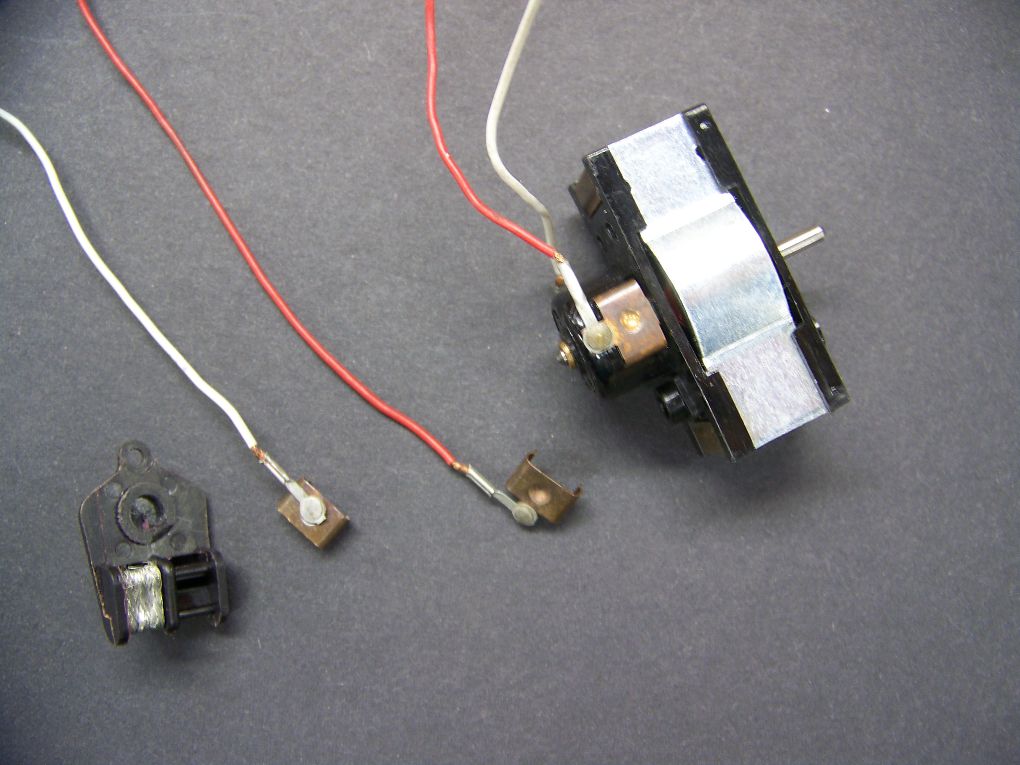
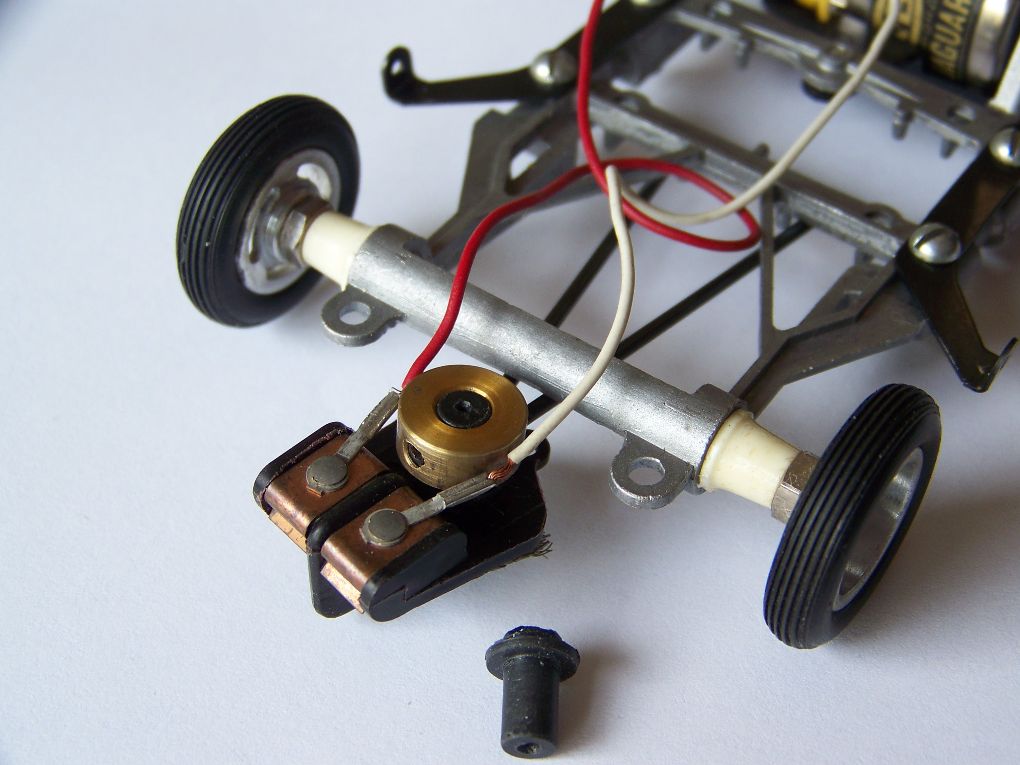
The chassis is a slightly different version of the Kanguroo unit, using the same rare body mounts as on the ultra-rare Batmobile. The motor is a version of the Mabuchi FT26 with nickel-plated can and yellow endbell named "Jaguar". The "quick-change" guide is specific to this car and only one other, the very rare K&B Ford MkII model.
The toy was sold in a clear plastic box with a printed built-up card tray and a separate card box containing the instructions and the scarce K&B nut wrench.
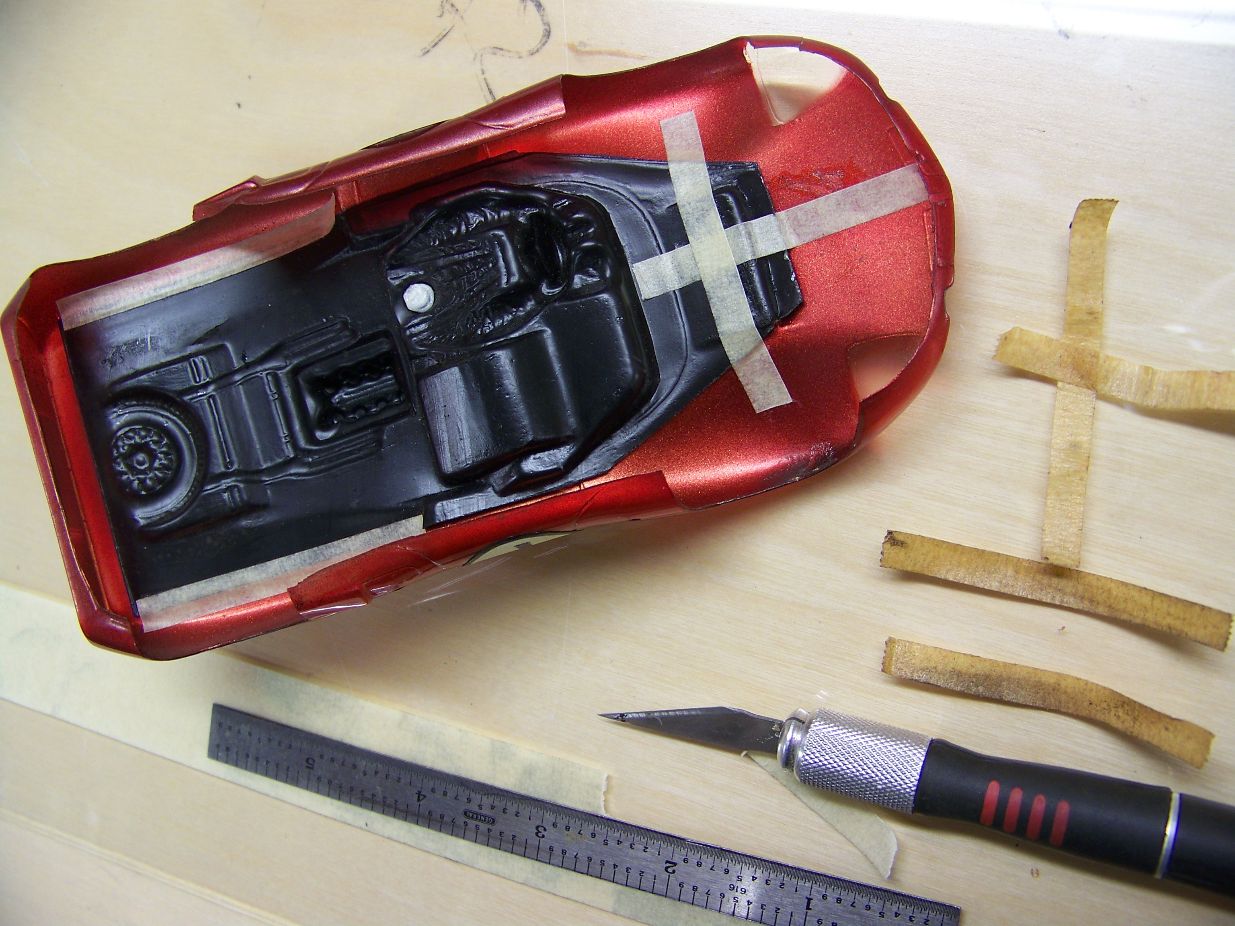
The clear plastic top is often cracked or scratched. This one was covered with adhesive tape and required a lot of work to get it to a reasonable condition.
Often these cars are found damged, mostly by their former owners. One of these has had its fenders cut for clearance... the other is already missing its side decals.
These two however did retain their original bits, even if in need of help.
- Terry Reeves likes this
Philippe de Lespinay
#2
Posted 29 May 2008 - 08:44 AM
I know the colors are all wrong, but I've always loved those cars. Kinda like the cat with only three legs you wanna take in... or is that just me?
Do you also have a blue model?
Great stuff!!
GTP Joe Connolly
In theory there is no difference between theory and practice.
In practice there is.
#3
Posted 29 May 2008 - 09:27 AM
The red ones show up at least three or four times a year on ePrey. Nice cars, make sure that they have the cockpit inside as you will never find a loose one...
Philippe de Lespinay
#4
Posted 15 March 2018 - 10:16 PM
Any one out there make repro paper numbers for the K and B 2D?
#5
Posted 16 March 2018 - 06:51 PM
Martin,
I have some that look really nice, almost indistinguishable from originals, but you have to use spray adhesive or super thin dual-sticky tape on their back side after trimming. PM me if you need some and I will be happy to send you a set.
Philippe de Lespinay
#6
Posted 18 March 2018 - 07:56 PM
While I have your attention I thought I would post my project and get your advise. You see I have two cars, one with original numbers but it has side body damage. The other has a nice body with no numbers.
So my question is, I can repair the body and touch up the RH hand number then finish the better body with your repro numbers assuming I do a bang-up job, change the wheels and guide to stock (I assume that's the stock guide in the pic).
Which one is the keeper? I only have one interior by the way so that goes with the keeper.
The basis for the question really pertains to any slot car. Which has more value, condition or originality???
#7
Posted 18 March 2018 - 10:04 PM
The keeper is always the one with the body in better shape. Decor can always be reproduced to a satisfactory level.
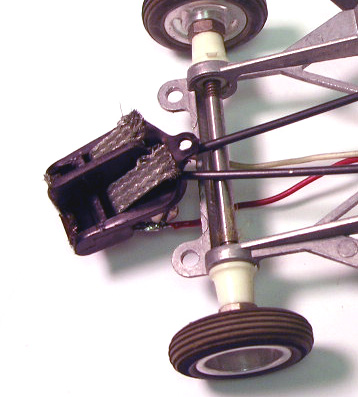
Both of your chassis have a K&B guide, but not the correct model for the car. I enclose a picture of the correct guide, which has a hook for a rubber band, just as the Cox guide.
The car with the intact body appears to have the correct wheels and tires.
Now, the body was held on the car by blackened steel wire forms. It appears that someone has flattened the body mounts at least on the car with the damaged body. Trying to reform them to the original 75-degree bend will likely fracture them... it needs to be done with a large radius, so, not with a pair of pliers unless they are needle nose and strong.
This is what the correct chassis with all the correct parts looks like:
See the wire retaining the body:
The guide flag:
Look at the body mounts. It appears that your chassis from the first car, was assembled from a chassis kit, that has four separate mounts, while the 2D RTR as well as the Batmobile have those one-piece mounts, one on each side.
With a little patience, you could Dremel some out of 16-gauge sheet steel, and blacken them with a torch. The wire forms can be made of steel wire, and blackened once formed.
Philippe de Lespinay
#8
Posted 19 March 2018 - 01:35 AM
The more I know the more i realize what I do not know.
So now I am on the hunt for the correct guide. I will look through my stash, but I do not remember this one.
The good body car has the four individual mounts and are factory bent to a 90 and do line up with the body holes. I may make some like you suggest if I cannot find the RTR style.
I notice your driver has a silver suit, my driver is all in black, unpainted. I will make a soft mask and air brush the silver suit, fuel hose, and spare wheel center then come back with the satin black belts.
I also plan to make a steel die to cut the paper numbers as if by machine. I have tried scissors in the past, never was satisfied.
Do the body pins look like the Revell style at there ends? The Revells are 1.6" and the K&Bs are 1.75" center to center. These I can make with the help of some low tech tooling.
PS: I found a good pic of your K&B Batmoble that shows the body pins.
#9
Posted 19 March 2018 - 06:47 PM
I would be happy to cut the numbers for you; I am actually quite handy with scissors. To do this right, you need curved scissors with a 1" set of blades. Piece of cake for me, I must have 20 pairs of various scissors! Just let me know where to mail them.
For the guide, they never sold it separately so it might be tough to find.
For the body mounting wire forms, I can make an exact drawing of one, and you can form them from 0.032" steel wire with a good pair of pliers with slightly ground sides to avoid breaking the wire.
Philippe de Lespinay
#10
Posted 19 March 2018 - 10:01 PM
Also when I took the body off the body clips were placed on the motor magnets for safe keeping.
Now I will adapting an old set of K&B motor brush hoods to clip over the brushes on the guide. A little fiddly for sure.
No rush, when ever you time on the numbers.
I will post pics on progress tomorrow in case it helps others and/or if anybody has interest?
#11
Posted 24 March 2018 - 05:02 PM
I turned a guide post from a scrap of plastic similar to the original material, that's the first attempt in the foreground. I liked the second one better, it has a bigger base for a more secure joint. also a smaller hole in the top.
At some point you have to say good enough and move on. Was not sure about the brass weight, thanks to Philippe pics I matched it with one I had in stock. It's an in-between size .7/16" D.
I did try the other two sizes I had. 3/8" looked too small, 1/2" was too big judging by the angle of the wires coming of the guide. It does sit up .040" higher because of the repair flange. Was not sure about the big Frankenstein screw to hold the weight to the post so I did that the way I thought it looked better. If I see more that one example with that screw I may change it. Hate to think the museum model is wrong in that detail, probably not?
I searched my stash and was excited to find a mint set of front tires, the original old one had multiple cracks, the other was wrong having a square profile not the rounded shape it should have.
As soon I receive the paper numbers and get them stuck on I will post a pic of the finished car.
#12
Posted 26 March 2018 - 09:45 PM
Very nice job, and true to period spec.
Your numbers will soon be on the way.
Philippe de Lespinay
#13
Posted 27 March 2018 - 02:26 AM
Thanks,welcome back, hope your race weekend went to plan.
#14
Posted 27 March 2018 - 06:50 PM
Not done yet, next week! Your numbers are in the mail.
Philippe de Lespinay
#15
Posted 16 May 2018 - 06:35 PM
Finally got this car finished, the numbers really set it off and look factory. Thanks again, Phillippe. I did end up making a custom punch to get that factory spec.
Here a few pics of the finished car. I think its my favorite 2D soft body.
- slotbaker and Jaeger Team like this
#16
Posted 17 May 2018 - 07:41 AM
That looks very nice, Martin - good work!
Don
#17
Posted 17 May 2018 - 01:03 PM
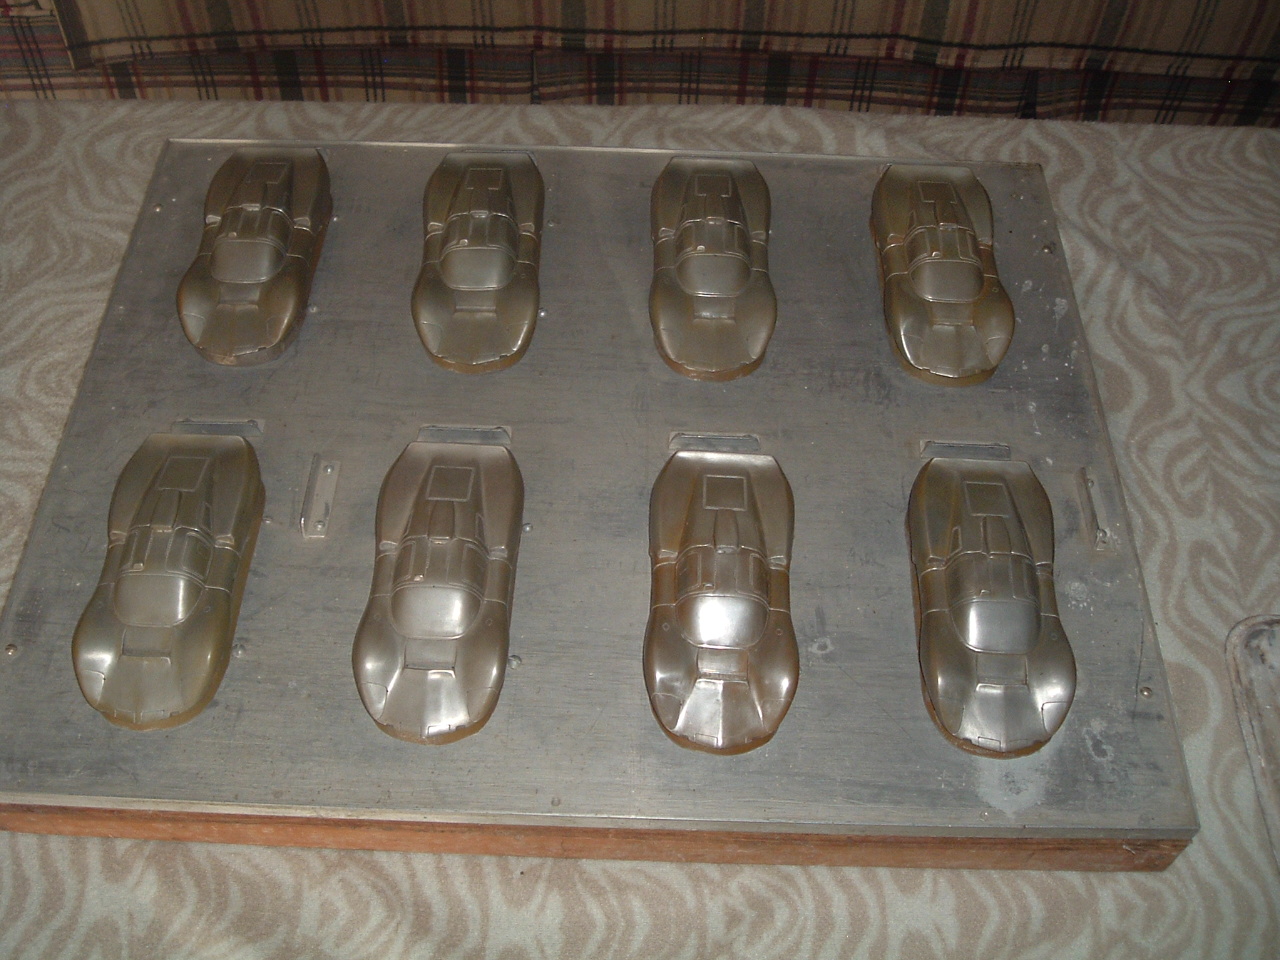
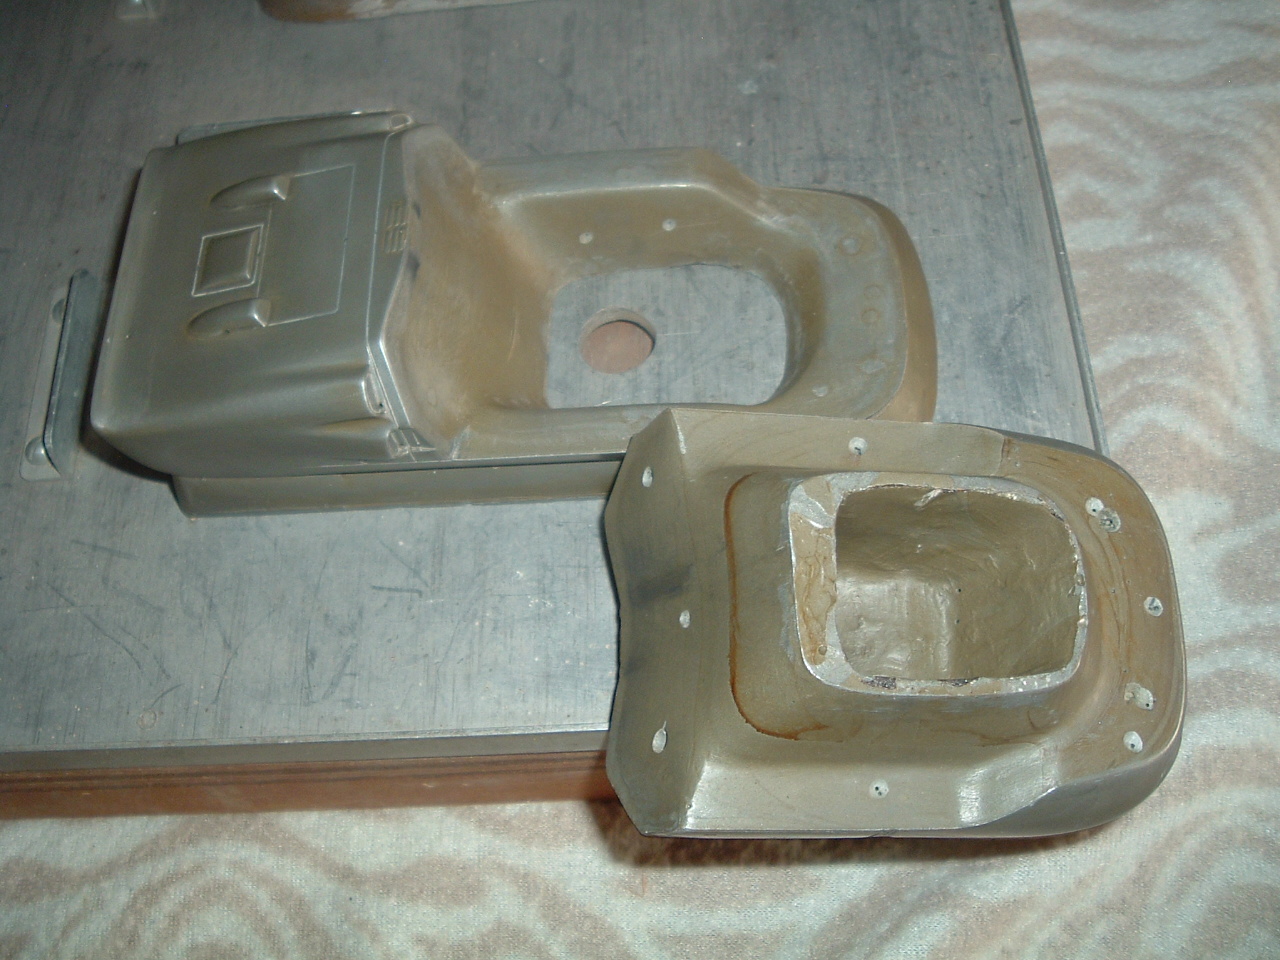
Very nice job. You will be pleased to know that no less than eight original body molds of that K&B 2D have just been acquired from the man who crafted them, by the LASCM, and will be on display at the museum.
Philippe de Lespinay
#18
Posted 17 May 2018 - 06:09 PM
Thanks Don and Phillippe for praise and taking an interest.
I would love to see an example of the K&B 2D mold. Is it the positive (what I call the plug) used to make the vac-u-formed body's or a negative mold to make multiple production plugs. Love to see how they get that body off the plug, Just the scoop and those valance undercuts, must disassemble right?
#20
Posted 18 May 2018 - 03:30 PM
That is a beautiful tool, a treasure for sure. I do not understand how they come apart, but I do not need to know everything.Just looking at the pic takes us back to the days of production runs.Thanks for your time.
#22
Posted 19 May 2018 - 02:46 AM
Great find Philippe... so, when are you going to be pulling some new bodies, eh?
Also, if I understand correctly, the fact that there are 8 molds of the 2D means that K&B was pulling a lot of these, or planned to? or they wore out fast?
Don
#23
Posted 19 May 2018 - 08:25 AM
Martin, what paint did you use for your car? It looks exactly like an original, which it basically is.
Matt Bishop
#24
Posted 19 May 2018 - 10:42 AM
Hey Matt. my restoration started with two original bodies. One with damage and one with original numbers. So once Phillippe found reproduction numbers for the mint body,the restoration was on.
So I wish I had the knowledge to paint colors that are found on factory cars i.e. Revels, K&B, Classic and other soft body cars. It has this gold mix to it, but is not a candy. I would love to know also if anyone has found colors as vibrant.
#25
Posted 19 May 2018 - 12:52 PM
Don,
I am not sure if Scott will pull bodies out of these molds. The plan is to display them on shelf in the museum with the marketed product mixed with them, boxed and unboxed.
The reason why there are so many molds for each car, is because the market was so large at the time, and speed was of the essence to produce as many as possible in the shortest time span. Remember that several companies produced over one MILLION of a single model over a very short period. Lancer had 3 machines dedicated to the Manta Ray at tone time, 8 bodies per plate, 24 bodies each 2-3 minutes, 8 hours par day. But a good hour each day is necessary for getting the machine to work properly with the right temperature, and the first 4-5 pressings go to the trash.
Vacuum forming cycle per day could only produce a few hundred bodies on one machine, assuming that each "plate" had 8 molds. Each mold being hand finished, is slightly different from the next, so many of these cars can show variations in details. There were 8 to 12 "tools" for each model, pulled 8 at a time, the others being used in case a mold would be damaged. Wear was a factor, but these tools are pretty resilient and real wear began when Lexan replaced the more compliant polystyrene butyrate.
Compared to that, injection molding machines that had molds with a single car, could run almost automatically, 24 hours a day, with one operator each 8-hour period.
- tonyp likes this
Philippe de Lespinay