Jump to content


Photo

Full-can magnet shims


  • Please log in to reply
9 replies to this topic

#1 havlicek

havlicek

    OCD Rewinder

  • Subscriber
  • PipPipPipPipPipPipPipPip
  • 11,198 posts
  • Joined: 20-August 07
  • Gender:Male
  • Location:NY

Posted 29 November 2017 - 08:00 PM

With a lot of "the good stuff" getting pretty scarce, it pays to look at repurposing seemingly useless parts.  Of all the vintage magnet shims, I think the two-piece Champion shims ("semi-can" shims) are about as good as it gets.  You can easily fit C can magnets in a D can motor and wind up with a workable hole.

Well, whenever I've been motivated to do so, there's another way to have at this.  A "C" can is a tight fit inside of a D can...so tight that, depending on which C and which D cans, it can either go with some force (*an arbor press is really handy), or not go at all.  It can help to take down all four sides of the C can, but doing that by sanding is painfully slow.  Now that I'm part-way into the 20th Century (while the rest of the world is into the 21st Century), there's a better way...it's called machine tools.  :)


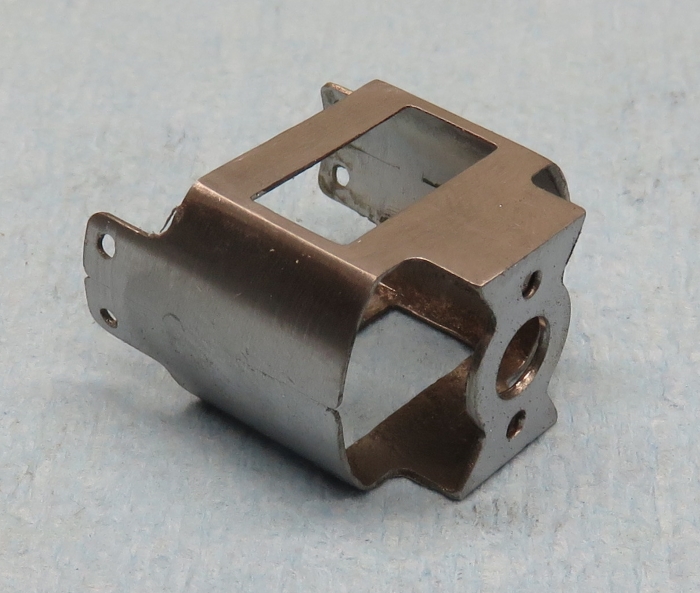
Sooo, starting with this later (I guess 1990's or so?) C can, I decided to take down a pair.  One would be used as a full can-shim, the other would go back into my pile-o-stuff where it could be built into a motor, or further cut up as another shim.

IMG_2340.JPG

It only really takes pretty much what the can needs to be flattened out, for it to be a nice "slide-fit".  Of course, the arcs are a bit different, but the inner "C" can will touch the center of the outer "D can" on the two curved sides, and the top and bottom flats will match-up really nicely.

IMG_2342.JPG

What you're left with is a can that you can install "C" sized magnets into and then slide *that* all into a D can where it can be epoxied in place.  Pretty nifty!

IMG_2341.JPG


  • Tex, Mike Patterson, C. J. Bupgoo and 1 other like this
John Havlicek


#2 Mike Patterson

Mike Patterson

    Village Luddite

  • Subscriber
  • PipPipPipPipPipPipPip
  • 2,525 posts
  • Joined: 14-October 07
  • Gender:Male
  • Location:Zanesville, OH

Posted 29 November 2017 - 09:29 PM

So, what endbell will you use, C or D?


I'm curious to see how this will work, with that much can material.


I am not a doctor, but I played one as a child with the girl next door.


#3 Geary Carrier

Geary Carrier

    Race Leader

  • Full Member
  • PipPipPipPipPip
  • 610 posts
  • Joined: 23-April 16
  • Gender:Not Telling
  • Location:CT

Posted 29 November 2017 - 11:34 PM

Hi John,


Now that is one fancy flux yoke...


Thanks,

g


Yes, to be sure, this is it...


#4 olescratch

olescratch

    olescratch

  • Subscriber
  • PipPipPipPipPip
  • 976 posts
  • Joined: 19-July 13
  • Gender:Male
  • Location:Ravenna, OH

Posted 30 November 2017 - 02:20 AM

So, what endbell will you use, C or D?


I'm curious to see how this will work, with that much can material.

Yeah!  It looks like neither one has enough room, but I'd guess the endbell will fit the outer can. 


  • havlicek likes this
John Stewart

#5 havlicek

havlicek

    OCD Rewinder

  • Subscriber
  • PipPipPipPipPipPipPipPip
  • 11,198 posts
  • Joined: 20-August 07
  • Gender:Male
  • Location:NY

Posted 30 November 2017 - 06:03 AM

Yeah!  It looks like neither one has enough room, but I'd guess the endbell will fit the outer can. 


Well of course, this is for a D end bell.  In the picture, the shim isn't slid all the way in so you can see it.  :)  Functionally, it all works exactly the way the Champion semi-can shims do, except it's in one piece instead of two "clamshell" pieces.  Again, the benefit here is having many choices for magnets and armatures.  Instead of using the EPX magnets, and then a .560" arm (*which works well of course), you can use any C can magnets and a small diameter arm.


  • olescratch likes this
John Havlicek

#6 havlicek

havlicek

    OCD Rewinder

  • Subscriber
  • PipPipPipPipPipPipPipPip
  • 11,198 posts
  • Joined: 20-August 07
  • Gender:Male
  • Location:NY

Posted 30 November 2017 - 08:08 AM

...more description.  If you cut off the "back end" of the can where the bearing strap is, you have more than enough room to slide the magnets and shim into the can and mount the standard D can motor end bell.  Actually, if you want to save even more "weight", you can cut off the front end of the can where the old C can end bell mounting holes are, and only leave as much of the old can as covers the magnets themselves.  This would be significantly less metal than the old semi-can shims.  You have to be careful as to how deep you set the magnets/shim because there's gobs of room in there after all the cutting.


John Havlicek

#7 havlicek

havlicek

    OCD Rewinder

  • Subscriber
  • PipPipPipPipPipPipPipPip
  • 11,198 posts
  • Joined: 20-August 07
  • Gender:Male
  • Location:NY

Posted 30 November 2017 - 08:23 AM

...oh and BTW, who's can (what brand) is this?  Except for the too-small tabs where the end bell is supposed to be mounted, they're kinda neat.


John Havlicek

#8 old & gray

old & gray

    Checkered Flag in Hand

  • Full Member
  • PipPipPipPipPipPip
  • 1,173 posts
  • Joined: 15-April 11
  • Gender:Male
  • Location:CT

Posted 30 November 2017 - 08:41 AM

Pro Slot (Champion) mid to late 1990's


  • havlicek likes this
Bob Schlain

#9 havlicek

havlicek

    OCD Rewinder

  • Subscriber
  • PipPipPipPipPipPipPipPip
  • 11,198 posts
  • Joined: 20-August 07
  • Gender:Male
  • Location:NY

Posted 30 November 2017 - 04:25 PM

Thanks for the info Bob!


John Havlicek

#10 havlicek

havlicek

    OCD Rewinder

  • Subscriber
  • PipPipPipPipPipPipPipPip
  • 11,198 posts
  • Joined: 20-August 07
  • Gender:Male
  • Location:NY

Posted 02 December 2017 - 09:28 PM

...and.....BAM!

Another Russkit "22" go the usual "treatment", strip/sand, drill for end bell screws, remove/replace can bushing, new paint (gold + clearcoat), can drilled for the choice of either can or end bell drive, and then I installed the shim with a pair of "yellow dots" that came up really nicely :bb: with a zap after removing all the old epoxy and gunk on them.  Setup was also honed, really to check that the shim and magnets were well-centered...and they are.  Final "hole" is a bit under .530".  So I pressed a stack spacing the shaft for either can or end bell drive.

I chose a Hong Kong Mabuchi end bell for this one, and I machined the bottom and top flats so they're not so proud of the thinner Japanese can metal.

IMG_2348.JPG


  • boxerdog, Samiam and Geary Carrier like this
John Havlicek


Electric Dreams Online Shop