Jump to content


Photo

How to build a Shinoda Lampray, old school method


  • Please log in to reply
12 replies to this topic

#1 Gene/ZR1

Gene/ZR1

    Race Leader

  • Subscriber
  • PipPipPipPipPip
  • 840 posts
  • Joined: 06-November 06
  • Gender:Male
  • Location:USA/Michigan

Posted 01 December 2017 - 02:02 PM

ROUND NO.1


How to build a Shinoda Lampray, old school method

This how to is about how a thingie was originally constructed with basic tools, I have always built my cars this way. If you take your time you can build a really nice racer.

The chassis build will be a rear hinged ISO.

Lets get started.


lp2.jpg

 Shinoda Lampray


01.jpg

The tools shown here is what built this how to chassis.


bracket.jpg

This is the only part you need to purchase.

This motor bracket will accept more than one type of 16D's


02.jpg

Get a flat board

Take the Lampray body and a sharpie marker and mark the wheel base. 


03.jpg

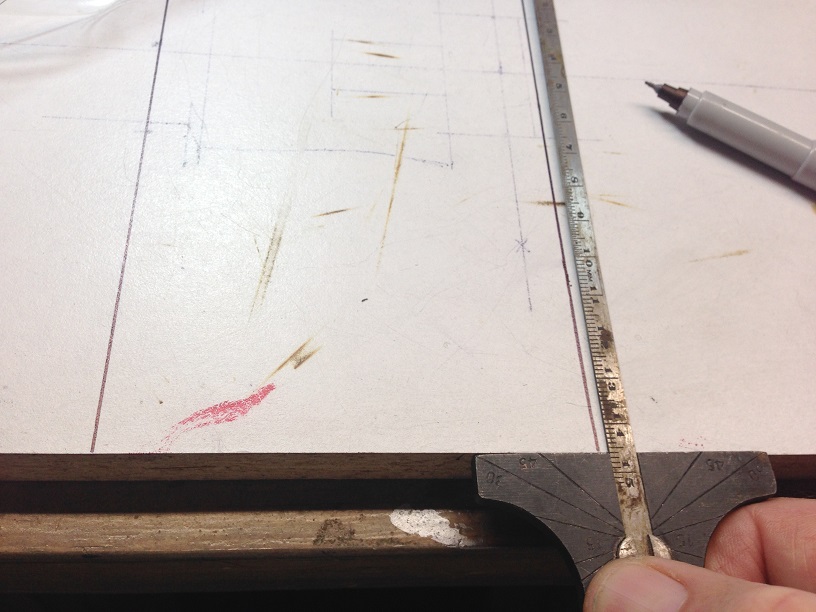
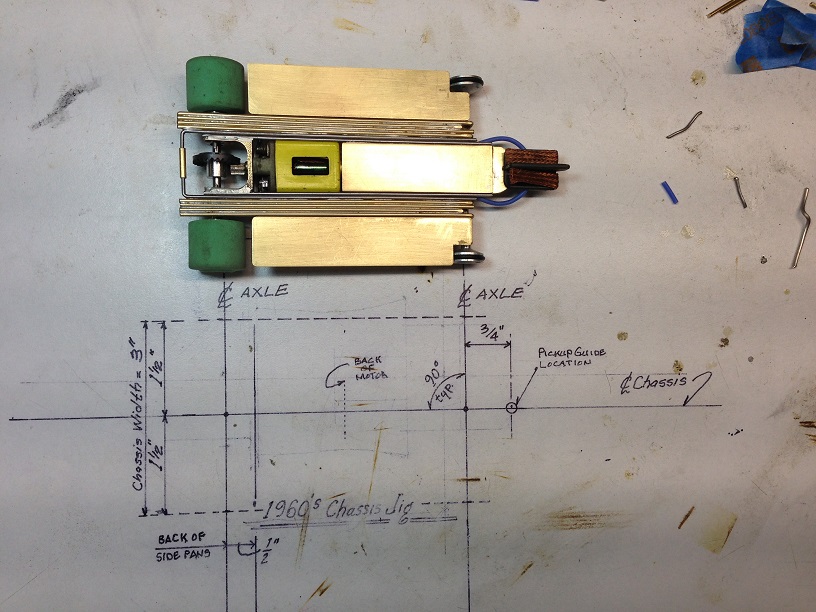
Starting to layout the chassis hands on jig, "1960's Style"

Take the square and mark the required wheel base.


04.jpg

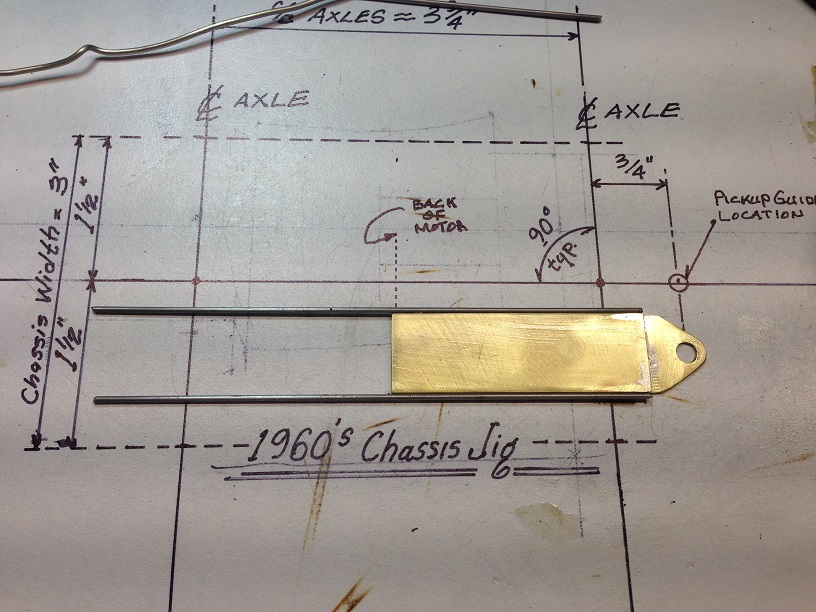
Additional line work added,wheel base, chassis width, pickup guide hole location, chassis centerline.

Some additional lines will be added as we go.


05.jpg

Mark the hinge hole location as shown,


06.jpg

Use your hand drill and drill a 1\16" hole on each side.


07.jpg

Take a piece of 3\32" piano wire and bend to fit around the motor bracket. We will cut this later.


WILL CONTINUE, stand by.

gene\zr1


  • slotbaker, proptop, Pablo and 3 others like this

Gene Adams AKA Gene/ZR1
ZR1 Corvette owner
Hand-carved balsa bodies, resin body plugs, silicone molds, vacuum bodies
Genes_World@ymail.com


#2 Gene/ZR1

Gene/ZR1

    Race Leader

  • Subscriber
  • PipPipPipPipPip
  • 840 posts
  • Joined: 06-November 06
  • Gender:Male
  • Location:USA/Michigan

Posted 01 December 2017 - 02:54 PM

ROUND NO.2 continue


08.jpg

Mark up the center guide section, make the pickup guide end piece and solder.


09.jpg

Center guide section, with the pickup guide end piece soldered together.


10.jpg

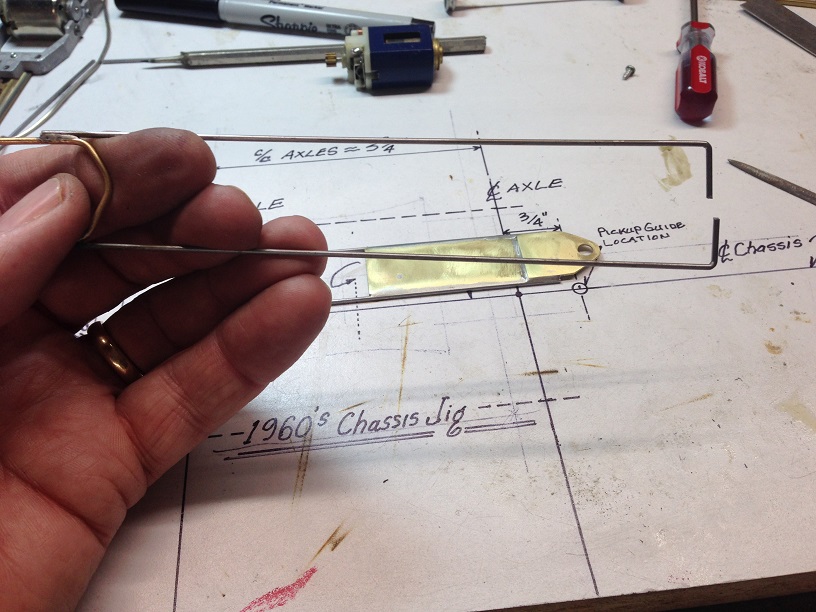
Motor bracket and pickup center section. place the pieces on the 1960's chassis jig and check for fit up.


11.jpg

Solder to piano wire side rails to center section as shown.

Notice that the back of motor location has been marked on the 1960's chassis jig.


12.jpg

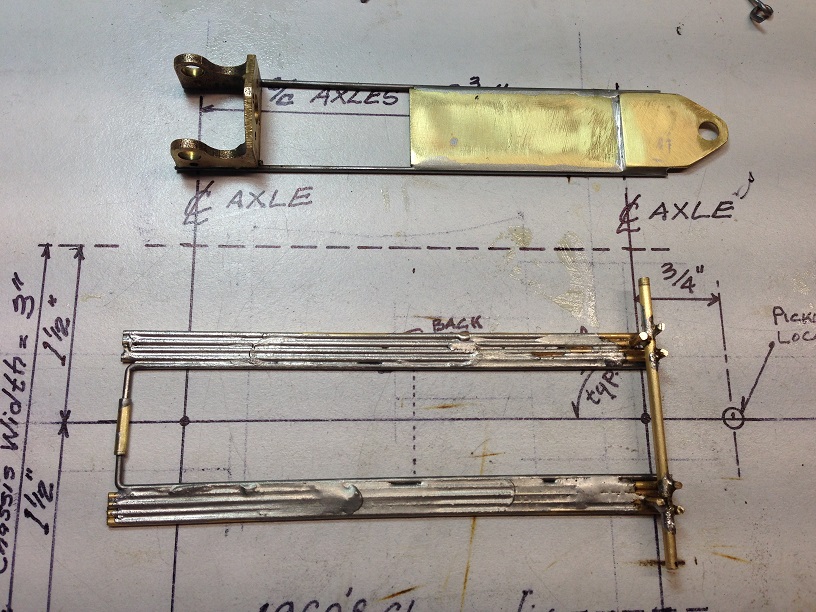
Solder the purchased motor mount to the center section side rails. Use the 1960's chassis jig to locate the parts in the proper location.


13.jpg

Cut the 3\32 u-frame made in round one post as shown.


14.jpg

As shown cut a piece or brass tube and slip each piece of the u-frame and solder as shown.

I use a steel weight to hold pieces flat during solder and prevents burnt fingers.


15.jpg

Completed u-frame, Note the temporary brass spreader\spacer at the right end, to hold u-frame rails parallel.


END OF ROUND NO.2

WILL CONTINUE, stand by.

gene\zr1


  • slotbaker, anglicanbeachparty, Jencar17 and 3 others like this

Gene Adams AKA Gene/ZR1
ZR1 Corvette owner
Hand-carved balsa bodies, resin body plugs, silicone molds, vacuum bodies
Genes_World@ymail.com


#3 Jairus

Jairus

    Body Painter Extraordinaire

  • Subscriber
  • PipPipPipPipPipPipPipPip
  • 10,174 posts
  • Joined: 16-February 06
  • Gender:Male
  • Location:Salem, OR

Posted 01 December 2017 - 03:17 PM

:clapping:  Go man GO!!!!


  • Maximo and miko like this

Jairus H Watson - Artist
Need something painted, soldered, carved, or killed? - jairuswtsn@aol.com

www.slotcarsmag.com

www.jairuswatson.net
http://www.ratholecustoms.com
Check out some of the cool stuff on my Fotki!


#4 Gene/ZR1

Gene/ZR1

    Race Leader

  • Subscriber
  • PipPipPipPipPip
  • 840 posts
  • Joined: 06-November 06
  • Gender:Male
  • Location:USA/Michigan

Posted 01 December 2017 - 03:28 PM

ROUND NO.3


16.jpg

Starting to assemble u-frame side rails to carry the front axle.

Tack solder 1\16" brass rails for now. Use your chassis jig to locate parts. 


17.jpg

Front axle assembly parts.


18.jpg

Tape 2 pieces of 1\16" brass rod to building board as shown. This will provide a 1\16" frame clearance.


19.jpg

Front axle tube assembly, tack solder in place as shown.


20.jpg

Finish the u-frame side rails to carry the front axle as shown.


21.jpg

Place the u-frame side rail axle frame in place as shown, should not bind to center section.


22.jpg

Cut 2 "L" pieces of piano wire and solder in place as shown.


24.jpg

Hinge view


23.jpg

Progress view


END OF ROUND NO.3

WILL CONTINUE, stand by.

gene\zr1


  • slotbaker, proptop, anglicanbeachparty and 5 others like this

Gene Adams AKA Gene/ZR1
ZR1 Corvette owner
Hand-carved balsa bodies, resin body plugs, silicone molds, vacuum bodies
Genes_World@ymail.com


#5 Maximo

Maximo

    Checkered Flag in Hand

  • Full Member
  • PipPipPipPipPipPip
  • 1,789 posts
  • Joined: 31-August 06
  • Gender:Male
  • Location:San Antonio, TX

Posted 01 December 2017 - 04:10 PM


Gene,

You are the Man!

You and Jairus and a few others post great How-To builds. Yours is awesome as it doesn't mandate an expensive chassis jig!

Go Gene Go!!!

MaximO
  • Old Pilot likes this

David Ray Siller

MAXImum MOtion


Retired Video Game Creator/Designer/Producer
Thingies are my thingy!


#6 Gene/ZR1

Gene/ZR1

    Race Leader

  • Subscriber
  • PipPipPipPipPip
  • 840 posts
  • Joined: 06-November 06
  • Gender:Male
  • Location:USA/Michigan

Posted 01 December 2017 - 04:10 PM

ROUND NO.4


25.jpg

Make a 1\16" U-bracket and solder in place as shown. This stops the center guide section from rising to high. NOTICE; the 1\32" "V" shape shim , this will allow the center guide section to rise  1\32".


26.jpg

 Completed U-bracket soldered in place.


27.jpg

Solder a piece of piano wire as shown, this prevents the completed motor center section from dropping.


28.jpg

Make 2 side pans as shown, use the chassis jig for sizing and fit up.


29.jpg

Square tube size.


30.jpg

Cut the square tube and slide into place and solder.


31.jpg

Slip a piece of piano thru the square brass tube, bend and solder as shown in the photo.


32.jpg

Make 2,  "z"-bends as shown.


33.jpg

Solder the  2,  "z"-bends in place as shown. These stops the side pan from rising.


34.jpg

Bottom of chassis view.


END OF ROUND NO.4

WILL CONTINUE, stand by.

gene\zr1


  • Jairus, slotbaker, anglicanbeachparty and 6 others like this

Gene Adams AKA Gene/ZR1
ZR1 Corvette owner
Hand-carved balsa bodies, resin body plugs, silicone molds, vacuum bodies
Genes_World@ymail.com


#7 Gene/ZR1

Gene/ZR1

    Race Leader

  • Subscriber
  • PipPipPipPipPip
  • 840 posts
  • Joined: 06-November 06
  • Gender:Male
  • Location:USA/Michigan

Posted 01 December 2017 - 04:35 PM

ROUND NO.5


35.jpg

Any of the motors as shown will screw to this bracket. Build the chassis, put in your motor of choice.


36.jpg

Completed chassis


37.jpg

Completed chassis

Approximate just the chassis cost including motor bracket  $9.00


This build is "Certus" powerd and it is going to the 2017 Shinoda Reunion December 16 2017.


No bells or whistles, just an easy common sense down to earth build, simple basic tools required.

This method can be modified to fit just about any body. Side pans  can be reconfigured to even fit a Shinoda Large Dart or others.


This is the way it was done in the 60's,  good luck and happy racing.


Body mounting post soon.


END OF ROUND NO.5

WILL CONTINUE with body soon.


"end of transmission" 

gene\zr1


  • slotbaker, proptop, anglicanbeachparty and 12 others like this

Gene Adams AKA Gene/ZR1
ZR1 Corvette owner
Hand-carved balsa bodies, resin body plugs, silicone molds, vacuum bodies
Genes_World@ymail.com


#8 olescratch

olescratch

    olescratch

  • Subscriber
  • PipPipPipPipPip
  • 977 posts
  • Joined: 19-July 13
  • Gender:Male
  • Location:Ravenna, OH

Posted 01 December 2017 - 04:38 PM

Gene making it all look easy.  How long does it usualy take for you to build a chassis like this?  Do you tumble your chassis once completed?


John Stewart

#9 Gene/ZR1

Gene/ZR1

    Race Leader

  • Subscriber
  • PipPipPipPipPip
  • 840 posts
  • Joined: 06-November 06
  • Gender:Male
  • Location:USA/Michigan

Posted 01 December 2017 - 05:04 PM

Gene making it all look easy.  How long does it usualy take for you to build a chassis like this?  Do you tumble your chassis once completed?

John

Yes it is easy, give it a try. I only build old vintage style.

About 7 - 8 hours off-on taking my time,

No I do not tumble as I see no reason to. If I want bling I will wax my ZR1  :laugh2:

regards; g


  • Maximo and olescratch like this

Gene Adams AKA Gene/ZR1
ZR1 Corvette owner
Hand-carved balsa bodies, resin body plugs, silicone molds, vacuum bodies
Genes_World@ymail.com


#10 Pablo

Pablo

    Builder

  • Administrator
  • PipPipPipPipPipPipPipPip
  • 18,443 posts
  • Joined: 20-February 06
  • Gender:Male
  • Location:Cleveland, Tennessee

Posted 01 December 2017 - 05:48 PM

Excellent tutorial :good:  :sun_bespectacled: :heart:


Paul Wolcott


#11 The Sawdust Man

The Sawdust Man

    Mid-Pack Racer

  • Full Member
  • PipPipPip
  • 140 posts
  • Joined: 24-October 16
  • Gender:Male
  • Location:Canton, MI

Posted 02 December 2017 - 05:14 AM

Very nice job Gene!


Robert Manzitti

#12 anglicanbeachparty

anglicanbeachparty

    Rookie Keyboard Racer

  • Full Member
  • Pip
  • 44 posts
  • Joined: 22-February 06
  • Gender:Male
  • Location:Detroit, MI

Posted 03 December 2017 - 07:14 AM

Wow!  Great write-up, Gene!!


Paul Erlandson


#13 grooverunner

grooverunner

    Mid-Pack Racer

  • Subscriber
  • PipPipPip
  • 146 posts
  • Joined: 10-December 15
  • Gender:Male
  • Location:MA

Posted 03 December 2017 - 09:44 AM

Thanks Gene !


Ken


Ken  Hill


Electric Dreams Online Shop