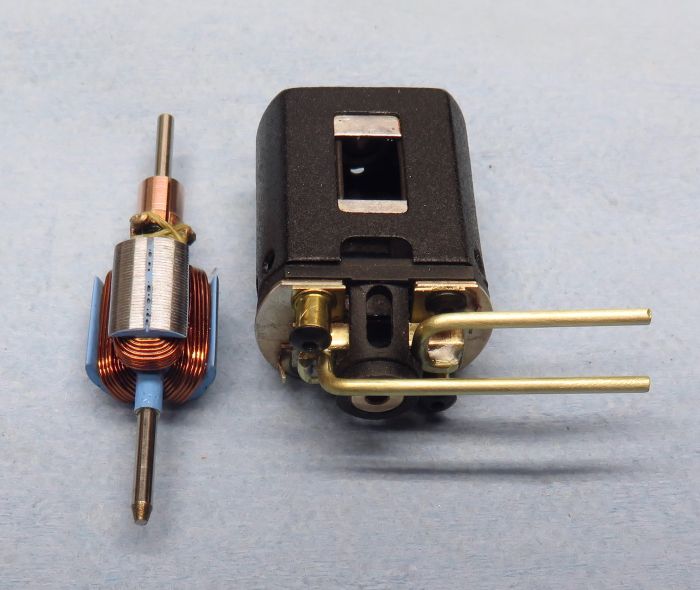
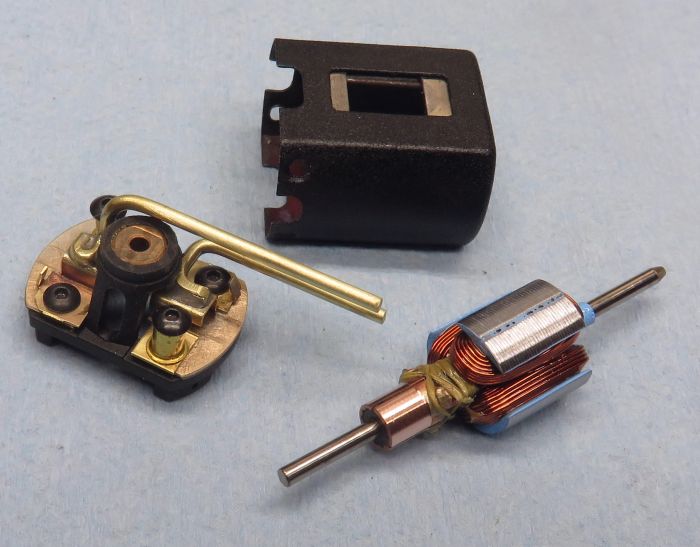
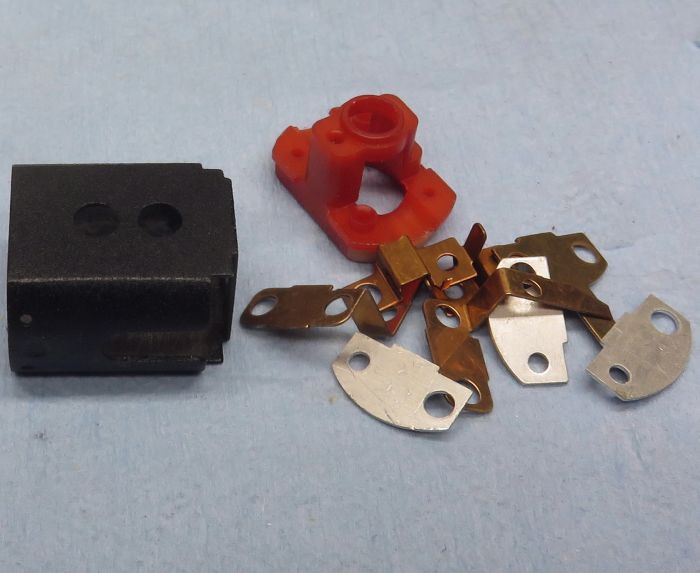
So I cleaned-up an old Mabuchi 16D can, removed the blind bushing and got busy.
*The existing can hole got reamed-out to 6mm, and a nice bearing installed.
*Four end bell mounting screw holes got drilled and countersunk.
*Some extra cutting got done for a bit better breathing.
*A coat of textured black made everything groovy.
*A set of Champion "split" can shims (*the best ones I've found) and a pair of nifty strong ceramics installed.
*A Parma "D" motor end bell got Mura hardware and a I fabbed-up a set of "old school" bussbars.
--------------------------------------------------------------------------------------------------------------------------------------------------
Soooooo...as you might have guessed, all this was leading to prep for some major muscle. ![]() So I did-up a 30/26 reverse-windTM to provide the necessary "oomph". This bad boy will haul the beans!
So I did-up a 30/26 reverse-windTM to provide the necessary "oomph". This bad boy will haul the beans!


An "almost vintage" butt-kicker
#1

Posted 14 November 2018 - 04:30 PM
- slotbaker, Jencar17, Tex and 6 others like this
#2

Posted 14 November 2018 - 05:12 PM
Bad to the Bone ![]()
- havlicek likes this
Paul Wolcott
#3

Posted 14 November 2018 - 06:42 PM
John, were these C-can ceramics you used with the Champion shims? Or did you have to cut down a pair of something to fit?
I intend to live forever! So far, so good.
#4

Posted 14 November 2018 - 08:48 PM
Bad to the Bone
Thanks Pablo!
#5

Posted 14 November 2018 - 08:50 PM
John, were these C-can ceramics you used with the Champion shims? Or did you have to cut down a pair of something to fit?
I've always used C can magnets with these Bill. They're a perfect no-hassle fit, best of any of the many types I've tried, so I wouldn't have thought of doing anything else.
#6

Posted 14 November 2018 - 09:05 PM
John, that's what i thought you were doing. I only asked to see if you had anything new going on. ![]() Those Champion 2-piece shims must be getting scarce now. With all the blue & white dot magnets I bought in the day, I only have 1 pr. of those shims & they may have come with DZs.
Those Champion 2-piece shims must be getting scarce now. With all the blue & white dot magnets I bought in the day, I only have 1 pr. of those shims & they may have come with DZs.
I intend to live forever! So far, so good.
#7

Posted 15 November 2018 - 02:37 AM
John, that's what i thought you were doing. I only asked to see if you had anything new going on.
Those Champion 2-piece shims must be getting scarce now. With all the blue & white dot magnets I bought in the day, I only have 1 pr. of those shims & they may have come with DZs.
Cut a modern C can to make similar two pieces shims. They fit well.
- havlicek likes this
#8

Posted 15 November 2018 - 05:25 AM
Cut a modern C can to make similar two pieces shims. They fit well.
Yep...done it many times.
#9

Posted 15 November 2018 - 06:31 AM
I should also mention that 30 turns of #26 is about as much of that gauge I would normally do, most often doing 26-27 turns. That's why I went to a reverse wind here, and the resulting 5-layer coils. You still wind up with a very tight, compact coil, with the last turn(s) nearest the com, and that's really the reason I came up with this way of winding.
The other thing going on here is that it was a little bit of a deal figuring out how to make these bussbars fit the Mura hardware, clear the Parma end bell, and still be able to get at the hardware screws. I also try to do these things with as much contact area between the bars and the top of the hoods for a connection that's as strong as possible. Sounds silly, but there was a fair amount of squinting, figuring and then jigging everything up to make the joints. I've said it before, but this stuff is not easy for me, and don't want to give that impression. It might be for others...not for me. ![]()

Next up in the "on deck circle", a MUCH more "S.O.P." kind of build. That's especially so since the can already got "the treatment"TM. Even the end bell and hardware are all NOS...no "saving" required!...whew!

- Jencar17, Tex, Peter Horvath and 2 others like this
#10

Posted 15 November 2018 - 08:26 AM
Those are beefy buss bars John. Are you soldering them to the hood faces a with silver solder or maybe brazing them? In the past, I've made some using a slightly smaller dia. copper wire (maybe 14 ga. or 16 ga.) & formed loops on the end that goes under the non-springpost hardware screws. I then brought the back bar up across the hood, soldered it there, & formed it forward. The front loop was soldered to the backing plate & formed forward. If the endbell had inspection holes, I used it to wire-tie the back buss I realize your brass buss bar material would be extremely difficult to form into loops.
I intend to live forever! So far, so good.
#11

Posted 15 November 2018 - 09:02 AM
#12

Posted 15 November 2018 - 10:10 AM
Those are beefy buss bars John. Are you soldering them to the hood faces a with silver solder or maybe brazing them?
I don't know, they're made from 1/16" brass rod, but I think it's a good idea to go a little on the safe side since this would allow better current flow without heating up as much as a thinner material might. These are soldered with a strong silver-bearing solder, so I think they're pretty secure.
I realize your brass buss bar material would be extremely difficult to form into loops.
Not really, one of the bussbars above is formed into a tight "U" (*again, for more contact area), which could easily have been made as a loop.
I guess buss bars are made by copper, a slightly soft metal.
I think most are Maurizio, but I prefer the better strength/rigidity of brass over copper, and both are good conductors. I *think* that slightly smaller diameter brass...like 3/64" rod would be fine for this also, and that would be even easier to bend if someone has difficulty with 1/16".
#13

Posted 15 November 2018 - 11:36 AM
John, if you need to use Parma endbells in an inline drive application, Steve Okeefe posted a method on here a few years back. I think it's still posted on his "The Independent Scratchbuilder" forum.
I intend to live forever! So far, so good.
#14

Posted 15 November 2018 - 11:58 AM
John, if you need to use Parma endbells in an inline drive application, Steve Okeefe posted a method on here a few years back. I think it's still posted on his "The Independent Scratchbuilder" forum.
Yep, I spoke with Steve about that some time back.
#15

Posted 15 November 2018 - 12:22 PM
30 Turns? Dang, what kind of car is this going into?
- havlicek likes this
#16

Posted 15 November 2018 - 12:46 PM
30 Turns? Dang, what kind of car is this going into?
Well, with most likely a bunch of both torque and revs, whatever car a person decides to put it in Mario. ![]()
- olescratch likes this
#17

Posted 15 November 2018 - 12:48 PM
Oh so this is your own build not a customers sent to you one. I get it ok. ![]()
#18

Posted 15 November 2018 - 06:48 PM
John, the bussbars brought back memories of making them from copper Romex stripped down. I never had on un-solder even running 25's and 24's at the real Speed & Sport. Of course when Bob Green/Mura came out with the ones we all know I switched. Good work on your part.
Jesse Gonzales
- havlicek and Slot-Racer like this
#19

Posted 16 November 2018 - 06:12 AM
John, the bussbars brought back memories of making them from copper Romex stripped down. I never had on un-solder even running 25's and 24's at the real Speed & Sport. Of course when Bob Green/Mura came out with the ones we all know I switched. Good work on your part.
Jesse Gonzales
Hi Jess, and thanks for looking-in. ![]() Yeah, I'm always worried about how things might fail and trying to include some insurance. Also here, the thing is that I took my time to get these bars to clear everything AND to be as parrallel with each other as I could manage. By using brass, I *think* they have a fighting chance of staying that way.
Yeah, I'm always worried about how things might fail and trying to include some insurance. Also here, the thing is that I took my time to get these bars to clear everything AND to be as parrallel with each other as I could manage. By using brass, I *think* they have a fighting chance of staying that way. ![]()
#20

Posted 16 November 2018 - 06:48 AM
Just my two cents.
- havlicek likes this
#21

Posted 16 November 2018 - 08:09 AM
I've got the same "forma mentis": try to include some insurance. In that aim I *think* copper is better than brass for the bars, because in a severe crash the stiffer brass will tend to tweak the brush hoder compromising the motor performance.
Just my two cents.
That's a good point Maurizio, and one I had considered. In the end, my thinking was that the motor is covered (I would think!!!!!) by the body, and it would take one heckuva crack-up to demo the bars. ***I make these things extra long as well, just to be sure there's more than enough there for almost any conceivable chassis. They should be cut to length once a safe length is figured out, which would also decrease the leverage they exert on the hoods, as well as the leverage anything else might exert on them in a crash.
- olescratch and Jaeger Team like this


