Jump to content


Photo

Designing and 3D-printing a modern slot car body


  • Please log in to reply
1 reply to this topic

#1 tjallen

tjallen

    Backmarker

  • Full Member
  • PipPip
  • 60 posts
  • Joined: 21-January 15
  • Gender:Male
  • Location:Mechanicsville, VA

Posted 24 February 2019 - 11:55 AM

Part 1: Drawing a Modern Slot Car Body in Tinkercad

In a previous post, Jan. 16, 2019, I described how I drew a simple 3D slot car body in Tinkercad, and sent it to Shapeways to 3D print. In that project, I created the body as a solid 3D object, which I hollowed out to create the underside of the body.

For this new project, I decided to try another method: Starting with a 3D model of the minimum requirements, I plan to cover the minimum shape with very thin, flat planks. Then I will delete the the minimum requirements model, leaving the assemblage of planks. By using this method, I will not need to hollow out the underside, since the underside is never filled in.

For this new project, I measured several of my wing car chassis. I wanted to design a body that didn't have to climb up over the front axle! With no front axle, the slot car body can rise gradually to the motor box and rear tires. Wing car chassis are anglewinders, so the motorbox is further back and wider. The wheels are also smaller than the previous design.

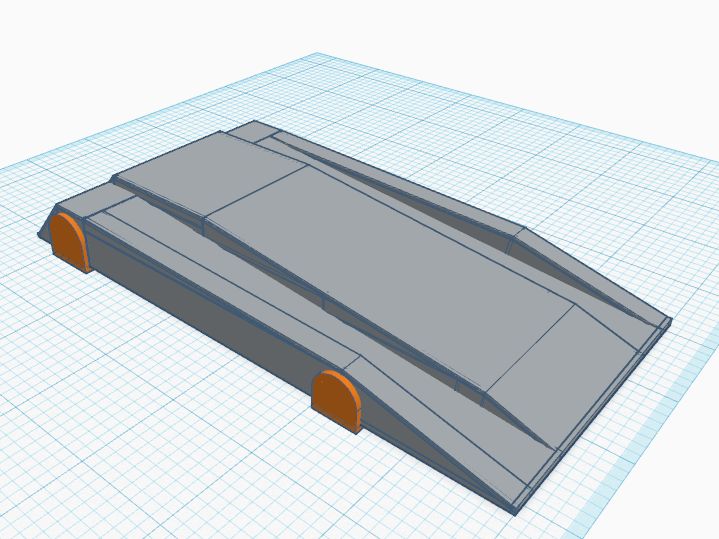
This image shows the 3D drawing of the minimum requirements, discovered by measuring several of my wing car chassis.

mbw-1a.jpg
 

A CAD drawing tip: You can easily make a duplicate of your 3D drawing. Do it! I make a copy at every crucial stage. Then, if I mess things up, I have a back-up.


Here I am laying out the planks, 1/32" (0.78mm) thick, rectangles and triangles.


mbw-2a.jpg

mbw-3.jpg

Setting out the horizontal pieces was fairly easy.

mbw-4.jpg

The outside vertical pieces were slightly more difficult, made of 5 combined, overlapping rectangles and triangles.

mbw-6.jpg

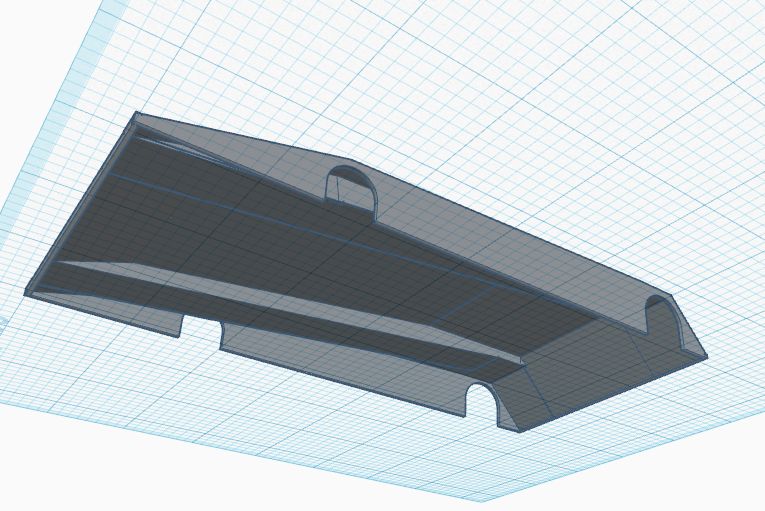
The interior vertical surfaces were much trickier. They must meet the horizontal pieces on both the top and bottom line. These pieces can not extend downward indefinitely into the hollow space below.

mbw-8.jpg

As you can see, these interior pieces had to be constructed of 2 and 9 overlapping pieces each, and fitted carefully into place. Luckily, when a panel is completed for one side, I can duplicate it, and fit it to the other side.


mbw-9.jpg

I cut holes for the wheel wells.

mbw-11.jpg

Here is the final design, ready to export as an .stl file, and upload to Shapeways.

mbw-12.jpg

mbw-13.jpg

mbw-14.jpg

Stay Tuned while I post Part 2, in just a few minutes.


  • Jesse Gonzales likes this
Jimmy Allen


#2 tjallen

tjallen

    Backmarker

  • Full Member
  • PipPip
  • 60 posts
  • Joined: 21-January 15
  • Gender:Male
  • Location:Mechanicsville, VA

Posted 24 February 2019 - 12:02 PM

Part 2: The 3D Printed Body

In about 10 days, the results of the 3D printing process arrived in the mail. Shapeways has printed my design in PA-12 (polyamide nylon).
 

mbw_6723.JPG

mbw_6722.JPG

The body is consistently 1/32" (0.8mm) thick.

mbw-18.jpg

This new design is wider, lower, and slightly shorter than the first project.

mbw_6727.JPG

The body is flexible, and very strong, too.

mbw_6751.JPG

The wing car chassis fits snugly under the body.

mbw_6730.JPG

Mock up, not quite ready to run!

mbw_6731.JPG

mbw_6732.JPG

The weight: The body weighs 15.3 grams. This is less than half the weight of the previous project, but still too heavy for a wing car body. Maybe the body panels behind the rear wheels can be removed, reducing the weight by a few grams.

mbw_6741.JPG

In comparison, in a recent post to the facebook group Slot Cars And 3D Printing, Marco Rizzi shared an Area 71 Slotcars product, a beautiful, curvy 3D printed body on the scale, at 11.25 grams, sanded and painted. The body did not have any window glass, so with glass, it probably weighs something similar to my 15 grams. I am beginning to get a handle on the weight of 3D printed bodies. See Area 71's beautiful work at this link:

https://www.facebook...94674450807838/

I have taken note of a comment on my previous post by brucefl, that I could consider this project successful, if I think in terms of molds (or casts). With small modifications, I probably could use these 3D printed bodies to make normal, lightweight slot car bodies out of more usual materials, like polycarbonate sheets. A good point, which I will pursue.

----

Extra fun:
As part of this project, I also drew and printed a super-streamlined driver. This item can be painted and glued to the body designs, for those classes that require a driver-figure.

slipstream-driver.jpg

ssd_6743a.JPG

ssd_6754.JPG


  • bbr and Jesse Gonzales like this
Jimmy Allen


Electric Dreams Online Shop