Jump to content


Photo

Inspired By Arodyn & Sandy Gross


  • Please log in to reply
86 replies to this topic

#1 havlicek

havlicek

    OCD Rewinder

  • Subscriber
  • PipPipPipPipPipPipPipPip
  • 11,198 posts
  • Joined: 20-August 07
  • Gender:Male
  • Location:NY

Posted 23 August 2008 - 03:27 PM

... I'm going to s-l-o-w-l-y have at my "version" of the Puzzle Pan chassis that Steve is building. It definitely won't be correct for the time as I'll make some changes along the way wherever it seems like a good idea.

For one, I'm doing mine out of hardened tool steel from a saw blade. After sanding off the lacquer and getting it down to a #320 grit finish, the steel blank I used came in at around .033" or so. The main pan had nice flex and weight once cut it seems (?) and it's really strong of course. There was no way I would attempt to heat and offset the drop arm, so I made it in two pieces (a man's gotta know his limitations!).

Also, once I brought a .jpg of Steve's drawing into my CAD program and traced it in 1:1 scale, I decided to scale it up slightly to a width of 3-1/8". My method for drawing the thing out on the steel is a little different from Steve's and as you can see from the picture, less accurate than his military spec precision. :shok: My cuts are nowhere near as beautiful as his either, but it should work fine.

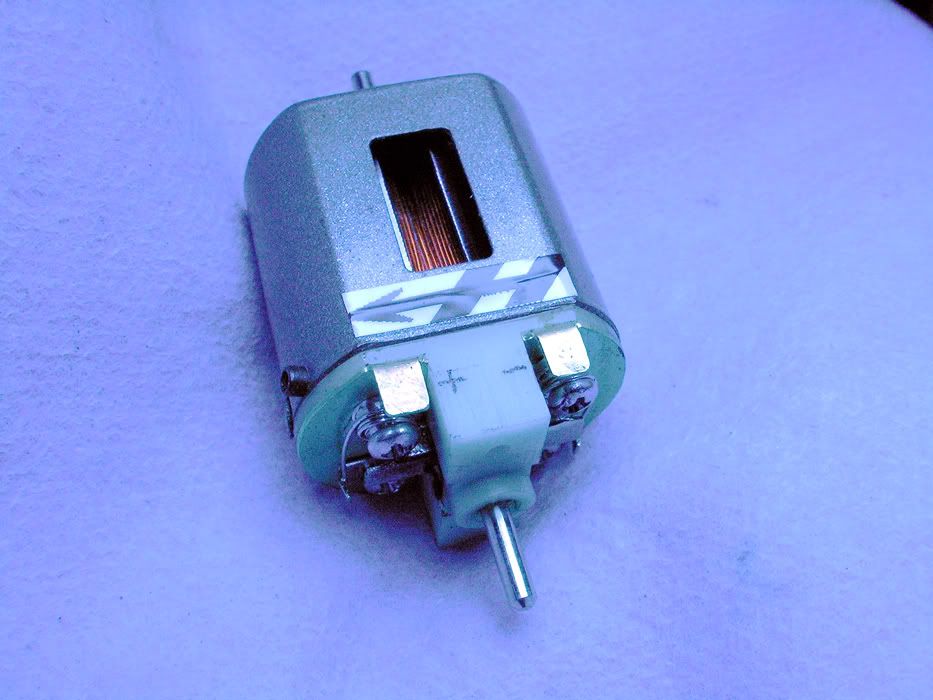
I simply cut out the pieces from a sheet printed at 1:1, lay them on the steel and scribe them with a carbide point. Just as far as I got today took me over three hours, so I'm going to put this aside for a while before I get motivated enough to have at it again. My eventual plan is to put a vintage Mura can in this thing that I fixed up a little and mount it can drive (another non-accurate aspect... ahhh what the heck). Anyway, until I get the desire to go back at it again, I got this far:

Posted Image

Another thing I was considering and aren't sure about is instead of making the drop arm hinged, doing it as a "clicker" thing like the sliding weight I saw in a Rick Thigpen (I think?) build. In that way, it could slide a bit forward and backward and also move a tiny amount side to side as well (it fits pretty tight at least right now).

I know the drop arm should be hinged for historical accuracy... but this thing isn't going to be at all accurate anyway. I wonder if allowing that kind of movement on the drop arm might make for poor contact... or be some kind of advantage???
John Havlicek


#2 Jairus

Jairus

    Body Painter Extraordinaire

  • Subscriber
  • PipPipPipPipPipPipPipPip
  • 10,174 posts
  • Joined: 16-February 06
  • Gender:Male
  • Location:Salem, OR

Posted 23 August 2008 - 04:45 PM

Good start! :)

Go, man, go...

Jairus H Watson - Artist
Need something painted, soldered, carved, or killed? - jairuswtsn@aol.com

www.slotcarsmag.com

www.jairuswatson.net
http://www.ratholecustoms.com
Check out some of the cool stuff on my Fotki!


#3 havlicek

havlicek

    OCD Rewinder

  • Subscriber
  • PipPipPipPipPipPipPipPip
  • 11,198 posts
  • Joined: 20-August 07
  • Gender:Male
  • Location:NY

Posted 23 August 2008 - 06:09 PM

Thanks, Jairus! I've got a nose-full of Dremel reinforced cut-off wheel dust mixed with steel powder over here and it looks like I have a mustache. :blink: Wood is so much easier. :)

Anyway, I'm going to watch and absorb more of Steve's build to figure out how I want to go here while I get "re-motivated".
John Havlicek

#4 havlicek

havlicek

    OCD Rewinder

  • Subscriber
  • PipPipPipPipPipPipPipPip
  • 11,198 posts
  • Joined: 20-August 07
  • Gender:Male
  • Location:NY

Posted 24 August 2008 - 11:03 AM

In keeping with my less-than-speedy build here, I got one more piece of this puzzle that I may use (or not).

Looking at the details of construction and function as explained on Steve's site, I thought that another way to achieve some vertical "slop" between the motor plate and the main pan was to just use thinner steel. I have some .020" steel from some other tool here and cut and fit it oversize for now (I'll trace and cut everything to fit the motor box after I struggle through that part later on!). However, with the main pan being .033", there's a difference of .013" between the two and that's a LOT more than the several thousandths Steve set up. It seemed like a good idea since, being lighter than the main pan material, it would shift a little of the weight forward and to the sides... and I could always grind the side stops to fit lower down instead of further up... I guess. In any case, I may just cut and fit another one out of the samw saw blade as the main pan.

For a bracket, the steel Slick 7 one seems appropriate and is going to save a lot of tedious and probably sloppy looking fabrication time. :-)

Posted Image
John Havlicek

#5 Pappy

Pappy

    Grand Champion Poster

  • Full Member
  • PipPipPipPipPipPipPipPip
  • 14,136 posts
  • Joined: 16-February 06
  • Gender:Male
  • Location:Oxford, OH

Posted 24 August 2008 - 08:02 PM

What's with the drawings? :angry: Real men don't use drawings, that's like stopping to ask directions. :laugh2: ;)

Looks as nice as the armatures you wind. :good:

Jim "Butch" Dunaway 
 
I don't always go the extra mile, but when I do it's because I missed my exit. 
All my life I've strived to keep from becoming a millionaire, so far I've succeeded. 
There are three kinds of people in the world, those that are good at math and those that aren't. 
No matter how big of a hammer you use, you can't pound common sense into stupid people, believe me, I've tried.


#6 dc-65x

dc-65x

    Grand Champion Poster

  • Subscriber
  • PipPipPipPipPipPipPipPip
  • 7,037 posts
  • Joined: 14-February 06
  • Gender:Male
  • Location:Captain Rick: The only vintage slot car nut in SW Oregon?

Posted 24 August 2008 - 09:37 PM

Hi John,

It's great to see another "Puzzler" amongst us. I say us because I hope to join in soon. I too enjoy putting these things into CAD. It's fun and for me I'm going the wussy route and turning mine over to the Laser Dude.

My hats off to you craftsman past and present that cut these things out by hand :shok: . And you, John, in spring steel no less :blink: :o .

Onward oh Master of Spring Steel :) . Thanks for sharing. :D

Rick Thigpen
Check out Steve Okeefe's great web site at its new home here at Slotblog:
The Independent Scratchbuilder
There's much more to come...


#7 havlicek

havlicek

    OCD Rewinder

  • Subscriber
  • PipPipPipPipPipPipPipPip
  • 11,198 posts
  • Joined: 20-August 07
  • Gender:Male
  • Location:NY

Posted 25 August 2008 - 05:51 AM

:D Thanks, Butch :laugh2: .

When I'm cutting something like the main pan on this thing, I would hate to screw something up because of all the time and material involved in that single piece. Having the drawings (and being able to re-scale things because of the CAD software), gives me a little peace of mind. Besides, I don't even own a machinist's square (or a jig for that matter... yeah I'm a caveman), so being able to cut the drawings up for patterns/templates allows me to lay the thing out more accurately.

Rick, thanks for the encouragement. Obviously, my build will not look anywhere near as nice as yours or Steve's (duh :laugh2: )... but the whole concept of this thing had me intrigued as soon as I saw it. I guess it's both because of just how cool looking the thing is, but also how different it is from the various hinged designs that have been around for... decades; hats-off again to Sandy Gross!

I've been looking at both simplifying the design and trying to figure alternatives to hinging the drop arm and body mounts (but allowing for movement) for a totally hinge-less design as an extension of Mr. Gross' concept, we'll see how that works out . :blink:

On the steel thing, I wish I had a Laser Dude but have no doubt if you decided to cut one of these out with a Dremel it would still be perfect. Anyway, a guy has to use the tools at hand. However, for all it's difficulty, steel does present opportunities because of it's strength-to-weight and there are already some pieces I see on the original I won't have to use because of those properties.

With all these puzzle pan builds around, maybe there should be a puzzle pan proxy in Peoria or Pittsburgh or Pawtucket? Heck... if Tony P had a puzzle pan for the puzzlepan proxy in Peoria, Pittsburgh, or Pawtucket (with pizza and prizes of course), THAT would be the penultimate puzzle pan proxy. :blink: :)
John Havlicek

#8 Pablo

Pablo

    Builder

  • Administrator
  • PipPipPipPipPipPipPipPip
  • 18,486 posts
  • Joined: 20-February 06
  • Gender:Male
  • Location:Cleveland, Tennessee

Posted 25 August 2008 - 06:54 AM

Where did this "havlicek" guy come from all of a sudden? :o :D

Paul Wolcott


#9 Pappy

Pappy

    Grand Champion Poster

  • Full Member
  • PipPipPipPipPipPipPipPip
  • 14,136 posts
  • Joined: 16-February 06
  • Gender:Male
  • Location:Oxford, OH

Posted 25 August 2008 - 07:00 AM

I think he came from the NBA. :D :laugh2: ;)

Jim "Butch" Dunaway 
 
I don't always go the extra mile, but when I do it's because I missed my exit. 
All my life I've strived to keep from becoming a millionaire, so far I've succeeded. 
There are three kinds of people in the world, those that are good at math and those that aren't. 
No matter how big of a hammer you use, you can't pound common sense into stupid people, believe me, I've tried.


#10 Jairus

Jairus

    Body Painter Extraordinaire

  • Subscriber
  • PipPipPipPipPipPipPipPip
  • 10,174 posts
  • Joined: 16-February 06
  • Gender:Male
  • Location:Salem, OR

Posted 25 August 2008 - 11:44 AM

Pablo, John has been with us for a year now. He started out by showing some early '80s chassis designs built using spring steel and I even had the honor of driving one on the Hillclimb. It ran like stink and stuck to the slot like Paris Hilton sticks to Gucci Leather in the summertime. (Now I can't get that out of my head either...)

John took a short building hiatus for about six months or more to learn and prefect his armature rewinding skills and now is probably/most-likely the nicest and most accomplished rewinder currently on the market! If you want any wind done he will do it, epoxy it and balance it with professional aplomb. I have maybe a dozen of his arms here and have used more than a few in projects during the last six months.

John Havicek is a recommended talent we should all make use of. :)

Jairus H Watson - Artist
Need something painted, soldered, carved, or killed? - jairuswtsn@aol.com

www.slotcarsmag.com

www.jairuswatson.net
http://www.ratholecustoms.com
Check out some of the cool stuff on my Fotki!


#11 havlicek

havlicek

    OCD Rewinder

  • Subscriber
  • PipPipPipPipPipPipPipPip
  • 11,198 posts
  • Joined: 20-August 07
  • Gender:Male
  • Location:NY

Posted 25 August 2008 - 01:43 PM

Jeez, Jairus... I'm blushing over here... no... really (but thanks a heap, Jairus)! Pablo was just funnin' anyway, as we've spoken several times. At least I hope he was funnin'! :blink:

Anyway, I looked at this thing and looked at it some more... and then for a change I looked at it to figure out how to proceed. First thing I did was cut and fit another motor plate out of the same .033" steel as the main pan. Then I used the old motor plate and made up two "straps (one for the drop arm and one for the motor plate) about 1/4" wide and about an eight wider than each piece.

Posted Image

Those were soldered on to the ends so they would act as a down stop for each, but also as a way to allow movement with no hinges.

I then made another piece out of steel slightly thicker than the two straps and soldered to the part of the main pan that separates the drop arm cutout from the motor plate cutout to act as a spacer. Then I cut another piece wide enough to cover both straps and to sit on the center slightly taller spacer and soldered that on (the wide cross piece seen in the picture). This last piece acts as an up stop for both the drop arm and the motor plate...as well as part of how I'll permanently locate them later on. For now, the drop arm only falls about an 1/8th", but that can be increased by bevelling the rear edge of the drop arm strap piece.

Posted Image

From the bottom, the "puzzle" look is intact.

Posted Image

That's it for a while, this took some time.
John Havlicek

#12 havlicek

havlicek

    OCD Rewinder

  • Subscriber
  • PipPipPipPipPipPipPipPip
  • 11,198 posts
  • Joined: 20-August 07
  • Gender:Male
  • Location:NY

Posted 28 August 2008 - 10:25 AM

So I figure the next thing to do is work on the whole rear end/motor area and in order to do that I need to have the gears and tires on hand for clearances. If anybody can give me some ideas regarding gear ratios for this kind of car it would be much appreciated.

The chassis is going to be a bit weighty (but not all that bad) and the motor will be a vintage Mura can, but with any arm I choose to stick in there (probably a sgl. #26, but not flaming hot).

Tires is another question, but since this car isn't meant to be at all correct for any particular period, I would work the tire size around a suggested gear ratio.

So... some starting suggestions would be much appreciated.
John Havlicek

#13 GTPJoe

GTPJoe

    On The Lead Lap

  • Full Member
  • PipPipPipPip
  • 448 posts
  • Joined: 26-July 07
  • Gender:Male
  • Location:Manch-Vegas NH

Posted 28 August 2008 - 10:58 AM

Hi John!

It looks great already. Since this really isn't running in any "class" you could go low with .720" or .750".

But let me suggest building it to the new IRRA anglewinder class specs. I think that this would give a good comparison between a brass version and your steel version to see how the handling changes based on the material used. I know Steve's gonna get some parts made and someones bound to run one of these in an IRRA race.

That said, it's .790" rears and .625" (5/8) fronts with .050" clearance both front and back. With a 26 single and coupe body you'd be flying!!

Just a thought...

GTP Joe Connolly

In theory there is no difference between theory and practice.
In practice there is.


#14 havlicek

havlicek

    OCD Rewinder

  • Subscriber
  • PipPipPipPipPipPipPipPip
  • 11,198 posts
  • Joined: 20-August 07
  • Gender:Male
  • Location:NY

Posted 28 August 2008 - 11:08 AM

Thanks for that, Joe, but I was most interested in gearing for a car like this, and had thought about .790" rears but that could change if the gearing warranted.

Since I'll be using a motor bracket, I'll have some leeway, but would like to try and start with the motor somewhat centered on the bracket with a good guess as to the gear ratio. That way, I can still move in either direction if things need to change and then solder/brace the motor to the rear axle carrier tube afterwards.
John Havlicek

#15 Pablo

Pablo

    Builder

  • Administrator
  • PipPipPipPipPipPipPipPip
  • 18,486 posts
  • Joined: 20-February 06
  • Gender:Male
  • Location:Cleveland, Tennessee

Posted 28 August 2008 - 07:24 PM

I'd be willing to guess on gearing, since I have several vintage cars with Mura motors, but first I need to know, 1) pitch (48p would be period-correct), 2) what size spur hangs level with the bottom of the chassis, and 3) what size wheels?

Paul Wolcott


#16 havlicek

havlicek

    OCD Rewinder

  • Subscriber
  • PipPipPipPipPipPipPipPip
  • 11,198 posts
  • Joined: 20-August 07
  • Gender:Male
  • Location:NY

Posted 28 August 2008 - 07:39 PM

Hi Pablo,

I was planning on attacking this thing from a different angle, making the gearing the first decision and then working the other things like clearances and tire size decisions afterwards. Period-correct doesn't mean anything on this since nothing about it (other than the general concept) is correct. I would tend to go with 64 pitch gears just for function and probably 3/32" axles as well (but not necessarily). I can work the chassis clearance a bit from here since the motor box and bracketry will be built afterwards.

Any advice though would be appreciated since I have a fair amount of work in this thing and have only just started. Anything that can save me from some missteps would be a help!
John Havlicek

#17 Pablo

Pablo

    Builder

  • Administrator
  • PipPipPipPipPipPipPipPip
  • 18,486 posts
  • Joined: 20-February 06
  • Gender:Male
  • Location:Cleveland, Tennessee

Posted 28 August 2008 - 08:28 PM

Disclaimer: No one has ever built a scratchbuilt car using a 300,000 RPM motor with lots of torque before. Just kidding, John :laugh2:

Anything that can save me from some missteps would be a help!

OK my advice is: decide on gear pitch and axle size first. If 64 pitch and 3/32" axle, then a 37 tooth will clear OK using approximately .750" wheels.

Then decide on pinion. Start conservative at about 4.6 to one (8t) then check motor temp after a few laps; if it's not hot, go to a 9t (4.1 to one). I think you will find a 4.0 to 4.3 numerical ratio to be in the ballpark. In a vintage motor the first thing that's gonna cook off is the endbell. LOL.

Hope this helps, and I'm curious to know if others agree or disagree with my advice...

If you need any vintage gears (or anything else) your wish is my command :)

Paul Wolcott


#18 havlicek

havlicek

    OCD Rewinder

  • Subscriber
  • PipPipPipPipPipPipPipPip
  • 11,198 posts
  • Joined: 20-August 07
  • Gender:Male
  • Location:NY

Posted 28 August 2008 - 09:04 PM

OK Pablo... that's pretty much in line with what I had been thinking and gives me a good place to start.

Thanks also for your generous offer!
John Havlicek

#19 Pablo

Pablo

    Builder

  • Administrator
  • PipPipPipPipPipPipPipPip
  • 18,486 posts
  • Joined: 20-February 06
  • Gender:Male
  • Location:Cleveland, Tennessee

Posted 28 August 2008 - 09:26 PM

You are welcome, sir. Anything I have in my "vintage box" is yours for the asking. :)

Paul Wolcott


#20 havlicek

havlicek

    OCD Rewinder

  • Subscriber
  • PipPipPipPipPipPipPipPip
  • 11,198 posts
  • Joined: 20-August 07
  • Gender:Male
  • Location:NY

Posted 29 August 2008 - 03:21 PM

So again moving at glacial speed :unsure:...

I thought for a while about how I wanted to attack the motor-end of the thing, and came up with a different approach from the original. Probably not "better", but very strong and I think it will save me from a couple of extra pieces. Hey... a microgram here and a microgram there might add up. :)

I decided to do a "hoop" to carry the rear axle and work my way forward, but still copying Steve's dimensions and placement pretty closely. This allowed me an easy way to "hop up" the .033" necessary to get over the motor plate and run full-length all in one piece by making the two short bends at the front of the motor box, kicking them up slightly and have them run as far forward as possible for strength. A bunch of acid and silver solder did the rest. A crosspiece on top of the two "runners" will act as downstops allowing limited movement for the motor plate assembly.

So here's where I'm at as of now and showing how the movement works.

Posted Image
John Havlicek

#21 Tex

Tex

    Grand Champion Poster

  • Full Member
  • PipPipPipPipPipPipPipPip
  • 9,247 posts
  • Joined: 07-July 06
  • Gender:Male
  • Location:Denton, TX

Posted 29 August 2008 - 04:04 PM

Mmmmm... steel, baby, steel!
Richard L. Hofer

Remember, two wrongs don't make a right... but three lefts do! Only you're a block over and a block behind.

#22 havlicek

havlicek

    OCD Rewinder

  • Subscriber
  • PipPipPipPipPipPipPipPip
  • 11,198 posts
  • Joined: 20-August 07
  • Gender:Male
  • Location:NY

Posted 29 August 2008 - 08:07 PM

... Steel is nice stuff, Tex. Difficult yes, but nice (reminds me of a certain someone). :laugh2:
John Havlicek

#23 Tex

Tex

    Grand Champion Poster

  • Full Member
  • PipPipPipPipPipPipPipPip
  • 9,247 posts
  • Joined: 07-July 06
  • Gender:Male
  • Location:Denton, TX

Posted 29 August 2008 - 10:01 PM

I cut one or two from spring steel back in the day. I breathed plenty of Dremel disk and steel dust. Didn't seem to help, though.
Richard L. Hofer

Remember, two wrongs don't make a right... but three lefts do! Only you're a block over and a block behind.

#24 68Caddy

68Caddy

    The Direktor

  • Full Member
  • PipPipPipPipPipPipPipPip
  • 10,546 posts
  • Joined: 17-March 07
  • Gender:Male
  • Location:CA, by the beach of course

Posted 29 August 2008 - 11:15 PM

Tex, think about all the toxin we are doing for the hobby, no wonder that we are dropping like flies... :laugh2: :laugh2:

But it's all good to show your desire for this hobby. ;)

I've started to love the fumes of paint and solder. :blink:

Nesta aka 68 Caddy
- Gabriel
Nesta Szabo

In this bright future you can't forget your past.
BMW (Bob Marley and the Wailers)

United we stand and divided we fall, the Legends are complete.
I'm racing the best here at BP but Father time is much better then all of us united.
Not a snob in this hobby, after all it will be gone, if we keep on going like we do, and I have nothing to prove so I keep on posting because I have nothing to gain.
It's our duty to remember the past so we can have a future.

Pistol Pete you will always be in my memory.

#25 havlicek

havlicek

    OCD Rewinder

  • Subscriber
  • PipPipPipPipPipPipPipPip
  • 11,198 posts
  • Joined: 20-August 07
  • Gender:Male
  • Location:NY

Posted 01 September 2008 - 12:43 PM

I got the rear axle tube, motor bracket, and additional bracing done and the whole rear end is very strong at this point. It's starting to look like a chassis a little now.

Posted Image
John Havlicek


Electric Dreams Online Shop