


In preparation for constructing my portable home track - which I initially posted my "Origami Track" concept thread, I wanted to gather as much information on techniques, materials used etc.,.
I read through many DIY home track builds and was was researching for information of the different types of materials people actually used - with success - when routing curves.
For practice, I went ahead and made a pivot arm to draw out curved track lanes, and thought about the router adapter plate many people have made.
As I drew the straightaway, then the curve, I remembered the many photos as well as the videos showing how they routed the curve with the swing arm, as it was lined up with the straightaway.
Being my first track build, I am not confident that I could accurately match up the tangents.
That's when I decided to employ a router guide strip.
Someone makes a kit using lexan strips, others have used this method, others suggest aluminum square rod, while some have mentioned using garden or irrigation hose.
I wanted to employ a guide strip but did not know what I would use.
I went to Lowe's and came across PVC molding in a variety of shapes. I picked up a 5/8” solid square bar 8 feet long and it felt flexible.
I attempted to see how far it would bend. I determined that without heating it, it would not bend enough to use as a guide for my specs for a hairpin turn.
I kept walking around and in the plumbing section I came across Pex Tubing. Very low price and quite flexible, yet with enough wall rigidity to resist “deforming/squishing” from pressing the router against it.
I picked up a 1/2"x 5 foot piece for $2, They have 25 feet available for less than $9; very economically priced!
I came home to research and experiment and was very pleased with the results.
Finding a router guide material was a hurdle for me but I’m satisfied with my discovery.
Research and Experimentation (R&E):
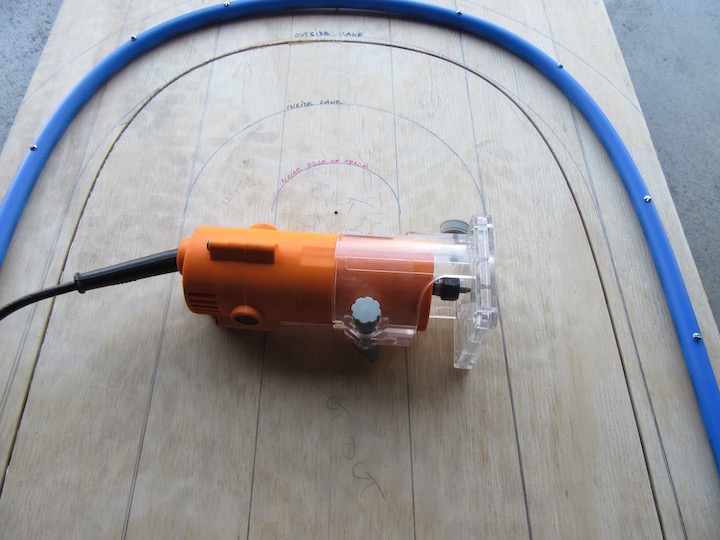
I used the 2' x 2' plywood board that I drew the track lanes on, to layout the router guide strip and determine how well the router glides along.
Initially I drew my turn lines using a pivot bar which obviously results in a perfect arc.
As I was starting to drill and screw down the Pex Tubing I decided to change the curve design to meld a 60 degree (approximately) radius into the turn.
If you look closely at the photos, you can view the linear difference between the drawn lines juxtaposed to the router guide strip and the routed slot.

I've decided on MDO plywood for my track material instead of the "standard" MDF board.
Why? It's lighter, stiffer, won't sag in the middle (depending on length) like MDF - thus not requiring underside support beams - remember I'm trying to keep the track light so I can fold it up and lift it!
Here is a brief description on MDO:
MDO stands for medium density overlay. It is a special type of material that is made from pressed plywood and a layer of resin bonded over the surface with heat and pressure. MDO offers special benefits over other materials as it is:
- Weather-resistant – can withstand the elements for years before degradation.
- Smooth surface makes it perfect for paint to stick on and appear professional.
- Wear and tear durable – While not as solid as real wood panels, MDO can withstand friction and every day wear and tear better.
I spoke with our illustrious member and slot car track builder - Steve Ogilvie, in regards to MDO, and he mentioned that when routing the slot, it leaves "fuzz" on the edge of the cut, while MDF leaves a nicer finish when routed.
Here's a picture of what Steve mentioned:
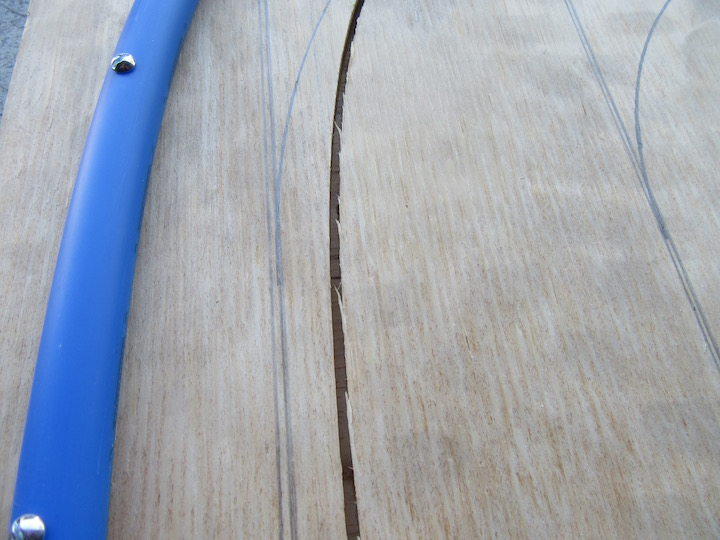
I placed a car in the slot and pushed it around the curve and due to the "fuzziness" there was quite a bit of drag.
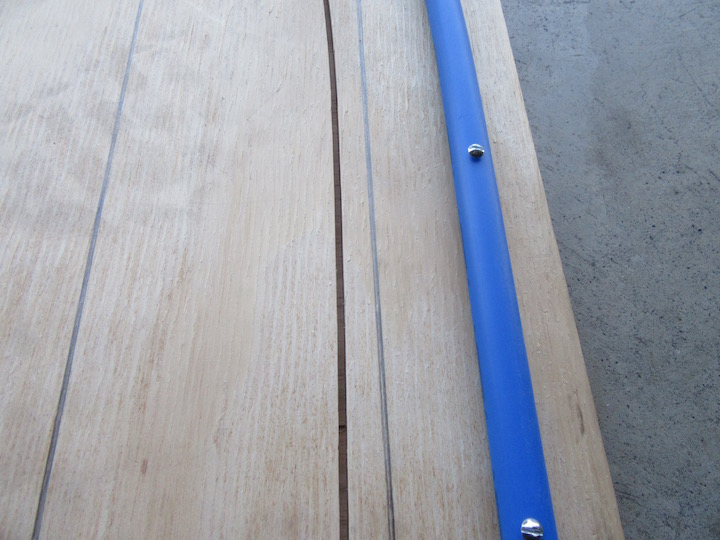
I decided to sand 1/2 of the turn and was left with a very nice finish; any plywood burrs can easily be remedied with a drop of Super Glue (SG) then sanded smooth.
I was satisfied with the visual results, which can only get better with some priming and painting!
Take a look:

I then pushed the car around once again, and the unfinished slot still had quite a bit of drag but upon reaching the sanded area, it pushed thru very smoothly!
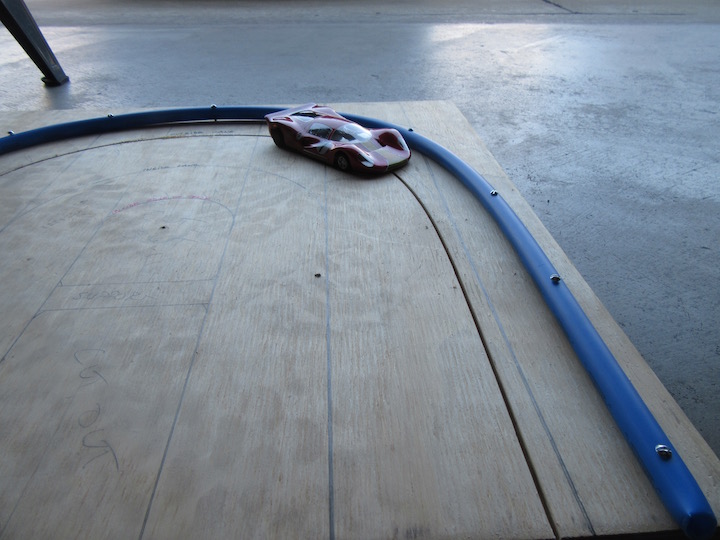

Again, it can only get better with priming and painting.
I do not own a plunge router, but my trim router worked very well.
I'm pleased with the R&E results and decided to employ this tubing for use in the fabrication of my portable track.
I'll be starting the construction, hopefully in the very near future.
Next on my to do list is:
I have to come to a definitive width and length of the track, as well as a design layout and how many pieces will be employed with folding capabilities.
Just wanted to share my findings.
Thank you for looking!
Ernie


