Jump to content


Photo

Braverman's 'Whatever Lola wants, Lola gets!'


  • Please log in to reply
29 replies to this topic

#1 dc-65x

dc-65x

    Grand Champion Poster

  • Subscriber
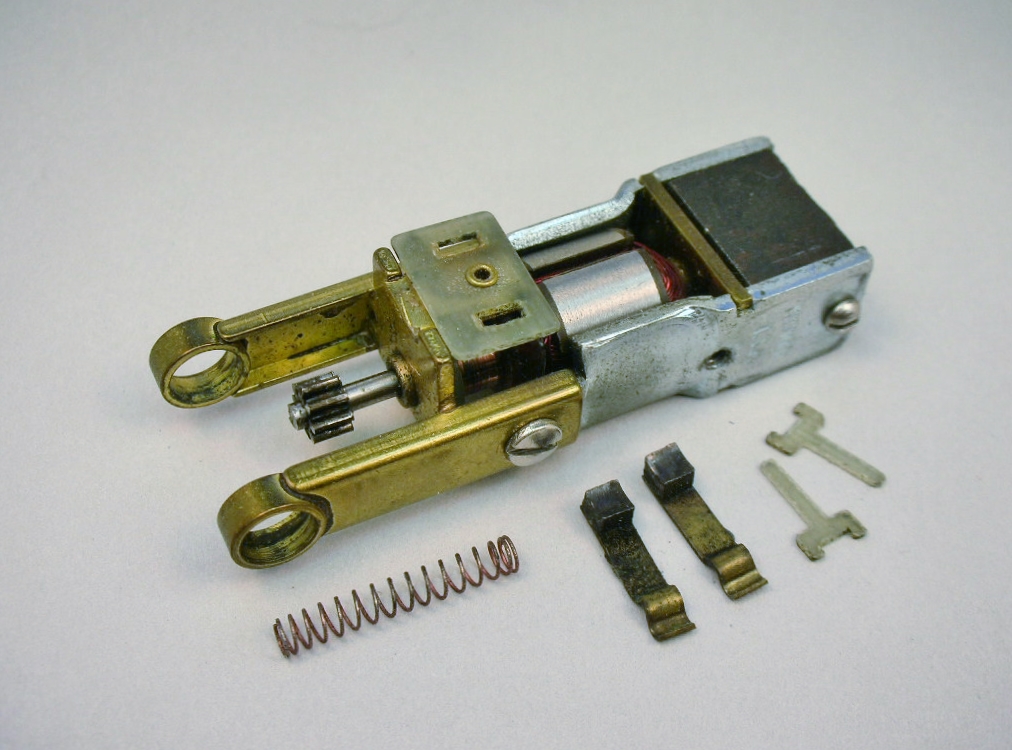
  • PipPipPipPipPipPipPipPip
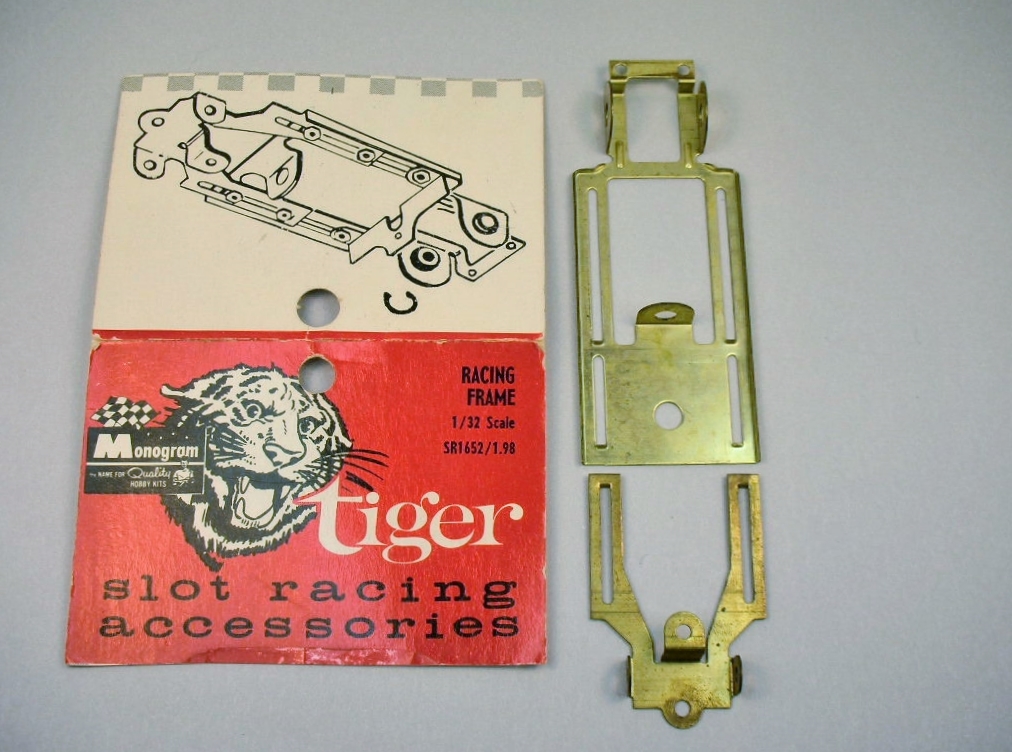
  • 6,976 posts
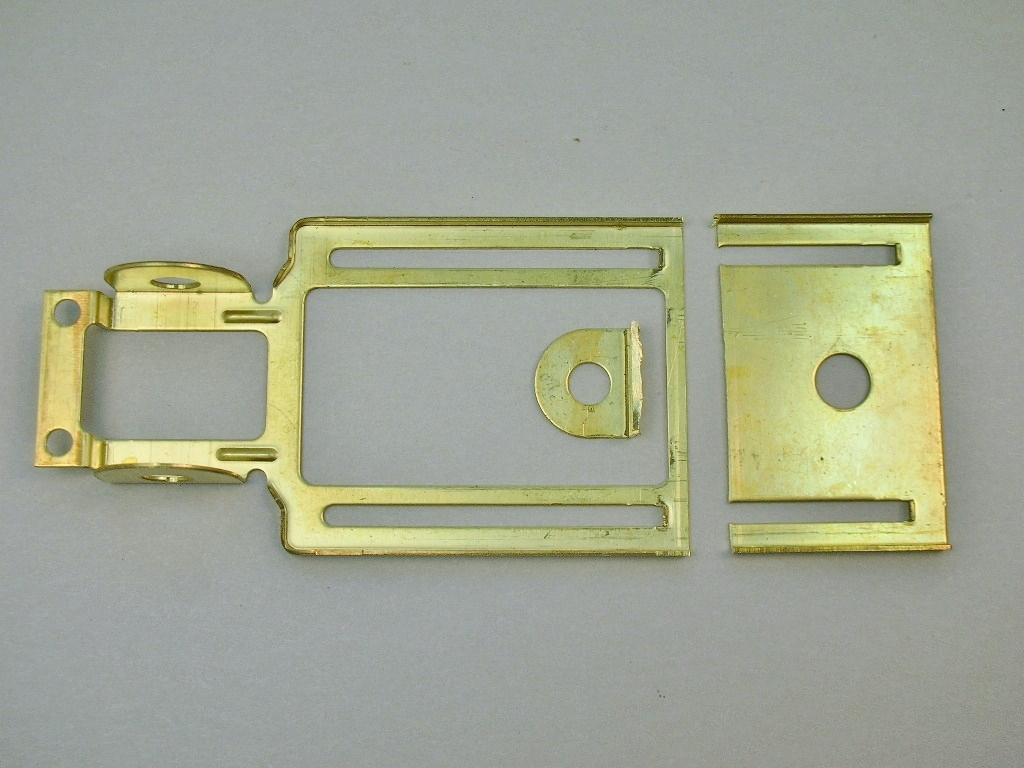
  • Joined: 14-February 06
  • Gender:Male
  • Location:Captain Rick: The only vintage slot car nut in SW Oregon?

Posted 24 August 2021 - 03:53 PM

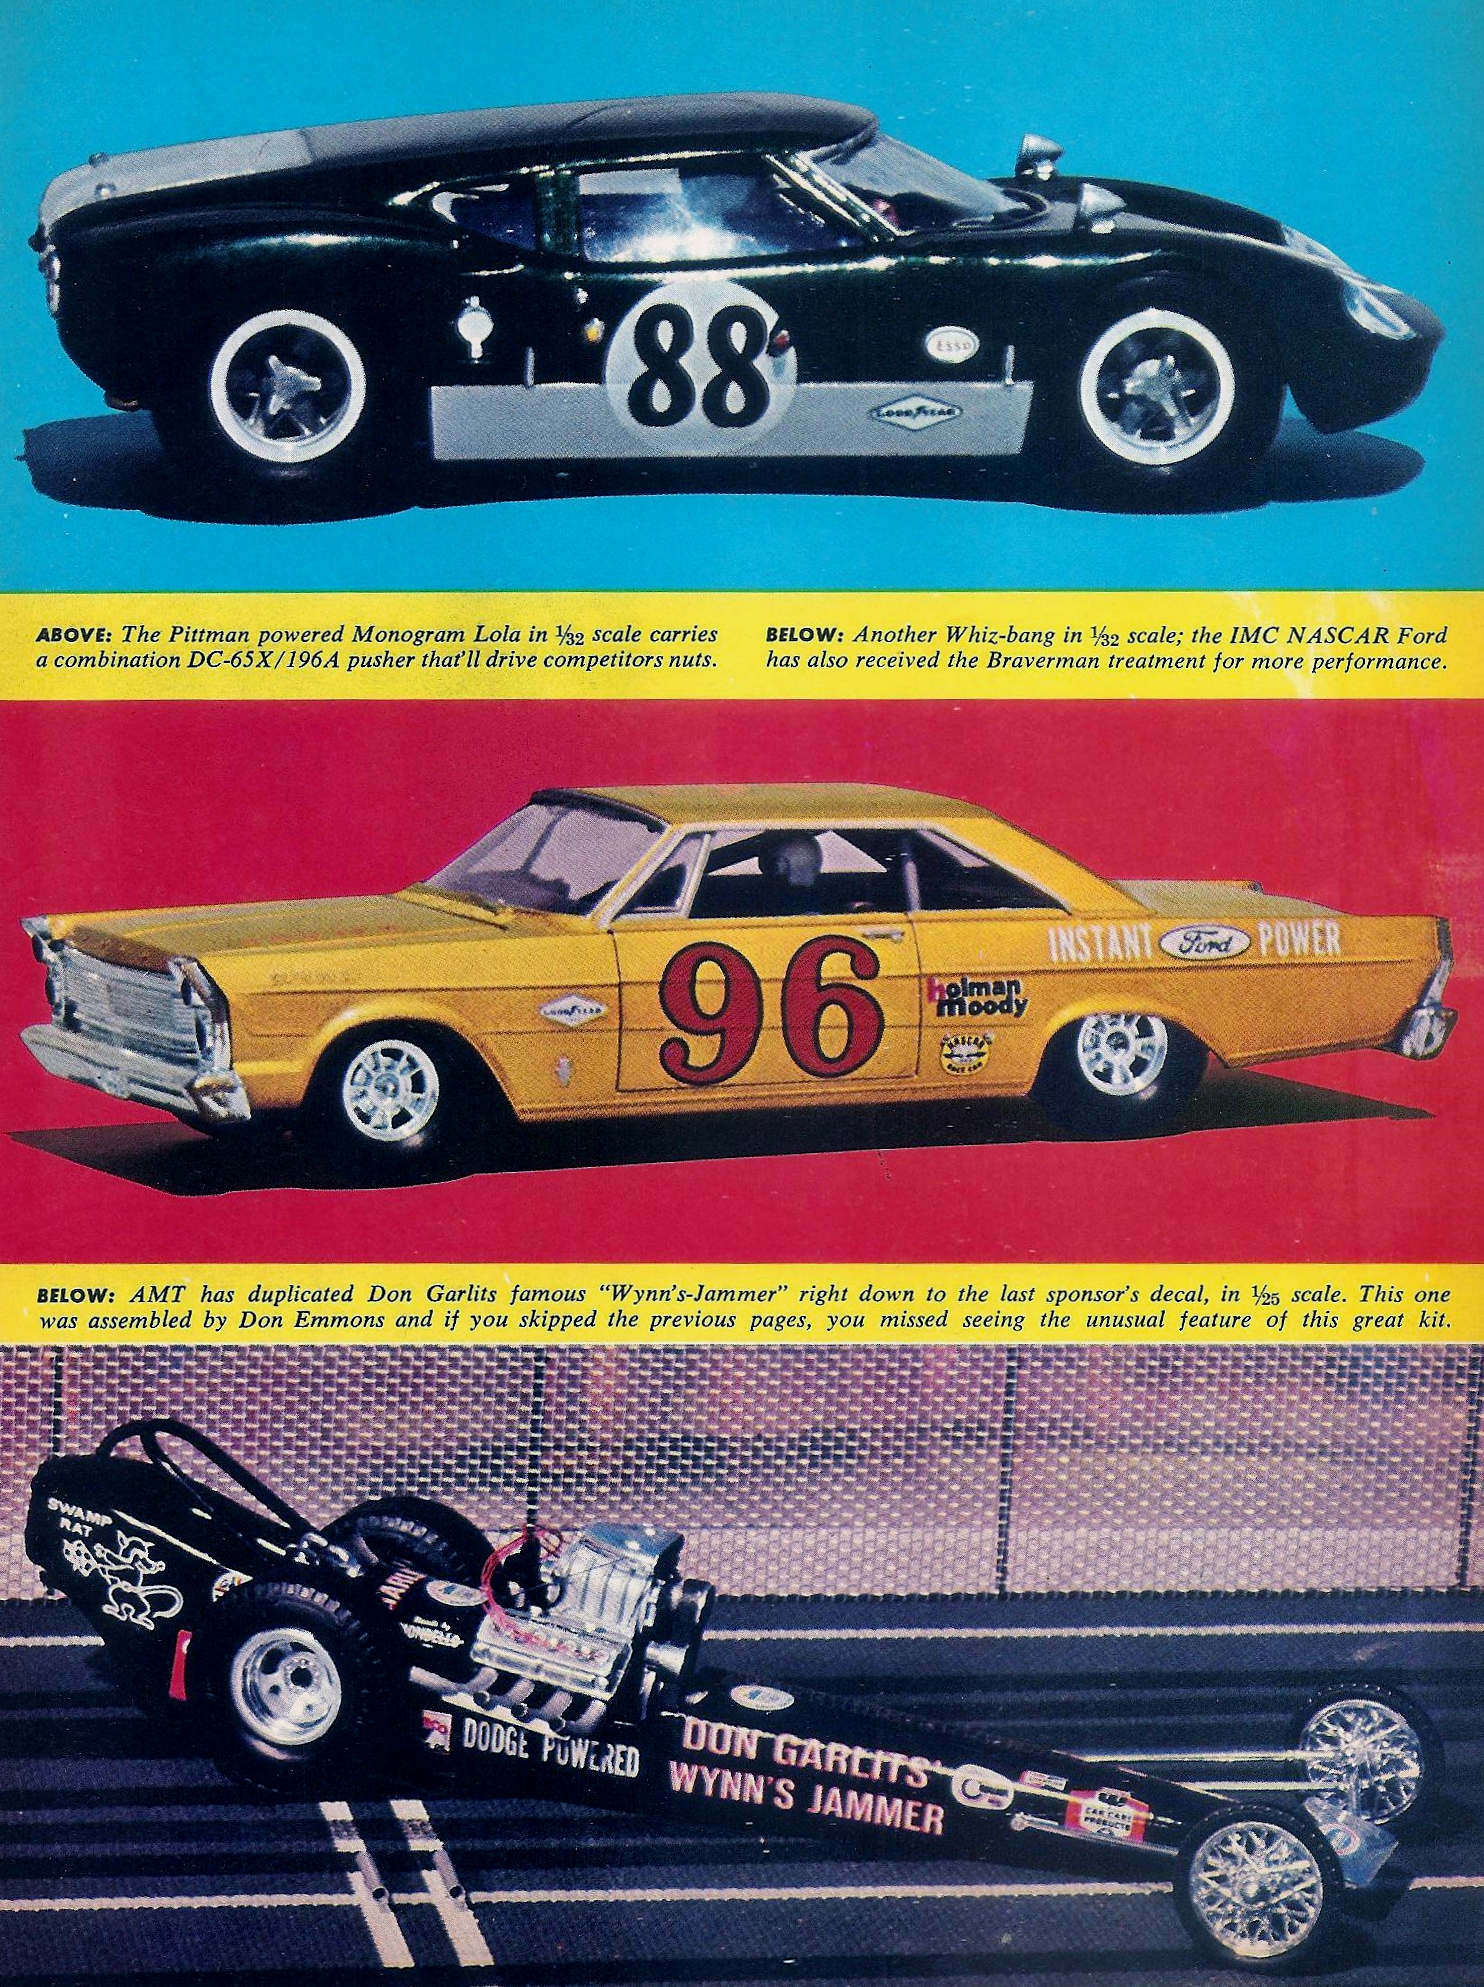
I was really impressed as a 15 year old in 1965 when I saw Bob Braverman's modifications to a Monogram Lola GT and I still am (top car in the photo): 


R&C 7-1965 (6).jpg


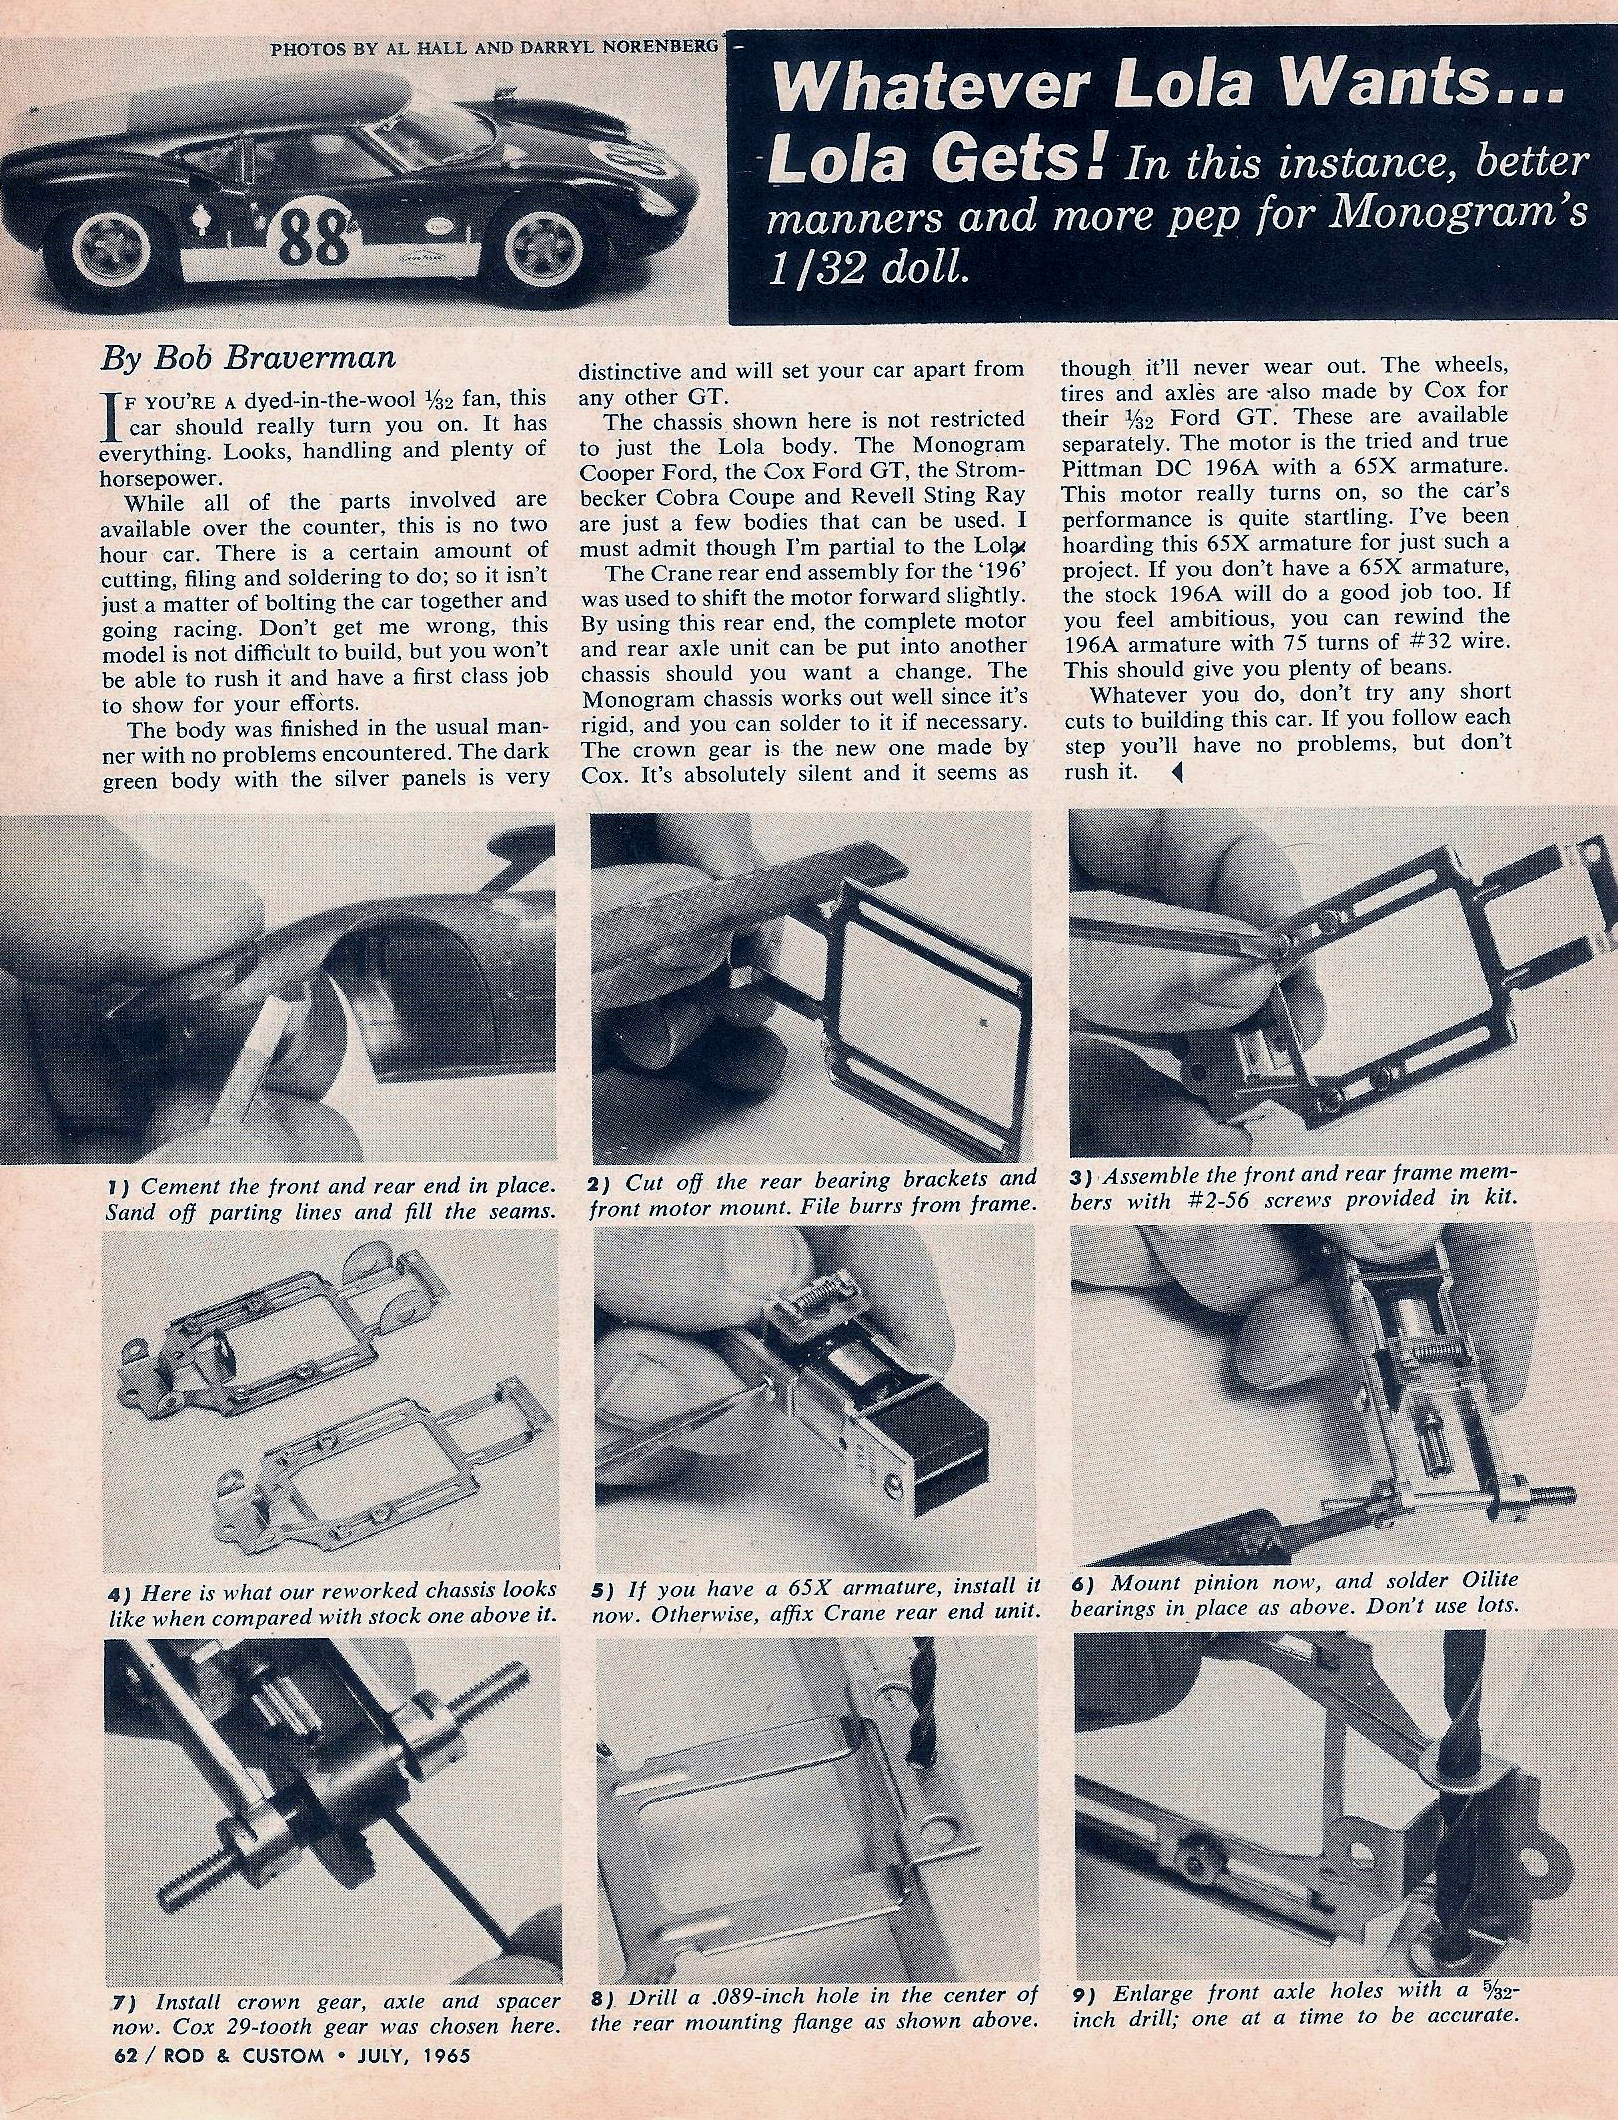
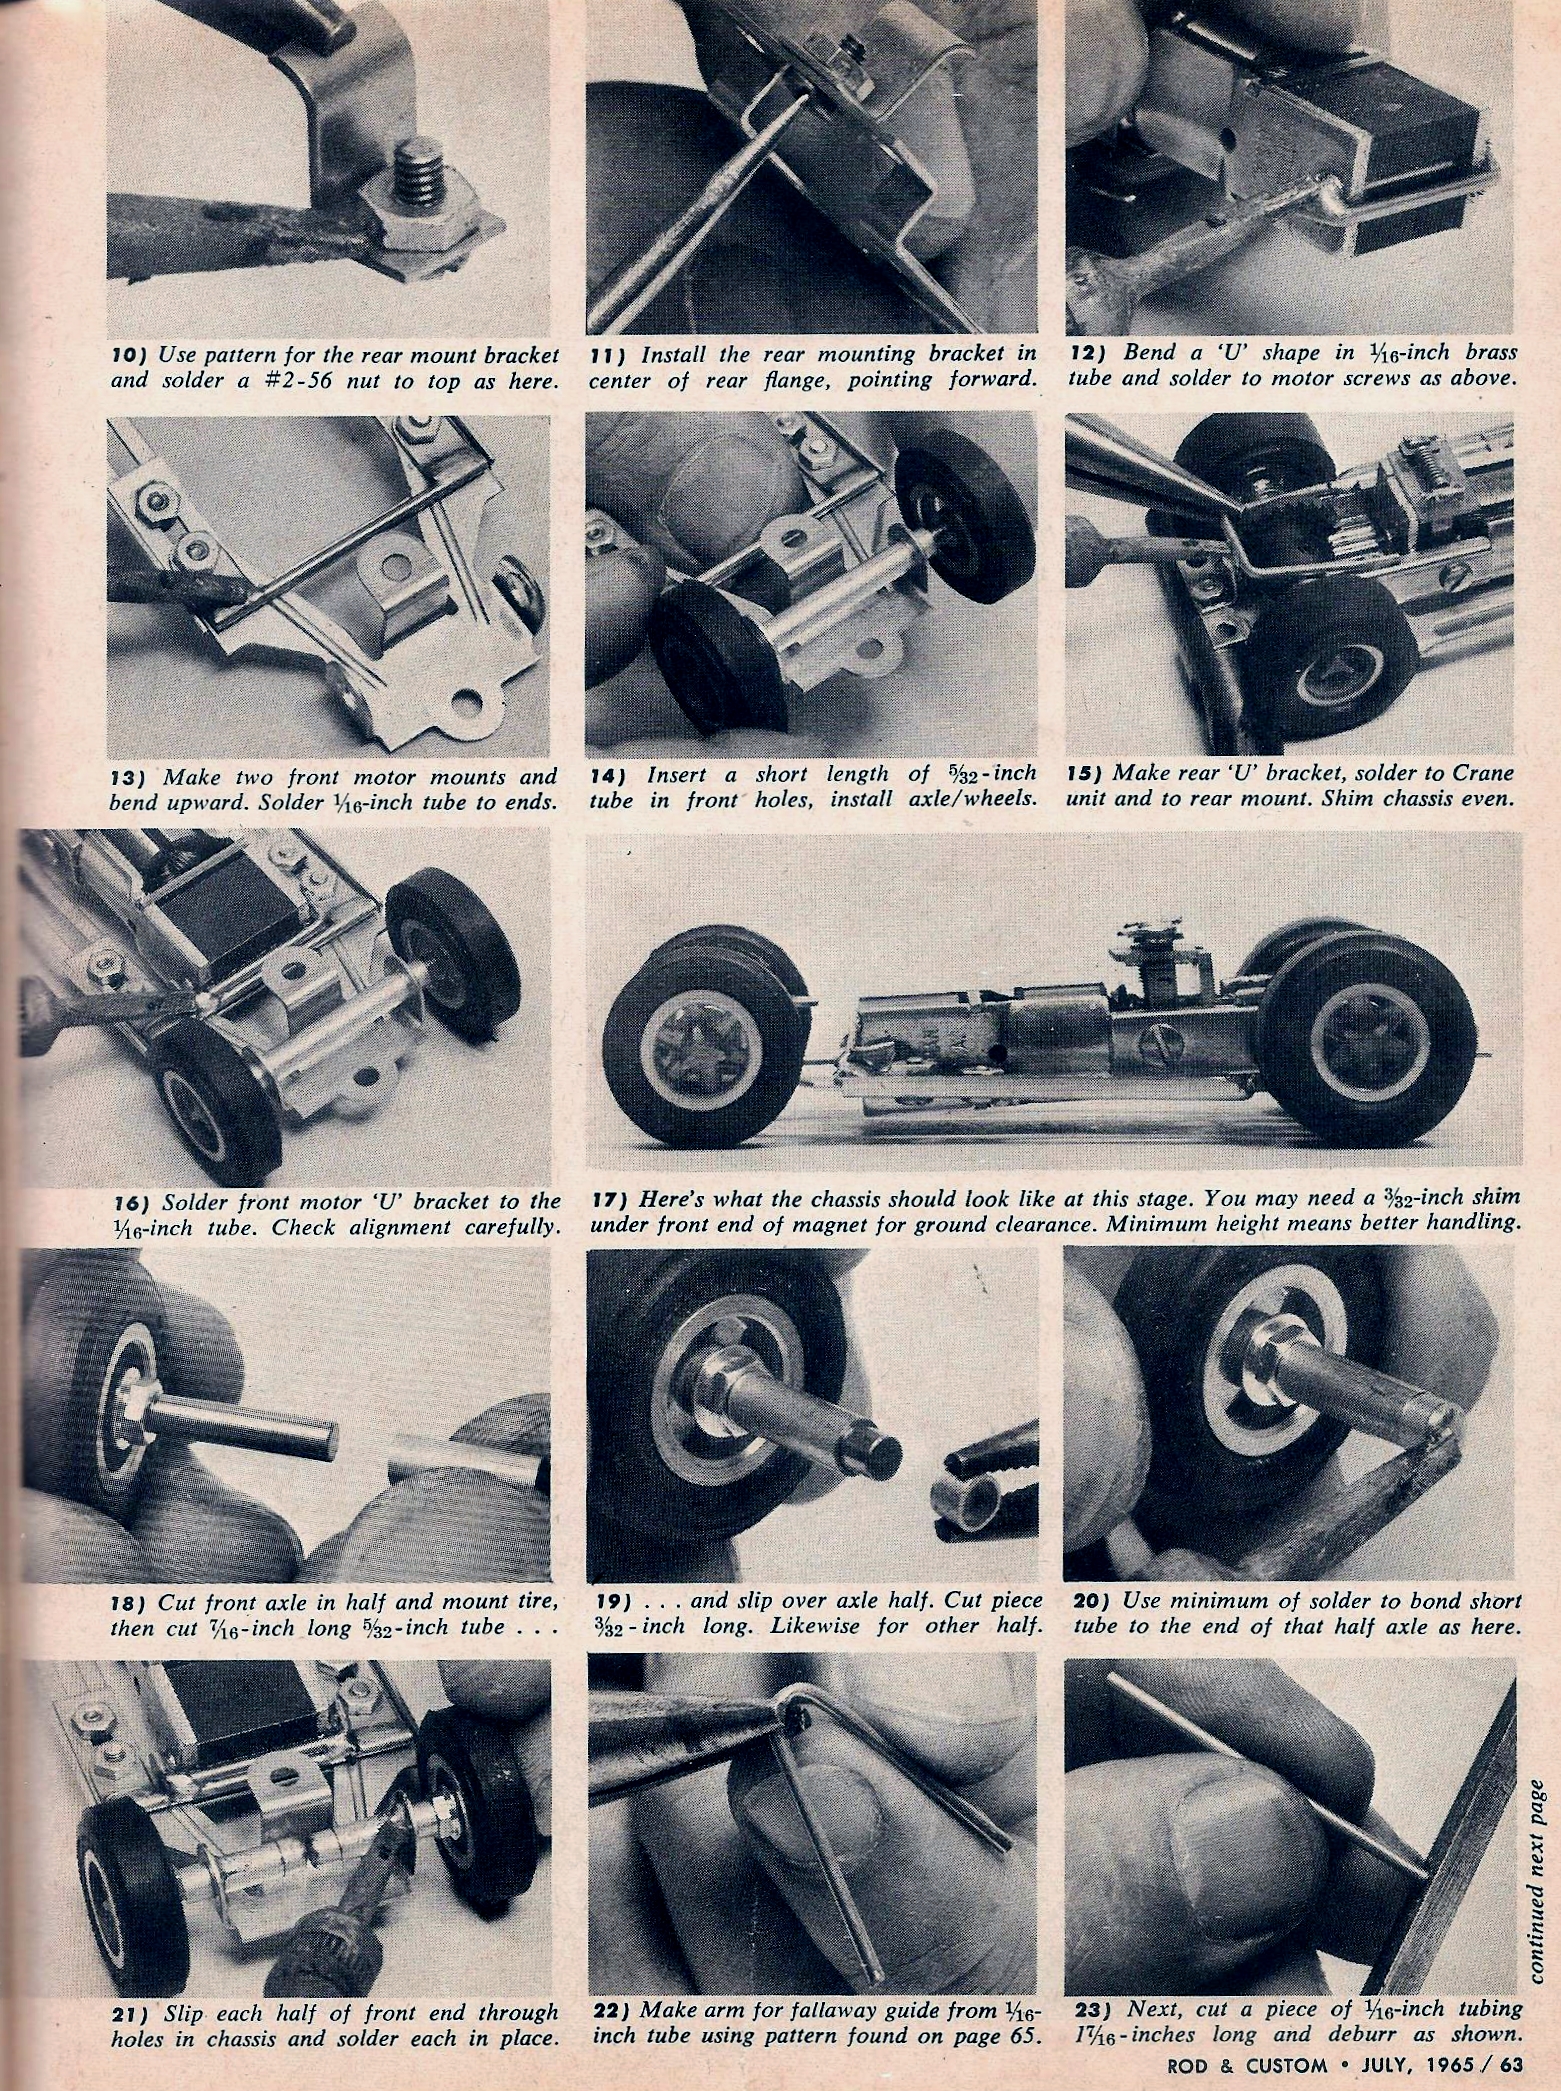
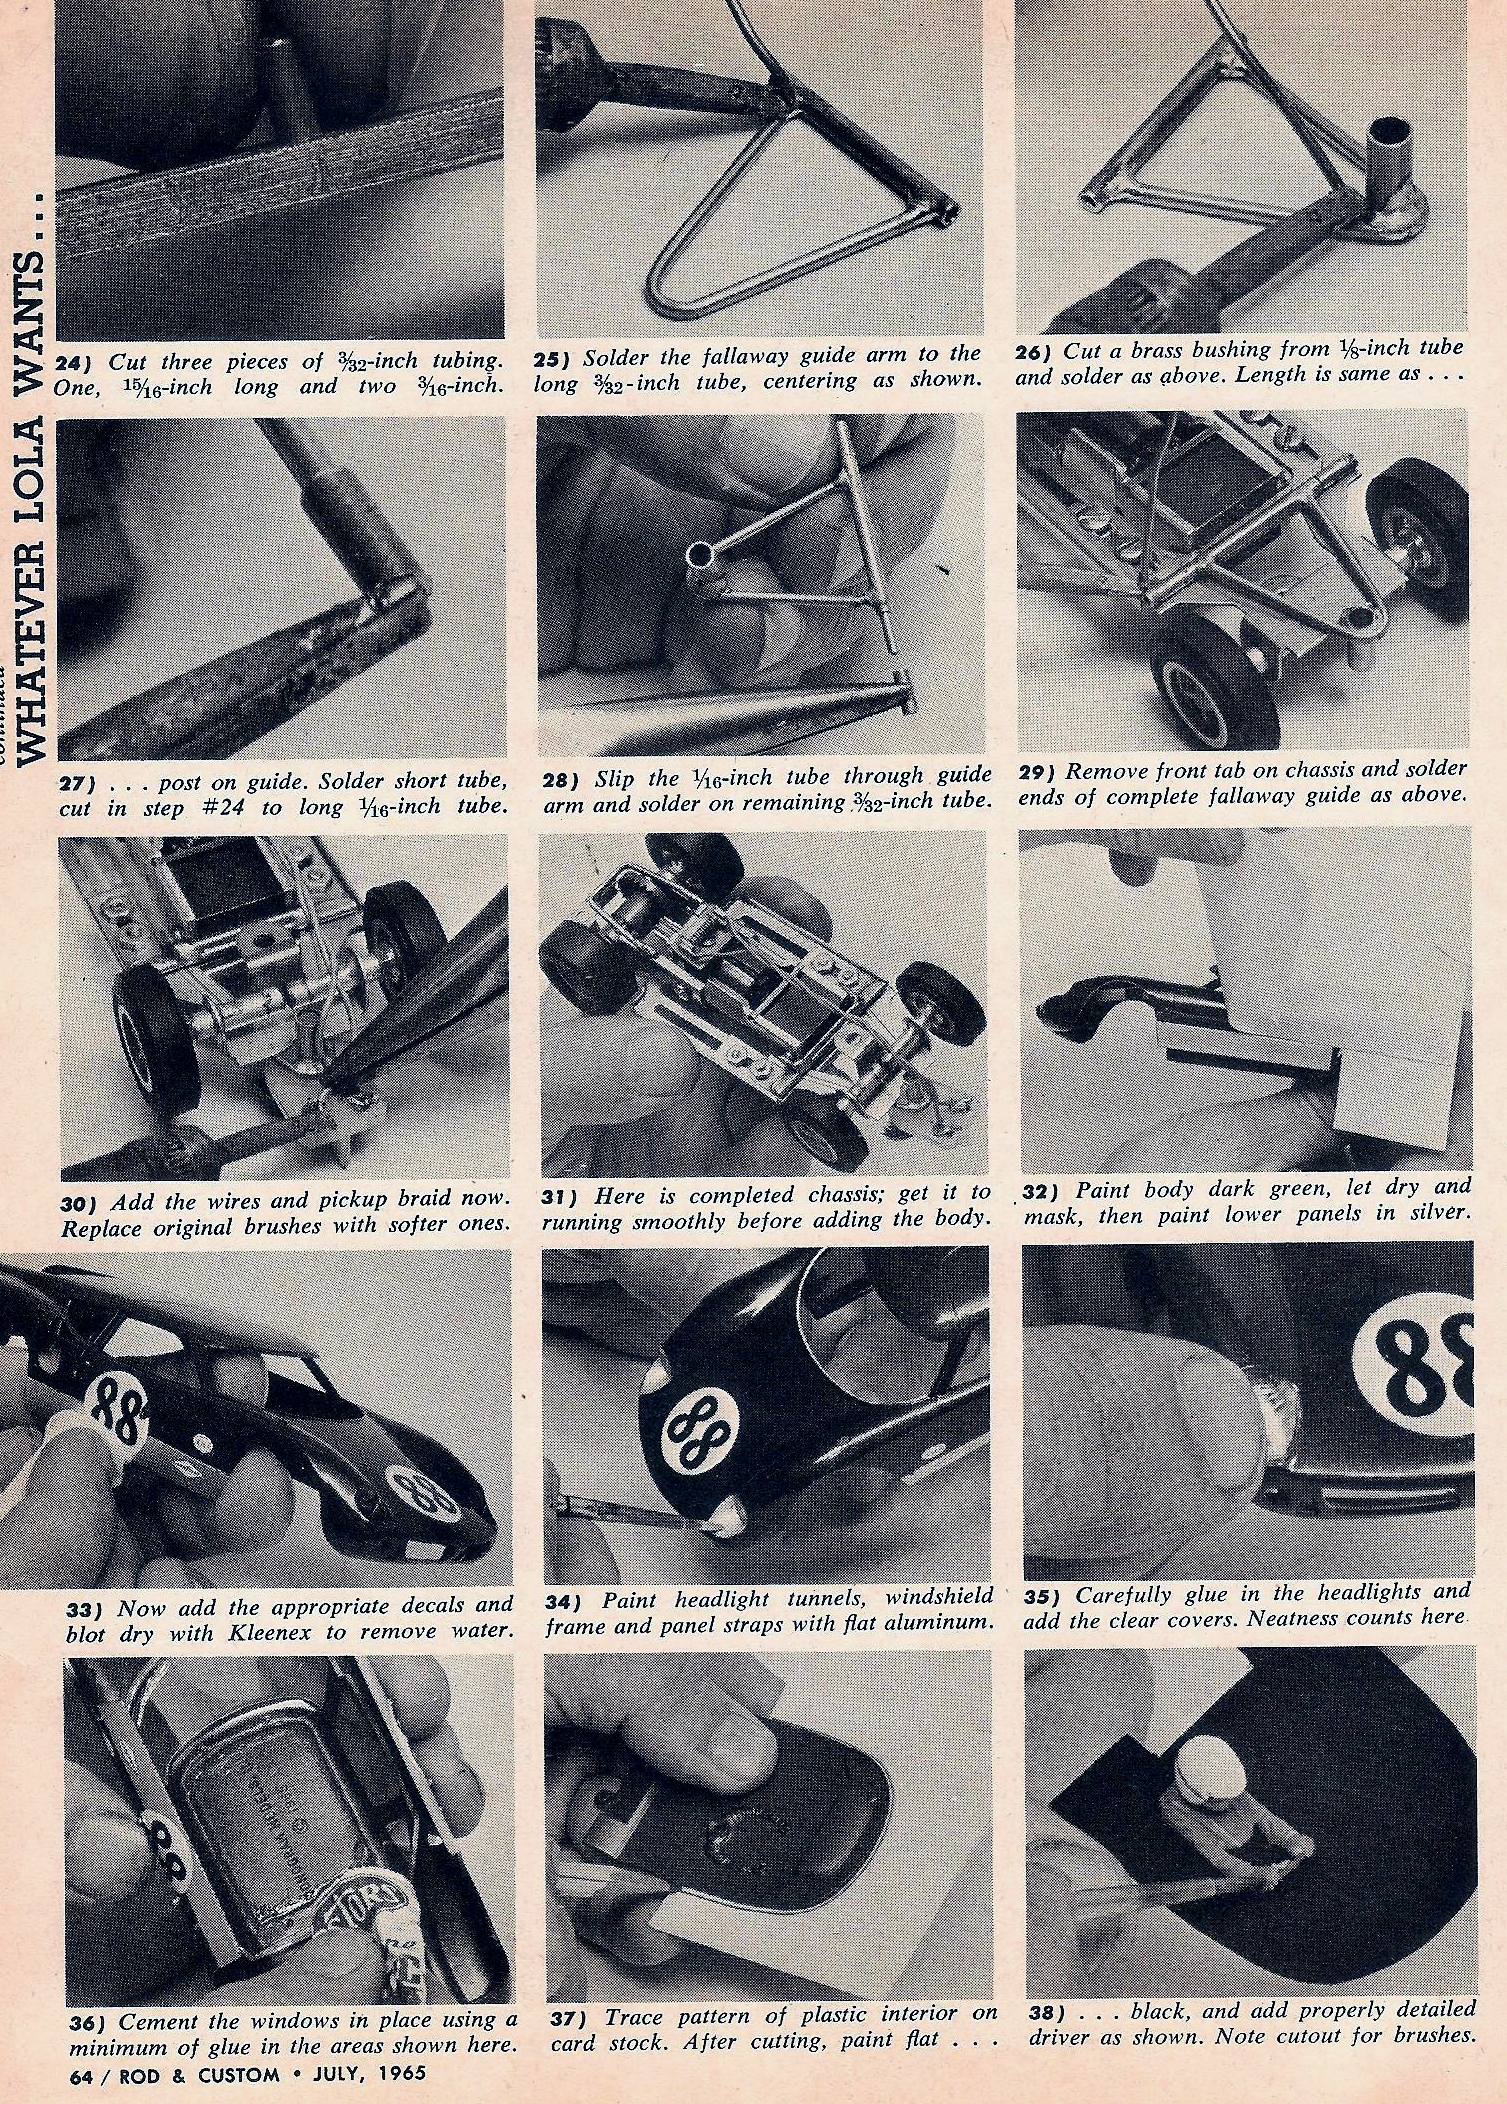
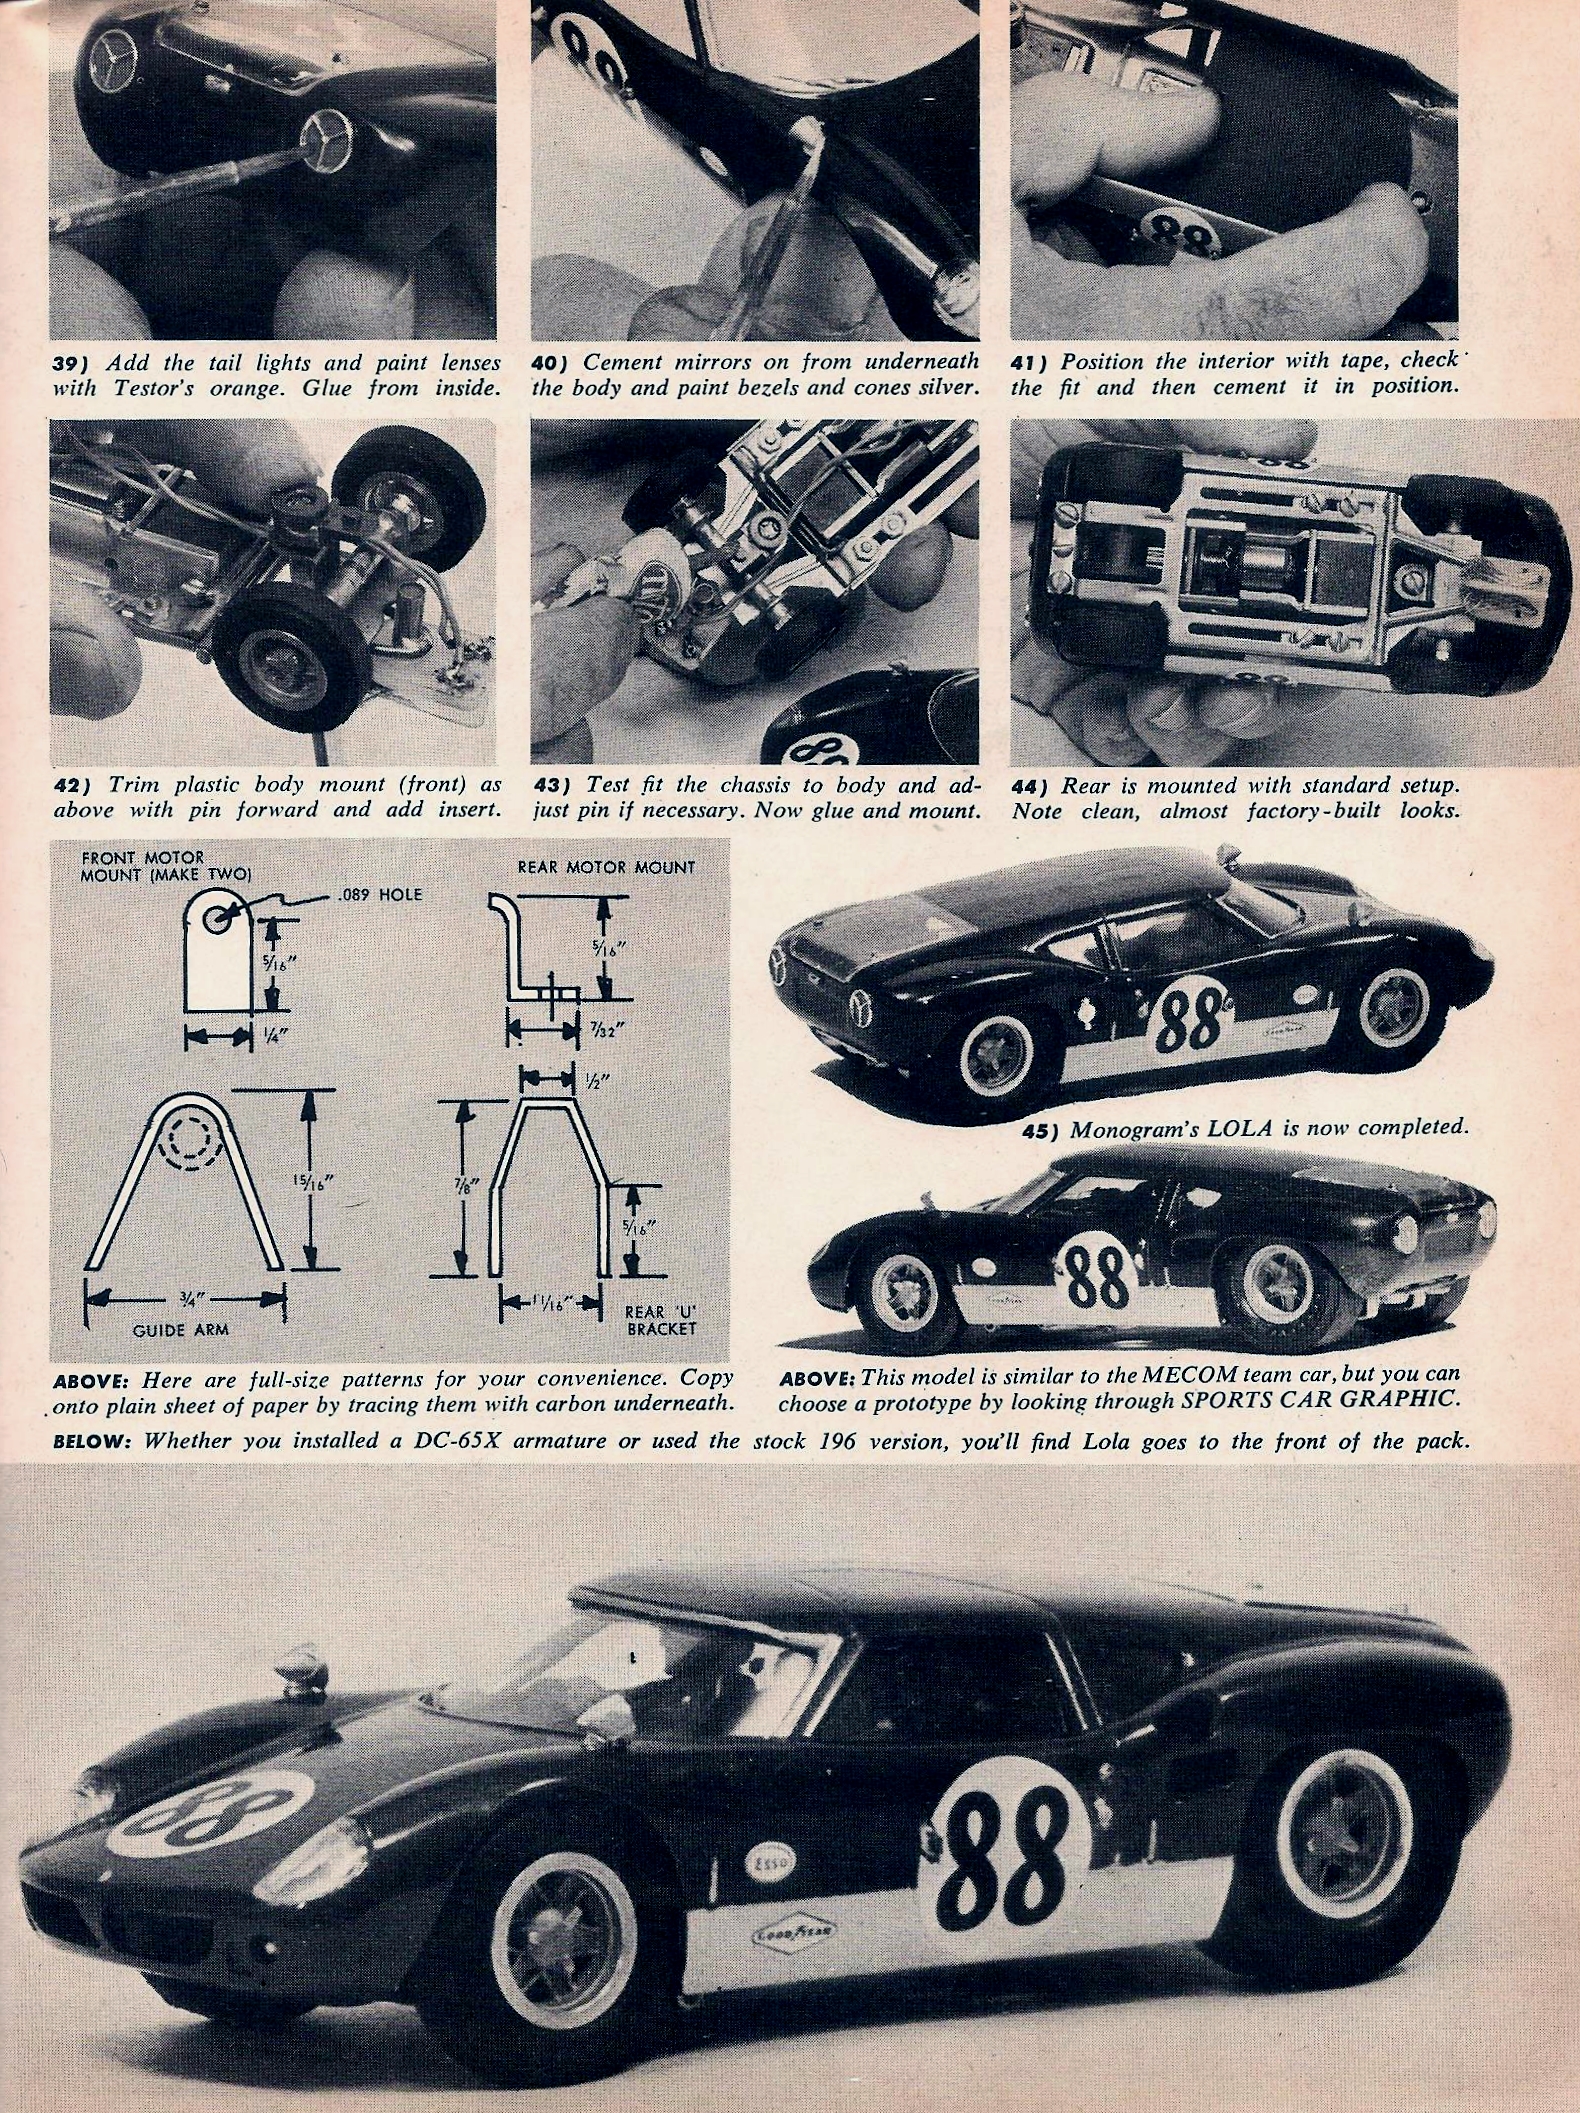
His build article was in the July 1965 Rod & Custom magazine:


R&C 7-1965 (1).jpg


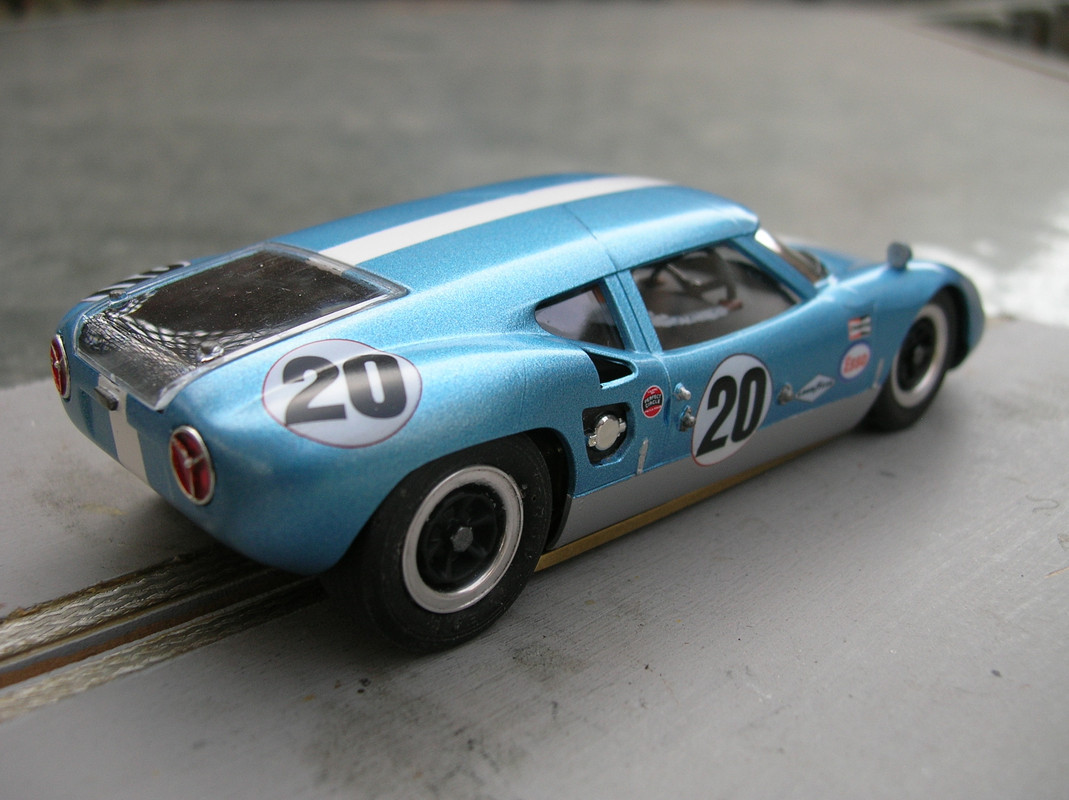
R&C 7-1965 (2).jpg


R&C 7-1965 (3).jpg


R&C 7-1965 (4).jpg


R&C 7-1965 (5).jpg


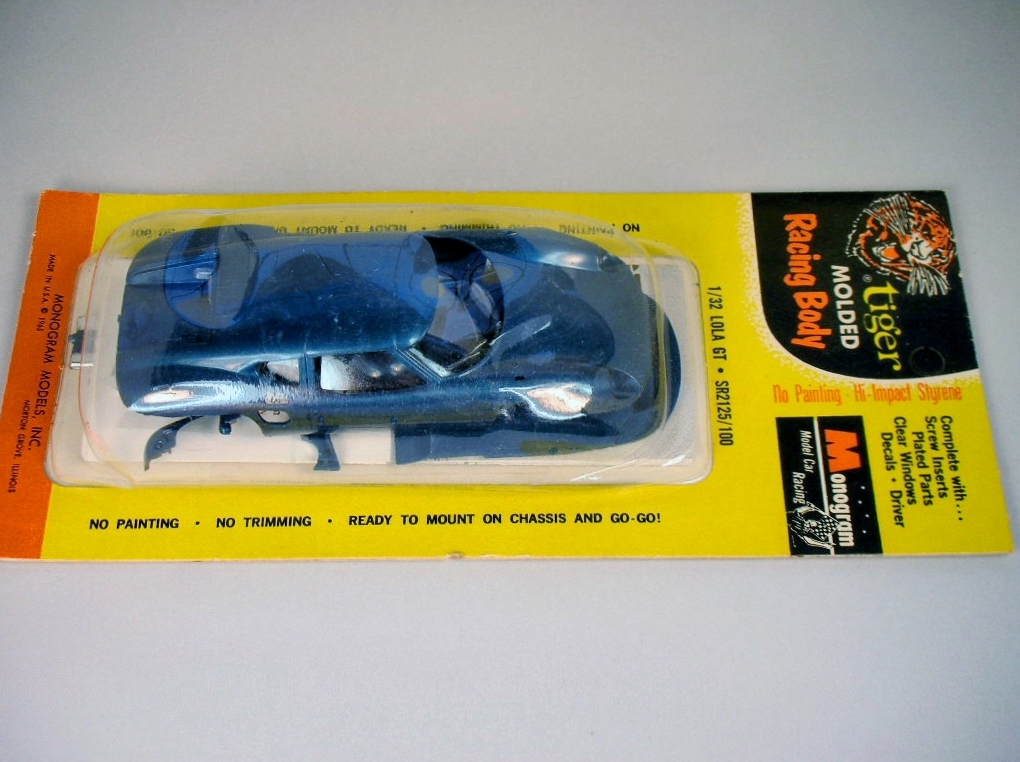
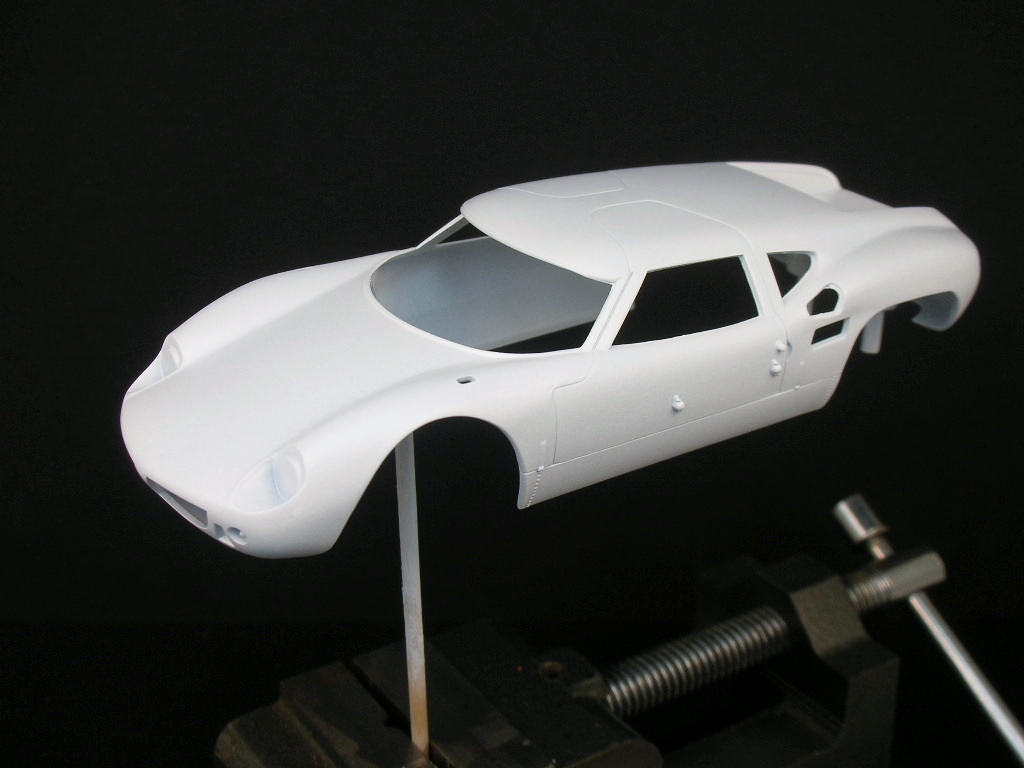
I've wanted to build my own "inspired by" version for over 50 years. I've tried to piece together a body kit but there has always been some stumbling block trying to do it without paying "collector" prices. I finally bit the bullet and paid for a nice intact body kit:


Braverman Lola (11).JPG


FINALLY!   All the pieces are there and undamaged:


Braverman Lola (12).JPG


Let the build begin!    :dance3:


  • Cheater, Tex, Lou E and 3 others like this

Rick Thigpen
Check out Steve Okeefe's great web site at its new home here at Slotblog:
The Independent Scratchbuilder
There's much more to come...


#2 Isaac S.

Isaac S.

    Checkered Flag in Hand

  • Full Member
  • PipPipPipPipPipPip
  • 1,507 posts
  • Joined: 02-September 20
  • Gender:Male
  • Location:USA

Posted 24 August 2021 - 04:09 PM

Like that article. That 65X will have plenty of power for that little car. There was an article I read and the writer was able to put over 10 motors in the Monogram chassis with little to no modifications. Pretty interesting. 


Isaac Santonastaso

#3 Lone Wolf

Lone Wolf

    Posting Leader

  • Full Member
  • PipPipPipPipPipPipPip
  • 2,736 posts
  • Joined: 03-March 08
  • Gender:Male
  • Location:New York

Posted 24 August 2021 - 05:39 PM

Nice :)


That body is impossible to find used without issues as you stated.


There really are a lot of mods. I think you can handle it.


I think you probably have one of the last Crane rear ends in existence.


Do you have the wheels? I think you got some of those from me years ago.


Solder on!


Joe Lupo


#4 dc-65x

dc-65x

    Grand Champion Poster

  • Subscriber
  • PipPipPipPipPipPipPipPip
  • 6,976 posts
  • Joined: 14-February 06
  • Gender:Male
  • Location:Captain Rick: The only vintage slot car nut in SW Oregon?

Posted 24 August 2021 - 06:44 PM

I've always liked the first generation Monogram 1/32 scale chassis Isaac.


Yup Joe, I've got the wheels and all the other parts including the Crane rear end. 

A few years ago I picked up a junk open frame motor lot cheap with several Crane rear ends installed.  :crazy:


I will state right now that I stink at building model kit type bodies.    :unknw: 


I used to love to build models as a kid but when I turned 14 in 1964 a commercial slot car raceway opened

near my home in Southern California............BAM!.........that was it. I was hooked. It was all 1/24 vac bodied cars from then until now.


So all you modelers that know what you are doing will cringe in horror at my follies but I'm confident I will get this car built....for better or worse.   :laugh2:


I'm starting my build with assembling the bodies front and rear valances just like Bob did. I've got them glued on and the joints backed with epoxy.

With them on I shaped the wheel openings and can set the wheelbase so the tires look good in the body.

I also did some 600 grit sanding of the parting lines and the rest of the body which really highlighted the sink hole that need putty.


Yes it looks ugly now so hey, things can only get better from here:   :D


Braverman Lola (13).JPG


Restoring the Cox magnesium wheels with 50+ years of oxidation are next.


  • Pablo, Tex, Lou E and 1 other like this

Rick Thigpen
Check out Steve Okeefe's great web site at its new home here at Slotblog:
The Independent Scratchbuilder
There's much more to come...


#5 Lone Wolf

Lone Wolf

    Posting Leader

  • Full Member
  • PipPipPipPipPipPipPip
  • 2,736 posts
  • Joined: 03-March 08
  • Gender:Male
  • Location:New York

Posted 24 August 2021 - 07:50 PM

May I recommend a Tamiya panel line scriber to sharpen those panel lines.


Also, Tamiya ultra fine primer and paint. They make some excellent dark greens.


But then again you probably know this already.


  • Bill from NH likes this

Joe Lupo


#6 mickey thumbs

mickey thumbs

    Mid-Pack Racer

  • Full Member
  • PipPipPip
  • 175 posts
  • Joined: 10-November 18
  • Gender:Male
  • Location:Western NC

Posted 24 August 2021 - 08:42 PM

Ah, yes. The infamous Monogram body post dimples. They showed up on an MRRC Porsche 904 from the Monogram molds that I built recently. A real pain to fill and sand without damaging the Carerra label.

The Lola was my favorite Monogram car back in the day. A new body like that is the holy grail. Congratulations on scoring one. Looking forward to following this build.


Mike Vernon

#7 dc-65x

dc-65x

    Grand Champion Poster

  • Subscriber
  • PipPipPipPipPipPipPipPip
  • 6,976 posts
  • Joined: 14-February 06
  • Gender:Male
  • Location:Captain Rick: The only vintage slot car nut in SW Oregon?

Posted 25 August 2021 - 05:22 PM

I have to admit I'm more interested in the mechanical aspects of Bob's build than the Lola body. 

I like the Lola but Bob might have chosen it because it is one of if not the only Monogram body that will fit over the tall brushes of that motor.

None of the roadsters would work. The Ferrari 330LM might work but I think it's even harder to find than the Lola.


Anyway here are the Cox cast magnesium Ford GT wheels Bob used out of the package after 50 years:


Braverman Lola (8).JPG


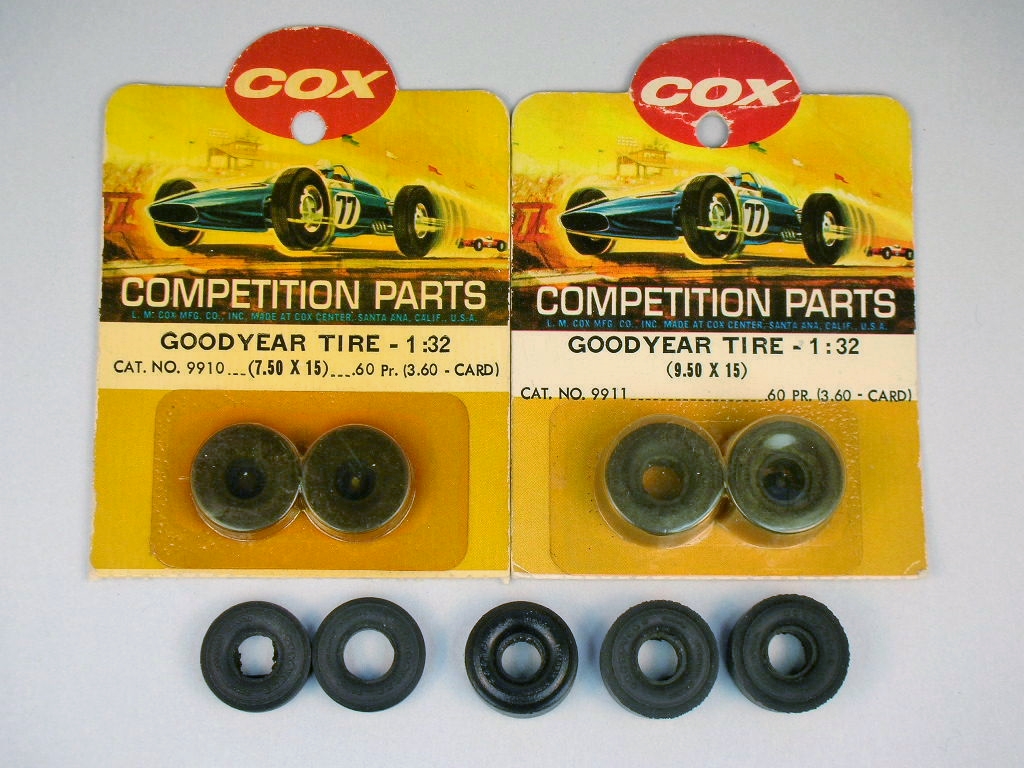
And the Cox Goodyear tires. The Cox rears will be for display. The shiny tire in the center is an Ortmann repop rear. I'm also getting urethane rears from Paul Gage.


Braverman Lola (5).JPG


I micro-bead blasted the wheels, polished the wheel lip and gave them a shot of clear:


Braverman Lola (18).JPG


Tires are mounted but not yet trued up:


Braverman Lola (16).JPG


  • Pablo, Tex, Lou E and 1 other like this

Rick Thigpen
Check out Steve Okeefe's great web site at its new home here at Slotblog:
The Independent Scratchbuilder
There's much more to come...


#8 chrisguyw

chrisguyw

    Mid-Pack Racer

  • Full Member
  • PipPipPip
  • 127 posts
  • Joined: 17-February 06
  • Gender:Male
  • Location:Toronto, Canada

Posted 28 August 2021 - 03:21 PM

Rick, before you get on with your invariably wonderful build, (which I am very much looking forward to), A couple of shots of a Monogram Lola GT that I built many moos ago. I did attempt to build it in a fairly stock configuration, with a few wire braces and a full pan, which was fairly common for the time. With a motor from Mr Havlicek, it runs very well.

It was done to represent the car driven by Augie Pabst and Walt Hangsen at Sebring 1964.


Cheers

ChrisWalker


PS No hijacking intended, not that it matters, as I know your build will be far more impressive  :D


2004-01-01-00-00-00-54-copy.jpg


2004-01-01-00-00-00-46.jpg


Stock(ish) chassis with lots of wire braces, and a "gruntier" motor.
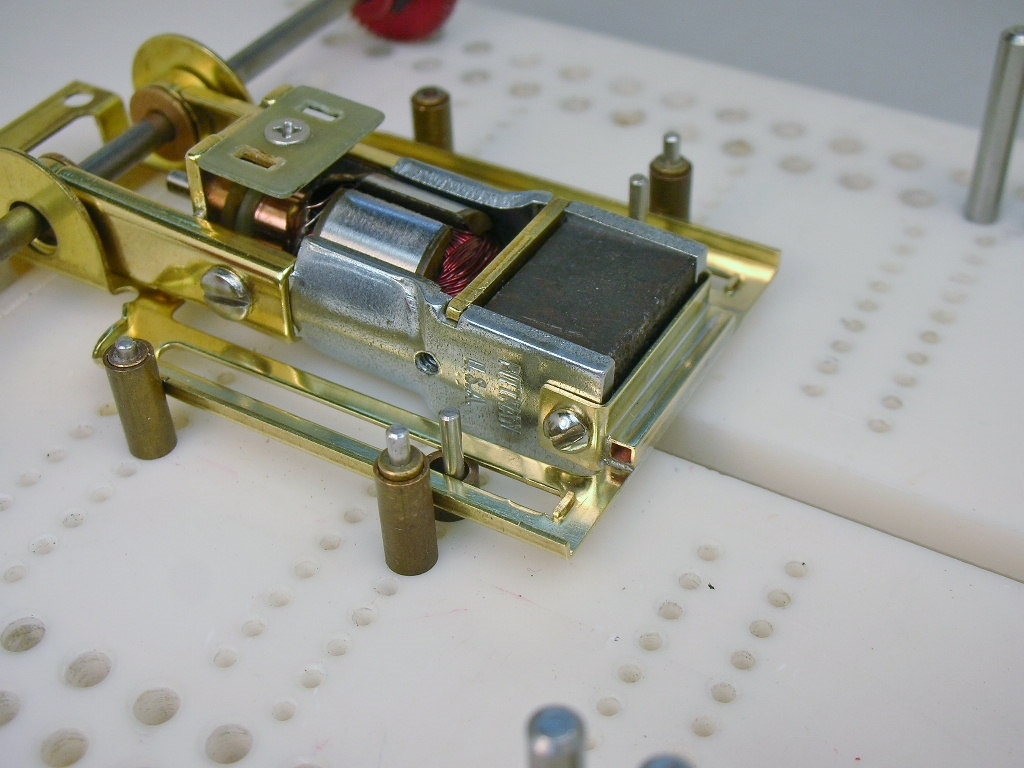
 

2003-12-31-23-00-00-149-copy.jpg


  • hiline2, Tex, Lou E and 3 others like this
Chris Walker

#9 dc-65x

dc-65x

    Grand Champion Poster

  • Subscriber
  • PipPipPipPipPipPipPipPip
  • 6,976 posts
  • Joined: 14-February 06
  • Gender:Male
  • Location:Captain Rick: The only vintage slot car nut in SW Oregon?

Posted 28 August 2021 - 04:47 PM

Hi Chris,
 
Very beautiful car.
 

PS No hijacking intended, not that it matters, as I know your build will be far more impressive   :D

 
Not likely cosmetically Chris but thanks to Bob Braverman's innovative mechanical modifications I might have a chance there.   :victory:


Here is the heart of those modifications. The Pittman 196A motor, Pittman DC65X armature and a Crane rear end:


Braverman Lola (2).JPG


Rather than bust open all those new parts I'm going to rebuild this vintage motor built back in the day:


Braverman Lola (3).JPG


DSCN0734.JPG


I reversed the brush plate on the Crane rear end to allow the brushes to better align with the comm:


DSCN0738.JPG


I added ball bearings and spruced everything up:


DSCN0740.JPG


With the motor ready it's time to fit it in the frame.......I hope!


DSCN0742.JPG


  • hiline2, Tex, Howie Ursaner and 6 others like this

Rick Thigpen
Check out Steve Okeefe's great web site at its new home here at Slotblog:
The Independent Scratchbuilder
There's much more to come...


#10 dc-65x

dc-65x

    Grand Champion Poster

  • Subscriber
  • PipPipPipPipPipPipPipPip
  • 6,976 posts
  • Joined: 14-February 06
  • Gender:Male
  • Location:Captain Rick: The only vintage slot car nut in SW Oregon?

Posted 30 August 2021 - 05:38 PM

Here's the chassis I've been saving for this build. It is a weirdo 1/24 size version of the original 1/32 chassis.

I'm also showing the label from the 1/32 frame because the tiger logo is cool....GRRRRRR:   :sun_bespectacled:


Braverman Lola (4).JPG


The rear section was shorten to the 1/32 length and the Mabuchi motor mount cut off:


Braverman Lola (19).JPG


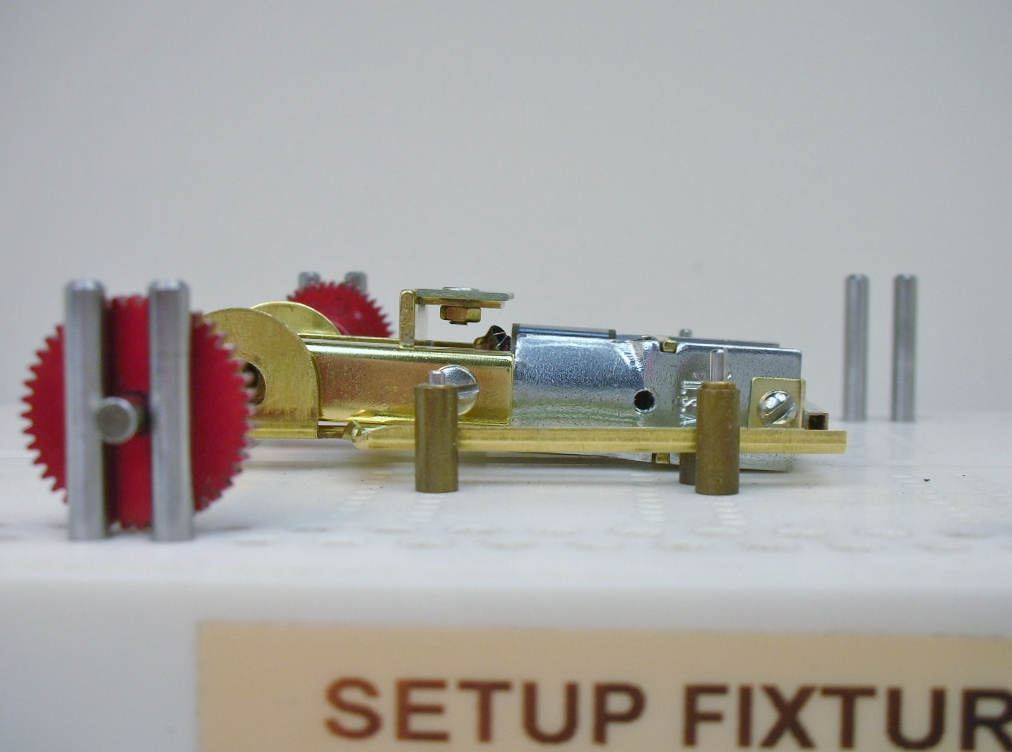
I have the luxury of a chassis jig to line things up with:


Braverman Lola (25).JPG


I left the stock rear axle mounts in place for now to make sure I got the new motor in the right location:


Braverman Lola (26).JPG


  • hiline2, Tex and Peter Horvath like this

Rick Thigpen
Check out Steve Okeefe's great web site at its new home here at Slotblog:
The Independent Scratchbuilder
There's much more to come...


#11 dc-65x

dc-65x

    Grand Champion Poster

  • Subscriber
  • PipPipPipPipPipPipPipPip
  • 6,976 posts
  • Joined: 14-February 06
  • Gender:Male
  • Location:Captain Rick: The only vintage slot car nut in SW Oregon?

Posted 30 August 2021 - 08:55 PM

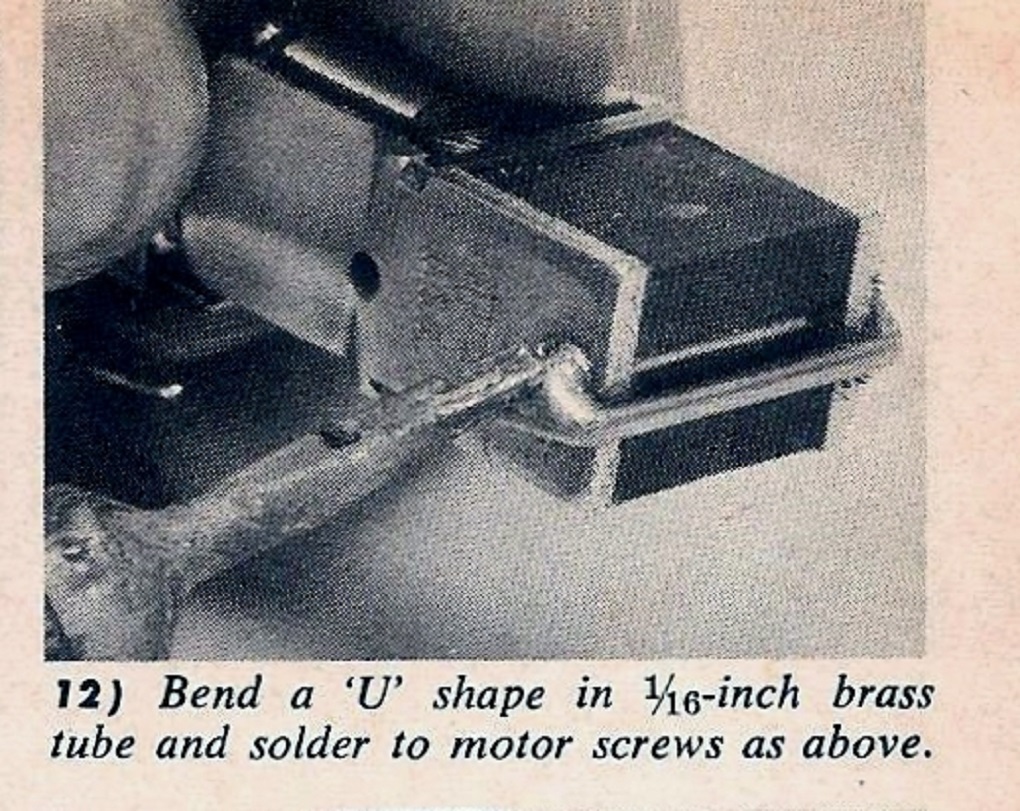
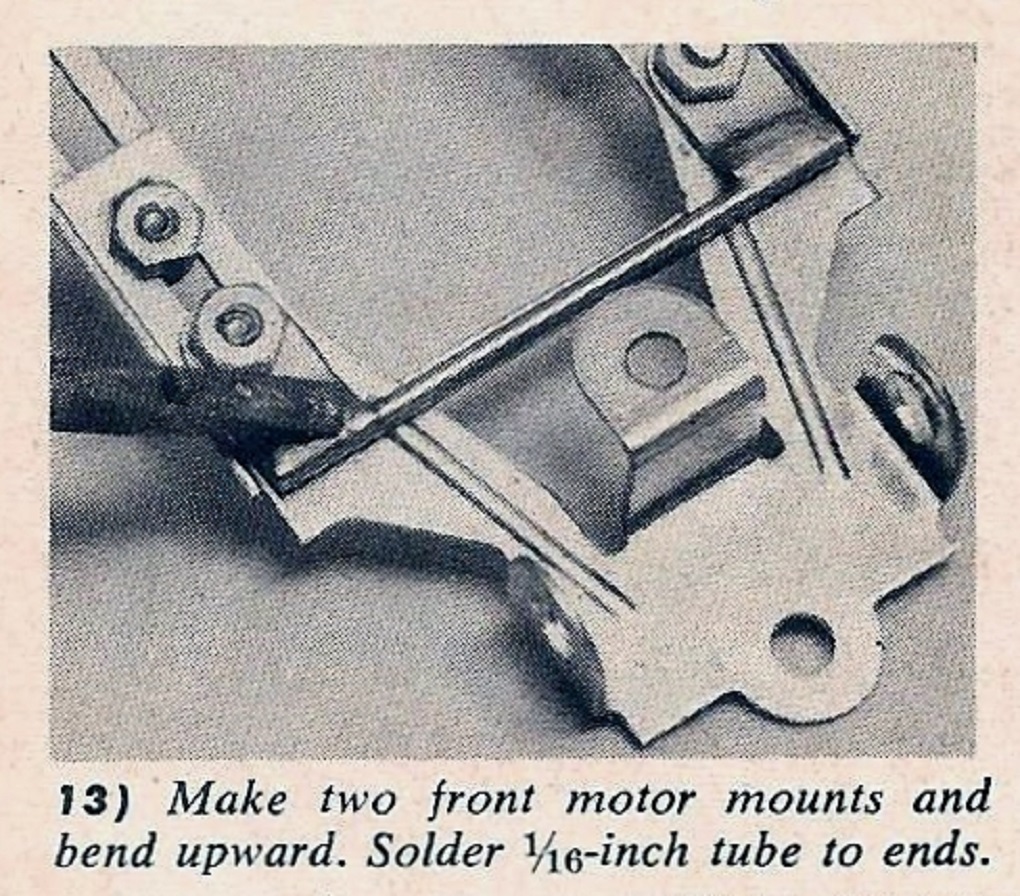
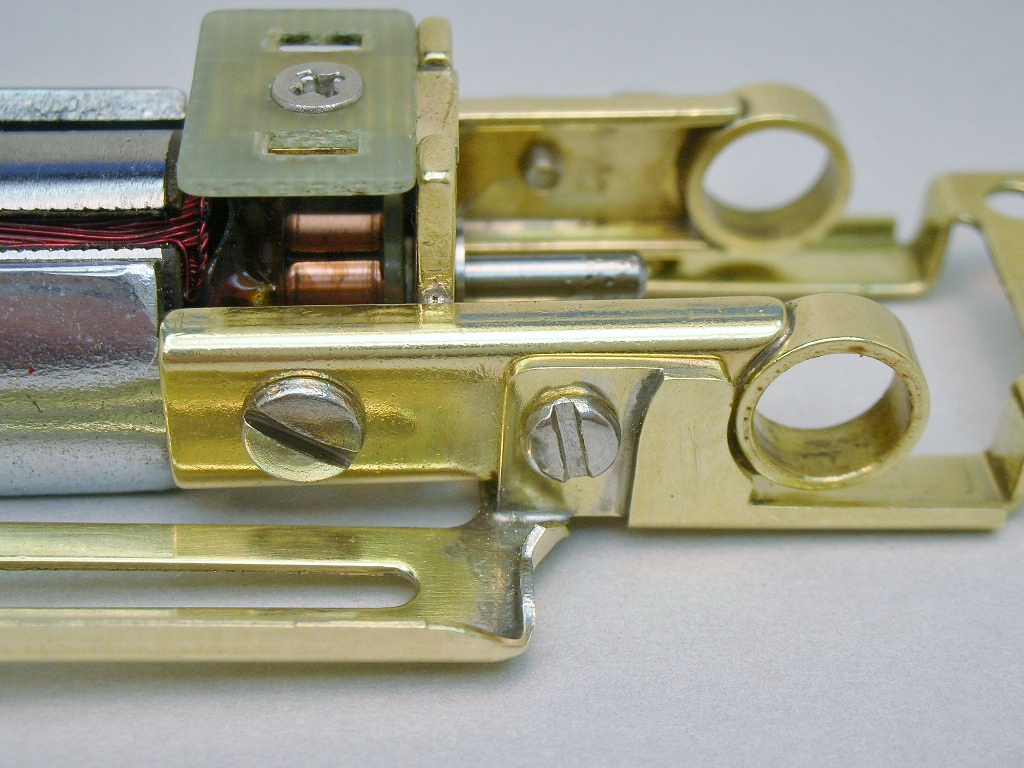
This is how Bob engineered his front motor mount:


R&C 7-1965 (3a).jpg


R&C 7-1965 (3b).jpg


R&C 7-1965 (3c).jpg


Very clever and undoubtedly worked great. But with the luxury of 20/20 hindsight

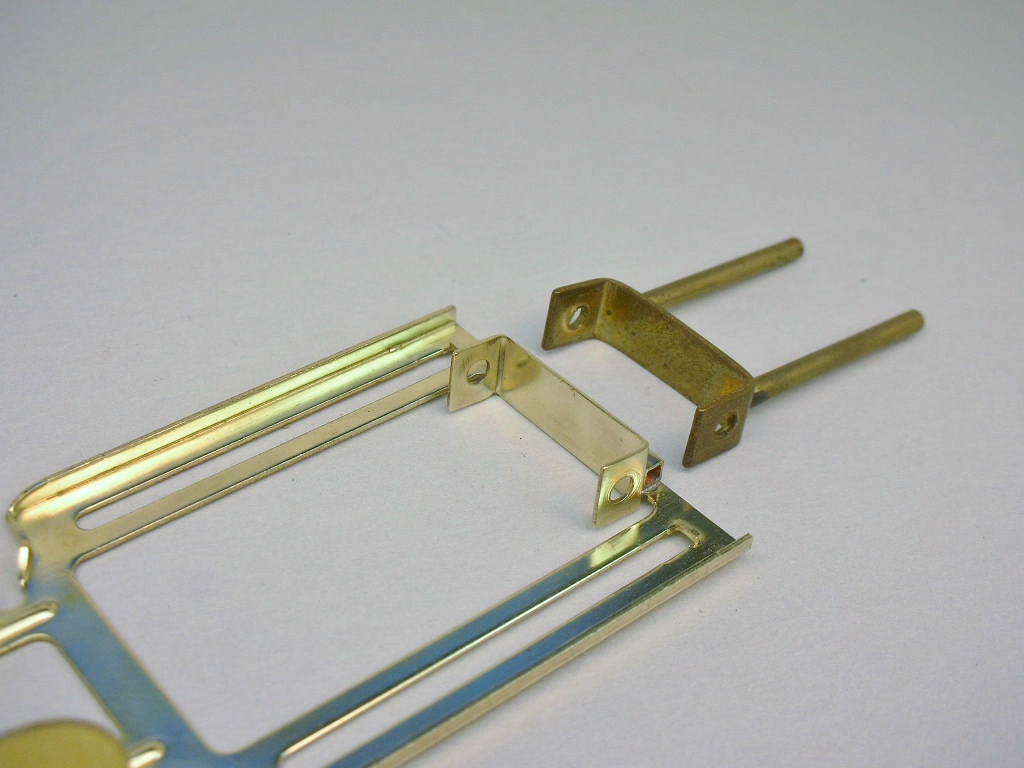
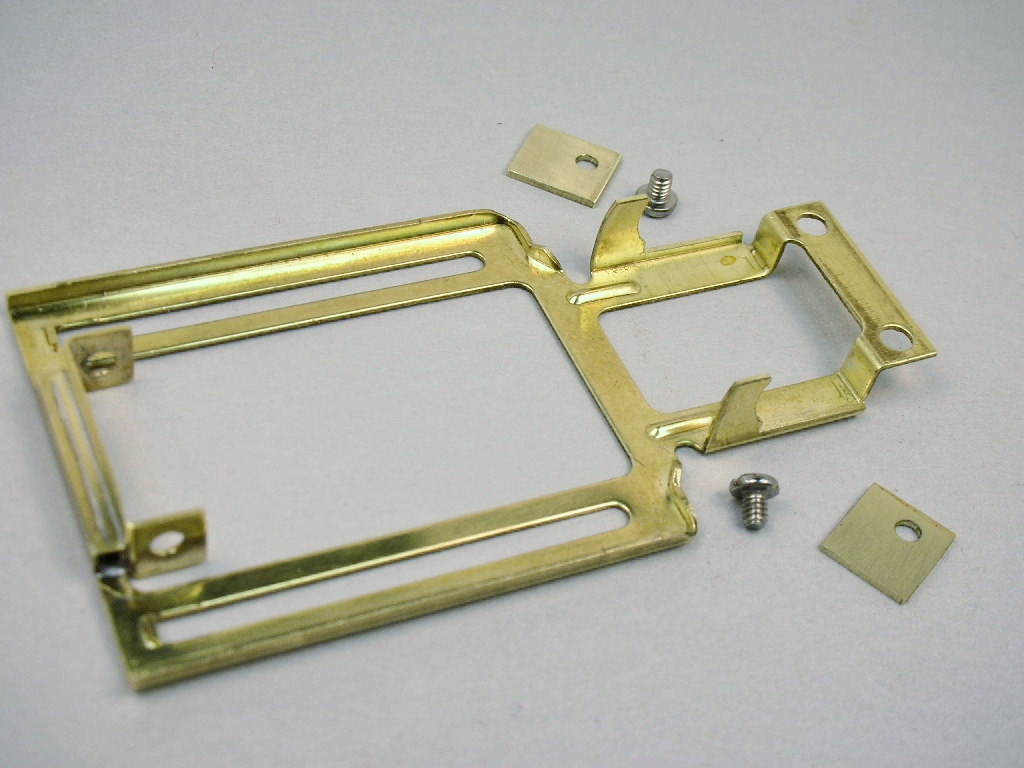
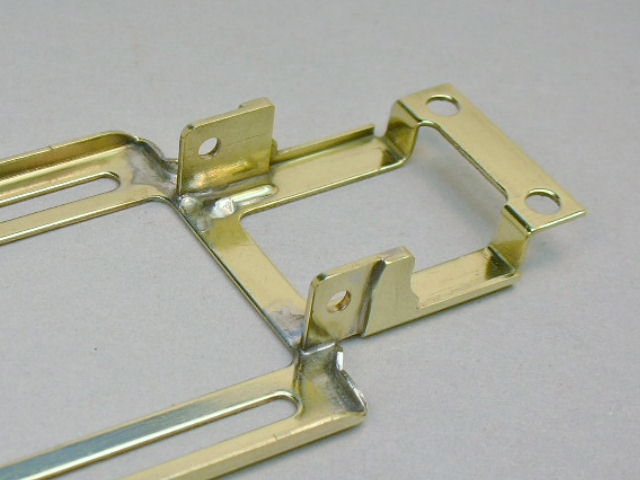
I decided to cut the U-shaped motor mount from a vintage frame........


Braverman Lola (28).JPG


........and solder it to the Monogram frame with a piece of 3/32" square tube:


Braverman Lola (27).JPG


I think it works really slick and is very clean:


Braverman Lola (29).JPG


The motor sits nice and low just like Bob's:


Braverman Lola (31).JPG


Next up is the rear motor mount. Again with 20/20 hindsight and lots of time,

I'm checking out a different approach but I have Bob's design to fall back on if mine is a dud.


  • hiline2, Tex, Peter Horvath and 2 others like this

Rick Thigpen
Check out Steve Okeefe's great web site at its new home here at Slotblog:
The Independent Scratchbuilder
There's much more to come...


#12 dc-65x

dc-65x

    Grand Champion Poster

  • Subscriber
  • PipPipPipPipPipPipPipPip
  • 6,976 posts
  • Joined: 14-February 06
  • Gender:Male
  • Location:Captain Rick: The only vintage slot car nut in SW Oregon?

Posted 01 September 2021 - 09:32 PM

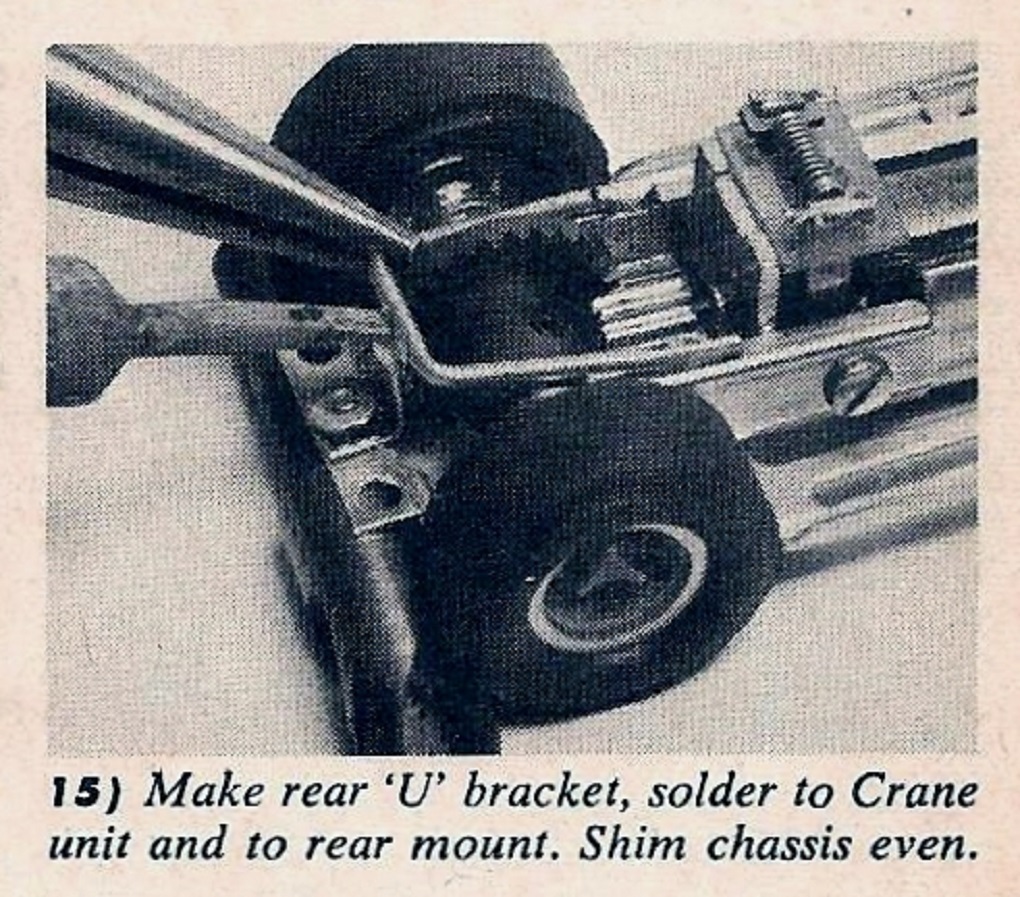
Here's Bob's rear motor mount:


R&C 7-1965 (3d).jpg


It's a good solid design but since scratch building is a creative hobby I came up with my own idea.

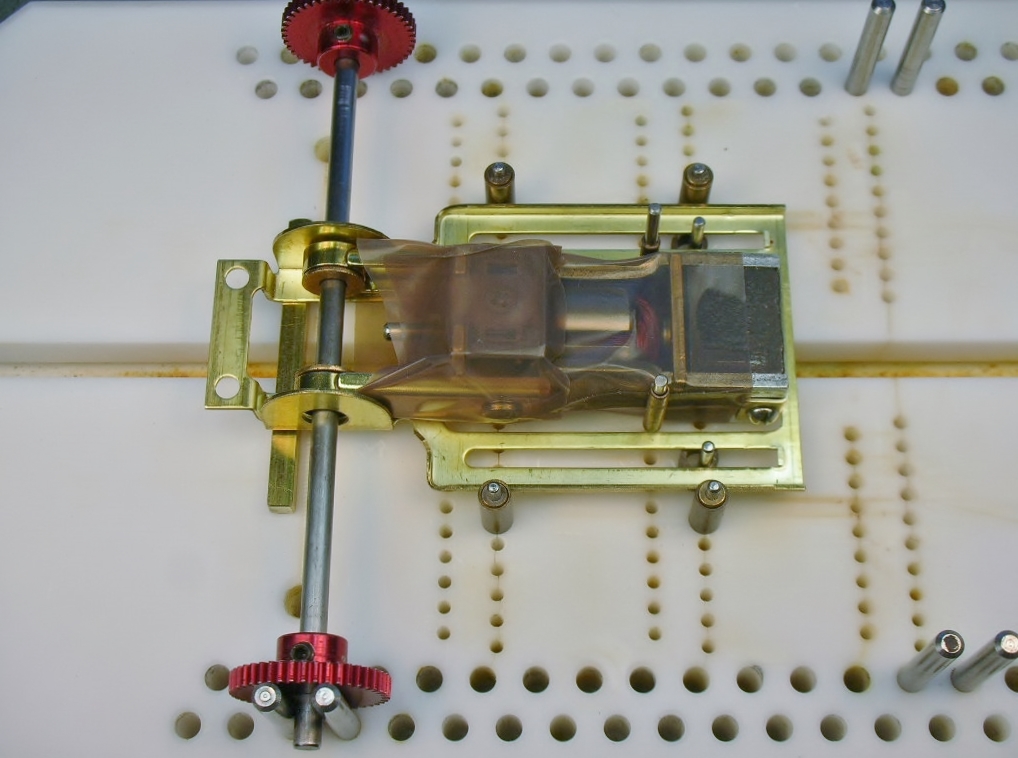
The chassis rear bearing mount was trimmed down and little brass motor mount gizmos made drilled and for a 2-56 screw:


Braverman Lola (36).JPG


With the gizmo soldered on it also acts as a gusset to strengthen one of the weakest parts of the chassis:


Braverman Lola (37).JPG


The Crane rear end was drilled and tapped for the motor mount gizmo to screw into:


Braverman Lola (35).JPG


I think the motor installation is clean and leaves the rear body mount free for tweaking if needed:


Braverman Lola (33).JPG


Now for the front end of the chassis.....


  • Pablo, Jencar17, Tex and 4 others like this

Rick Thigpen
Check out Steve Okeefe's great web site at its new home here at Slotblog:
The Independent Scratchbuilder
There's much more to come...


#13 dc-65x

dc-65x

    Grand Champion Poster

  • Subscriber
  • PipPipPipPipPipPipPipPip
  • 6,976 posts
  • Joined: 14-February 06
  • Gender:Male
  • Location:Captain Rick: The only vintage slot car nut in SW Oregon?

Posted 04 September 2021 - 05:11 PM

Bob created independently rotating front wheels by cutting the axle in half and soldering short spacers on the ends to hold them in place:


R&C 7-1965 (3f).jpg


I wanted to make my axles removable without any unsoldering:


Braverman Lola (39).JPG


I modified a 3" axle and threaded the ends for a small nut instead of soldering a spacer on it:


Braverman Lola (38).JPG


Axle holes in the chassis are opened up and bushings soldered in place just like Bob's car. I also added a U-brace to help keep the wheels pointed in the same direction:


Braverman Lola (40).JPG


The front end assembled for a test fit:


Braverman Lola (41).JPG


The drop arm is next.....


  • Pablo, Lou E, Peter Horvath and 1 other like this

Rick Thigpen
Check out Steve Okeefe's great web site at its new home here at Slotblog:
The Independent Scratchbuilder
There's much more to come...


#14 dc-65x

dc-65x

    Grand Champion Poster

  • Subscriber
  • PipPipPipPipPipPipPipPip
  • 6,976 posts
  • Joined: 14-February 06
  • Gender:Male
  • Location:Captain Rick: The only vintage slot car nut in SW Oregon?

Posted 05 September 2021 - 07:47 PM

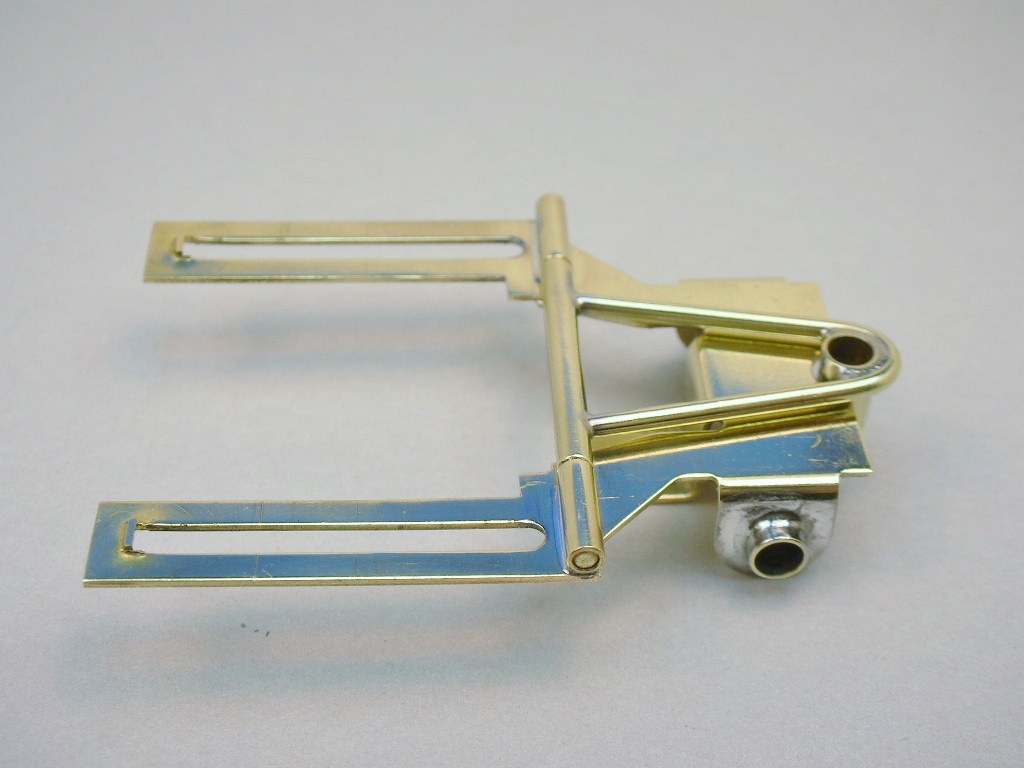
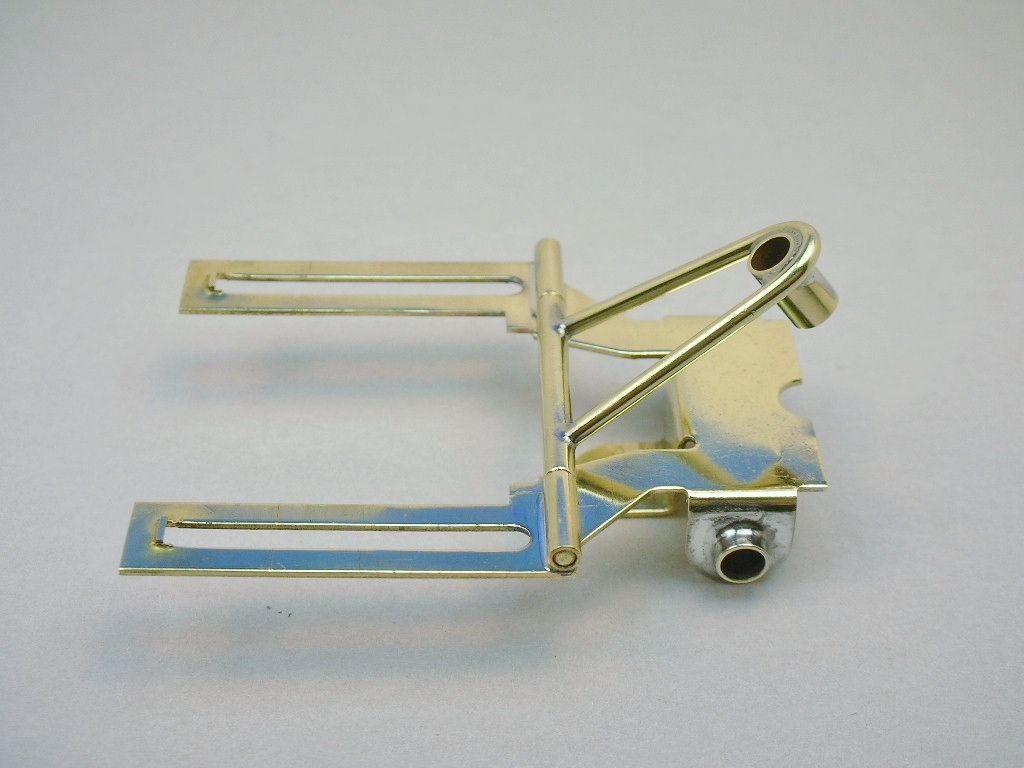
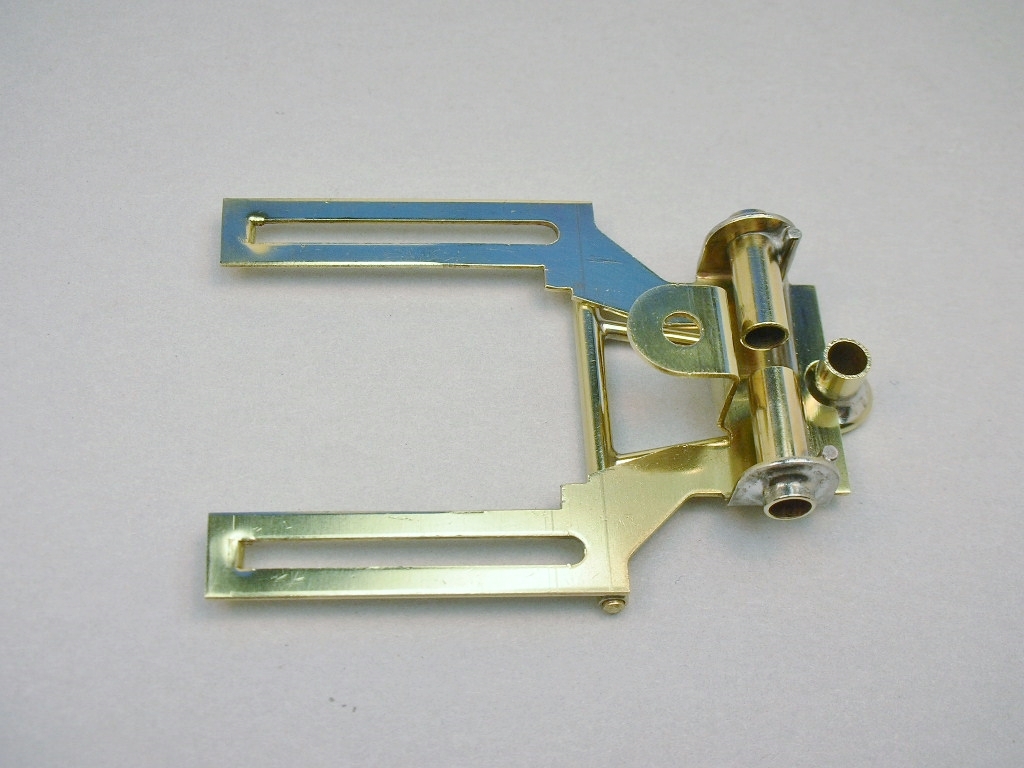
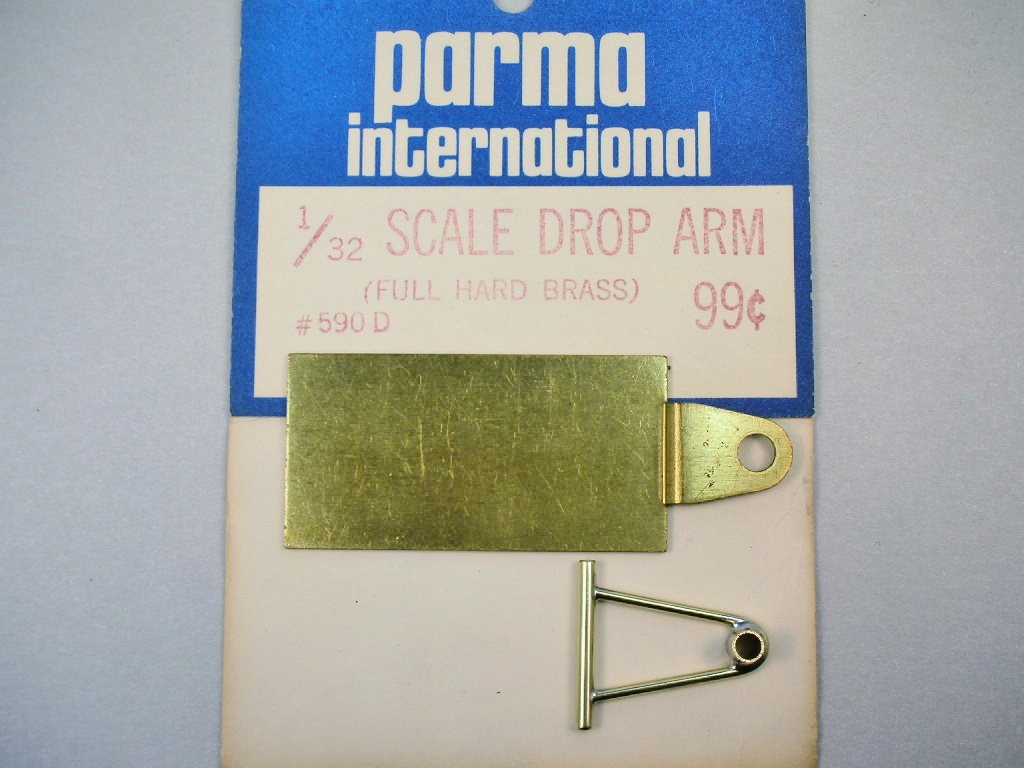
Is there anything that can't be fixtured up in a Rick's Jig? Here the front of the chassis gets the drop arm hinge tubes:


Braverman Lola (42).JPG


Again in the jig, the drop arm is soldered up in situ. Kapton tape stops the drop arm from being soldered up solid to the frame:


Braverman Lola (43).JPG


The finished drop arm is pretty much just what Bob did:


Braverman Lola (47).JPG


The lead wires will act as a down stop. The drop arm is very light weight so this works and was common practice in the earliest days:


Braverman Lola (46).JPG


Braverman Lola (45).JPG


What a difference 5 years or so made:   :shok:


Braverman Lola (48).JPG


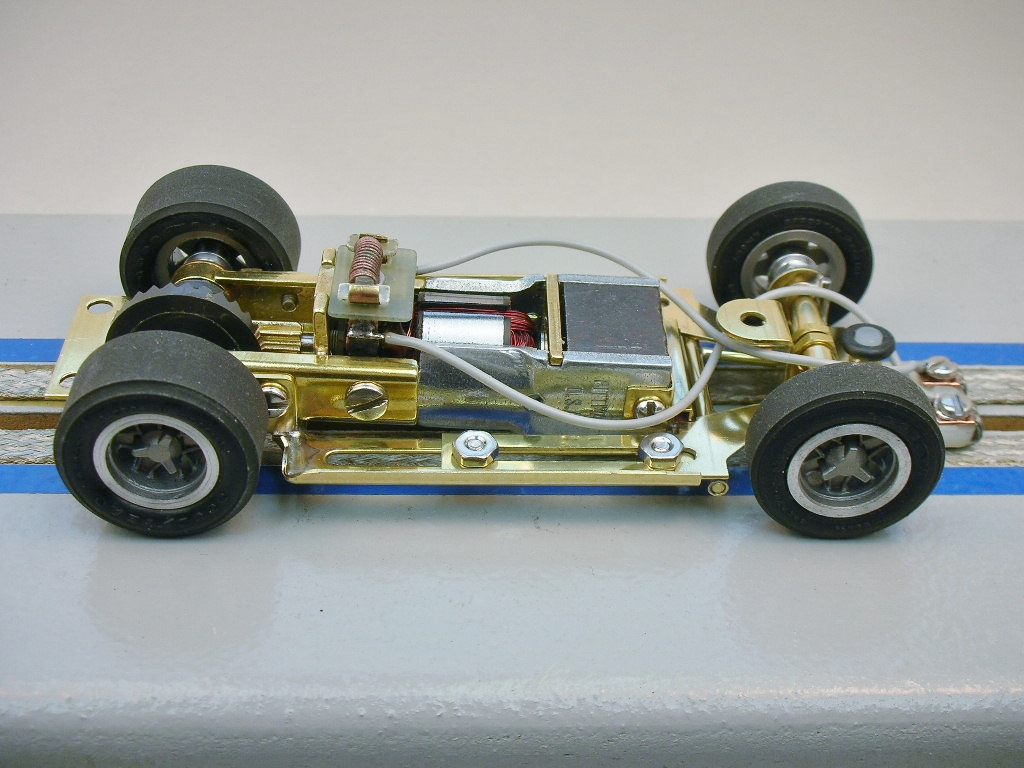
Mechanical fabrication is done. Time to, "wire it up and fire it up!"   :dance3:


  • Tex, Peter Horvath and Larry Horner like this

Rick Thigpen
Check out Steve Okeefe's great web site at its new home here at Slotblog:
The Independent Scratchbuilder
There's much more to come...


#15 munter

munter

    Checkered Flag in Hand

  • Full Member
  • PipPipPipPipPipPip
  • 1,049 posts
  • Joined: 11-April 08
  • Gender:Male
  • Location:Napier, New Zealand

Posted 06 September 2021 - 03:44 PM

Just logged in to see this masterpiece unfolding.....come on Rick, I want to see what's next!


Bountiful, beautiful, clever craftsmanship par excellence to be seen here.


John Warren
Slot cars are my preferred reality


#16 dc-65x

dc-65x

    Grand Champion Poster

  • Subscriber
  • PipPipPipPipPipPipPipPip
  • 6,976 posts
  • Joined: 14-February 06
  • Gender:Male
  • Location:Captain Rick: The only vintage slot car nut in SW Oregon?

Posted 07 September 2021 - 07:57 PM

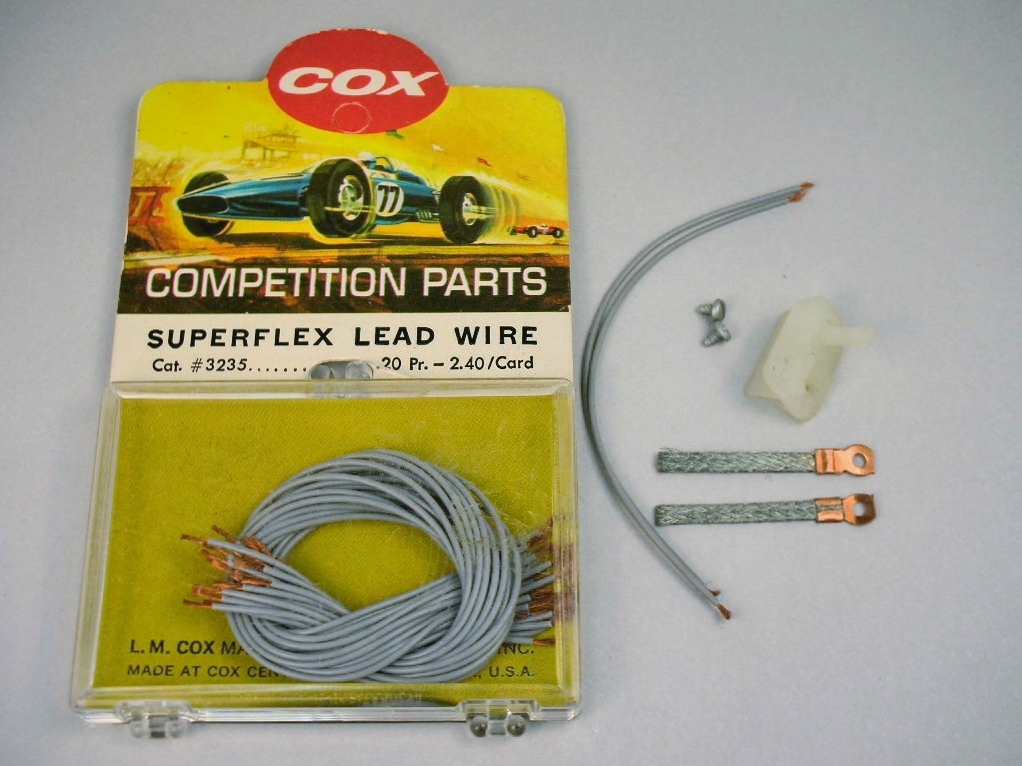
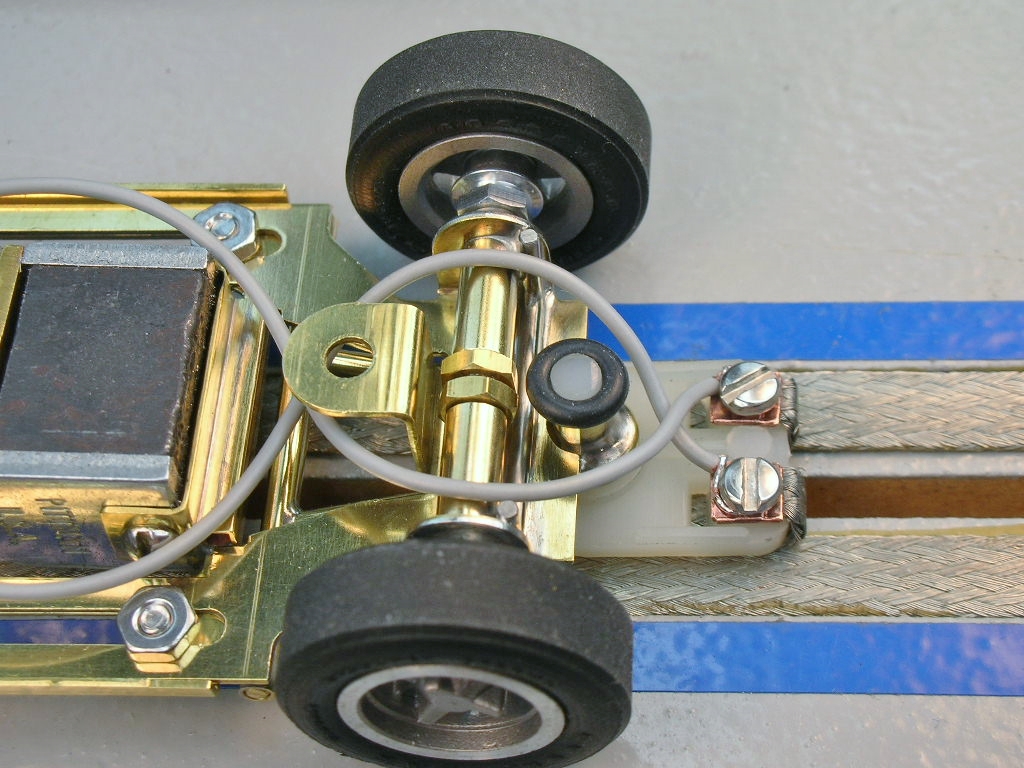
Thanks John, I got the roller together and running starting with the guide, braid and lead wires:


Braverman Lola (9).JPG


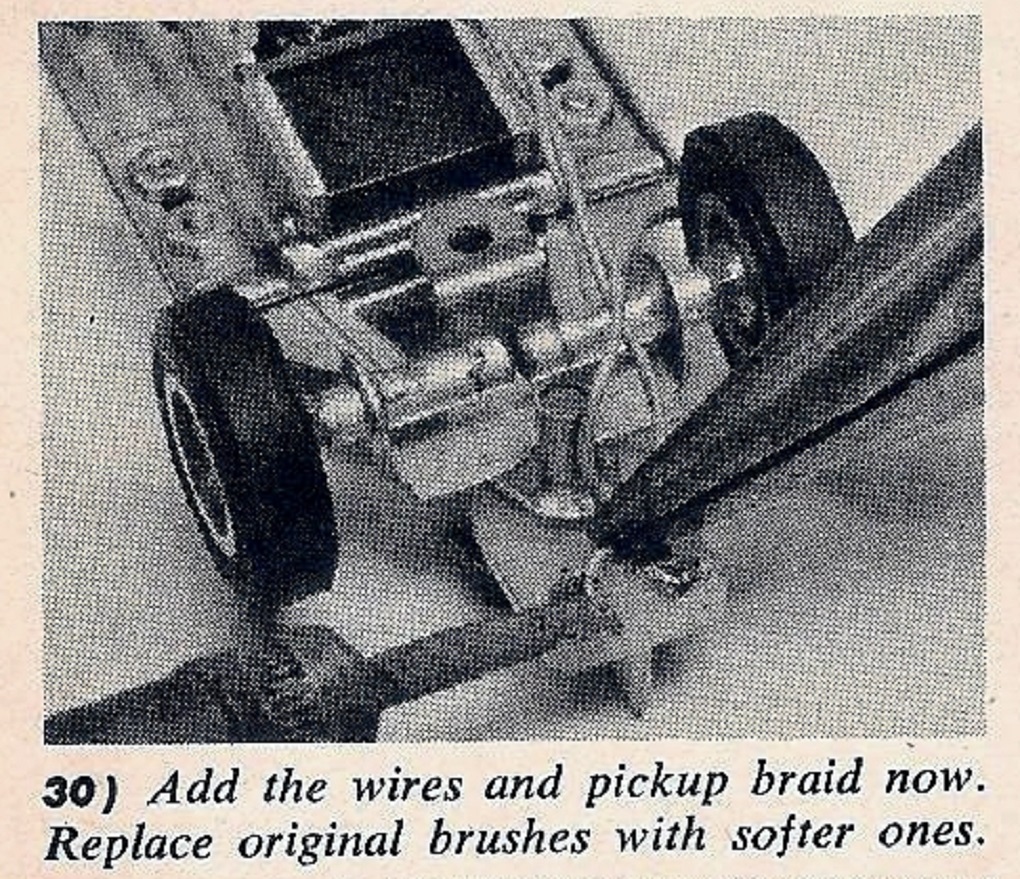
It looks like Bob used some "pickup wire" that can be combed out and stuffed it down the screw hole in the guide, then melted it in place when he soldered the lead wires on. I remember doing this sort of "braid attachment" for quick braid replacement on customer cars while working in the raceway.....just don't breath in that melting plastic smoke!  :laugh2:


R&C 7-1965 (4a).jpg


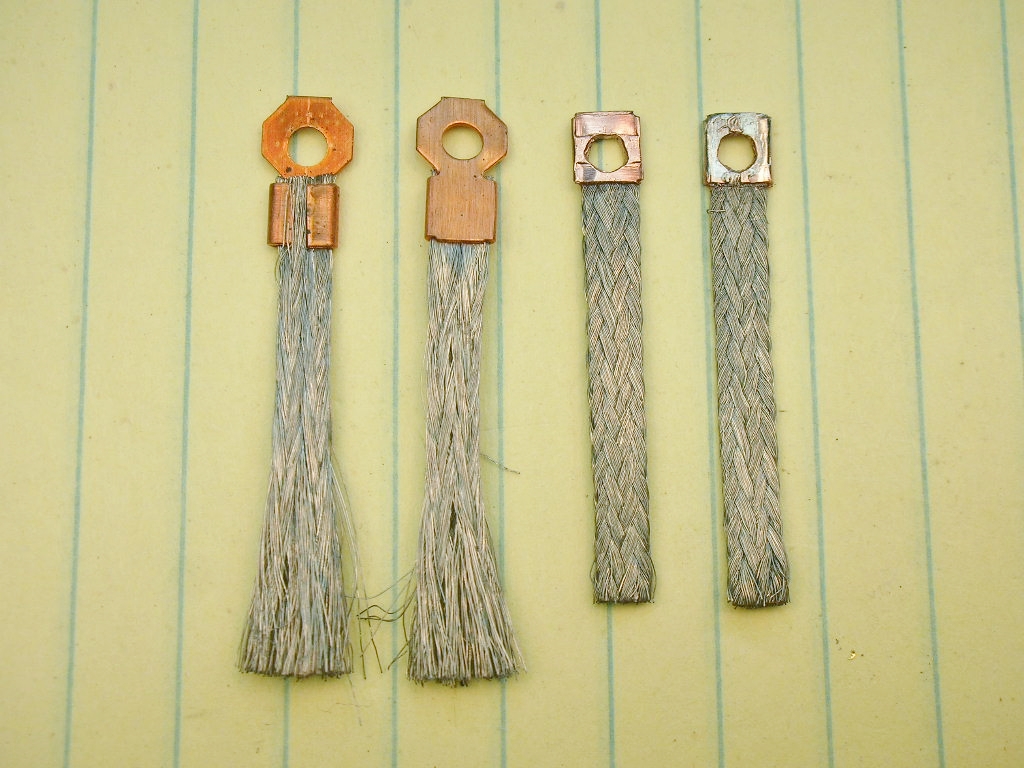
I fudged the timeline of this build a bit using Cox supersoft braid. I'm not sure it was available in mid '65. I modified it as shown on the right.......


Braverman Lola (50).JPG  


........and wrapped it around the front of the guide. Looks like I should have used my "geezer goggles" as I didn't get one lead wire wrapped all the way around the screw. I'll fix that:


Braverman Lola (56).JPG


Here's the finished roller:


Braverman Lola (51).JPG


Braverman Lola (55).JPG


I tested the car on 50+ year old "new old stock" Cox rubber tires. The tires were ground down to size which exposed fresher rubber. Also shown is the first generation Coxalloy 29T crown gear and Cox 8T pinion reamed out to .0925" to fit the Pittman shaft:


Braverman Lola (57).JPG


The car ran really well, very smooth and it really scoots on the straights. This was my best lap time on freshly cleaned tires:


Braverman Lola (54).JPG


That's about 1 second slower than similar era 1/24 cars I've tested. I have some urethane tires to try too but I want to get the body done next.


  • Tex, munter, Peter Horvath and 1 other like this

Rick Thigpen
Check out Steve Okeefe's great web site at its new home here at Slotblog:
The Independent Scratchbuilder
There's much more to come...


#17 dc-65x

dc-65x

    Grand Champion Poster

  • Subscriber
  • PipPipPipPipPipPipPipPip
  • 6,976 posts
  • Joined: 14-February 06
  • Gender:Male
  • Location:Captain Rick: The only vintage slot car nut in SW Oregon?

Posted 11 September 2021 - 07:37 PM

I "rattle mounted" the body by screwing 1/16" long 4-40 set screws into the bottom of the body mount inserts. They can be adjusted up or down to get the right amount of rattle.


The body mount screws had to be shortened a little. The gizmo shown is from Brownells and holds the screws while filing:


Braverman Lola (62).JPG


I set up the body with .015" of rattle:


Braverman Lola (58).JPG


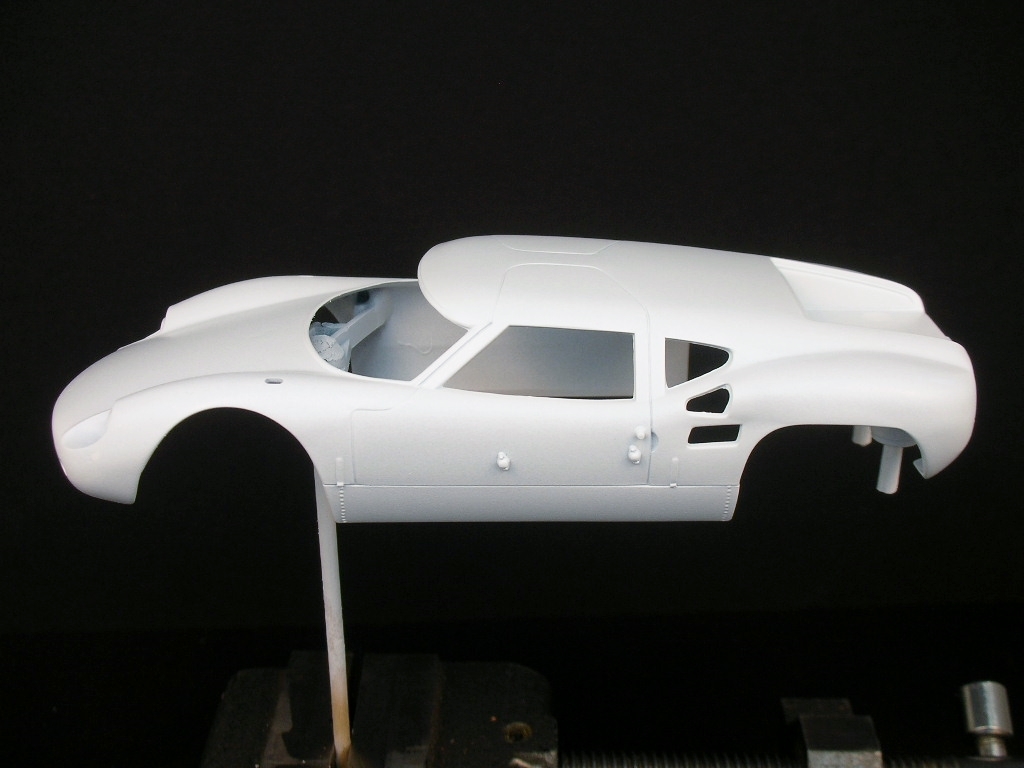
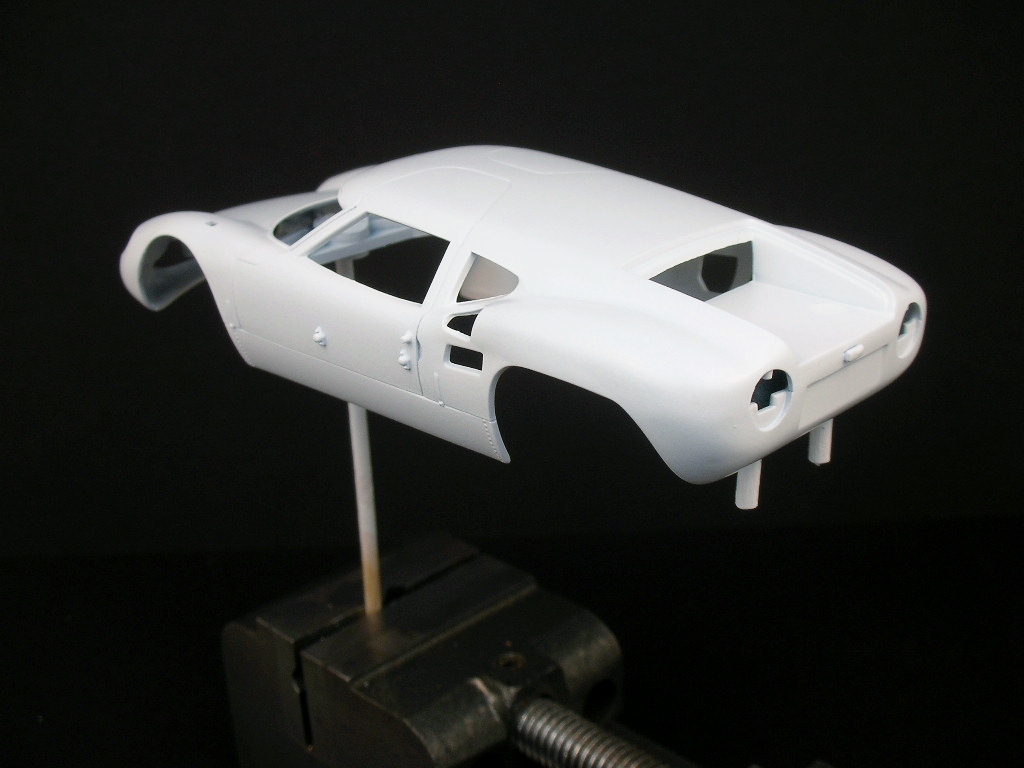
Here's the body with the first coat of Tamiya Fine White Primer:


Braverman Lola (61).JPG


With a recommendation from Rodney, I switched from Squadron green putty to Tamiya White Putty and I really liked it:


Braverman Lola (60).JPG


I got the joints and sink holes filled. I have some final shaping to do:


Braverman Lola (59).JPG


I decided to do a different livery than Mecom blue I had planned. The new color paint should arrive the 16th. 


  • Tex, Lou E, munter and 1 other like this

Rick Thigpen
Check out Steve Okeefe's great web site at its new home here at Slotblog:
The Independent Scratchbuilder
There's much more to come...


#18 Pablo

Pablo

    Builder

  • Administrator
  • PipPipPipPipPipPipPipPip
  • 18,448 posts
  • Joined: 20-February 06
  • Gender:Male
  • Location:Cleveland, Tennessee

Posted 11 September 2021 - 09:14 PM

Rick, if I ever need brain surgery I want you as my doctor


  • Peter Horvath likes this

Paul Wolcott


#19 dc-65x

dc-65x

    Grand Champion Poster

  • Subscriber
  • PipPipPipPipPipPipPipPip
  • 6,976 posts
  • Joined: 14-February 06
  • Gender:Male
  • Location:Captain Rick: The only vintage slot car nut in SW Oregon?

Posted 16 September 2021 - 08:59 PM

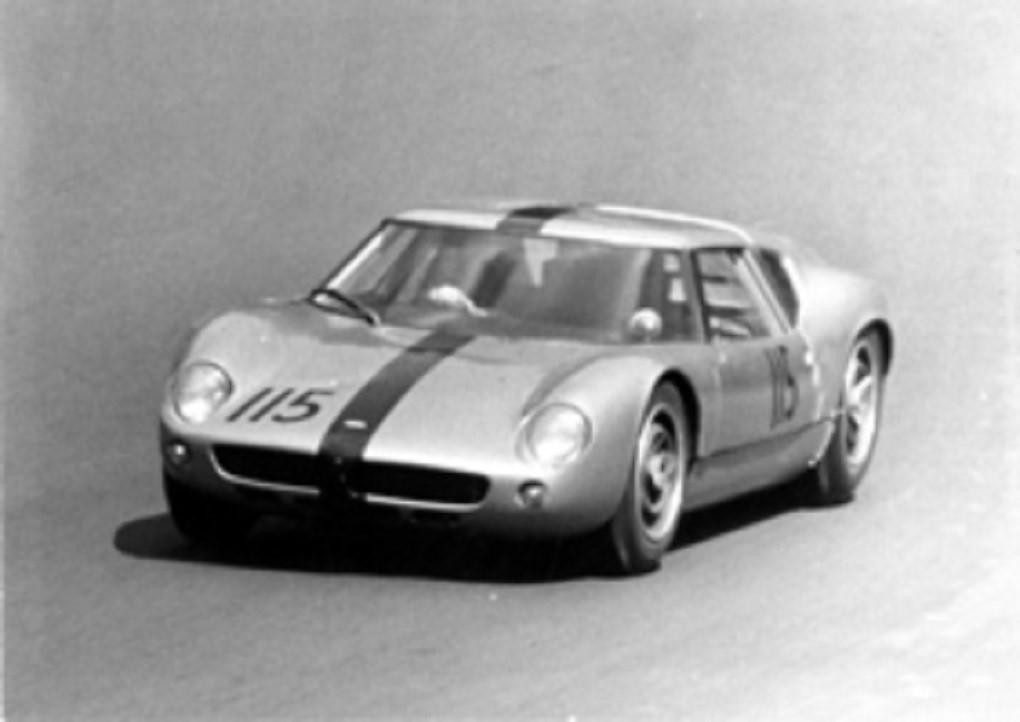
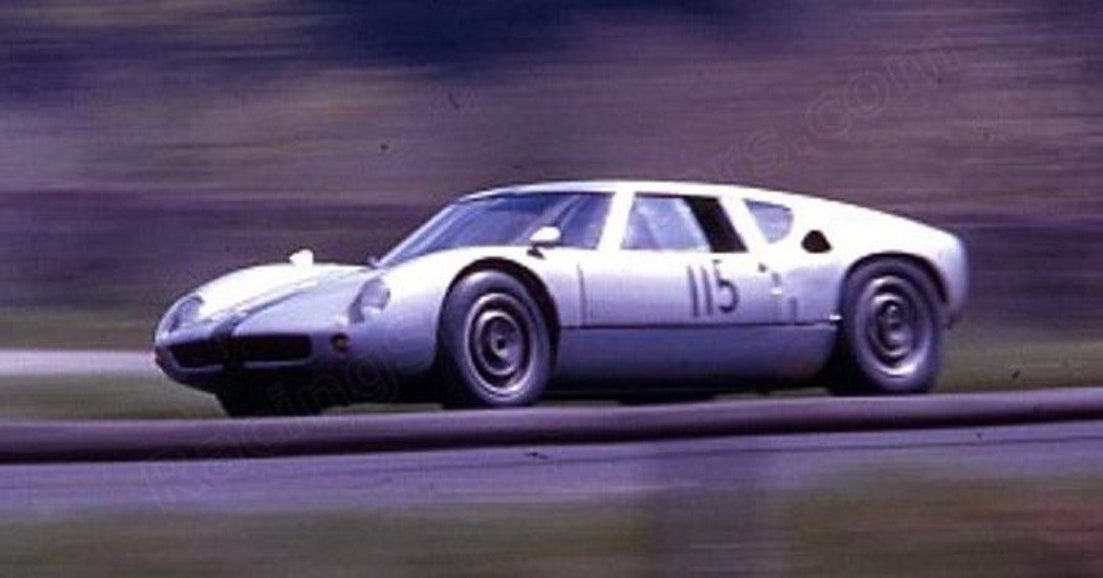
I found an interesting early livery to replace the Mecom blue livery I was planning on:


Lola 115 (4).jpg


Lola 115 (5).jpg


It is silver with a green racing stripe:


epEsmmKzTdGb_tKJIyB2kg.jpg


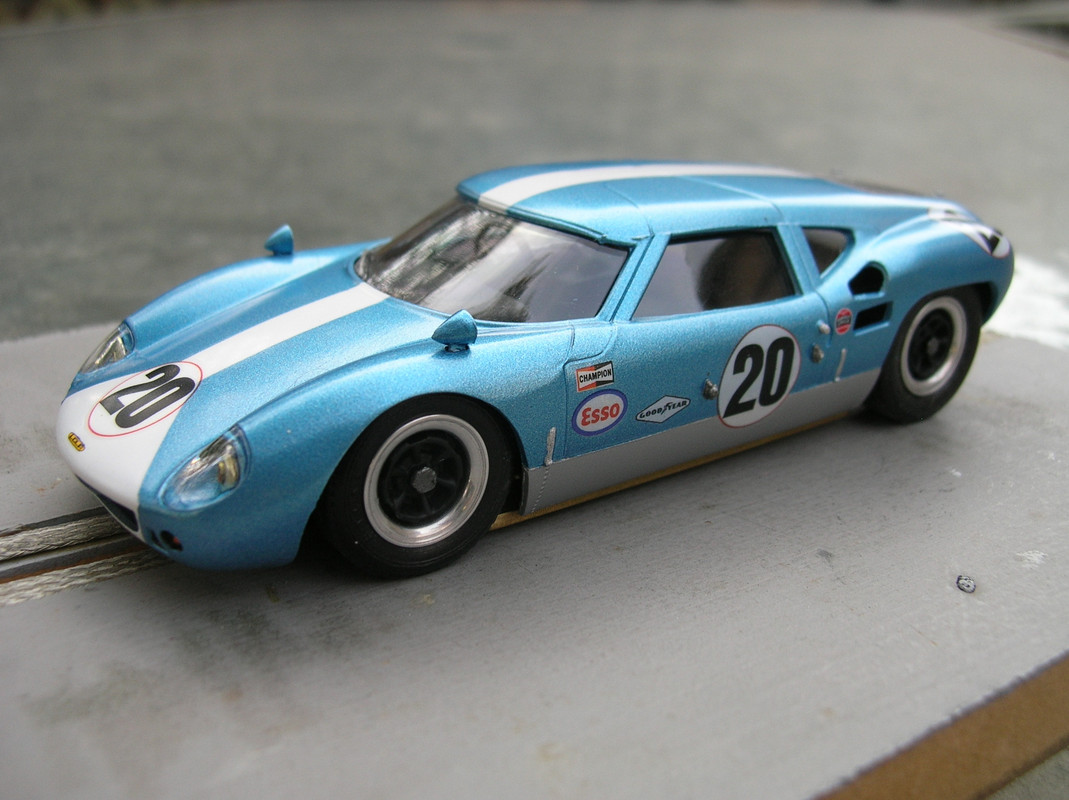
Here is a model of the car that shows the colors better:


Lola 115 (2).jpg


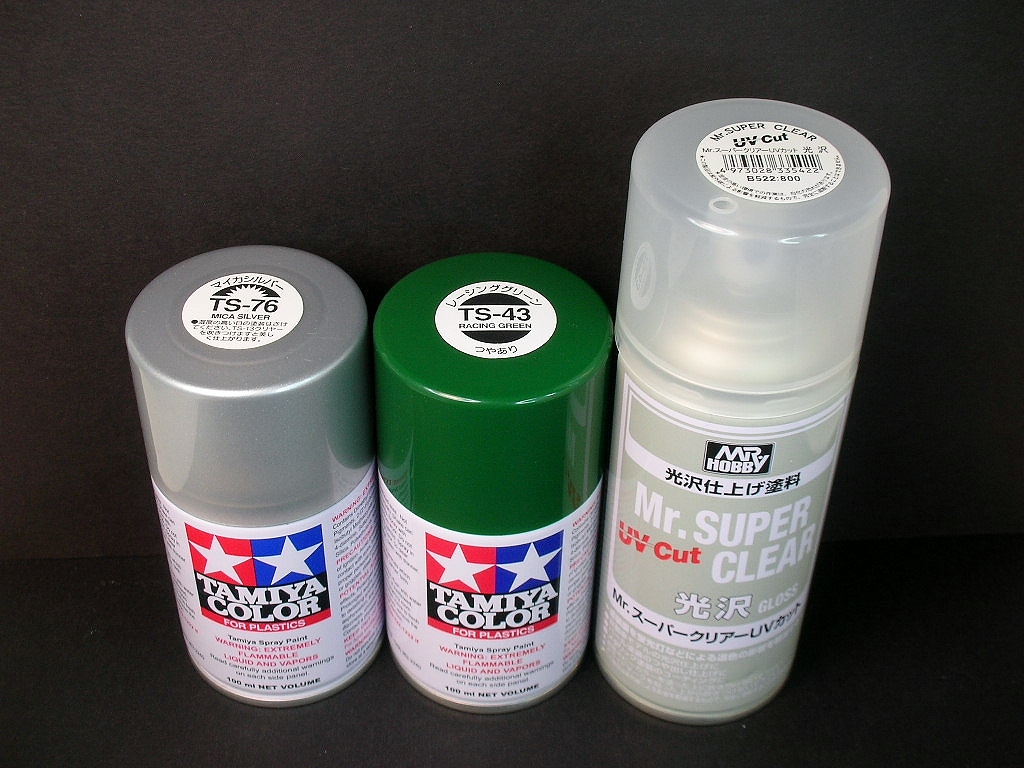
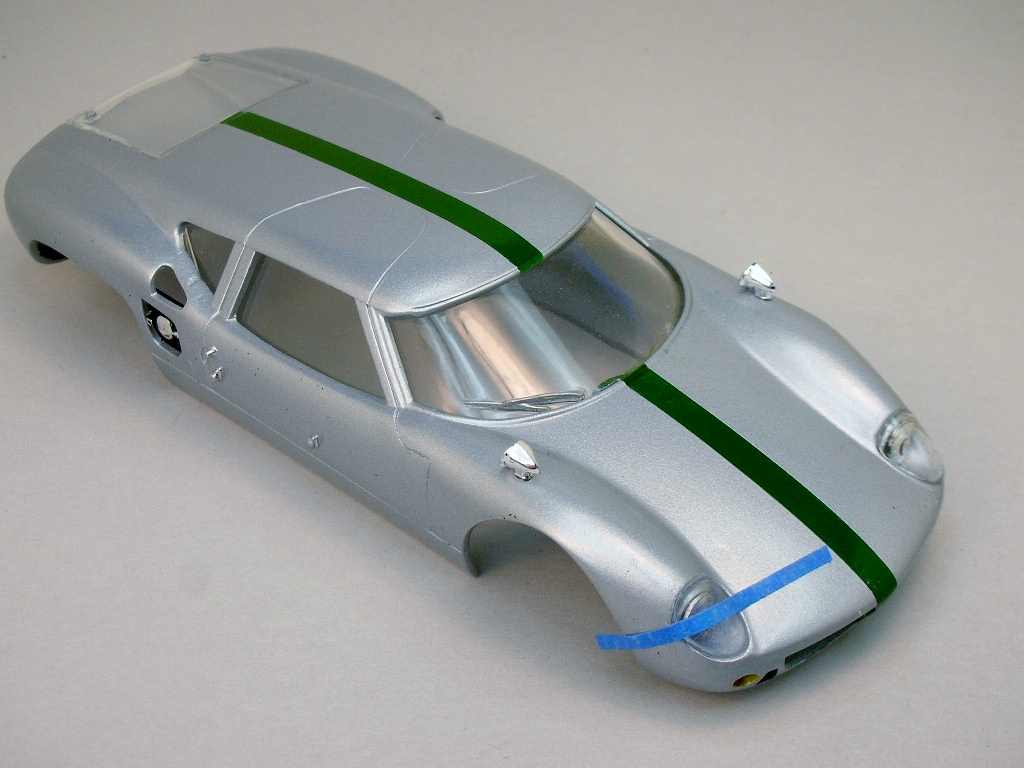
I used Tamiya Mica Silver for the body color and Tamiya Racing Green for the stripe and top coated it with Mr. Super Clear Gloss acrylic:


DSCN0850.JPG


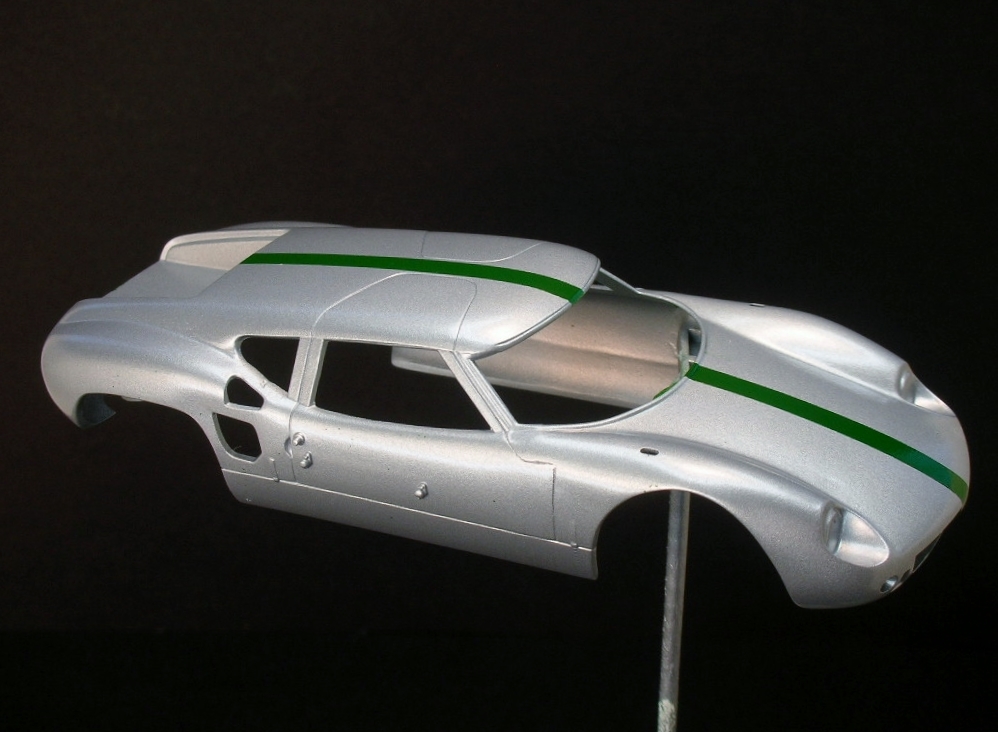
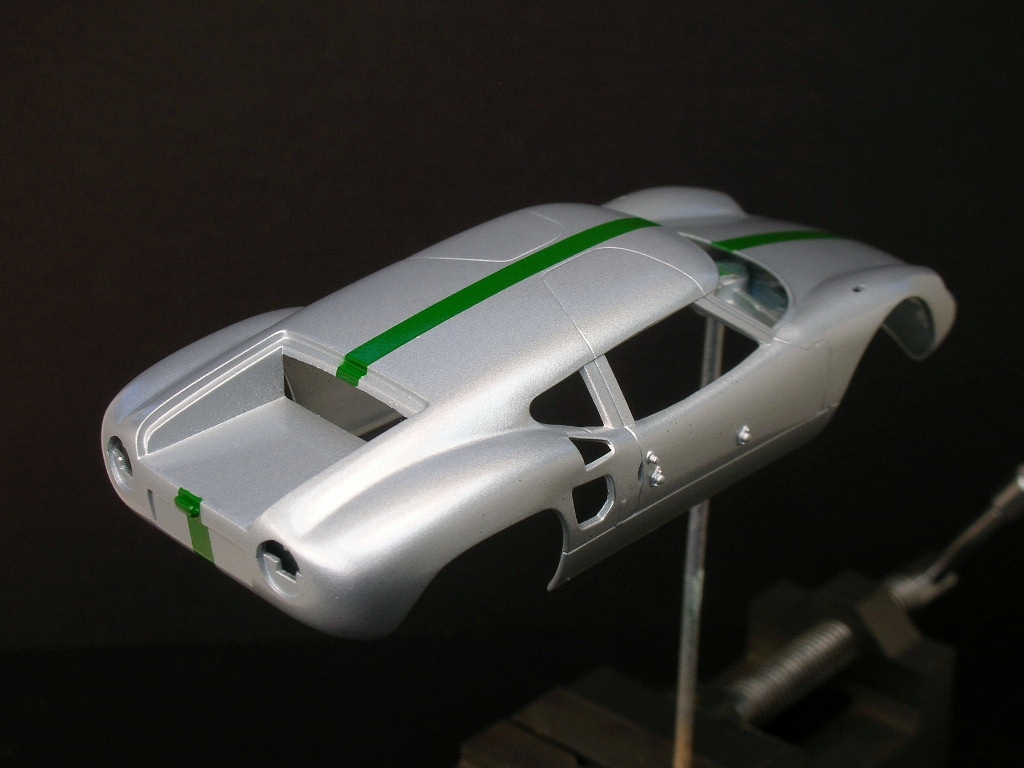
After much struggling and one incident that I thought scrapped the thing for sure......it's painted:  


Braverman Lola (70).JPG


Braverman Lola (69).JPG


After this experience, I'll never complain about painting a vac body again.   :laugh2:


  • Pablo, Tex, Lou E and 3 others like this

Rick Thigpen
Check out Steve Okeefe's great web site at its new home here at Slotblog:
The Independent Scratchbuilder
There's much more to come...


#20 Pablo

Pablo

    Builder

  • Administrator
  • PipPipPipPipPipPipPipPip
  • 18,448 posts
  • Joined: 20-February 06
  • Gender:Male
  • Location:Cleveland, Tennessee

Posted 16 September 2021 - 11:10 PM

Looks great  :sun_bespectacled:


Paul Wolcott


#21 munter

munter

    Checkered Flag in Hand

  • Full Member
  • PipPipPipPipPipPip
  • 1,049 posts
  • Joined: 11-April 08
  • Gender:Male
  • Location:Napier, New Zealand

Posted 18 September 2021 - 04:24 AM

A handsome result....which is no surprise to me.


Why is it that painting is the stressful thing but the mechanical side feels under control?


With a recommendation from Rodney, I switched from Squadron green putty to Tamiya White Putty and I really liked it:


It's good stuff. I use the basic grey a lot. Once the cap is off and the seal pierced it starts to deteriorate so I replace the cap tightly and keep a spare tube for when the point of frustration is reached.


John Warren
Slot cars are my preferred reality


#22 dc-65x

dc-65x

    Grand Champion Poster

  • Subscriber
  • PipPipPipPipPipPipPipPip
  • 6,976 posts
  • Joined: 14-February 06
  • Gender:Male
  • Location:Captain Rick: The only vintage slot car nut in SW Oregon?

Posted 18 September 2021 - 10:19 AM

Why is it that painting is the stressful thing but the mechanical side feels under control?


The mechanical and fabrication part of the build just seems easy and enjoyable John. I guess that's why I became a machinist. The more artistic painting and detailing is a struggle........and struggling to get a decent result is more like work than an enjoyable pastime.   :unknw:


If I pull off a decent paint job that end result is enjoyable. So far so good with the little Lola GT.   :)


  • munter and boxerdog like this

Rick Thigpen
Check out Steve Okeefe's great web site at its new home here at Slotblog:
The Independent Scratchbuilder
There's much more to come...


#23 Pablo

Pablo

    Builder

  • Administrator
  • PipPipPipPipPipPipPipPip
  • 18,448 posts
  • Joined: 20-February 06
  • Gender:Male
  • Location:Cleveland, Tennessee

Posted 18 September 2021 - 03:57 PM

Why is it that painting is the stressful thing but the mechanical side feels under control?


Because mechanical things can easily be changed or fixed. But once you screw up a paint job on a rare irreplaceable body, you are done  :o


  • munter, Slot Car Rod and Isaac S. like this

Paul Wolcott


#24 munter

munter

    Checkered Flag in Hand

  • Full Member
  • PipPipPipPipPipPip
  • 1,049 posts
  • Joined: 11-April 08
  • Gender:Male
  • Location:Napier, New Zealand

Posted 19 September 2021 - 04:03 AM


The mechanical and fabrication part of the build just seems easy and enjoyable John. I guess that's why I became a machinist. The more artistic painting and detailing is a struggle........and struggling to get a decent result is more like work than an enjoyable pastime.    :unknw:


If I pull off a decent paint job that end result is enjoyable. So far so good with the little Lola GT.  

agree


Because mechanical things can easily be changed or fixed. But once you screw up a paint job on a rare irreplaceable body, you are done   :o


and also agree


  • Pablo and boxerdog like this

John Warren
Slot cars are my preferred reality


#25 dc-65x

dc-65x

    Grand Champion Poster

  • Subscriber
  • PipPipPipPipPipPipPipPip
  • 6,976 posts
  • Joined: 14-February 06
  • Gender:Male
  • Location:Captain Rick: The only vintage slot car nut in SW Oregon?

Posted 26 September 2021 - 08:58 PM

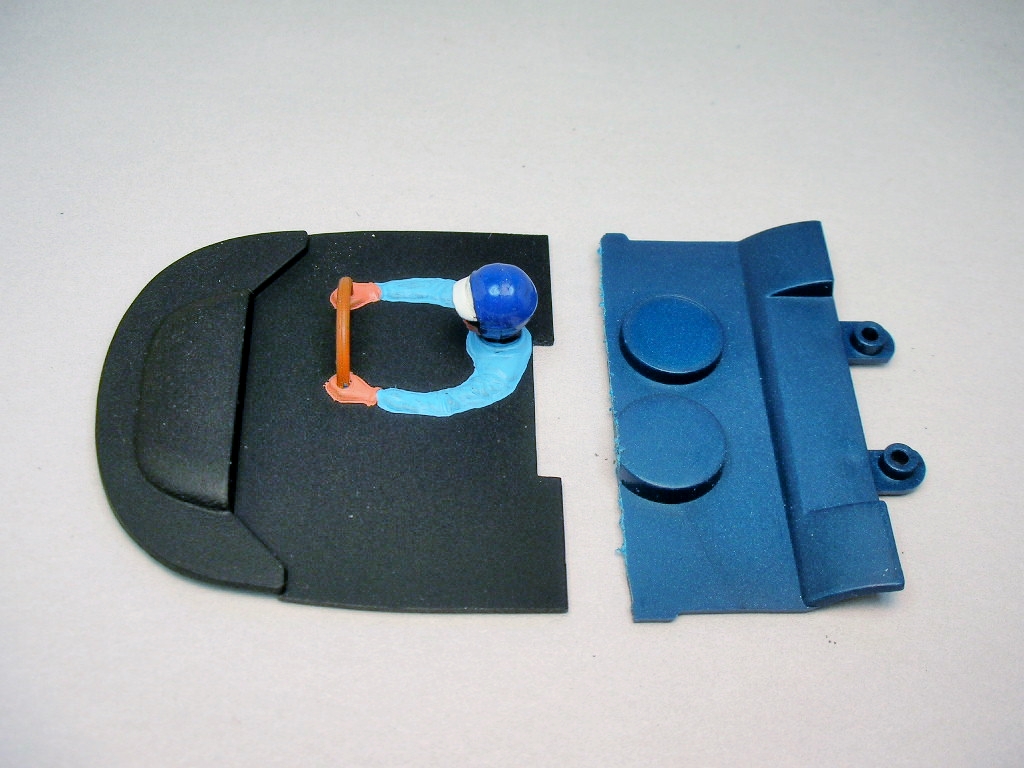
Bob made a new interior out of card stock, a Cox driver and glued it in place. I cut down the Monogram interior to fit and taped it in place. With the back of the cockpit area open to the motor, crap-O-la will get all over the inside of the "glass". I can remove my interior to clean:


Braverman Lola (73).JPG


Next up came gluing the clear headlight covers in place. More drama.   :o  I should have asked for Rodney's tips first but of course I didn't. I used Testors white glue (mistake!) for clear plastic and managed to get the ill fitting covers on misaligned.   :dash2:


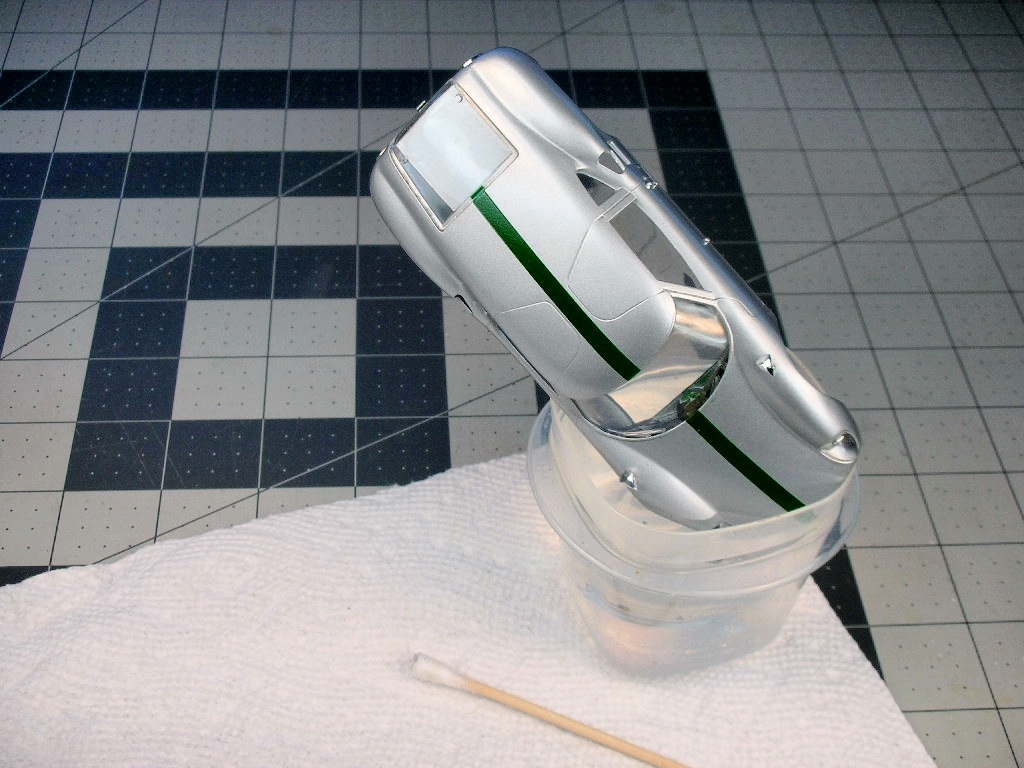
After talking to Rodney I found my poor technique resulted in this debacle. Soaking the headlight cover in water to soften the crap glue and remove the cover:


Braverman Lola (74).JPG


Problem with this is the Testors glue is more tenacious than the Formula 560 Canopy Glue I should have used. The Testors crud dissolved just enough in the water to float around and deposit itself all over. It wrinkled up the clearcoat in places and what remained in the headlight area had to be manually scraped away. What a nightmare.


After touchup painting inside the headlight bucket and repainting the headlight with liquid chrome, I used Rodney's technique to reinstall the cover with the correct adhesive. A thin strip of tape holds the cover and gave me something to hang on to while applying the glue and positioning the cover:


Braverman Lola (75).JPG


Once the cover is in position the tape is simply pressed down and holds the cover in place:


Braverman Lola (72).JPG


The ill fitting cover still had gaps but the Formula 560 was simply applied to fill the gap. After drying any excess glue was easily removed with a wet cotton swab.


The headlight cover on the other side is not as bad as the one I redid..........I'm leaving it alone!


Note to self........call Rodney BEFORE you do something you've never done before.    :laugh2:


  • Tex, Slot Car Rod, Peter Horvath and 1 other like this

Rick Thigpen
Check out Steve Okeefe's great web site at its new home here at Slotblog:
The Independent Scratchbuilder
There's much more to come...


Electric Dreams Online Shop