Jump to content


Photo

Is this a Cobra production chassis, kit, or neither?


  • Please log in to reply
17 replies to this topic

#1 ajd350

ajd350

    On The Lead Lap

  • Full Member
  • PipPipPipPip
  • 229 posts
  • Joined: 09-June 10
  • Gender:Male
  • Location:Chicago area

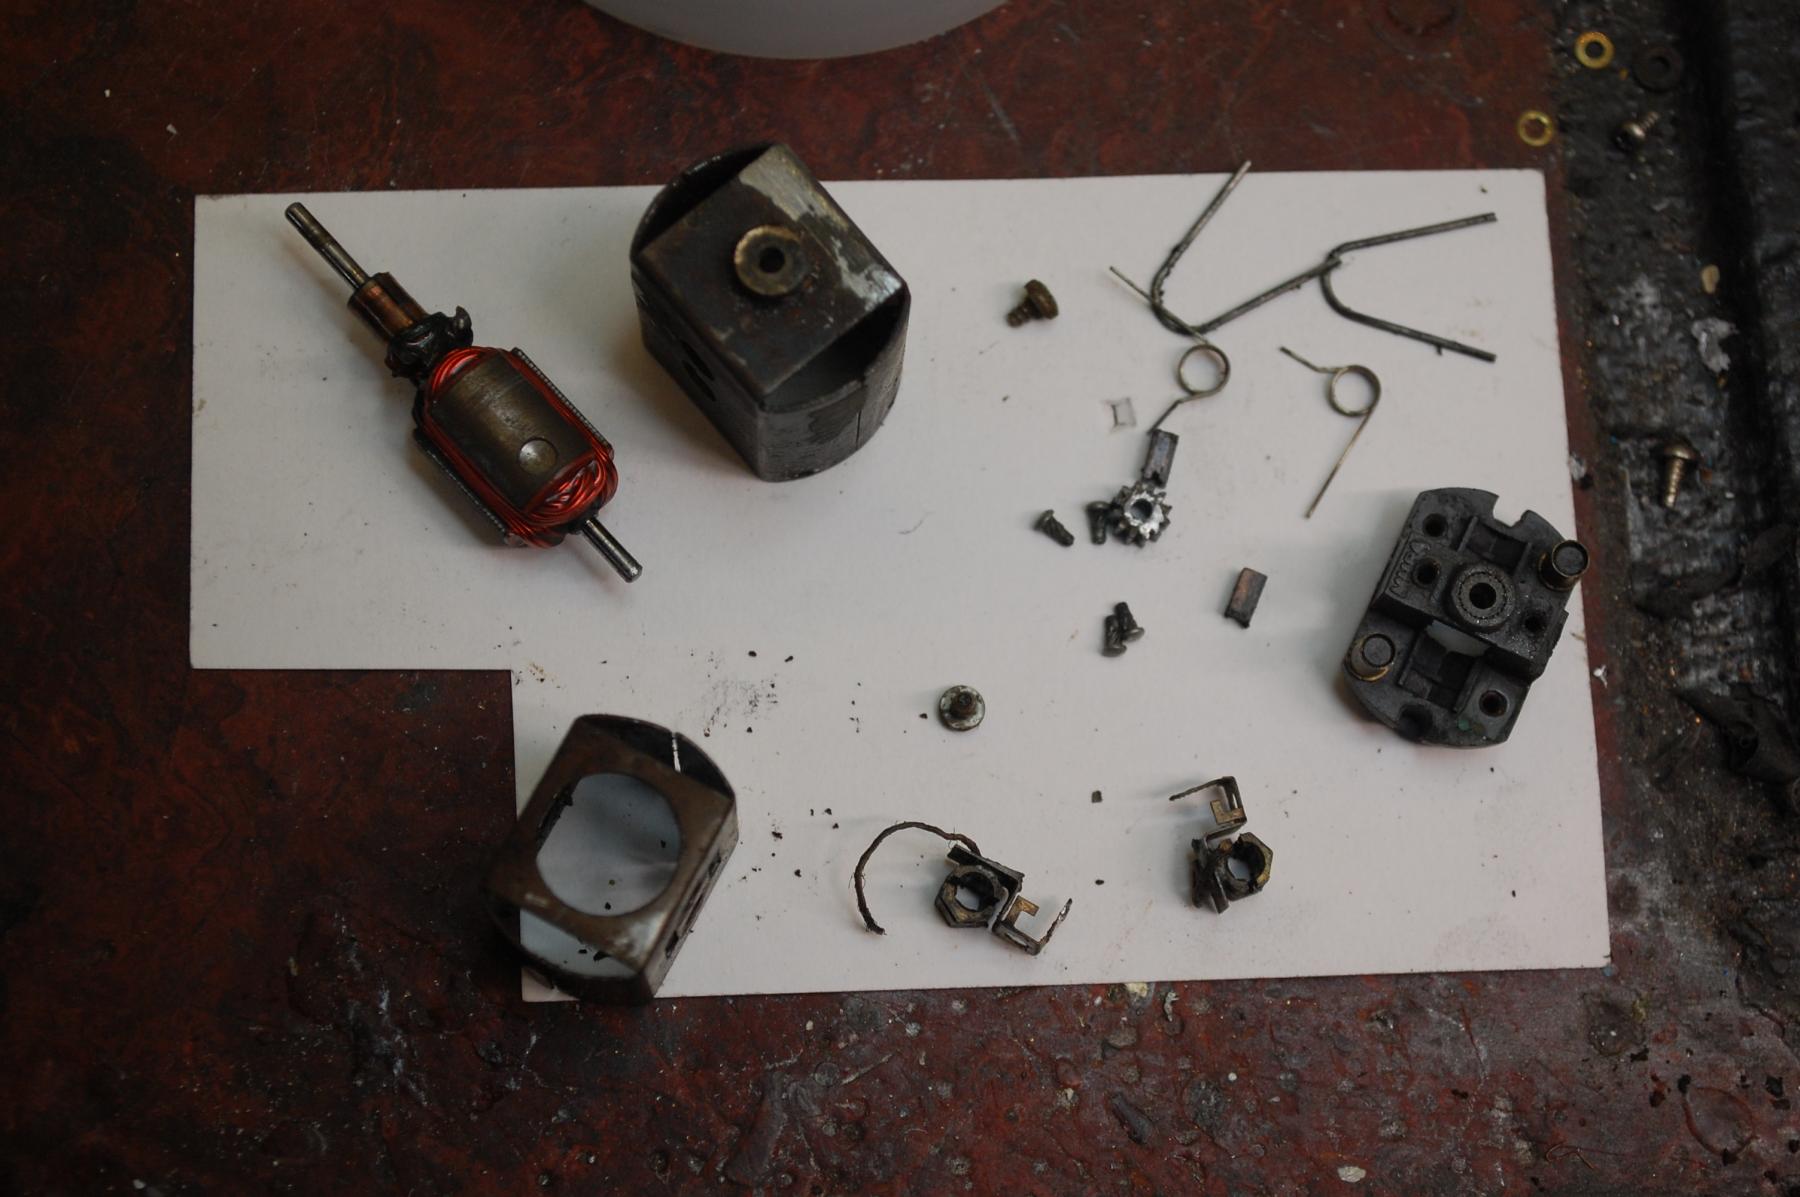
Posted 23 July 2022 - 08:47 AM

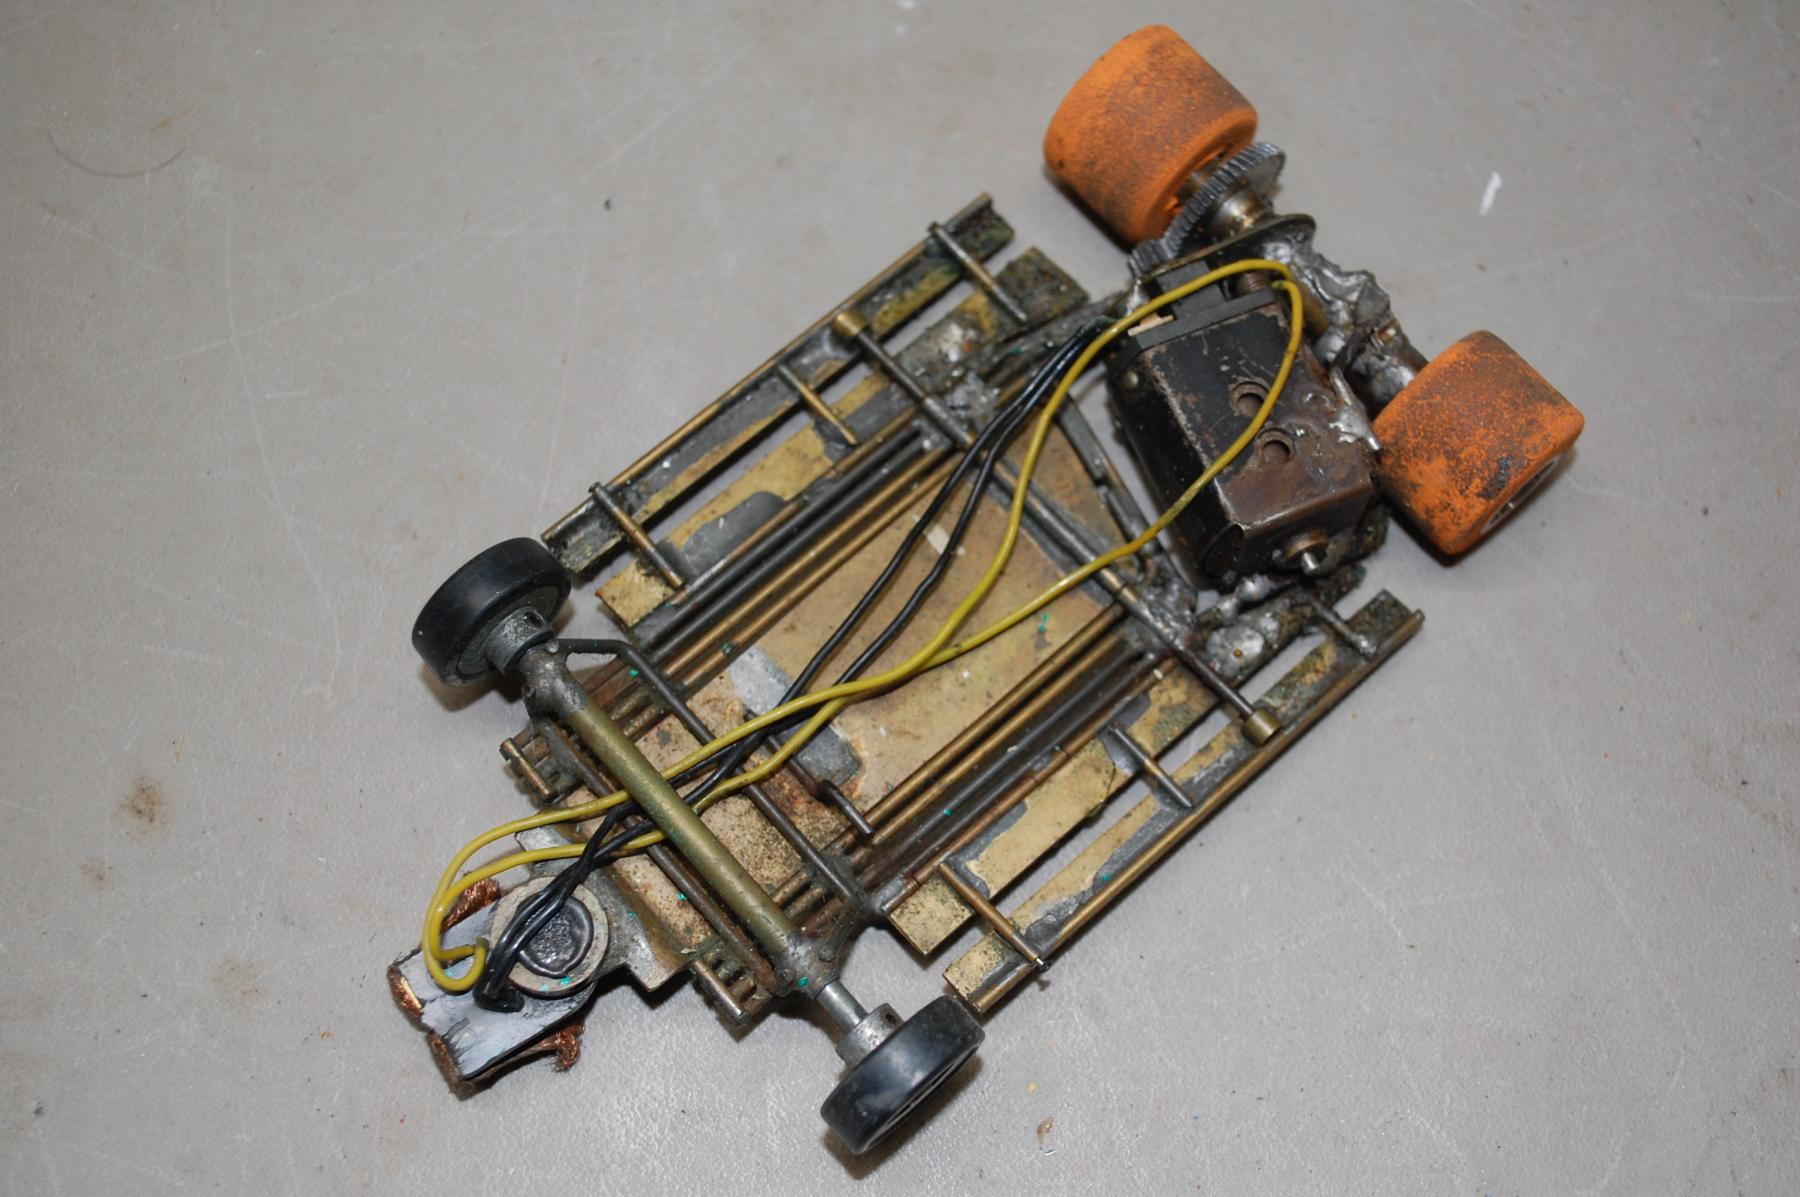
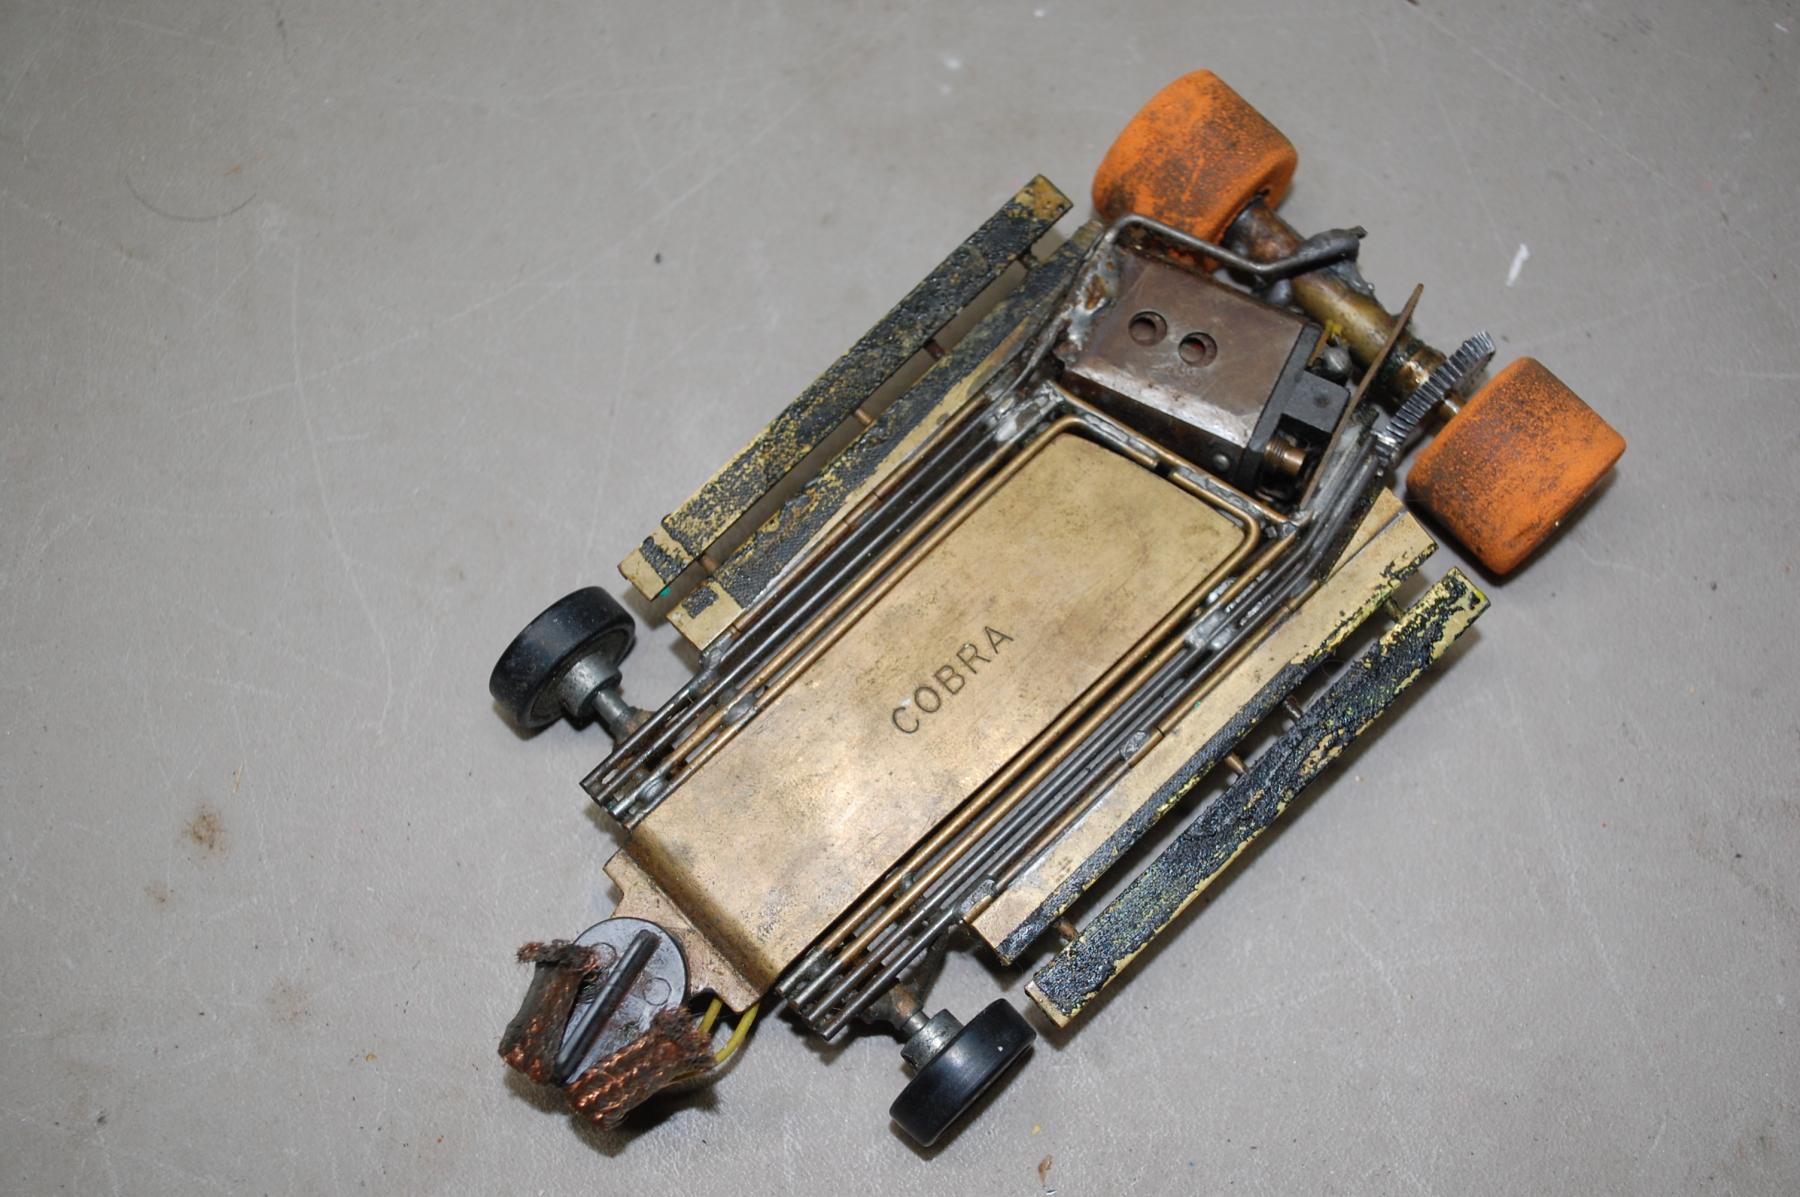
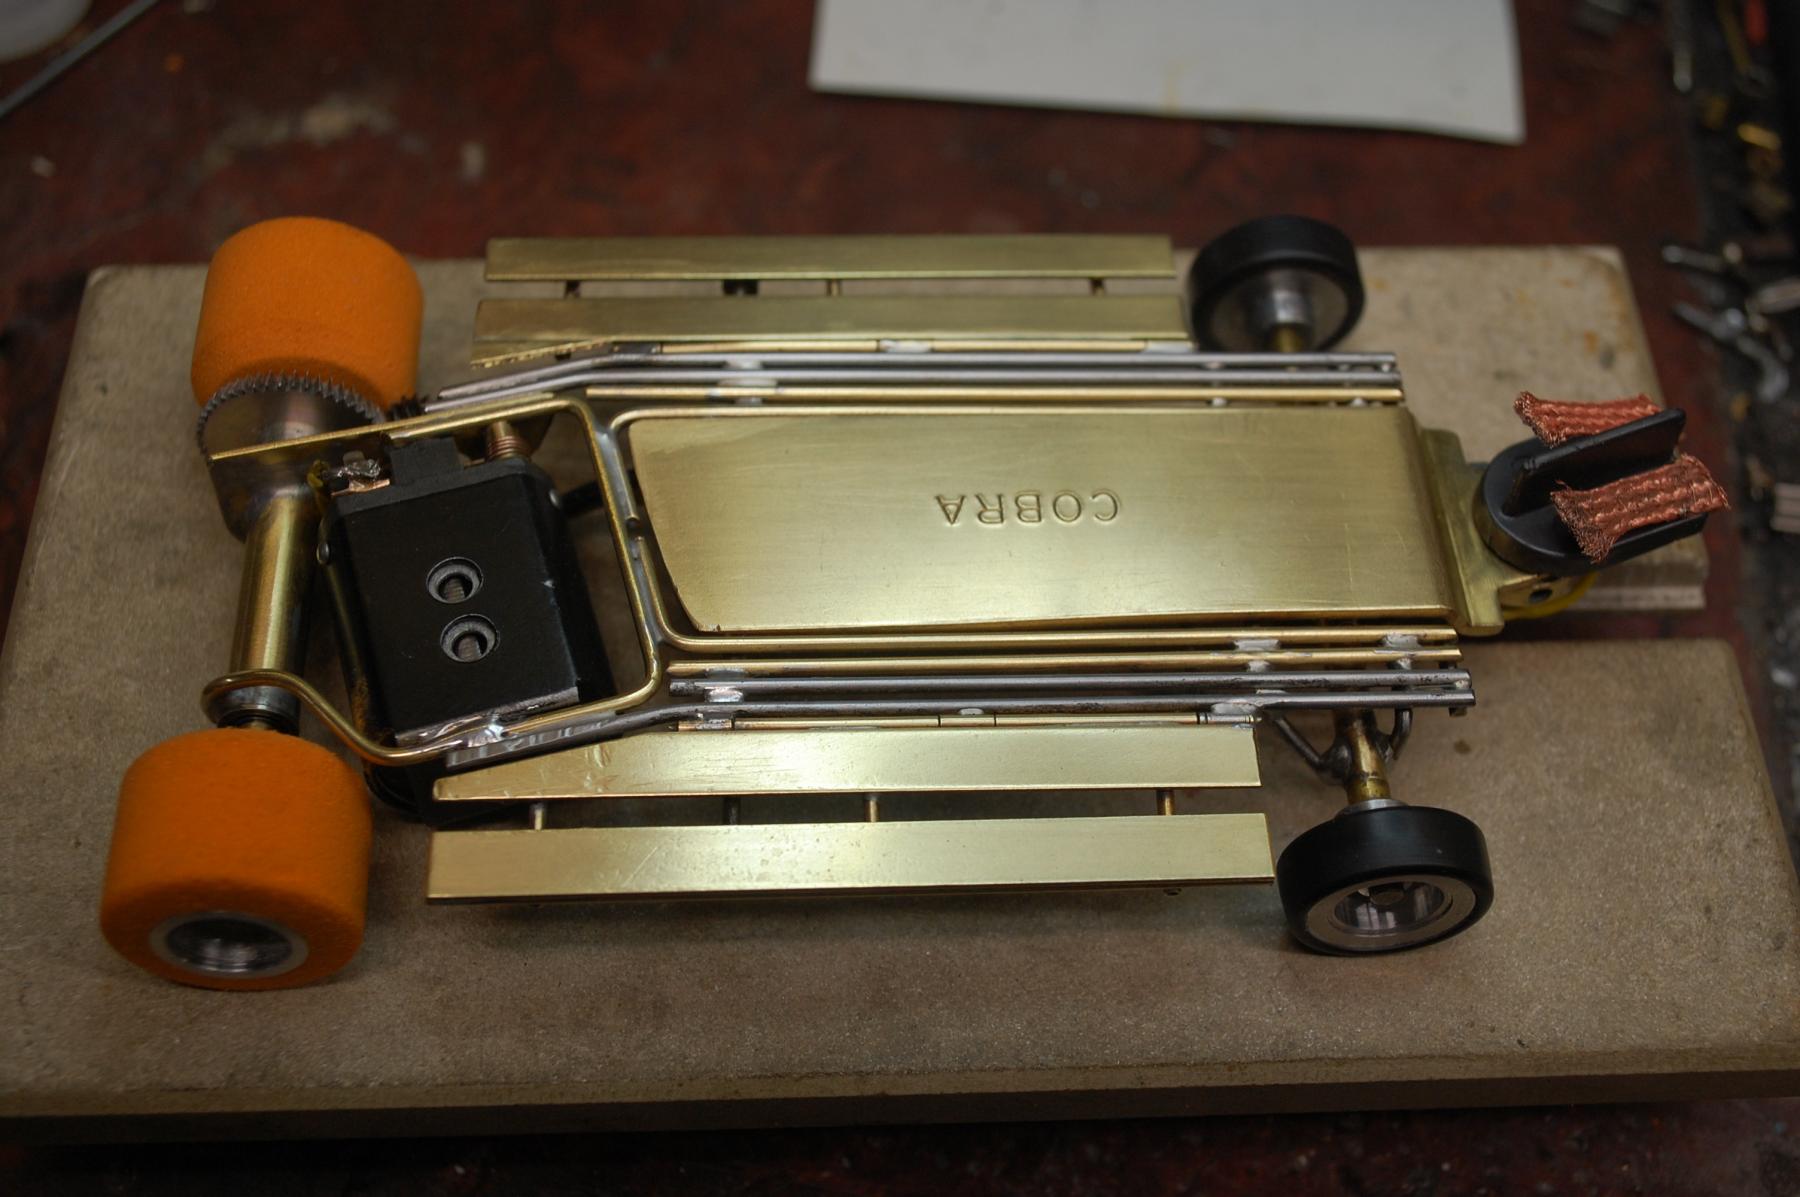
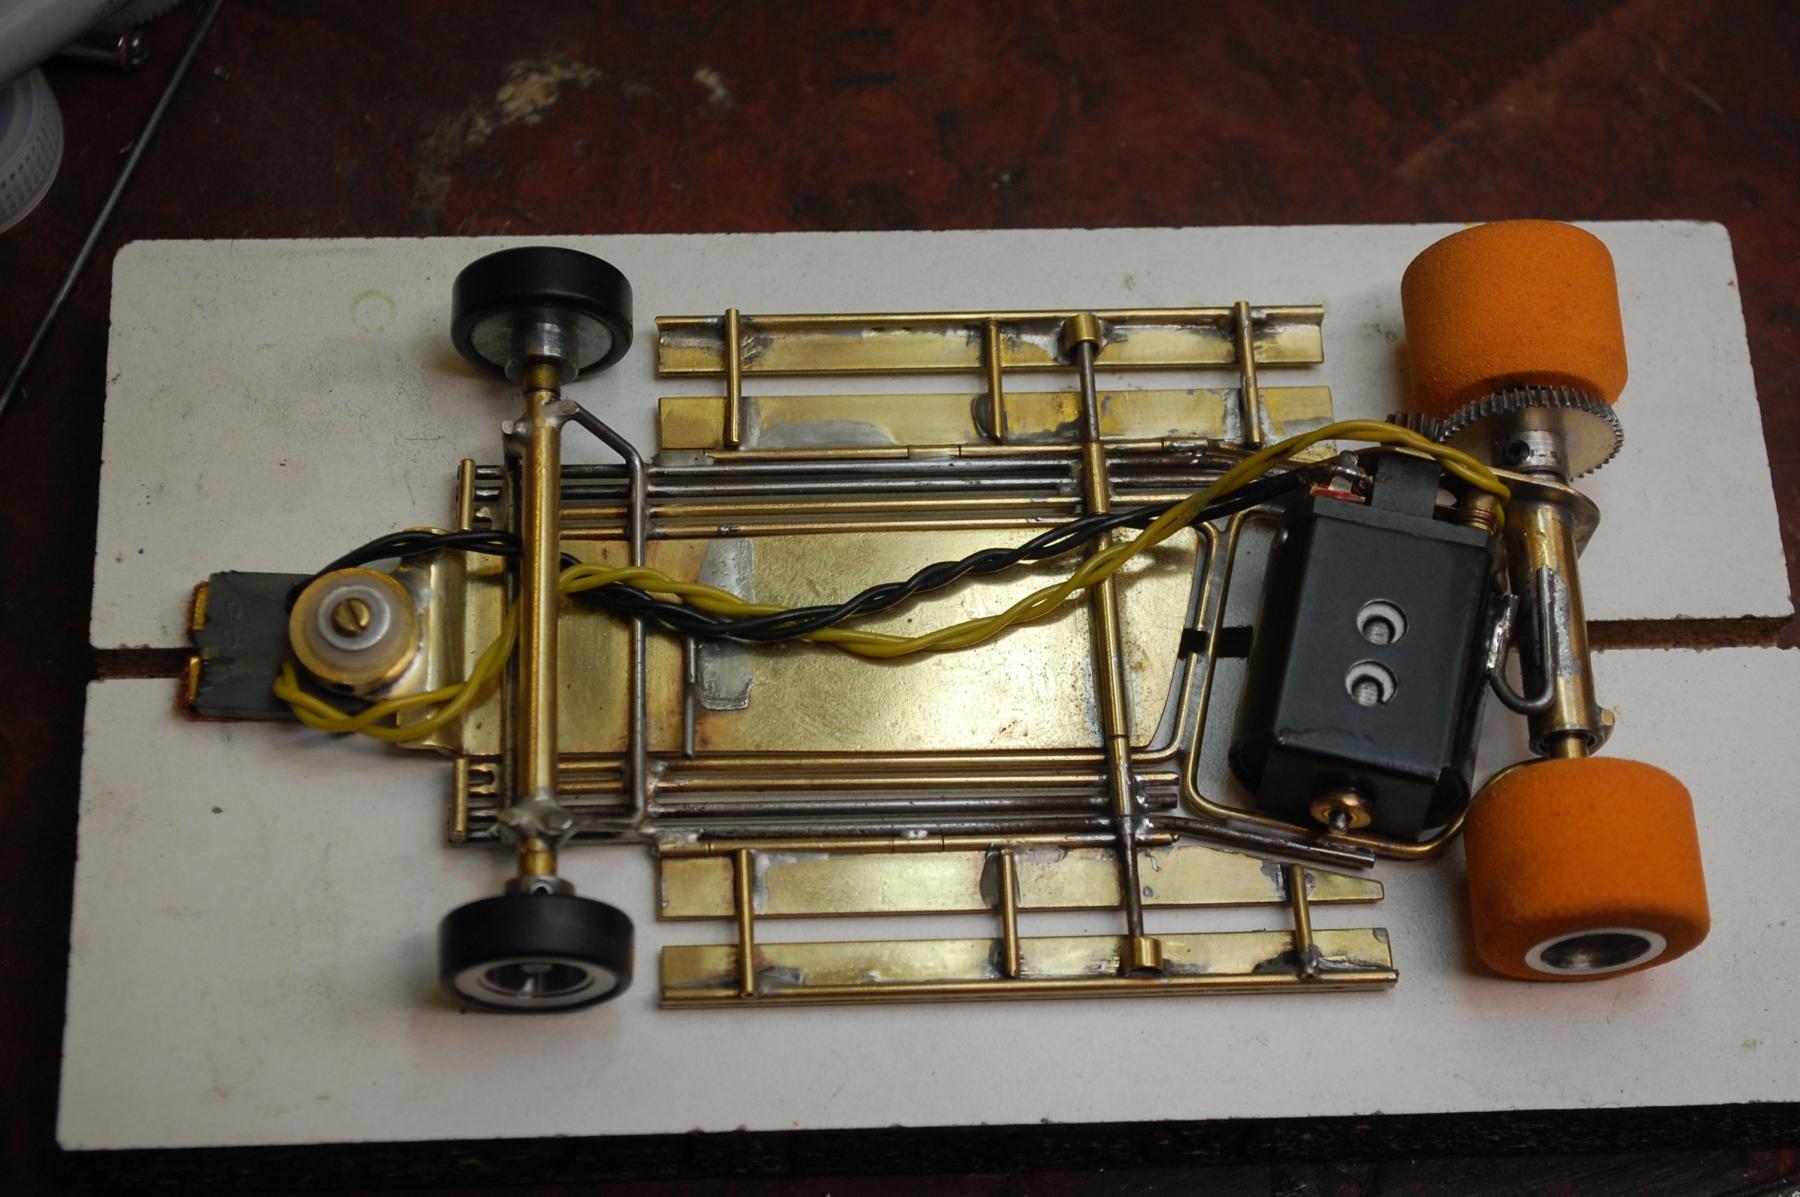
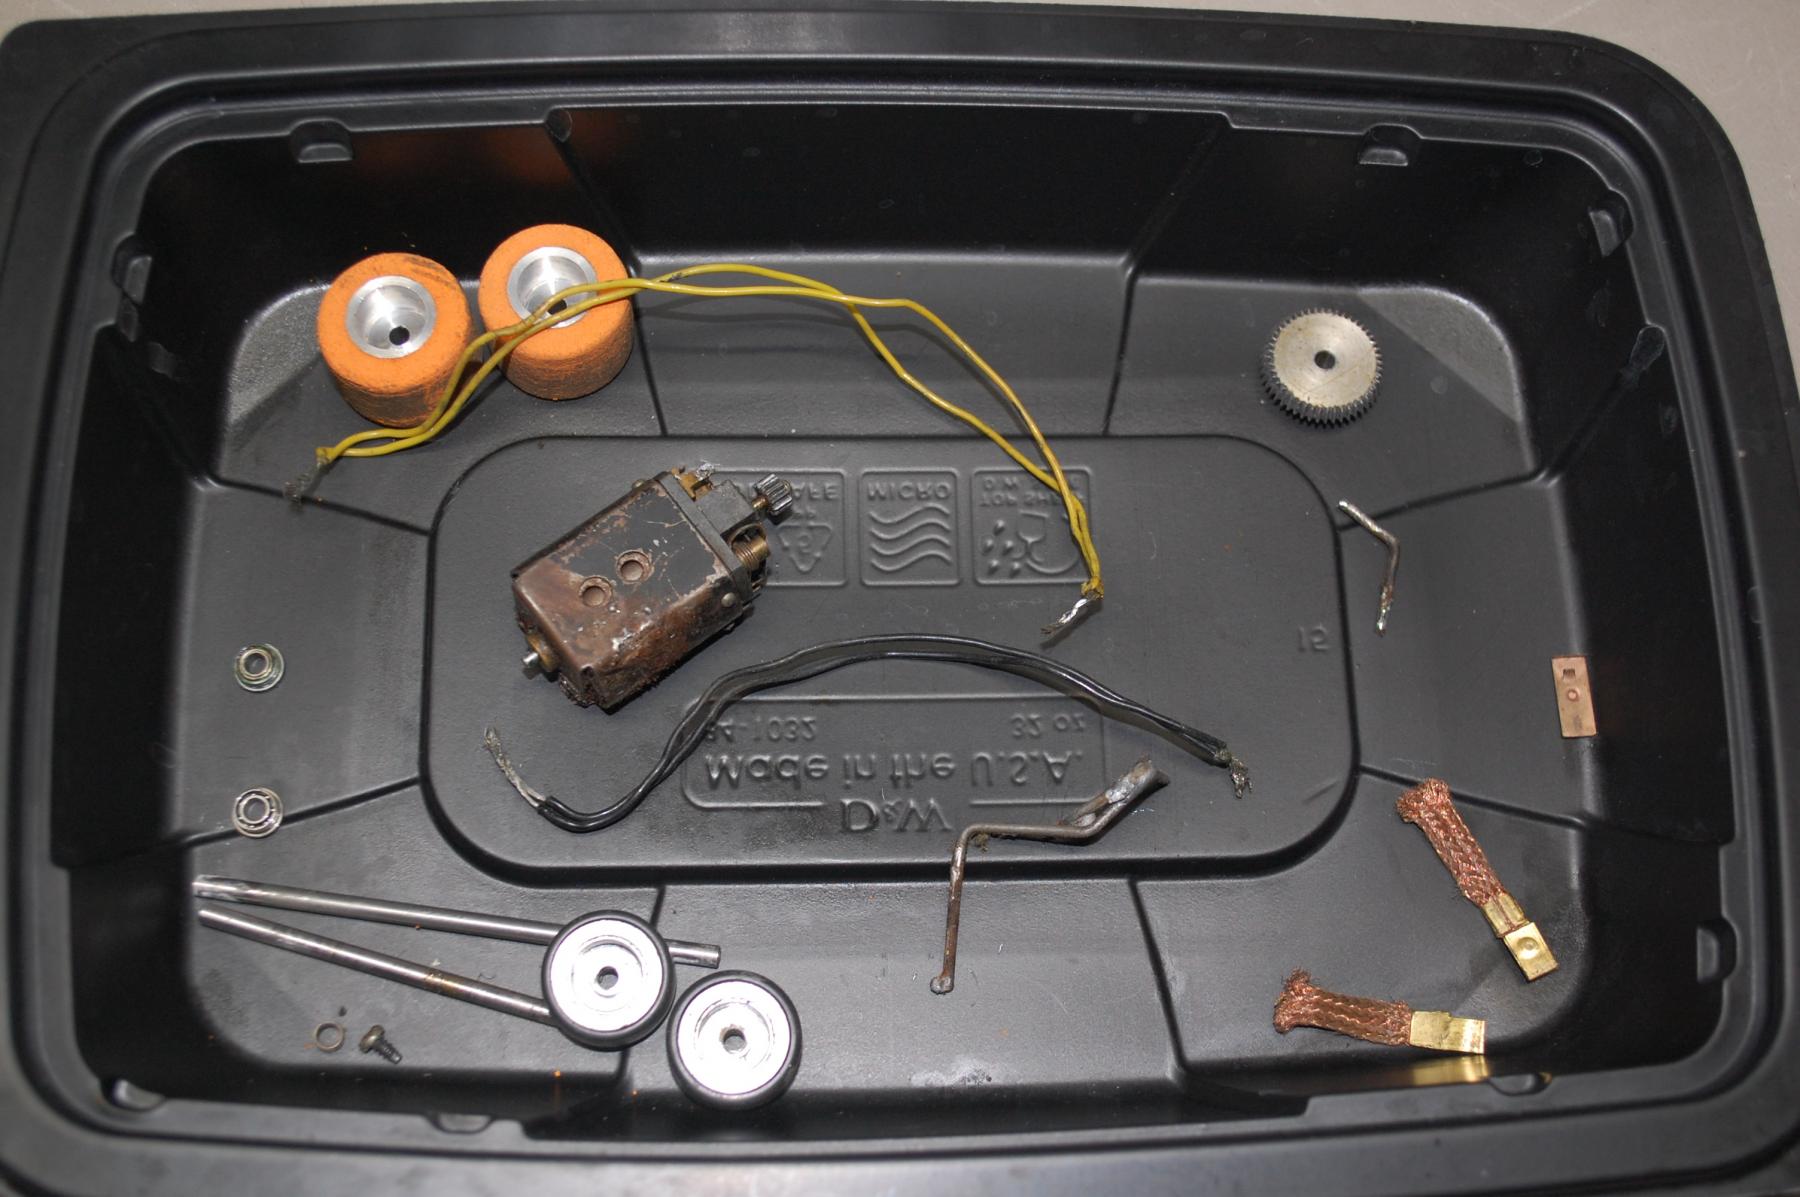
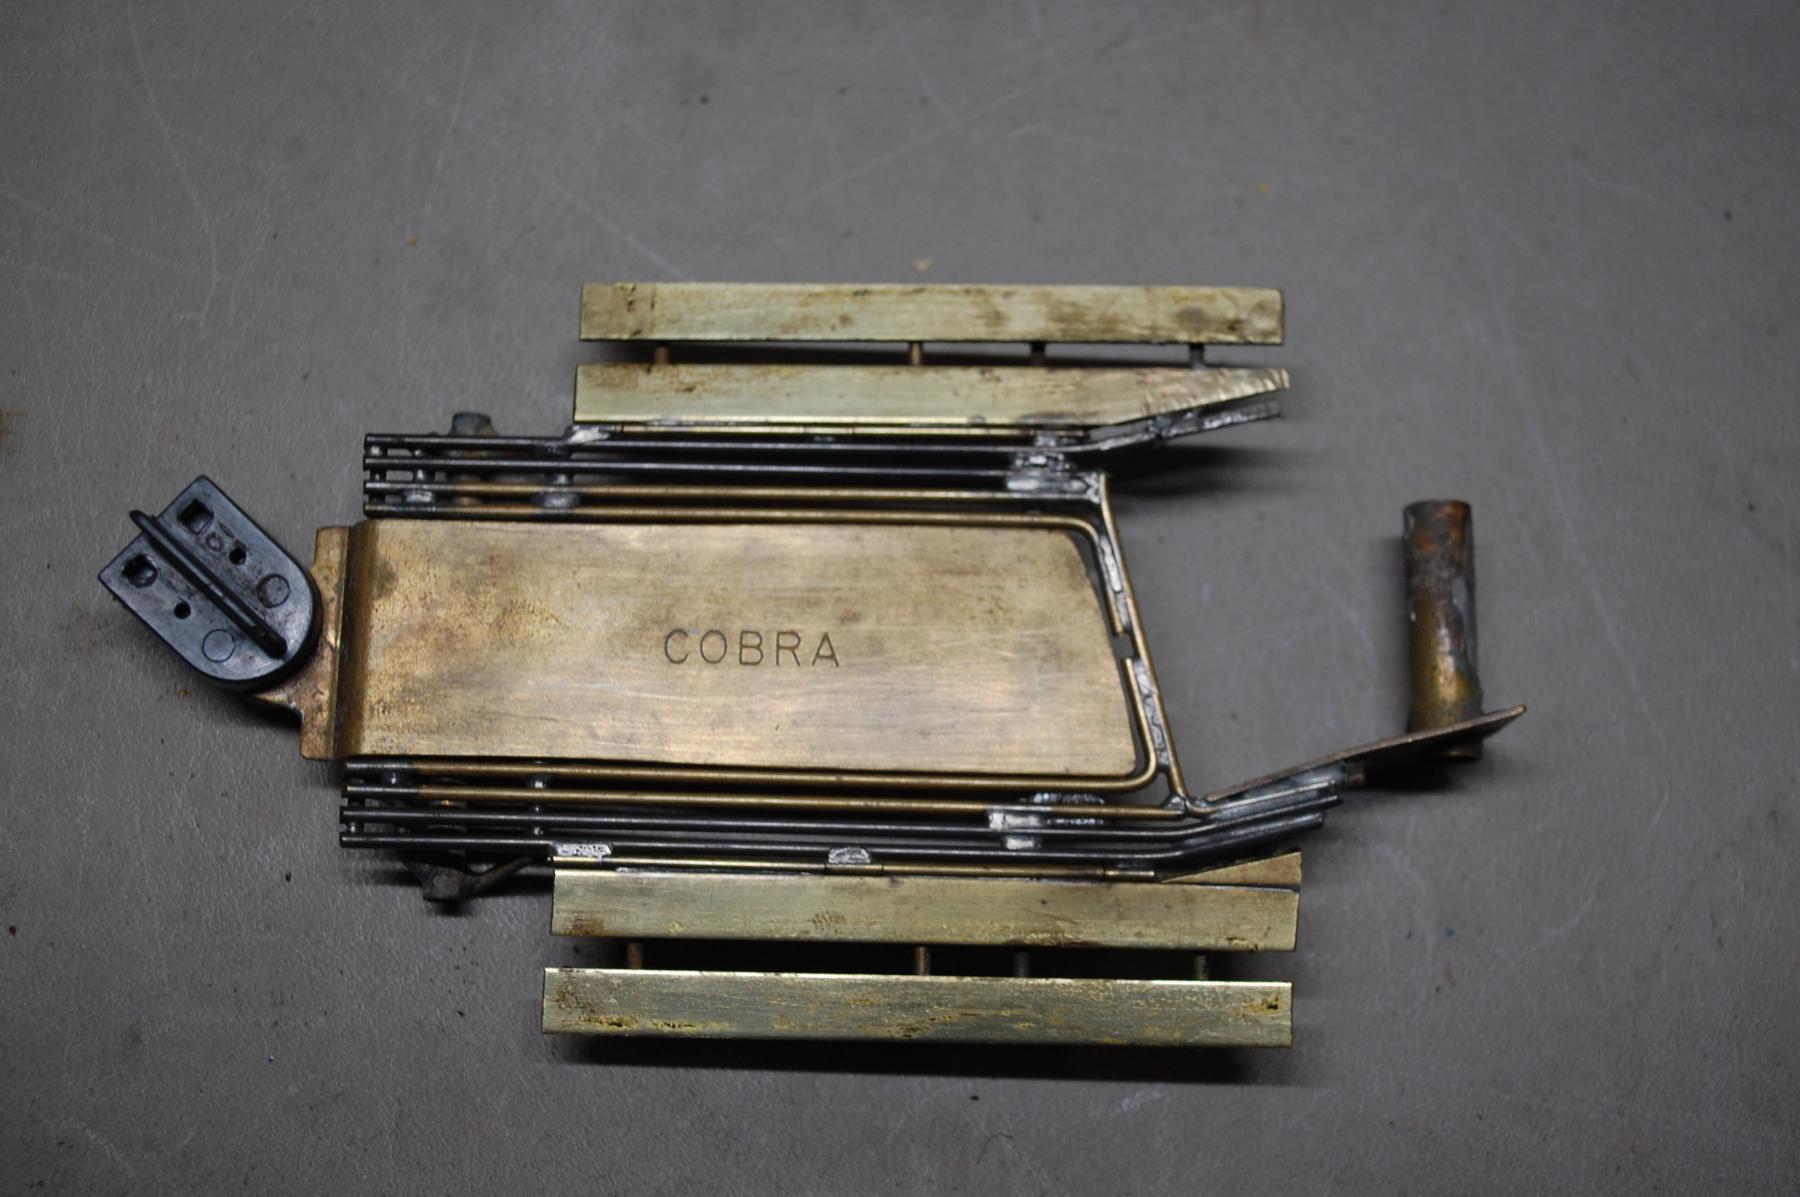
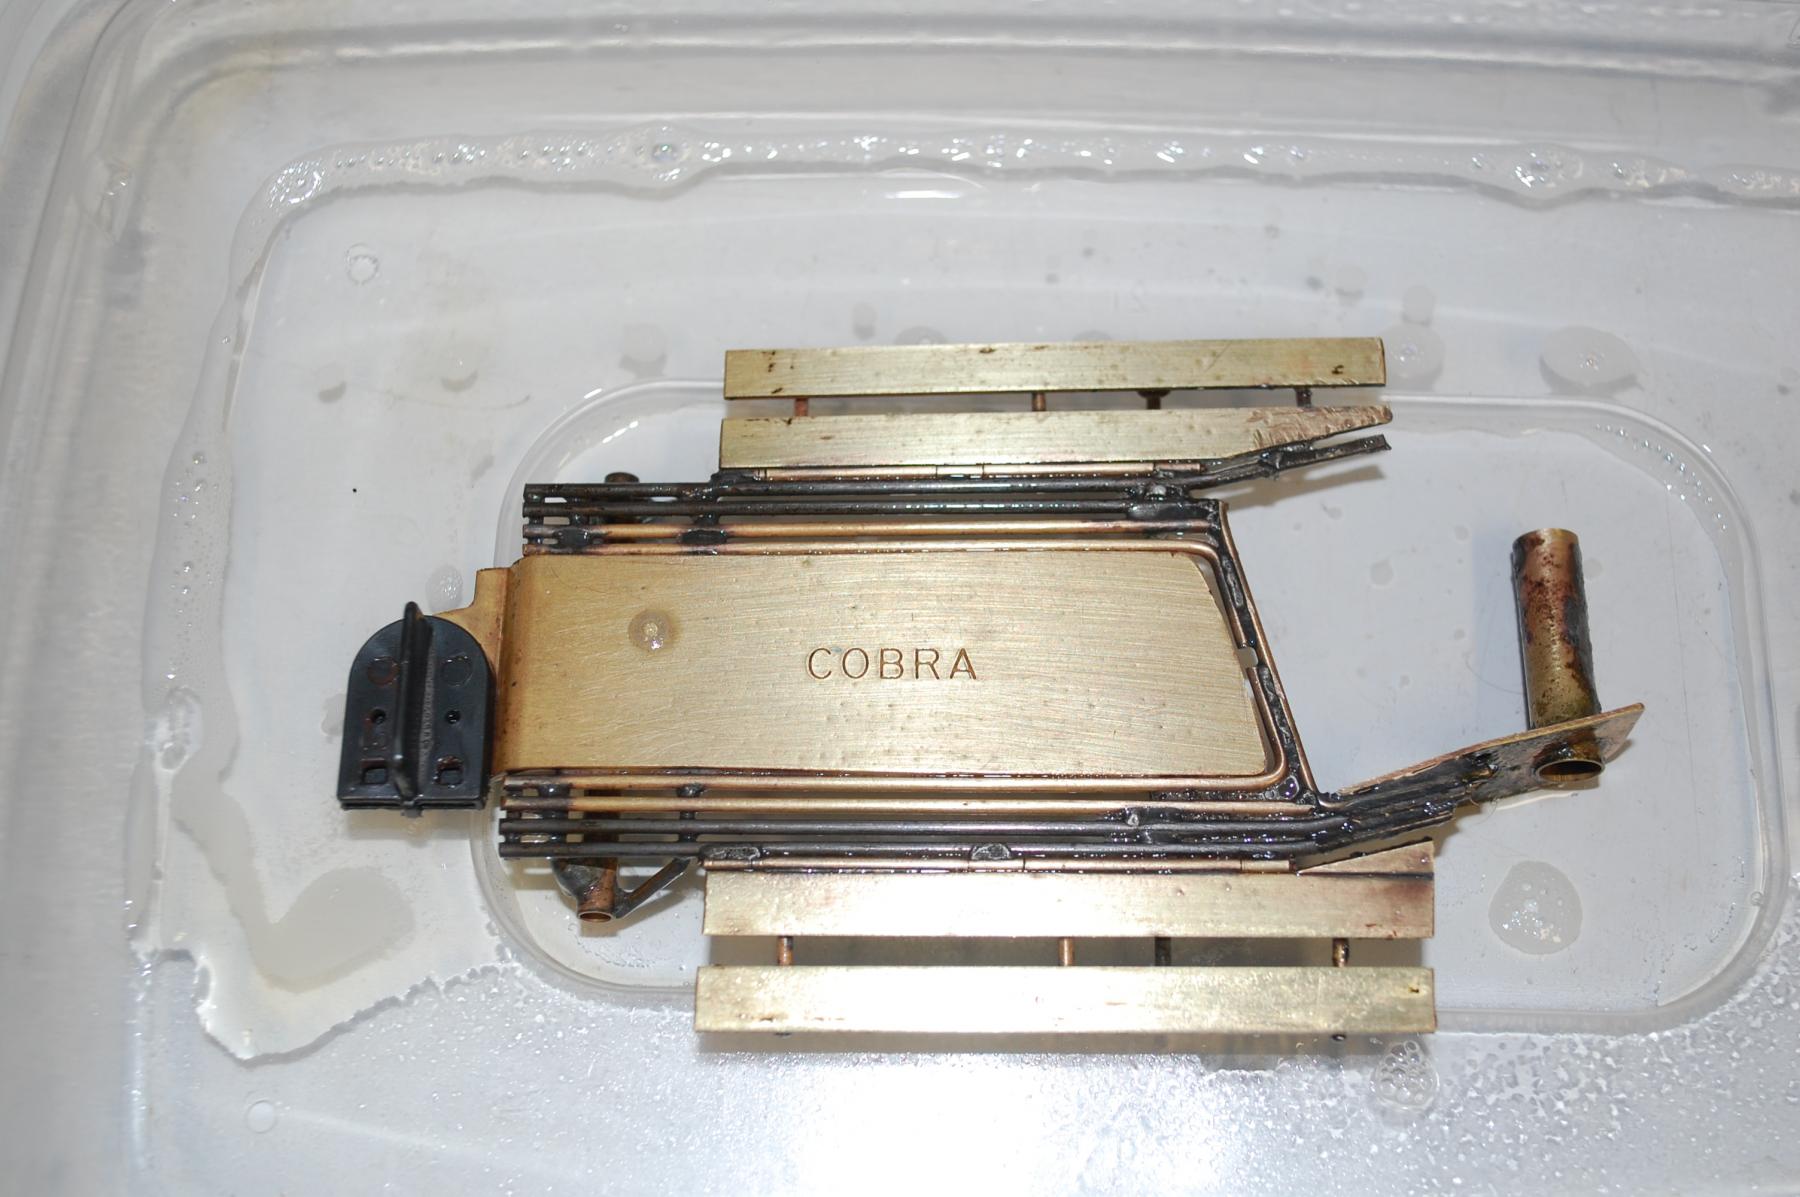
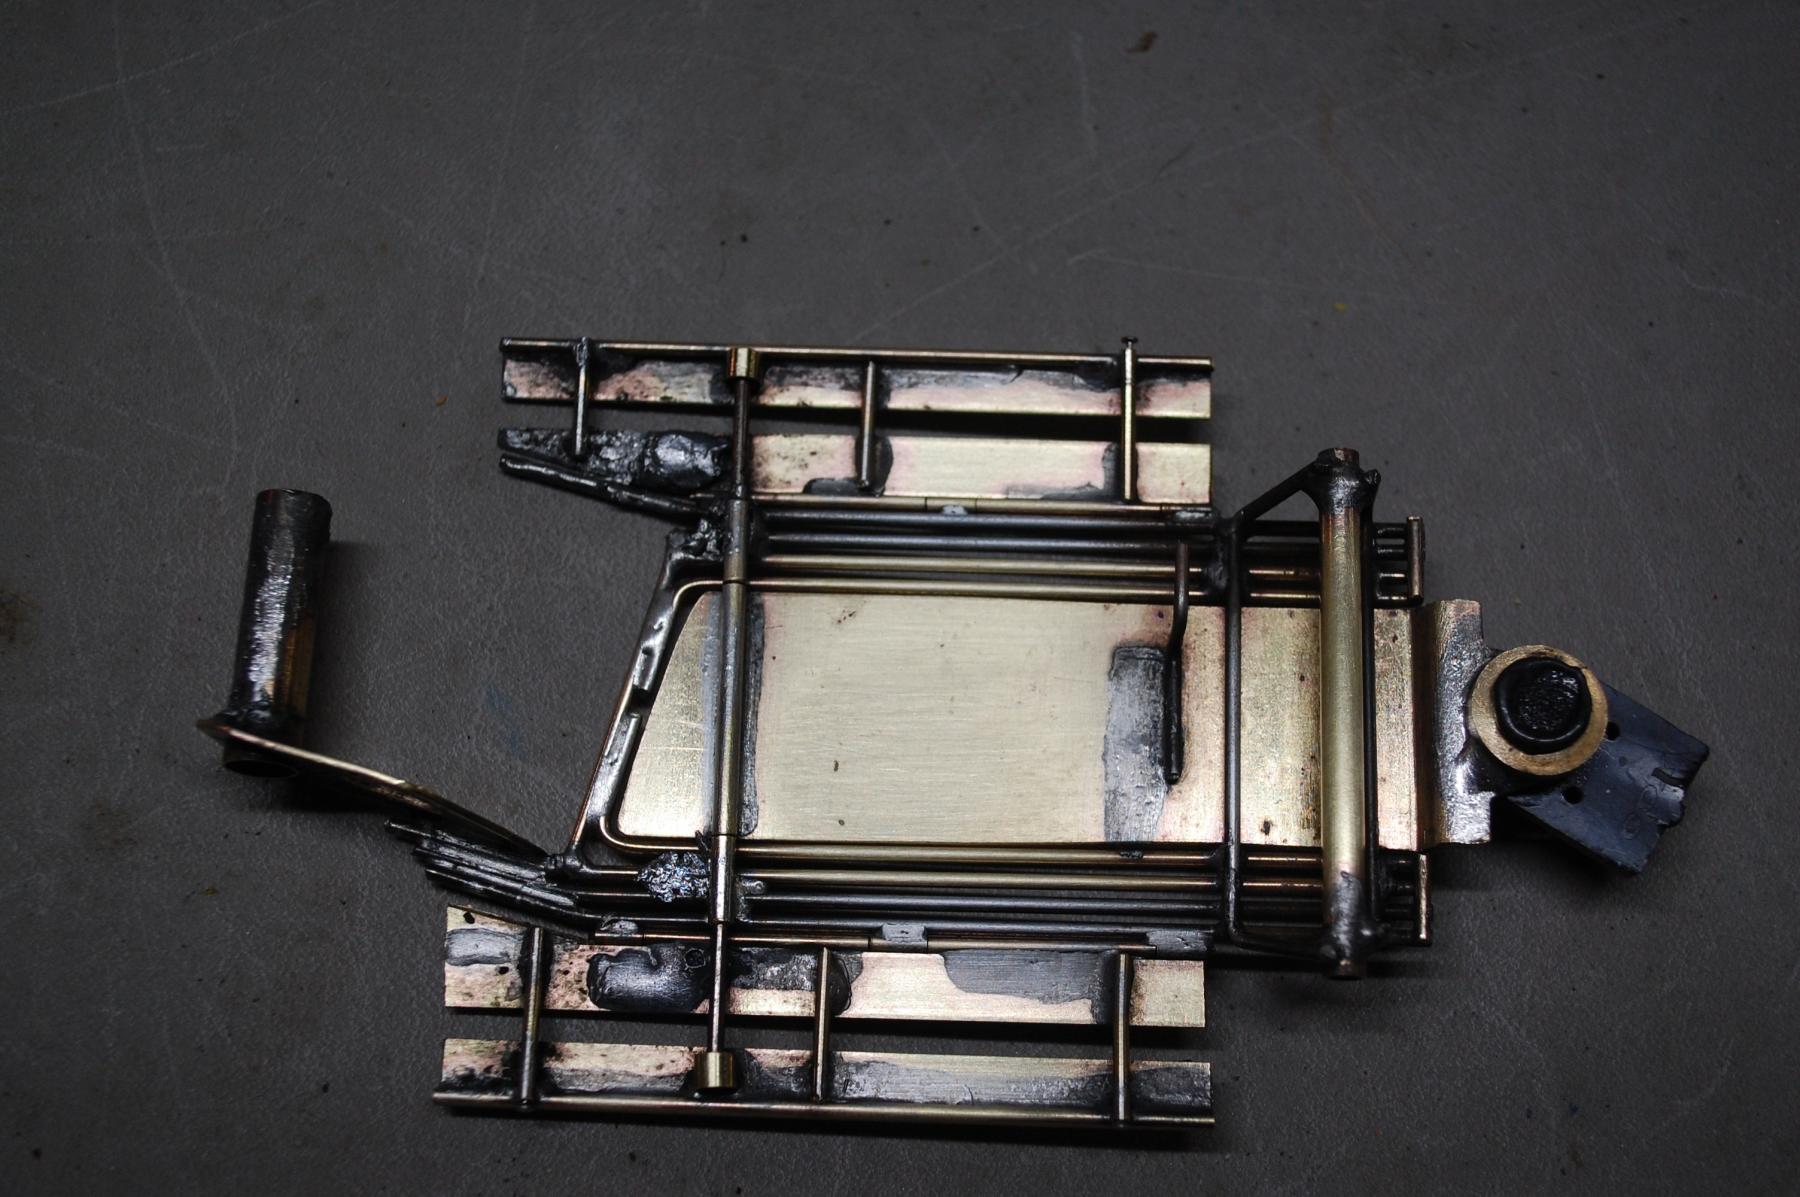
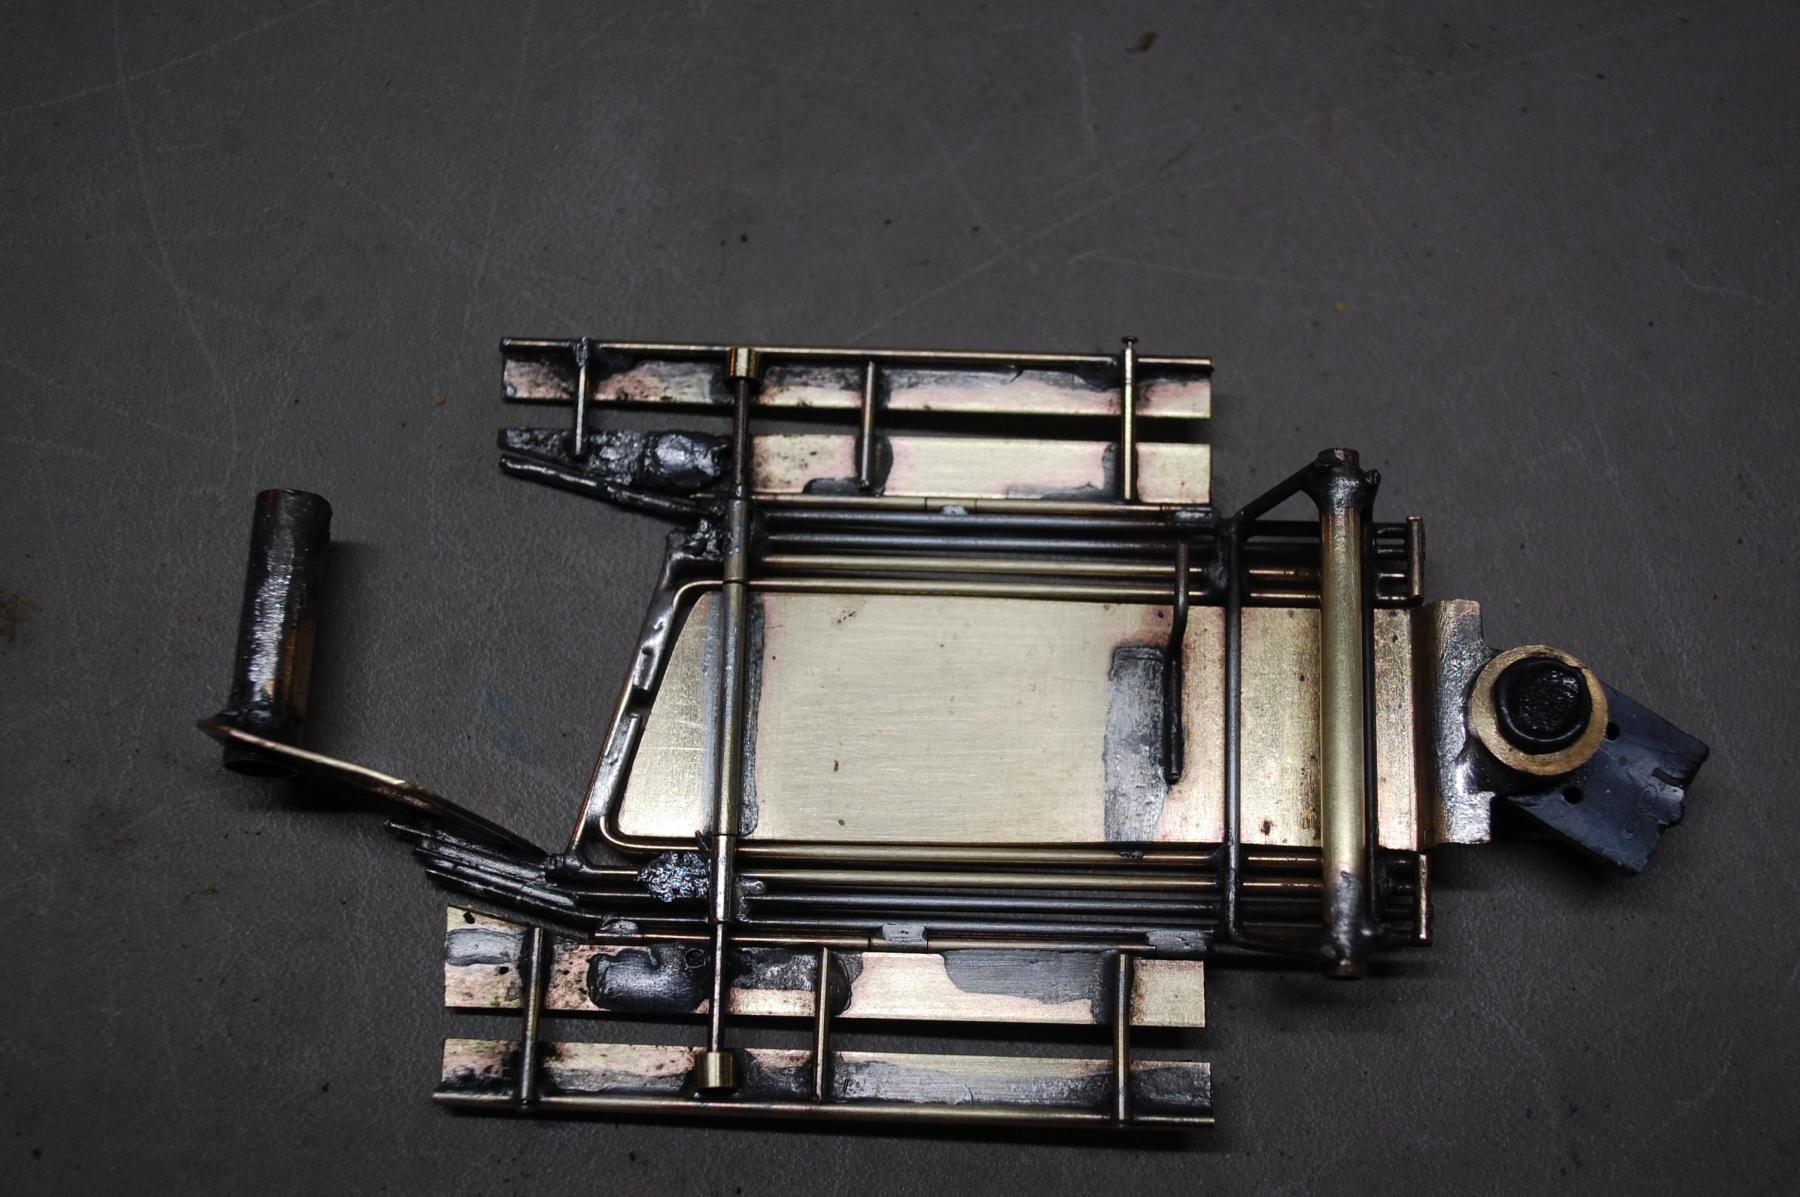
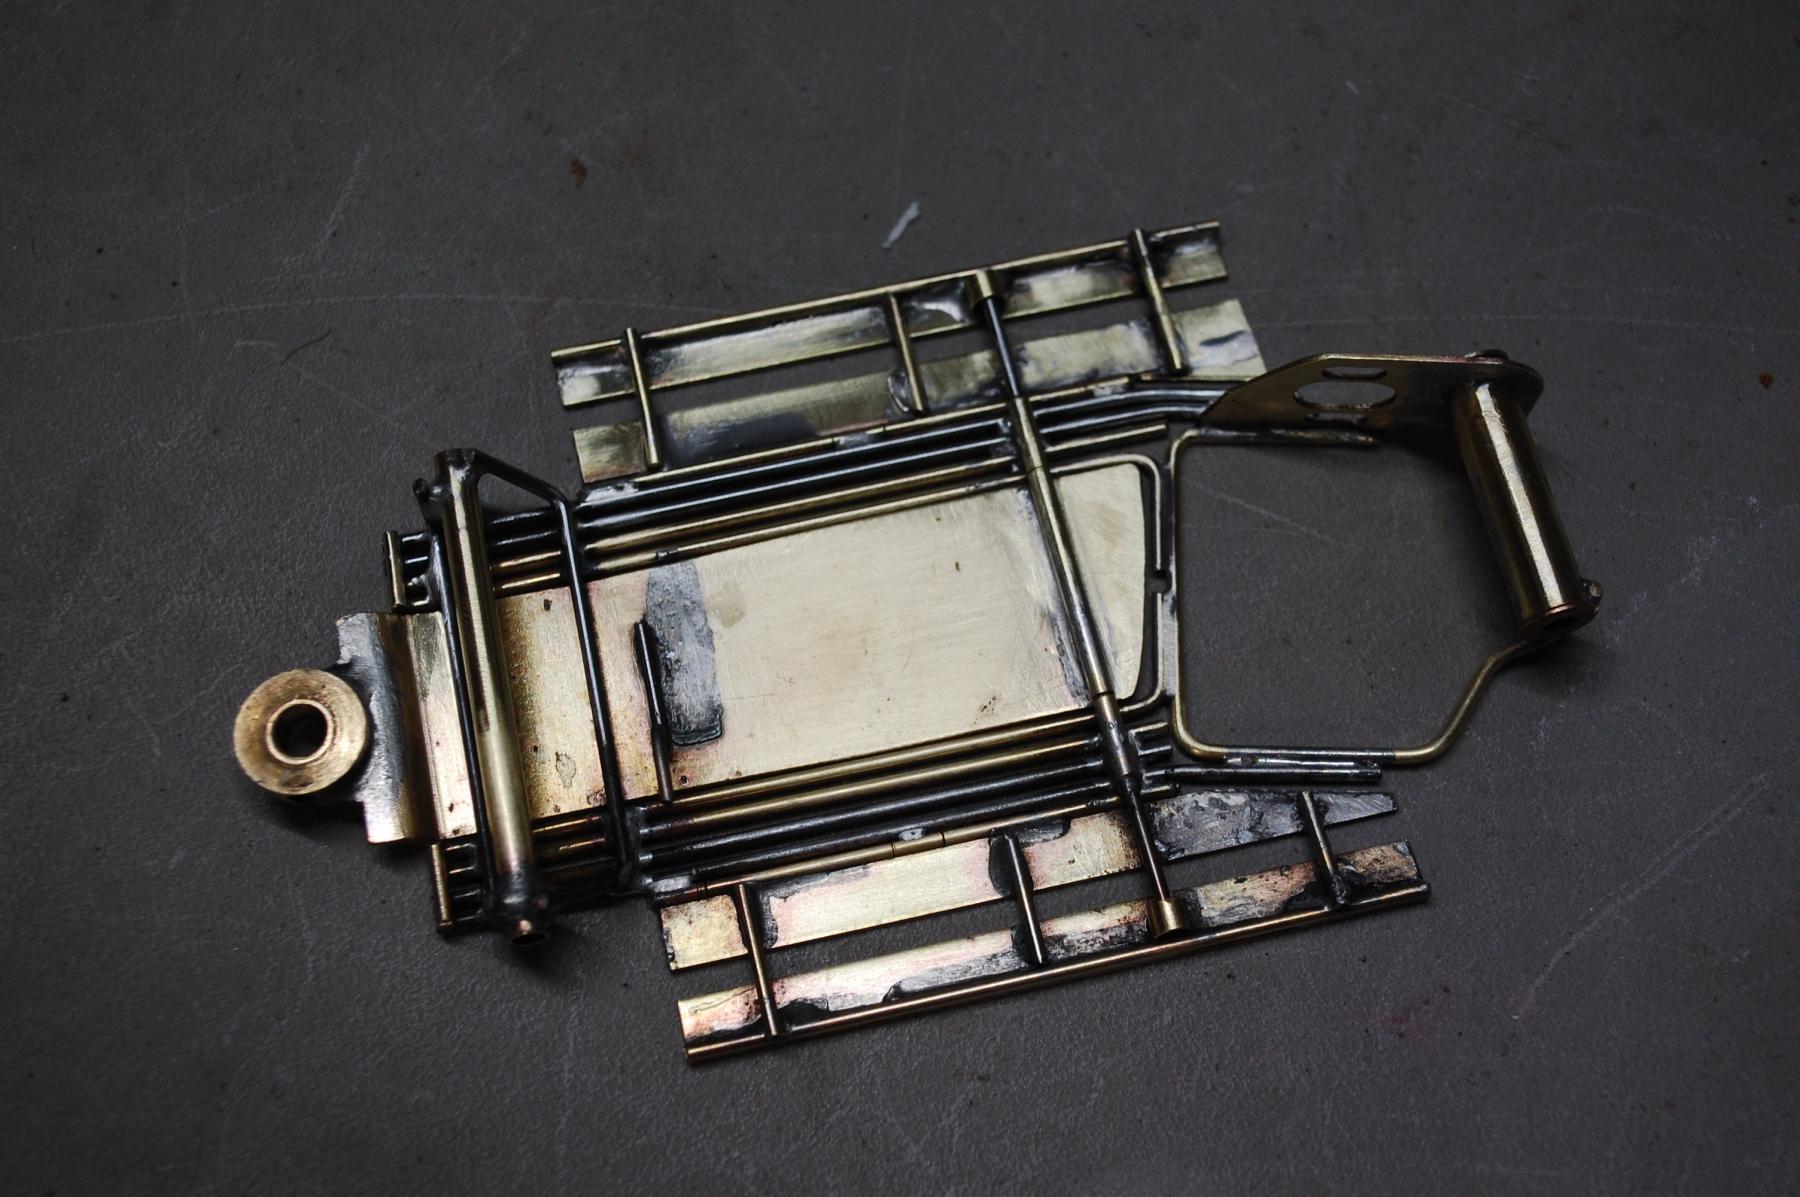
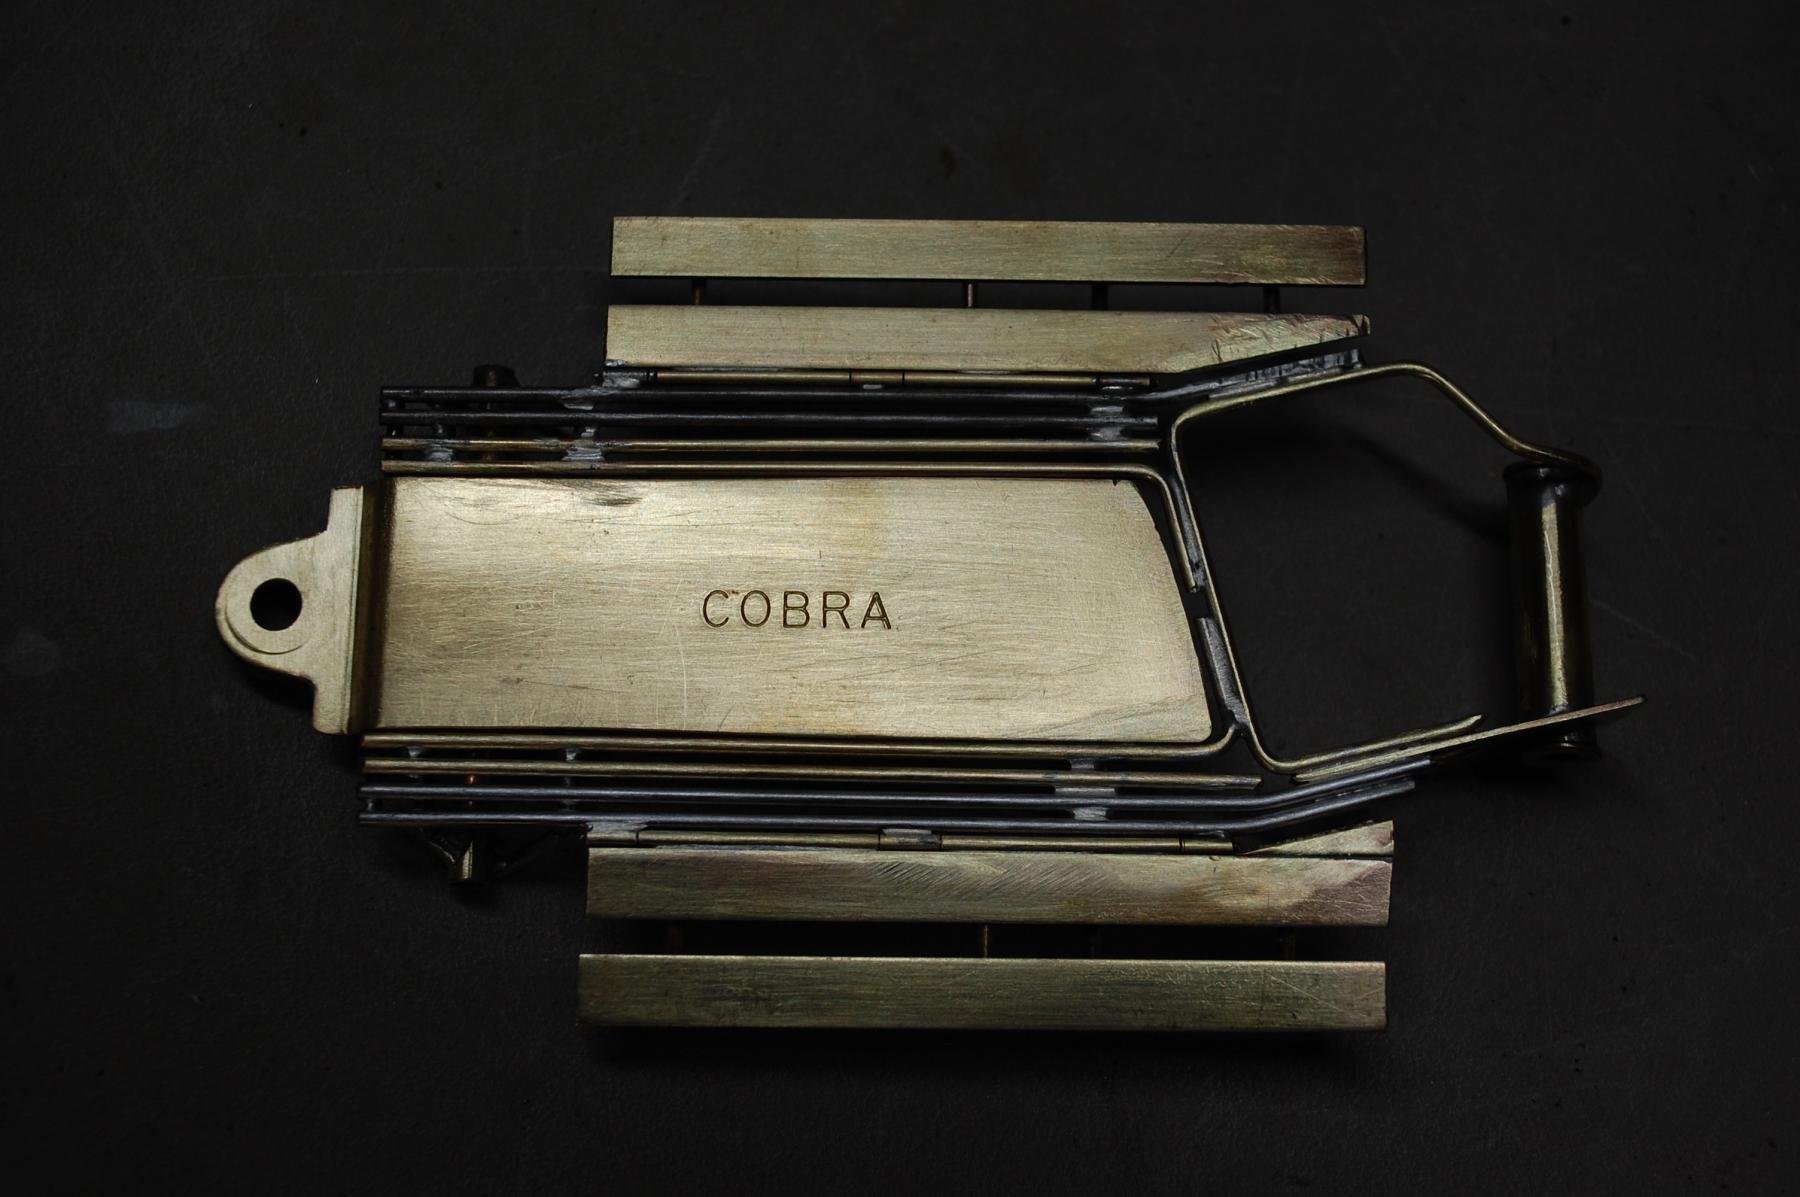
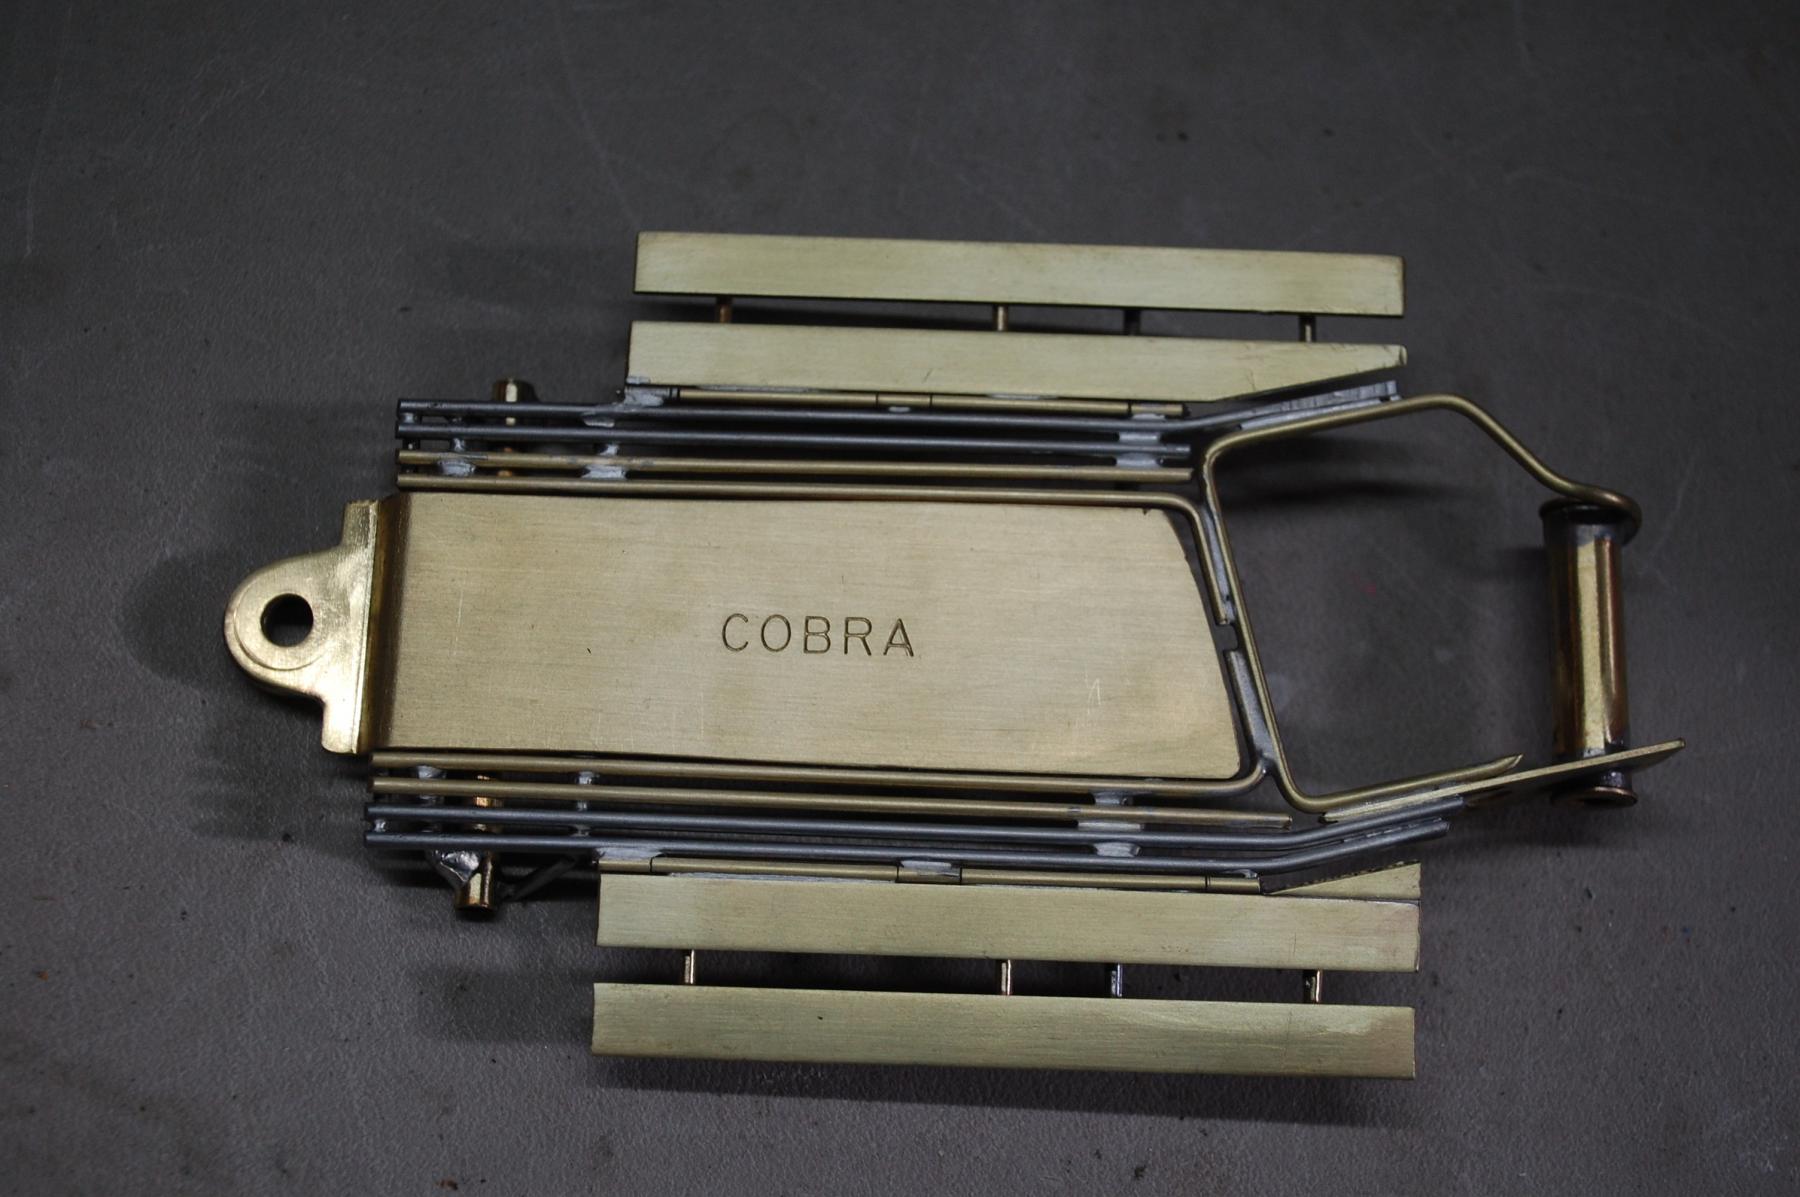
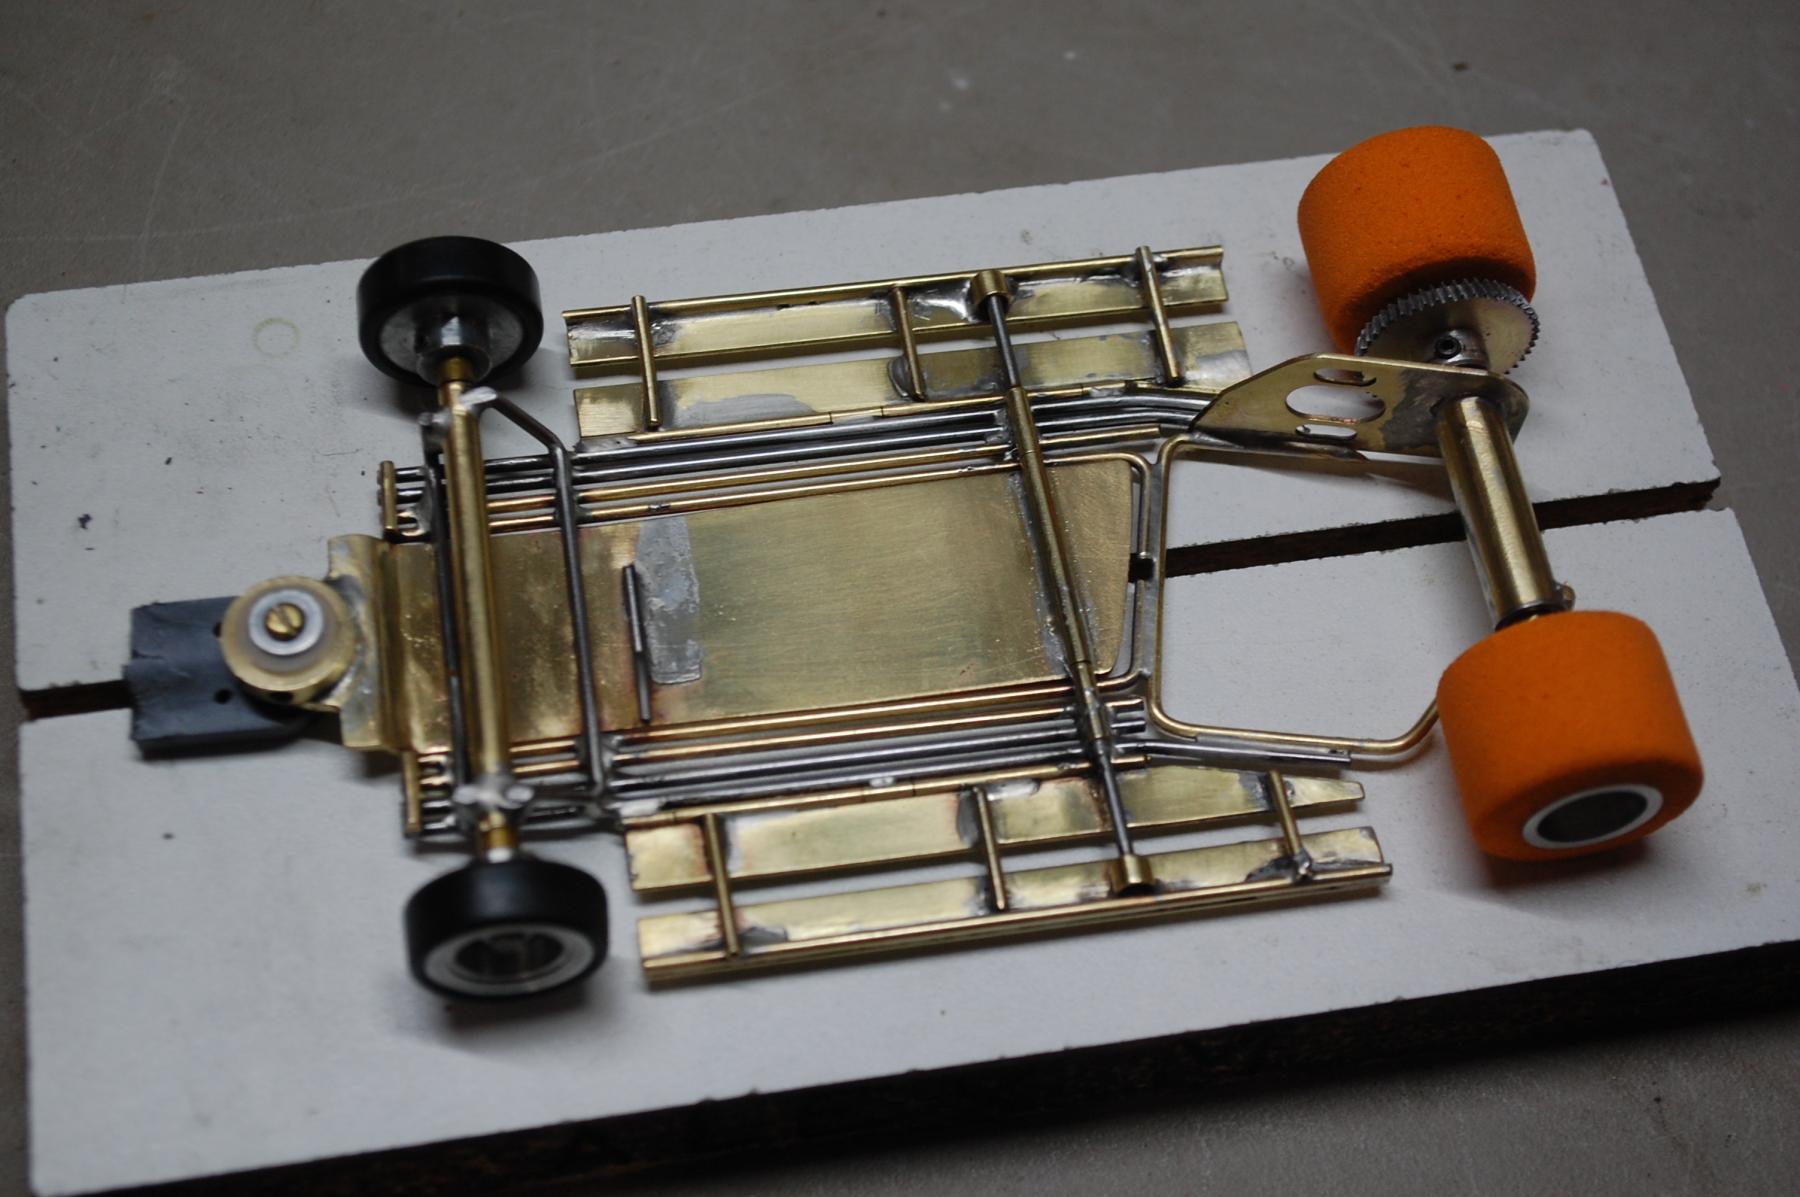
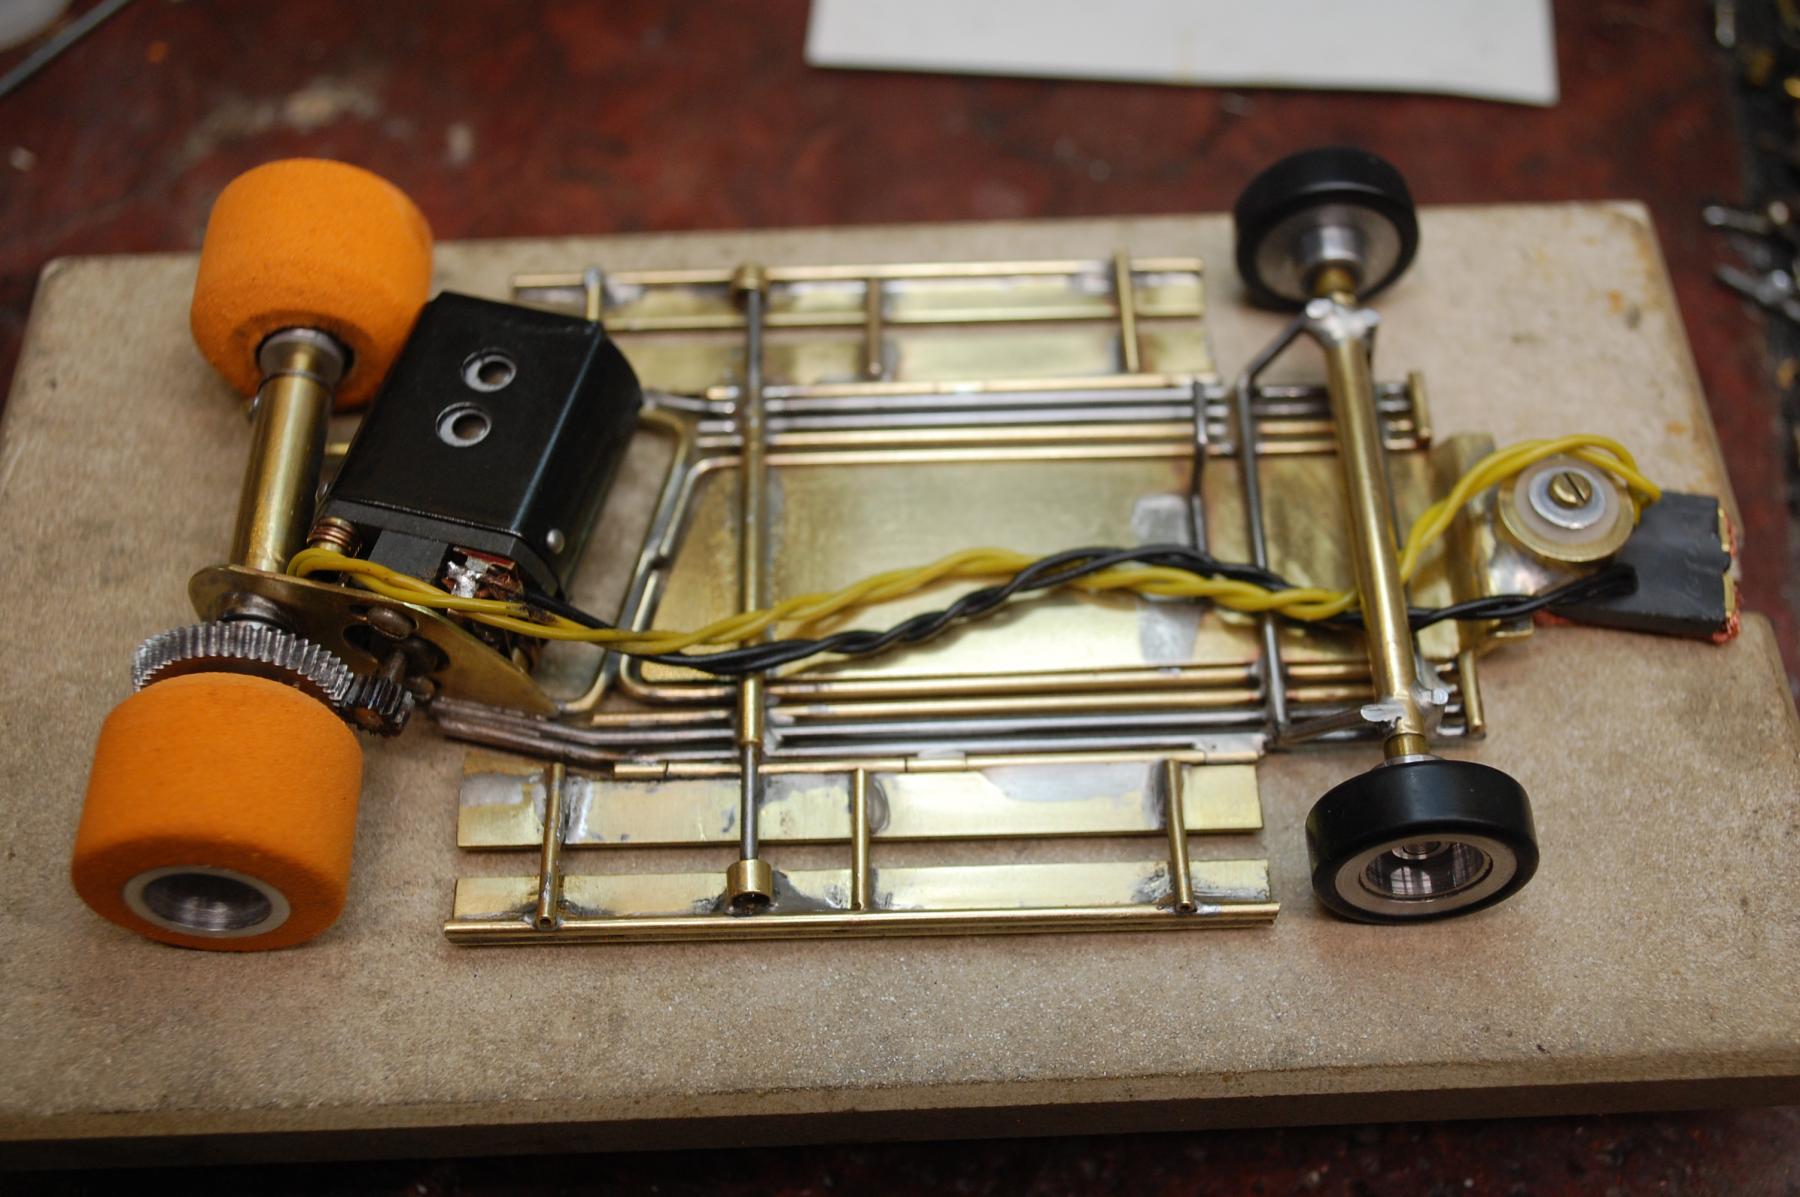
I came across this well-worn chassis and can't find any pics of any Cobra chassis to match.


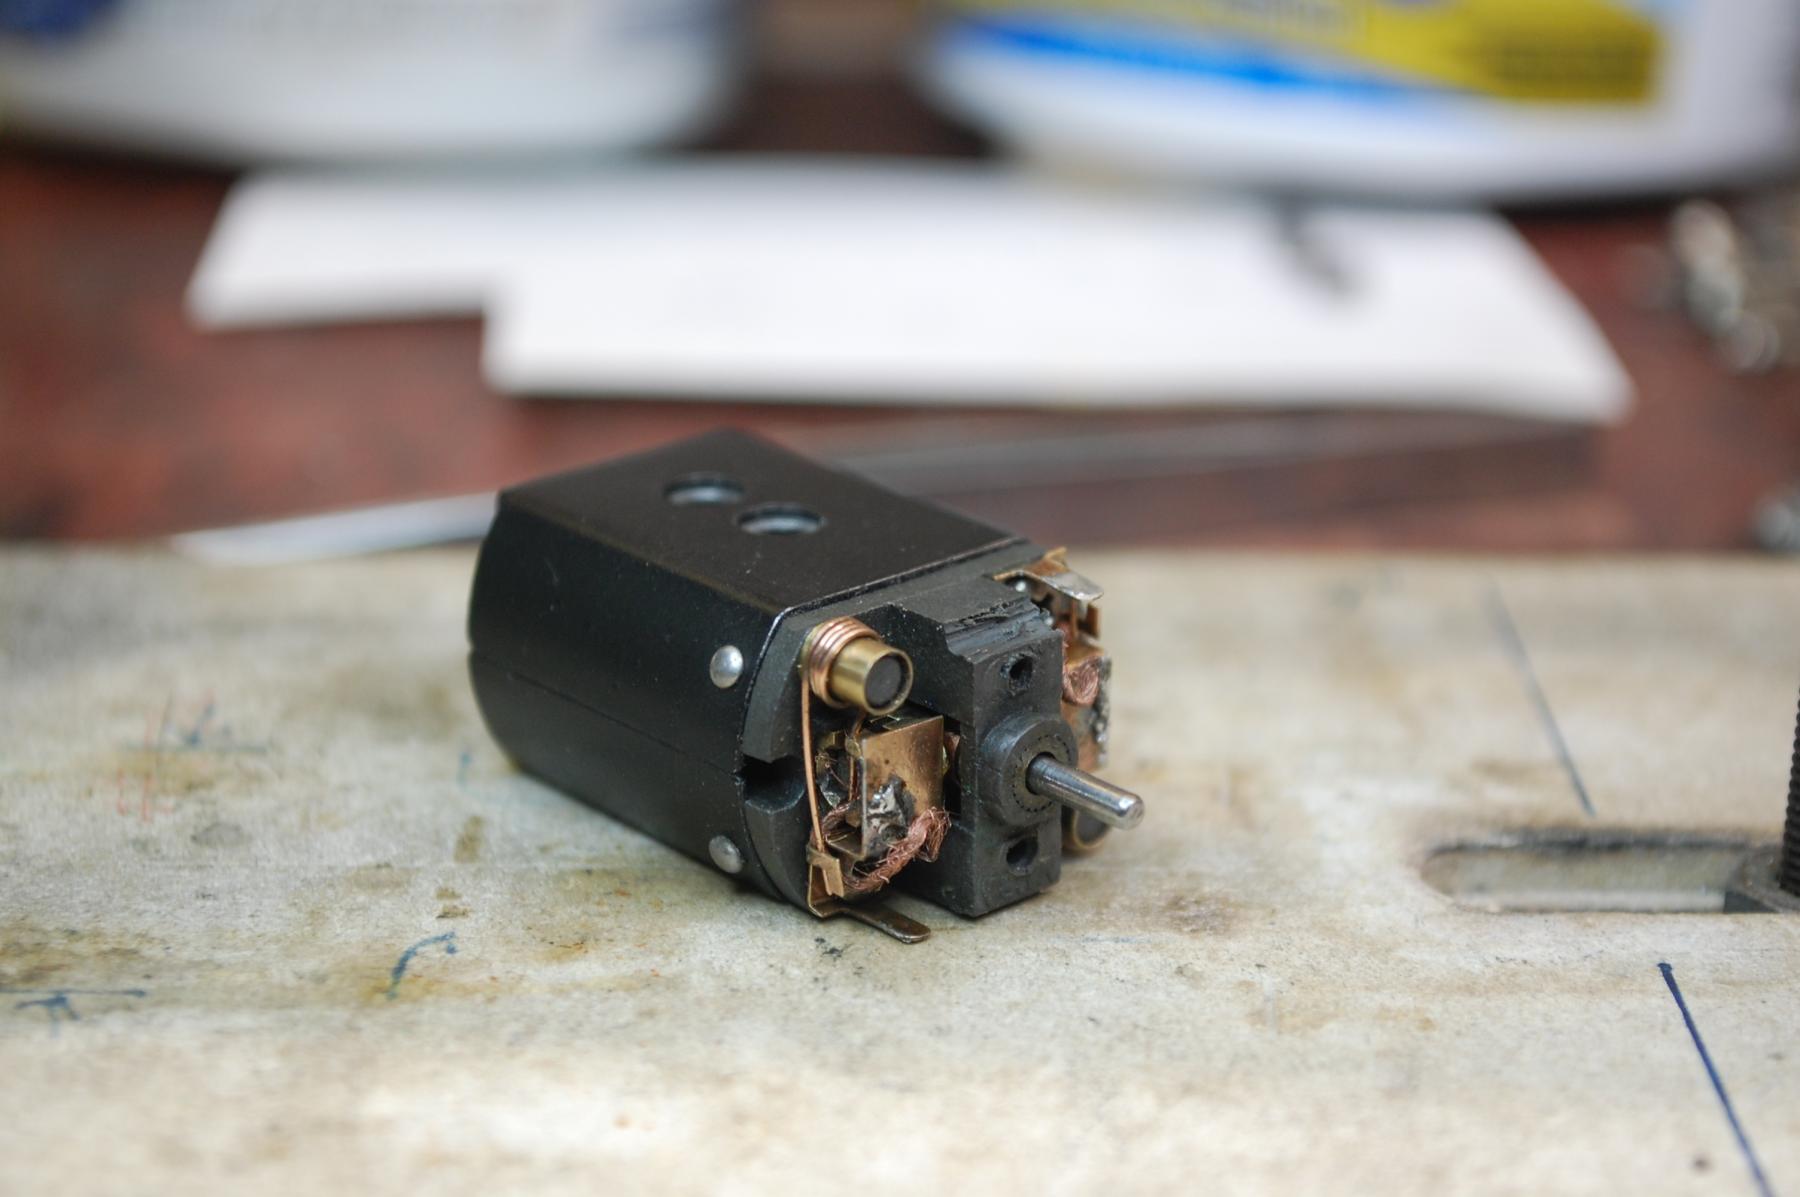
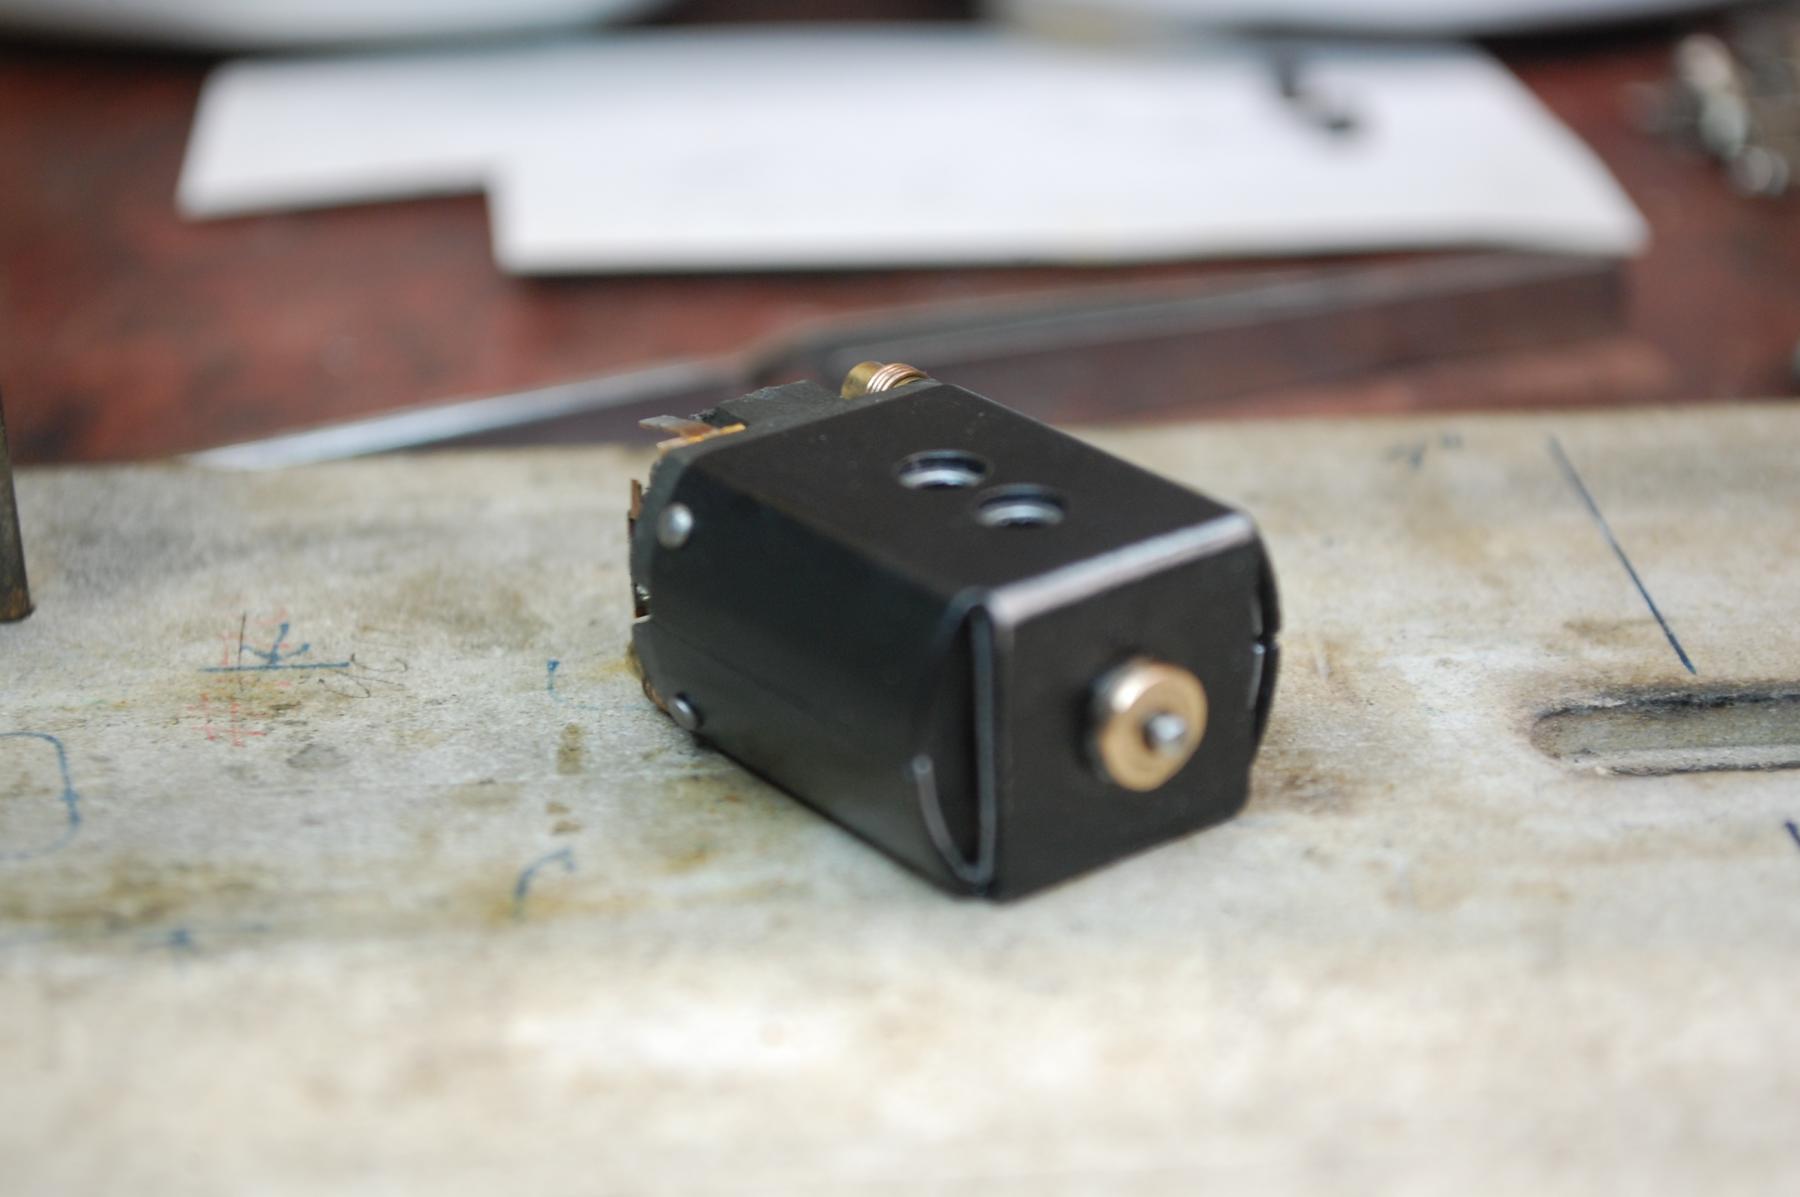
Did Cobra sell a chassis kit or pre-made like this? The motor box was damaged and 'repaired' so I had to wing it on that.


Other than that, everything was saved except the comm brushes. 


DSC_0468.JPG


DSC_0469.JPG


DSC_0516.JPG


DSC_0518.JPG


  • Jencar17, MSwiss, Tex and 4 others like this
Al DeYoung


#2 Bill from NH

Bill from NH

    Age scrubs away speed!

  • Full Member
  • PipPipPipPipPipPipPipPip
  • 14,674 posts
  • Joined: 02-August 07
  • Gender:Male
  • Location:New Boston, NH

Posted 23 July 2022 - 09:18 AM

I think this is someone's scratchbuilt chassis using Cobra parts sold individually for scratchbuilding. Notice how your motor box is brass rod rather than piano wire. (Easier to work with.) Also note how your drop arm end is rounded at an angle rather than sheared off straight. There are other tell-tale signs too.


I think this chassis is nicely constructed, but I don't think it was factory built, it was user-built.


  • JerseyJohn likes this
Bill Fernald
 
I intend to live forever!  So far, so good.  :laugh2:  :laugh2: 

#3 Brian Czeiner

Brian Czeiner

    On The Lead Lap

  • Full Member
  • PipPipPipPip
  • 494 posts
  • Joined: 04-March 08
  • Gender:Male
  • Location:Tyler, TX

Posted 23 July 2022 - 11:15 AM

I am just curious. This appears each rail and component was disassembled, refinished and then soldered back together? There must be 100 hours or more in this. Compliments and admiration to those who take on these types of projects.


If it's not a Caveman, It's HISTORY!          Support Your local raceways!


cavemanbodeez@gmail.com         CavemanBodeez.com      Womp Mafia


#4 Martin

Martin

    Posting Leader

  • Full Member
  • PipPipPipPipPipPipPip
  • 4,150 posts
  • Joined: 22-February 09
  • Gender:Male
  • Location:US

Posted 23 July 2022 - 12:27 PM

Great Save Al.

Looks custom to me as all ready stated.


Martin Windmill

#5 Isaac S.

Isaac S.

    Checkered Flag in Hand

  • Full Member
  • PipPipPipPipPipPip
  • 1,507 posts
  • Joined: 02-September 20
  • Gender:Male
  • Location:USA

Posted 23 July 2022 - 12:53 PM

Yeah, agreed. Custom. Cobra kits and RTRs all have the main piano wire main rail that stretches back to the rear axle. Nice restoration.
Isaac Santonastaso

#6 ajd350

ajd350

    On The Lead Lap

  • Full Member
  • PipPipPipPip
  • 229 posts
  • Joined: 09-June 10
  • Gender:Male
  • Location:Chicago area

Posted 23 July 2022 - 01:32 PM

I suspected that it was built around the drop arm too but I did not want assume. Brian, very little had to be removed and only to make repairs. I took several pics of the process of this resto if anyone wants to see it.


Al DeYoung

#7 Brian Czeiner

Brian Czeiner

    On The Lead Lap

  • Full Member
  • PipPipPipPip
  • 494 posts
  • Joined: 04-March 08
  • Gender:Male
  • Location:Tyler, TX

Posted 23 July 2022 - 01:40 PM

 Brian, very little had to be removed and only to make repairs. I took several pics of the process of this resto if anyone wants to see it.

Then you have some mad solder cleanup skills too. :yahoo:


If it's not a Caveman, It's HISTORY!          Support Your local raceways!


cavemanbodeez@gmail.com         CavemanBodeez.com      Womp Mafia


#8 Bill from NH

Bill from NH

    Age scrubs away speed!

  • Full Member
  • PipPipPipPipPipPipPipPip
  • 14,674 posts
  • Joined: 02-August 07
  • Gender:Male
  • Location:New Boston, NH

Posted 23 July 2022 - 01:58 PM

Al, post your resto photos of this chassis. Some of us may learn something new from them. No one ever knows everything.  :)


Bill Fernald
 
I intend to live forever!  So far, so good.  :laugh2:  :laugh2: 

#9 Bill Seitz

Bill Seitz

    Still Half-Fast After All These Years

  • Subscriber
  • PipPipPipPipPip
  • 561 posts
  • Joined: 20-February 21
  • Gender:Male
  • Location:Tucson, AZ

Posted 23 July 2022 - 05:19 PM

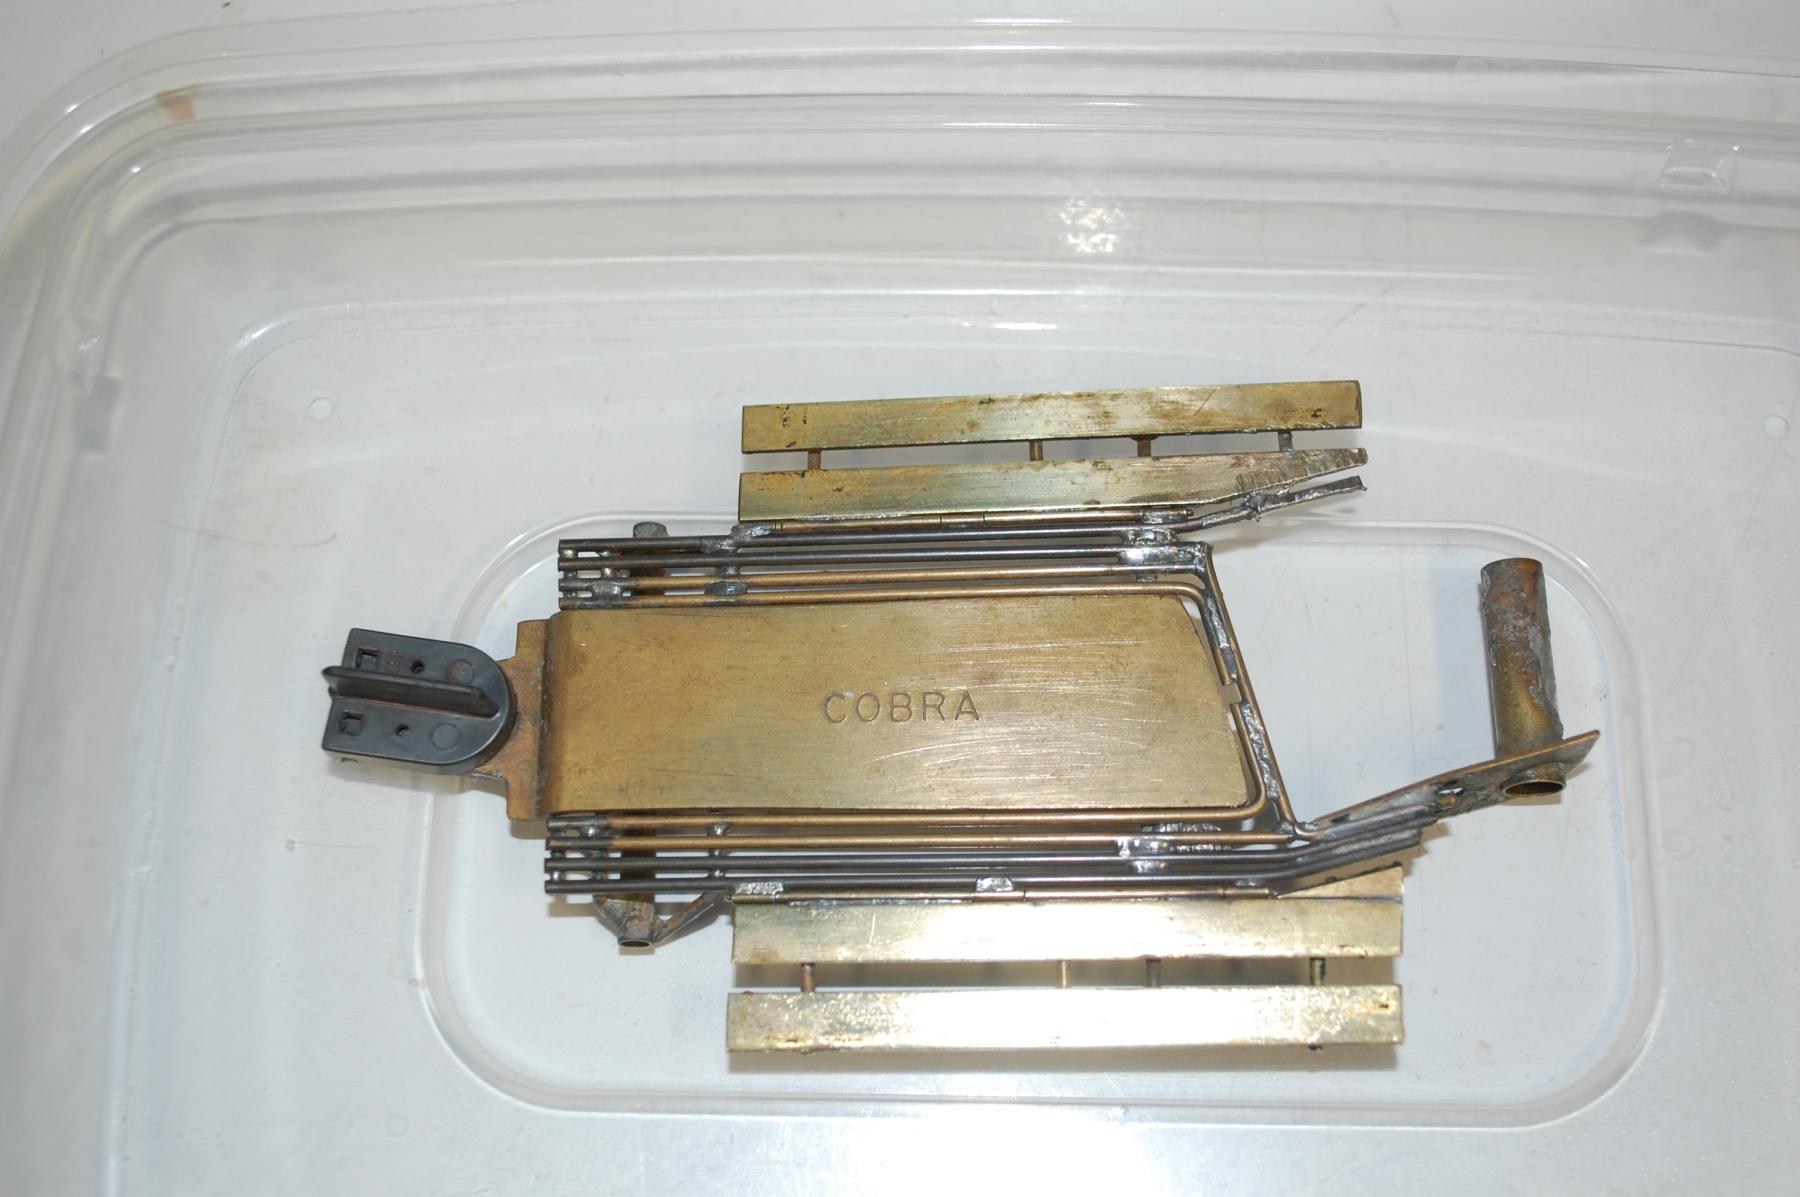
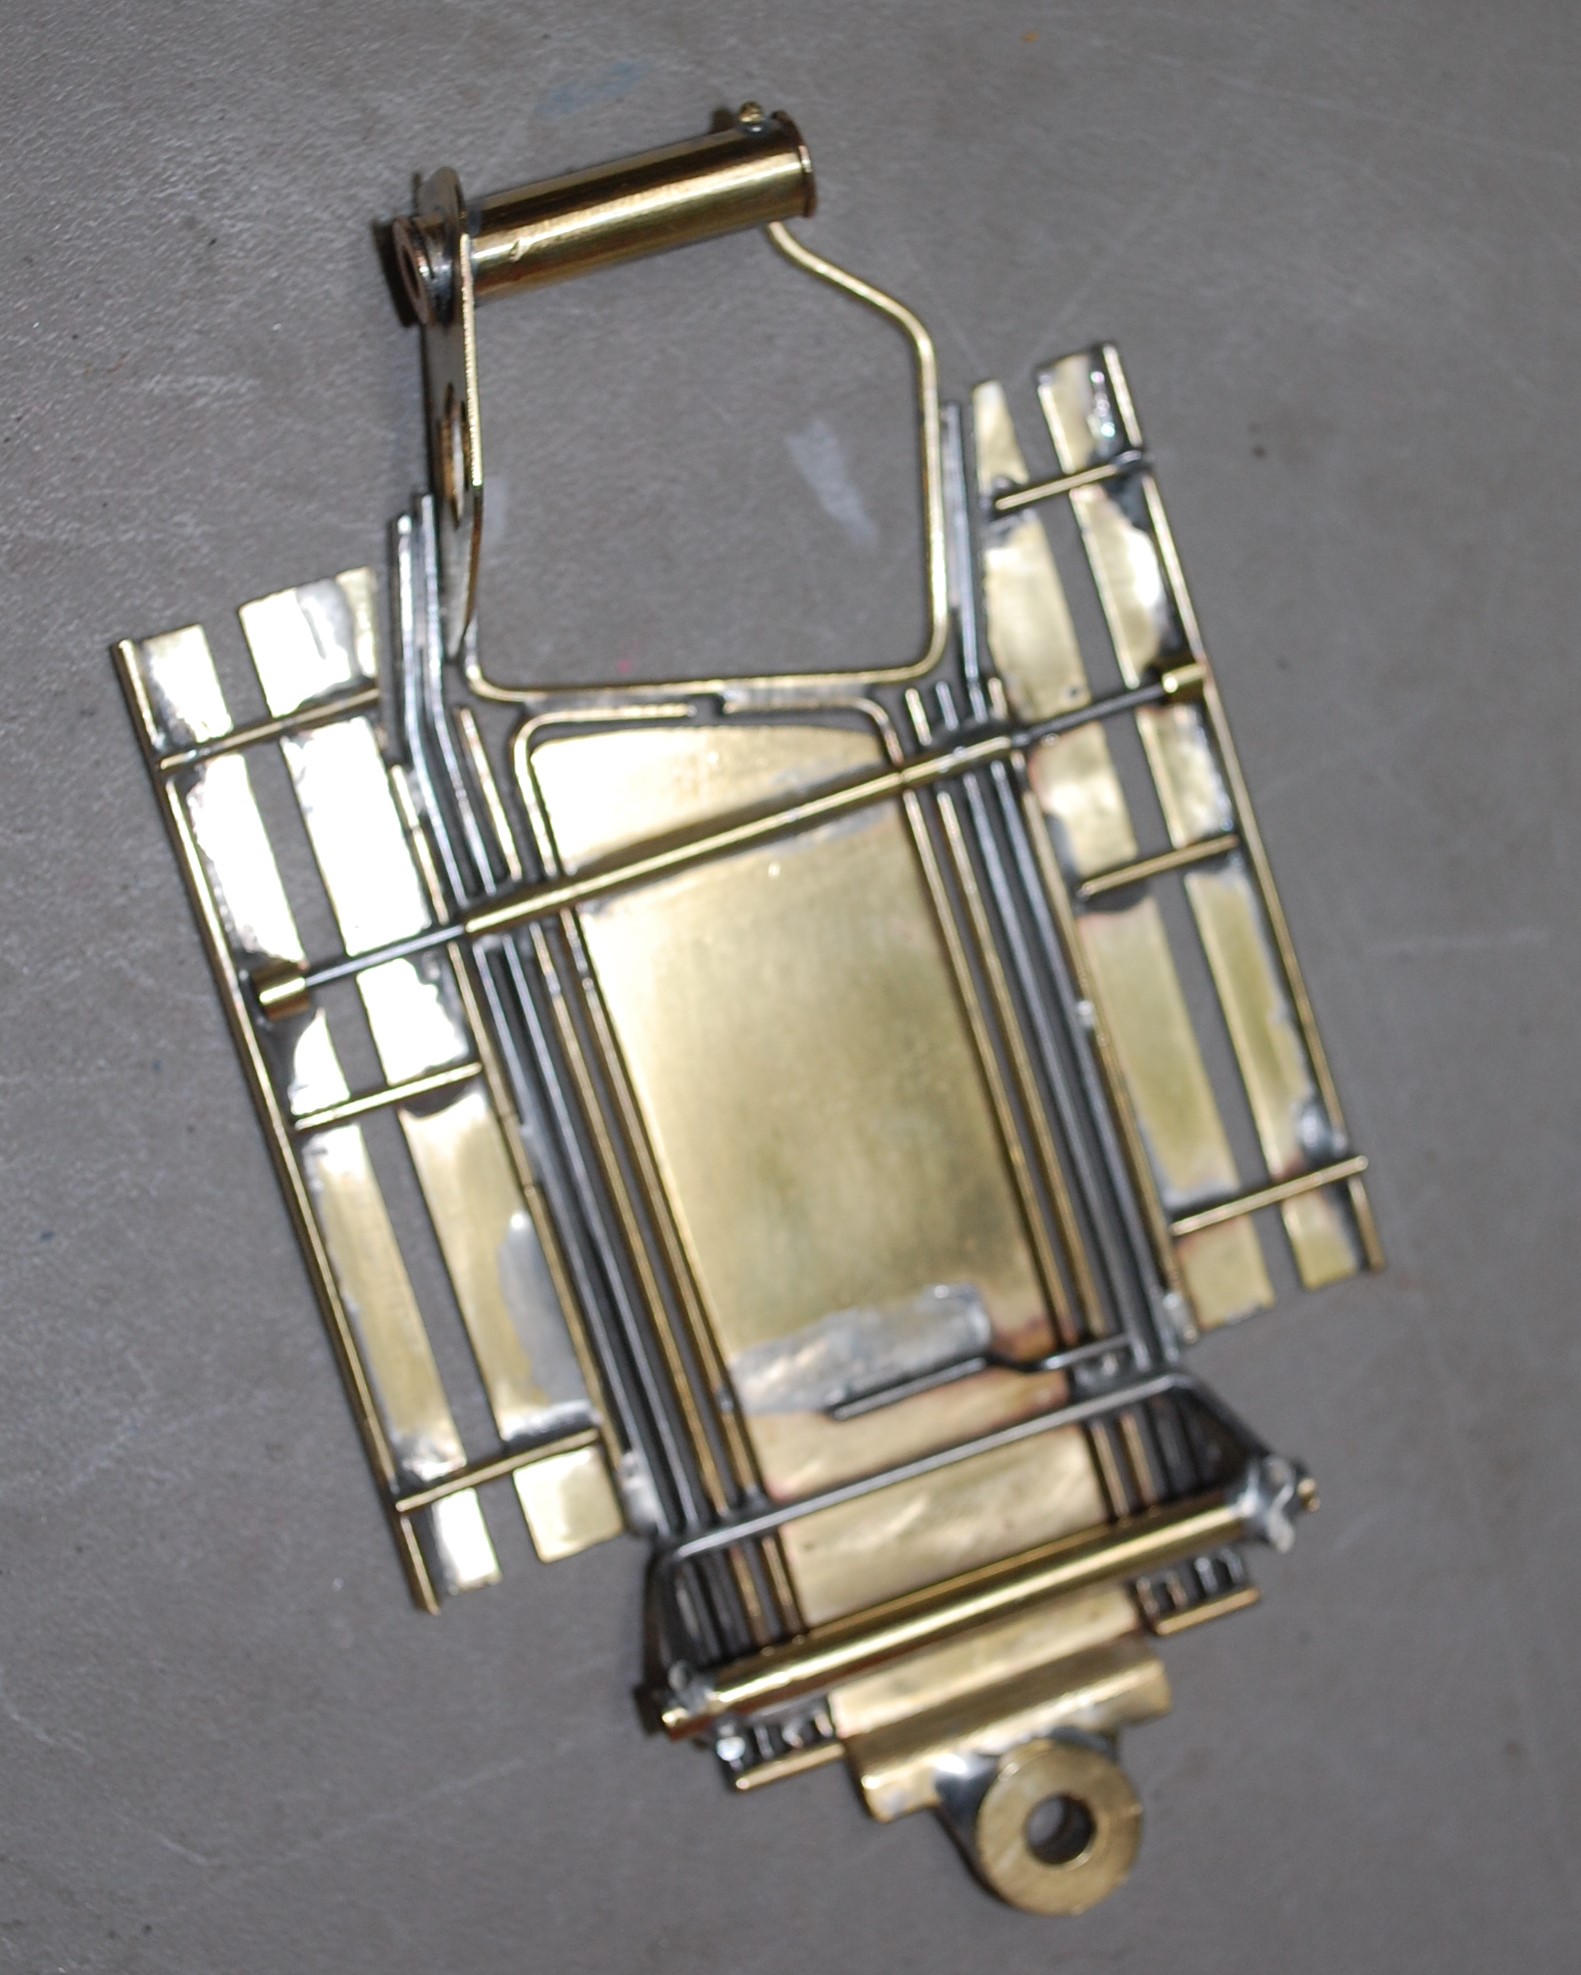
Looking at the second and third photos, before and after restoration, it appears the chassis originally had a piano wire main rail that went all the way back to form the left rear axle tube support that's been cut off and a replacement brass rod piece that wraps around the motor and provides the left axle tube support is now in the restoration. The previous piano wire rail (could this have been the Cobra main rail?), is now shortened to the the motor box and solders to the new brass rod motor box piece. If this chassis were really going to be used, that new brass rod piece is not going to make as sturdy a rear axle assembly, although with the motor soldered into the structure with the new, more substantial axle tube brace may be adequate. In addition to the clean-up, the motor box and rear chassis is also somewhat modified with the axle tube supports moved farther apart (not a bad change). A piano wire piece (or keeping the original main rail) would've been a little more effort to bend for the wider rear axle support stance, but I don't think that difficult in .062 which I'm sure this chassis is using.


Also note that the way this new brass rod motor box wraps to the motor bracket there's a potential short or near short of the bottom motor spring post to the chassis. Again, actually running this chassis could result in some crazy arcing to the track and some damage to the spring and post.


The piano wire drop arm stop has been re-positioned in the restoration and has less rail overlap. At best it looks like it's only marginally catching the inside rail and won't provide a very reliable droparm down-stop.


I see the original side slip front axle arrangement has had brass tube spacers added to eliminate the side slip. Front axle tubes in these chassis were intentionally shorter to allow some side slip to offset the rather poor handling created by the locked front wheel/axle arrangement.


  • ajd350 likes this

#10 ajd350

ajd350

    On The Lead Lap

  • Full Member
  • PipPipPipPip
  • 229 posts
  • Joined: 09-June 10
  • Gender:Male
  • Location:Chicago area

Posted 23 July 2022 - 05:45 PM

As you wish. 


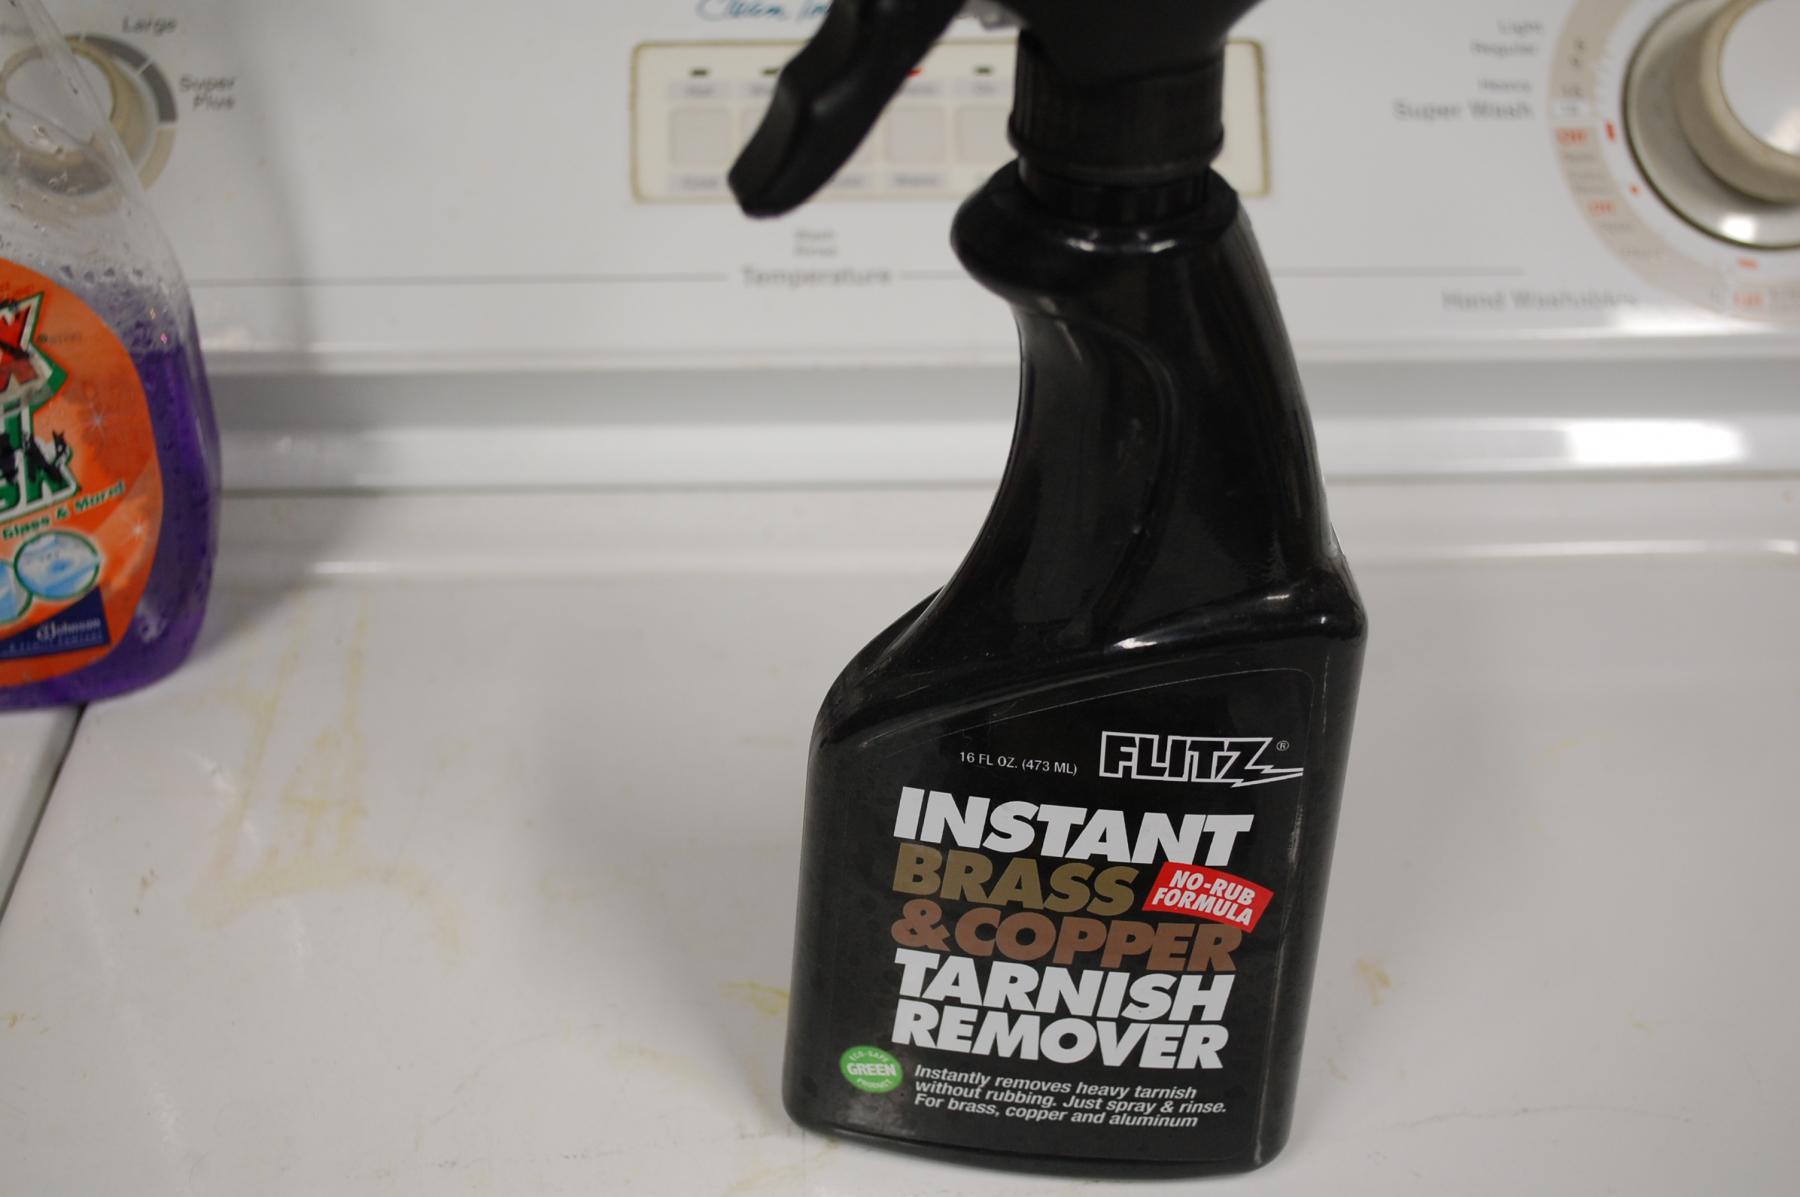
After teardown the chassis is cleaned with Super Clean to get all the oils and grease residue. I use a stiff bristle brush, brass brush and/or a Scotch Brite then rinse. Next I use this brass/copper spray to help knock down the tarnish. It gets into the hard to get areas.before and after is 10 seconds using just 2 pumps. (Do not skip the degreaser step because the oil/grease will act as a barrier for the tarnish spray.) Then go at it with the brushes and Scotch Brite again and rinse the tarnish spray. At this point the solder will go dark grey. Don't be concerned about it.

Attached Images

  • DSC_0470.JPG
  • DSC_0473.JPG
  • DSC_0474.JPG
  • DSC_0475.JPG
  • DSC_0476.JPG
  • DSC_0478.JPG

  • Pablo likes this
Al DeYoung

#11 ajd350

ajd350

    On The Lead Lap

  • Full Member
  • PipPipPipPip
  • 229 posts
  • Joined: 09-June 10
  • Gender:Male
  • Location:Chicago area

Posted 23 July 2022 - 06:26 PM

Next step is to look over all the solder joints and address them, preferably on a jig or at least a flat plate. In this case the motor box was a mess and the motor was off angle. The original box was brass, so I used brass in a different configuration. Next, solder wick is used to get the excess solder off with a HOT iron. When you have all the excess solder you can remove, clean all the flux and other residue. You can then use a steel brush in a dialed-down Dremel, getting everywhere you can reach. Be patient and the solder can be shaped and small and thin areas can be 'erased'. How perfect you want to go is up to you. The next step is sanding the bottom using 400 or 600grit sandpaper to get it flat. The top side is the tedious one with all the nooks and crannies. The last step I did on this one was to hand polish with Blue Magic, there are many good products on the market as well. Old t-shirts, toothbrushes, Q-Tips all come in to play here. I was going for the soft satin finish. You can take it all the way to blinding if you wish. Note: I do not own a tumbler (yet).

Attached Images

  • DSC_0478.JPG
  • DSC_0479.JPG
  • DSC_0480.JPG
  • DSC_0484.JPG
  • DSC_0485 (2).JPG

  • NY Nick, Alchemist, boxerdog and 1 other like this
Al DeYoung

#12 ajd350

ajd350

    On The Lead Lap

  • Full Member
  • PipPipPipPip
  • 229 posts
  • Joined: 09-June 10
  • Gender:Male
  • Location:Chicago area

Posted 23 July 2022 - 06:51 PM

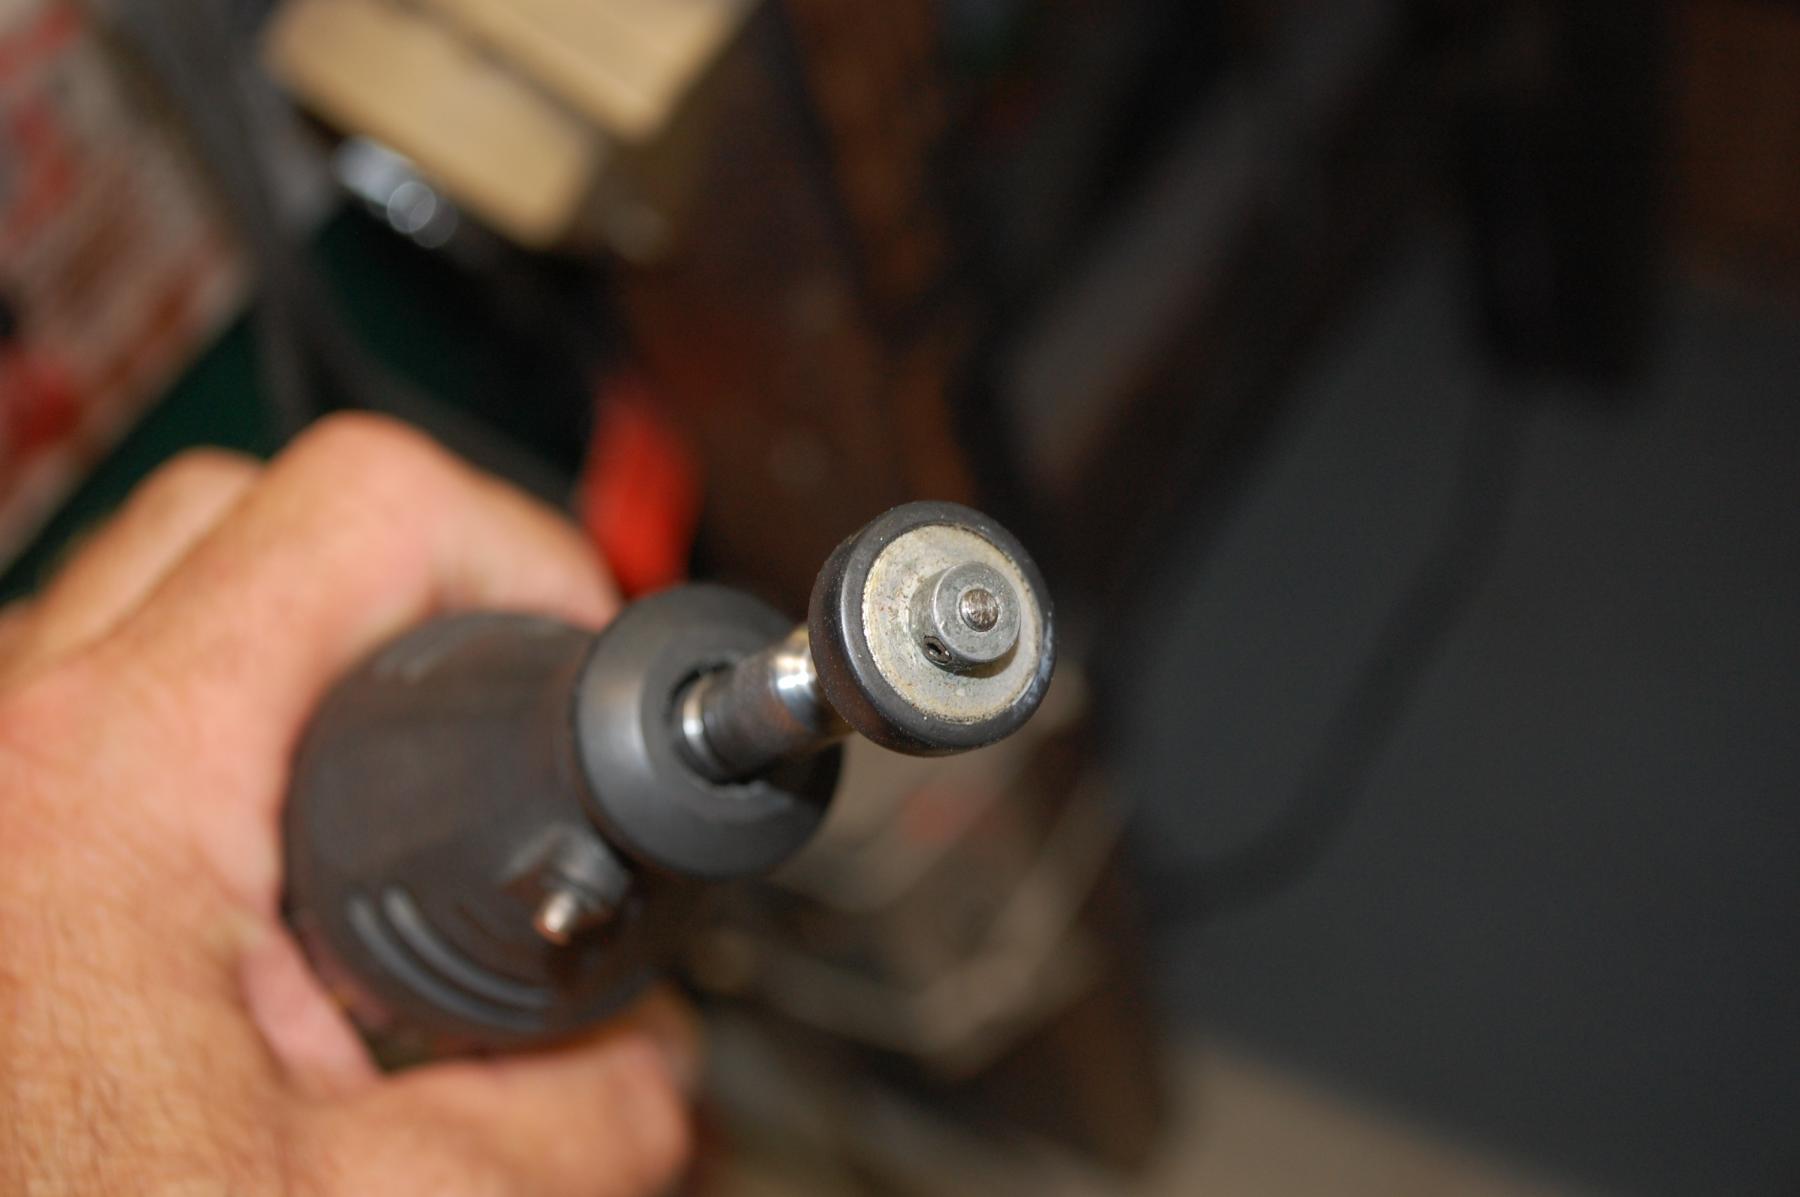
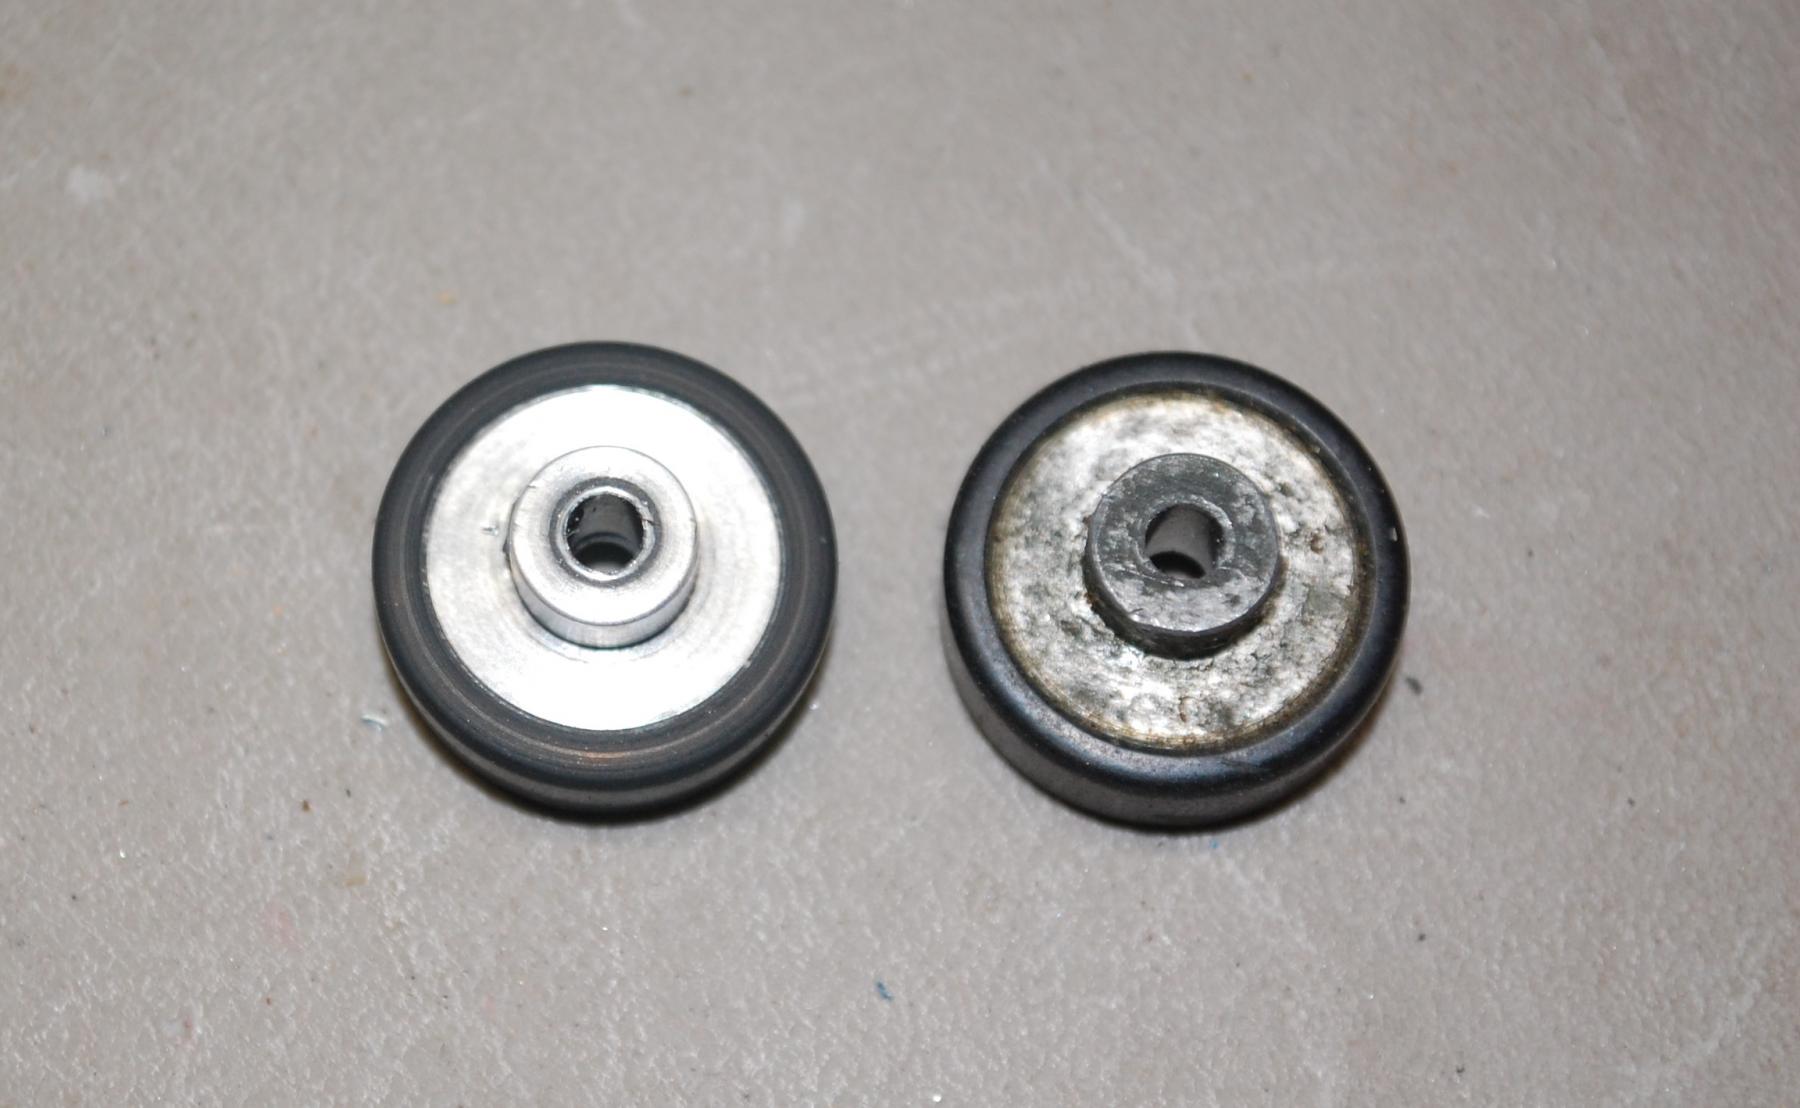
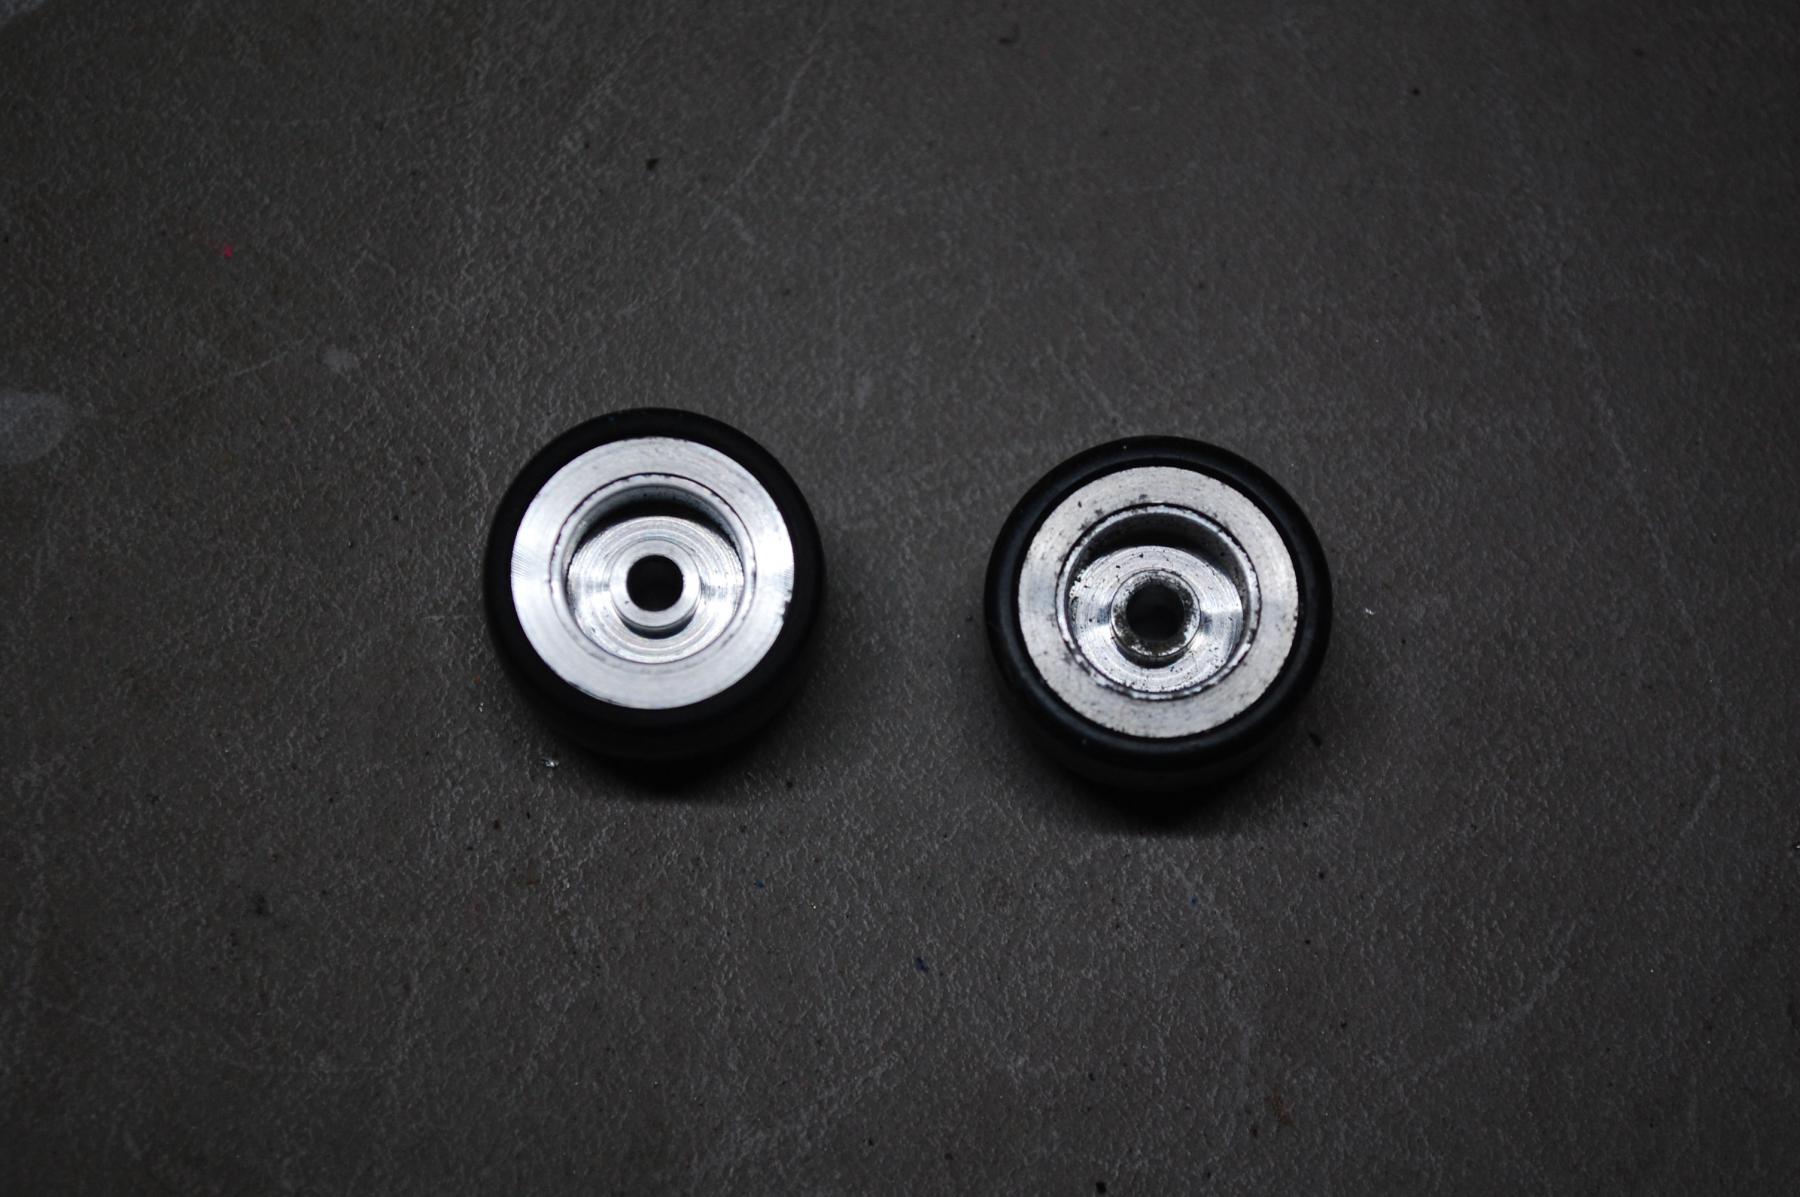
Now to the wheels...   I use a Dremel for clean and refinish wheels. My Dremel is a multi-speed running through an external speed controller so I can dial it way down. If not, I would use my drill so as not to fling the rubber off the wheel. That said, I chuck the wheel up and use my Scotch Brite (fine) to bring it back as new. There again you can mirror polish them if you wish. On to the rears. I chuck them up and using an emery board sand them just enough to look 'new'. (This is a crap shoot. Sometimes the end up too small and you will have to replace them.) Then use any sun screen with at least a 50SPF rating and knead it into the foam and wipe off the excess. It isn't permanent, but it probably helps and it smells nice...LOL.

Attached Images

  • DSC_0487.JPG
  • DSC_0488 (2).JPG
  • DSC_0489.JPG
  • DSC_0490.JPG

  • Pablo, NY Nick, Alchemist and 2 others like this
Al DeYoung

#13 Bill from NH

Bill from NH

    Age scrubs away speed!

  • Full Member
  • PipPipPipPipPipPipPipPip
  • 14,674 posts
  • Joined: 02-August 07
  • Gender:Male
  • Location:New Boston, NH

Posted 23 July 2022 - 07:02 PM

Thanks for the additional photos Al. I'm surprised nobody has commented on the pans yet. A definite scratchbuilt item along with an unusual hinge arrangement for the time. Neither are Cobra.           


  • ajd350 likes this
Bill Fernald
 
I intend to live forever!  So far, so good.  :laugh2:  :laugh2: 

#14 ajd350

ajd350

    On The Lead Lap

  • Full Member
  • PipPipPipPip
  • 229 posts
  • Joined: 09-June 10
  • Gender:Male
  • Location:Chicago area

Posted 23 July 2022 - 07:19 PM

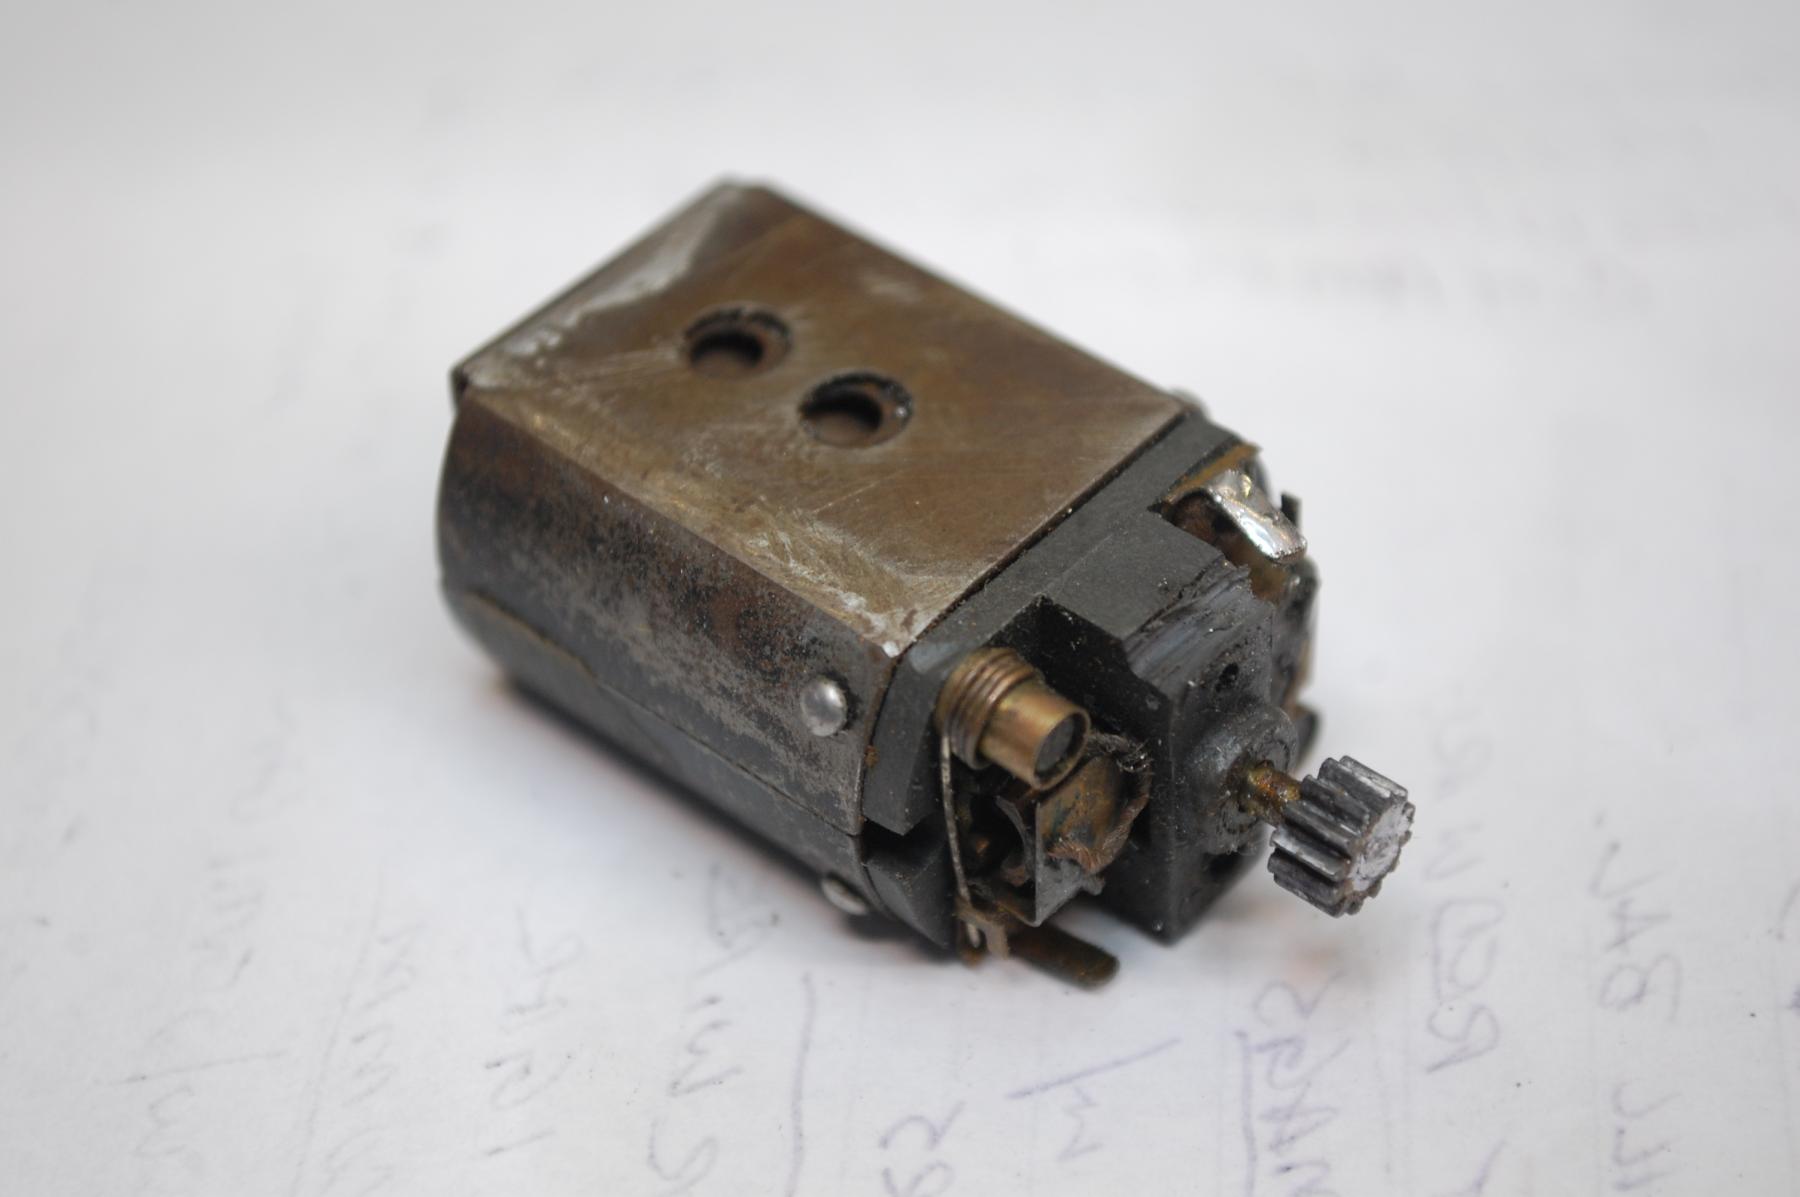
Motor time! Can this be saved? Probably. Teardown shows some wear and comm brush misaligment. Bushings are acceptable and the rest looks OK, just ugly. The arm is fine and the comm is now fresh cut. The rest took a dip in the degreaser pool. The brush hoods were soldered to the holders (good) crooked (not so good). This was addressed and are now aligned properly. The can and shim were cleaned and painted as original. Runs beautifully. The rest is just final assembly. One more deviation was the guide that was melted. I drilled and tapped it to 2-56 and shimmed it. Done.  


Some of my methods I came up with when restoring vintage bicycles, some from 1/1 concours vintage Mustangs and some from right here on these forums. Hope this is helpful.


Attached Images

  • DSC_0491.JPG
  • DSC_0493.JPG
  • DSC_0513.JPG
  • DSC_0514.JPG
  • DSC_0515.JPG

  • Jencar17, Phil Smith, NY Nick and 3 others like this
Al DeYoung

#15 don.siegel

don.siegel

    Grand Champion Poster

  • Subscriber
  • PipPipPipPipPipPipPipPip
  • 5,806 posts
  • Joined: 17-February 06
  • Gender:Male
  • Location:Paris, France

Posted 24 July 2022 - 05:08 AM

Beautiful job and extremely helpful, thanks! 


Just one question: do you use some kind of jig to realign the brush hoods? or just eyeball it? I assume you don't keep them in the endbell for that. 


Don 


#16 ajd350

ajd350

    On The Lead Lap

  • Full Member
  • PipPipPipPip
  • 229 posts
  • Joined: 09-June 10
  • Gender:Male
  • Location:Chicago area

Posted 24 July 2022 - 07:41 AM

Don, I aligned the holders with a drill bit then put the hoods on. Got in and out quickly (2-3 sec.) with a HOT iron. Between the Mura endbell and the drill bit acting as a heat sink, no damage done. Both surfaces have to be super clean and a dab of flux makes it easy. I don't know if I could get away with that on a Mabuchi endbell.  :hang3:


Al DeYoung

#17 Pablo

Pablo

    Builder

  • Administrator
  • PipPipPipPipPipPipPipPip
  • 18,430 posts
  • Joined: 20-February 06
  • Gender:Male
  • Location:Cleveland, Tennessee

Posted 24 July 2022 - 08:22 AM

Looks great!  :heart:  :heart:  :heart:  :good:


Paul Wolcott


#18 don.siegel

don.siegel

    Grand Champion Poster

  • Subscriber
  • PipPipPipPipPipPipPipPip
  • 5,806 posts
  • Joined: 17-February 06
  • Gender:Male
  • Location:Paris, France

Posted 24 July 2022 - 11:09 AM

Thanks! I'll try that, but maybe not on a Mabuchi endbell, as you say! 


Don 


Electric Dreams Online Shop