Jump to content


Photo

Husting-inspired 1968 anglewinder for commercial tracks


  • Please log in to reply
45 replies to this topic

#1 dc-65x

dc-65x

    Grand Champion Poster

  • Subscriber
  • PipPipPipPipPipPipPipPip
  • 6,942 posts
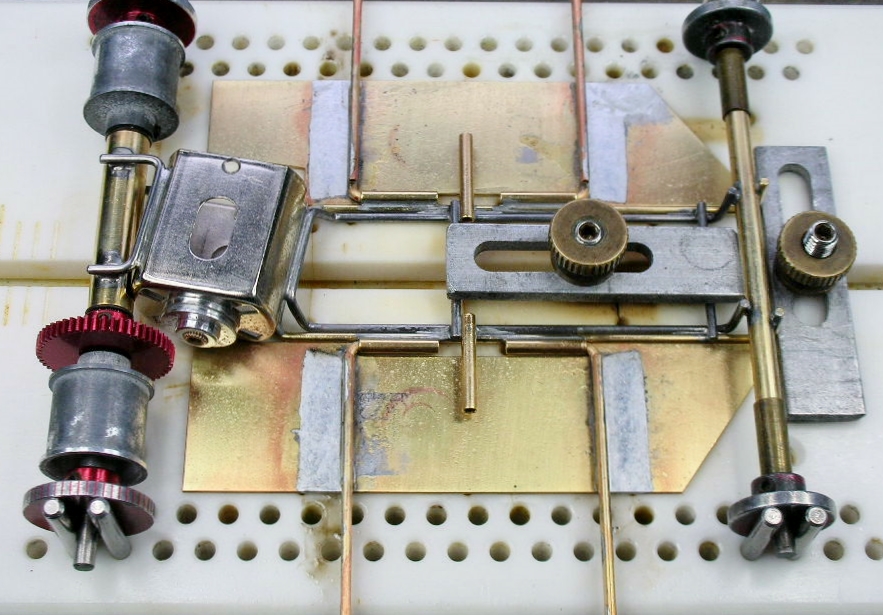
  • Joined: 14-February 06
  • Gender:Male
  • Location:Captain Rick: The only vintage slot car nut in SW Oregon?

Posted 01 March 2024 - 08:30 PM

My friend Steve Okeefe and I have been discussing Gene Husting’s groundbreaking 1968 first 1/24 anglewinder Pro car pictured below:
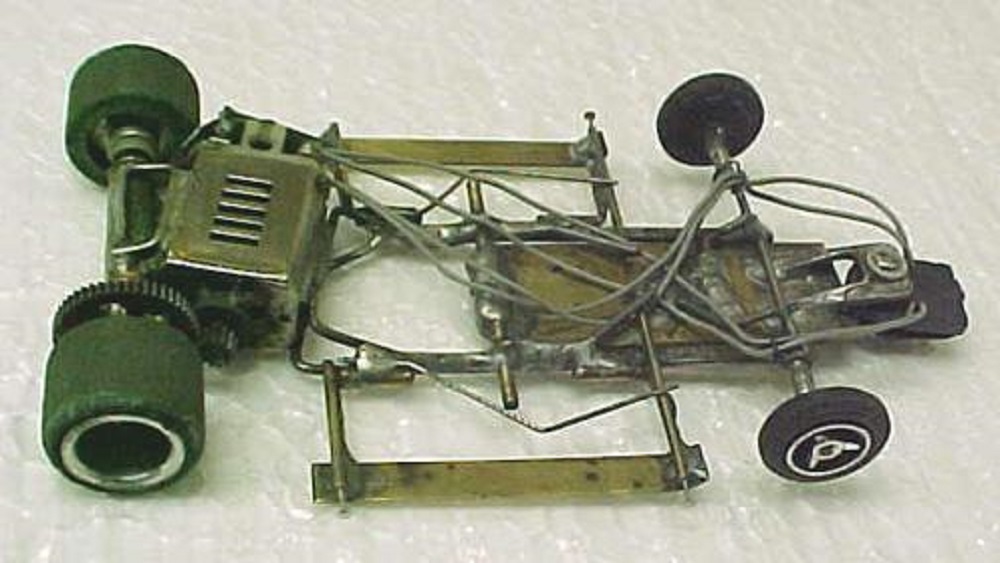
 
post-11-0-65798600-1363738873.jpg
 
We thought it would be fun to create our own take on the Husting first anglewinder. We are going to build our own versions in 2 different build threads in this subforum.
 
Steve's build will be engineered toward the 1/24 club/home track and mine towards the commercial raceway.
 
This will be one of my favorite type of vintage builds that I call a "what if buiild". The premise behind my build is what if you had been at one of the raceways Hustings was running and promoting his anglewinder concept before the first Pro anglewinder race in April 1968?
 
His car was fast and when you saw it in 1968 what jumped out was:
 
1. The chassis wasn’t an inline or a full sidewinder, but rather the motor was at shallow angle and can driving a big red Weldun spur gear!
 
2.  The chassis had a front and a rear section both of which were directly soldered to the motor can!!
 
What if you decided to build one and try and kick butt as an armature at your local raceway in 1968?
 
As William Shatner would say:
 
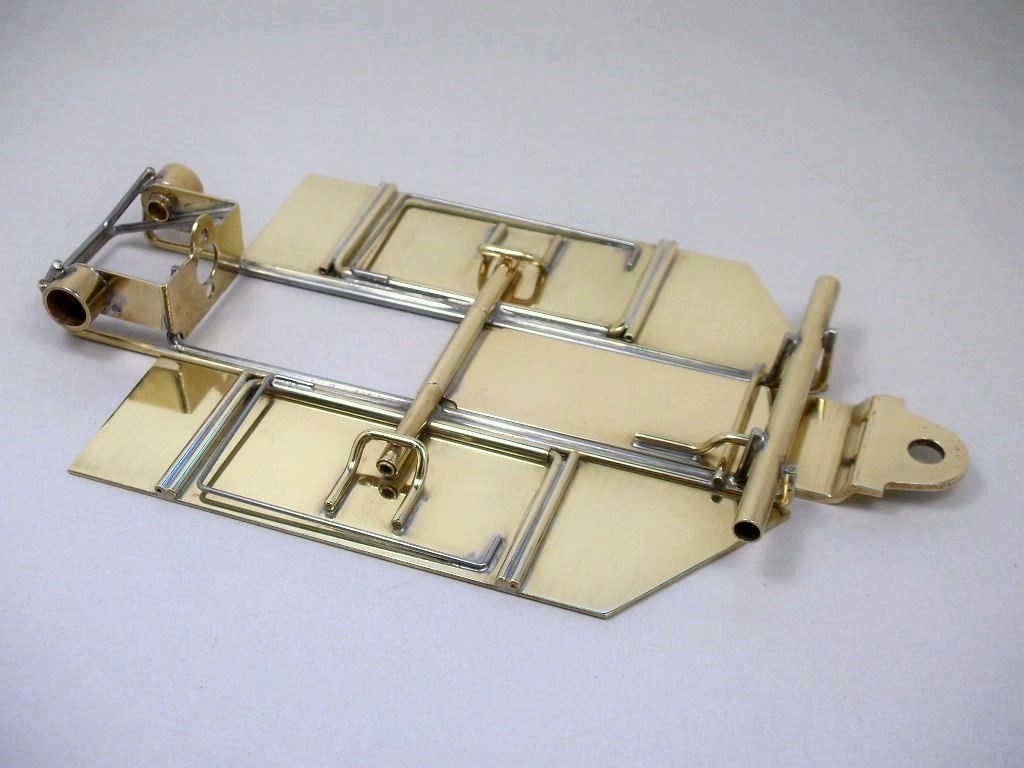
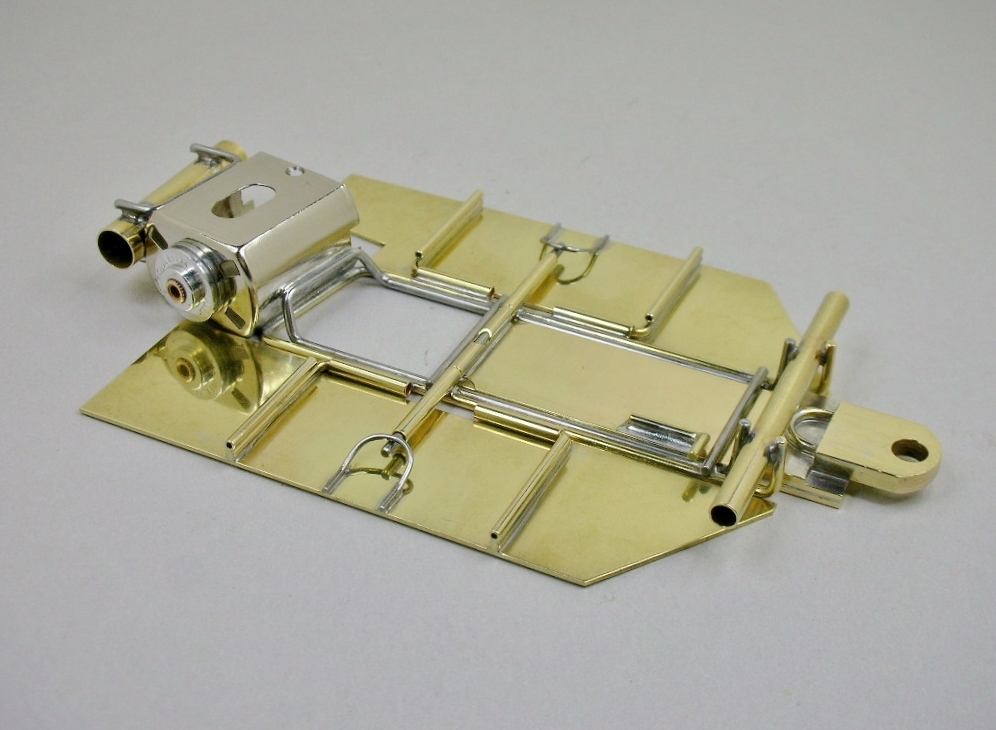
F_6cU_gX0AA8QgH.jpg
 
Gene Husting did a first anglewinder race report in Model Car Science magazine. In it he discusses his efforts to convince his fellow racers that anglewinders were the way to go before that first anglewinder race.
 
It is interesting reading.
 
Below is a link to my recent thread about the first anglewinder race with the MCS/Husting race report in Post #1:
 
The first Pro anglewinder race
 
To go along with Husting’s anglewinder theme of front and rear chassis sections soldered directly to the motor, I’ll be using this Phil Ruben chassis for my design cues:
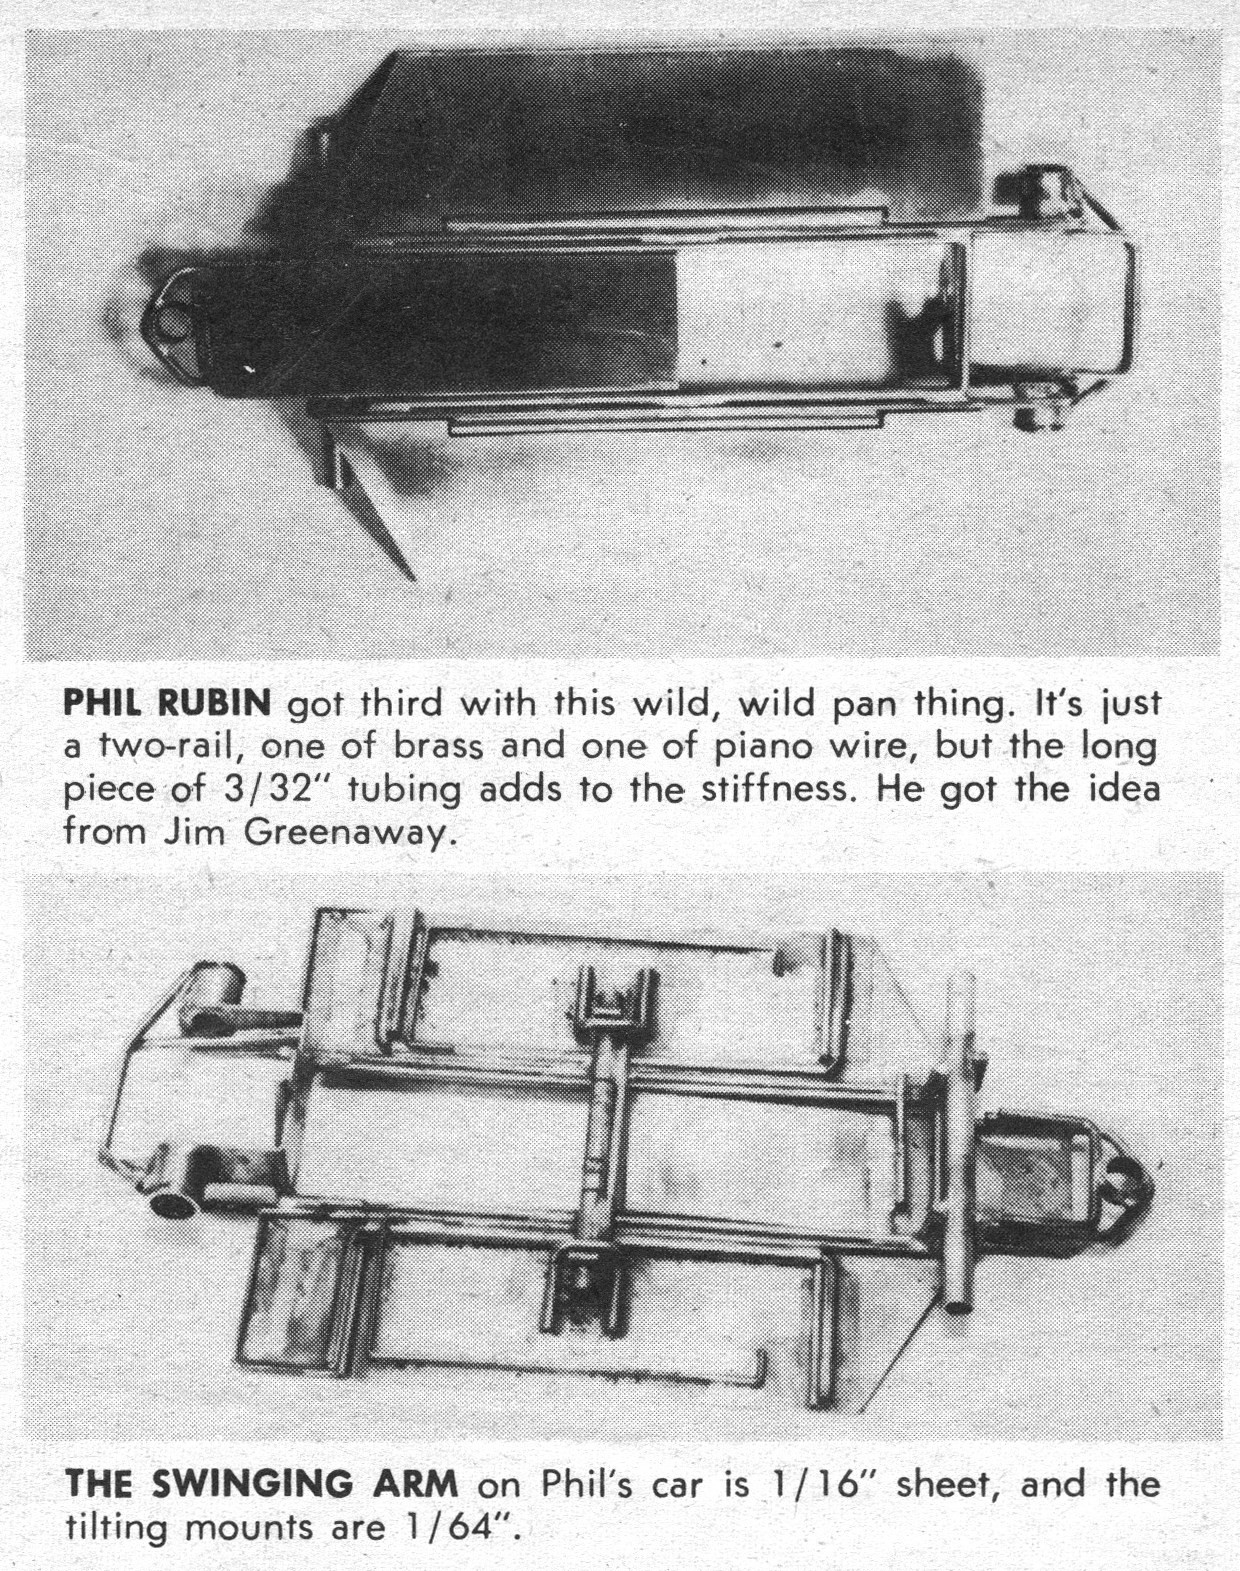
 
phil ruben last inline gasp.jpg
 
Why I chose the Rubin “wild, wild pan thing” is because of what the late great TonyP said about the design in my Ruben build thread (link to the Ruben thread below):
 
Phil Rubin's 1968 'wild, wild pan thing’
 

You need to build a second one and cut it in half to make an anglewinder which a lot of people did. Lol. This was the state of the art inline, much better than what we were using, unfortunately it was state of the art for one race. It’s what Jerry Brady took to the west coast to beat the pros, unfortunately while he was 8 Miles High traveling to LA, the fast guys were beating out anglewinders.


With all that background said…….time to start building.   :dance3:


  • Steve Okeefe, Tex, Geary Carrier and 1 other like this

Rick Thigpen
Check out Steve Okeefe's great web site at its new home here at Slotblog:
The Independent Scratchbuilder
There's much more to come...


#2 bbr

bbr

    Posting Leader

  • Full Member
  • PipPipPipPipPipPipPip
  • 2,413 posts
  • Joined: 08-March 12
  • Gender:Male
  • Location:LA

Posted 01 March 2024 - 09:21 PM

are you doing a "restomod" interpatation for modern tracks?


use a BL motor,,, I will donate,,, if you build me a copy :D


Mike Low
Cry like a baby, drive like a girl, walk like a man.
Give me enough rope and I'll build a fast car... or hang myself?

#3 Larry Horner

Larry Horner

    On The Lead Lap

  • Full Member
  • PipPipPipPip
  • 454 posts
  • Joined: 18-March 17
  • Gender:Male
  • Location:San Francisco

Posted 01 March 2024 - 09:24 PM

Well mine is mostly finished but so cool to have three people doing inspired versions of the same chassis. Can't wait to see what you and Steve come up with!


As a side note, Merriam-Webster recently decided it is permissible to end a sentence with a preposition ... so we got that going for us.


#4 Martin

Martin

    Posting Leader

  • Full Member
  • PipPipPipPipPipPipPip
  • 4,180 posts
  • Joined: 22-February 09
  • Gender:Male
  • Location:US

Posted 01 March 2024 - 09:42 PM

:clapping:  :victory:  :good:  :heart:  Looking forward to this one, or 3.


Martin Windmill

#5 dc-65x

dc-65x

    Grand Champion Poster

  • Subscriber
  • PipPipPipPipPipPipPipPip
  • 6,942 posts
  • Joined: 14-February 06
  • Gender:Male
  • Location:Captain Rick: The only vintage slot car nut in SW Oregon?

Posted 01 March 2024 - 10:25 PM

are you doing a "restomod" interpatation for modern tracks?


Hi MIke,


No modern interpretation. Strictly period as if it was done back in 1968 after seeing Gene's car in action.


We should have a couple, well three when Steve posts his, builds on the Husting theme Larry.


Three it is Martin.   :)

Rick Thigpen
Check out Steve Okeefe's great web site at its new home here at Slotblog:
The Independent Scratchbuilder
There's much more to come...


#6 Steve Okeefe

Steve Okeefe

    The Independent Scratchbuilder

  • Administrator
  • PipPipPipPipPipPip
  • 1,139 posts
  • Joined: 16-February 06
  • Gender:Male
  • Location:State of Independence

Posted 02 March 2024 - 12:28 AM

Thread is up... and we're "off to the races"  :clapping:


Phil Rubin's "Wild Pan Thing" is elegant in it's simplicity, and should adapt well to anglewinder drive. :good:


Steve Okeefe


I build what I likes, and I likes what I build


#7 dc-65x

dc-65x

    Grand Champion Poster

  • Subscriber
  • PipPipPipPipPipPipPipPip
  • 6,942 posts
  • Joined: 14-February 06
  • Gender:Male
  • Location:Captain Rick: The only vintage slot car nut in SW Oregon?

Posted 02 March 2024 - 12:40 PM

That's great Steve. I'm looking forward to seeing what you and Larry come up with.   :victory:


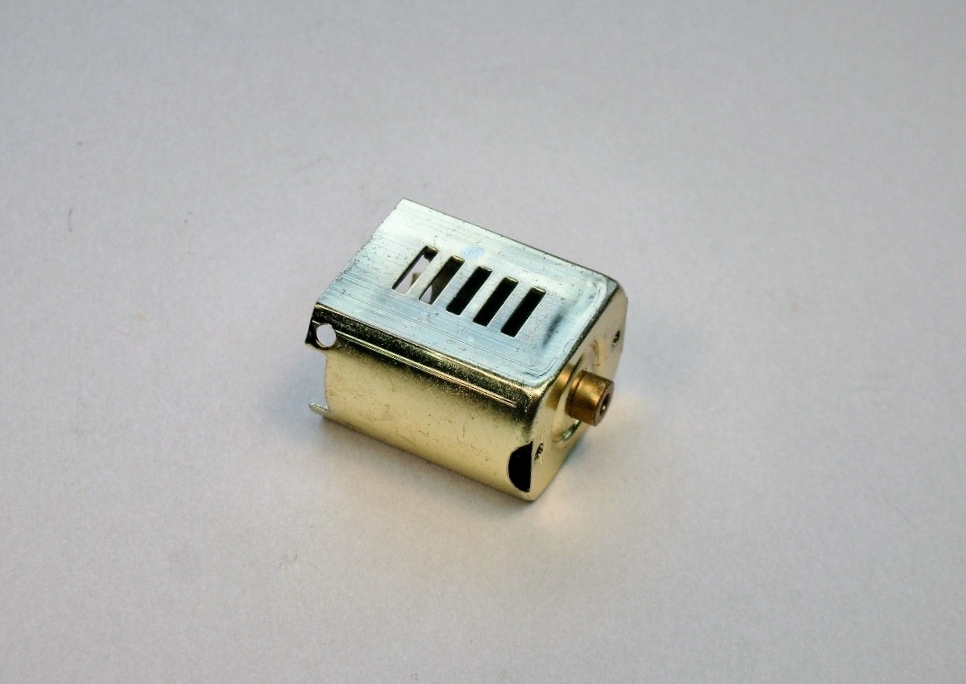
Fellow Slotbloger from Australia George Hawkins (nostalgic) gifted me a rare and beautiful new old stock Russkit 28 motor can for this project. Check out the goldish finish. It looks like it was made yesterday:


nostalgic 2.JPG


I can't bring myself to solder and splatter acid flux all over it and ruin the finish. George has agreed to let me use the can in another project.


Thanks George!    :D


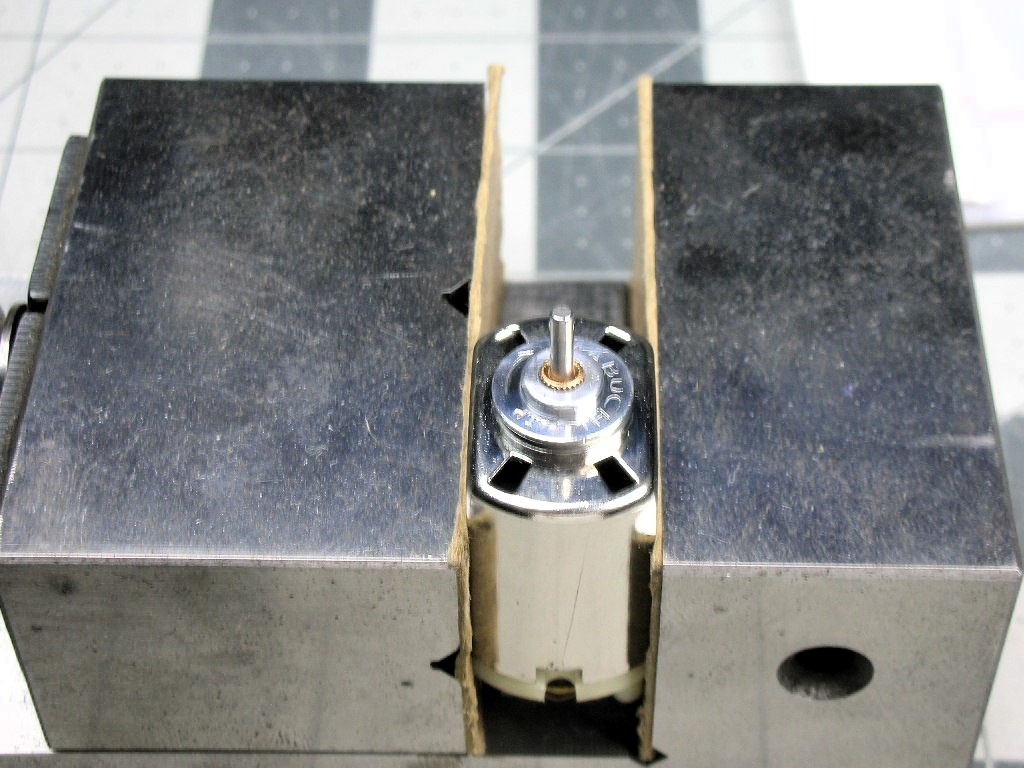
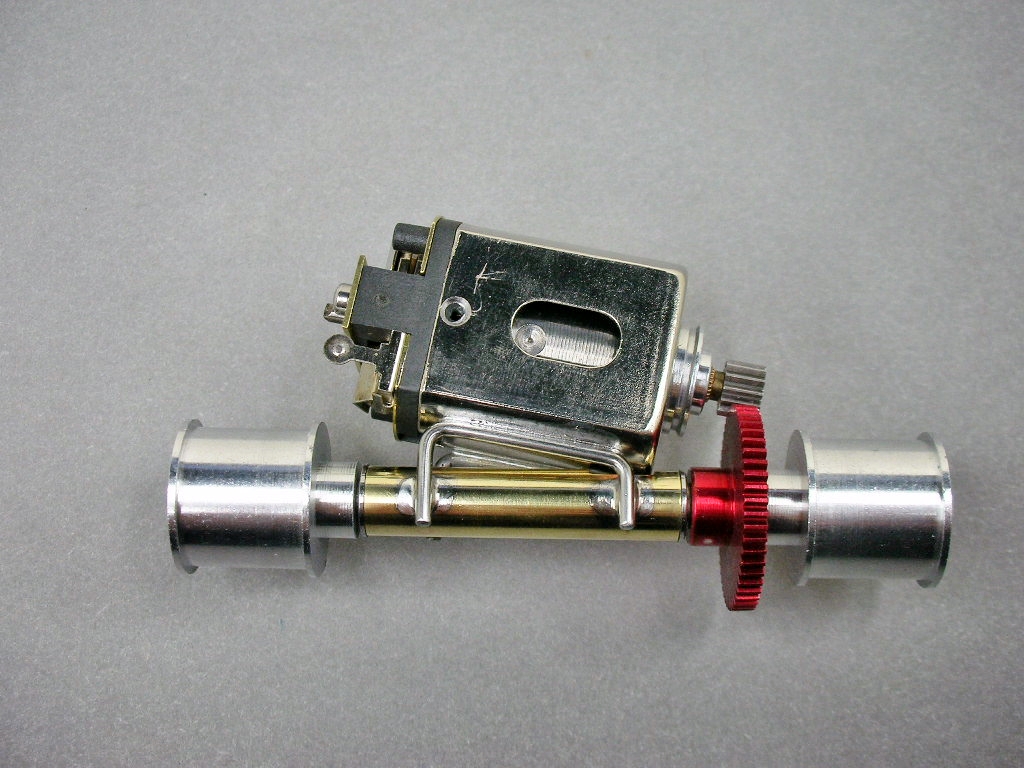
I decided to go with the good old 68 Mabuchi ball bearing can. I don't know what the shiny plating is but it solders beautifully and acid flux doesn't hurt it if cleaned off reasonably quickly.


The cheesy ball bearing was replace by JB Welding in an endbell oilite bearing:


msg-5-0-45531800-1706318787.jpg


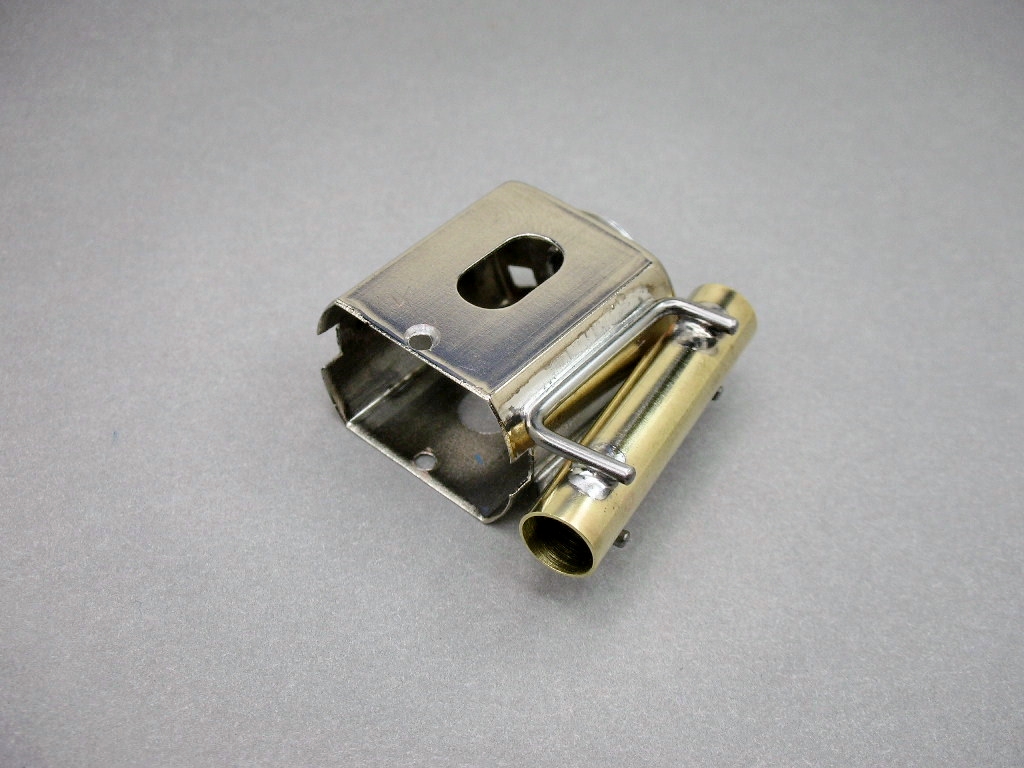
A small notch was filed into the axle tube to get the motor a little closer to the gear:


chassis (5).JPG


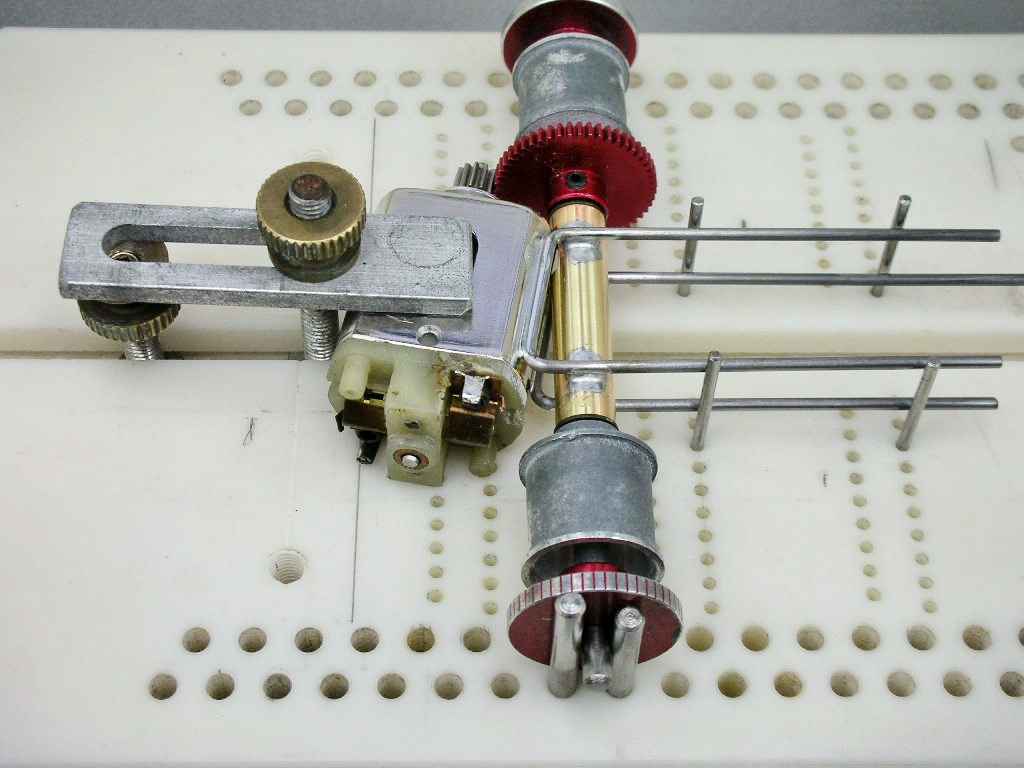
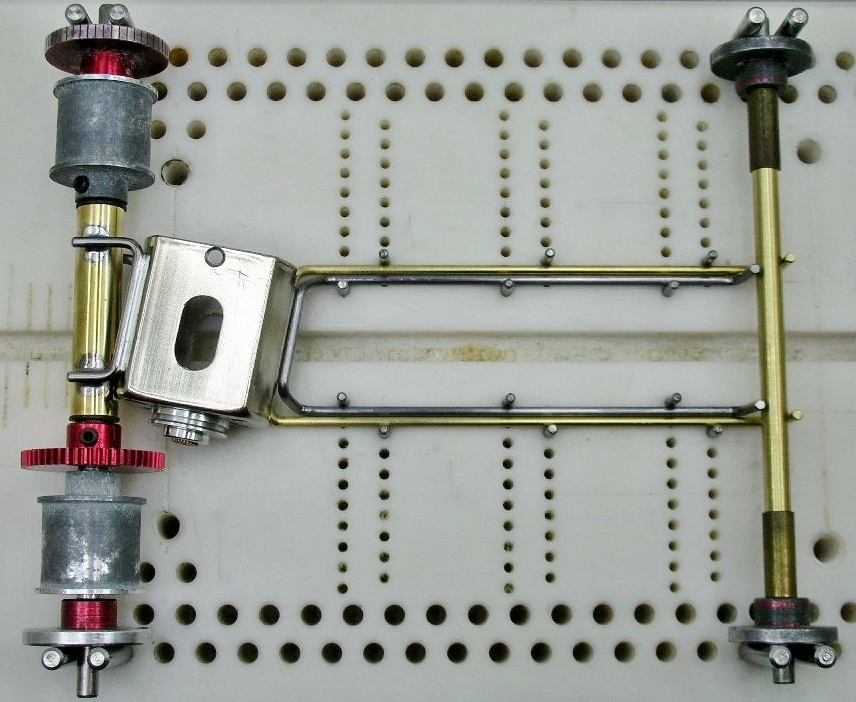
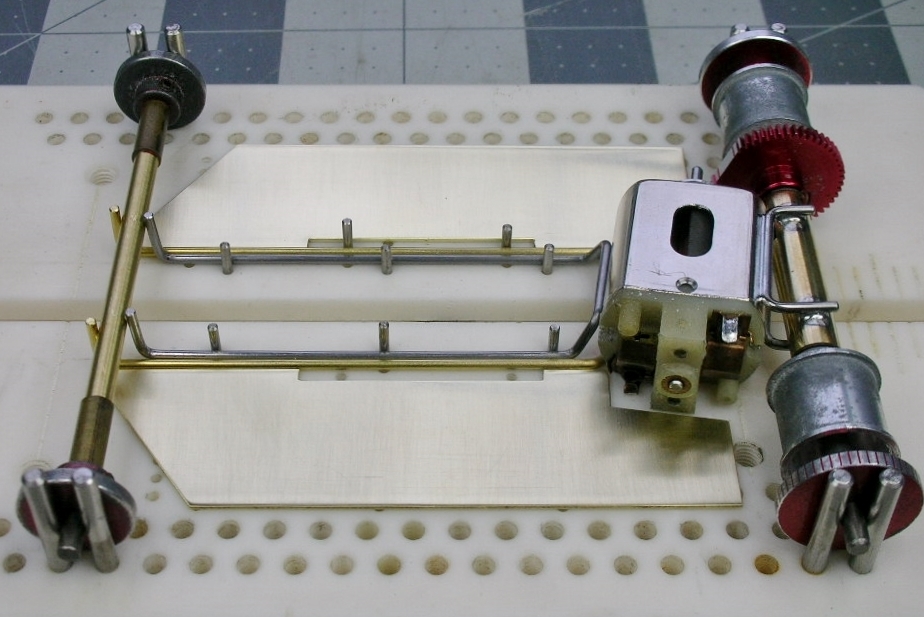
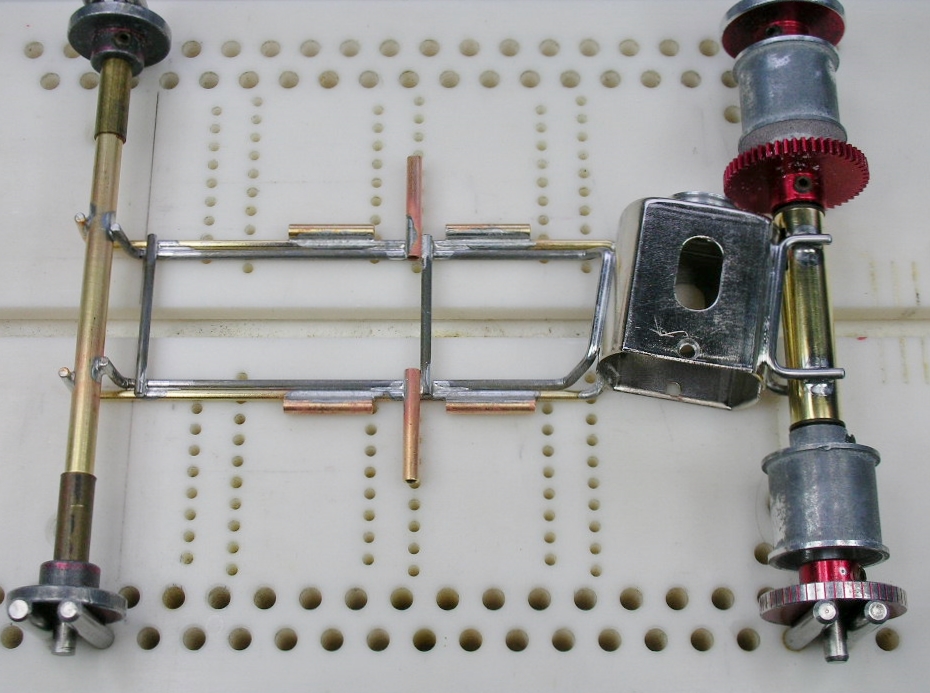
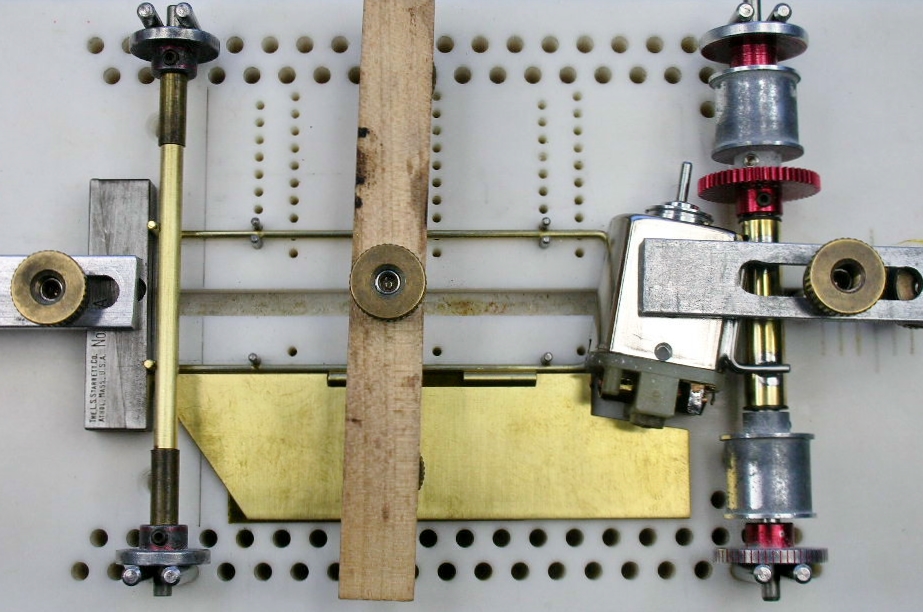
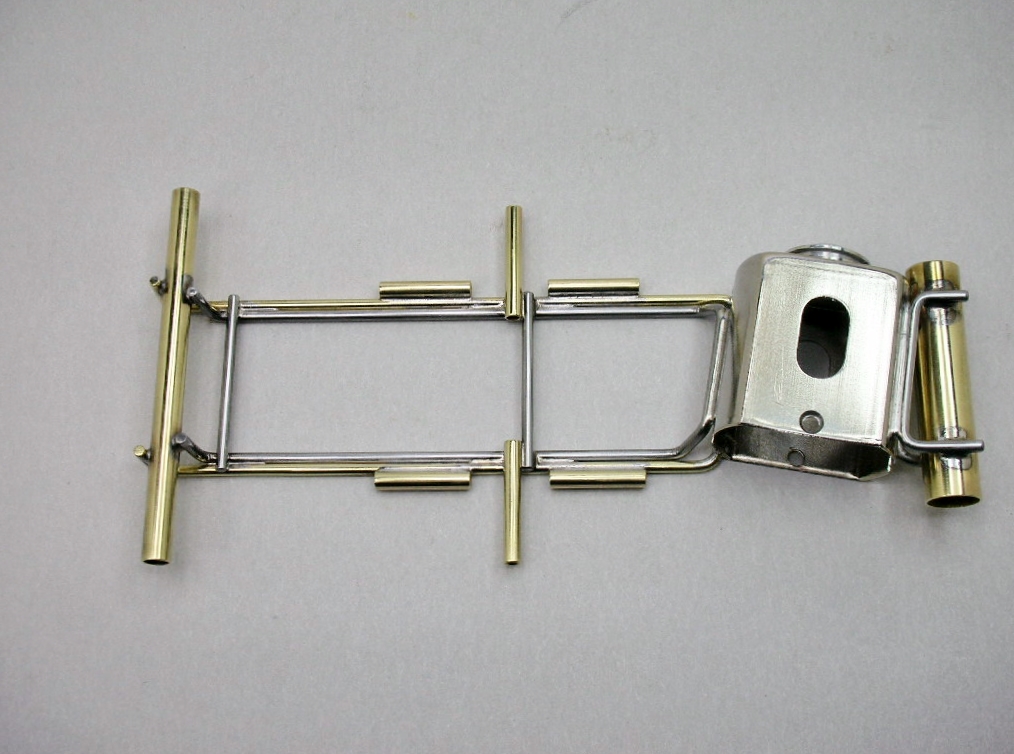
I'm using two U-braces to hold the axle tube to the can. The motor angle is about 10 degrees. I kept the braces parallel with the track surface and the arms pointed straight ahead. I thought it gave more of an "inline" look:


chassis (4).JPG


I set my motor up for clockwise timing and can drive like Gene did. I am hoping it might make lead wire and brush spring installation easier......we'll see:


chassis (3).JPG


I'm also using top and bottom flat head screws ala Champion to get them out of the way of the chassis rails. I love those red 64P Weldun gears:


chassis (2).JPG


I spend lots of time fiddling around to get the gear mesh correct and get the motor located side to side to mate up with the front half of the chassis. I hope to minimize any awkward angled bends in the main rails to connect with the can.


I want the front half of the chassis, in fact, the rest of the chassis to look like Phil Rubin's inline beauty...........just at TonyP suggested.


  • Pablo and Alchemist like this

Rick Thigpen
Check out Steve Okeefe's great web site at its new home here at Slotblog:
The Independent Scratchbuilder
There's much more to come...


#8 Larry Horner

Larry Horner

    On The Lead Lap

  • Full Member
  • PipPipPipPip
  • 454 posts
  • Joined: 18-March 17
  • Gender:Male
  • Location:San Francisco

Posted 02 March 2024 - 03:33 PM

Wow, your design for attaching the axle tube is WAY easier than mine ... when will I learn to not overthink things!  :dash2:


#9 dc-65x

dc-65x

    Grand Champion Poster

  • Subscriber
  • PipPipPipPipPipPipPipPip
  • 6,942 posts
  • Joined: 14-February 06
  • Gender:Male
  • Location:Captain Rick: The only vintage slot car nut in SW Oregon?

Posted 02 March 2024 - 03:55 PM

Larry, I was thinking about what would be easiest to cut off and do over if I screwed up!   :laugh2:


  • Larry Horner likes this

Rick Thigpen
Check out Steve Okeefe's great web site at its new home here at Slotblog:
The Independent Scratchbuilder
There's much more to come...


#10 dc-65x

dc-65x

    Grand Champion Poster

  • Subscriber
  • PipPipPipPipPipPipPipPip
  • 6,942 posts
  • Joined: 14-February 06
  • Gender:Male
  • Location:Captain Rick: The only vintage slot car nut in SW Oregon?

Posted 02 March 2024 - 08:50 PM

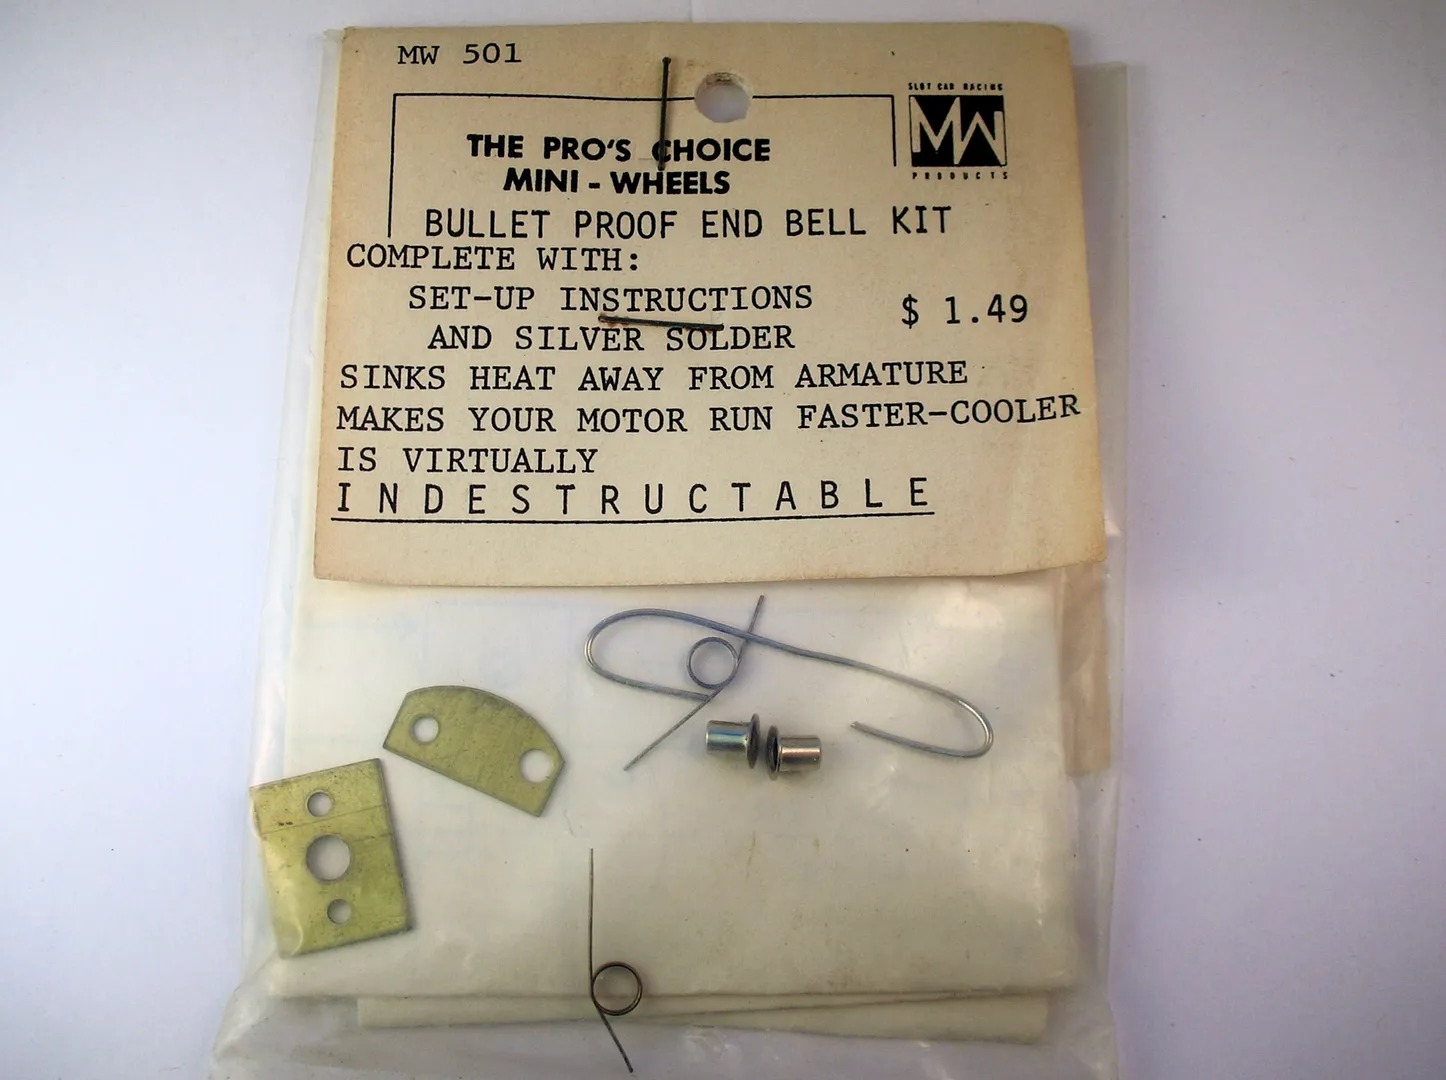
While I was modifying the can I also worked over the Mura 1st gen "unmeltable" endbell. I wanted to have the modified endbell finished to make sure it would clear the chassis, especially Rubin's huge "wild, wild pans"


I installed a Mini Wheels endbell bulletproofing kit:


husting motor (9).jpg


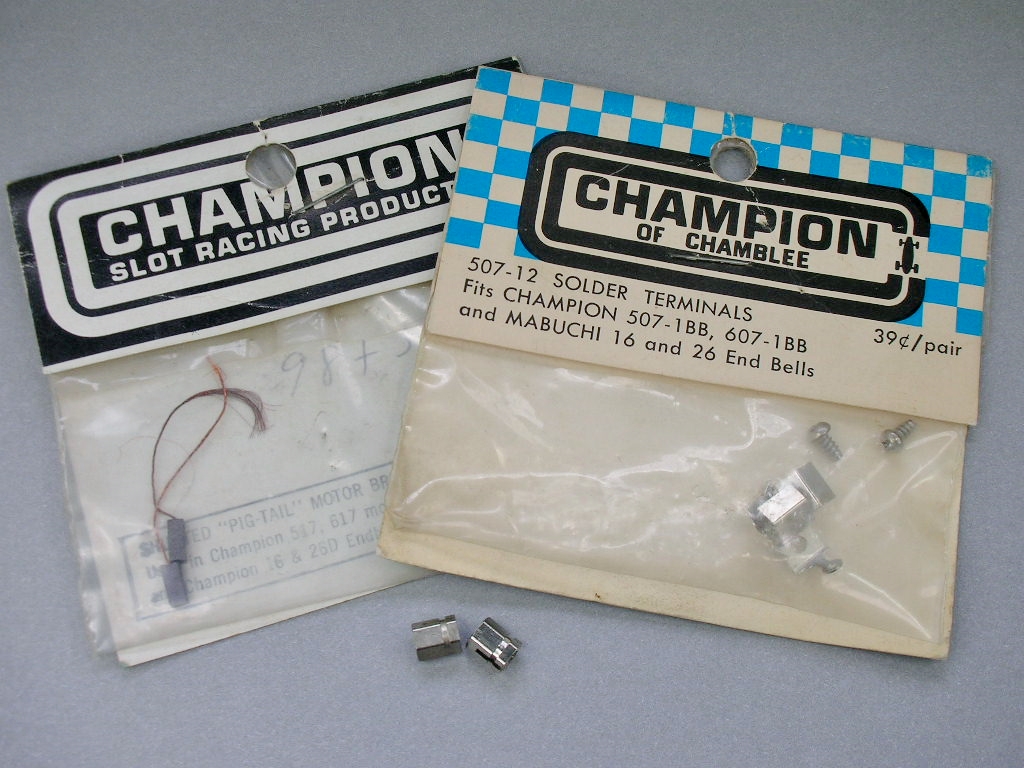
I'm using Champion 26D brush hoods, hex brush holders and shunted brushes:


husting motor (13).JPG


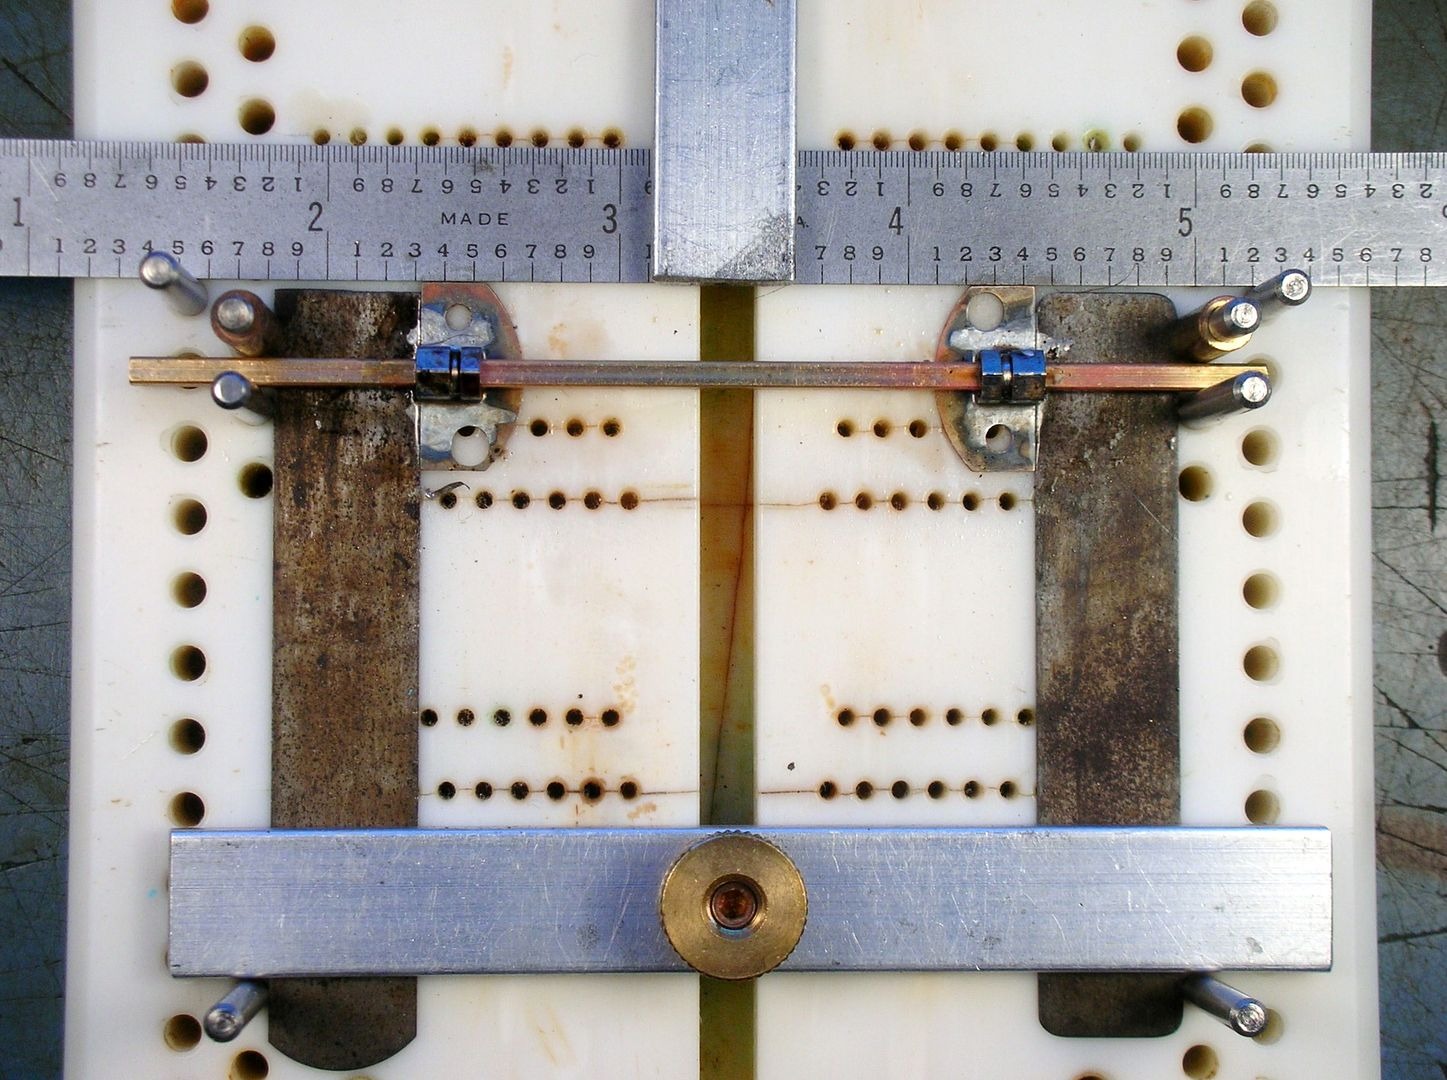
The 26D hex brush holders are cut down and soldered directly to the kit's bulletproofing plates in my Rick's Jig:


husting motor (11).jpg


Here they are all cleaned up and ready to install:


husting motor (2).JPG


The stock endbell on the left and the modified endbell on the right ready to accept the kit:


husting motor (6).JPG


The endbell bearing is soldered to the kit bulletproofing plate and attached with 2-56 stainless steel machine screws:


husting motor (7).JPG


2-56 screws also attach the brush plates:


husting motor (8).JPG


Ready to go:


husting motor (4).JPG


  • Steve Okeefe, don.siegel, Jencar17 and 2 others like this

Rick Thigpen
Check out Steve Okeefe's great web site at its new home here at Slotblog:
The Independent Scratchbuilder
There's much more to come...


#11 dc-65x

dc-65x

    Grand Champion Poster

  • Subscriber
  • PipPipPipPipPipPipPipPip
  • 6,942 posts
  • Joined: 14-February 06
  • Gender:Male
  • Location:Captain Rick: The only vintage slot car nut in SW Oregon?

Posted 03 March 2024 - 08:35 PM

Time to get the front half of a Phil Rubin style "last gasp of the inlines" chassis........


post-5-0-79977600-1577570753.jpg


..........onto my anglewinder as TonyP suggested:


chassis (13).JPG


chassis (12).JPG


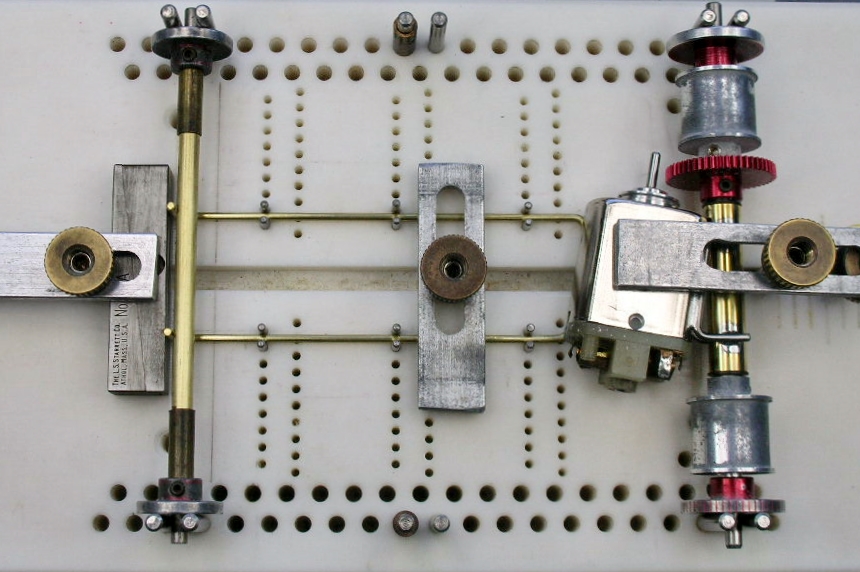
The side by side rails (1/16" brass rod and piano wire) and spacing for a 3/4" drop arm are all the same as the inline.


chassis (14).JPG


The outer brass rail in jig and ready to start soldering:


chassis soldering (1).JPG


But I'm having second thoughts. I think I should make the pans first so I'll know where the hinge tube will be located.


  • Steve Okeefe, Pablo, Jencar17 and 1 other like this

Rick Thigpen
Check out Steve Okeefe's great web site at its new home here at Slotblog:
The Independent Scratchbuilder
There's much more to come...


#12 dc-65x

dc-65x

    Grand Champion Poster

  • Subscriber
  • PipPipPipPipPipPipPipPip
  • 6,942 posts
  • Joined: 14-February 06
  • Gender:Male
  • Location:Captain Rick: The only vintage slot car nut in SW Oregon?

Posted 05 March 2024 - 08:17 PM

I love Phil Rubin's "wild, wild pan thing". Those big pans are a favorite feature.


I can't help myself.........


il_570xN.3699516995_ejoc.jpg


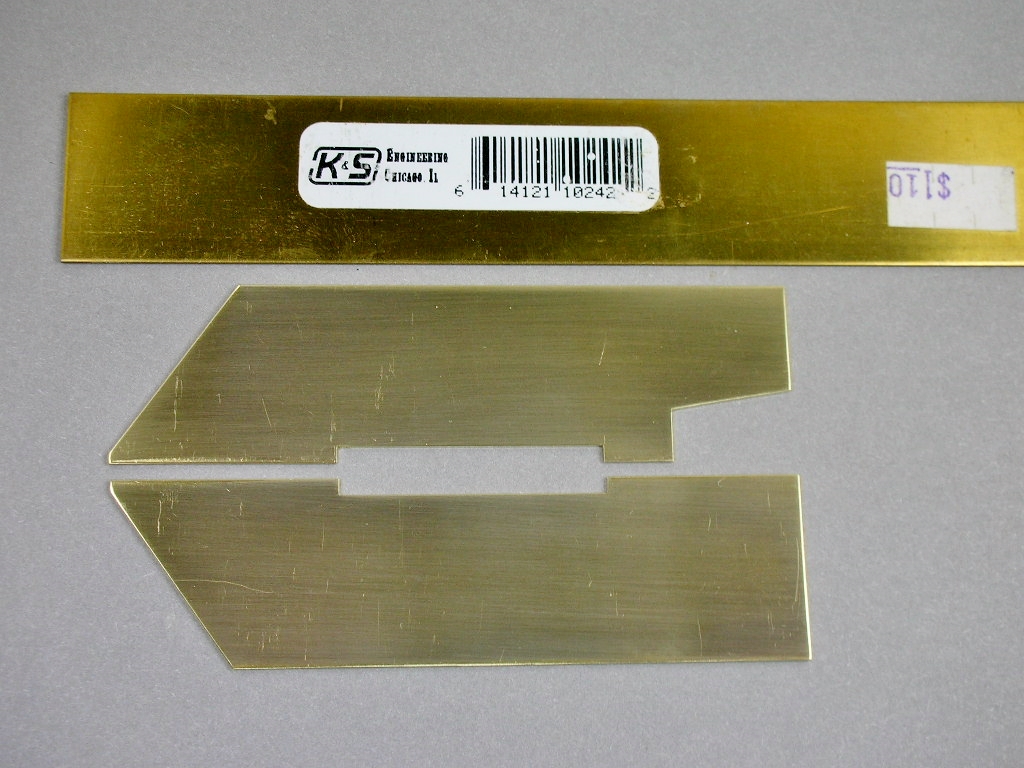
Here are the pans cut from 1" X .032" K&S brass strip. Check out the price tag. It really must be OLD.    :shok:


chassis (699).JPG


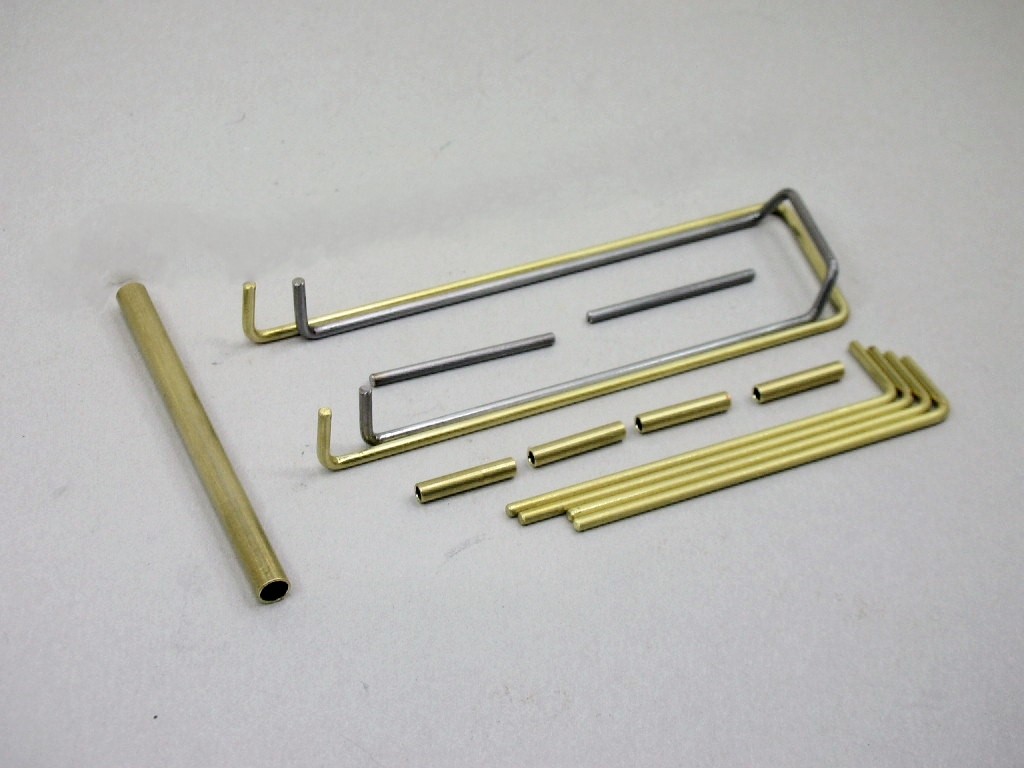
I also made up the pan hangers and hinge tubes. I'm going to solder the hinge tubes at the same time I do the rails. I decided to make the hinge tubes 2-piece so I can blow all the acid flux and water out of them:


chassis (15) - Copy.JPG


Two 1" pans, a 3/4" drop arm and 1/4" worth of rails make a nice and easy 3" wide chassis without any custom cutting:


chassis (7).JPG


OK, now it's finally time to solder........


  • Steve Okeefe, Bill from NH, Alchemist and 1 other like this

Rick Thigpen
Check out Steve Okeefe's great web site at its new home here at Slotblog:
The Independent Scratchbuilder
There's much more to come...


#13 Martin

Martin

    Posting Leader

  • Full Member
  • PipPipPipPipPipPipPip
  • 4,180 posts
  • Joined: 22-February 09
  • Gender:Male
  • Location:US

Posted 06 March 2024 - 12:21 AM

Enjoying your thought process and the choices along the way. :good:  


I must confess I like the narrow drop arm and the wide pans too.


Martin Windmill

#14 dc-65x

dc-65x

    Grand Champion Poster

  • Subscriber
  • PipPipPipPipPipPipPipPip
  • 6,942 posts
  • Joined: 14-February 06
  • Gender:Male
  • Location:Captain Rick: The only vintage slot car nut in SW Oregon?

Posted 06 March 2024 - 08:06 PM

Thanks Martin.   :) 
 
I made an important choice along the way thanks to a reminder from Steve Okeefe:    :victory: 
 

Soldering brass rod and piano wire main rails together will cause them to warp quicker than Captain Kirk on the Starship Enterprise .   :wacko2:

 
I don't know how I forgot this nightmare.  :shok:   When I built my Phil Rubin inline chassis I did solder both brass and piano wire rails the full length and probably got them plenty hot too. 
 

The hinge tubes and the full length of the rails are soldered. They warped like crazy into an hour glass shape.   :wacko2: 
Quite a project to straighten things out.


msg-5-0-07181500-1707529222.jpg


As I recall I had to cut out the front axle tube and straighten out each pair of rails individually.


Anyway this time I'm using plan B. I soldered the hinge tubes to the outer brass rails first after aligning them with the pans:


chassis soldering (3).JPG


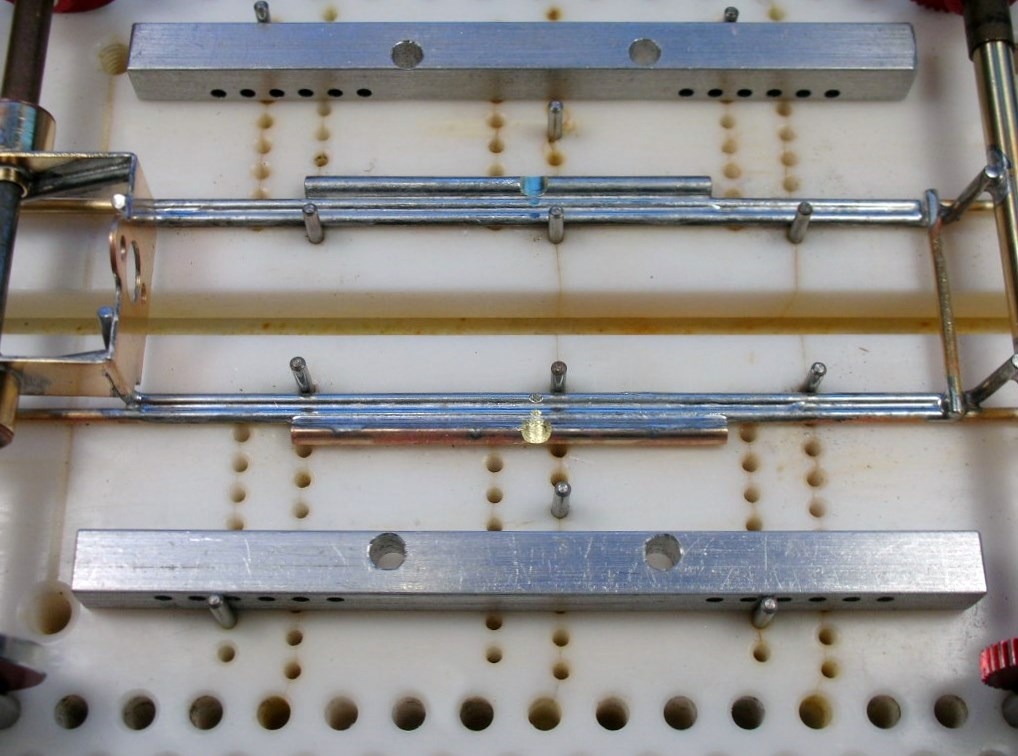
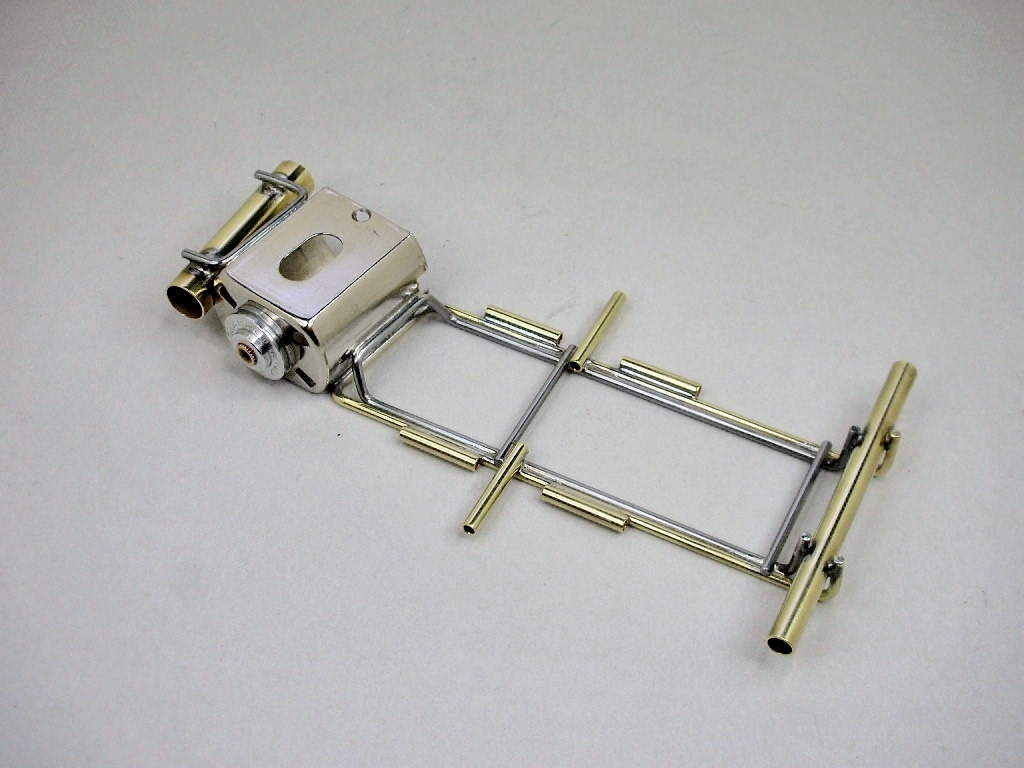
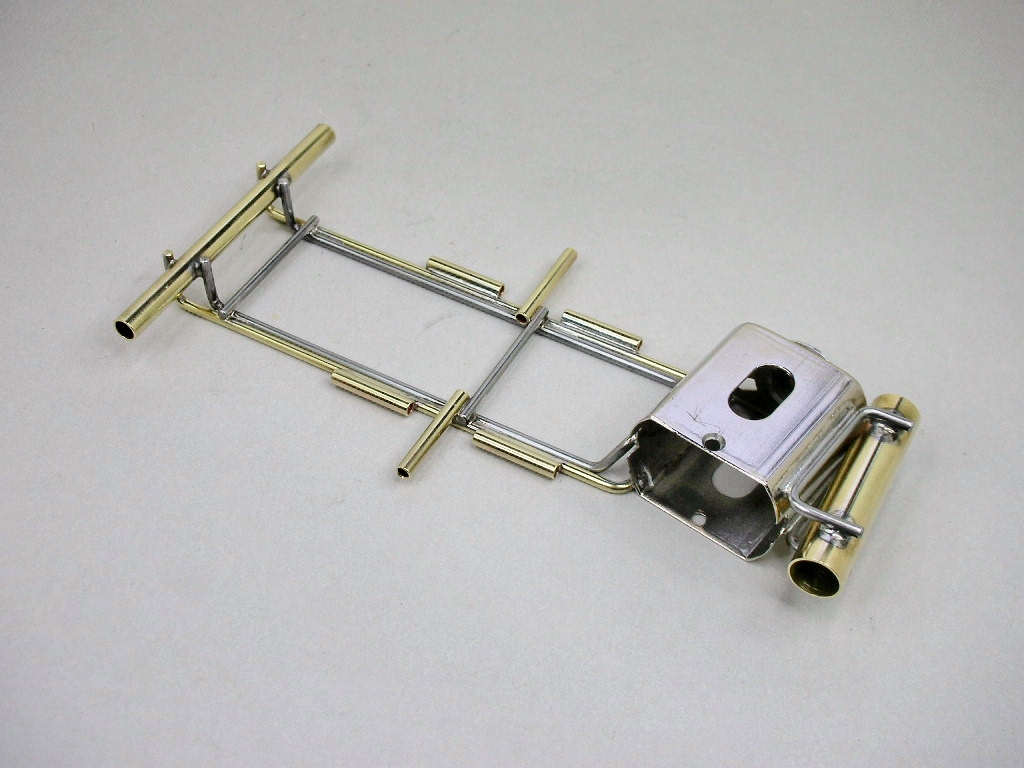
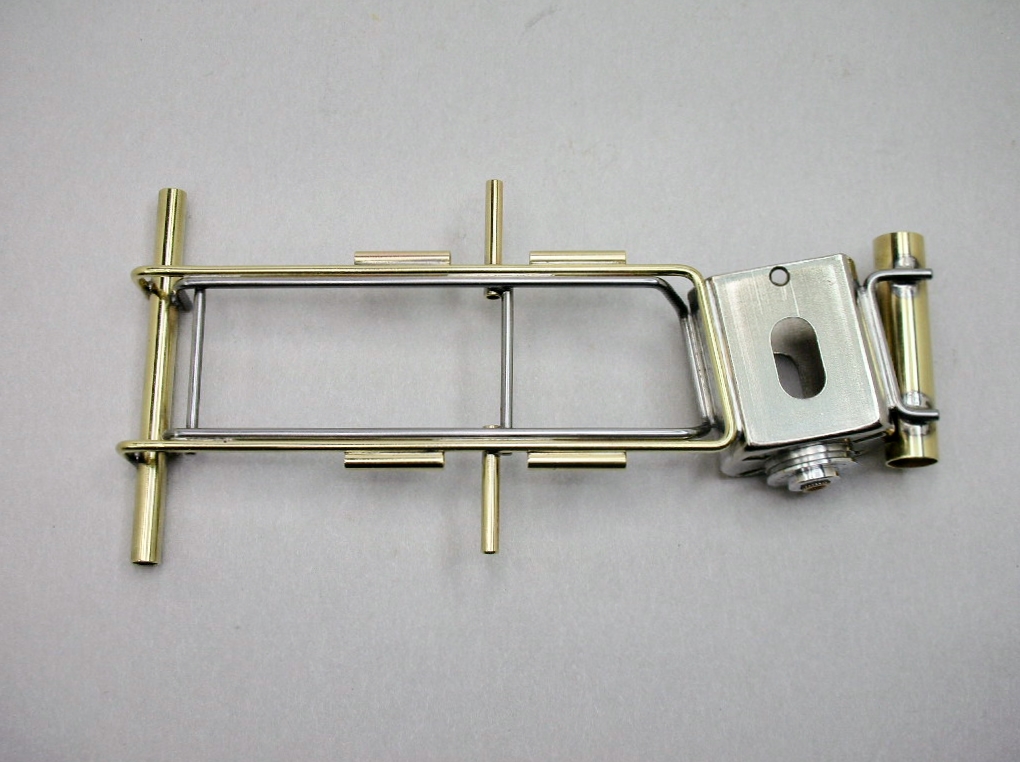
Then I soldered the inner piano wire rails to the motor and connected them to the outer brass rails at just the drop arm hinge tubes and their reinforcement bar. This ties the middle of the chassis together:


chassis (19).JPG


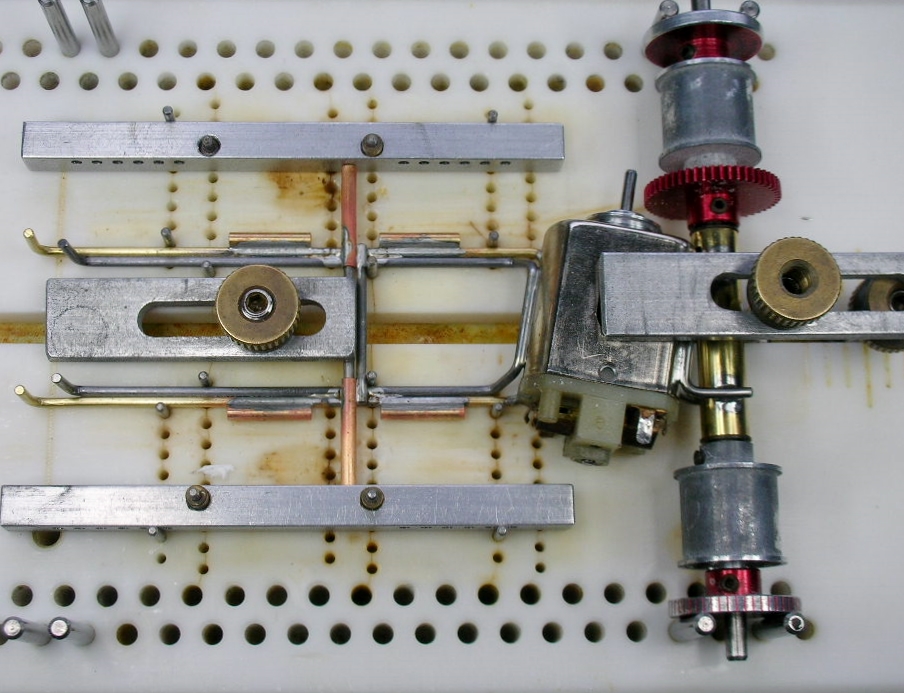
Next the front axle tube went on and the drop arm up-stop ties all 4 rails together at the front:


chassis (17).JPG


At this point the rails are straight and parallel and I could probably slowly and carefully solder everything together. But I think things are fine the way they are. 


I shared all this in the hopes it might help other scratch builders. And I'm sure others would do thing differently and perhaps far better. I encourage them to start their own build threads here on Slotblog and share their techniques and tips with us.   :good:


OK, time to do lots of cleanup and "put the buff to it" to see what this thing really looks like.    :D


  • Steve Okeefe, Tex, Alchemist and 1 other like this

Rick Thigpen
Check out Steve Okeefe's great web site at its new home here at Slotblog:
The Independent Scratchbuilder
There's much more to come...


#15 Larry Horner

Larry Horner

    On The Lead Lap

  • Full Member
  • PipPipPipPip
  • 454 posts
  • Joined: 18-March 17
  • Gender:Male
  • Location:San Francisco

Posted 06 March 2024 - 11:46 PM

Looking great! And to think I was feeling guilty about my 1/2" pans.   :good:


#16 dc-65x

dc-65x

    Grand Champion Poster

  • Subscriber
  • PipPipPipPipPipPipPipPip
  • 6,942 posts
  • Joined: 14-February 06
  • Gender:Male
  • Location:Captain Rick: The only vintage slot car nut in SW Oregon?

Posted 07 March 2024 - 11:46 AM

No "pan guilt" Larry. Your build is looking great.   :victory:


Here's my "center section" all spiffed up and ready for the next step:


chassis (22).JPG


chassis (26).JPG


chassis (25).JPG


chassis (24).JPG


I'm happy with it so far. Onward to the next step, the drop arm.


  • Steve Okeefe, Pablo and Larry Horner like this

Rick Thigpen
Check out Steve Okeefe's great web site at its new home here at Slotblog:
The Independent Scratchbuilder
There's much more to come...


#17 Martin

Martin

    Posting Leader

  • Full Member
  • PipPipPipPipPipPipPip
  • 4,180 posts
  • Joined: 22-February 09
  • Gender:Male
  • Location:US

Posted 07 March 2024 - 12:21 PM

When you are done Rick just send it to me so I can add my patina process. It takes awhile 20+ years maybe?, but look at that color.  :sun_bespectacled:  Beautiful work then (?) and now. :good: Still part of my Master builder collection.


paul Rubin bott.JPG big.JPG


paul Rubin better top.JPG


Martin Windmill

#18 dc-65x

dc-65x

    Grand Champion Poster

  • Subscriber
  • PipPipPipPipPipPipPipPip
  • 6,942 posts
  • Joined: 14-February 06
  • Gender:Male
  • Location:Captain Rick: The only vintage slot car nut in SW Oregon?

Posted 07 March 2024 - 12:30 PM

Hi Martin,


I guess I like Rubin's chassis design. You have my first one done many years ago and I working on my third and it's an anglewinder no less.   :crazy:    :dance3:


Rick Thigpen
Check out Steve Okeefe's great web site at its new home here at Slotblog:
The Independent Scratchbuilder
There's much more to come...


#19 Martin

Martin

    Posting Leader

  • Full Member
  • PipPipPipPipPipPipPip
  • 4,180 posts
  • Joined: 22-February 09
  • Gender:Male
  • Location:US

Posted 07 March 2024 - 12:36 PM

Found this early PVA angle winder chassis recently, It may be of some influence on your build (not that you need it) :)


pva4.JPG


P.S. I can always erase this post if it muddies your build? I just wanted you to see the drop arm and the slash back pans really. In case it helps.


Martin Windmill

#20 dc-65x

dc-65x

    Grand Champion Poster

  • Subscriber
  • PipPipPipPipPipPipPipPip
  • 6,942 posts
  • Joined: 14-February 06
  • Gender:Male
  • Location:Captain Rick: The only vintage slot car nut in SW Oregon?

Posted 07 March 2024 - 12:44 PM

Thanks Martin, but I have a built up drop arm already in the works. And my build predates all 1/24 Pro style anglewinders except for Gene Husting's car so the PVA anglewinder isn't really relevant.


It looks like Rubin influenced PVA from the look of those pans.    :)


Rick Thigpen
Check out Steve Okeefe's great web site at its new home here at Slotblog:
The Independent Scratchbuilder
There's much more to come...


#21 Alchemist

Alchemist

    Posting Leader

  • Full Member
  • PipPipPipPipPipPipPip
  • 2,692 posts
  • Joined: 11-November 09
  • Gender:Male
  • Location:Far, far away

Posted 07 March 2024 - 12:55 PM

Awesome project Rick!


Ernie


Ernie Layacan

#22 Larry Horner

Larry Horner

    On The Lead Lap

  • Full Member
  • PipPipPipPip
  • 454 posts
  • Joined: 18-March 17
  • Gender:Male
  • Location:San Francisco

Posted 07 March 2024 - 02:30 PM

Looking awesome Rick! :good: One quick question about the pivot tubes for the pans ... are they flush with the bottom of the chassis or are they elevated slightly? It looks like there might be a shadow under them in the photos so I was just wondering.


#23 dc-65x

dc-65x

    Grand Champion Poster

  • Subscriber
  • PipPipPipPipPipPipPipPip
  • 6,942 posts
  • Joined: 14-February 06
  • Gender:Male
  • Location:Captain Rick: The only vintage slot car nut in SW Oregon?

Posted 07 March 2024 - 03:44 PM

Thanks Ernie.    :)


Good eye Larry. With the pans up against the hinge tubes I always mount the hinge tubes flush with the bottom of the chassis.........if I'm using .032" piano wire for the hinges. I can easily bend a little kink in the hinges and file a matching notch in the pans and all is good.


With 1/16" hinges it's more problematic. As was often done with early hinged pans I spaced my hinge tubes up with .030" feeler gages covered with high temperature Kapton tape:


chassis soldering (2).JPG


The pans are spaced upward also but just while soldering the hinge tube to the chassis to locate the tubes for and aft:


chassis soldering (3).JPG


When it comes time to solder on the pans they will lay flat on the jig and I can use simple L-shaped hinges to attach them.


  • Steve Okeefe, Pablo, Tex and 2 others like this

Rick Thigpen
Check out Steve Okeefe's great web site at its new home here at Slotblog:
The Independent Scratchbuilder
There's much more to come...


#24 dc-65x

dc-65x

    Grand Champion Poster

  • Subscriber
  • PipPipPipPipPipPipPipPip
  • 6,942 posts
  • Joined: 14-February 06
  • Gender:Male
  • Location:Captain Rick: The only vintage slot car nut in SW Oregon?

Posted 09 March 2024 - 12:13 PM

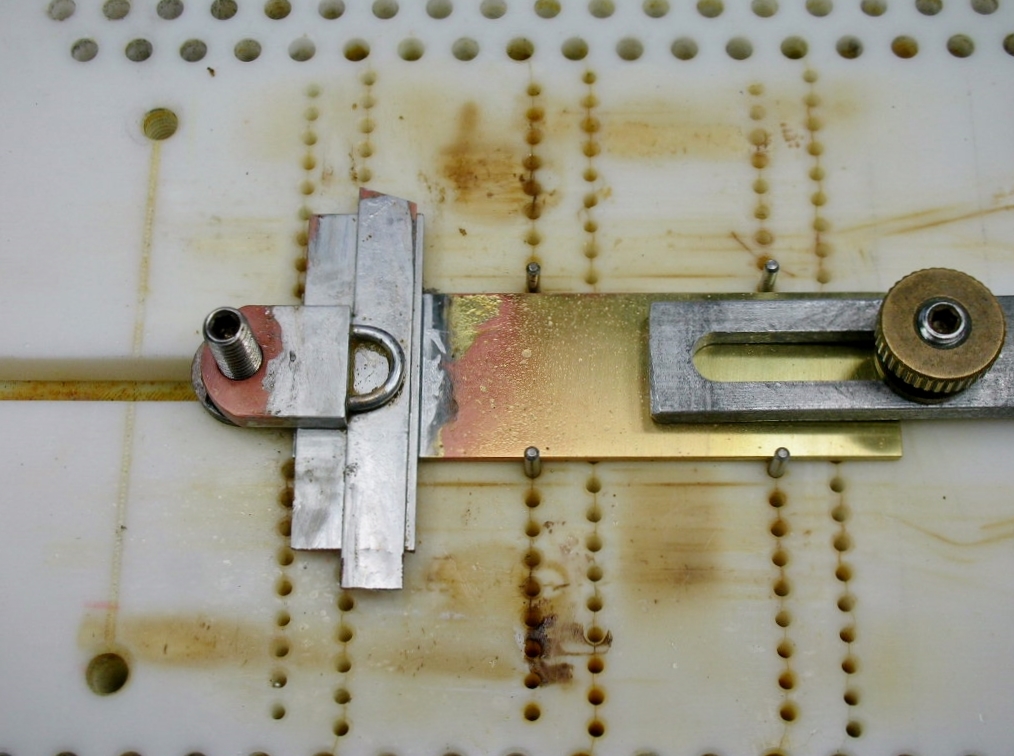
Here are parts and setup for my drop arm. A Dynamic pillow block will hold the guide flag. 1/32" brass strip will serve as a spacer to raise the pillow block to the correct height for a Cox guide:


chassis (29).JPG


I left the brass strips extra long to "drag" any excess solder away from the joint:


chassis (31).JPG


The 3/4" strip drop arm itself is located close enough to the guide flag so it acts as a rotational stop:


chassis (34).JPG


chassis (33).JPG


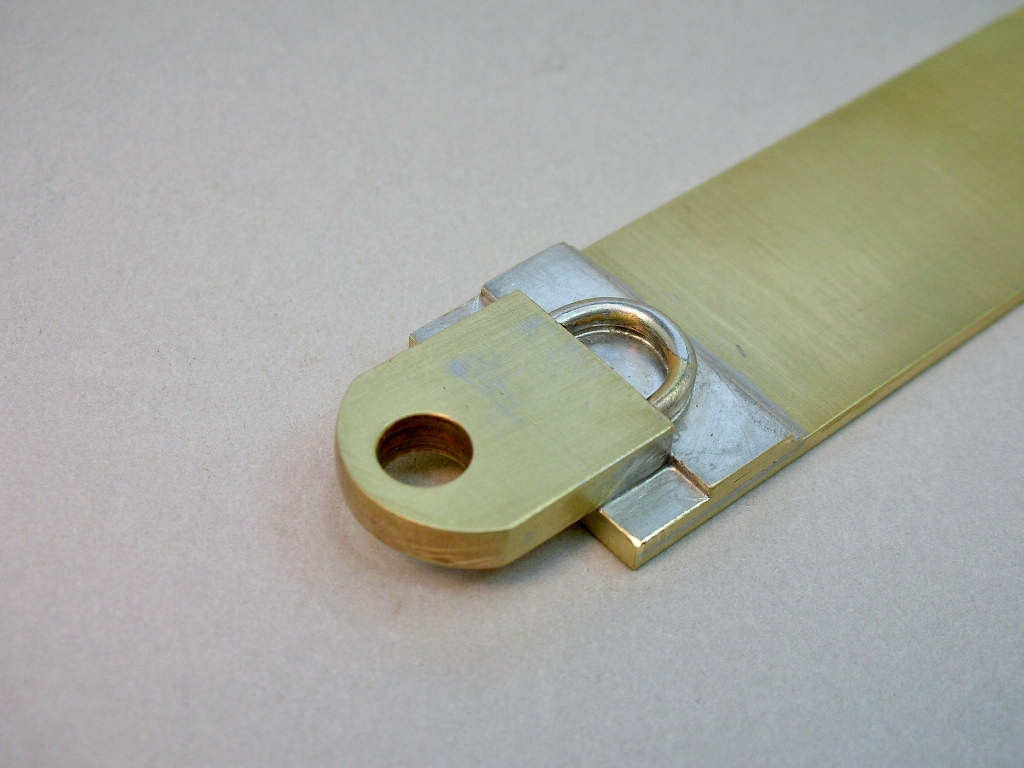
The back end of the drop arm gets milled reliefs to stop solder from flowing into the its hinge tube:


chassis (35).JPG


Ready for the down stop:


chassis (32).JPG


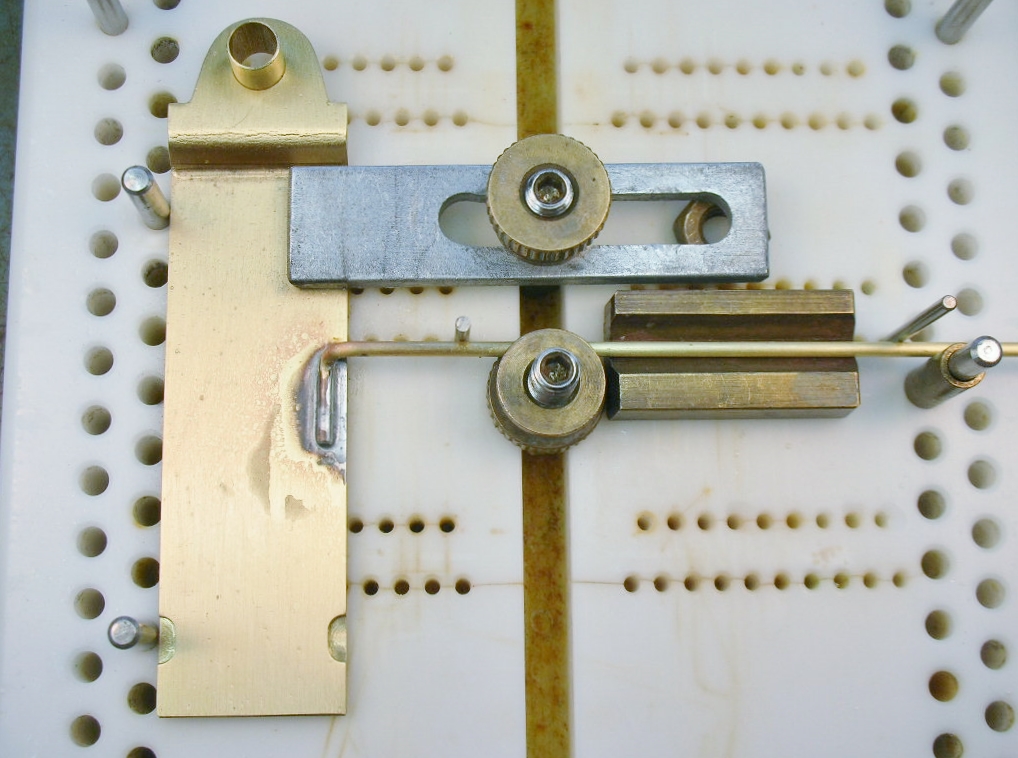
This is a picture I've saved to remind me of the setup I use for installing down stops on thick plate drop arms. It aligns and holds the stop in place and I only have to heat up a small area of the plate to solder it in place:


Drop arm down stop jig setup.jpg


Attaching the pans to finish the chassis is next.


  • Steve Okeefe, Slot Car Rod and Larry Horner like this

Rick Thigpen
Check out Steve Okeefe's great web site at its new home here at Slotblog:
The Independent Scratchbuilder
There's much more to come...


#25 dc-65x

dc-65x

    Grand Champion Poster

  • Subscriber
  • PipPipPipPipPipPipPipPip
  • 6,942 posts
  • Joined: 14-February 06
  • Gender:Male
  • Location:Captain Rick: The only vintage slot car nut in SW Oregon?

Posted 10 March 2024 - 02:05 PM

The setup for pan installation:


chassis (39).JPG


Ready for trimming off the excess material:


chassis (40).JPG


All that's left are the pan down stops. I like the thin wire stye on this Lee Hines inline:


MCJ V1N9 p5 - Copy.jpg


The chassis is finished and I think it's a "wild, wild pan thing" indeed:


chassis (47).JPG


My Phil Rubin inline chassis that (along with the Hustings anglewinder of course) inspired this build:


chassis (46).jpg


Time to finish the motor...


  • Steve Okeefe, Pablo and Bill from NH like this

Rick Thigpen
Check out Steve Okeefe's great web site at its new home here at Slotblog:
The Independent Scratchbuilder
There's much more to come...


Electric Dreams Online Shop