Jump to content


Photo

MESAC Veteran class


  • Please log in to reply
81 replies to this topic

#51 dc-65x

dc-65x

    Grand Champion Poster

  • Subscriber
  • PipPipPipPipPipPipPipPip
  • 6,976 posts
  • Joined: 14-February 06
  • Gender:Male
  • Location:Captain Rick: The only vintage slot car nut in SW Oregon?

Posted 11 April 2024 - 07:36 PM

I don't know Martin you'll have to give it a try.  Rubber is not the easiest to machine cleanly.     :victory:


Personally, I really like the flat bottom grooves the saw blade gives and the blade cut so cleanly. I fed the blade in slowly to a depth of .010", stopped and let it sit there and spin for 30 seconds or so. I think that really helped clean up any fuzziness in the grooves.


Rick Thigpen
Check out Steve Okeefe's great web site at its new home here at Slotblog:
The Independent Scratchbuilder
There's much more to come...


#52 Martin

Martin

    Posting Leader

  • Full Member
  • PipPipPipPipPipPipPip
  • 4,212 posts
  • Joined: 22-February 09
  • Gender:Male
  • Location:US

Posted 12 April 2024 - 10:08 AM

Your results look great  :good:


I am trying to come up with ways to create the grooves in one pass, to set the spacing. I may try and stack blades with a pre set space between them so they cut together in one go. 


The only time I did cut grooves, it was on a O-ring tire, there I used a small hack saw blade so I could follow the curve. A bit hit or miss, but it got it done.

Its fun to come up with ways to create details like this.


Screenshot (2070).png


  • Jaeger Team likes this
Martin Windmill

#53 dc-65x

dc-65x

    Grand Champion Poster

  • Subscriber
  • PipPipPipPipPipPipPipPip
  • 6,976 posts
  • Joined: 14-February 06
  • Gender:Male
  • Location:Captain Rick: The only vintage slot car nut in SW Oregon?

Posted 14 April 2024 - 07:49 PM

Thanks Martin. You did a really nice job free hand grooving that o-ring tire.


I made up the 1/4" wide brass strip main rails and encountered a clearance issue with the rear wheels. The strip is wider than the axle bushing it needs to attach to. A little trimming fixed things:


veteran chassis (24).JPG


The first steps in construction are complete. Along with the main rails I added a drop arm upward stop and an and "anti-spread bar" behind where the drop arm pivot will go:


veteran chassis (20).JPG


The excess piano wire is trimmed and the chassis cleaned up a bit with a Scotch-Brite pad:


veteran chassis (21).JPG


veteran chassis (22).JPG


There is only one way to describe the chassis so far. Just as Steve Okeefe predicted:


boing-roger-lighterness.jpg


I've talked to Rodney about the extreme weakness with just those 1/32" thick brass strip main rails. Since I'm building a proof of concept prototype chassis from the MESAC proposal drawing, I'm going refine things  bit.


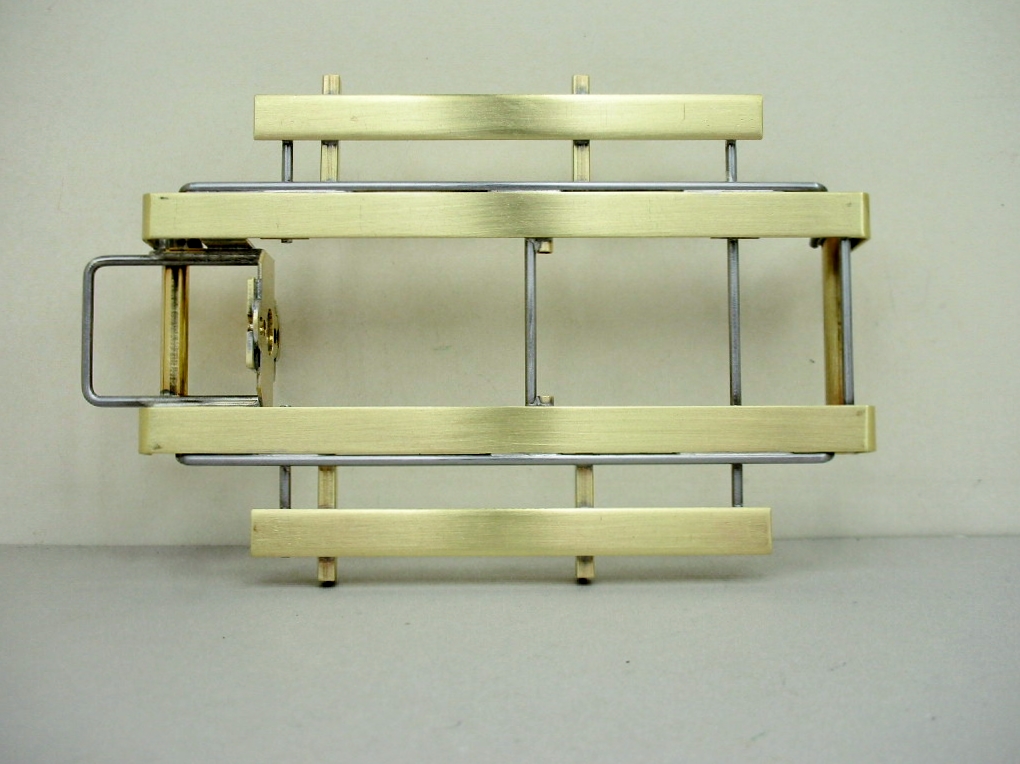
The next step will be adding a piece of 1/16" piano wire to the outside of each main rail.


  • Steve Okeefe, Pablo and Slot Car Rod like this

Rick Thigpen
Check out Steve Okeefe's great web site at its new home here at Slotblog:
The Independent Scratchbuilder
There's much more to come...


#54 dc-65x

dc-65x

    Grand Champion Poster

  • Subscriber
  • PipPipPipPipPipPipPipPip
  • 6,976 posts
  • Joined: 14-February 06
  • Gender:Male
  • Location:Captain Rick: The only vintage slot car nut in SW Oregon?

Posted 16 April 2024 - 09:57 AM

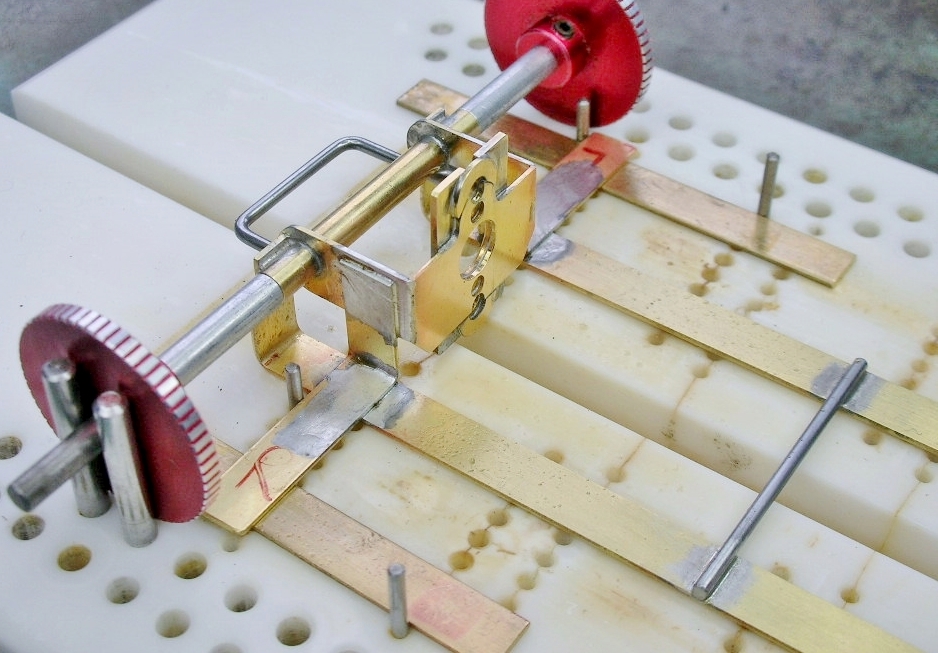
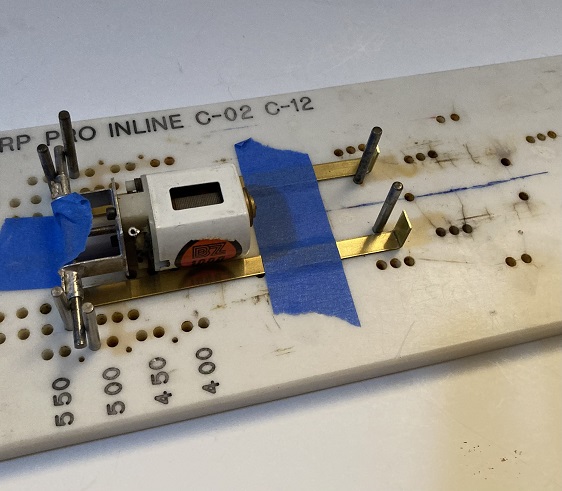
The MESAC proposal drawing shows "optional bracket stiffeners". Here's my jig setup for their installation to attach the motor bracket to the main rails:


veteran chassis (25).JPG


After installation, trimming and Scotch-Brite pad cleanup:


veteran chassis (29).JPG


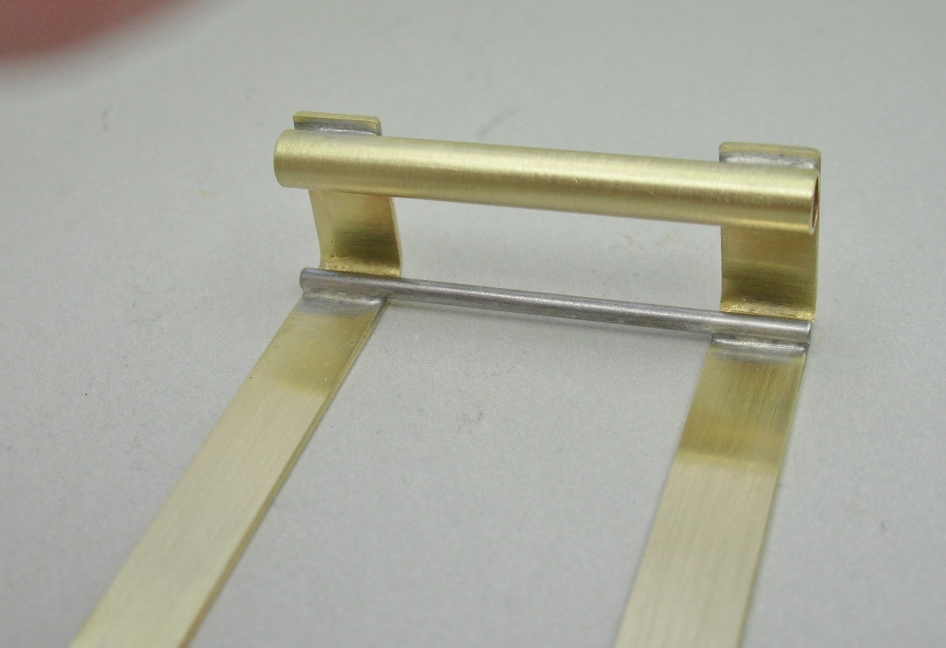
The drop arm hinge tubes also get attached:


veteran chassis (28).JPG


Trimmed and cleaned up:


veteran chassis (30).JPG


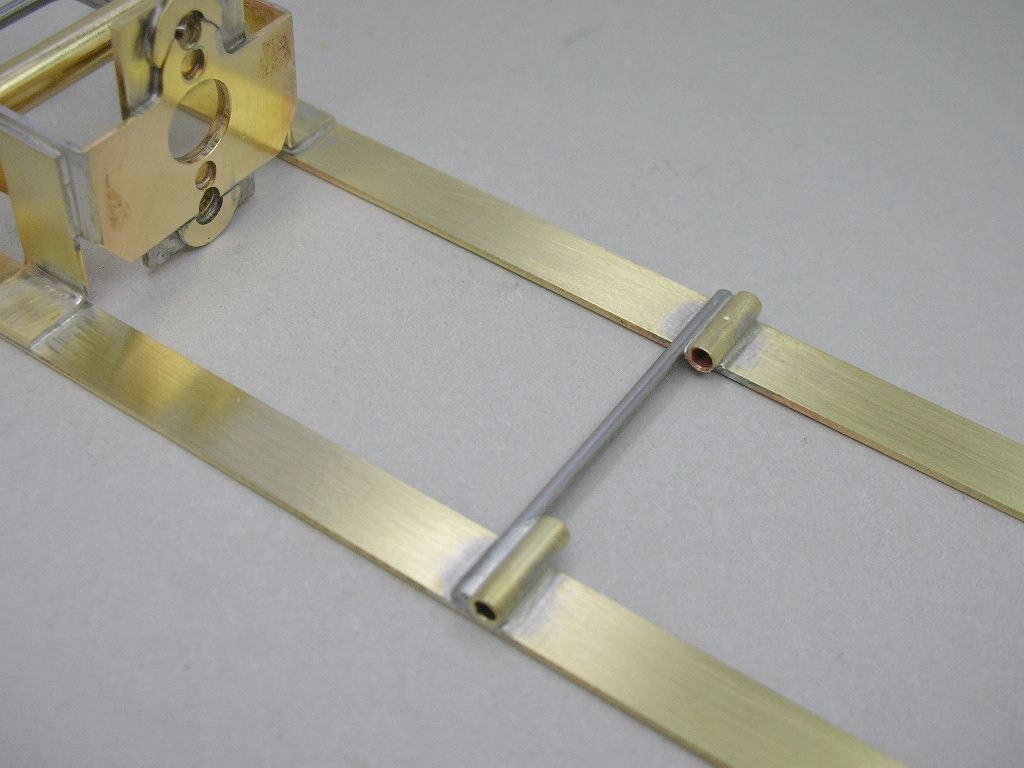
The drawing shows an "optional cross piece" which is U-shaped to connect the main rails to the front axle tube. Since I'll be installing piano wire main rails to the axle tubes, my cross piece is a simple straight job:


veteran chassis (31).JPG


Up next is my first real deviation from the proposal drawing, the addition of a piano wire rail to each 1/4" brass strip main rail. Hopefully that will cure the chassis from going "boing - boing - boing".   :)


  • Steve Okeefe and Tex like this

Rick Thigpen
Check out Steve Okeefe's great web site at its new home here at Slotblog:
The Independent Scratchbuilder
There's much more to come...


#55 Steve Okeefe

Steve Okeefe

    The Independent Scratchbuilder

  • Administrator
  • PipPipPipPipPipPip
  • 1,139 posts
  • Joined: 16-February 06
  • Gender:Male
  • Location:State of Independence

Posted 16 April 2024 - 01:10 PM

No doubt the "optional bracket stiffeners" will go a long way to help strengthen the motor mount. :good:


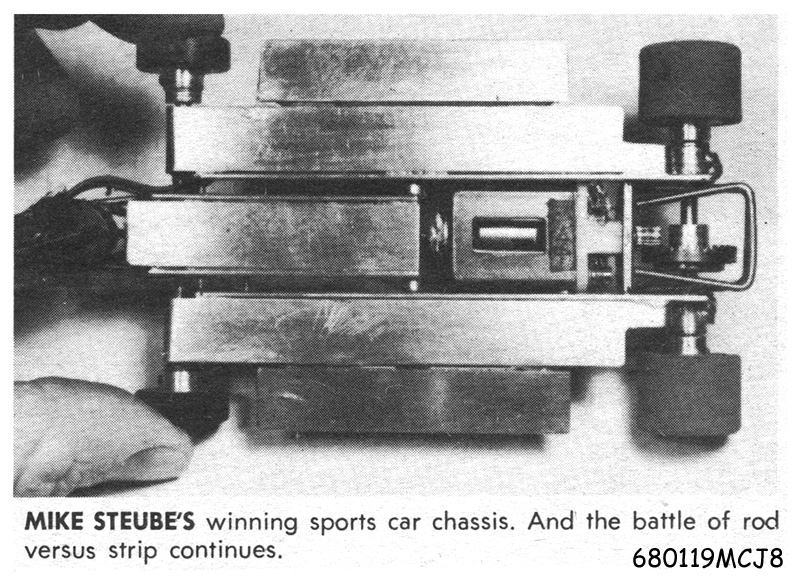
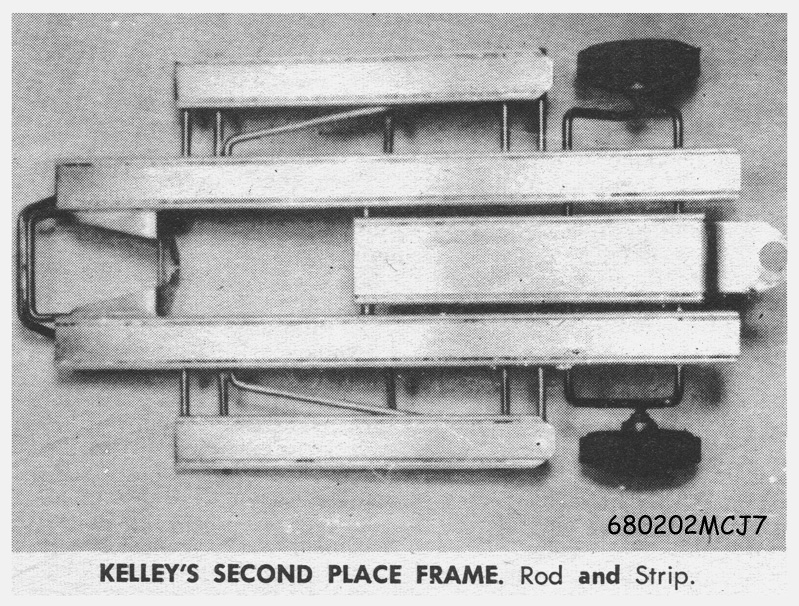
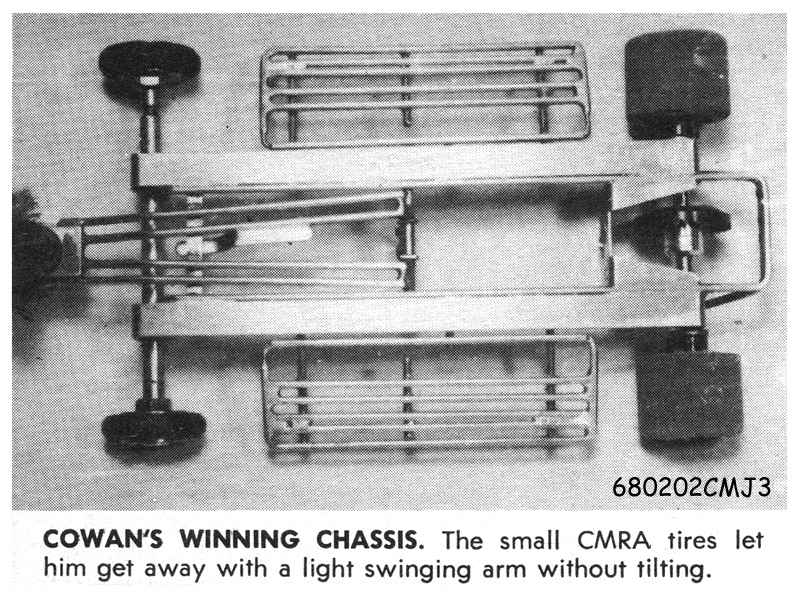
It's the part from there to the drop arm hinge, and to a lesser degree from the drop arm hinge to the front axle.  A piano wire rail on each side should do the trick. much like the late 1967 / early 1968 "rod and strip" chassis:


680106 Local Steube Sports btm.jpg


680120 4th CM G3 Kelley Coupe btm.jpg


680127 3rd CMRA Cowan Coupe btm.jpg


Looking good!  :victory:


  • Pablo and Tex like this

Steve Okeefe


I build what I likes, and I likes what I build


#56 dc-65x

dc-65x

    Grand Champion Poster

  • Subscriber
  • PipPipPipPipPipPipPipPip
  • 6,976 posts
  • Joined: 14-February 06
  • Gender:Male
  • Location:Captain Rick: The only vintage slot car nut in SW Oregon?

Posted 17 April 2024 - 07:37 PM

Thanks Steve.   :)


The piano wire outer main rails have simple 90 degree bends at each end. I leaned the rails over until they touched the rear bracket. That let them clear the wheel's set screw bosses:


veteran chassis (32).JPG


A rough cleanup with a Scotch-Brite pad:


veteran chassis (34).JPG


I added 1/4" squares of .032" brass as spacers for the pan mounting cross bars:


veteran chassis (38).JPG


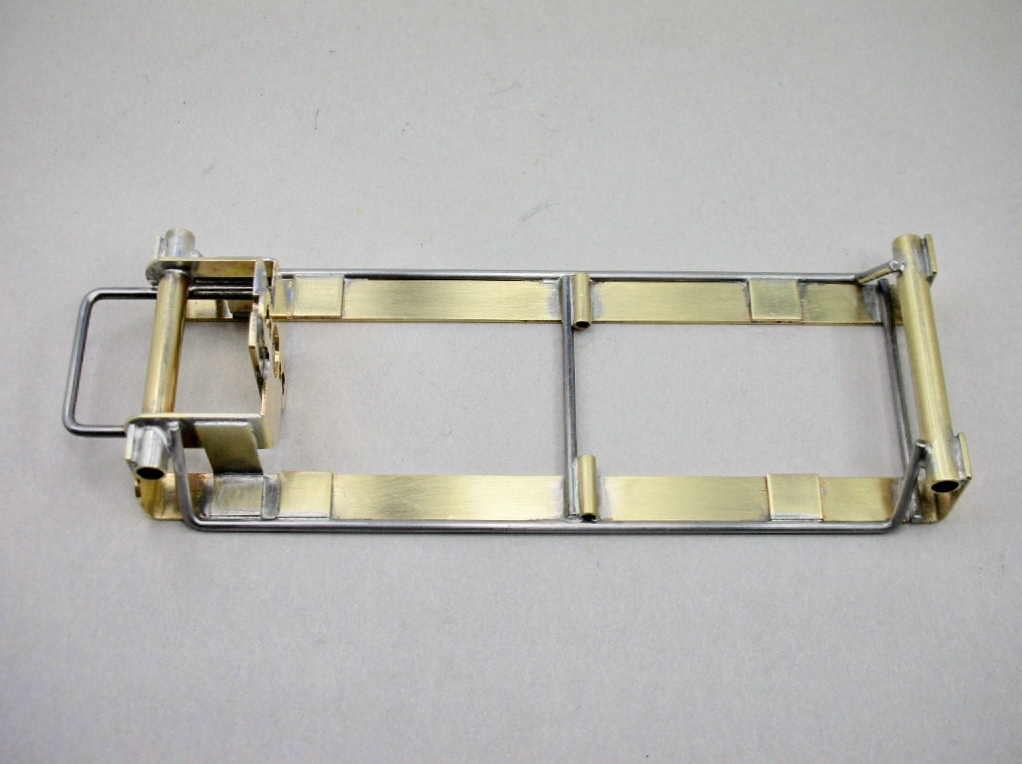
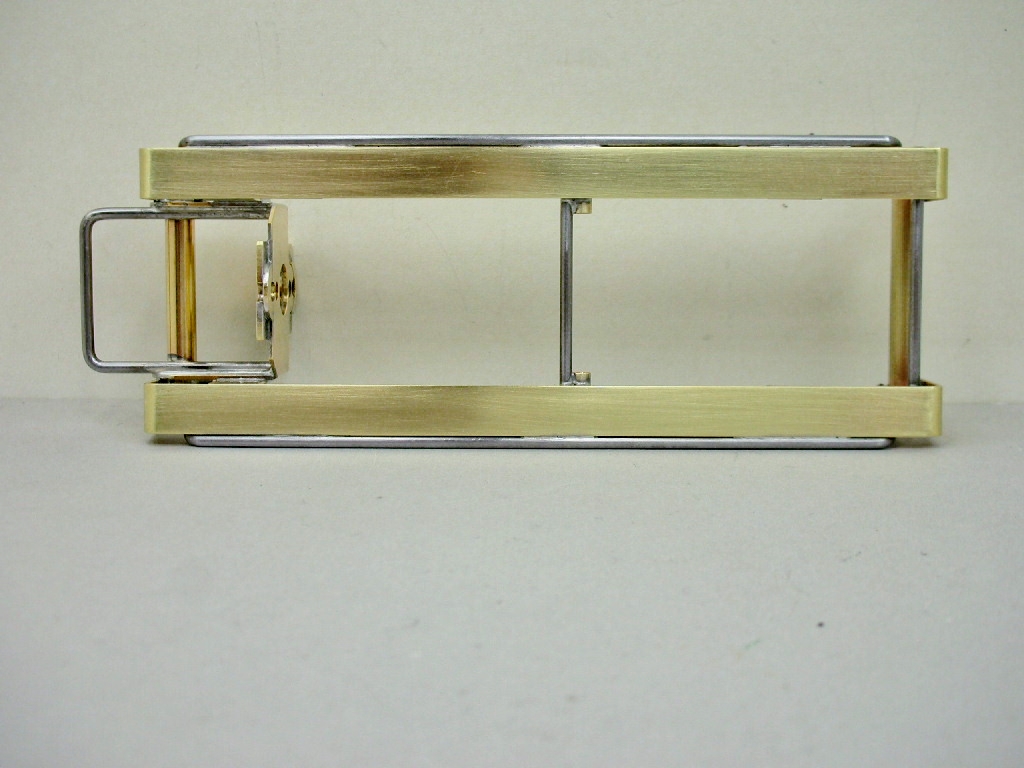
The chassis is now plenty strong. Before adding the wire rails I was afraid of bending the chassis simply handling it:


veteran chassis (36).JPG


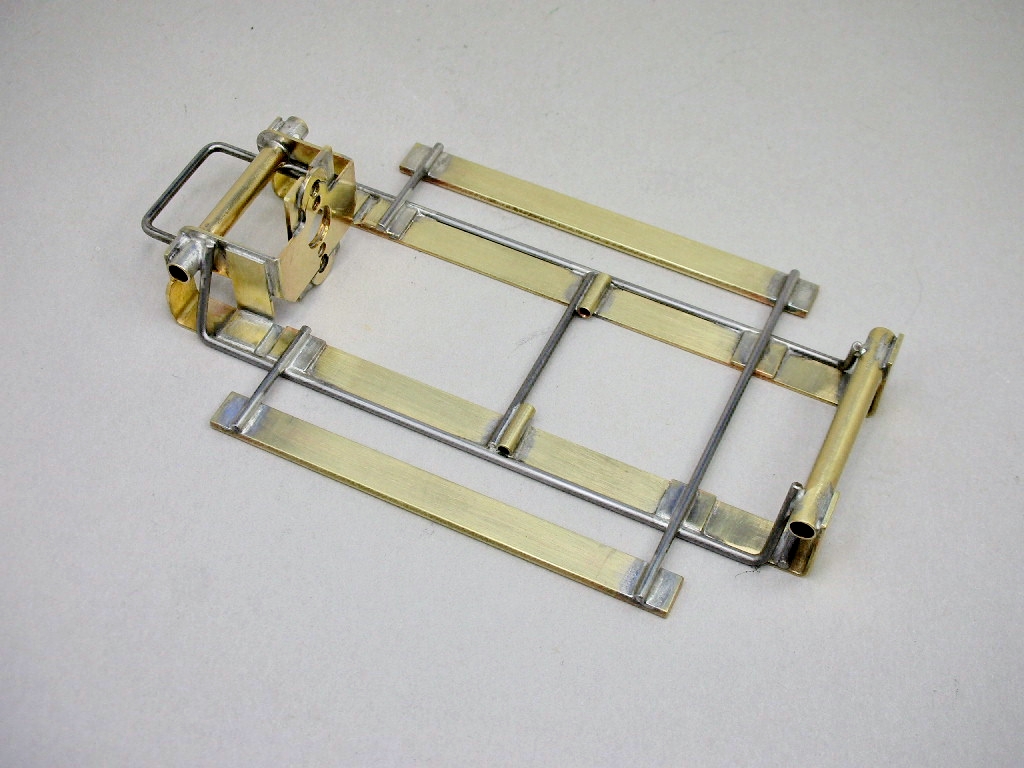
The pans go on next:


veteran chassis (37).JPG


  • Steve Okeefe, Tex, Slot Car Rod and 1 other like this

Rick Thigpen
Check out Steve Okeefe's great web site at its new home here at Slotblog:
The Independent Scratchbuilder
There's much more to come...


#57 dc-65x

dc-65x

    Grand Champion Poster

  • Subscriber
  • PipPipPipPipPipPipPipPip
  • 6,976 posts
  • Joined: 14-February 06
  • Gender:Male
  • Location:Captain Rick: The only vintage slot car nut in SW Oregon?

Posted 18 April 2024 - 07:54 PM

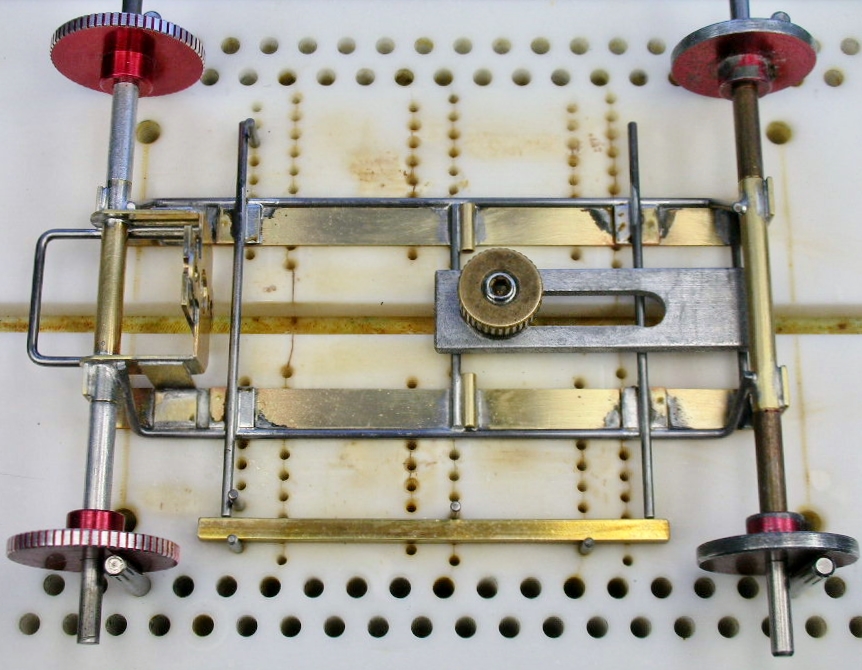
Installing the pan cross bars:


veteran chassis (39).JPG


Pans installed and a rough cleanup with a Scotch-Brite pad:


veteran chassis (40).JPG


Starting to look like Veteran class chassis:


veteran chassis (41).JPG


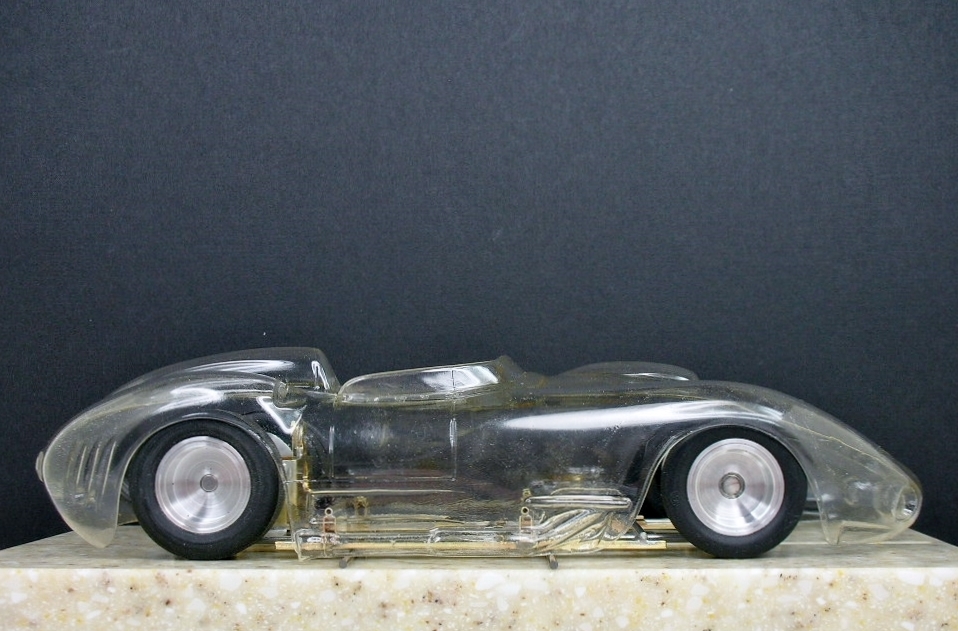
Next I have to come up with a body mount for a 2 1/2" wide chassis that works with a 2 3/4" wide body and attaches above the bodies "bazooka's" (side pipes).


  • Steve Okeefe and Tex like this

Rick Thigpen
Check out Steve Okeefe's great web site at its new home here at Slotblog:
The Independent Scratchbuilder
There's much more to come...


#58 dc-65x

dc-65x

    Grand Champion Poster

  • Subscriber
  • PipPipPipPipPipPipPipPip
  • 6,976 posts
  • Joined: 14-February 06
  • Gender:Male
  • Location:Captain Rick: The only vintage slot car nut in SW Oregon?

Posted 20 April 2024 - 07:45 PM

I needed to raise up the pin tube body mounts above the bodies molded in side pipes. I decided to use 3/32" X 3/16" rectangular tube.


The Rick's jig is amazing. Below is the setup that holds the little rectangular tubes in place at a 2 3/4" width and aligns them fore and aft.


Here's jig with the setup........


veteran chassis (43).JPG


.........and with the chassis and the rectangular tubes held and aligned in place:


veteran chassis (44).JPG


The setup worked great. Here's the chassis with body mounts in place after a rough cleanup:


veteran chassis (47).JPG


veteran chassis (48).JPG


veteran chassis (49).JPG


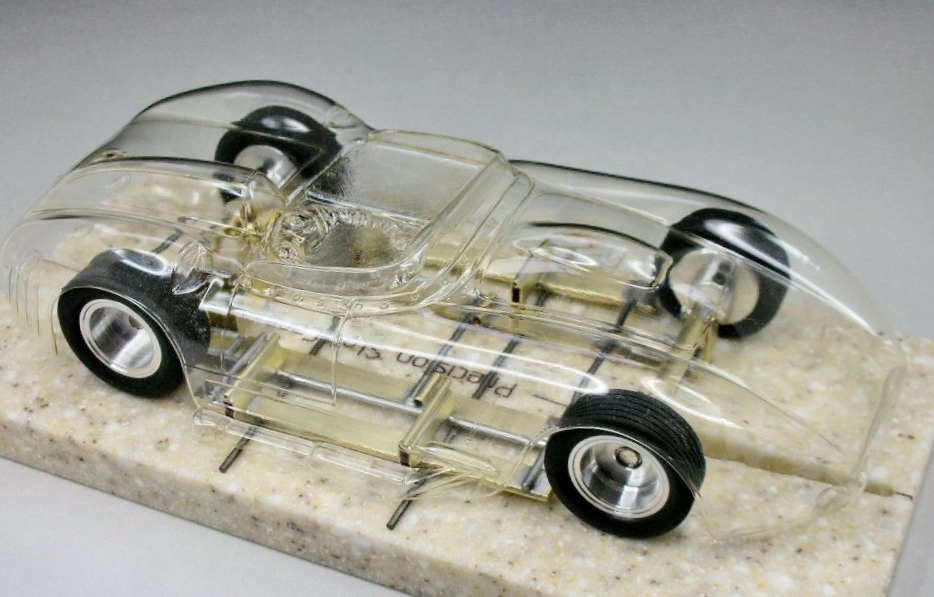
Body set on the chassis:


veteran chassis (45).JPG


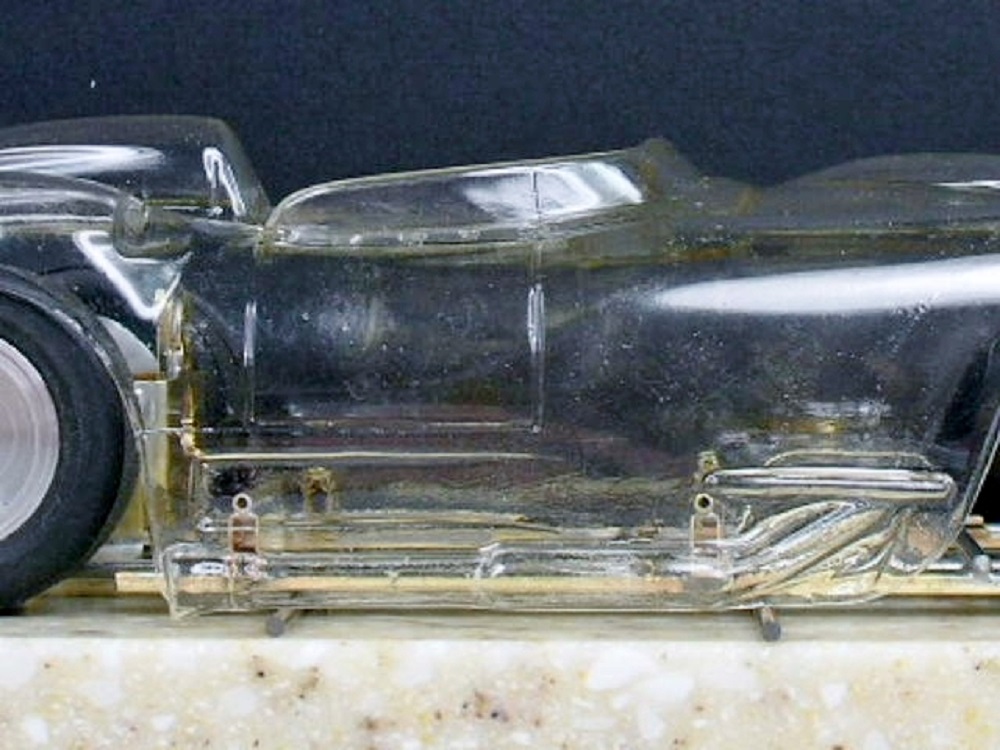
The rear pin tube has to fit in a  rectangular depression and above the side pipes:


veteran chassis (51).JPG


I think the stance is looking pretty good:


veteran chassis (50).JPG


The last thing to tackle on the chassis is the drop arm.


  • Steve Okeefe, Pablo and Tex like this

Rick Thigpen
Check out Steve Okeefe's great web site at its new home here at Slotblog:
The Independent Scratchbuilder
There's much more to come...


#59 dc-65x

dc-65x

    Grand Champion Poster

  • Subscriber
  • PipPipPipPipPipPipPipPip
  • 6,976 posts
  • Joined: 14-February 06
  • Gender:Male
  • Location:Captain Rick: The only vintage slot car nut in SW Oregon?

Posted 24 April 2024 - 07:47 PM

In my effort to beef up my especially flexy chassis it ended up a bit stiffer than I'd hoped. In my perfect 20/20 hindsight I wish I'd used 1/16" brass rod in place of piano wire for everything but the motor mount U-brace.   :unknw:


In an effort gain a bit more flex I cut the front pan cross piece:


veteran chassis (52).JPG


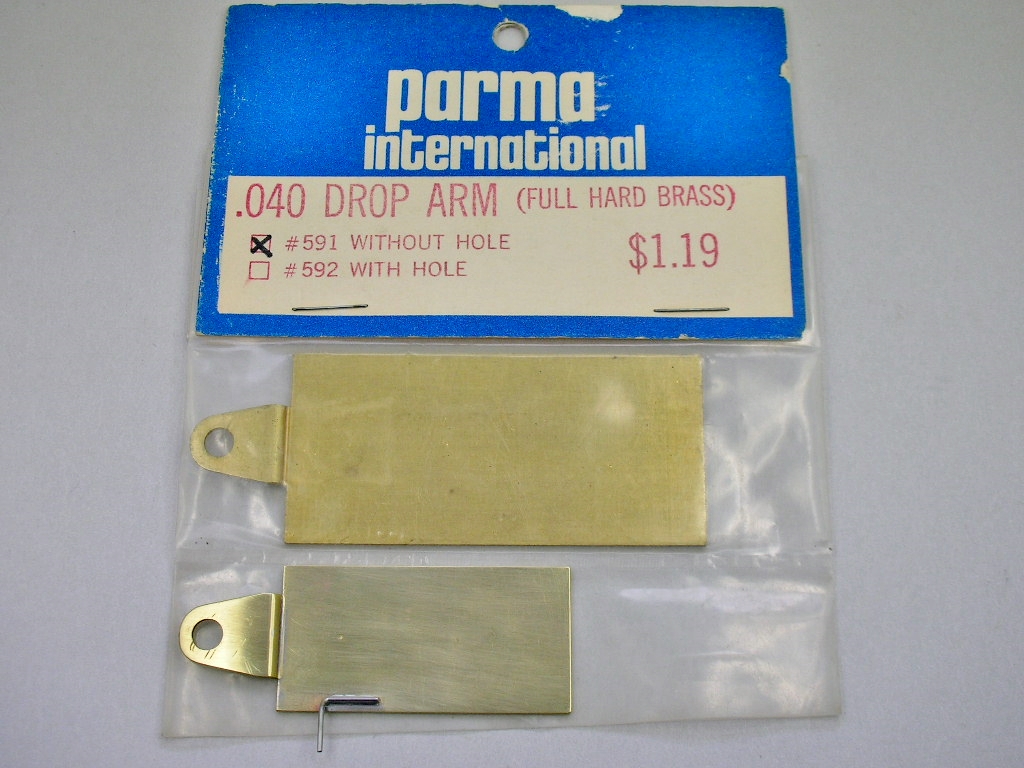
The final piece for this chassis is the drop arm. I cut up a very used Parma style arm. The packaged arm is shown for reference:


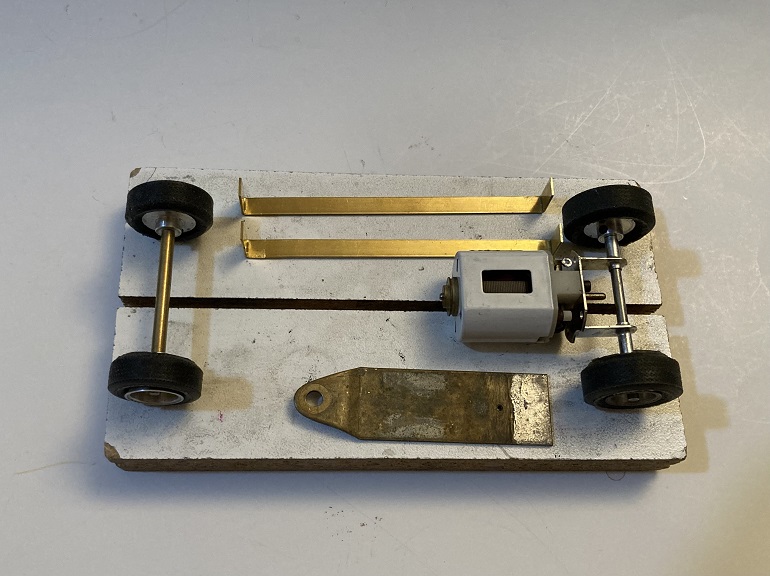
veteran chassis (53).JPG


With the drop arm installed and a bit of polishing the chassis is finally finished:


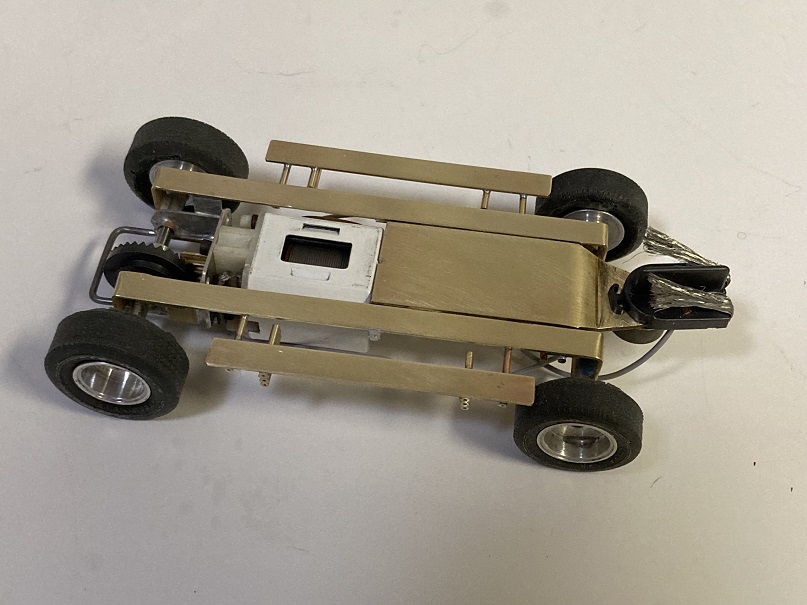
veteran chassis (57).JPG


veteran chassis (58).JPG


veteran chassis (54).JPG


  • Steve Okeefe, don.siegel, Tex and 3 others like this

Rick Thigpen
Check out Steve Okeefe's great web site at its new home here at Slotblog:
The Independent Scratchbuilder
There's much more to come...


#60 breese

breese

    Rookie Keyboard Racer

  • Subscriber
  • Pip
  • 46 posts
  • Joined: 24-March 24
  • Gender:Male
  • Location:Arlington Heights, IL

Posted 25 April 2024 - 06:58 AM

Wow!

A true craftsman at work....


Started racing slot cars back at the old Grand Avenue Raceway on Grand Ave. in Chicago, Illinois.
Started with Group 12, moved up to Group 27 and Open.
Still have my two cars and over a dozen arms.
Just recently discovered a track local to me and am looking forward to meeting up with the old timers and new people in the hobby.

Bob (B.J.) Reese


#61 Slot Car Rod

Slot Car Rod

    Race Leader

  • Subscriber
  • PipPipPipPipPip
  • 759 posts
  • Joined: 15-March 10
  • Gender:Male
  • Location:Oakland Speedway NorCal

Posted 25 April 2024 - 11:35 AM

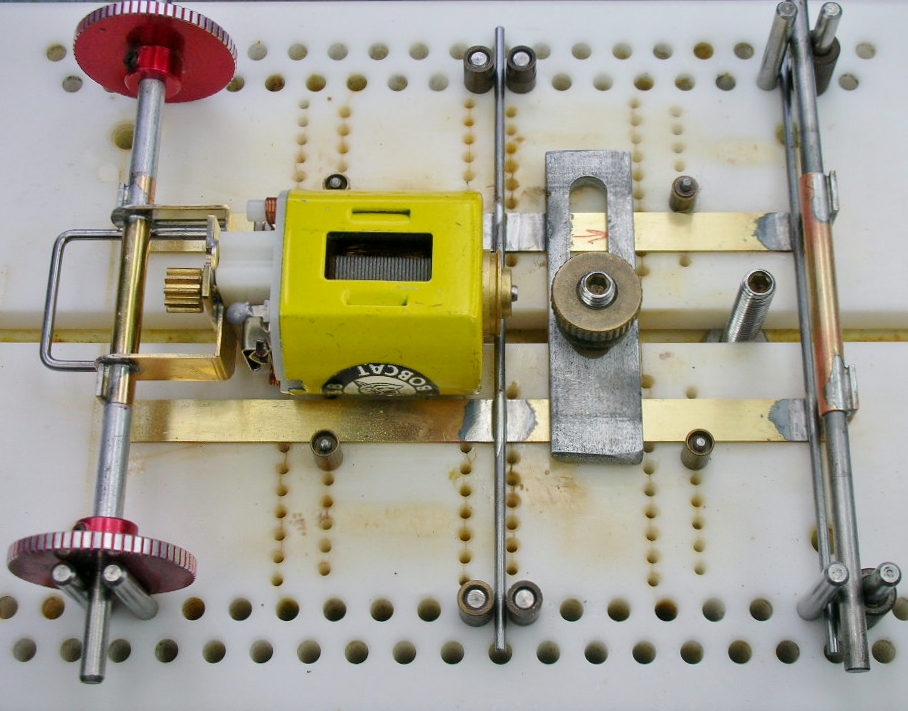
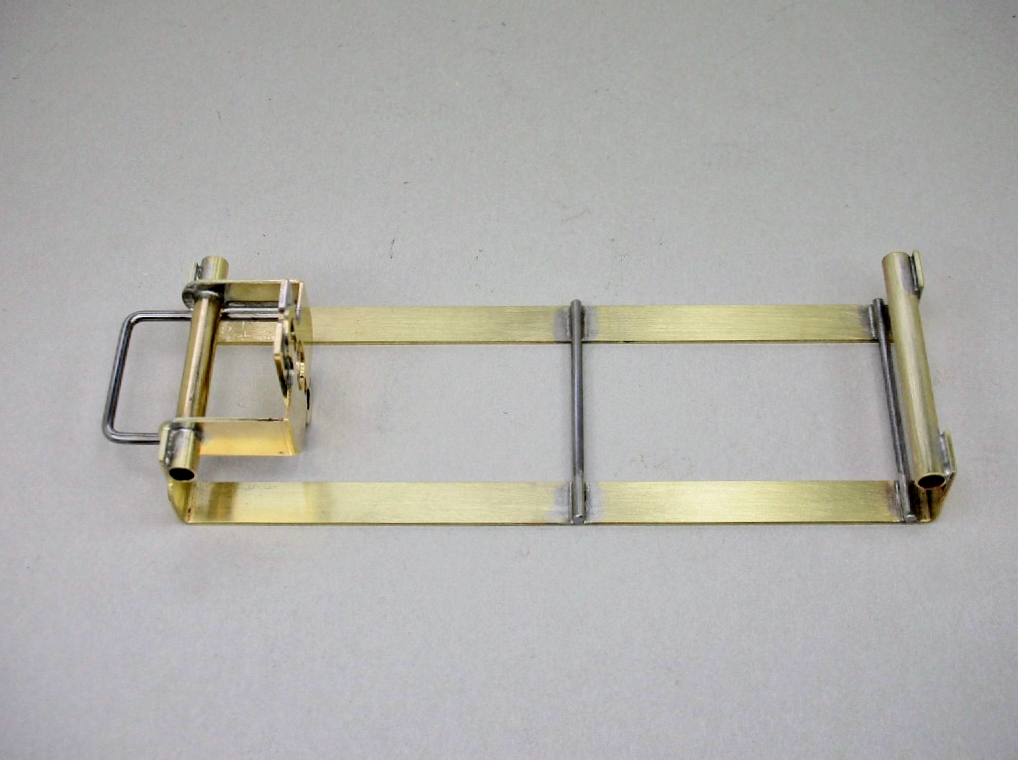
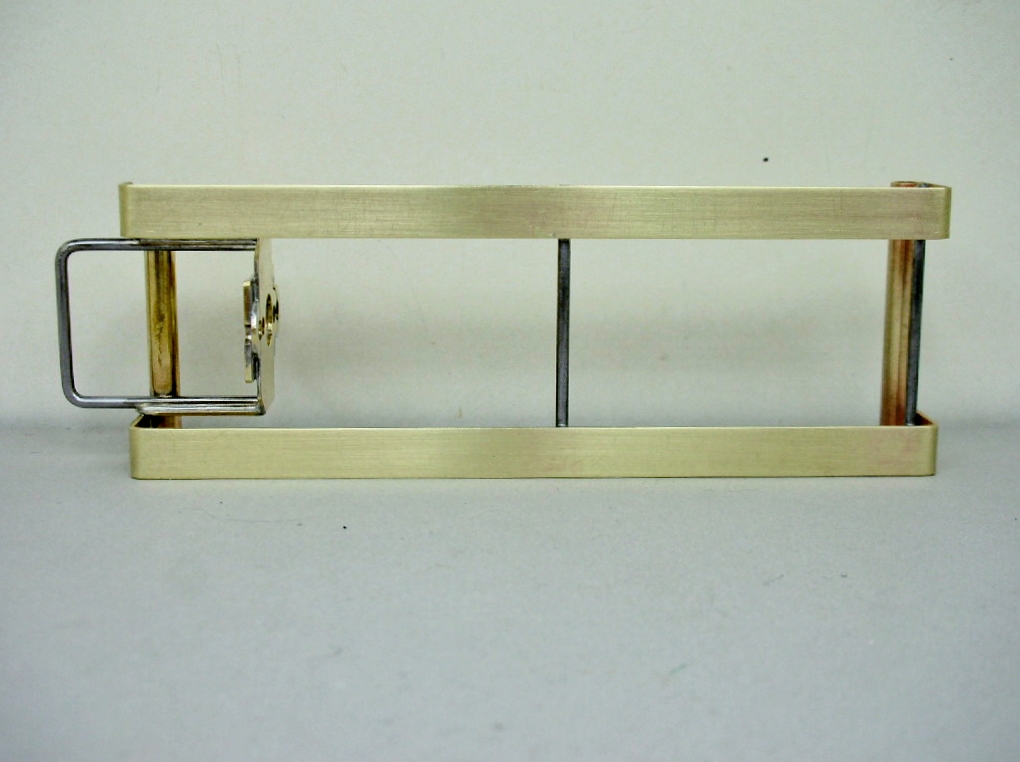
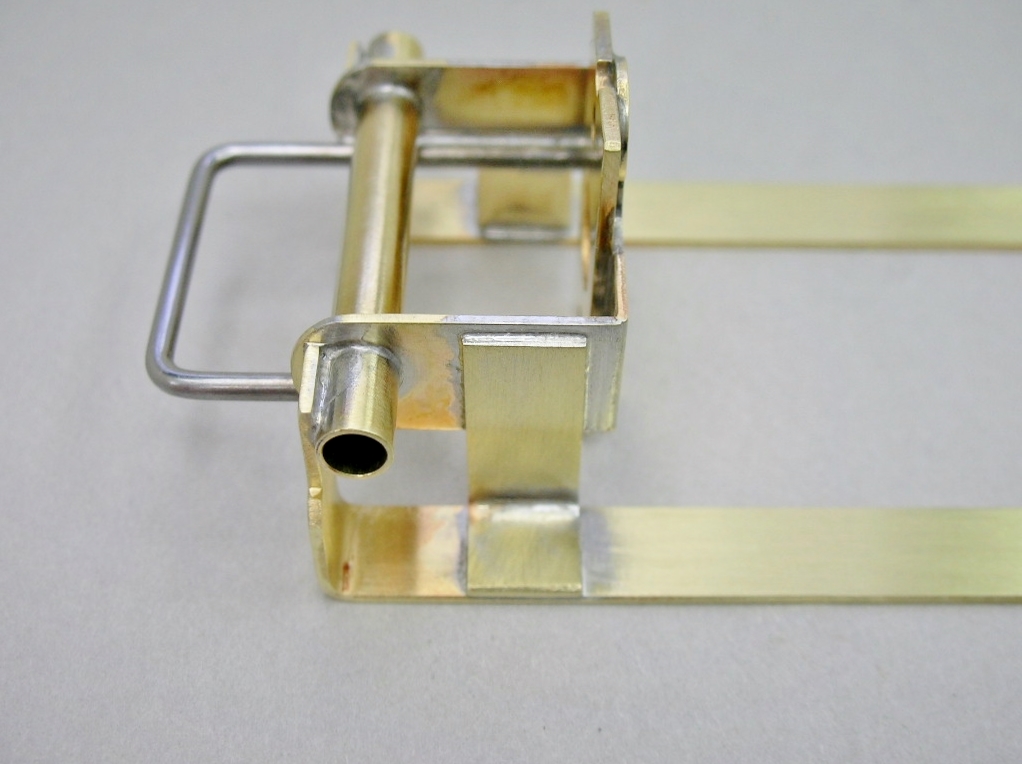
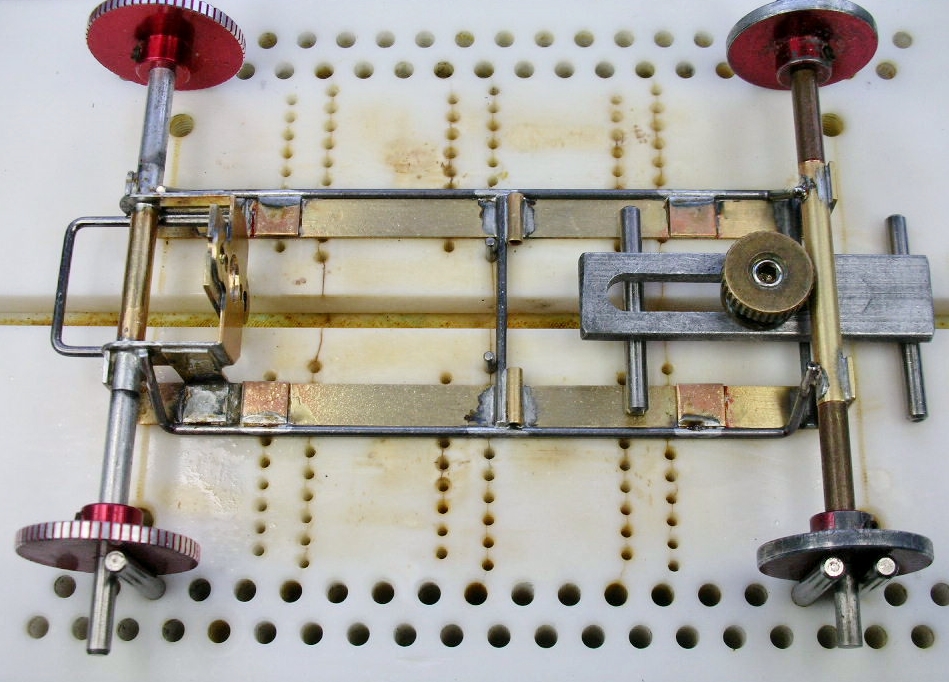
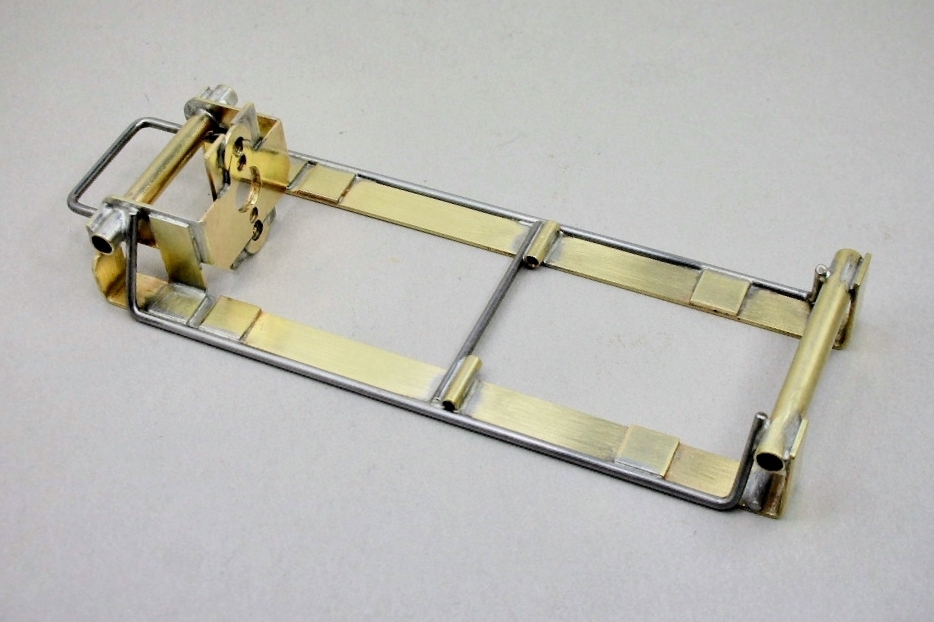
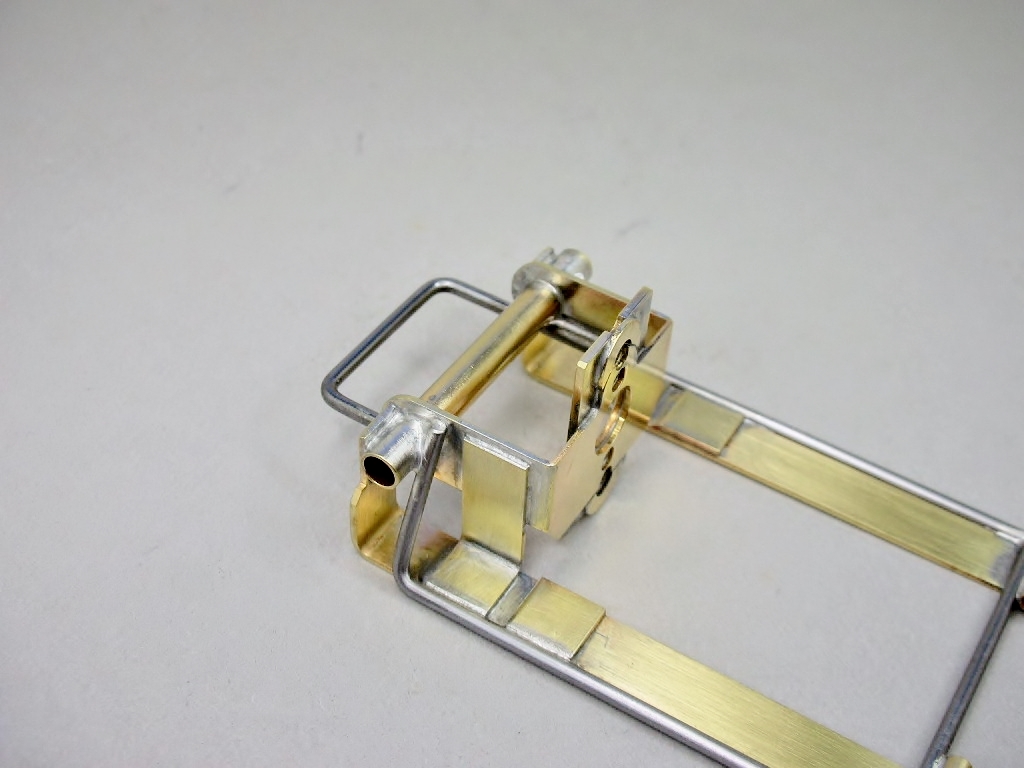
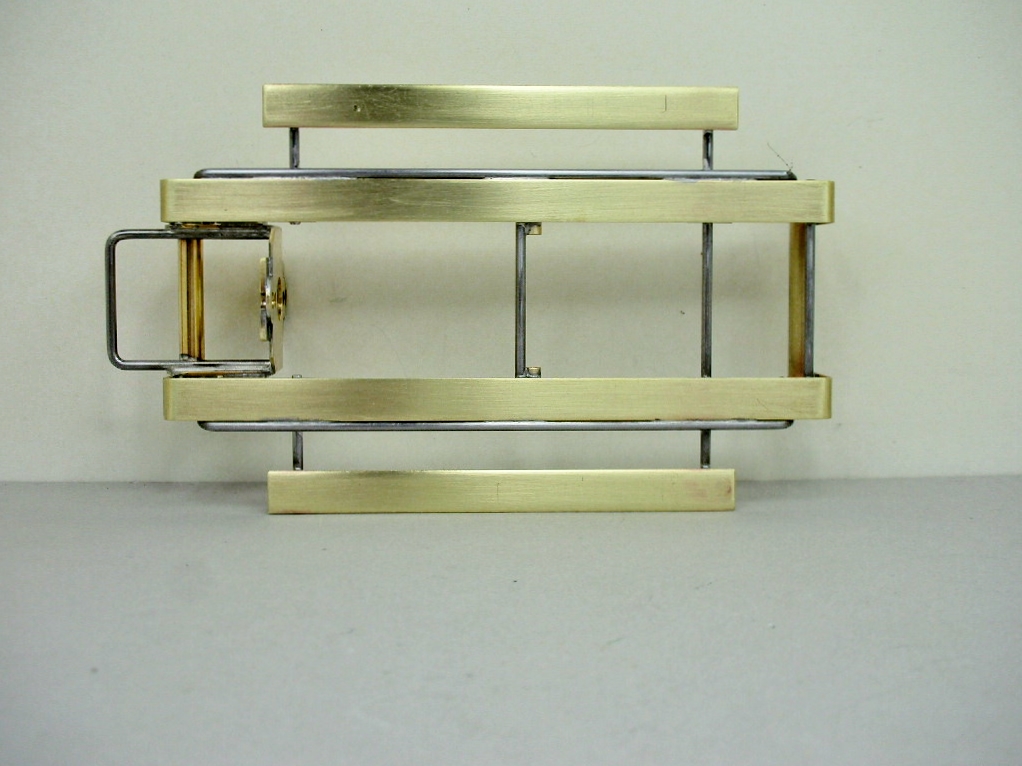
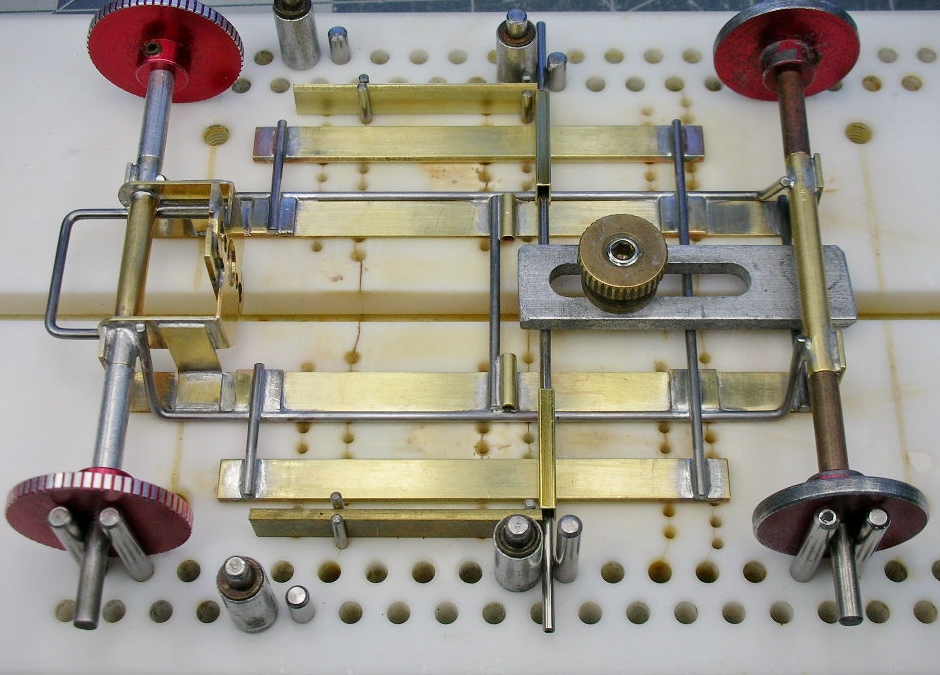
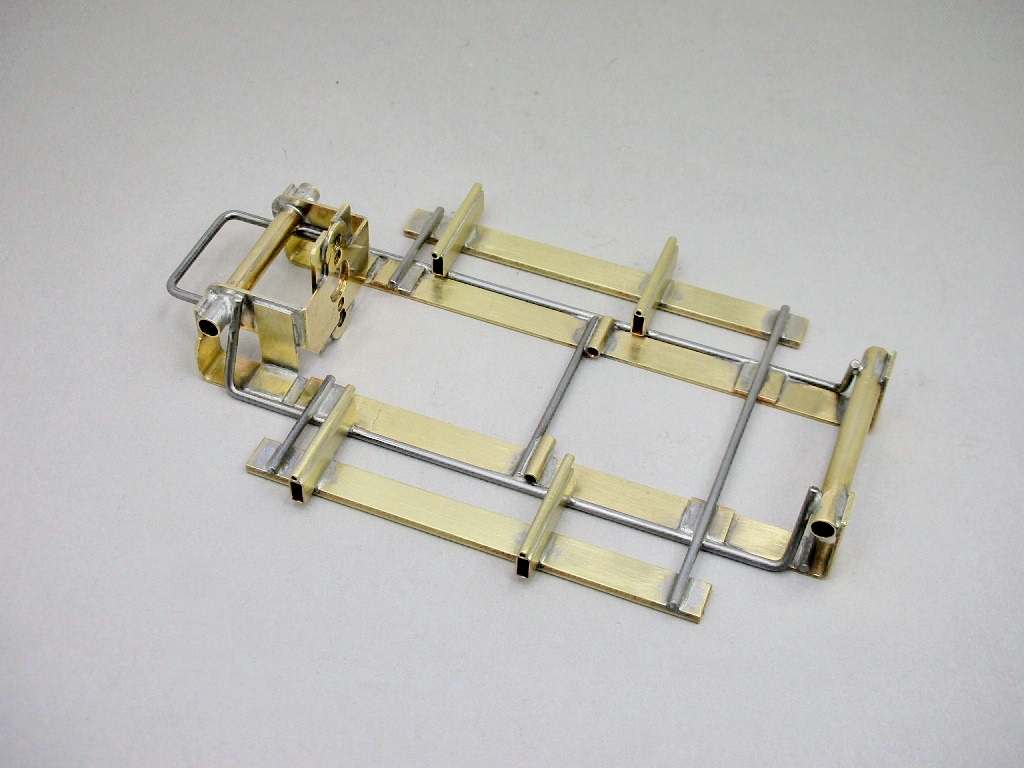
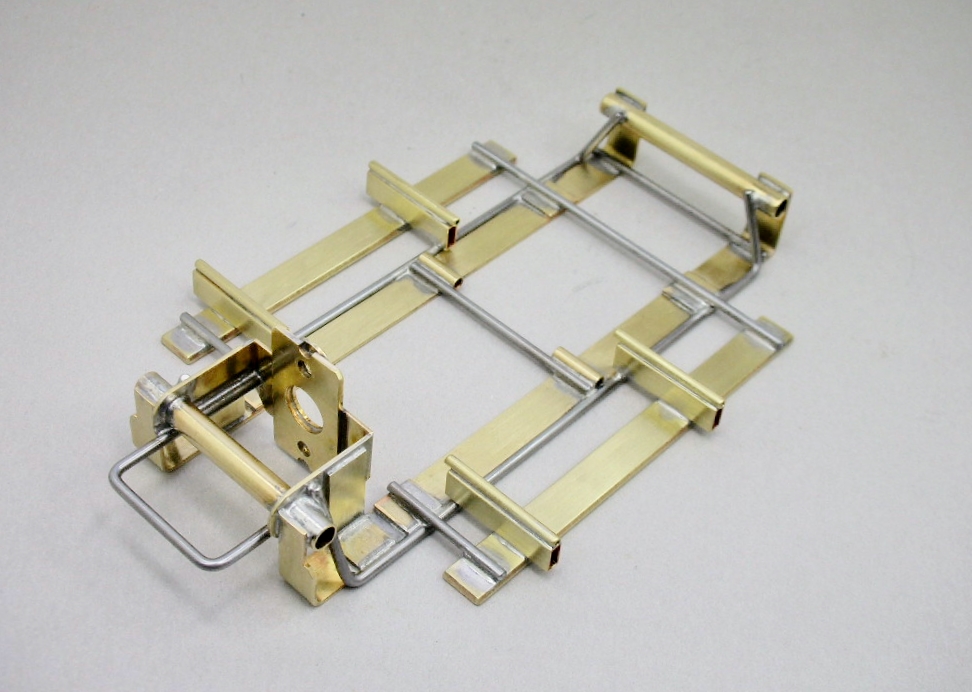
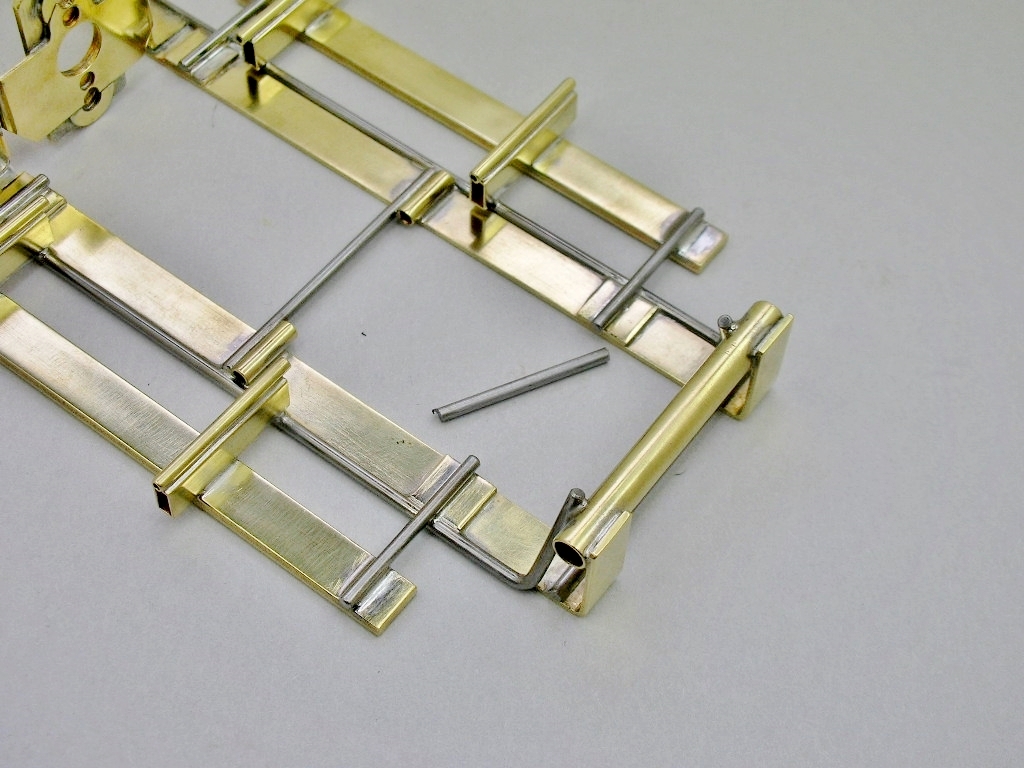
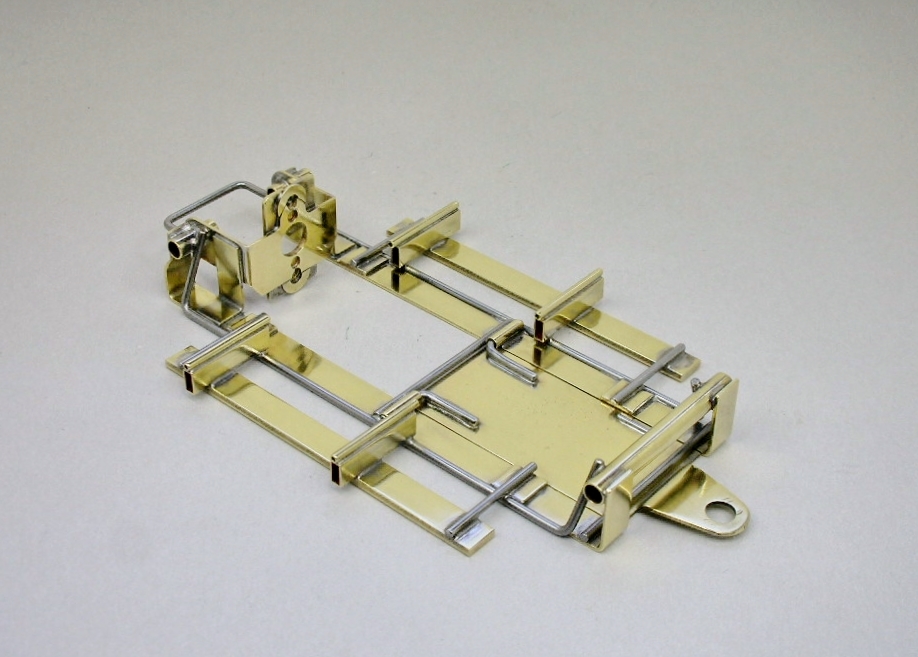
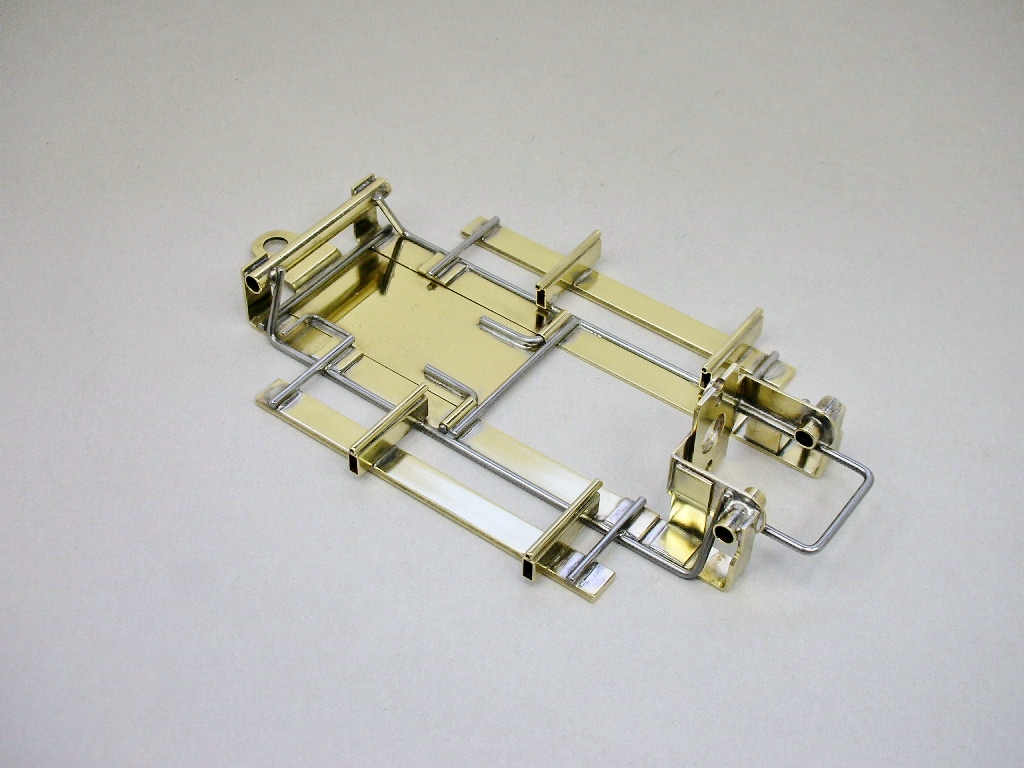
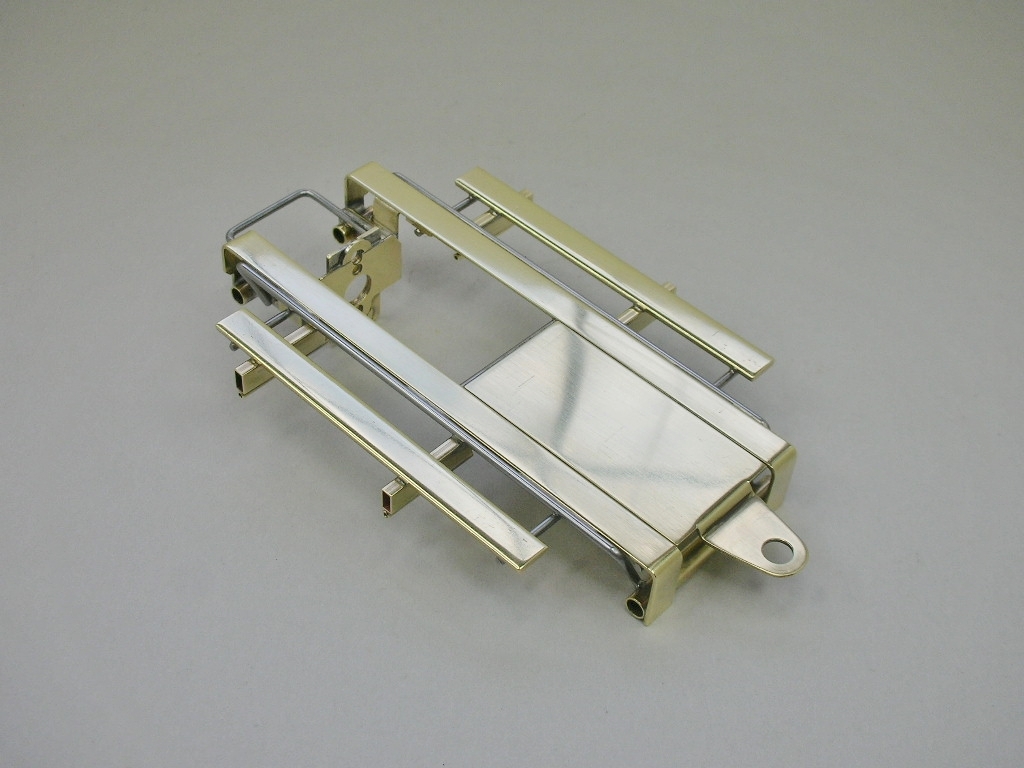
Here is the Veteran Class chassis I just completed.  It is built like the one in the class proposal drawing.  Rick and I were curious about how a spec. one would run compared to the modified ones.  The brass strip main rails measure .034" thick.


vet 1.jpg


vet 2.jpg


vet 3.jpg


vet 4.jpg


  • dc-65x, Steve Okeefe and don.siegel like this
Rodney Chew

#62 dc-65x

dc-65x

    Grand Champion Poster

  • Subscriber
  • PipPipPipPipPipPipPipPip
  • 6,976 posts
  • Joined: 14-February 06
  • Gender:Male
  • Location:Captain Rick: The only vintage slot car nut in SW Oregon?

Posted 25 April 2024 - 12:34 PM

Looks great Rodney.    :good:


That's a second new Veteran class build.   :dance3:


Rick Thigpen
Check out Steve Okeefe's great web site at its new home here at Slotblog:
The Independent Scratchbuilder
There's much more to come...


#63 dc-65x

dc-65x

    Grand Champion Poster

  • Subscriber
  • PipPipPipPipPipPipPipPip
  • 6,976 posts
  • Joined: 14-February 06
  • Gender:Male
  • Location:Captain Rick: The only vintage slot car nut in SW Oregon?

Posted 25 April 2024 - 08:09 PM

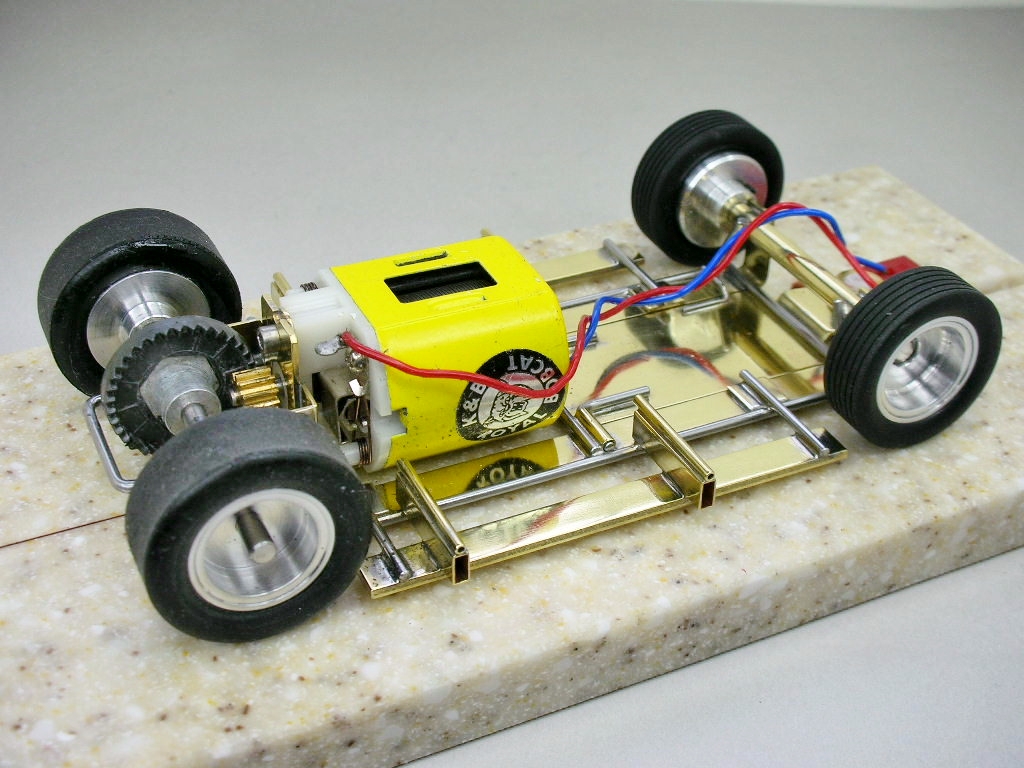
With the chassis finished, the wheels and tires all trued and ready to go I decided to just throw the thing together and get it on my track for a shake down. I'll shorten the long axles and clean things up later.


Since the endbell was already cracked at the bearing I decided to tap the mounting holes so nothing else cracked. With the brushes removed any plastic chips can be blown out of the motor:
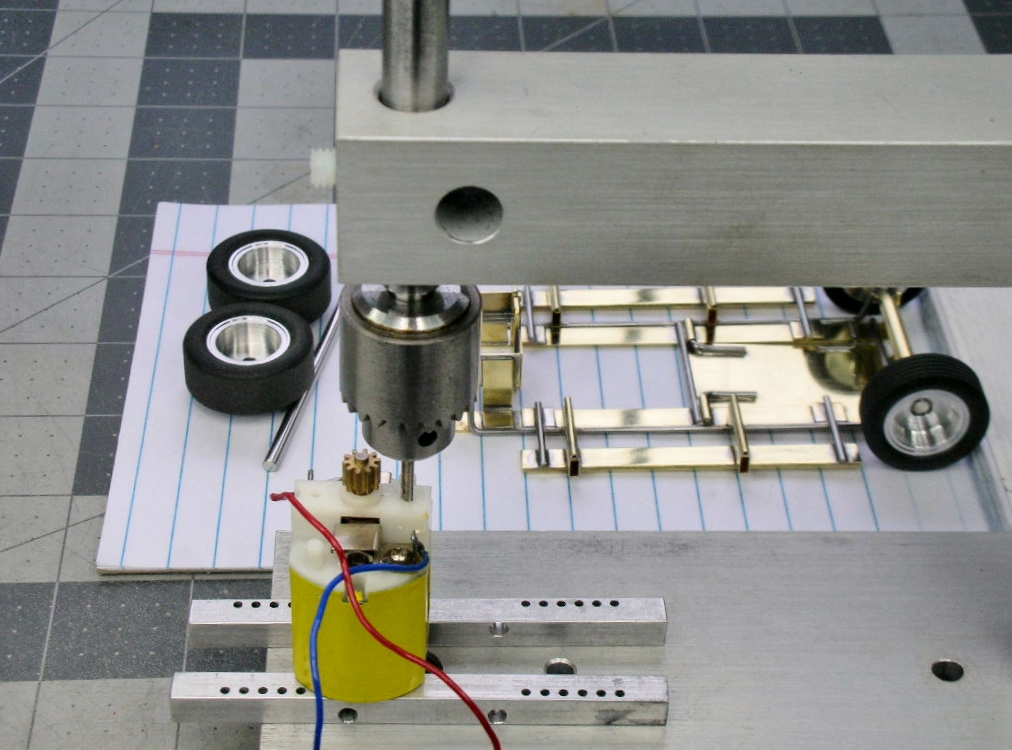
 

veteran roller (7).JPG


Since this is a 1971 build I used a JET flag and attached it with a nut:
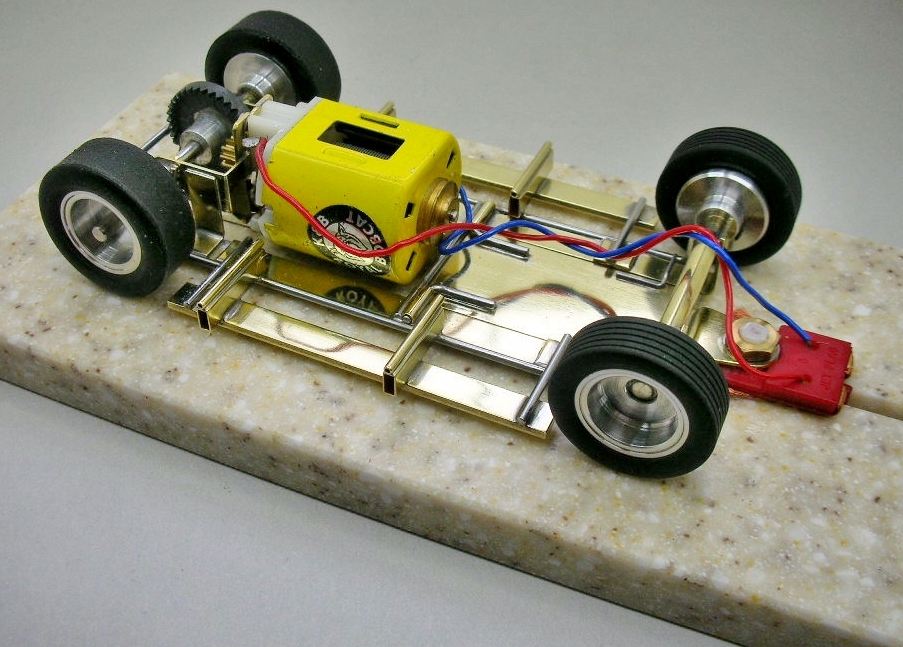
 

veteran roller (4).JPG


The crown gear is a 35T Weldun:


veteran roller (1).JPG


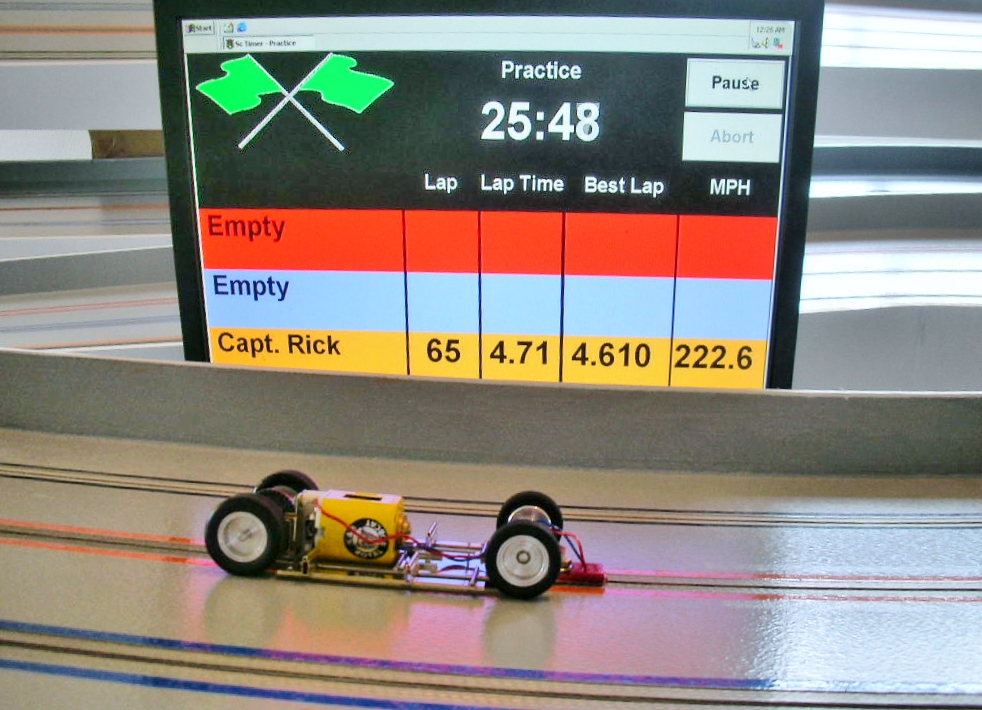
After running this car I was reminded why the 36D Mabuchi's pretty much replaced the Pittman's, Kemtron's, etc. with the average racers at the commercial raceways. It's pretty fast, has good brakes, runs cool and it's cheap.


It also set the fastest lap time for my urethane tire equipped cars:
 

veteran roller (6).JPG


My other cars and their lap time are in the link below;


Track test lap times


There is a caveat to my lap times with the Veteran car. I didn't have a set routine for prepping the track surface for  testing the previous cars. I used a method for the Veteran car that worked great for urethane tires and avoids spray gluing the entire track.


I clean the track with a Swiffer dry floor duster to pickup most of the dust and wiped my lane down with lighter fluid and a rag.


There is still enough dust on the track to really hurt performance. I can run just a single lap, the car gets squirrely and the tires are covered with dust again. I can clean the tires and repeat a thousand times, the tires still pickup dust and traction goes away after one lap.


BUT, if I put a little dot of glue on the tires, rub it in and run a lap the tires really pickup that dust. Cleaning the tires with lighter fluid and repeating the process a couple more times and the dust is gone.


Then I set the car at the start a turn with the dots of glued rubbed into the tires and drive a few laps. After repeating this for each turn the track is fine to run lap after lap without being squirrely. I really can't even see the glue on the track.    :dance3:


  • Steve Okeefe, Pablo, Tex and 1 other like this

Rick Thigpen
Check out Steve Okeefe's great web site at its new home here at Slotblog:
The Independent Scratchbuilder
There's much more to come...


#64 Steve Okeefe

Steve Okeefe

    The Independent Scratchbuilder

  • Administrator
  • PipPipPipPipPipPip
  • 1,139 posts
  • Joined: 16-February 06
  • Gender:Male
  • Location:State of Independence

Posted 26 April 2024 - 03:14 PM

How much does the car weigh? :D


Steve Okeefe


I build what I likes, and I likes what I build


#65 dc-65x

dc-65x

    Grand Champion Poster

  • Subscriber
  • PipPipPipPipPipPipPipPip
  • 6,976 posts
  • Joined: 14-February 06
  • Gender:Male
  • Location:Captain Rick: The only vintage slot car nut in SW Oregon?

Posted 26 April 2024 - 07:45 PM

Hi Steve,


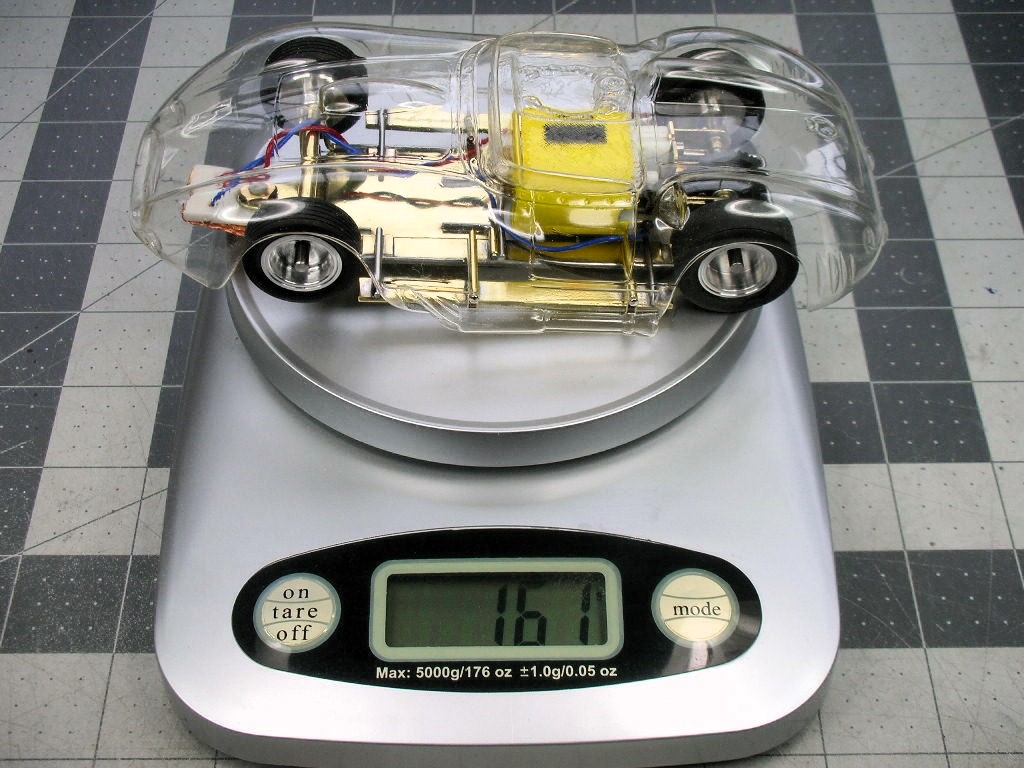
The car as pictured weighs 161 grams.........or as we used to say in olden times, 5.7 ounces:


FSCN4490.JPG


The car has no bad habits. It doesn't tilt or understeer out of the slot. I'm sure it's not the fastest Veteran class car there is but it is very fun to drive.......I like it!    :)

  • Steve Okeefe, Pablo, Tex and 3 others like this

Rick Thigpen
Check out Steve Okeefe's great web site at its new home here at Slotblog:
The Independent Scratchbuilder
There's much more to come...


#66 Steve Okeefe

Steve Okeefe

    The Independent Scratchbuilder

  • Administrator
  • PipPipPipPipPipPip
  • 1,139 posts
  • Joined: 16-February 06
  • Gender:Male
  • Location:State of Independence

Posted 27 April 2024 - 03:45 PM

That's a big boy, but not all that surprising given that the 36D motor weighs 51g (1.8 oz.) al by itself.


Perhaps in this case the chassis being so stiff in addition to being heavy actually helps the handling.


You wrote: "The car has no bad habits."  You may be on to something here. :good:


Steve Okeefe


I build what I likes, and I likes what I build


#67 dc-65x

dc-65x

    Grand Champion Poster

  • Subscriber
  • PipPipPipPipPipPipPipPip
  • 6,976 posts
  • Joined: 14-February 06
  • Gender:Male
  • Location:Captain Rick: The only vintage slot car nut in SW Oregon?

Posted 29 April 2024 - 07:33 PM

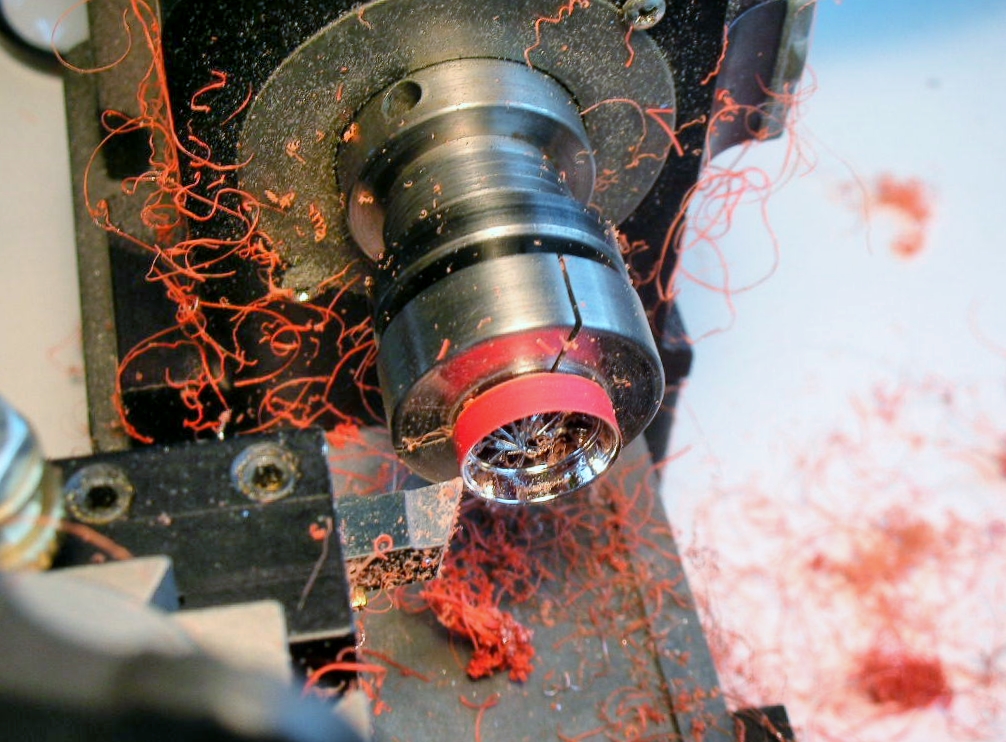
I'm happy with the way the car runs Steve so it's time to finish up the way it looks. I fired up the hobby lathe and attacked the wire wheels from the reissue Monogram Ferrari 275P model kit:


veteran wheels (2).JPG


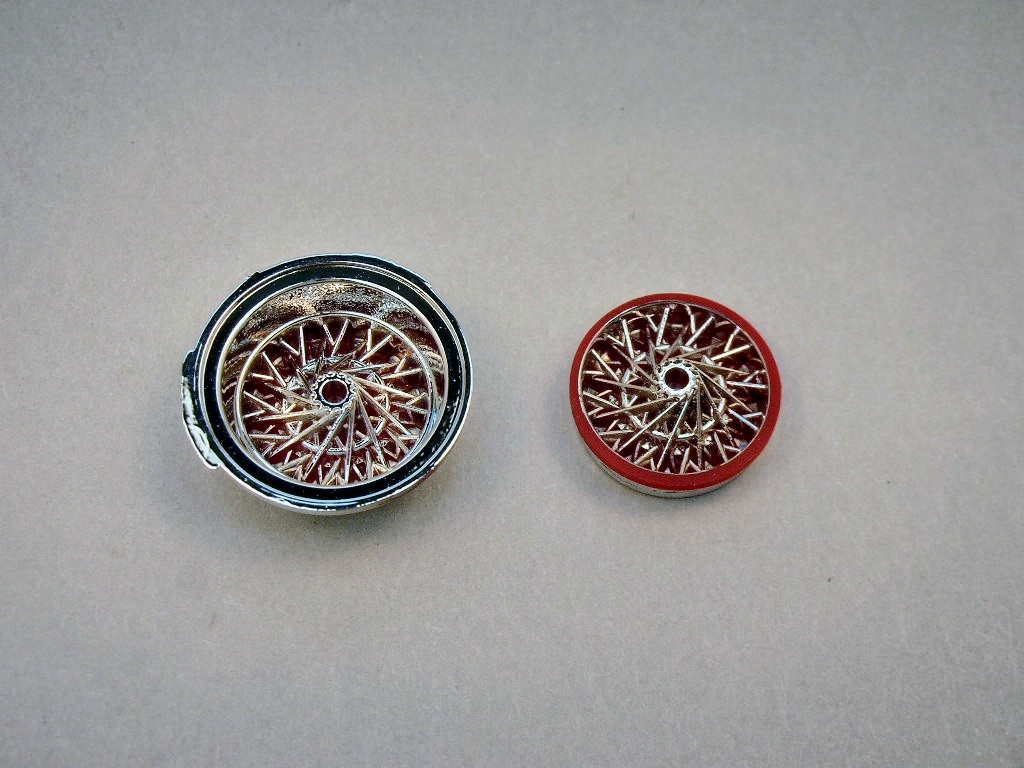
The chrome on my particular example was very thin with lots of red plastic still exposed:


veteran wheels (1).JPG


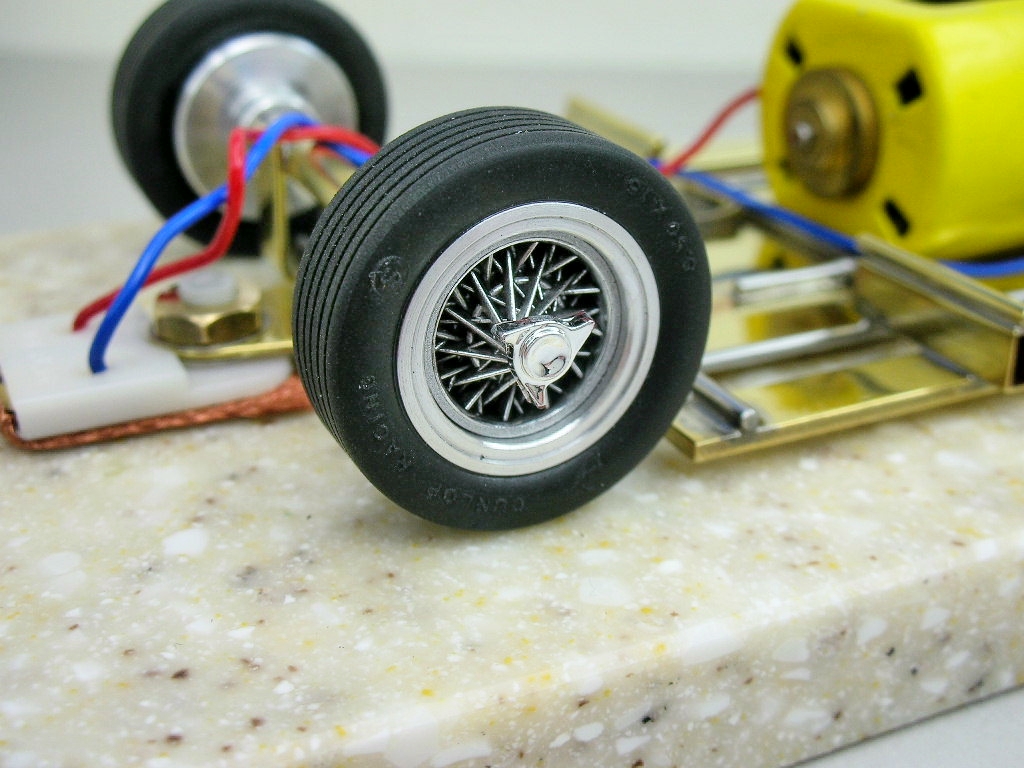
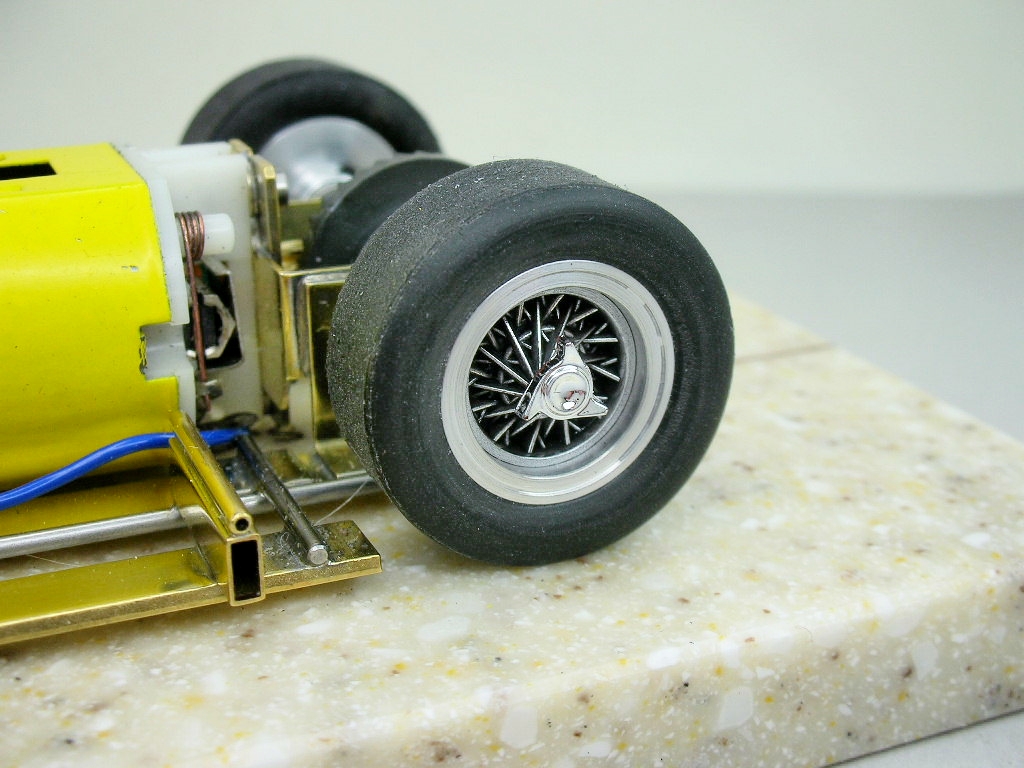
I used a black wash to cover the red plastic and fill in-between the spokes:


veteran wheels (17).JPG


veteran wheels (16).JPG


Time to paint that Maserati body.


  • don.siegel, Jencar17, Tex and 5 others like this

Rick Thigpen
Check out Steve Okeefe's great web site at its new home here at Slotblog:
The Independent Scratchbuilder
There's much more to come...


#68 Slot Car Rod

Slot Car Rod

    Race Leader

  • Subscriber
  • PipPipPipPipPip
  • 759 posts
  • Joined: 15-March 10
  • Gender:Male
  • Location:Oakland Speedway NorCal

Posted 01 May 2024 - 05:47 PM

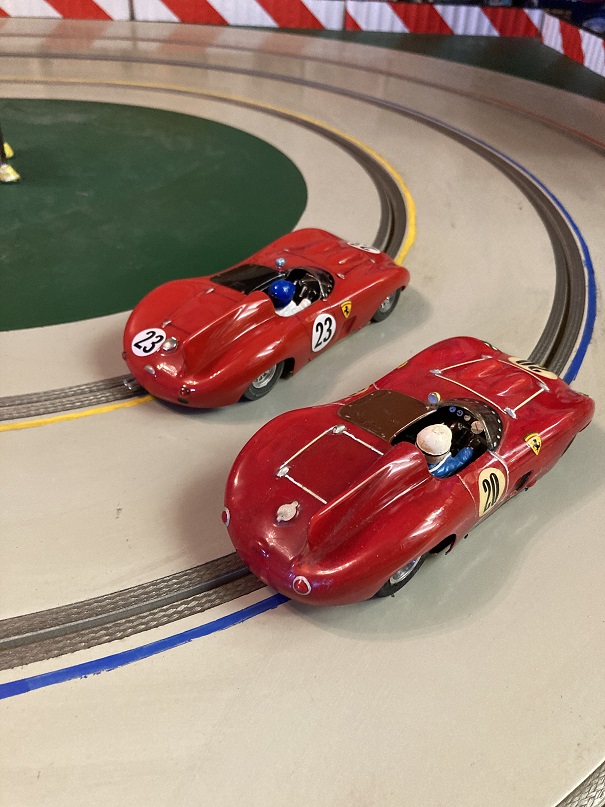
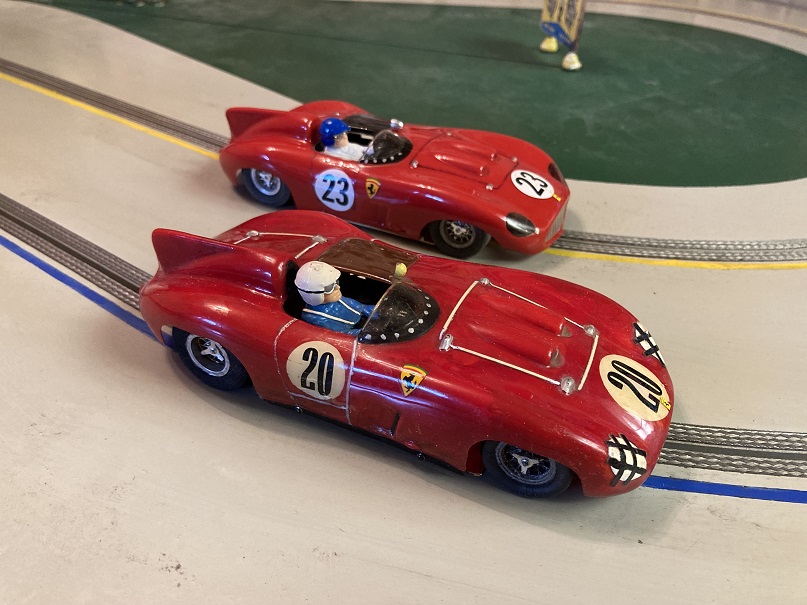
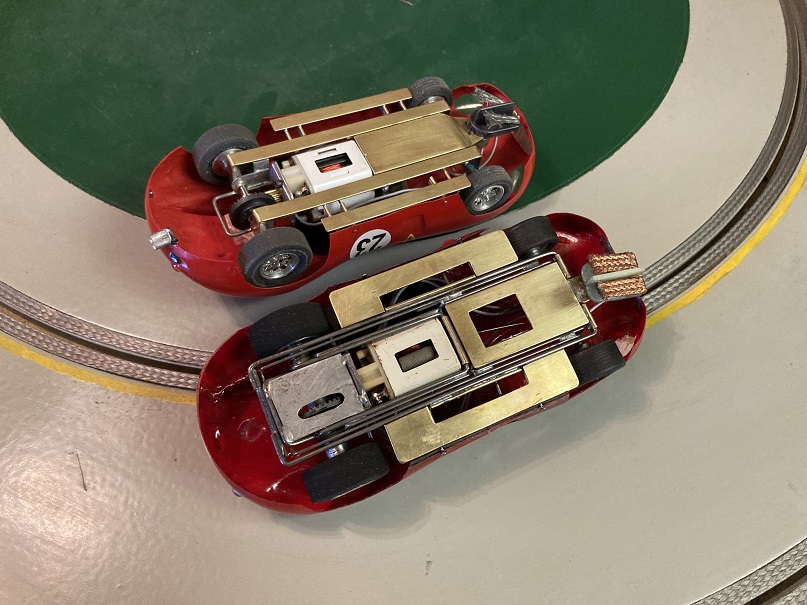
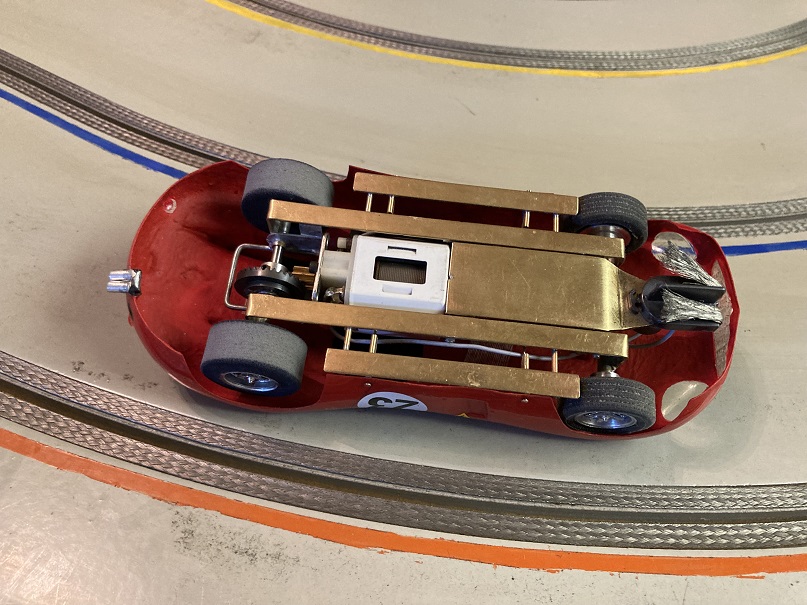
I did a Veteran Class comparison test with the Veteran Class MESAC (car number 20) Ferrari and my spec Veteran Class chassis car (car number 23).
 
According to Victor, he believes the chassis in car number 20 is from the 1972 MESAC Veteran Class championship-winning Don Sloan car.
Car number 23 is built to the original Veteran Class spec sheet design.
 
Tests were done on a small, routed track where 4 second lap times are typical for the Veteran Class cars.  The MESAC car number 20 is about two and a half tenths of a second faster than the spec car number 23 (grey tires).  The MESAC car number 20 is also easier to drive, has better brakes, and you can really push it.  The MESAC car has a real pro car feel to it.  The spec car was fast and fun, and easy to drive.  No tilting with either car.  When pushed, the tails would drift out a little.
 
In my opinion, the Veteran Class would have made a fun race class.
vet 10.jpg
 
vet 11.jpg
 
Tires on car number 23 later changed to grey sponge.  Grey sponge tires were two tenths of a second faster than urethane tires.
vet 12.jpg
 
MESAC grey tires.
vet 13.jpg

  • don.siegel, Jencar17, Tex and 1 other like this
Rodney Chew

#69 Mark Onofri

Mark Onofri

    Posting Leader

  • Full Member
  • PipPipPipPipPipPipPip
  • 2,452 posts
  • Joined: 18-November 20
  • Gender:Male
  • Location:Syracuse, NY

Posted 01 May 2024 - 11:36 PM

This is what I had in mind but, your's looks like a better idea. Although,a Bonner powered version would rock.

Attached Images

  • IMG_20240502_003045.jpg

  • Martin and Slot Car Rod like this

#70 dc-65x

dc-65x

    Grand Champion Poster

  • Subscriber
  • PipPipPipPipPipPipPipPip
  • 6,976 posts
  • Joined: 14-February 06
  • Gender:Male
  • Location:Captain Rick: The only vintage slot car nut in SW Oregon?

Posted 13 May 2024 - 08:13 PM

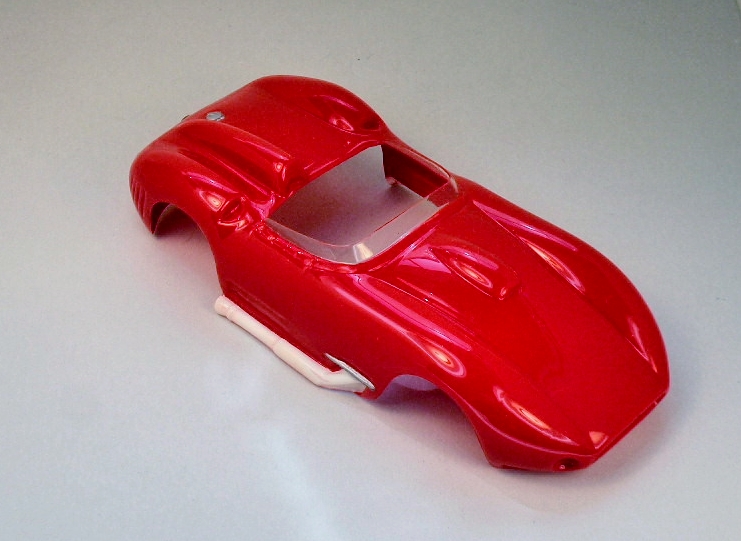
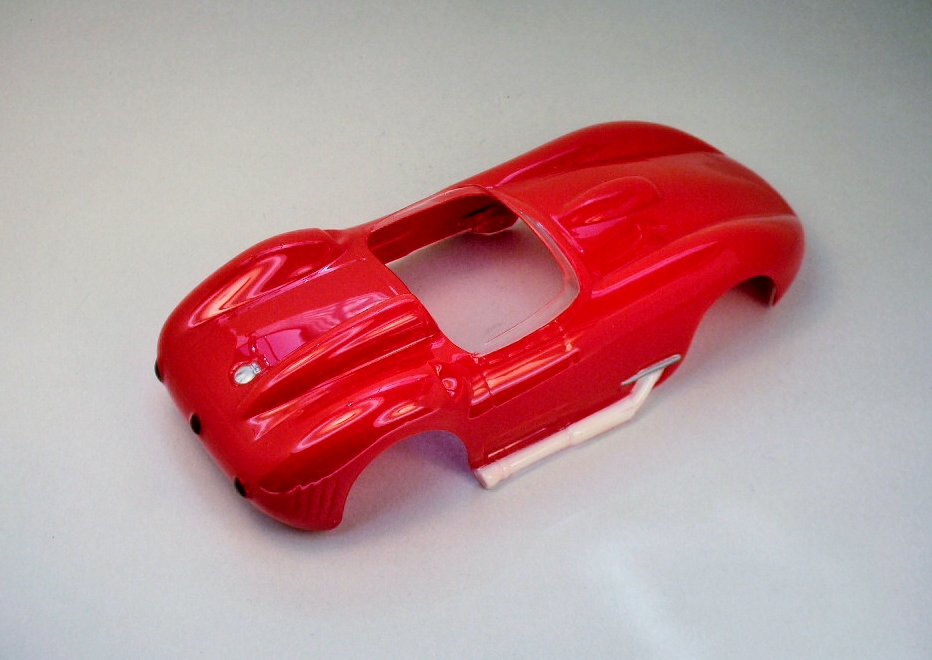
I finally have my Maserati in paint:


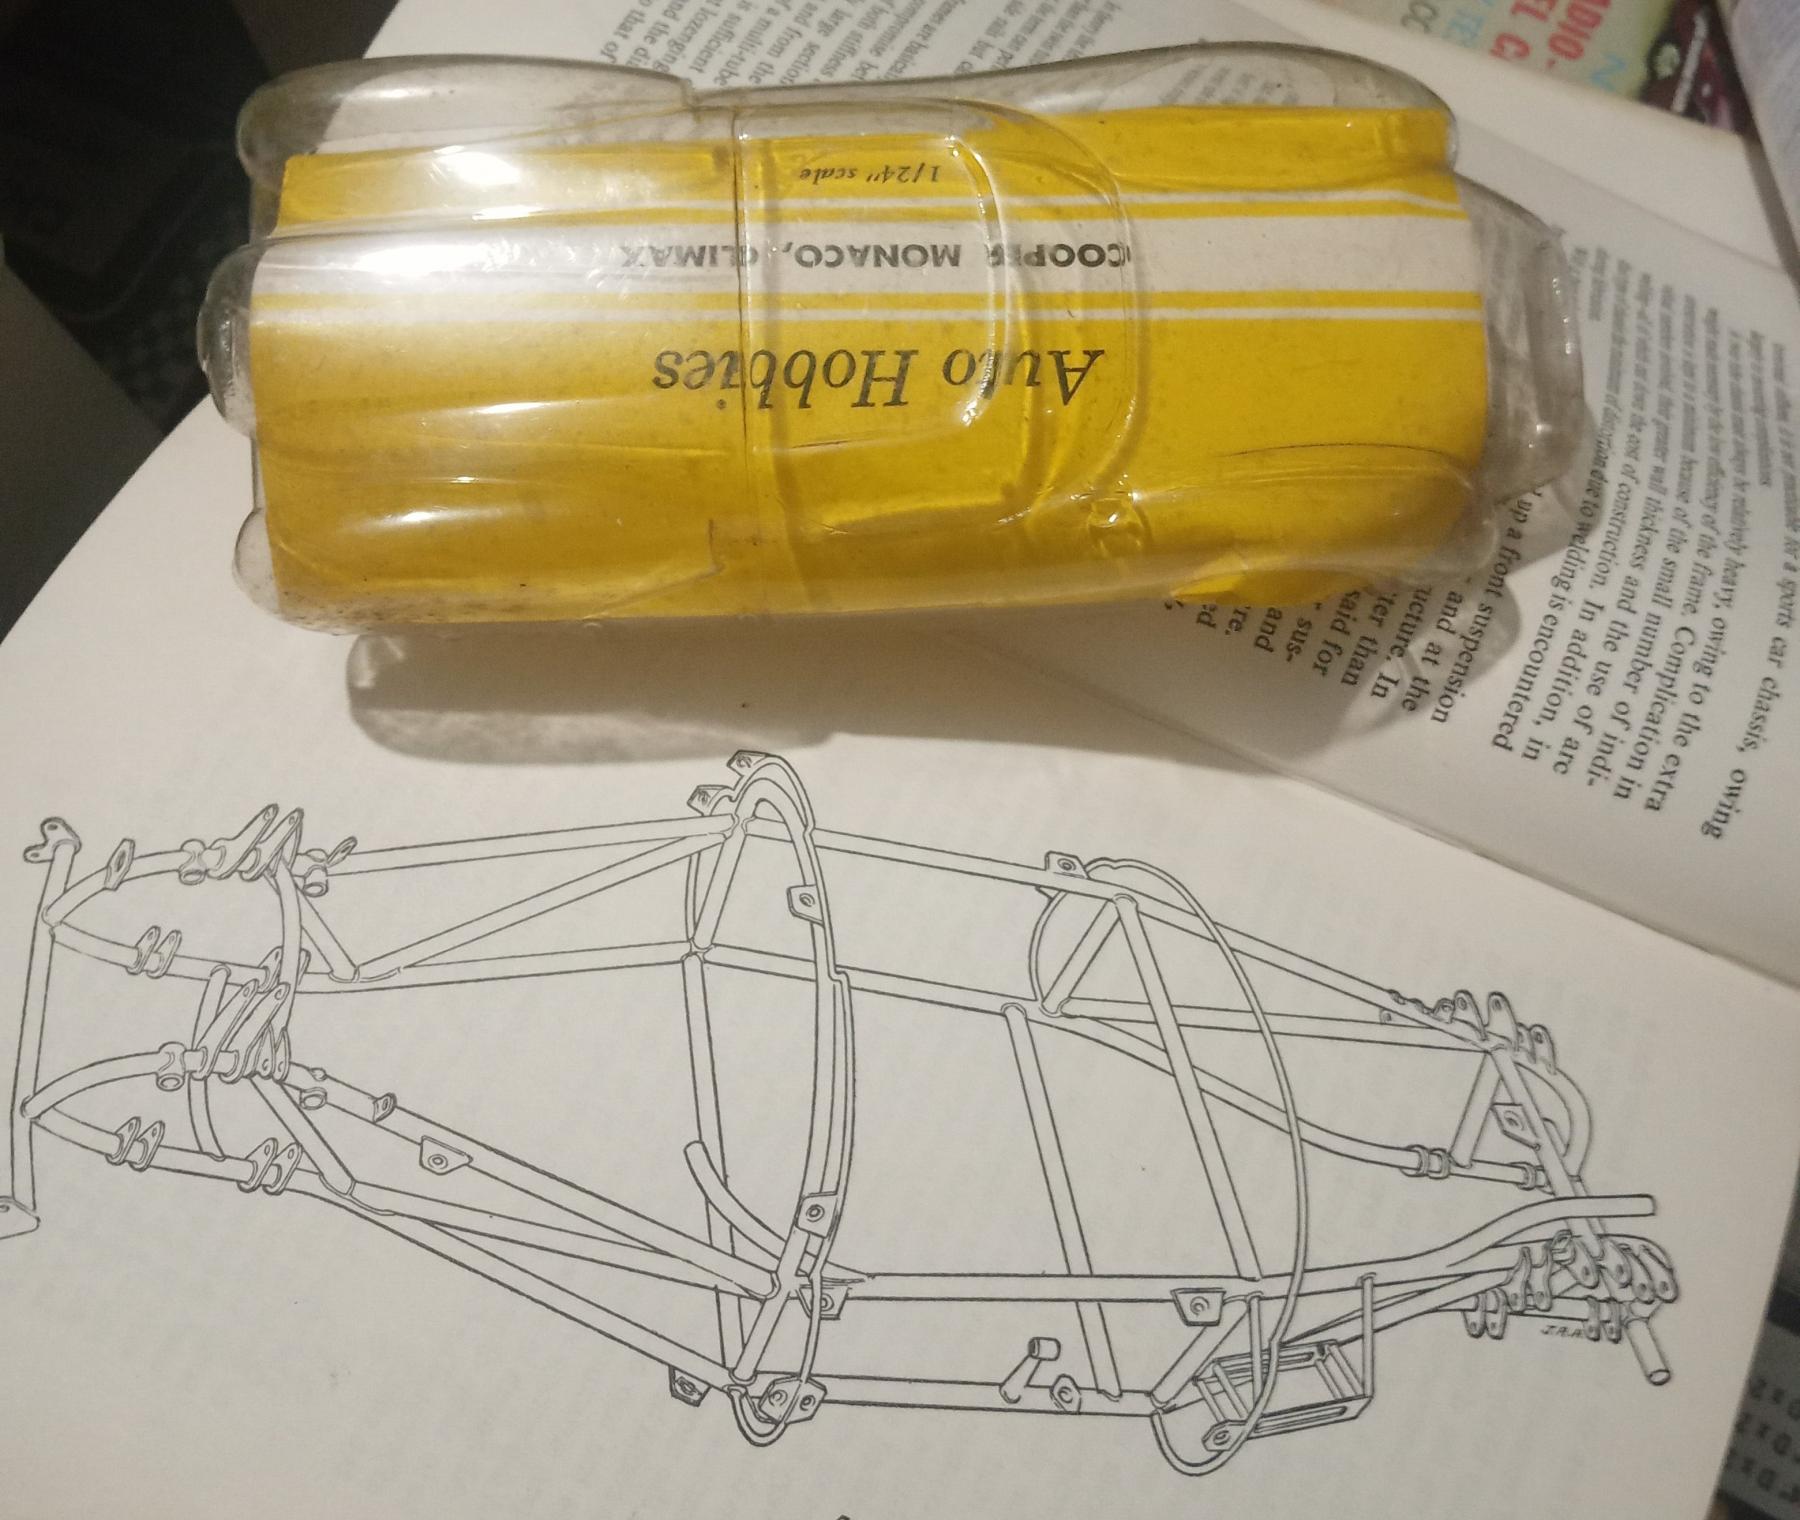
AH Maserati 450S (1).JPG


AH Maserati 450S (6).JPG


Black detail painting is next........


  • Pablo, Tex and Fergy like this

Rick Thigpen
Check out Steve Okeefe's great web site at its new home here at Slotblog:
The Independent Scratchbuilder
There's much more to come...


#71 Pablo

Pablo

    Builder

  • Administrator
  • PipPipPipPipPipPipPipPip
  • 18,448 posts
  • Joined: 20-February 06
  • Gender:Male
  • Location:Cleveland, Tennessee

Posted 13 May 2024 - 09:24 PM

It's a cute little bugger   :)


Paul Wolcott


#72 Martin

Martin

    Posting Leader

  • Full Member
  • PipPipPipPipPipPipPip
  • 4,212 posts
  • Joined: 22-February 09
  • Gender:Male
  • Location:US

Posted 14 May 2024 - 12:05 AM

So glad you cut the built in interior out  :good: I never did like bodies that had the intoror as one with the body. 

Looking good Rick.


Martin Windmill

#73 dc-65x

dc-65x

    Grand Champion Poster

  • Subscriber
  • PipPipPipPipPipPipPipPip
  • 6,976 posts
  • Joined: 14-February 06
  • Gender:Male
  • Location:Captain Rick: The only vintage slot car nut in SW Oregon?

Posted 14 May 2024 - 10:35 AM

Thanks Martin. 


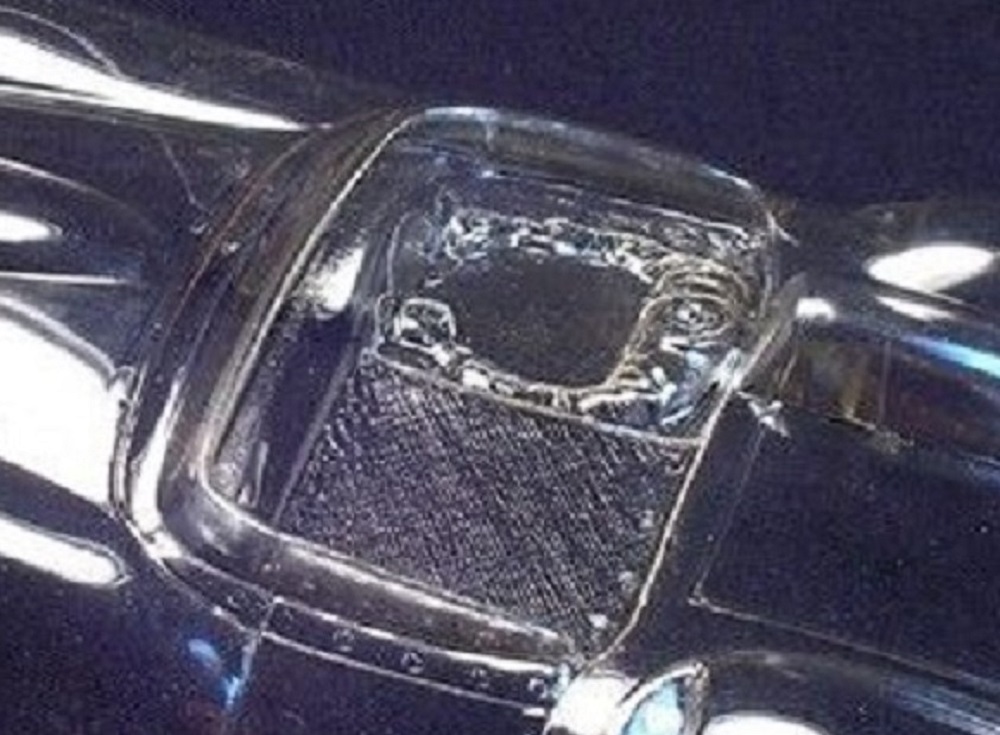
That molded in interior was a pain. The "inner and outer" plastic of the sides of the windscreen were so close together a piece of paper barely fit between them. How did they make a mold that would do that?


AH Maserati 450S (10) - Copy.jpg


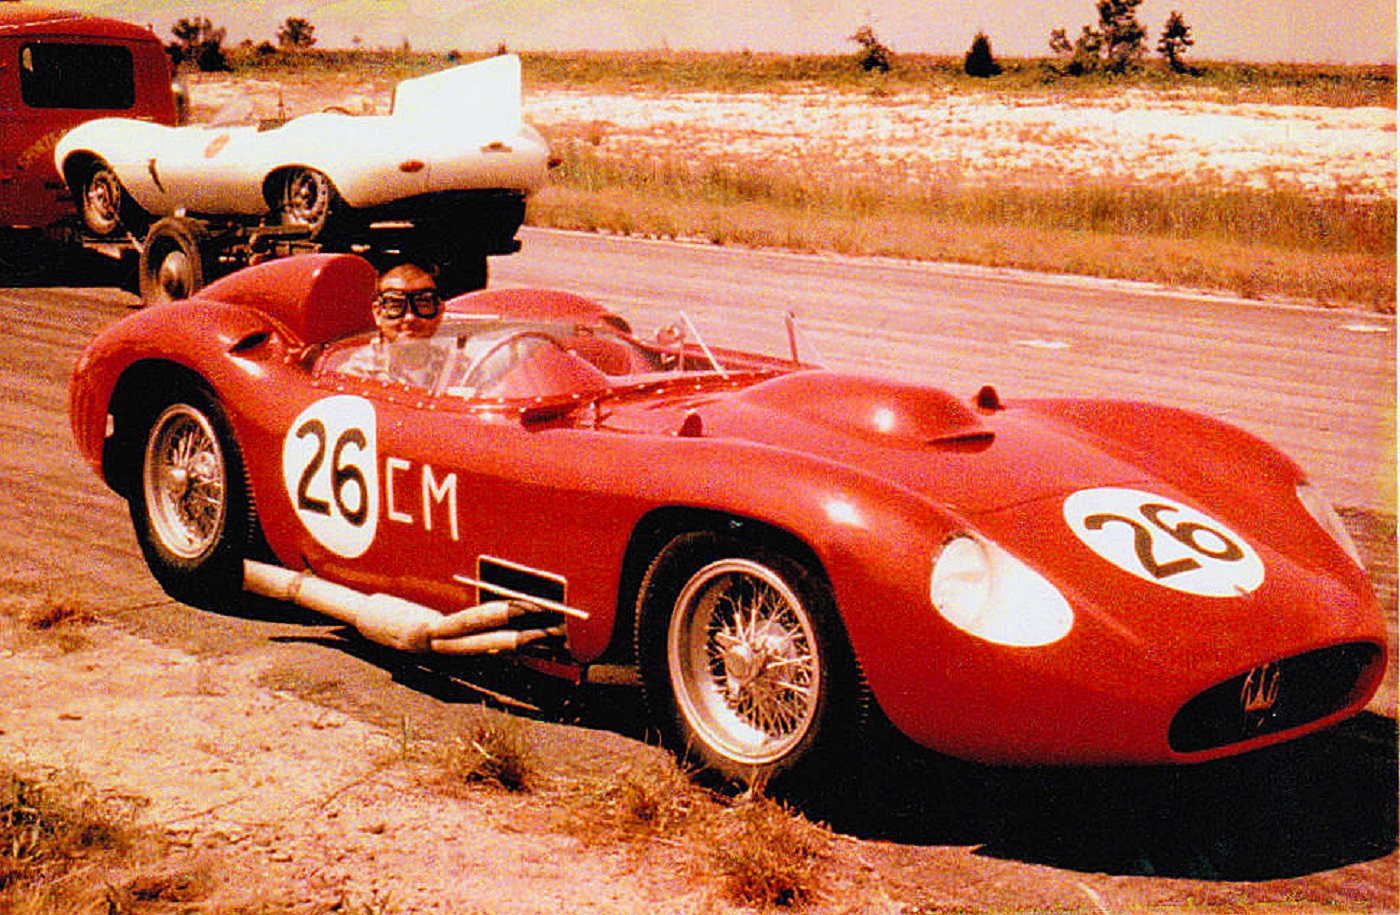
Hi Pablo, here's the that little bugger for real:


w2-1-002.jpg


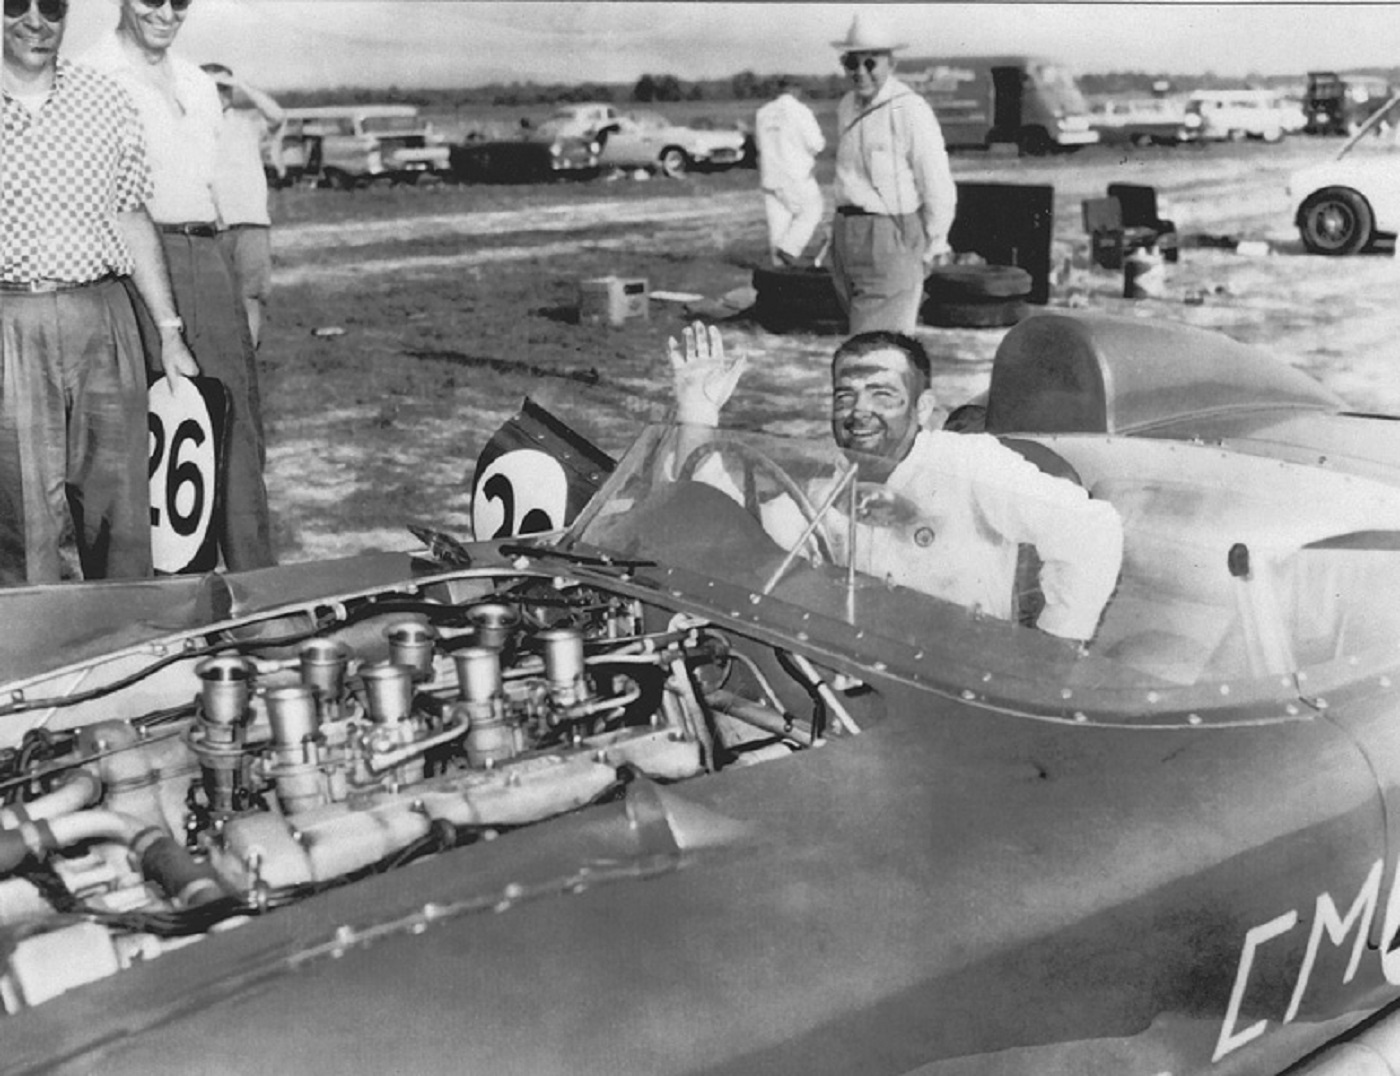
Here's a link to a story on the history of this car from a VeloceToday.ccm article. It is a cool story with great period pictures:


Maserati 450S


Check out the engine in this thing   :shok:


photo-3.jpg


  • Pablo and Tex like this

Rick Thigpen
Check out Steve Okeefe's great web site at its new home here at Slotblog:
The Independent Scratchbuilder
There's much more to come...


#74 Martin

Martin

    Posting Leader

  • Full Member
  • PipPipPipPipPipPipPip
  • 4,212 posts
  • Joined: 22-February 09
  • Gender:Male
  • Location:US

Posted 14 May 2024 - 12:05 PM

Great history Rick.

Things do go better with Coke.

Love the air jack feature and the connection with Jim Hall as a driver of this car.


Martin Windmill

#75 Pablo

Pablo

    Builder

  • Administrator
  • PipPipPipPipPipPipPipPip
  • 18,448 posts
  • Joined: 20-February 06
  • Gender:Male
  • Location:Cleveland, Tennessee

Posted 14 May 2024 - 02:59 PM

From the big driver's smiles I'll be it was a real hoot to drive  :yes:


Paul Wolcott


Electric Dreams Online Shop