Jump to content


Photo

Building a home track - Policar


47 replies to this topic

#26 John Luongo

John Luongo

    Race Leader

  • Full Member
  • PipPipPipPipPip
  • 677 posts
  • Joined: 01-August 16
  • Gender:Male
  • Location:Haverhill, MA

Posted 12 February 2025 - 01:49 AM

Here's one with mostly the same parts as your design. I did use some 22.5 degree (half) R2 turns, hoping you have some. The idea here is to break up the parallel straights. While it might not drive all that differently, it will LOOK better on the table.


attachicon.gif Policar_8x20_antiochdave_03.png

very interesting track layout. it looks like you have incorporated straights and turns from classic, vintage race tracks like monza, spa and nurmburgring. and you still have space for scenery or structures to enhance that effect. 


  • MrFlippant likes this


#27 MrFlippant

MrFlippant

    On The Lead Lap

  • Full Member
  • PipPipPipPip
  • 298 posts
  • Joined: 12-May 14
  • Gender:Male

Posted 12 February 2025 - 11:41 AM

very interesting track layout. it looks like you have incorporated straights and turns from classic, vintage race tracks like monza, spa and nurmburgring. and you still have space for scenery or structures to enhance that effect. 


I was just messing around.

The last one, the more I played with it, the more it reminded me of Fiorano near Maranello, Italy. 

https://en.wikipedia...Fiorano_Circuit


Being able to include R3/4 and R4/5 turns would allow even more realism. 


Generally speaking, when I design a layout, this is what I do.

- Put in the absolute longest straight that I can. If a flat track, usually along the longest side of the table. If an overpass is allowed, usually on the longest diagonal.

- For overpasses, I put the straight on the bottom. While this does complicate the supports for the overpass, it virtually eliminates crashed cars ending up under a bridge and being hard to access. It also reduces or eliminates visibility issues, since you don't need to modulate your speed in the straight much, if at all between start and end.

- Try to avoid more than a couple parallel straights. The more turn options we have, the fewer parallel straights you are forced into.

- Try to avoid turns that are a single radius from beginning to end. Make turns that start wide and tighten, or that start tight and widen, or do both in a parabola (but avoid turns that start tight, widen, and then end tight. "Isochronus" curves are generally unpleasant to drive).

- Try to avoid using the same turn combinations multiple times, particularly ALL the time.

- Try to ensure that every straightaway is a different length.

- Try to avoid putting short straights between turns to make things fit. Even a 1/4 straight can mess with the flow of a turn.


  • Antiochdave and John Luongo like this

#28 Antiochdave

Antiochdave

    Antiochdave

  • Full Member
  • PipPipPipPip
  • 216 posts
  • Joined: 26-August 11
  • Gender:Male
  • Location:Winchester Tennessee

Posted 12 February 2025 - 02:28 PM

OK. I've been trying to work within that constraint. I don't see any 1/2 R2 turns, so you'll need to get a few of those. Here's another one with more or less the same pieces, but I just blew them up and did something crazy. I did not track the actual number of things, though. 


I enjoy doing this stuff sometimes, but right now I'm getting the hang of using UR3, because my usual program can't do Policar. 


attachicon.gif Policar_8x20_antiochdave_04.png

Hi Greg,


How many R2 quarter rounds did you use in this design? [4?]


David Heistand

#29 Antiochdave

Antiochdave

    Antiochdave

  • Full Member
  • PipPipPipPip
  • 216 posts
  • Joined: 26-August 11
  • Gender:Male
  • Location:Winchester Tennessee

Posted 12 February 2025 - 02:31 PM

OK. I've been trying to work within that constraint. I don't see any 1/2 R2 turns, so you'll need to get a few of those. Here's another one with more or less the same pieces, but I just blew them up and did something crazy. I did not track the actual number of things, though. 


I enjoy doing this stuff sometimes, but right now I'm getting the hang of using UR3, because my usual program can't do Policar. 


attachicon.gif Policar_8x20_antiochdave_04.png

Hi Greg,


How many R2 quarter rounds did you use in this design? [4?]

Attached Images

  • post-5816-0-68095900-1739331303.png

  • Tim Neja likes this
David Heistand

#30 MrFlippant

MrFlippant

    On The Lead Lap

  • Full Member
  • PipPipPipPip
  • 298 posts
  • Joined: 12-May 14
  • Gender:Male

Posted 12 February 2025 - 03:26 PM

yes, four in that one, and two in the one with the bridge


  • Antiochdave likes this

#31 Antiochdave

Antiochdave

    Antiochdave

  • Full Member
  • PipPipPipPip
  • 216 posts
  • Joined: 26-August 11
  • Gender:Male
  • Location:Winchester Tennessee

Posted 13 February 2025 - 08:37 PM

Hi everybody,


Today I worked on the two electrical track taps.

The photo that has the red tape on the straights shows the location of the taps and lets me know which is lane one.

I bought a wire kit from Slot Car Corner which I recommend if you building your own track.

They make the kit for two through 8 lanes track, just order the kit to match your layout.

The kit comes with sticker labels so you can identify the wires, this makes it easier to do the work while you are under the table assembling, the kit also comes with jumper terminal blocks and templates to go with each block, again this makes it so much easier to be able to buy everything you need except for the wire its self. I had to buy red, white and black wire to do the project.


Note - It's very important to layout and assemble your track before doing any of the wire work. You will need to know exactly where the track location will be so you can lay out any penetrations you will need to make.

Yes, you will have to take sections of your track apart to do the wire taps, but it's not a big deal.


After I finished the electrical track taps, I was able to put the track back together again. I also took the time today to put the guard rails up which you can see in the pictures.

I can say that Policar does have the best guard rails I ever used. They are very flexible, and they grab/hold the track well.


Tomorrow I will continue to work on the electrical and hopefully I will be done by this weekend, if not, who cares, I'm retired - LOL.


Remember to have fun during the build, take your time and take a lot of breaks. For me, building this track is all part of my fun. The racing is just the frosting on the cake.


Thanks for checking in!

Dave - 


Attached Images

  • IMG_8201 (002).jpg
  • IMG_8202 (002).jpg
  • IMG_8204 (002).jpg
  • IMG_8205 (002).jpg
  • IMG_8206 (002).jpg
  • IMG_8207 (002).jpg
  • IMG_8209 (002).jpg
  • IMG_8210 (002).jpg
  • IMG_8211 (002).jpg
  • IMG_8212 (002).jpg

  • Tim Neja and John Luongo like this
David Heistand

#32 Antiochdave

Antiochdave

    Antiochdave

  • Full Member
  • PipPipPipPip
  • 216 posts
  • Joined: 26-August 11
  • Gender:Male
  • Location:Winchester Tennessee

Posted 15 February 2025 - 09:58 PM

Hi there,


Today I'm continuing with the wiring of the track.

I hooked up my two power taps to their power blocks. While I was connecting one of the wire taps, the wire pulled off the track. 

I had to take apart a section of the track to be able to repair the wire. Policar offers a simple way to connect the power tap wires to the underside of the track rails.

These metal clips are small and they break easy. I am using 14 ga wire throughout the track. but these clips are like 25ga wire.

I have decided to solder my 14ga wire directly to the track rails which will be much better than using Policar tap clips.

I believe these clips would be ok for a smaller track and if one plans on using only low voltage cars/motors. 

Two steps forward and one step back, this is the way it goes sometimes but it's not a big deal to do it right.


I bought an after-marker power supply, it has a variable Volts of 0-20v and 1-15 a, this power supply should handle the motors I will be running [16D motor]. 


I must give Slot Car Corners credit again on their wiring kit, the kit makes it so much easier. As I said before, the only thing you will need is to buy the wire [black, red and white wire]


That's it for now,

Cheers,

Dave - 


Attached Images

  • IMG_8214 (002).jpg
  • IMG_8218 (002).jpg
  • IMG_8219 (002).jpg
  • IMG_8220 (002).jpg
  • IMG_8224 (002).jpg
  • IMG_8226 (002).jpg

David Heistand

#33 Mark Onofri

Mark Onofri

    Posting Leader

  • Full Member
  • PipPipPipPipPipPipPip
  • 2,485 posts
  • Joined: 18-November 20
  • Gender:Male
  • Location:Syracuse, NY

Posted 15 February 2025 - 10:17 PM

Unless you have a dehumidifier, you might regret using the chopped Ham board,aka,OSB. My track had it for the base and it was subject to extreme expansion/contraction due to
1) temperature
2) humidity
A little late at this point for this information but, your going to DEFINITELY want a dehumidifier. The sawdust board (I can't remember what it's really called) although very, very heavy ,is stable under almost, ALMOST, any of the listed variables.
Mr. Flippant, I really like the last layout, with the exception of the esses in the lower right.
Hopefully the amount of effort in building this will be surpassed by the amount of
enjoyment. Even though,
" if it has t**s or wheels, it's bound to give you trouble"
I also put wheels on anything I can.😶
  • Antiochdave likes this

#34 Mark Onofri

Mark Onofri

    Posting Leader

  • Full Member
  • PipPipPipPipPipPipPip
  • 2,485 posts
  • Joined: 18-November 20
  • Gender:Male
  • Location:Syracuse, NY

Posted 17 February 2025 - 03:41 PM

Another thing, I really get pissed when people tell me
"if I were you I'd"
So, I won't do that. But, you might want to consider solenoid power control. I set mine up for individual lanes (black flag) or all Lanes, track call.
If you're interested, I'll post the wiring. If I remember correctly,it also was controlled by my "Trackmate" program for starting and ending the race.

#35 Antiochdave

Antiochdave

    Antiochdave

  • Full Member
  • PipPipPipPip
  • 216 posts
  • Joined: 26-August 11
  • Gender:Male
  • Location:Winchester Tennessee

Posted 17 February 2025 - 10:06 PM

Another thing, I really get pissed when people tell me
"if I were you I'd"
So, I won't do that. But, you might want to consider solenoid power control. I set mine up for individual lanes (black flag) or all Lanes, track call.
If you're interested, I'll post the wiring. If I remember correctly,it also was controlled by my "Trackmate" program for starting and ending the race.


Hi There,


I will be using a relay so the timer can shut down/start the track power.

I would appreciate a diagram show how to hook up the relay, I only found a video on the installation.  I will be installing the relay between the power supply and the power block.

I will be using just one shut off button which I will be installing in the middle of the driver station.


Thanks for your help,

Dave -  


David Heistand

#36 Antiochdave

Antiochdave

    Antiochdave

  • Full Member
  • PipPipPipPip
  • 216 posts
  • Joined: 26-August 11
  • Gender:Male
  • Location:Winchester Tennessee

Posted 17 February 2025 - 10:54 PM

Hi there,


Electrical tap update,


After spending time trying to solder the wire taps directly to the track rails, I had to stop.

Because the rails are stainless, I had to get the rails so hot that I ended up melting a section of the track.

The metal tap piece that Policar offer is too small of a gauge [25g], especially for a large track and running 16D motors. [see photo below] 

I spent time on the internet to see what other people did; I found a form showing that someone used a Scaleauto SC-10131 power clip on their Policar track. The clips looked a lot better than what Policar was offering but I was unable to find anybody in the US that had them in stock.


After spending time thinking what I could do and spending over an hour walking around Home Depot, I saw some small picture hanging hooks. I thought I may be able to open the hanger hook so it would slip into the track rails. Each box was under $2.00 so I bought two different sizes to see if I could get them to work.

To make a long story short, the small picture hook worked perfectly. [see the photos below]


The hook fitted tight into the track rail and would not pull out without using pliers [see photos below].

I was able to solder my wire taps with no problems and I checked all the connection with my volt Ohm Amp Meter which was perfect. 


Hope this helps someone else out,

Dave - 


Attached Images

  • IMG_8238 (002).jpg
  • IMG_8237 (002).jpg
  • IMG_8236 (002).jpg
  • IMG_8234 (002).jpg
  • IMG_8233 (002).jpg
  • IMG_8231 (002).jpg
  • IMG_8230 (002).jpg
  • IMG_8239 (002).jpg

  • Tim Neja and Alchemist like this
David Heistand

#37 Bill from NH

Bill from NH

    Age scrubs away speed!

  • Full Member
  • PipPipPipPipPipPipPipPip
  • 14,819 posts
  • Joined: 02-August 07
  • Gender:Male
  • Location:New Boston, NH

Posted 18 February 2025 - 08:39 AM

Good solution Dave. F.Y, I., most stainless steels can be soldered using silver solder & acid flux.


  • Antiochdave likes this
Bill Fernald
 
I intend to live forever!  So far, so good.  :laugh2:  :laugh2: 

#38 Antiochdave

Antiochdave

    Antiochdave

  • Full Member
  • PipPipPipPip
  • 216 posts
  • Joined: 26-August 11
  • Gender:Male
  • Location:Winchester Tennessee

Posted 18 February 2025 - 12:15 PM

Good solution Dave. F.Y, I., most stainless steels can be soldered using silver solder & acid flux.


Now you tell me! - LOL

Thanks for the info Bill - 


David Heistand

#39 Antiochdave

Antiochdave

    Antiochdave

  • Full Member
  • PipPipPipPip
  • 216 posts
  • Joined: 26-August 11
  • Gender:Male
  • Location:Winchester Tennessee

Posted 18 February 2025 - 12:29 PM

Another thing, I really get pissed when people tell me
"if I were you I'd"
So, I won't do that. But, you might want to consider solenoid power control. I set mine up for individual lanes (black flag) or all Lanes, track call.
If you're interested, I'll post the wiring. If I remember correctly,it also was controlled by my "Trackmate" program for starting and ending the race.


Found a drawing for my relay.

Thanks anyway!


Cheers!

Dave - 

Attached Images

  • Screenshot 2025-02-18 112656.png

David Heistand

#40 Alchemist

Alchemist

    Posting Leader

  • Full Member
  • PipPipPipPipPipPipPip
  • 2,706 posts
  • Joined: 11-November 09
  • Gender:Male
  • Location:Far, far away

Posted 20 February 2025 - 12:32 AM

Hi Dave,


Your track build looks to be progressing very well.

I'd like to inquire as to what controllers you'll be using and will you be running both 1/32 and 1/24 scale cars?


I initially ran only 1/32 cars when I first built my track but have since changed the track design and track surface a few times.


Now I primarily run my 1/24 scale cars.

Thanks,

Ernie


  • Antiochdave likes this
Ernie Layacan

#41 Antiochdave

Antiochdave

    Antiochdave

  • Full Member
  • PipPipPipPip
  • 216 posts
  • Joined: 26-August 11
  • Gender:Male
  • Location:Winchester Tennessee

Posted 20 February 2025 - 09:22 PM

Hi Dave,


Your track build looks to be progressing very well.

I'd like to inquire as to what controllers you'll be using and will you be running both 1/32 and 1/24 scale cars?


I initially ran only 1/32 cars when I first built my track but have since changed the track design and track surface a few times.


Now I primarily run my 1/24 scale cars.

Thanks,

Ernie


Hi Ernie,


I'm running 1/32 scale cars and 1/32 Parma Womp Ultra Wide RTR, March Sports Car with the 16D motors.

I'm not running 1/24 car just because I find there isn't really enough room on the Policar track. 

I get the speed/power of the 1/24 car with my 1/32 Parma 16D cars and still have plenty of room on the track for the cars to race.

For the scale cars I use DS -3503D Version 3 Racing controls with the alligator clips [35 Ohm]

For my Parma 16D cars, I use my Difalco DD201 HD30 with adjustments for the brakes and sensitivity, which is a great controller by the way.


Hope this helps,

Dave - 

 
David Heistand

#42 Antiochdave

Antiochdave

    Antiochdave

  • Full Member
  • PipPipPipPip
  • 216 posts
  • Joined: 26-August 11
  • Gender:Male
  • Location:Winchester Tennessee

Posted 22 February 2025 - 10:22 PM

IMG_8263 (002).jpg IMG_8276 (002).jpg IMG_8268 (002).jpg


Hi there,


Well, I'm done.

I took my time, and it took me about a month from start to finish. 

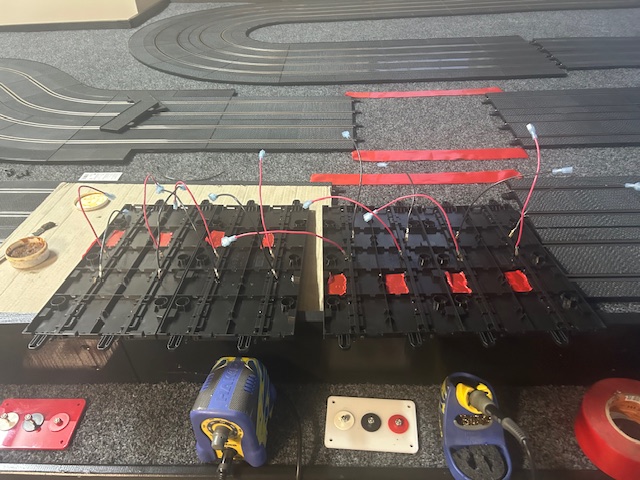
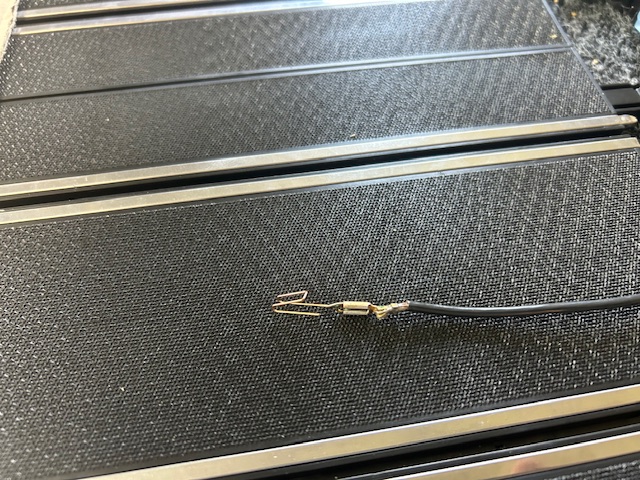
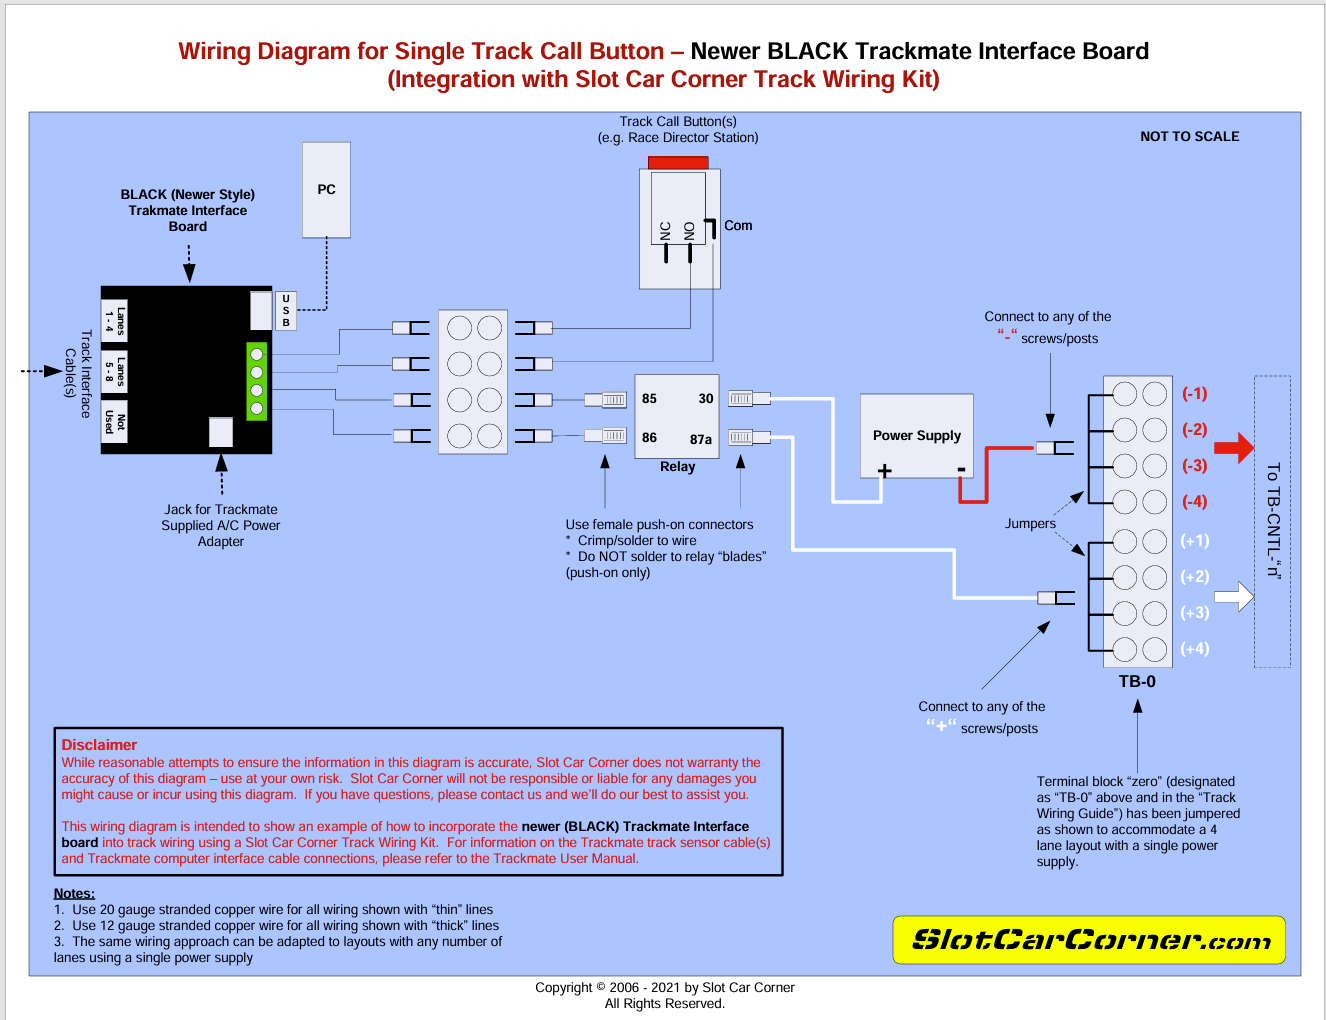
I installed my Track-Mate lap counter/timer and installed a single relay. I really like the Track-Mate because you can use the track by yourself and just race against the clock.

I like racing my nephew in the lap races mode, I teach him how you may have a faster car than the other person, but this does not mean you will win the race, you must stay on the track without crashing. This being said, the kid is fast - LOL

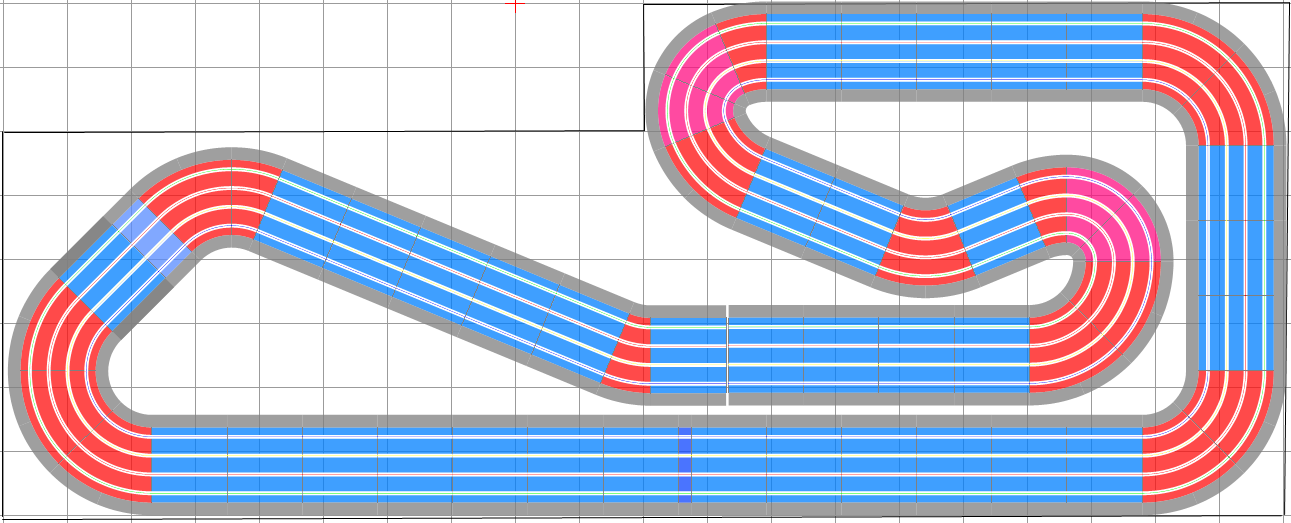
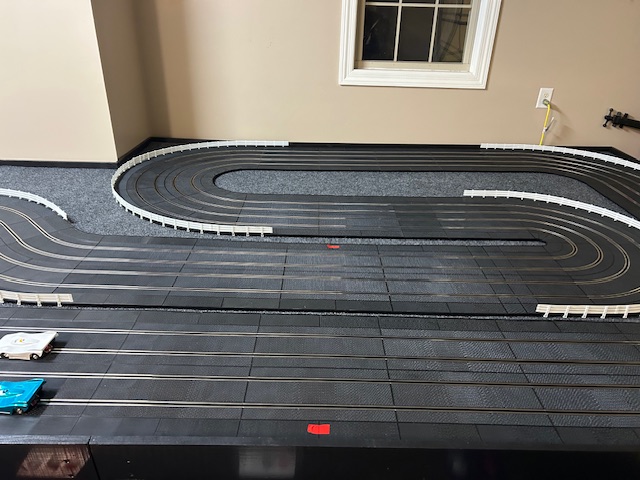
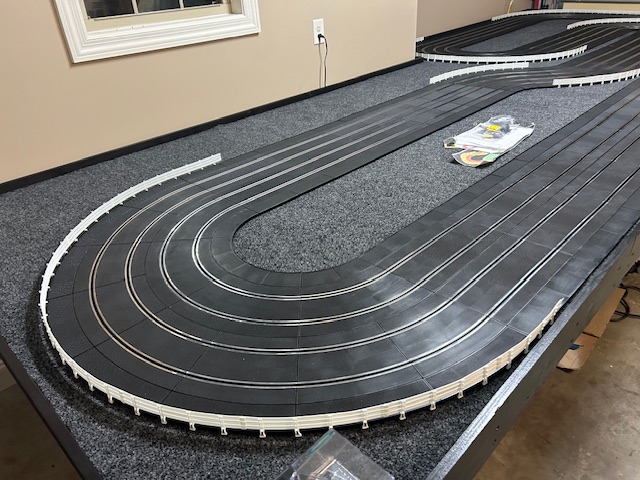
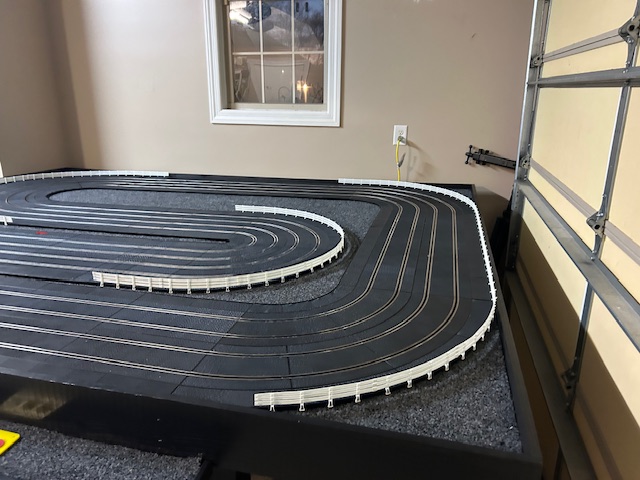
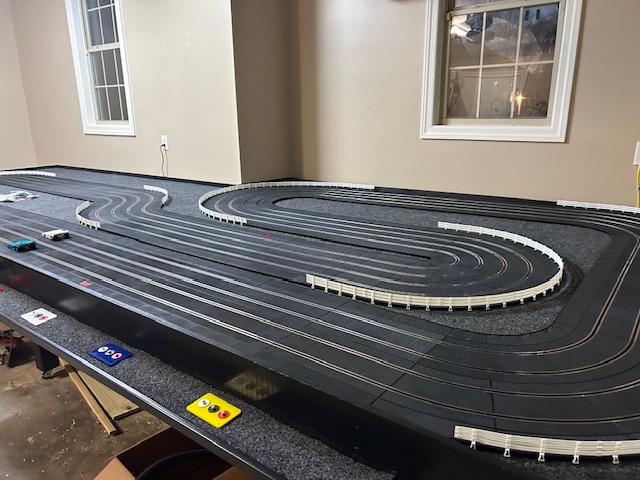
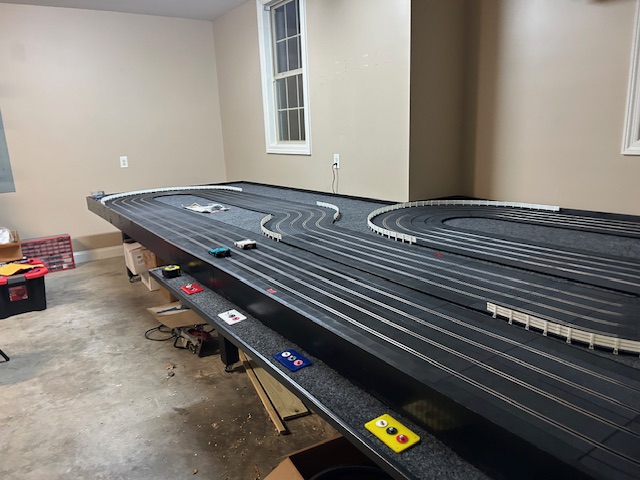
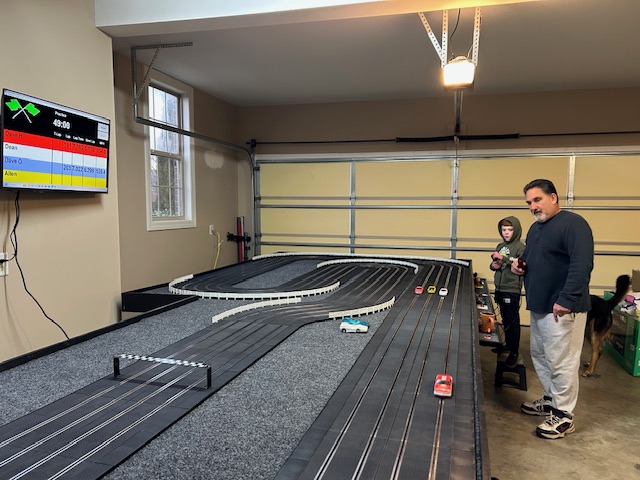
As far as I'm concern the track has a good flow and the hairpin is great, it keeps you on your toes.

All my corners are made from #2 & #3 corners except the hairpin which is a #1 & #2.

Layout dimensions are 20'x8' [a section of it is only 6' deep].

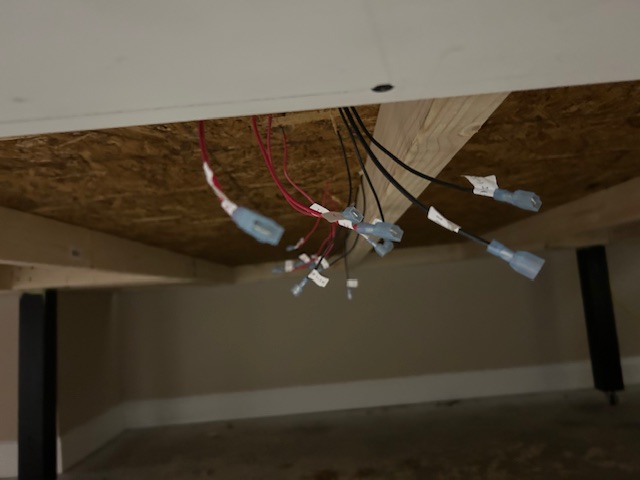
The best thing I did was to put wheels on the legs so I could move the layout off the walls when I'm using/racing and then put it back against the wall when I'm done so there is more room in the garage. 


My thought on the Policar track,

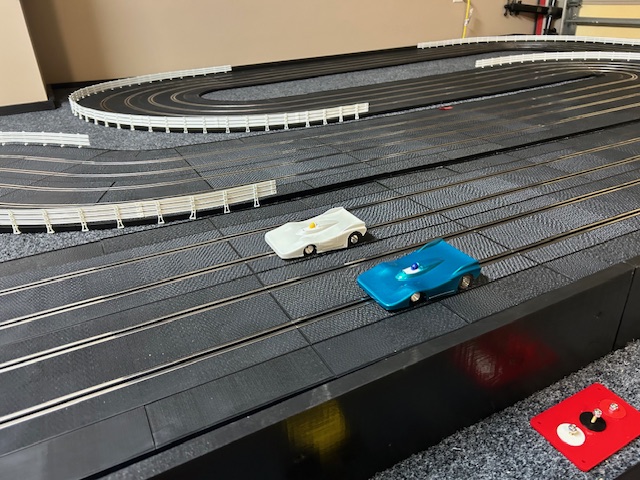
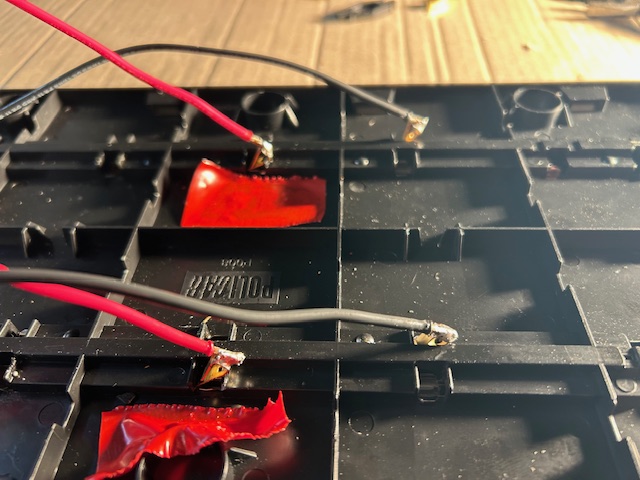
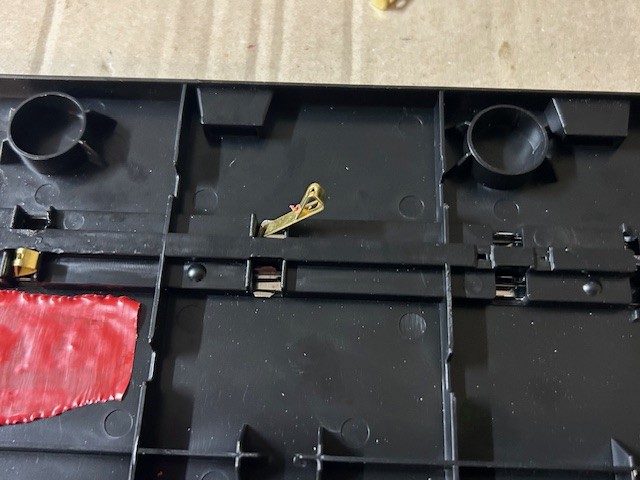
It's a good track, it has deep guides slots so you can use the bigger/commercial guides, The electrical rails are stainless and there's a large contact surface for the car brushes. 

Policar offer inner and outer borders which I used throughout the layout. 

The guardrails are made from some kind of a rubber material, and they do a great job of catching the cars and keeping them on the track when you de-slot/crash.  

The tracks are strong and there is no issue of brakeage. 

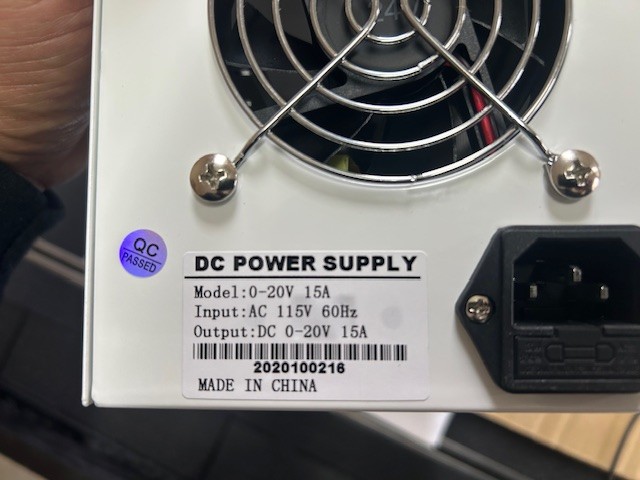
I didn't use the Policar speed controls or their power supply, so I'm unable to give you my opinion on how they performed, they seem to me to be on par with Carrera.

I ended up using a aftermarket power supply and controllers due to that I did built a driver stand with the electrical power studs.


In my opinion, the only thing that Policar could have done better was to give you more lane space so one could race 1/24 cars. I see others have run their 1/24 cars on the track but there really is not enough room to race.

I run my 1/32 Parma Womp Ultra Wide RTR, March Sports Car with the 16D motors on the track with no problem. These cars are a little bigger than the scale 1/32 cars with the 16D motor [plenty of power].


Cost,

This was not a cheap project; one could have done it much cheaper if they bought a used track.

I was going to have another wood track [20'x10'] made for me but it would have cost me around $8000 [not delivered] which was not a bad deal for the amount of work that goes into it.

I looked for a used home wood track but could not find one at the time.


Cost break down;

I did all the building/electrical work myself.


Materials to build the table [$500 +/-] 


Policar 4 lane track set [PT004Z-US

Additional track, boards, guardrails and accessories,   

Power supply,

Speed controllers,

Four Slot cars,

$2,272


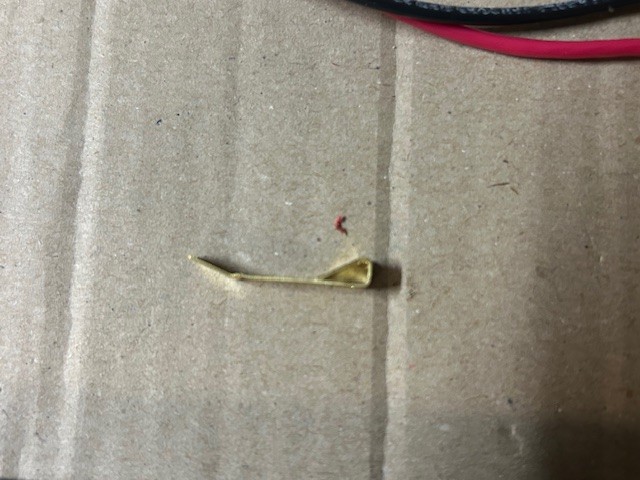
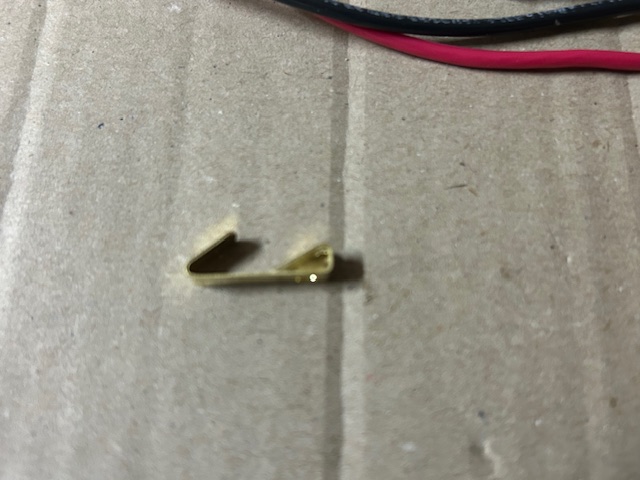
Track Wire Kit - $110.


4 Lane Driver station Wiring kit - $88.00


Track-Mate $250.00


Total 3,220.00


If you want to play, you have to pay.

Racing is not cheap, even slot cars.

Motocross, Race Kart's, Cars, RC Cars, Planes, Boats will cost you about the same or much more, I have done them all. 

I have always come back to slot cars just because once you have the track set up, you don't incur a lot more cost afterwards. 

All you do is walk to your garage and you are there. Family and friends always enjoy the track as well.


I hope this helps others out.

Please feel free to ask any questions you may have.

If you are ever in the Winchester Tennessee area, PM me and we will hook up and race.


Have fun!!

Cheers!!

Dave - 


  • Alchemist, Eddie Fleming, MrFlippant and 1 other like this
David Heistand

#43 John Luongo

John Luongo

    Race Leader

  • Full Member
  • PipPipPipPipPip
  • 677 posts
  • Joined: 01-August 16
  • Gender:Male
  • Location:Haverhill, MA

Posted 23 February 2025 - 02:54 AM

well done, Sir!


  • Antiochdave likes this

#44 MrFlippant

MrFlippant

    On The Lead Lap

  • Full Member
  • PipPipPipPip
  • 298 posts
  • Joined: 12-May 14
  • Gender:Male

Posted 23 February 2025 - 12:02 PM

Excellent overall review, sir! :)


In my opinion, the only thing that Policar could have done better was to give you more lane space so one could race 1/24 cars. I see others have run their 1/24 cars on the track but there really is not enough room to race.

I run my 1/32 Parma Womp Ultra Wide RTR, March Sports Car with the 16D motors on the track with no problem. These cars are a little bigger than the scale 1/32 cars with the 16D motor [plenty of power].


Opinions differ. :) If the cars don't scrape in the straights, they can race. Lots of people prefer to have plenty of room between them, though. Slot.it/Policar chose the "just big enough for 1/24, but primarily meant for 1/32" size of track, similar to NINCO track in width. Generally speaking, if one wishes to make 1/24 racing a big part of their hobby, and choose to go with plastic track, Carrera or ScaleAuto are the primary choices.


As for wood tracks... they're not particularly hard to make with a few simple tools. I've been making and selling the OldSlotRacer wood track building kit for several years now. I've recently made the how-to video free to watch on YouTube. If you ever get the hankering for wood again, and think you might want to take a whack at it yourself, check it out.


  • Antiochdave likes this

#45 Antiochdave

Antiochdave

    Antiochdave

  • Full Member
  • PipPipPipPip
  • 216 posts
  • Joined: 26-August 11
  • Gender:Male
  • Location:Winchester Tennessee

Posted 28 February 2025 - 12:27 AM

Hi Greg,


What a great video, thanks for sharing it with me. You guys put a lot of work into your track and it shows, beautiful! 


  • MrFlippant likes this
David Heistand

#46 Alchemist

Alchemist

    Posting Leader

  • Full Member
  • PipPipPipPipPipPipPip
  • 2,706 posts
  • Joined: 11-November 09
  • Gender:Male
  • Location:Far, far away

Posted 28 February 2025 - 01:37 PM

Hi Dave,


Congratulations on the completion of your new track - it looks great!


Are you finished with the layout or will you eventually put up some diorama?


Thanks for sharing Dave.


Ernie


Ernie Layacan

#47 Antiochdave

Antiochdave

    Antiochdave

  • Full Member
  • PipPipPipPip
  • 216 posts
  • Joined: 26-August 11
  • Gender:Male
  • Location:Winchester Tennessee

Posted 28 February 2025 - 05:02 PM

Hi Dave,


Congratulations on the completion of your new track - it looks great!


Are you finished with the layout or will you eventually put up some diorama?


Thanks for sharing Dave.


Ernie


Hi Ernie,


I have been thinking about adding some grandstands and a couple of the road signs, but that be about it.


By the way, your track really came out great. You should show it on this chain. Will you be dressing up your layout with any buildings/landscaping?


Dave - 


David Heistand

#48 Alchemist

Alchemist

    Posting Leader

  • Full Member
  • PipPipPipPipPipPipPip
  • 2,706 posts
  • Joined: 11-November 09
  • Gender:Male
  • Location:Far, far away

Posted Yesterday, 03:07 PM

Hi Dave,


I did put up a some race track scene diorama, the concern was that a neighbor of mine that participates in my track sessions is wheelchair bound.


So being at a lower height blocked his view of the entire opposite side of the track.


Taking that into consideration I decided to remove the scenery.


Here is a link to a thread where I shared a few pictures of my initial Carrera track layout with my first piece of diorama:


http://slotblog.net/...slot-car-track/


Thanks Dave.


Ernie


Ernie Layacan


Electric Dreams Online Shop