Jail Door GP photo build tour
#1
Posted 04 May 2009 - 09:44 PM
#2
Posted 04 May 2009 - 09:47 PM
Really wish you were my neighbor...
Jairus H Watson - Artist
Need something painted, soldered, carved, or killed? - jairuswtsn@aol.com
www.slotcarsmag.com
www.jairuswatson.net
http://www.ratholecustoms.com
Check out some of the cool stuff on my Fotki!
#3
Posted 04 May 2009 - 09:50 PM
#4
Posted 04 May 2009 - 09:57 PM
8/19/54-8/?/21
Requiescat in Pace
#5
Posted 04 May 2009 - 10:12 PM
Great pictorial. So that is how the pros do it. Good idea to wrap the mandril handle. Mine keeps on slipping out. Did you drill the extra hole in the back of your jig and tap it or did Bryan? Is Corian easy to drill? Is that an RGeo drop arm wire bender? Beautiful job. How do you like your new Backtrack Jig? Thanks for the thread. This thread will help me be a better builder.
#6
Posted 04 May 2009 - 10:18 PM
Mike Katz
Scratchbuilts forever!!
#7
Posted 04 May 2009 - 10:25 PM
Mike, I see you around the track and I see you racing those great cars of yours and I have to say that you are one of kind. This build is way Sano and I been waiting for you to build it, and this is helping me to get me out of my depression.
Thank you Mike,(even if some people think I have to much to say)joke, being facetious of course.
Why did I do this? I guess I need to say what i have on my mind.
NestaHalf Breed
Nesta Szabo
In this bright future you can't forget your past.
BMW (Bob Marley and the Wailers)
United we stand and divided we fall, the Legends are complete.
I'm racing the best here at BP but Father time is much better then all of us united.
Not a snob in this hobby, after all it will be gone, if we keep on going like we do, and I have nothing to prove so I keep on posting because I have nothing to gain.
It's our duty to remember the past so we can have a future.
Pistol Pete you will always be in my memory.
#8
Posted 04 May 2009 - 10:33 PM
I knew with your imagination you could up with some great idea's how to utilize the jig.
Those drop arm pics were something really needed to help spark the Jailbreak movement.
Mike Swiss
Inventor of the Low CG guide flag 4/20/18
IRRA® Components Committee Chairman
Five-time USRA National Champion (two G7, one G27, two G7 Senior)
Two-time G7 World Champion (1988, 1990), eight G7 main appearances
Eight-time G7 King track single lap world record holder
17B West Ogden Ave., Westmont, IL 60559, (708) 203-8003, mikeswiss86@hotmail.com (also my PayPal address)
Note: Send all USPS packages and mail to: 692 Citadel Drive, Westmont, Illinois 60559
#9
Posted 04 May 2009 - 10:41 PM
One question, how did you get the 2nd bend on the drop arm so close to the first?
Did you use a spacer (bar) of some sort? I can't figure it out from the pix.
Ron
#10
Posted 05 May 2009 - 12:30 AM
#11
Posted 05 May 2009 - 01:10 AM
Mill Conroy
AKA : TWO LAP CONROY, Anointed Trigger Monkey by Mike Swiss
Deal me life's toughest cards, without chance for hope nor fame, just let me play this one last hand, and I'll win this whole damn game.
Second Most Interesting Man in the World.
#12
Posted 05 May 2009 - 04:55 AM
wish I could build outside .... sun light rules for lighting.
People need to see "HOW TO" posts to get them motivated
& excited about our sport & show that they can do it to.
Especially by the top people in racing
Home of the Gorski Double-Micro Controller
#13
Posted 05 May 2009 - 05:24 AM
-john
#14
Posted 05 May 2009 - 06:48 AM
Joe "Noose" Neumeister
Sometimes known as a serial despoiler of the clear purity of virgin Lexan bodies. Lexan is my canvas!
Noose Custom Painting - Since 1967
Chairman - IRRA® Body Committee - Roving IRRA® Tech Dude - "EVIL BUCKS Painter"
"Team Evil Bucks" Racer - 2016 Caribbean Retro Overall Champion
The only thing bad about Retro is admitting that you remember doing it originally.
#15
Posted 05 May 2009 - 11:34 AM
Install the tube and rails. Only solder the rear of the arm rails. Now solder all of the arm rails but, don't solder the tube in place. Now center the tube and solder it in place.
Now make two lines on the arm. One at 3/4" and one at 5/8". Place the arm in the vise aligning the 3/4" mark. Push the arm forward to approx. 45 degree angle. Loosen the vise. Now align the arm in the vise at the 5/8" mark. Pull the arm back towards you to a vertical position. Remove the arm from the vise and turn it over and align it in the vise at the 3/4" mark. Tweek until it's sano.
I've been soldering a #10 brass washer onto the bottom of the arm to give strength to the guide tube.
The next two pics show the aluminum tubing I used to shim the 3/32" axle to the 5/32" axle tubes. Cut the aluminum tube slightly smaller than the axle tubes.
#16
Posted 05 May 2009 - 11:39 AM
#17
Posted 05 May 2009 - 11:42 AM
Remember, two wrongs don't make a right... but three lefts do! Only you're a block over and a block behind.
#18
Posted 05 May 2009 - 11:43 AM
#19
Posted 05 May 2009 - 11:58 AM
There is no standard, only personal choice.
The reason I ask is that I could swear I saw a debate about this, as most of the photos of the R&C series cars for 1966 did not have slab arms until either at the end of the year or maybe early 1967.
Doesn't matter either way to me, just that if these were not common until 1967, then why not allow plate arms since these were starting to be used in '67? It would make building easier, and would seem to give the same basic result.
#20
Posted 05 May 2009 - 01:21 PM
PS. The brass rod arm helps improve everybodies soldering and bending.
#21
Posted 05 May 2009 - 03:41 PM
Some really great info your sharing!
What is the overall maximum length for the drop arm main rails,with a .675 guide lead center from the front axle tube? BEFORE making the bends! at the 5/8 and 3/4 mark. Doesn't the bend make it shorter?
I'm a little confused as to when or what step you need to get the guide lead set at length and still have enough wire at hinge point.
Thank You,
Best Regards,
Slots-4-Ever
Brian McPherson
REM Raceway
"We didn't realize we were making memories, we just knew we were having FUN!"
#22
Posted 05 May 2009 - 05:56 PM
The guide lead on the GP chassis in this thread is 5/8". Center of the front axle to the center of the guide's pivot pin.
I've held back from posting specs. I think each builder needs to measure the body and choose his specs.
#23
Posted 06 May 2009 - 01:39 PM
Well, I'll have to give Mike credit. This design just about builds itself. When using brass no bending jig is needed, just use a long peice of 7/32nds tubing to bend the first rod around. The bend doesn't have to be perfect as the 4 rods placed inside the U bend will align the rods. The next 4 or 6 "outside" rods couldn't be any more easy as they are straight!
Thanks Mike! The design is very effective and a fair amount easier to build.
11/6/54-2/13/18
Requiescat in Pace
#24
Posted 06 May 2009 - 07:11 PM
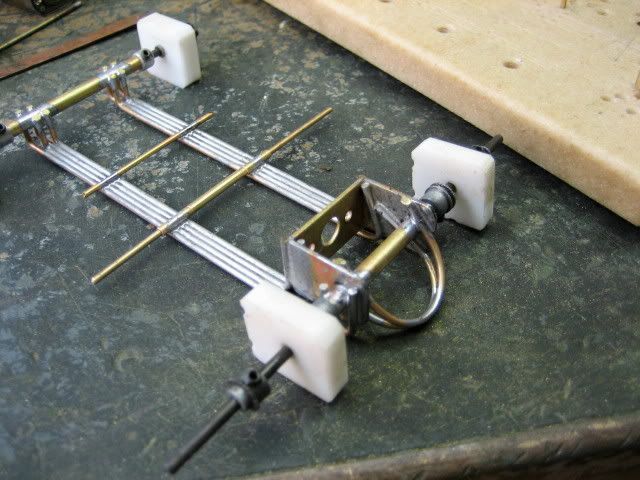
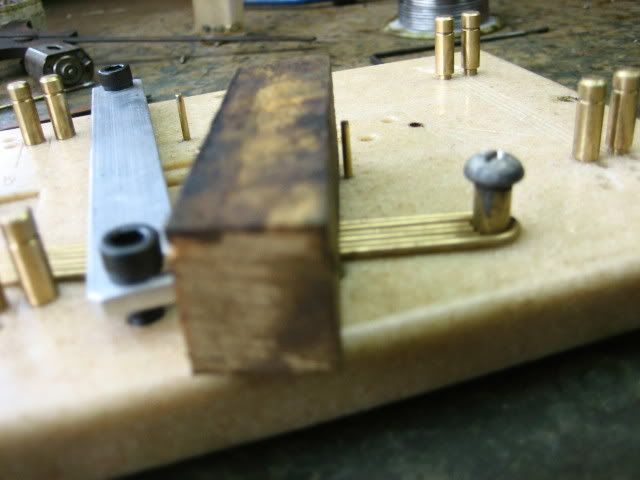
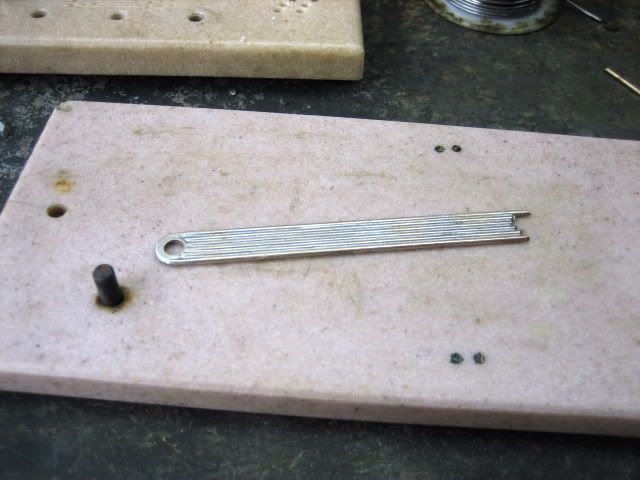
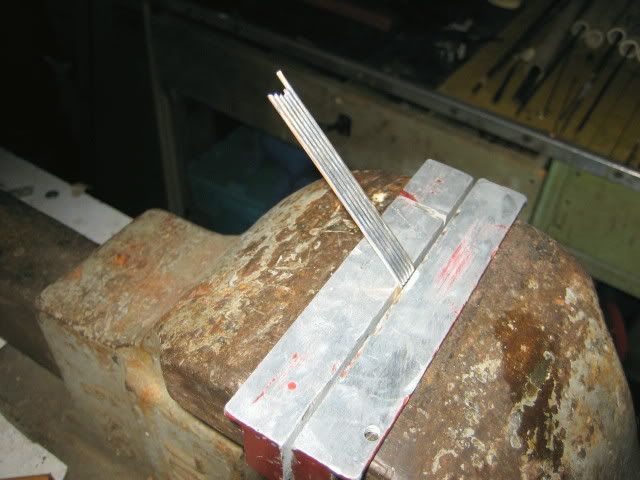
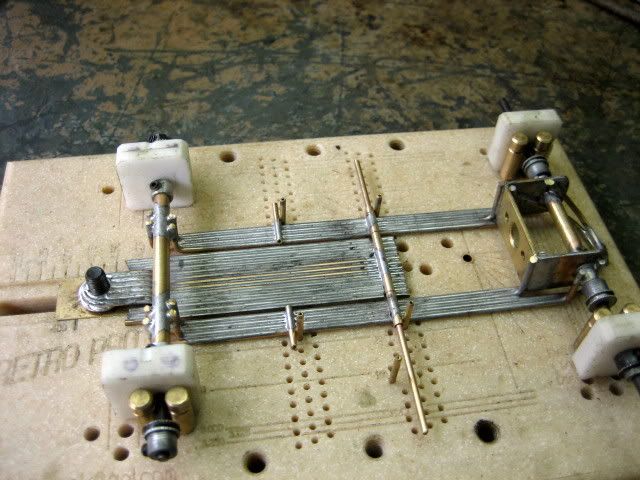
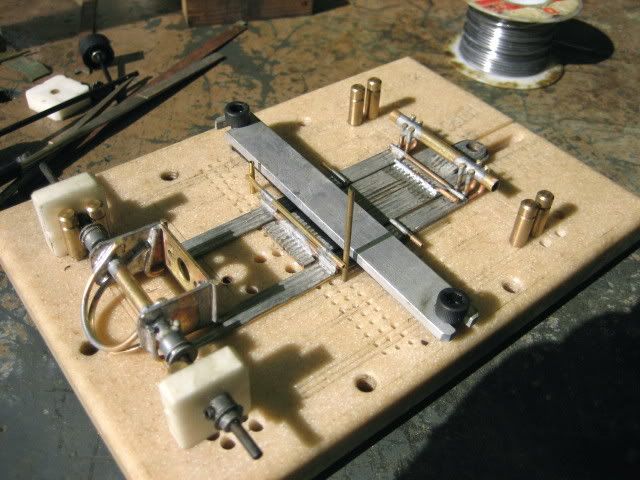
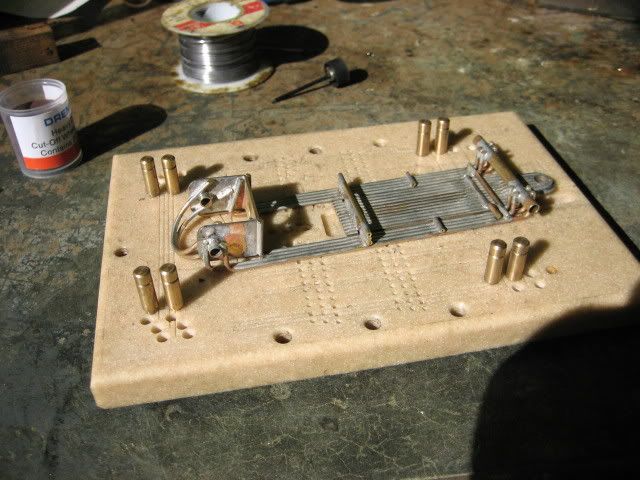
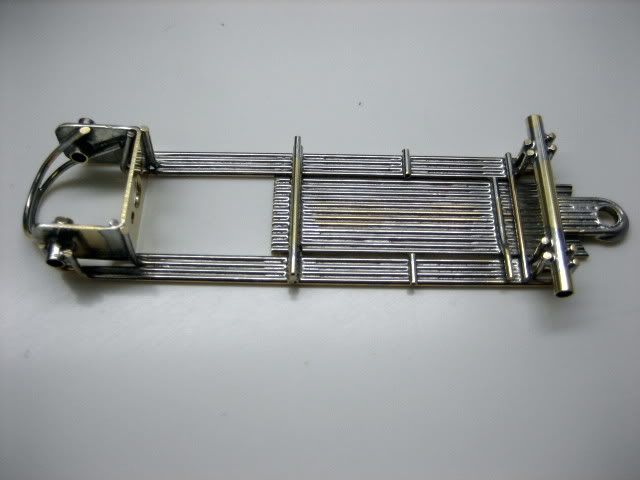
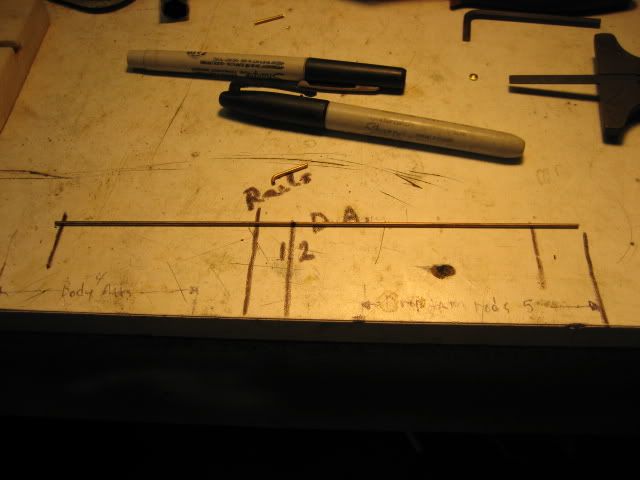
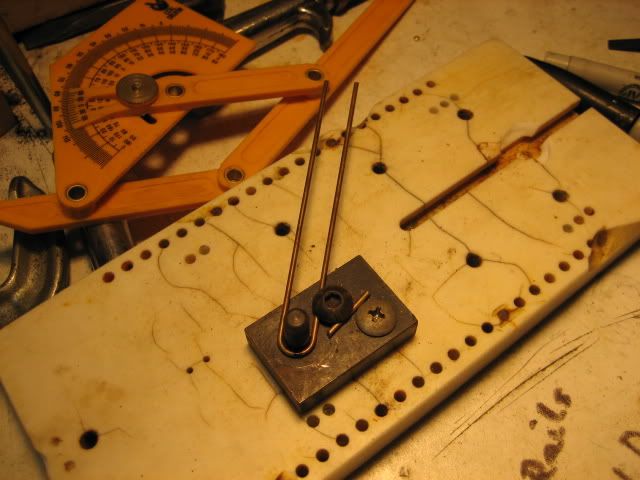
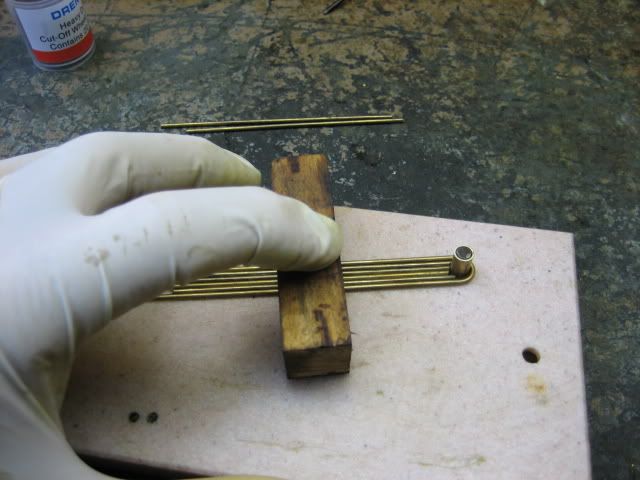
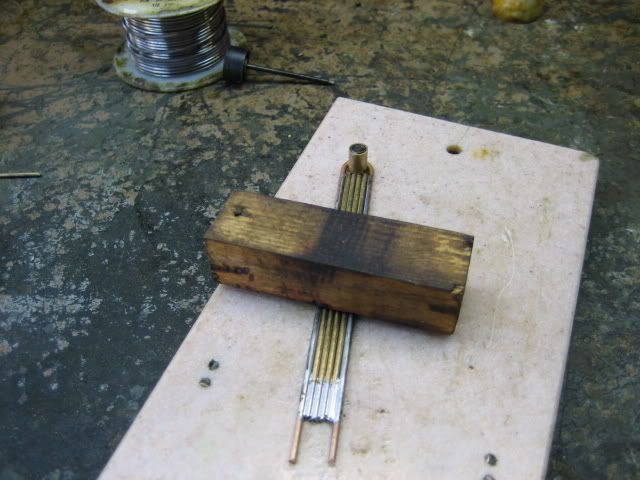
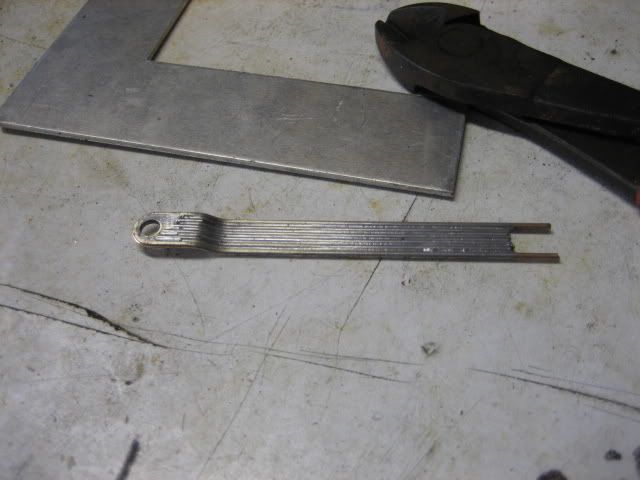
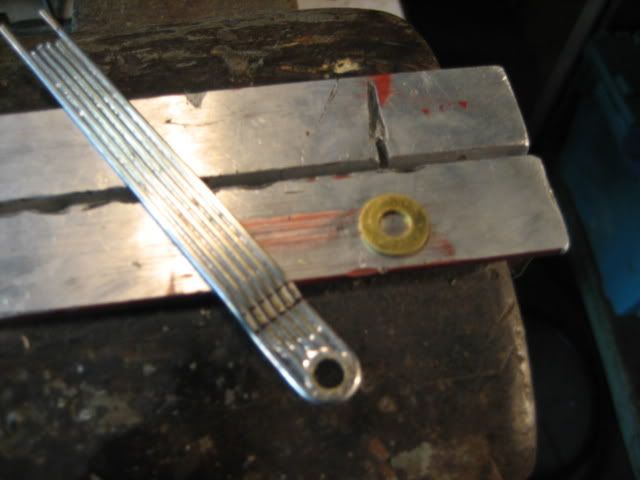
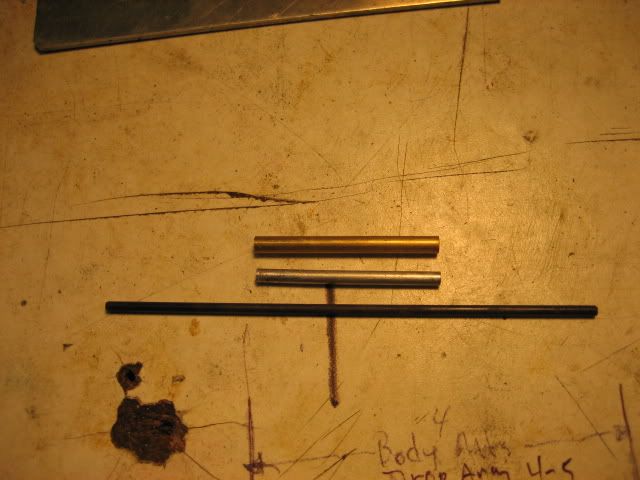
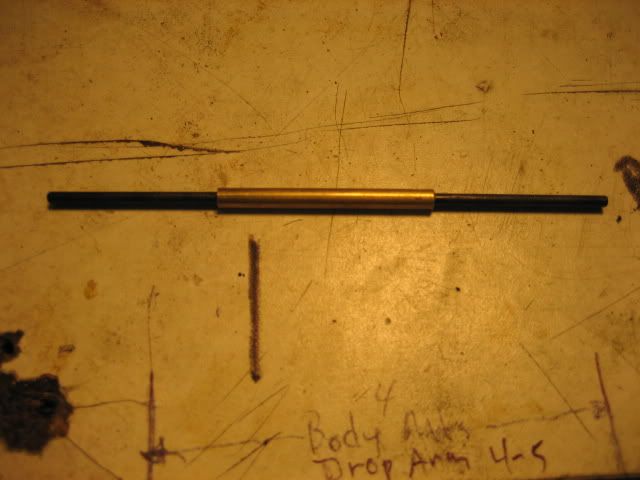
I've found that we don't all visualize in the same ways; some don't visualize at all! I can't draw a picture, f'instance, but I can build chasses in my head where the next guy might not! All different.[Mike S.] I've held back from posting specs. I think each builder needs to measure the body and choose his specs.
But, I've seen this sort of hesitation a lot--"what's the size, what goes where, what if I do it wrong--" in the hobby I'm currently on sabbatical from, I tell guys to just lay down stock and look at it, see if it fits the picture of what they're doing, cut & fit--and if you get it wrong, it's still easy to fix. A lot of the not-knowing goes away if you start moving rods around on your table, and then you get used to doing it and no more hesitation.
Duffy
1950-2016
Requiescat in Pace
And I am awaiting
perpetually and forever
a renaissance of wonder
#25
Posted 06 May 2009 - 09:14 PM