Jump to content


Photo

The Point


  • Please log in to reply
9 replies to this topic

#1 Jairus

Jairus

    Body Painter Extraordinaire

  • Subscriber
  • PipPipPipPipPipPipPipPip
  • 10,174 posts
  • Joined: 16-February 06
  • Gender:Male
  • Location:Salem, OR

Posted 16 July 2007 - 06:49 PM

The Point!
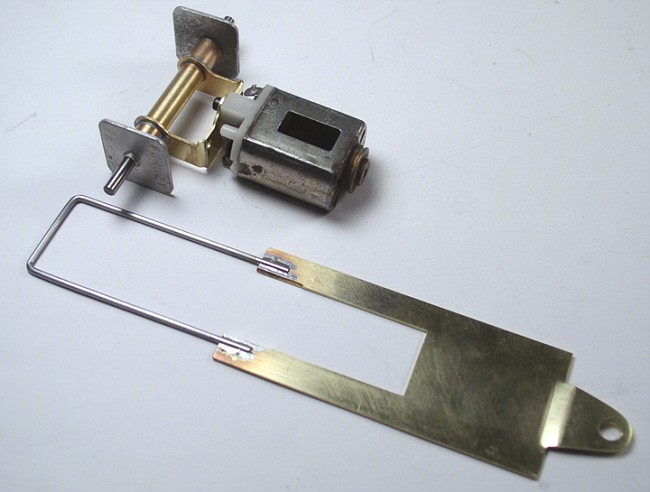
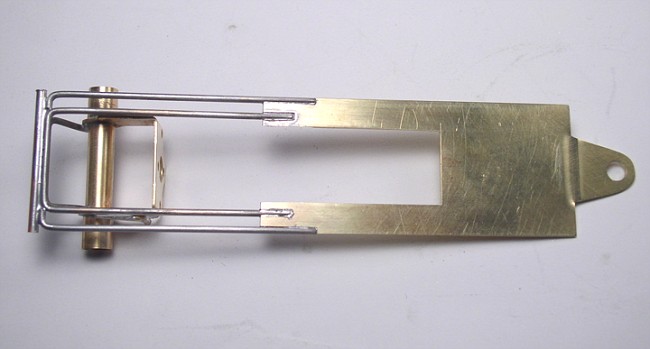
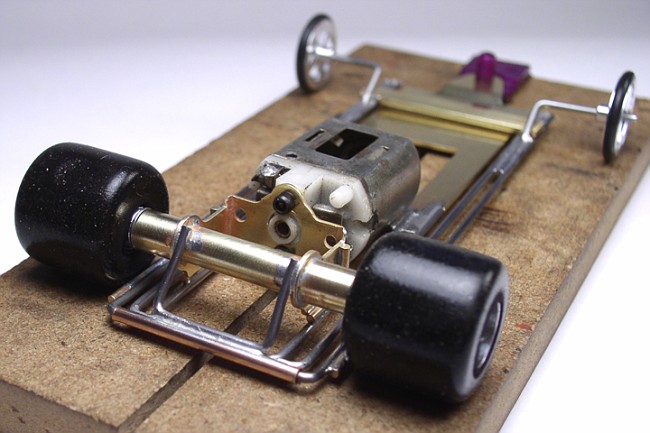
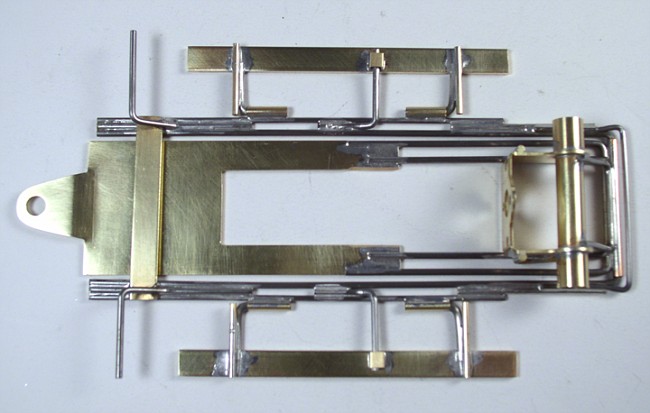
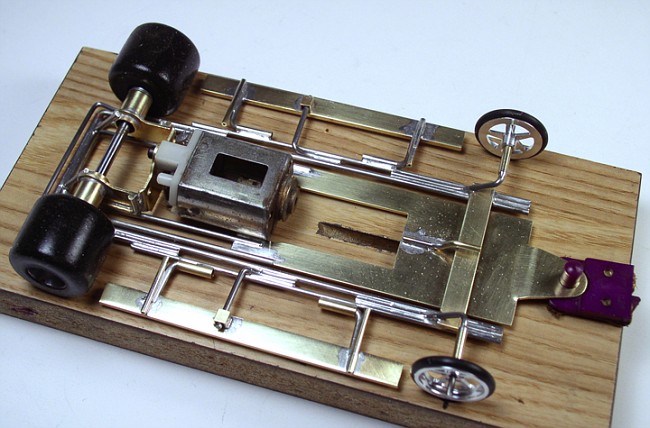
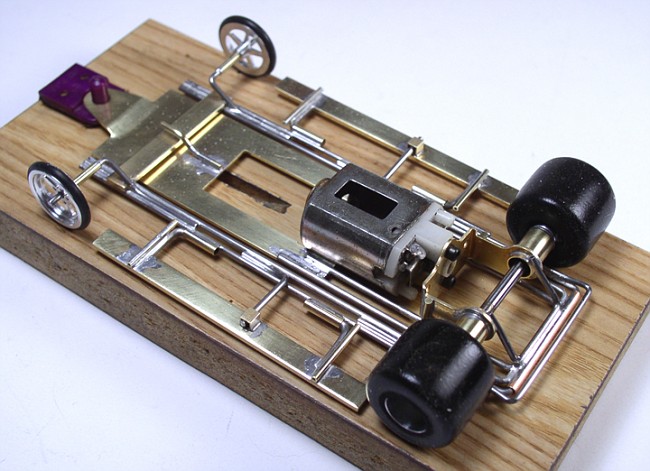
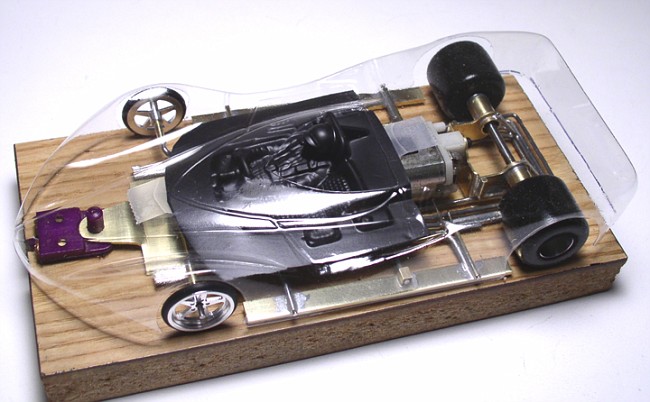
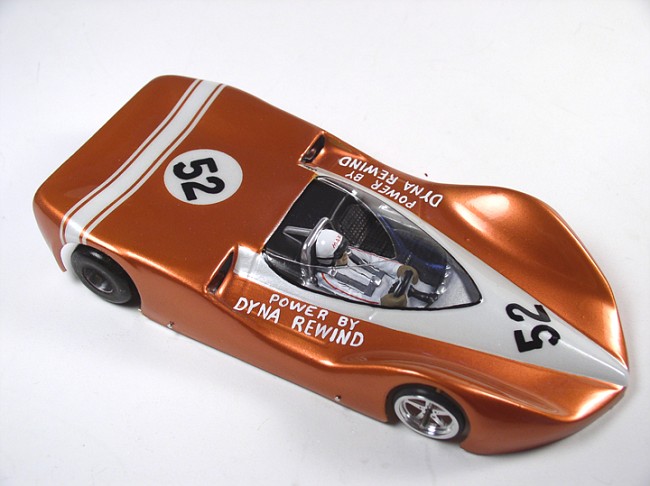
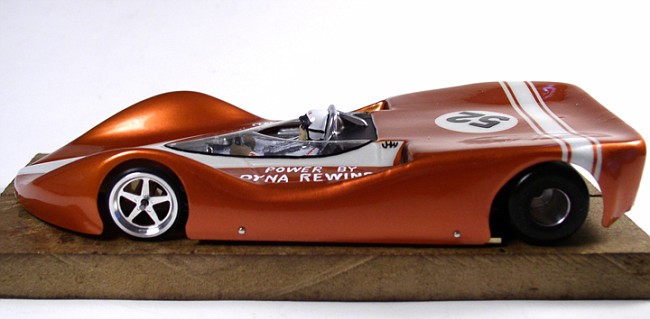
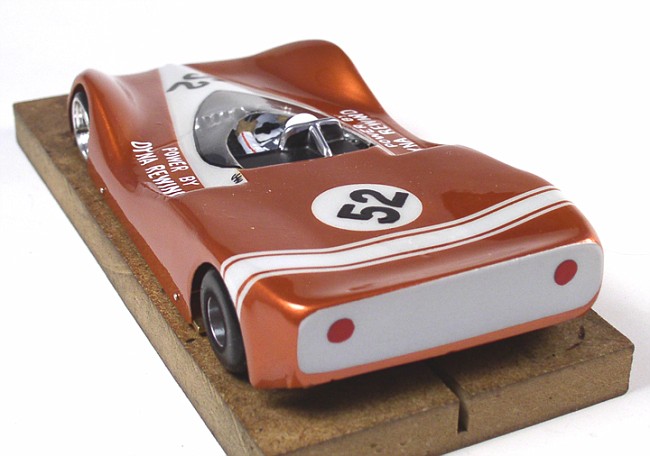
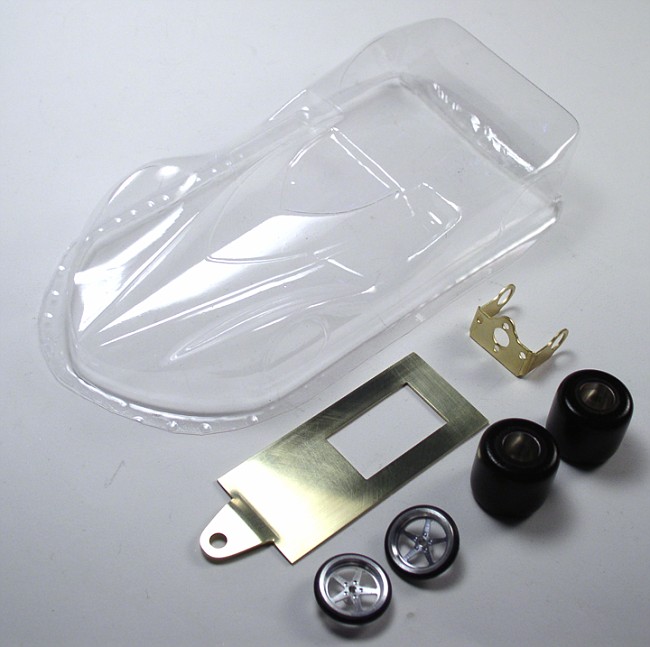
This Thingy body looks so much like a Can-Am car that I decided to build a chassis that was worthy of its sleek lines. One27Ray is the maker of this Vacuum formed piece, which I assume is a back pour of something available in 1968. The molding is very nice and has very few flaws in the surface. It should paint up very nicely! The 1.25” drop arm is .040 brass and the motor bracket Russkit.
Posted Image

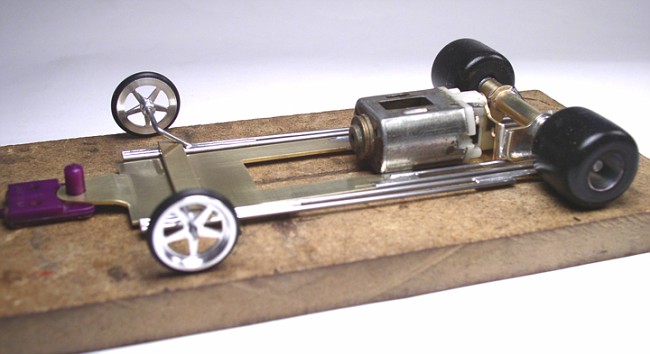
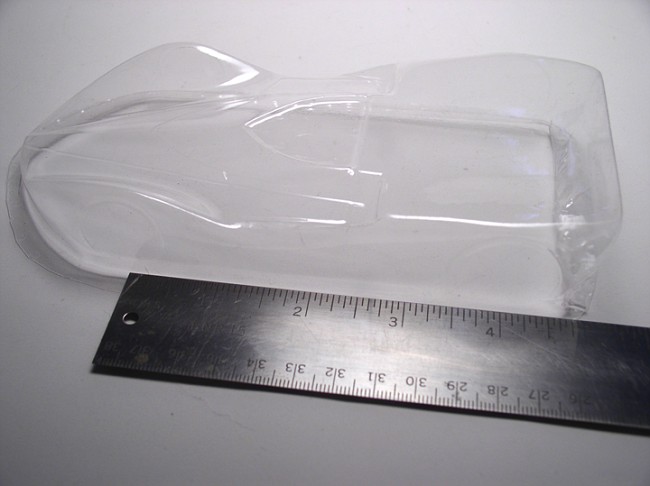
The first step before building any chassis, besides a general idea of its construction, is the length of the wheelbase, chassis width and tire size. Tire size is most important because you want the lowest possible center of gravity while still allowing legal track clearance. A quick measure of the body determines that this is going to be a 4” chassis. Width is 3.125” and rear wheel diameter is 7/8”. Now we can get started!
Posted Image

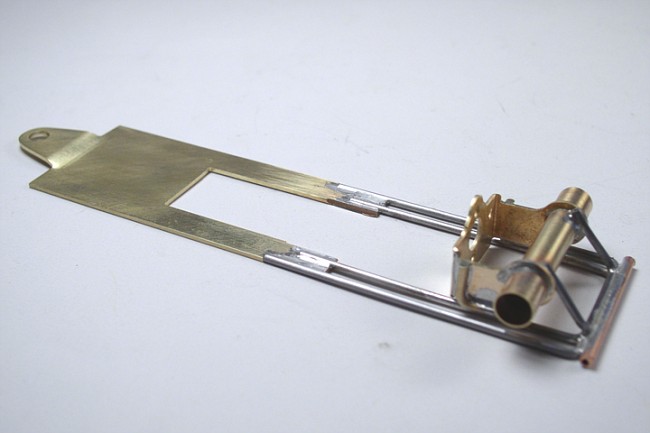
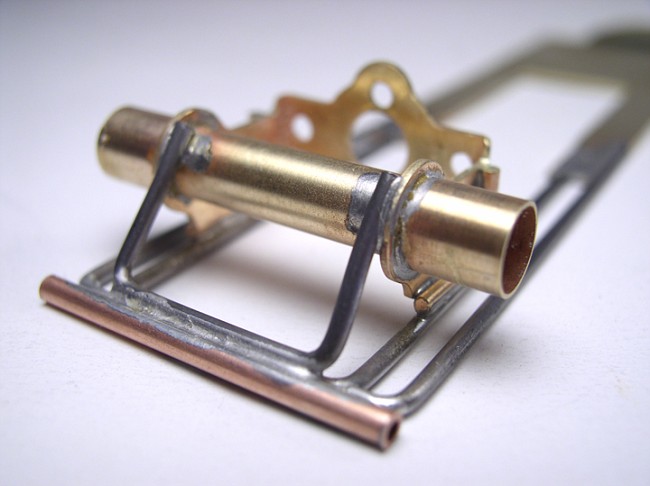
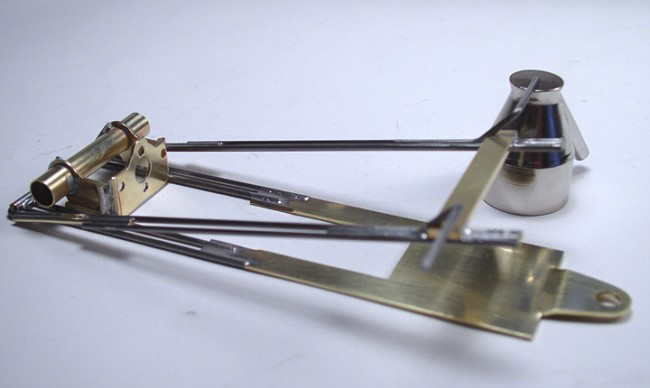
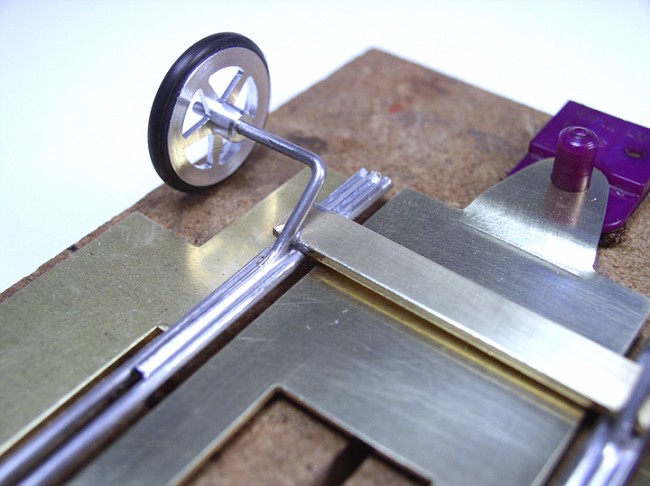
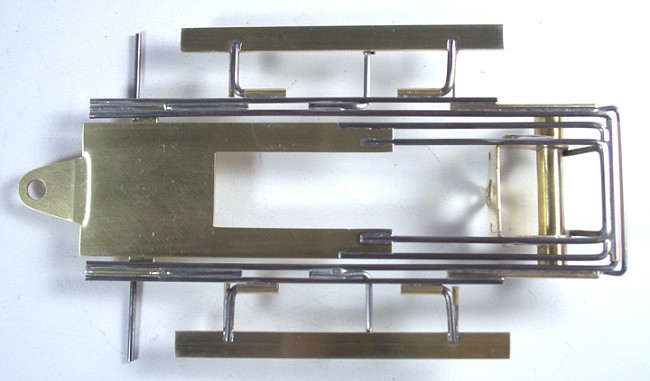
The next step is to assemble the rear axle, wheels and bearings in order to determine the correct width of the rear axle assembly. We want to place the bearings as close to the wheels as we can and still allow spacing for axle washers.
Posted Image

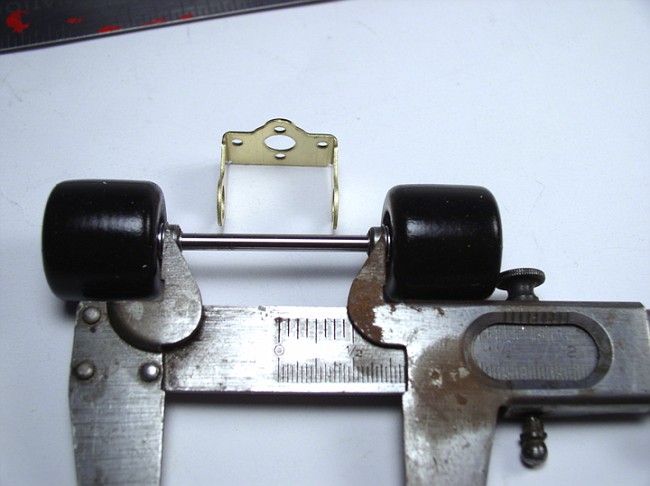
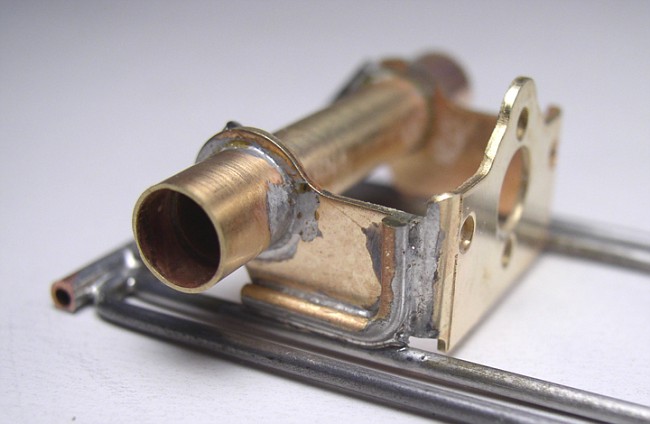
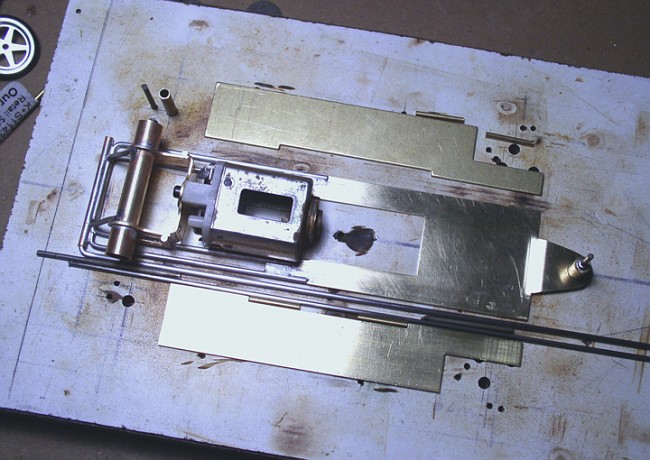
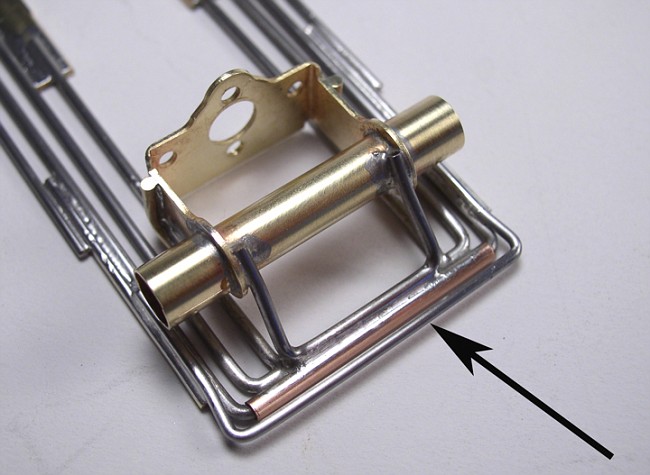
The rear axle assembly is soldered up using two diameters of tubing with the centerpiece left across during construction for strength. That will be cut away later…. The motor you see is just a shell that I use for assembly while in the jig.
Posted Image
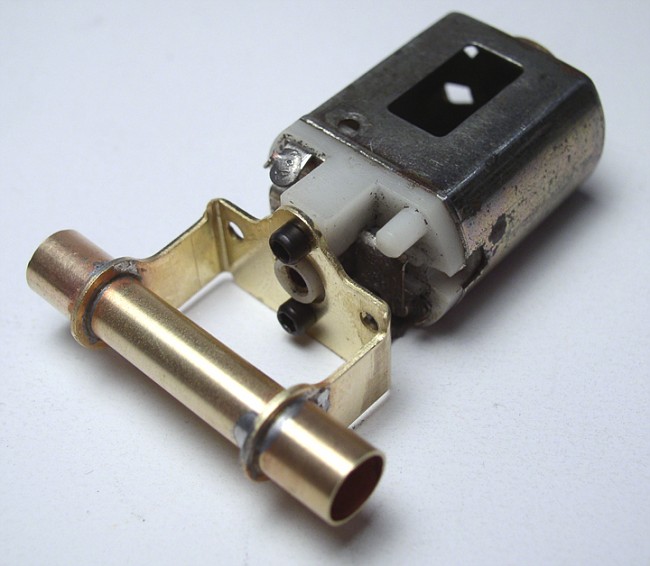
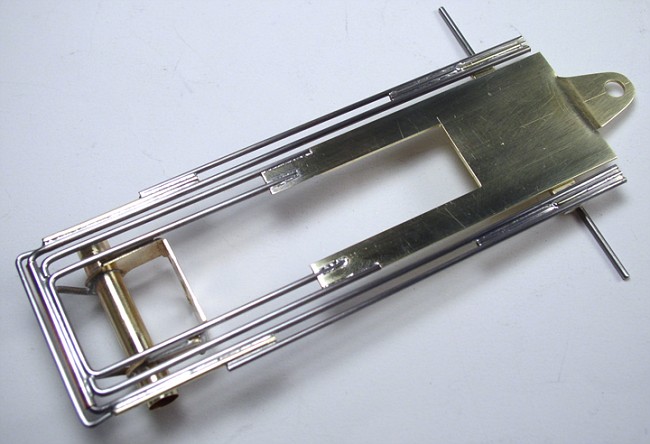
Next: Center section completed….

Jairus H Watson - Artist
Need something painted, soldered, carved, or killed? - jairuswtsn@aol.com

www.slotcarsmag.com

www.jairuswatson.net
http://www.ratholecustoms.com
Check out some of the cool stuff on my Fotki!


#2 Jairus

Jairus

    Body Painter Extraordinaire

  • Subscriber
  • PipPipPipPipPipPipPipPip
  • 10,174 posts
  • Joined: 16-February 06
  • Gender:Male
  • Location:Salem, OR

Posted 17 July 2007 - 08:04 AM

Center Section of an ISO

The first step is to set up the jig motor, axles and jig wheels into the chassis jig to figure how short to cut the drop arm. Then I get started bending wire and figure out how to connect the two…
Posted Image

And just about a half hour later the two are now one!
Posted Image
Close up of the rear shows a copper tube at the rearmost of the chassis…. This is the ISO pivot.
Posted Image

The motor bracket is securely attached to the frame rails by the spreader bar at the back, and these brass angles on each side. This is plenty strong and will take quite a beating before breaking. The chassis pieces have not been cleaned up other than a good scrubbing with Comet kitchen cleanser and a toothbrush. This is a good habit to get into, in that scrubbing all the flux off the chassis as soon as you unplug the iron.
Posted Image

Posted Image

Next: Fab’g the ISO rails and a front axle. :P

Jairus H Watson - Artist
Need something painted, soldered, carved, or killed? - jairuswtsn@aol.com

www.slotcarsmag.com

www.jairuswatson.net
http://www.ratholecustoms.com
Check out some of the cool stuff on my Fotki!


#3 Jairus

Jairus

    Body Painter Extraordinaire

  • Subscriber
  • PipPipPipPipPipPipPipPip
  • 10,174 posts
  • Joined: 16-February 06
  • Gender:Male
  • Location:Salem, OR

Posted 17 July 2007 - 06:18 PM

The ISO
An ISO is a hinge, which connects two different parts of a car but allows them a controlled amount of movement. In this case the front wheels and body are separated from the motor/drop arm assembly. The hinge is placed at the very back of the chassis. Before starting, the center section is placed back into the jig and .062 side rails are cut and bent…. Then using .055 outer rails and .062 spacers, the bat pans are used to determine that a correct overall width will be maintained.
Posted Image

The completed ISO is demonstrated.
Posted Image

Now the wheels and motor and guide are attached to check fit and clearances….
Posted Image
Posted Image

The front wheel mounts are also spacers between the rails. The mounting is as strong as it needs to be…. Cross member is a chunk of .060” quarter inch strip of brass.
Posted Image

Can’t forget the rear spreader bar. This “U” shaped rod connects the back half of the ISO together. Before this is soldered permanently, the ISO pivot is lubed with light oil.
Posted Image

And the bottom….
Posted Image
Next: The bat pans…. Stay tuned to this same bat time and same bat channel…

Jairus H Watson - Artist
Need something painted, soldered, carved, or killed? - jairuswtsn@aol.com

www.slotcarsmag.com

www.jairuswatson.net
http://www.ratholecustoms.com
Check out some of the cool stuff on my Fotki!


#4 Larry LS

Larry LS

    a dearly-missed departed member

  • Member at Peace
  • PipPipPipPipPipPip
  • 1,661 posts
  • Joined: 16-February 06
  • Gender:Male
  • Location:Central Coast of CA.

Posted 17 July 2007 - 08:24 PM

Great looking Chassis and the body that I saw on SCI, very beautiful work Jairus!!!. :wub:
Larry Shephard
1937-2011
Requiescat in Pace

#5 Jairus

Jairus

    Body Painter Extraordinaire

  • Subscriber
  • PipPipPipPipPipPipPipPip
  • 10,174 posts
  • Joined: 16-February 06
  • Gender:Male
  • Location:Salem, OR

Posted 18 July 2007 - 09:31 AM

Thank you Larry!
I saved the posts so I could put them here ... at my home!

And away we go!
The BAT’s but not pans…..
Changed my mind on the floppy Bats…. Decided to go with something more period. Pans would have been cool but were too modern for this Thingy!
Posted Image
Not sure what I am going to do about the drop arm stop…. Don’t really need one to limit side to side movement/flex as the double rail design is extremely stiff laterally!
Posted Image

Not painted yet but the chassis is finished and the body mounted.
Posted Image

Posted Image

Posted Image

So then I threw some paint on it and I like this body! The paint is a copper metallic that I custom mixed using Practra lacquers. The formula is one glug of Coral Pearl, a gloop of bright yellow and a drop of my own custom mixed metallic orange pearl. (Good luck matching that again….)
Posted Image

Posted Image

The reason I say finished is that I built this car for someone else. It will have a custom built motor installed and professionally set up for racing by someone else now that I am done.
On to the next project…..
Posted Image

Posted Image
B)

Jairus H Watson - Artist
Need something painted, soldered, carved, or killed? - jairuswtsn@aol.com

www.slotcarsmag.com

www.jairuswatson.net
http://www.ratholecustoms.com
Check out some of the cool stuff on my Fotki!


#6 TSR

TSR

    The Dokktor is IN

  • Full Member
  • PipPipPipPipPipPipPipPip
  • 42,284 posts
  • Joined: 02-February 06
  • Gender:Male
  • Location:Marxifornia

Posted 18 July 2007 - 09:49 AM

Awchucks Jairus, I still had some original DECALS for the "Power by Dyna-Rewind" and "Shinoda-Bilt"... can you buff that and I'll shoot you some in the mail?

Philippe de Lespinay


#7 Jairus

Jairus

    Body Painter Extraordinaire

  • Subscriber
  • PipPipPipPipPipPipPipPip
  • 10,174 posts
  • Joined: 16-February 06
  • Gender:Male
  • Location:Salem, OR

Posted 18 July 2007 - 10:36 AM

Sure!
It's just enamel on the surface of the body. A little paint thinner and it comes right off. Send them and I'll see what the owner wants to do.
Thanks Philippe!

Jairus Watson
4528 2nd Way SE
Salem, OR 97302

Jairus H Watson - Artist
Need something painted, soldered, carved, or killed? - jairuswtsn@aol.com

www.slotcarsmag.com

www.jairuswatson.net
http://www.ratholecustoms.com
Check out some of the cool stuff on my Fotki!


#8 TSR

TSR

    The Dokktor is IN

  • Full Member
  • PipPipPipPipPipPipPipPip
  • 42,284 posts
  • Joined: 02-February 06
  • Gender:Male
  • Location:Marxifornia

Posted 21 July 2007 - 09:18 PM

I'll send them Monday after I get back from the coupe race.

Philippe de Lespinay


#9 Maximo

Maximo

    Checkered Flag in Hand

  • Full Member
  • PipPipPipPipPipPip
  • 1,788 posts
  • Joined: 31-August 06
  • Gender:Male
  • Location:San Antonio, TX

Posted 23 July 2007 - 01:38 PM

Jairus,

Been on vacation....just got back!

Excellent job building this POINT project car as usual! You are this guy's best friend indeed.

I have wanted this car ever since I first saw one on this forum long ago! Finally a body became available to build one and I did have two different thicknesses to consider, so I sent to you the thinner body and kept the thicker one here.

Although I do not have a "Dyna-Rewind" (yet) I will install a hot Mabuchi FT16D motor in it as I do with every scratch-built project car. This one is "Shinoda-Inspired...Watson Built" If Dokk does send you those decals I would love to have them to place onto this body. After all, the car on the Electric Dreams web site is the inspiration for this project!

-Maxismile :rolleyes:

David Ray Siller

MAXImum MOtion


Retired Video Game Creator/Designer/Producer
Thingies are my thingy!


#10 Pablo

Pablo

    Builder

  • Administrator
  • PipPipPipPipPipPipPipPip
  • 18,370 posts
  • Joined: 20-February 06
  • Gender:Male
  • Location:Cleveland, Tennessee

Posted 27 July 2007 - 07:34 PM

I've been wanting to see a "how to" on the ISO style.
Thank YOU Dr. Watson for sharing a spectacular work.
Beautiful as always.

Paul Wolcott


Electric Dreams Online Shop