


Hammerhead Thingies
Page 4
While I was playing around with different ideas for the side pan hinge arrangements on this chassis, I considered the idea of including a plumber hinge. Trouble was, this is supposed to be a vintage 1968 chassis, and the plumber hinge hadn't been invented yet! Sorry, no plumber hinge.
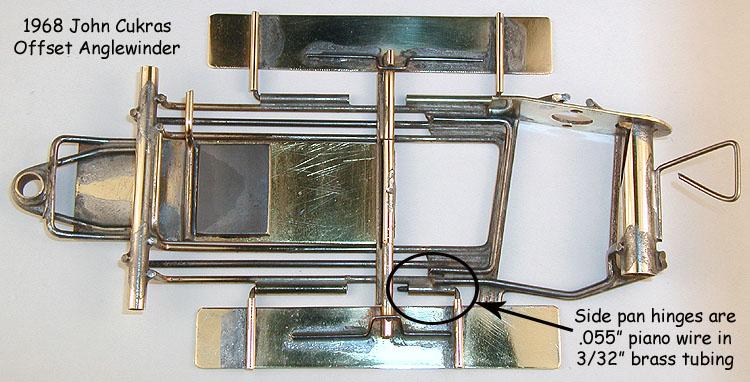
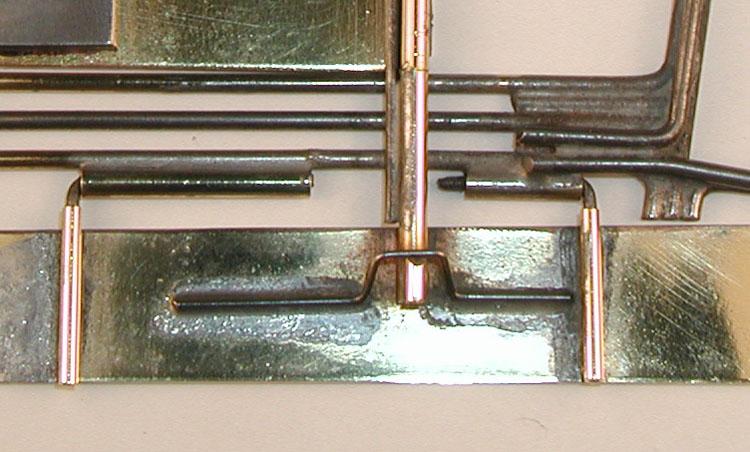
On the other hand, the concept of loosely attached (klunker) chassis parts, like side pans hinged using .055" (1.4 mm) piano wire in 3/32" (2.38 mm) brass tubing was, even in 1968, certainly nothing new. John Cukras had in fact been playing around with this very idea for side pans in his early anglewinder chassis, and I used it in my original Hammerhead design.
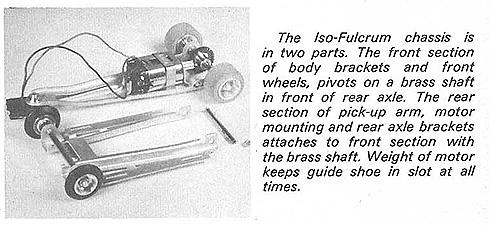
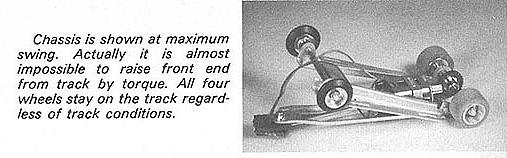
In addition, there was the Iso Fulcrum hinge idea, already a couple of years old in 1968.

So, how could I achieve the function of a plumber hinge without actually using a hinge? Maybe cross the Iso Fulcrum idea with Cukras' "klunker" side pans, and then take it one step further with a kind of "Klunker Reverse Iso"? (A what?) Read on...
First a drawing to satisfy myself that all the parts will fit together:

Note that while this chassis is similar to the original Hammerhead design on the previous page, their are significant differences, so I will call this one "version 3" (v.3), which of course, makes the previous one "version 2". What happened to "version 1"? I didn't like the way the design was developing, so it never went past the concept stage; I didn't even create a drawing.
After cutting another nose piece, I built up the center section:


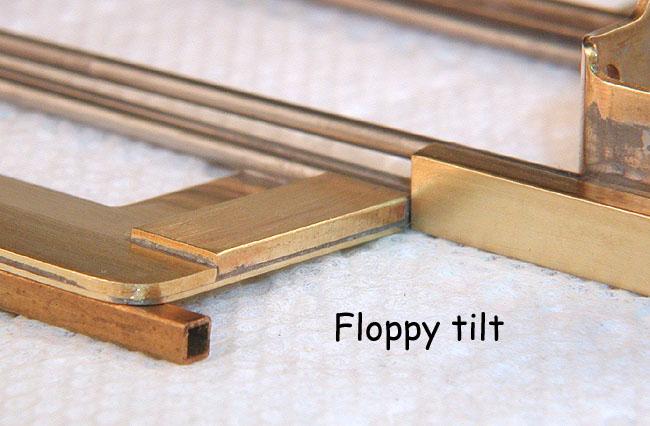
The two main rails (on each side) are stacked one on top of the other, instead of side by side, as in the original Hammerhead design. This was done to increase the "beam" strength of the center section, to make it as narrow as possible, and to give the rear floppy "hinge" tube, which is rectangular, a good solid anchor point.
The "Klunker Reverse Iso" hinge rods are pieces of 1/16" (1.59 mm) piano wire (didn't even need to use .055"!). They fit into the 3/32" (2.36 mm) square brass tube "pocket" at the front, and the 3/16" by 3/32" (4.76 by 2.36 mm) rectangular tube at the back. Note there is no "traditional" plumber hinge.
Now, add the bat wing side pans:
As you can see, the front axle hinge tubes are not attached to the center section, instead they are attached to the side pans, and are part of the "Klunker Reverse Iso" chassis subsection.
Now, to illustrate how it works:


Finishing out the chassis, I add the side pan up and down stops, and the front end suspension.
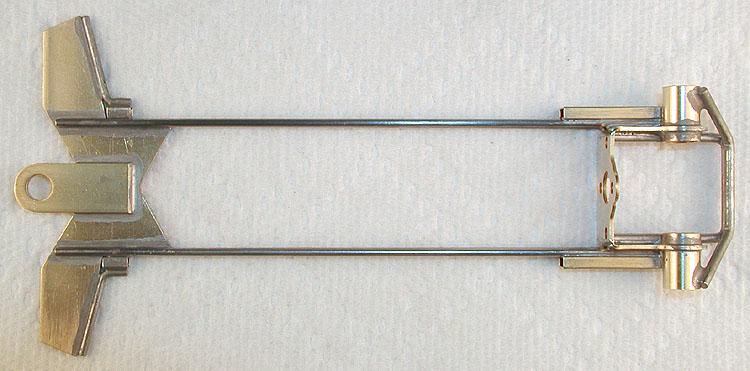
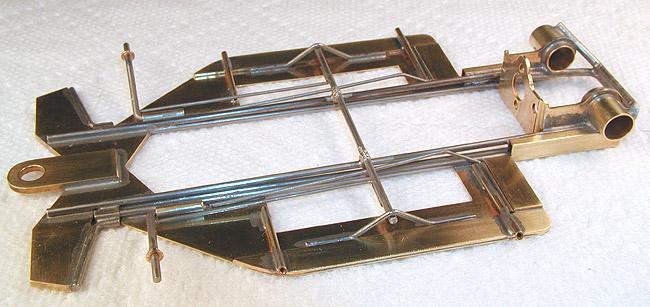
Top and bottom views:

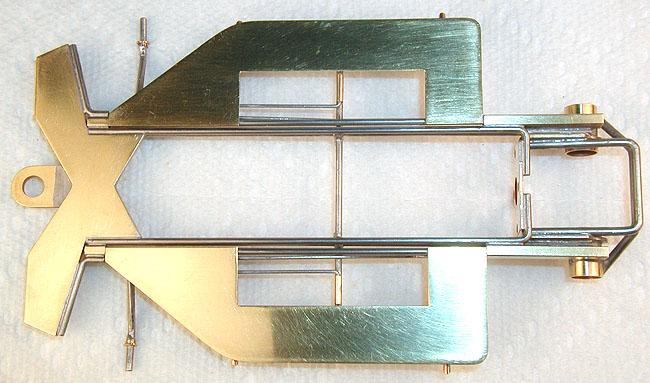
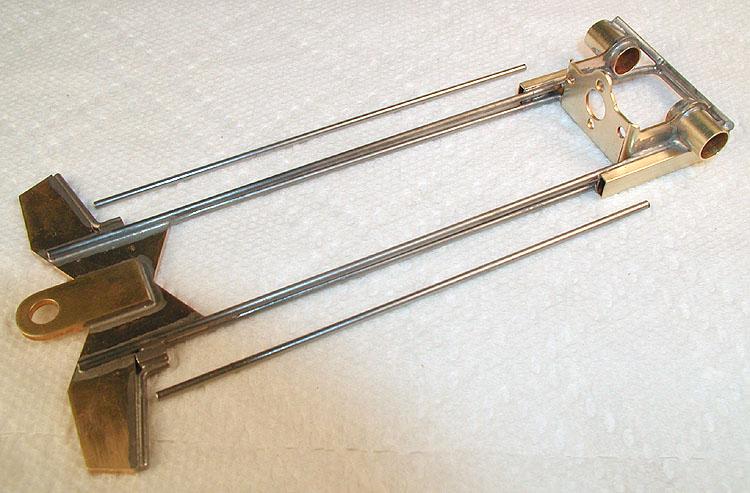
An isometric and side view:
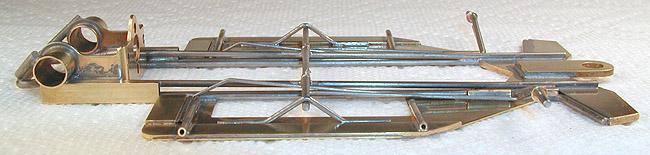
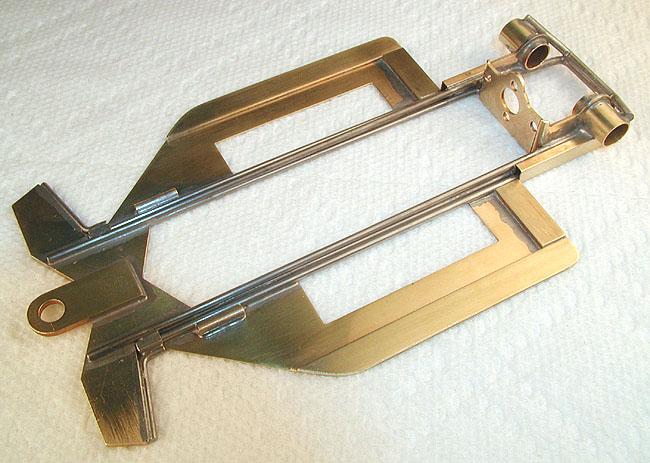
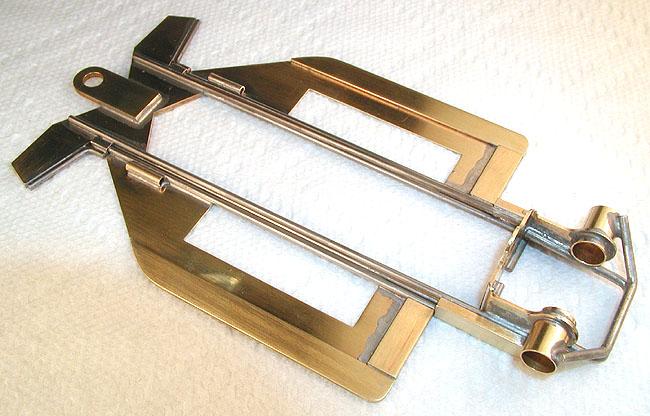
And a couple of detail shots:
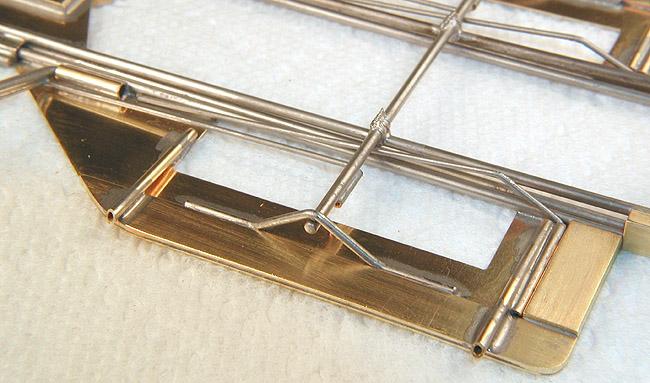
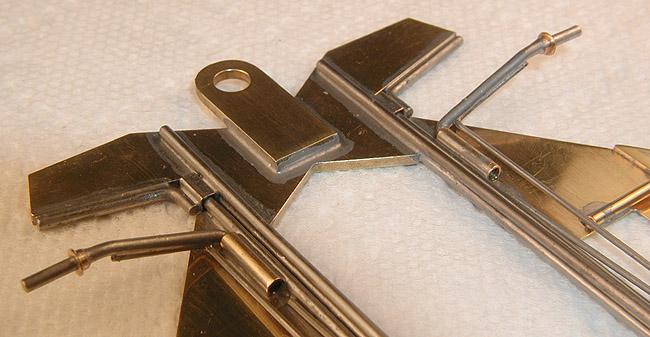
There are two .032" (0.79 mm) spring wires on each side, the outboard wire is for front wheel suspension and operates in a torsion (twisting) mode. The inboard wire springs (pushes) the "Klunker Reverse Iso" movement down, and operates in a bending mode, similar to downward sprung side pans. The side pans themselves are, however, not sprung at all.
Simple... right? 


