Jump to content


Photo

R&C Captain Rick’s entry #1


  • Please log in to reply
105 replies to this topic

#1 dc-65x

dc-65x

    Grand Champion Poster

  • Subscriber
  • PipPipPipPipPipPipPipPip
  • 6,937 posts
  • Joined: 14-February 06
  • Gender:Male
  • Location:Captain Rick: The only vintage slot car nut in SW Oregon?

Posted 12 October 2013 - 07:31 PM

I was 16 years old in 1966 and built and entered a car in the 6th Rod & Custom Road Race. Man, I was in WAY over my head.  :dash2:  But that's a story for another day.  :laugh2:

Since I've already built these cars as a kid, I know I would have fun doing these new builds as the 63 year old retired Journeyman Machinist I am today. And, having fun building and driving these great old cars is what this is all about.


So, I'll be jumping into the time machine (with my Rick's Jig in my pocket) and traveling to 1966 to build my R&C entries. :dance3:
 

For my motor I dug up an original period rewound Russkit 23:
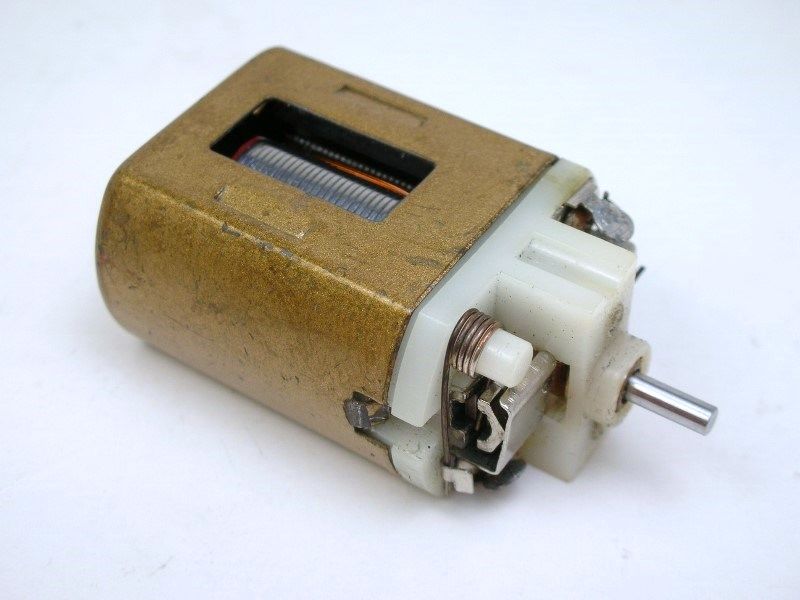
 

PeriodRewind13.jpg


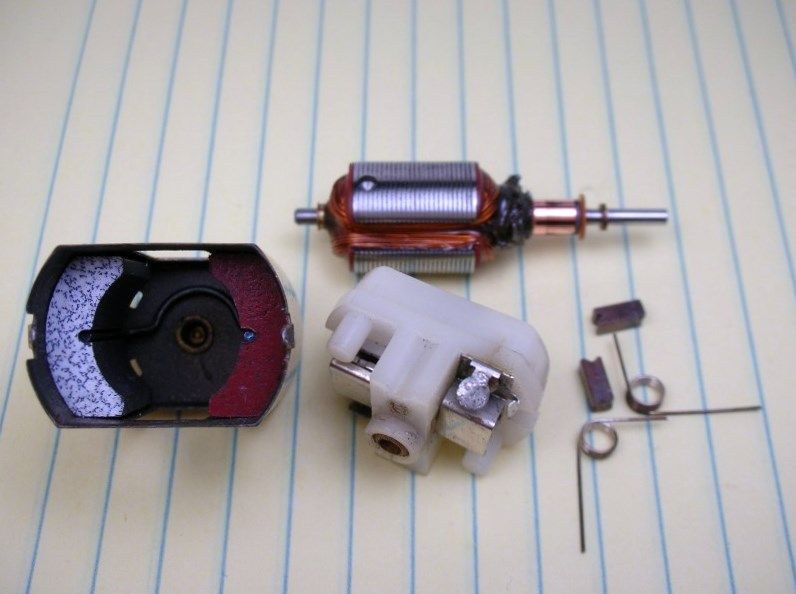
Here she is torn down. The arm was lightly epoxied and drill balanced and reads .6 ohms. It's got a French/Tradeship 11 degree comm, French/Tradeship HD magnets and HD brush springs.
 

PeriodRewind14.jpg


I could have just used this motor as is but what fun would that be? I decided to restore the armature and build a new setup.


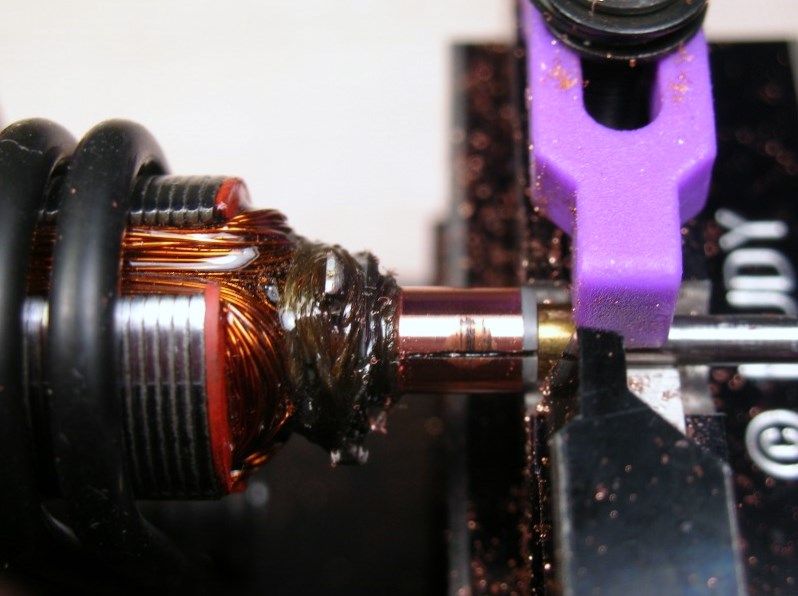
The comm was a mess. I had to take .009" of the diameter to clean it up. There probably is not a lot of life left in her but she should run like new until she blows. I really enjoy experiencing how the "real deal" cars ran back in the day.....something Rodney taught me.
 

PeriodRewind1.jpg


The thread wound on the comm was dry and frayed plus I needed to install a metal spacer on the back of the arm as I'm not going to run a "blind" bearing on my motor. The arm was recoated with epoxy and baked.
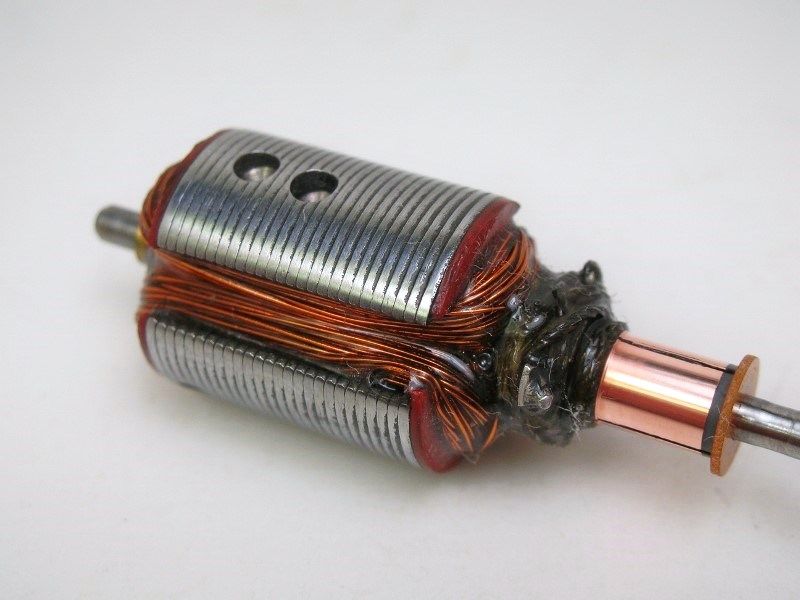
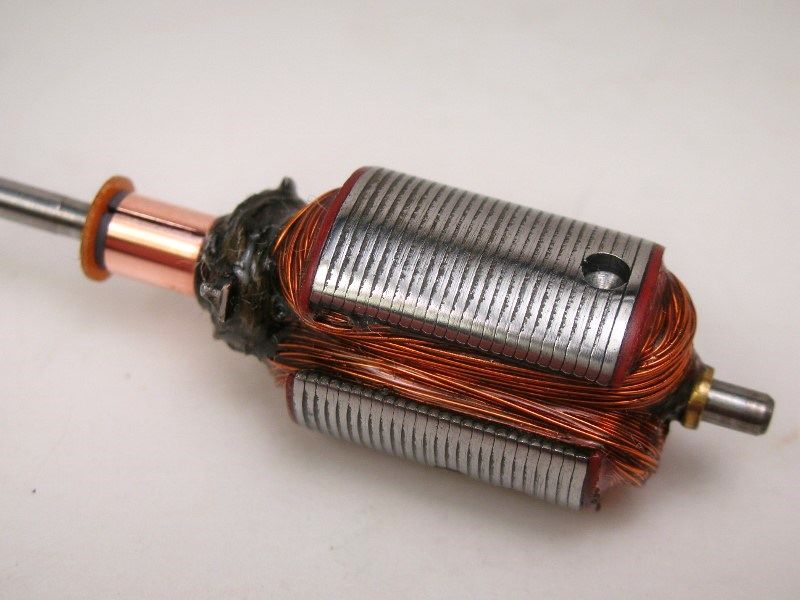
 

PeriodRewind2.jpg


PeriodRewind3.jpg


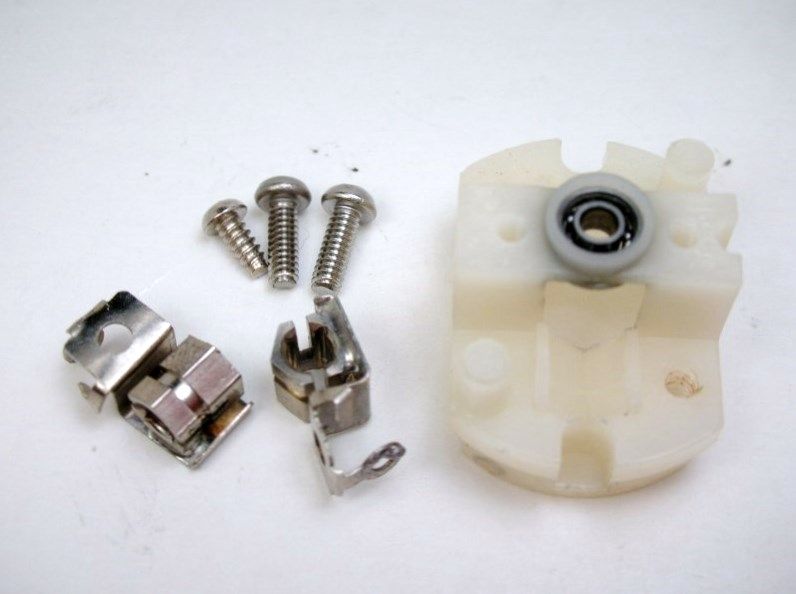
Here's the modified Mabuchi endbell. The brush hoods are soldered to the hex brush holders, the self taping screws were ditched for machine screws and the worn out oilite bushing replaced with a new ball bearing:
 

PeriodRewind.jpg


OK, ball bearings, I don't believe any of the top guys used them. Reading the race reports they talk about not using BB's in the rear axle so they will have more brakes. They even talk about setting up a tight gear mesh for more brakes.


I'm not a "top guy" and BB's were installed as part of a motor "hop-up" in all the magazines way before the R&C series. And I personally like them....I have fun building motors with them.


Machine screws vs self taping screws. Machinists generally don't like self taping screws. Using them is like driving a wedge into the hole of the brittle plastic. They are also prone to stripping out. I don't like them. They do not make me happy....machine screw do. :crazy:


Soldering the brush hoods to the brush holders. I'm not sure when the first person realized this was a good idea. I had the job done before I thought about it. Hmmmmm.....maybe when I went back in time and did this, I actually started the practice :laugh2:


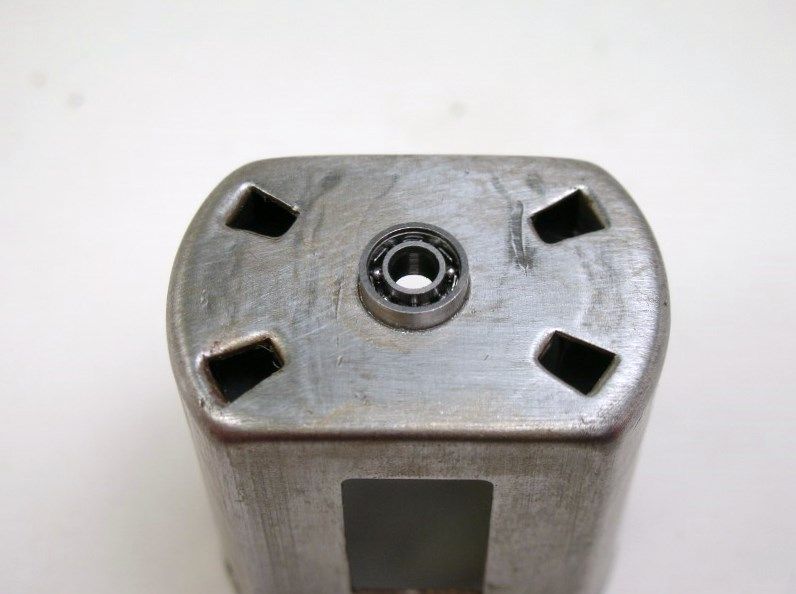
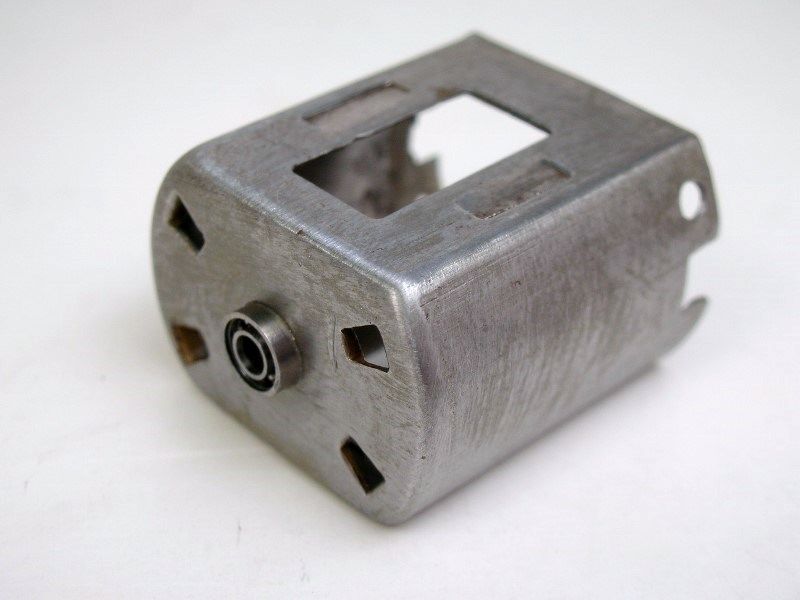
Mr Motor Can gets a ball bearing too:


PeriodRewind4.jpg


Ditching the blind bearing and replacing it with an endbell bearing was often done. This is the high end, "no brakes" version. The can is also drilled for endbell mounting screws, the magnet holding gizmo's are smashed flat and is ready for paint:
 

PeriodRewind9.jpg


For magnets I'm using French/Tradeship like the original motor:
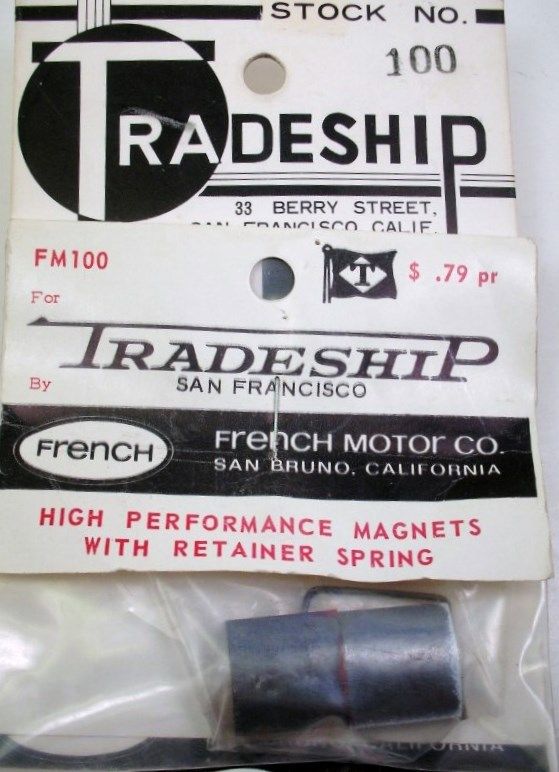
 

PeriodRewind11.jpg


Since I have several sets I went through them with my gauss gauge to find a strong set that were matched:
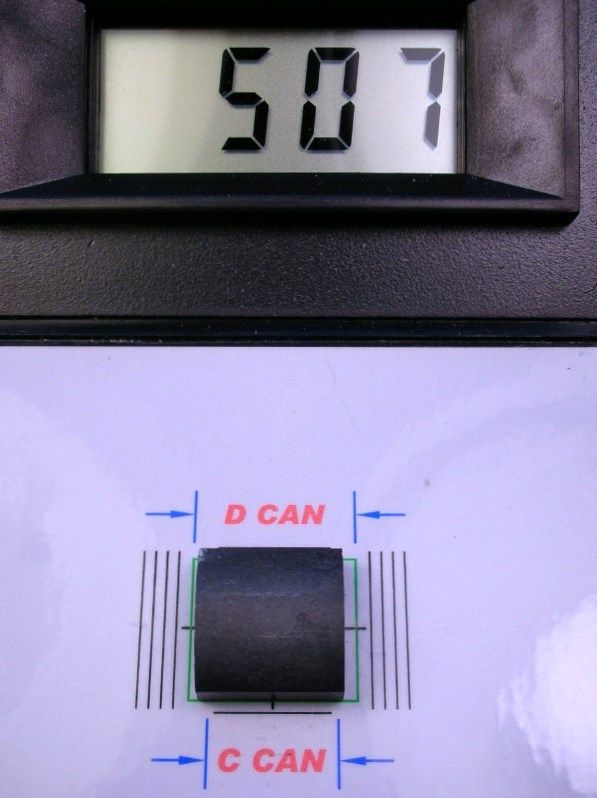
 

PeriodRewind10.jpg


Not a bad reading. They are about as strong as Hemi's. Whatever you do, DON'T try and zap this type of magnet. It will just get weaker. If you don't believe me just ask our friend R-geo Rick!


Oh, I don't have a mechanical gauss gauge like Tom Malone used in period Car Model Magazine articles (although Eddie does!) Here are the magnets with lightly polished faces, magnet clip and .004" steel magnet shims:
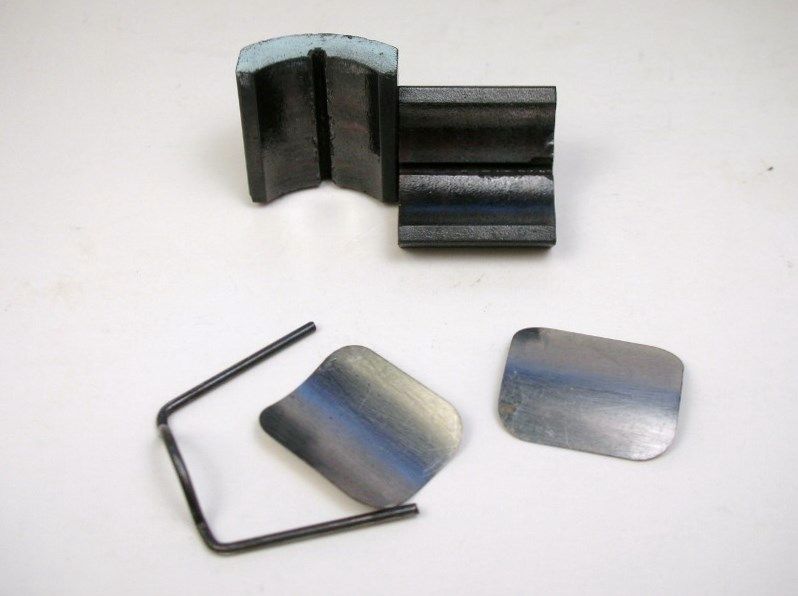
 

PeriodRewind5.jpg


STEEL MAGNET SHIMS! :shok:


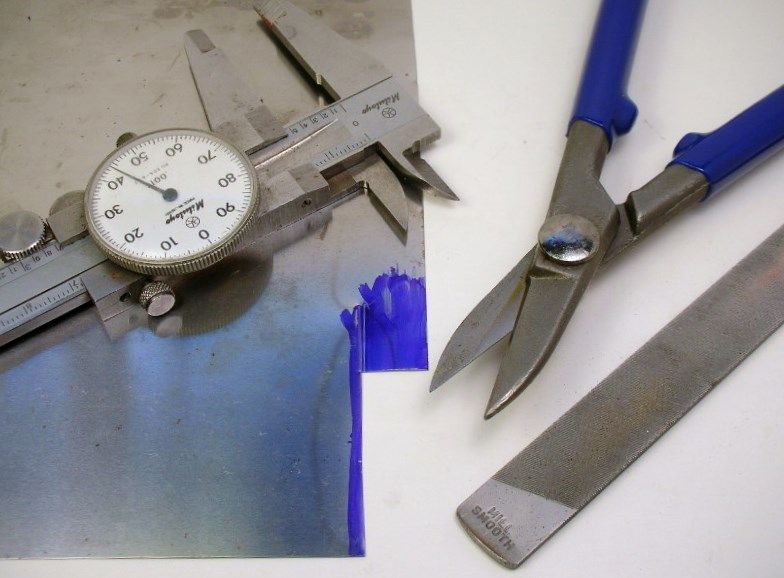
Yes, steel magnet shims. Machinists don't use masking tape. Actually, I've got period magazine articles where the author is cutting shims from old tin cans! Steel shim stock was readily available in 1966. :)


Here's how I made mine:


PeriodRewind6.jpg


Okie Dokie, that's the motor. I'm not painting and assembling it yet. I want to use the bare can and endbell as my jig motor.


Time to build a chassis......which means I have to quit waffling on what body to use!


Onward


  • Peter Horvath likes this

Rick Thigpen
Check out Steve Okeefe's great web site at its new home here at Slotblog:
The Independent Scratchbuilder
There's much more to come...


#2 SlotStox#53

SlotStox#53

    Posting Leader

  • Full Member
  • PipPipPipPipPipPipPip
  • 4,084 posts
  • Joined: 13-March 13
  • Gender:Male
  • Location:TX

Posted 12 October 2013 - 07:40 PM

One sweet original rewound arm you dug up there Rick :D :good:  Should propel the finished car round the track most excellently :)


Goes well with the period touches to the can & endbell that you have shown many times in previous builds.


#3 TSR

TSR

    The Dokktor is IN

  • Full Member
  • PipPipPipPipPipPipPipPip
  • 42,299 posts
  • Joined: 02-February 06
  • Gender:Male
  • Location:Marxifornia

Posted 12 October 2013 - 08:14 PM

Rick,

with the comm cut so low, may I recommend that you install a "comm cap" made from a chunk of high-temp plastic or even aluminum? There is enough Celron material sticking beyond the copper segment to guarantee insulation.


  • MarcusPHagen likes this

Philippe de Lespinay


#4 dc-65x

dc-65x

    Grand Champion Poster

  • Subscriber
  • PipPipPipPipPipPipPipPip
  • 6,937 posts
  • Joined: 14-February 06
  • Gender:Male
  • Location:Captain Rick: The only vintage slot car nut in SW Oregon?

Posted 12 October 2013 - 08:23 PM

Hi Philippe,


Good idea. I'll see what I have room for. :)


Rick


Rick Thigpen
Check out Steve Okeefe's great web site at its new home here at Slotblog:
The Independent Scratchbuilder
There's much more to come...


#5 Pablo

Pablo

    Builder

  • Administrator
  • PipPipPipPipPipPipPipPip
  • 18,437 posts
  • Joined: 20-February 06
  • Gender:Male
  • Location:Cleveland, Tennessee

Posted 12 October 2013 - 08:28 PM

How do you remove the epoxy from the comm and shaft areas ?


Paul Wolcott


#6 TSR

TSR

    The Dokktor is IN

  • Full Member
  • PipPipPipPipPipPipPipPip
  • 42,299 posts
  • Joined: 02-February 06
  • Gender:Male
  • Location:Marxifornia

Posted 12 October 2013 - 08:47 PM

Paul,

you machine it off on a small lathe.  :)


Philippe de Lespinay


#7 Pablo

Pablo

    Builder

  • Administrator
  • PipPipPipPipPipPipPipPip
  • 18,437 posts
  • Joined: 20-February 06
  • Gender:Male
  • Location:Cleveland, Tennessee

Posted 12 October 2013 - 09:15 PM

So he slathers the entire arm then removes the epoxy on those areas with the Hudy comm cutter ?


Paul Wolcott


#8 TSR

TSR

    The Dokktor is IN

  • Full Member
  • PipPipPipPipPipPipPipPip
  • 42,299 posts
  • Joined: 02-February 06
  • Gender:Male
  • Location:Marxifornia

Posted 12 October 2013 - 09:16 PM

I would use a standard lathe to remove the epoxy from the stack, then a comm lathe for the comm... :)


Philippe de Lespinay


#9 dc-65x

dc-65x

    Grand Champion Poster

  • Subscriber
  • PipPipPipPipPipPipPipPip
  • 6,937 posts
  • Joined: 14-February 06
  • Gender:Male
  • Location:Captain Rick: The only vintage slot car nut in SW Oregon?

Posted 12 October 2013 - 09:37 PM

What I've done in the past is to just wipe the Crap-O-La off with my finger before it sets up. Any film left can be sanded off with very fine sand paper while spinning the arm in a drill.


In this post I show the process:


http://slotblog.net/...tors-made-easy/


Rick Thigpen
Check out Steve Okeefe's great web site at its new home here at Slotblog:
The Independent Scratchbuilder
There's much more to come...


#10 Pablo

Pablo

    Builder

  • Administrator
  • PipPipPipPipPipPipPipPip
  • 18,437 posts
  • Joined: 20-February 06
  • Gender:Male
  • Location:Cleveland, Tennessee

Posted 12 October 2013 - 10:06 PM

Very slick.


Paul Wolcott


#11 SlotStox#53

SlotStox#53

    Posting Leader

  • Full Member
  • PipPipPipPipPipPipPip
  • 4,084 posts
  • Joined: 13-March 13
  • Gender:Male
  • Location:TX

Posted 12 October 2013 - 10:07 PM

Pile on the epoxy ,wipe and bake ... *noted* :D  Now need a cheap toaster oven :laugh2: 


Have you decided on a body for this #1 entry yet Rick?


#12 dc-65x

dc-65x

    Grand Champion Poster

  • Subscriber
  • PipPipPipPipPipPipPipPip
  • 6,937 posts
  • Joined: 14-February 06
  • Gender:Male
  • Location:Captain Rick: The only vintage slot car nut in SW Oregon?

Posted 12 October 2013 - 10:44 PM

I think so Paul. I'm going to sleep on it :D


Rick Thigpen
Check out Steve Okeefe's great web site at its new home here at Slotblog:
The Independent Scratchbuilder
There's much more to come...


#13 SlotStox#53

SlotStox#53

    Posting Leader

  • Full Member
  • PipPipPipPipPipPipPip
  • 4,084 posts
  • Joined: 13-March 13
  • Gender:Male
  • Location:TX

Posted 12 October 2013 - 10:55 PM

:D :laugh2: Excellent Team Pittman will anxiously await the announcement :D


#14 Fast Freddie

Fast Freddie

    Race Leader

  • Full Member
  • PipPipPipPipPip
  • 723 posts
  • Joined: 04-March 08

Posted 13 October 2013 - 10:48 AM

Most of my arms from the mid 60s have little or no epoxy on them. What kind of epoxy are you guys using on these older arms? In 1965 I dewound a Cox motor and used a standard 2 part epoxy to do the arm. Then I used two razor blades in balsa wood along with a small file to balance the arm. It worked OK for the times and my budget.
Fred Younkin

#15 TSR

TSR

    The Dokktor is IN

  • Full Member
  • PipPipPipPipPipPipPipPip
  • 42,299 posts
  • Joined: 02-February 06
  • Gender:Male
  • Location:Marxifornia

Posted 13 October 2013 - 10:53 AM

Fred,

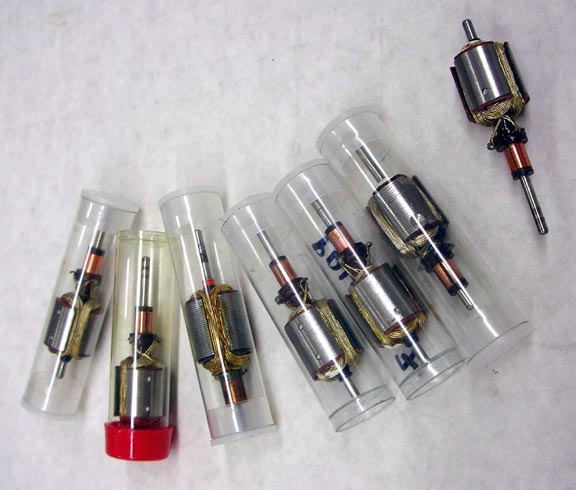
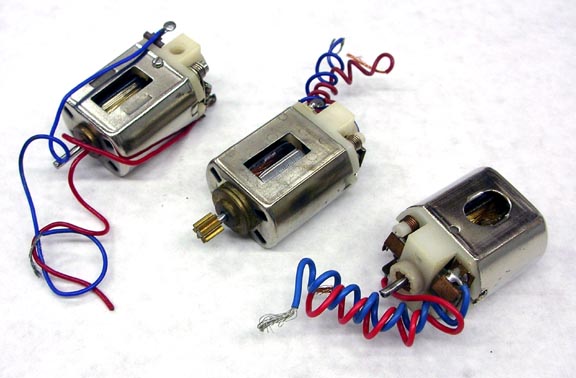
personally I was using a "HT" varnish found in electronic stores in Paris, France. Since I was mostly using mild windings, mostly 28-29, double 31, double 30, and rarely a single 26 AWG on Hemi blanks and Tradeship comms, I never ran into trouble By the end we used FT26 ( "26D") motors de-wound and varnished with the HT stuff, and no issues. I used Revell rigging string for model ships to tie down the arms. the stuff was a fiberglass thread that was very strong and heat resistant.


Some of my survivors here:


pdl-1967-armatures.jpg


And surviving motors:


pdl-1967-motors-2.jpg


  • Jocke P likes this

Philippe de Lespinay


#16 Pablo

Pablo

    Builder

  • Administrator
  • PipPipPipPipPipPipPipPip
  • 18,437 posts
  • Joined: 20-February 06
  • Gender:Male
  • Location:Cleveland, Tennessee

Posted 13 October 2013 - 10:56 AM

Here is your answer, Fred:

http://slotblog.net/...tors-made-easy/

Rick used Devcon 2 part epoxy on this motor.


Paul Wolcott


#17 SlotStox#53

SlotStox#53

    Posting Leader

  • Full Member
  • PipPipPipPipPipPipPip
  • 4,084 posts
  • Joined: 13-March 13
  • Gender:Male
  • Location:TX

Posted 13 October 2013 - 11:27 AM

Some beautiful silver wire armatures you got there Philippe :D

#18 TSR

TSR

    The Dokktor is IN

  • Full Member
  • PipPipPipPipPipPipPipPip
  • 42,299 posts
  • Joined: 02-February 06
  • Gender:Male
  • Location:Marxifornia

Posted 13 October 2013 - 11:32 AM

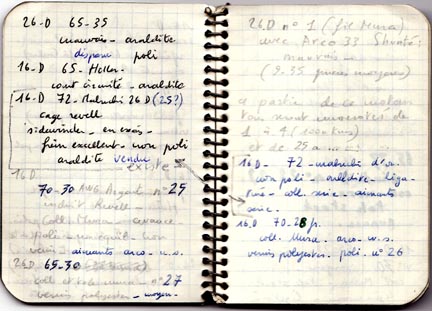
Paul, I even donated to the museum, my little "secret book" where I had all the info on all these arms and motors...


bluebook-1.jpg


That's before computers of course!  :laugh2:


  • SlotStox#53 likes this

Philippe de Lespinay


#19 dc-65x

dc-65x

    Grand Champion Poster

  • Subscriber
  • PipPipPipPipPipPipPipPip
  • 6,937 posts
  • Joined: 14-February 06
  • Gender:Male
  • Location:Captain Rick: The only vintage slot car nut in SW Oregon?

Posted 13 October 2013 - 11:43 AM

Here is your answer, Fred:

http://slotblog.net/...tors-made-easy/

Rick used Devcon 2 part epoxy on this motor.


Thanks Pablo,


Fred, at the raceways I worked at in So Cal we were using epoxy on our rewinds in '66. Lots of period magazine articles showed the authors using "Klinks" epoxy. So I guess that's why I still use epoxy (Devcon 2-Ton) today.


Thanks for the cool pictures Philippe :good:


Rick Thigpen
Check out Steve Okeefe's great web site at its new home here at Slotblog:
The Independent Scratchbuilder
There's much more to come...


#20 Fast Freddie

Fast Freddie

    Race Leader

  • Full Member
  • PipPipPipPipPip
  • 723 posts
  • Joined: 04-March 08

Posted 13 October 2013 - 01:41 PM

Thanks guys. By the way does anyone know what the stock Cox 150 and stock Russkit (in my Lola "Black Widow) winds were? Would a dewind version of those motors be OK for the R&C or is a complete rewind in order? I have several 60s motors but those two seem like good candidates for this type of racing.
Fred Younkin

#21 dc-65x

dc-65x

    Grand Champion Poster

  • Subscriber
  • PipPipPipPipPipPipPipPip
  • 6,937 posts
  • Joined: 14-February 06
  • Gender:Male
  • Location:Captain Rick: The only vintage slot car nut in SW Oregon?

Posted 13 October 2013 - 03:30 PM

Hi Fred,


I think even a dewound TT150 or Russkit 22/23 will be pretty mild compared to the Pro's rewinds. They ran a lot of 28's and 29's with cranked timing.


You could try a dewind and if it didn't perform you could always swap out the arm.


Rick Thigpen
Check out Steve Okeefe's great web site at its new home here at Slotblog:
The Independent Scratchbuilder
There's much more to come...


#22 TSR

TSR

    The Dokktor is IN

  • Full Member
  • PipPipPipPipPipPipPipPip
  • 42,299 posts
  • Joined: 02-February 06
  • Gender:Male
  • Location:Marxifornia

Posted 13 October 2013 - 04:05 PM

My experience with de-winding stock 16D arms in the day was always a loss of performance, while de-winding about 10 turns off each pole from a 26D increased performance.


  • MarcusPHagen likes this

Philippe de Lespinay


#23 Hworth08

Hworth08

    Posting Leader

  • Member at Peace
  • PipPipPipPipPipPipPip
  • 3,563 posts
  • Joined: 16-February 06
  • Gender:Male
  • Location:Springfield, TN

Posted 13 October 2013 - 07:11 PM

Most of the Mabuchi Russkit 22 type arms with the green comm are wound with 130 turns of 34 gage wire and ohm 3.3. The earlyest white commed arms can go up to 180/34 but these were the ones for Revell tracks that used 18 volt transformers. Those arms ohm 6.0.

The "hotter" arms used in the motors with the metal brush holders(Russkit 23) are 110/34 and ohm 2.8. 110 turns is about as low as will preform as you just can't get more current through 34 gage wire. A change to bigger wire is necessary to allow more current.

Early Mura and Lenz motors used 80/32 that ohm 1.8 and were dipped in varnish as Philippe did.

65 turns of 30 on a stock length Mabuchi stack ohms .9.

Fred, they have to be rewound! LOL
  • MarcusPHagen likes this
Don Hollingsworth
11/6/54-2/13/18
Requiescat in Pace

#24 Fast Freddie

Fast Freddie

    Race Leader

  • Full Member
  • PipPipPipPipPip
  • 723 posts
  • Joined: 04-March 08

Posted 15 October 2013 - 08:36 AM

Since I have no arm blanks of the 60s era is it in keeping with tradition to remove all the wire from a stock 60s arm and rewind it? I know that "rewind" should make it plainly obvious, right? That's probably how it was done in the olden days. I noticed the current 16Ds are wound with 70 turns of #30 wire while the current S16D arms use 60 turns of #28 wire. Is a current S16D performance similar to those old FT16D rewinds? What is the difference between a FT16 and FT16D? One more thing, what is the difference between a Russkit 22 and 23? What I have in my Black Widow are 22s but I think I have a 23 although it has no sticker saying so it does have a gold can like my 22s. Is there any way to make a positive ID. I checked the motor ID chart but I'm still not sure.
Fred Younkin

#25 Hworth08

Hworth08

    Posting Leader

  • Member at Peace
  • PipPipPipPipPipPipPip
  • 3,563 posts
  • Joined: 16-February 06
  • Gender:Male
  • Location:Springfield, TN

Posted 15 October 2013 - 09:09 AM

 What is the difference between a FT16 and FT16D? One more thing, what is the difference between a Russkit 22 and 23?  Is there any way to make a positive ID.


Super simple. The 22 does NOT have metal brush holders, the brushes ride directly on the end bell plastic and are held with a nickel plated cap.


The 23 uses the metal brush holder and the brush holder is held by the cap.


The 22 has either a white or green comm and a rough or smooth stack. The white comm/rough stack is wound with 140/34 wire. The much better green comm and smooth stack is 130 of 34.


The 23 all have smooth stacks and green comms with 110 of 34.  The can and magnets are the same.


  • MarcusPHagen likes this
Don Hollingsworth
11/6/54-2/13/18
Requiescat in Pace


Electric Dreams Online Shop