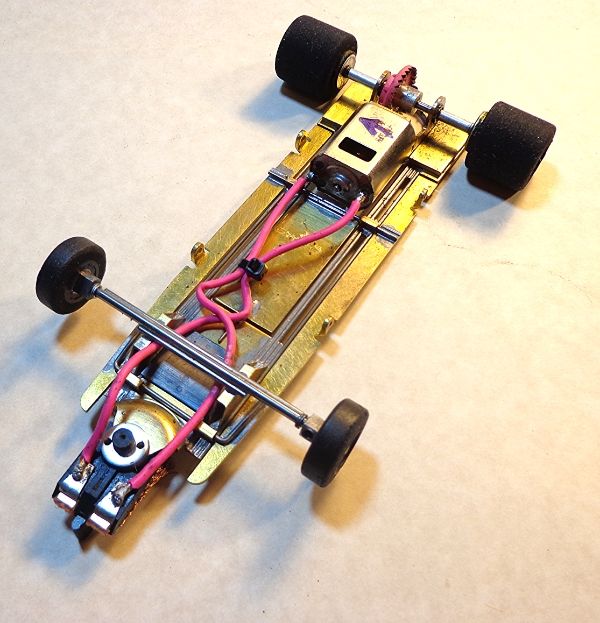
What you get with this kit is as follows...
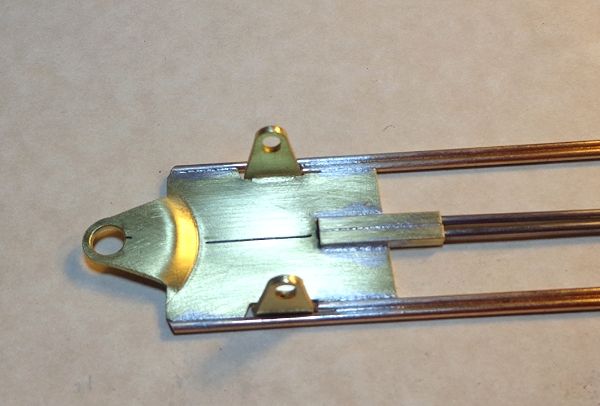
1" bracket
1" nosepiece
bracket plate
Two nicely-formed tuning fork rails (.062" wire)
Four straight bronze rails (.062")
Two nice .062" thick pans. (I'm sure you can get the lighter pans as well)
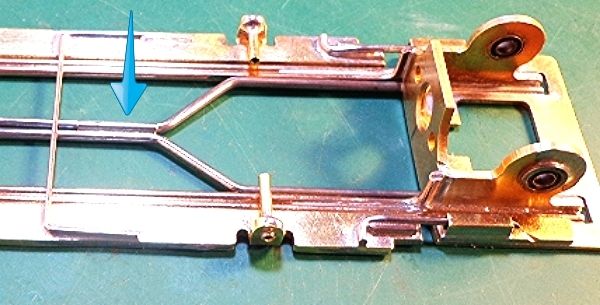
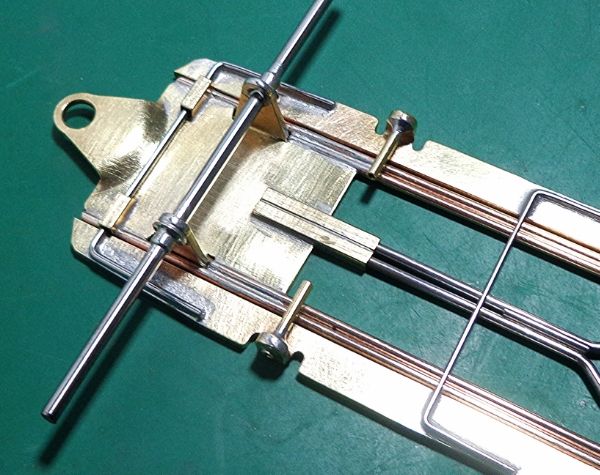
- You start from the inside out working with the wire forks running inside the bracket.
- Next, you place the inner main frame rail which butts against the face of the bracket.
- You want at least .005" clearance between the inner main rail and the tuning fork.
- You can just lay the rail in place and butt solder to the bracket face and the nosepiece.
- If so, then your inner rail will be about .010"-.015" wider than the bracket sides
- Thus... your outer main rail will have a small gap next to the bracket. No big deal, but...
- I wanted the outer rail to go flush against the bracket and square and straight to the 1" nose plate.
- This is the inner frame rail bent to go against the bracket face.
- I filed a ~ .015" flat about 1.062" forward of the bend.
- This allows the inner main rails to nestle around the tuning fork and still be 1.00" outside width.
- Then your outer main rail will go flush to the sides of the bracket and nose plate with no gap.
- I notched the nose plate aft of the axle upright .062" on each side.
- The inner main rail is inset into the plate.
- Then, your outer rail will lay flush with the front part of the plate which is still 1" wide.
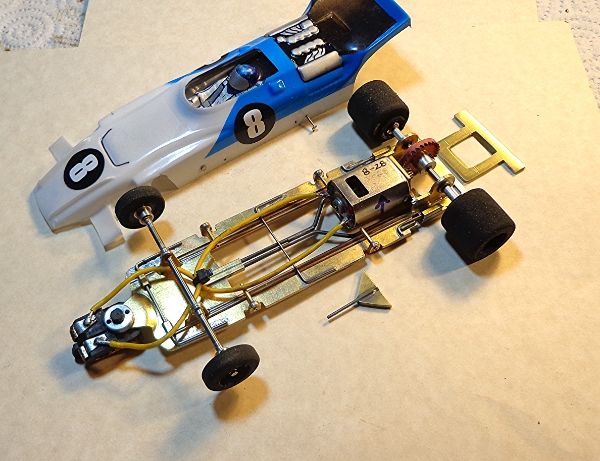
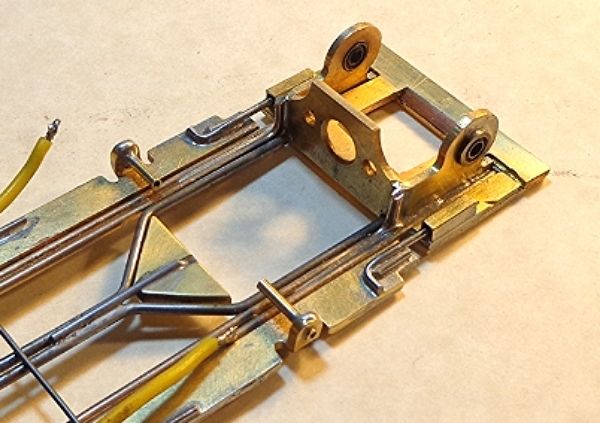
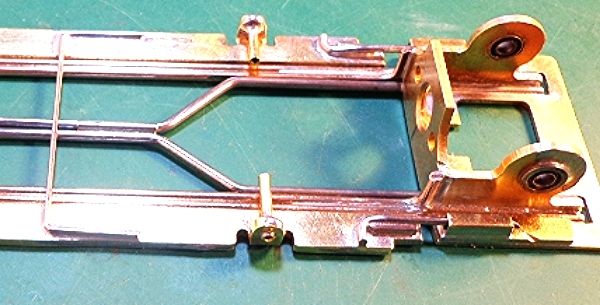
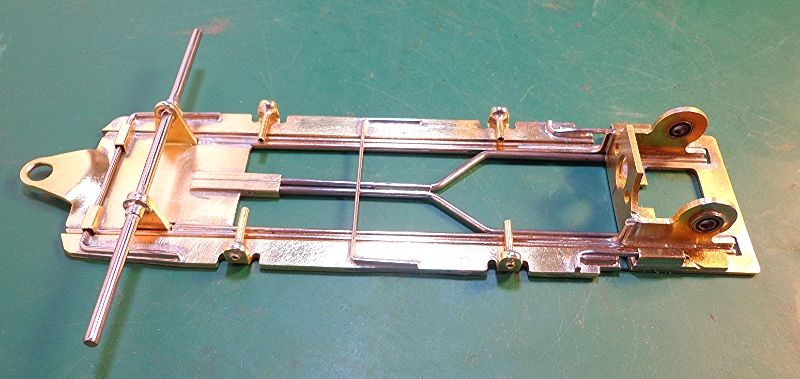
Detail of finished front end.
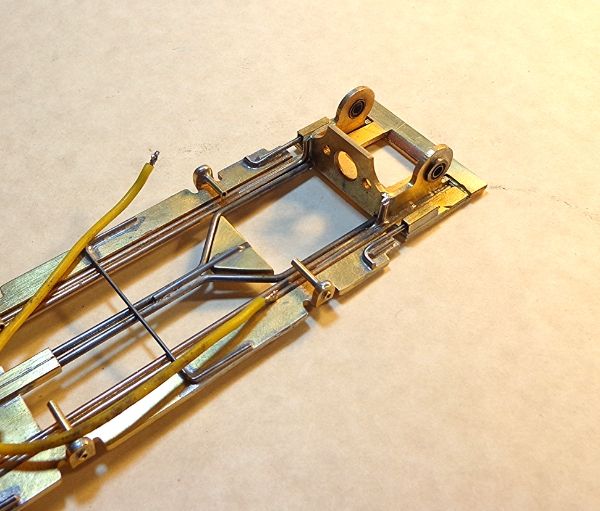
- I did these following steps before putting the axle in place so it's easier to get at the front bits.
- Square 3/32" tubes form the front pan hinge tubes.
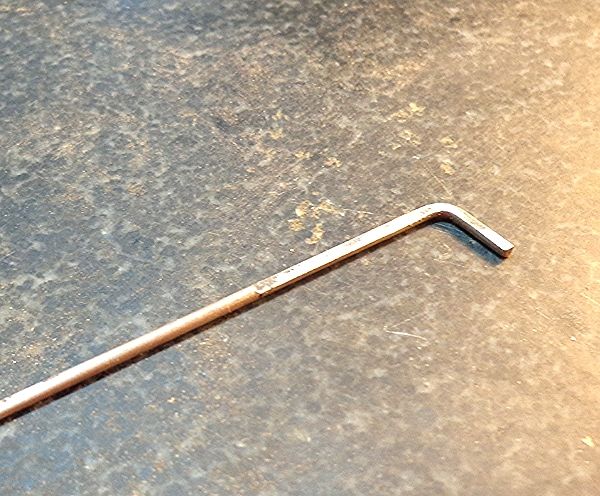
- .047" piano wire forms your hinge rod. Bend one leg then slip through tubes and bend the other side.
- When soldering up the hinge wire, I leave about .010" between the pan and the main rail.
- Spreader wire is .032" but could be any size. Small wire allows the pans to be slightly independent.
- Small bit of .047" wire goes right at the crux of the fork rails to tie them together. (Quick and easy to remove)
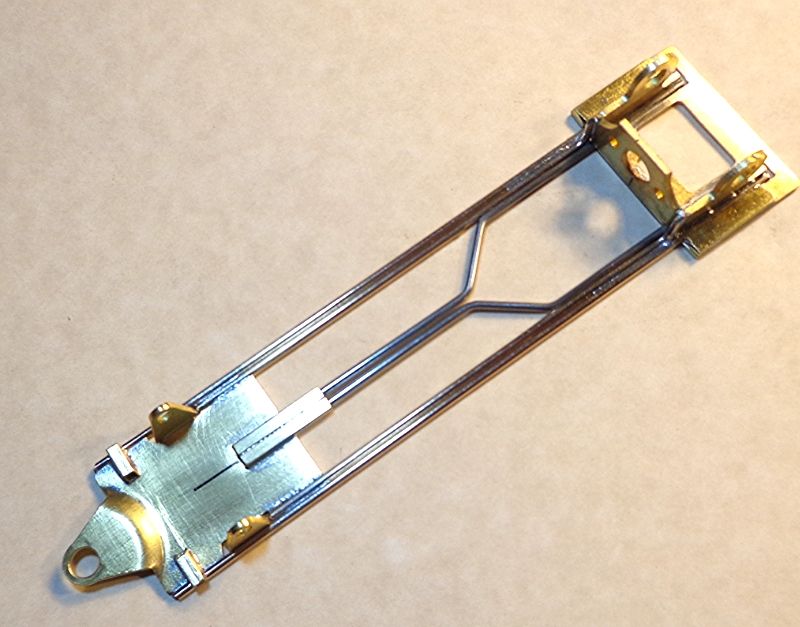
- The bracket plate comes with fairly long ears going forward.
- I cut the ears off flush with the front face of the bracket and soldered the cut offs on top.
- This makes the bracket plate a little thicker than the pans which are .062.
- Square 3/32" captures the .047" wire which forms a downstop and upstop.
- Slight dogleg is bent into the .047" wire and a little scrap of wire reinforces the solder joint.
- Note that the main rails are soldered together only about 1/2" forward of the bracket.
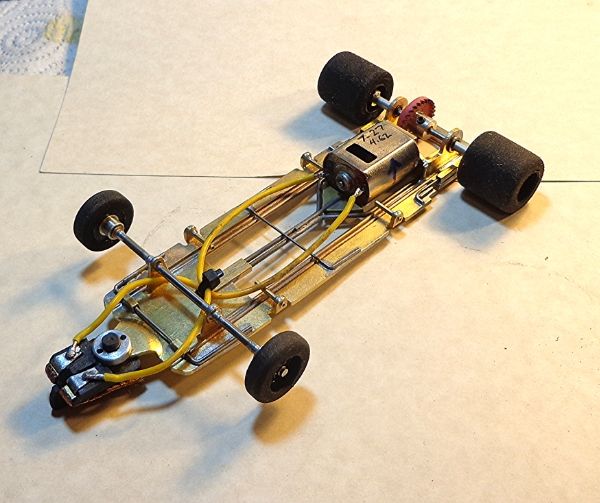
- Finished product: Bare frame as shown here is 56.5 grams. All up with body will run 98-100 grams.
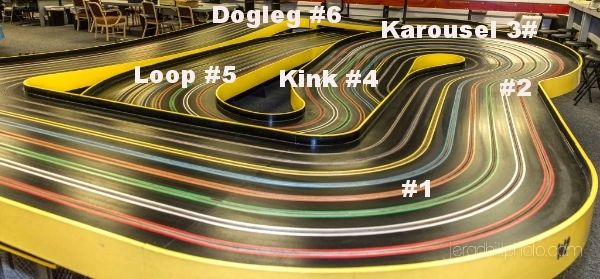
- This will get tested first on the "Korkscrew" flat track at MoTown raceway in Modesto.
- This build might be a little light for that twisty 88' track or our other technical flat tracks.


 Nice job JF!!! I'm jealous of your skills!! I keep trying--but mine never come out so nice and neat!! Very nice!! Looking forward to seeing how it handles!! Rick--send me a couple of those kits!!