Jump to content


Photo

R&C "Plate Chassis" GP entry


  • Please log in to reply
33 replies to this topic

#1 dc-65x

dc-65x

    Grand Champion Poster

  • Subscriber
  • PipPipPipPipPipPipPipPip
  • 6,937 posts
  • Joined: 14-February 06
  • Gender:Male
  • Location:Captain Rick: The only vintage slot car nut in SW Oregon?

Posted 11 March 2014 - 04:14 PM

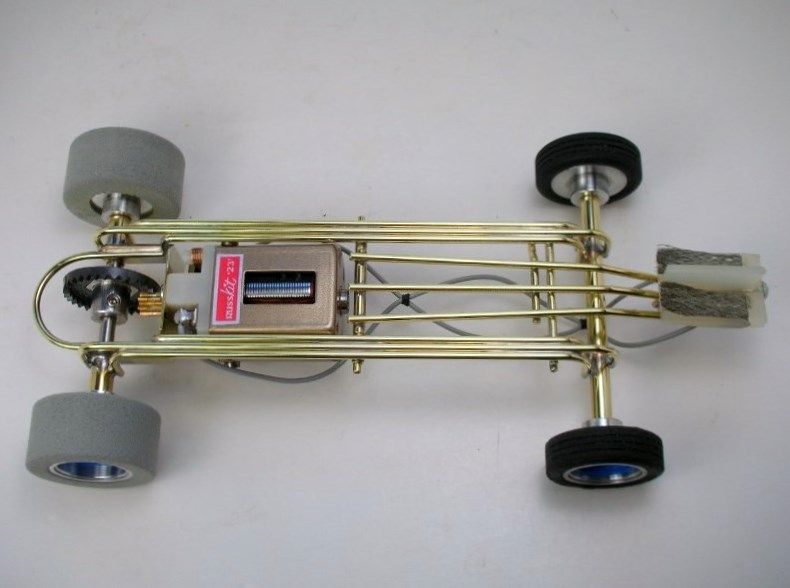
This build is going to be one of my favorite kinds, a “What If” build! What would an R&C GP car built with a period “Midwest” influence run like?


In Car Model, February 1966, pg. 24, Mike Morrissey wrote about his travels as Captain of Team Russkit, specifically to The Groove, in Royal Oak, Michigan:


"To begin with, everywhere we went, we were surprised at how fast cars are going. From Las Vegas to Long Island, we found cars almost as fast as ours, and in Detroit... well, I'll come to that later."


Detroit was the home of The Groove Raceway and there things did not go exactly as planned according to Morrissey:


"We didn't have much trouble going as fast as anyone else except in one place, The Groove, in Royal Oak, Michigan. It was here that we got clobbered, whipped, and obliterated. I mean, they could have saved themselves some time by simply beating us with hammers and throwing us outa the joint!"


"You see, it was at The Groove that we learned all about 'super-traction' tracks... the hard way. We had heard about these Midwest track surfaces, but we'd never realized just how sticky they were. They use a high-gloss paint that is nearly shiny. Then after the track is broken in and builds up a little tire goop on the paint surface, it becomes so sticky that you can't believe it!"


"Anyway, our cars are built for normal surfaces and are, as I said, very light. They wouldn't slide or drift at all, but instead would just do snap rolls. The locals' cars weigh 5 to 6 ounces or more. They use flat brass plate about 1/8" thick for frames, those 'Silastic' tires, and a variety of motors. The flat plates give a very low center of gravity, which kills the flipping tendency, and the weight stabilizes them. To get all that mass down the straights, they use hairy motors like Dyno-Chargers, Rams, and wildly rewound Pittmans and Mabuchi’s. To stop they use up to 6 volts of power brakes. We'll be back that way, though, and next time we'll be properly armed!”


The “super-traction” track Mike describes reminds me a bit of a modern high-gloss track surface that has been cleaned and freshly glued. On that kind of surface, with modern black tires, my R&C cars would snap roll into the wall instead of doing a nice controlled drift at the limit. I could add lead to the drop arm and it just increased the cornering speed before the snap roll.


Switching tires to a harder, lower traction tire like vintage VC or Tiny’s greys really helped with the problem. Alpha colored SBR rubber also helped. But back to my “Midwest” theme……..how about something like this:
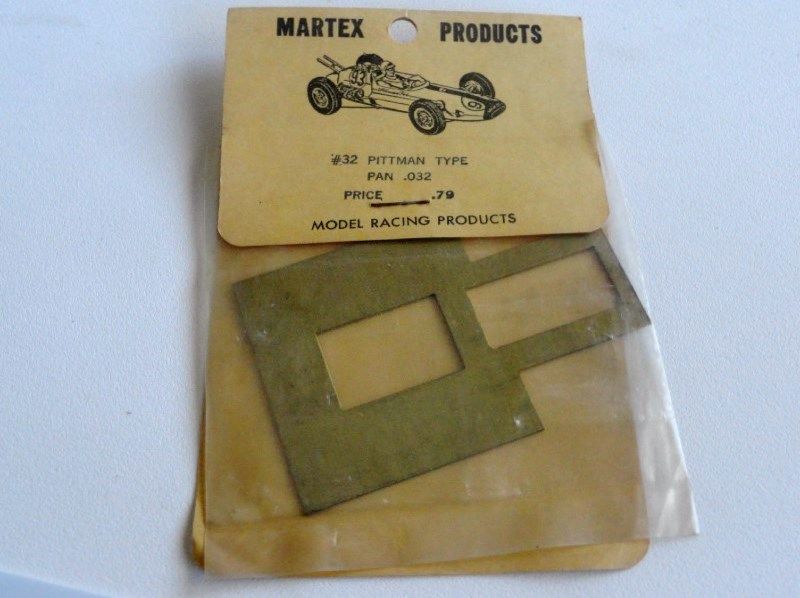
 

MartexPan.jpg
 

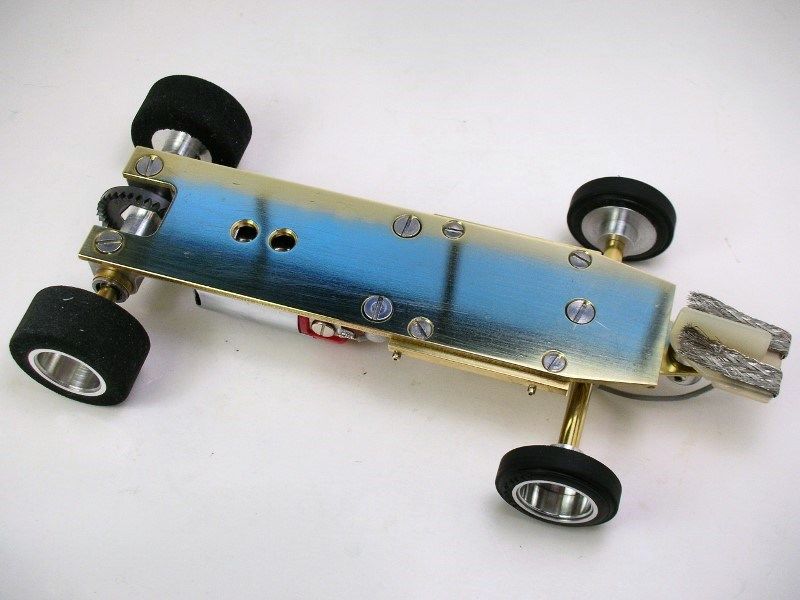
A big hunk-O-brass pan………….I mean PLATE. In deference to the great Midwest builder Pete Hagenbuch I’m calling this a plate chassis. In his June 1964 Car Model Magazine article, “ A Second Look At Slotcar Handling” he defined a pan chassis as, “…a chassis hogged out of a solid hunk of brass or aluminum and closely surrounds the motor.” This build is going to have a PLATE chassis.


So, what to hang this honk’n plate under? Rodney’s latest GP entry gave me an idea:
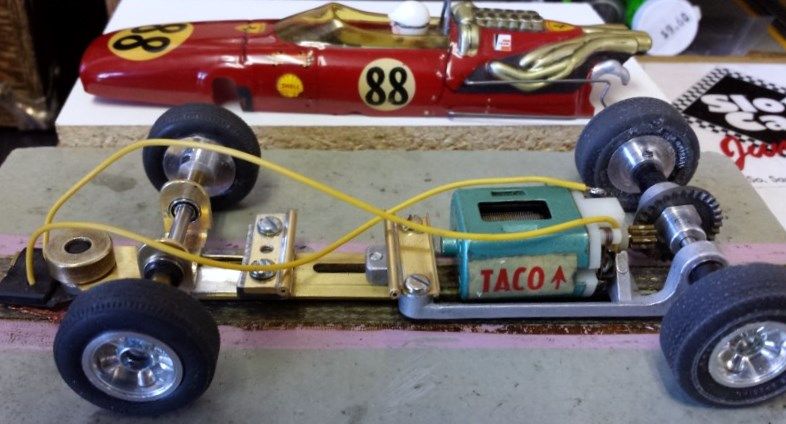
 

Dynamic1.jpg


Okie Dokie, a Dynamic chassis but we need more “Midwest”. How about this:
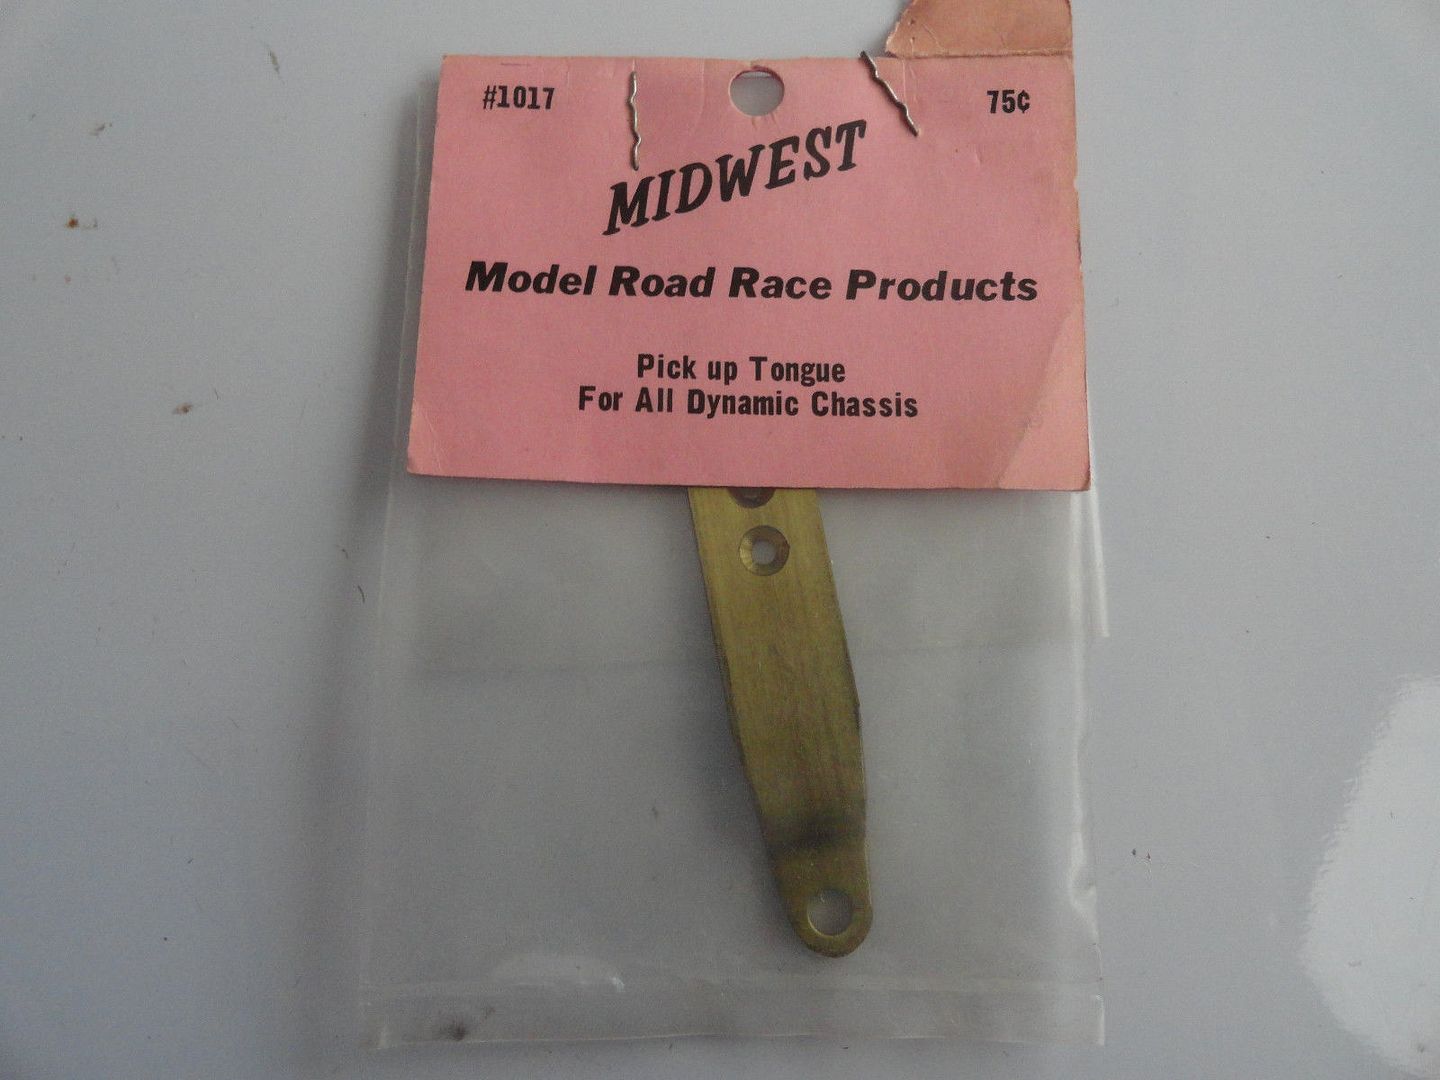
 

MidwestGuideTongue-1.jpg


MidwestGuideTongue-2.jpg


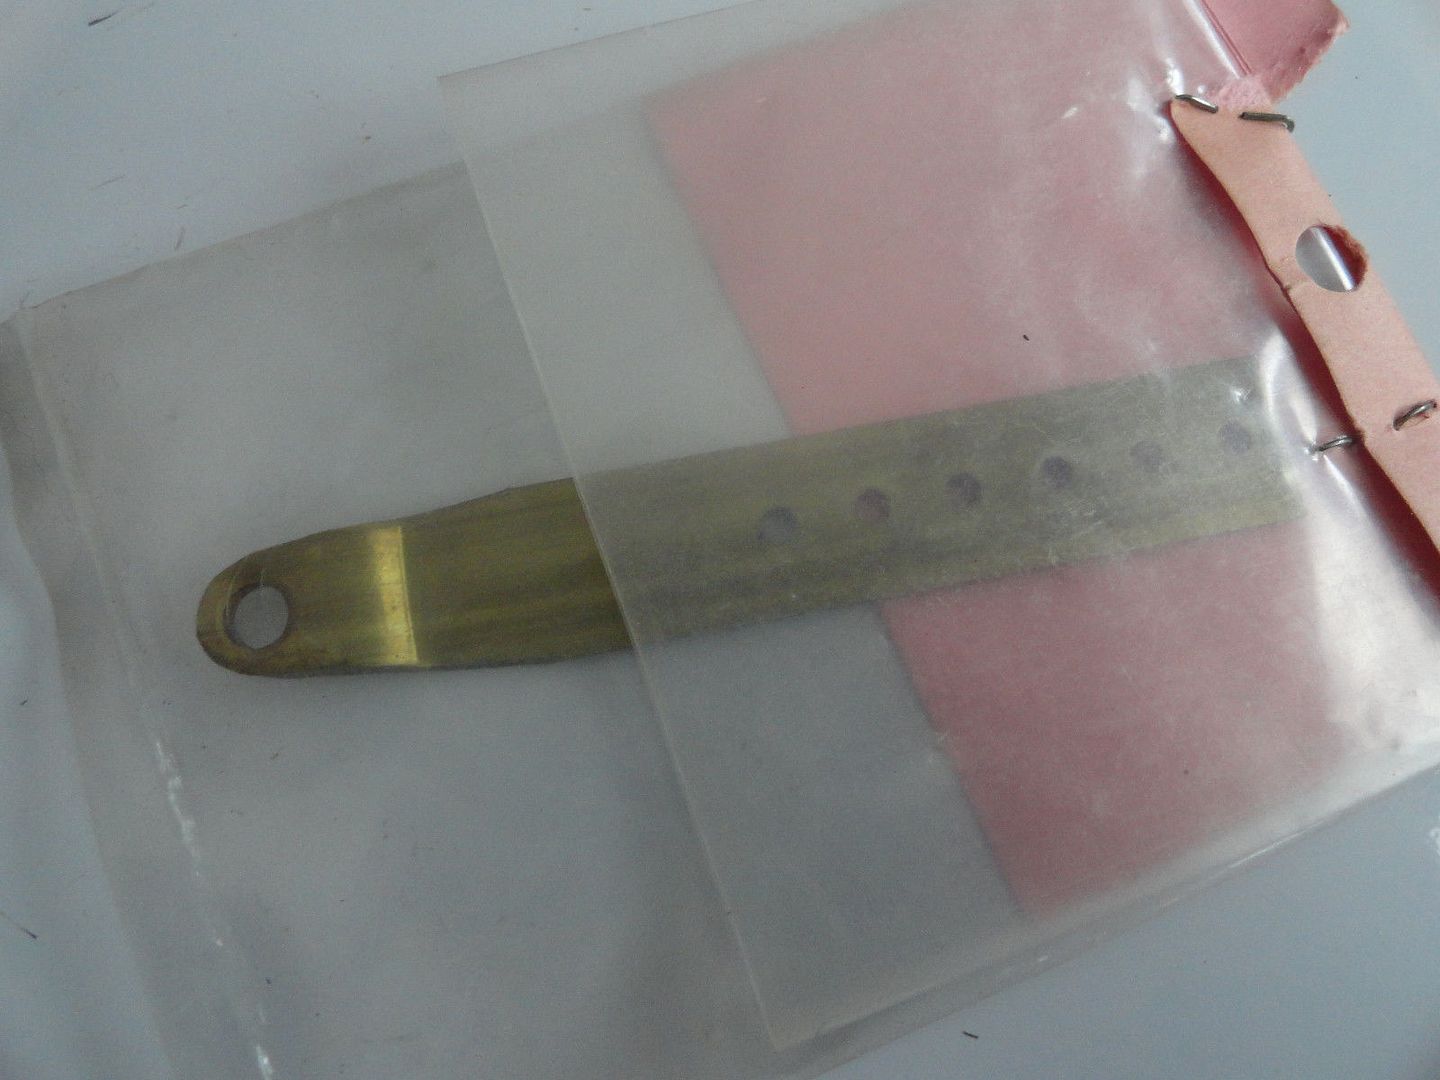
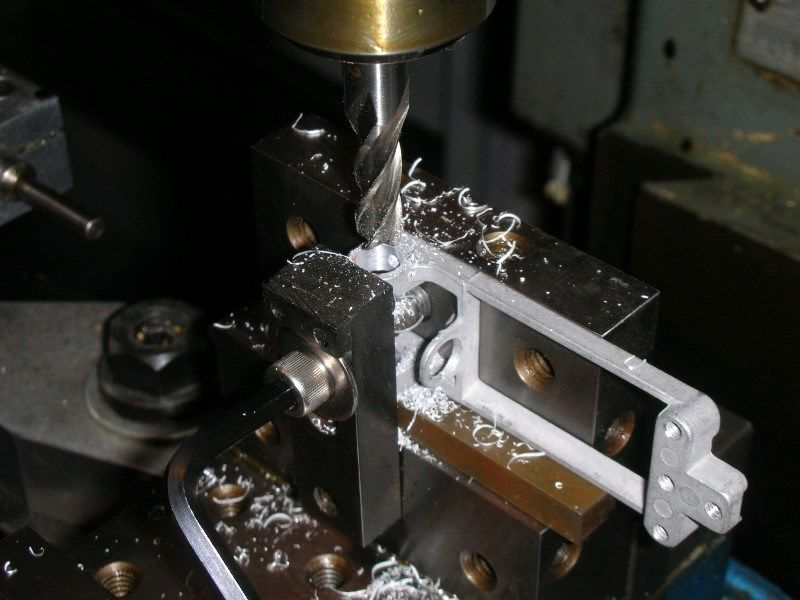
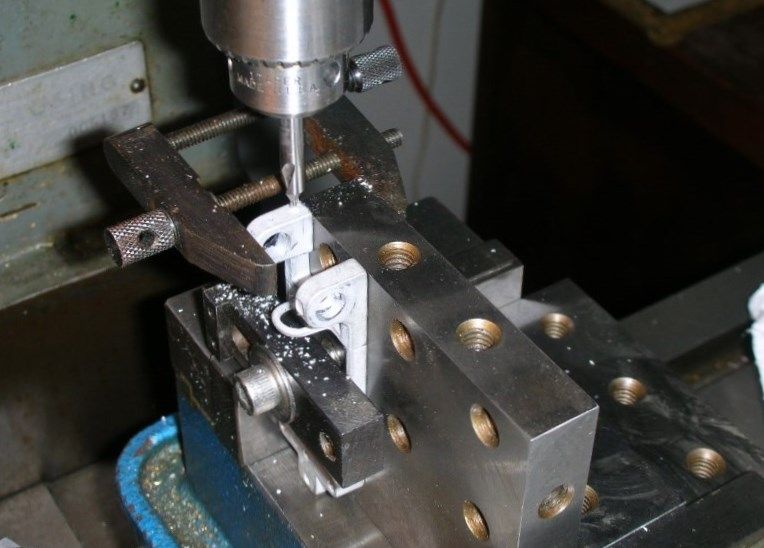
Master fabricator R-Geo Rick sent me a sample of his prototype repo and that’s what I decided to use instead of the fragile Dynamic piece. But first I needed to get the Dynamic motor mount drilled and tapped for pan.......I mean PLATE mounting.


Here the holes for set screws that will lock the plate mounting screws in place so the plate can be a nice, loose "rattle fit":
 

1002800x600.jpg


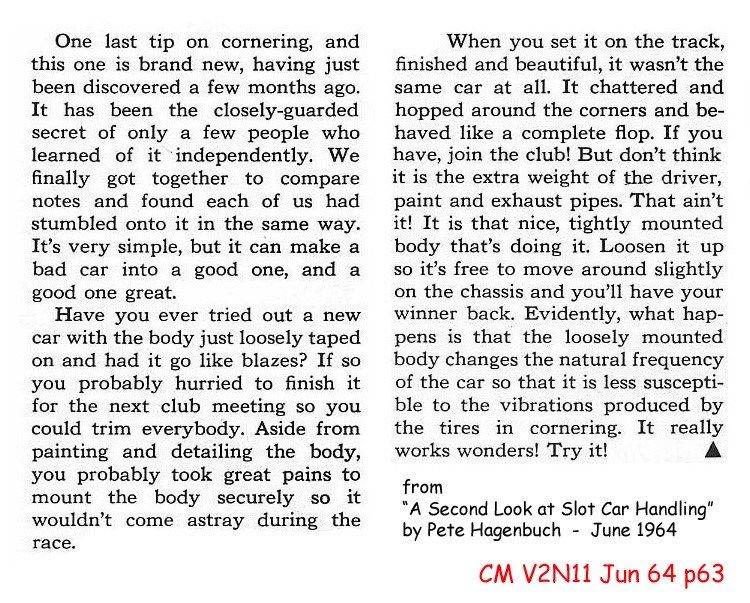
The loose body mounting was also discussed by Pete Hagenbuch in the same June 1964 article:
 

CarModelJun64p63.jpg


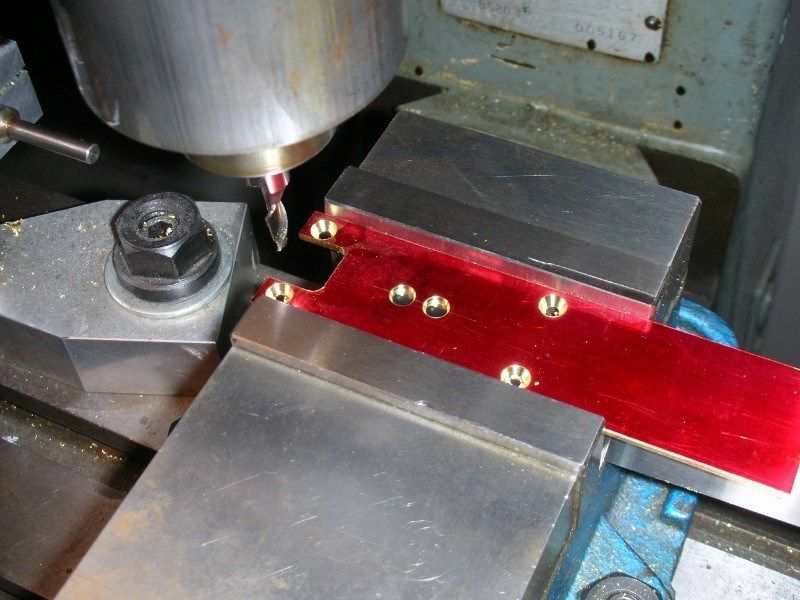
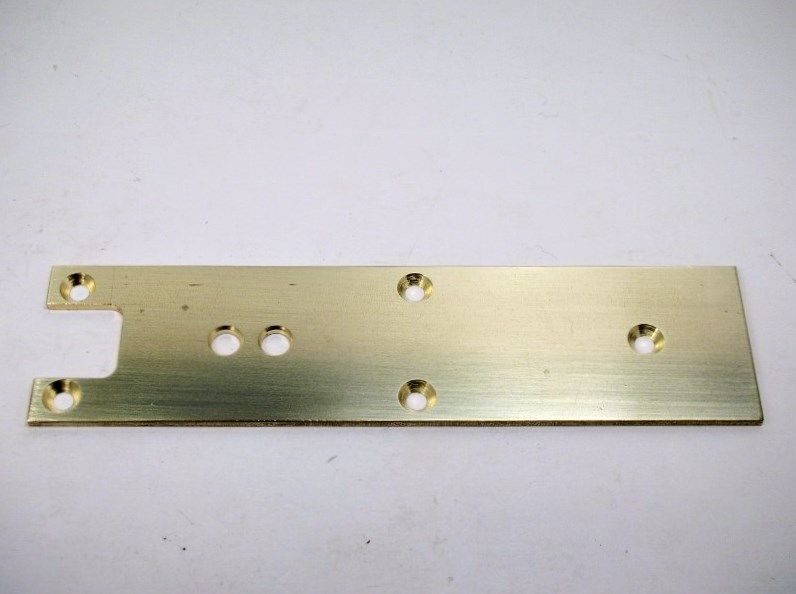
It's brass plate hogging time. This plate is 1/16" thick and 1.150" wide:
 

PlateGP-.jpg


It's got a notch for gear clearance and 2 motor cooling holes. It may get the outside profiled a bit depending on my body choice:
 

PlateGP-1.jpg


Onward :)


  • S.O. Watt and Peter Horvath like this

Rick Thigpen
Check out Steve Okeefe's great web site at its new home here at Slotblog:
The Independent Scratchbuilder
There's much more to come...


#2 SlotStox#53

SlotStox#53

    Posting Leader

  • Full Member
  • PipPipPipPipPipPipPip
  • 4,084 posts
  • Joined: 13-March 13
  • Gender:Male
  • Location:TX

Posted 11 March 2014 - 05:10 PM

Very interesting R&C build Rick :good: Can't wait to see what you do with it :D  haven't looked at it in great depth yet & often wondered exactly how people fitted plates to the Dynamic stuff now I know .


:popcorm1:


#3 don.siegel

don.siegel

    Grand Champion Poster

  • Subscriber
  • PipPipPipPipPipPipPipPip
  • 5,814 posts
  • Joined: 17-February 06
  • Gender:Male
  • Location:Paris, France

Posted 12 March 2014 - 07:08 AM

Excellent stuff Rick, and as usual a very well considered reflection on "what if?"...


Curiously enough, I just reread that Pete Hagenbuch article too, and was very struck by his comments at the end on the "loose bodies". And I didn't quite get his distinction between plate and pan either... his group was probably the only one that regularly machined chassis out of solid chunks...


I'm trying to fit a plate/pan/casserole to a Dynamic chassis as well, and am hesitating about the best way to do it...


Don


#4 dc-65x

dc-65x

    Grand Champion Poster

  • Subscriber
  • PipPipPipPipPipPipPipPip
  • 6,937 posts
  • Joined: 14-February 06
  • Gender:Male
  • Location:Captain Rick: The only vintage slot car nut in SW Oregon?

Posted 12 March 2014 - 12:19 PM

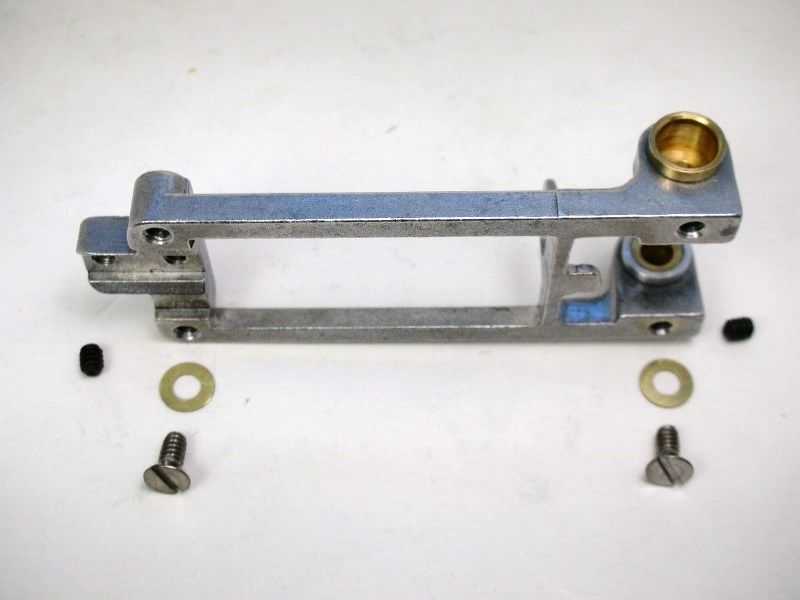
To attach the plate to my Dynamic motor mount I used the two existing 4-40 tapped holes in the front and drilled two more in the rear:


PlateGP-7.jpg


The plate is hung on flat head screws. They are adjusted to position the plate to allow 1/16" track clearance with 15/16" tires. Without the plate you'd have to use 13/16" (illegal) tires to get that 1/16" track clearance.


Set screws are used to lock the flat head screws in place. In front, they're screwed in from the top. In the rear I drilled holes and screwed them in from the side.


With the plate in position there was about .020" gap between it and the bottom of the chassis. This allowed quite a bit of side to side movement. To reduce that movement a bit I'm trying some Cox .010" thick spacers shown above.


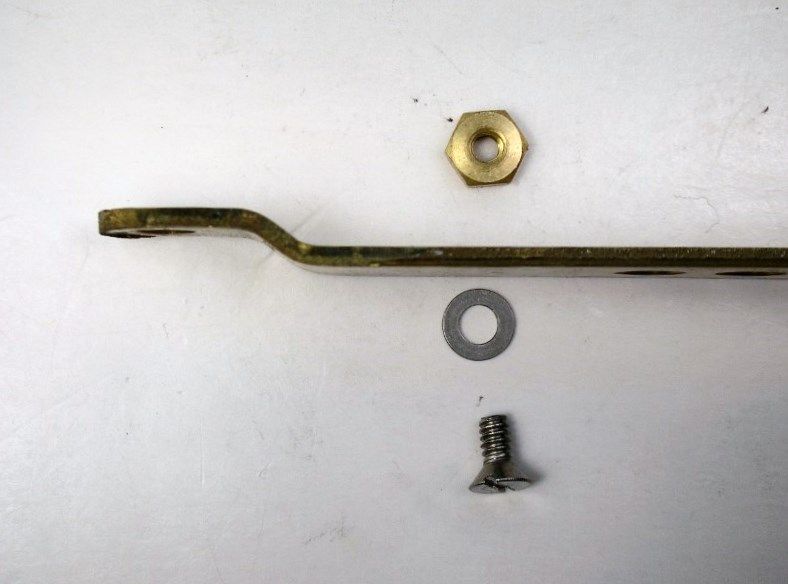
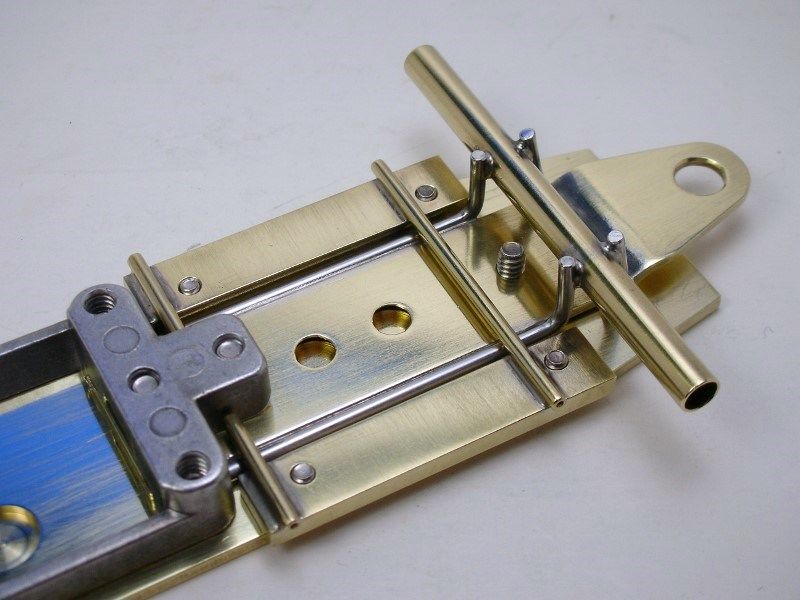
This method worked well on a 1/32 scale car I built but with the longer 1/24 scale plate there was a problem. The longer plate would sag down in the front and raise up at the rear. I simply added one screw up front into the guide tongue. It sets the pan clearance in front and is locked in place with a small nut:


PlateGP-20.jpg


This is but one method of attaching a "rattle pan"........I mean PLATE. :laugh2: It does work best with precise hole placement best accomplished with a milling machine.


I think Al Penrose (BWA) has lots of others.


Rick Thigpen
Check out Steve Okeefe's great web site at its new home here at Slotblog:
The Independent Scratchbuilder
There's much more to come...


#5 dc-65x

dc-65x

    Grand Champion Poster

  • Subscriber
  • PipPipPipPipPipPipPipPip
  • 6,937 posts
  • Joined: 14-February 06
  • Gender:Male
  • Location:Captain Rick: The only vintage slot car nut in SW Oregon?

Posted 12 March 2014 - 06:49 PM

I mounted the plate to the Dynamic motor mount, fitted the Korrect jig wheels and set it in my Rick's Jig only to find the thing sitting all catawampus. :wacko2:

Now I remember why I don't care for Dynamic chassis. One rear bearing hole was 1/64" lower than the other. :dash2: Back into the mill to open up the bearing holes to 9/32" in the Korrect location:


PlateGP-3.jpg


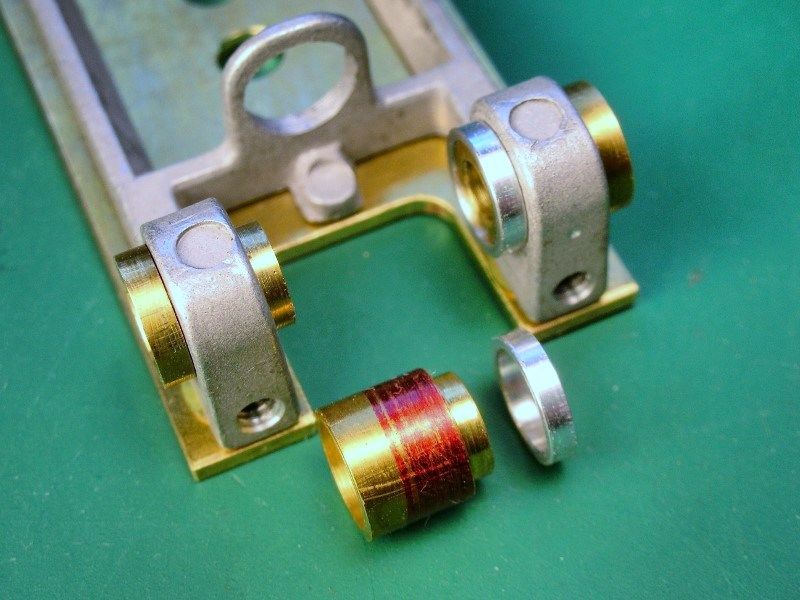
I turned down the red area on a pair of duffy's to press fit into the new holes. I also made up a little aluminum ring to epoxy onto the other end of the duffy to lock it in place. This piece probably isn't necessary but I had fun making it. :crazy:


PlateGP-8.jpg


Back to the Rick's Jig to build the front end..............


  • MarcusPHagen and Peter Horvath like this

Rick Thigpen
Check out Steve Okeefe's great web site at its new home here at Slotblog:
The Independent Scratchbuilder
There's much more to come...


#6 Pablo

Pablo

    Builder

  • Administrator
  • PipPipPipPipPipPipPipPip
  • 18,437 posts
  • Joined: 20-February 06
  • Gender:Male
  • Location:Cleveland, Tennessee

Posted 12 March 2014 - 07:51 PM

Very SANO, Rick. :heart:  :good:

Don't forget to spell it "duffy", not "Duffy", he gets fussy if he sees it that way :crazy:


Paul Wolcott


#7 SlotStox#53

SlotStox#53

    Posting Leader

  • Full Member
  • PipPipPipPipPipPipPip
  • 4,084 posts
  • Joined: 13-March 13
  • Gender:Male
  • Location:TX

Posted 12 March 2014 - 08:18 PM

Very sweet Rick :D


Oh yeah definitely spell it duffy & not with the "D" I got a telling off from Duffy when I made that mistake !


Those little duffy gizmo's are awesome things!


#8 dc-65x

dc-65x

    Grand Champion Poster

  • Subscriber
  • PipPipPipPipPipPipPipPip
  • 6,937 posts
  • Joined: 14-February 06
  • Gender:Male
  • Location:Captain Rick: The only vintage slot car nut in SW Oregon?

Posted 12 March 2014 - 08:36 PM

Thanks guys, correction made. :dance3:


Rick Thigpen
Check out Steve Okeefe's great web site at its new home here at Slotblog:
The Independent Scratchbuilder
There's much more to come...


#9 dc-65x

dc-65x

    Grand Champion Poster

  • Subscriber
  • PipPipPipPipPipPipPipPip
  • 6,937 posts
  • Joined: 14-February 06
  • Gender:Male
  • Location:Captain Rick: The only vintage slot car nut in SW Oregon?

Posted 13 March 2014 - 04:13 PM

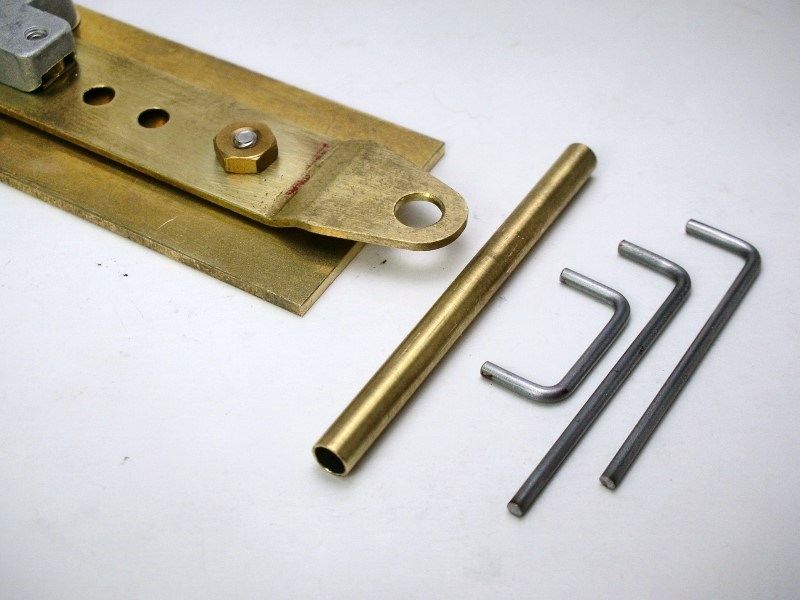
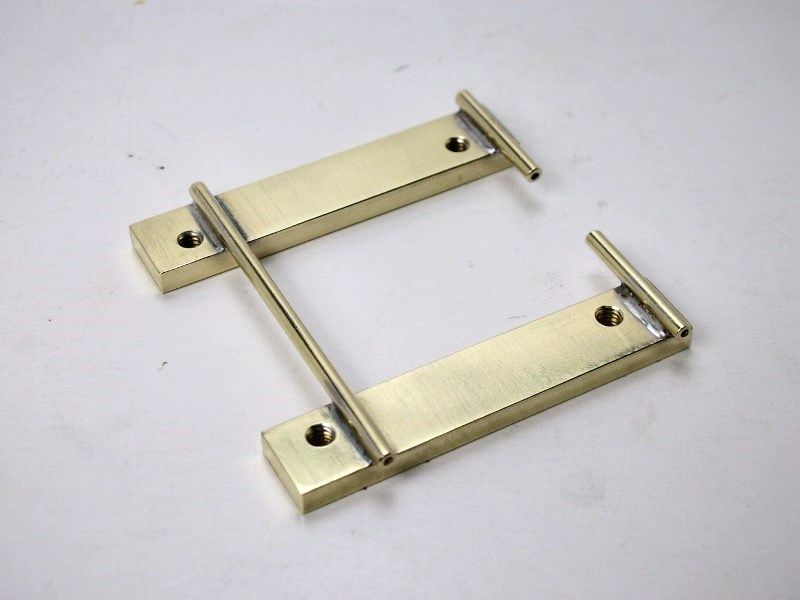
Here are the pieces for the front end. A 5/32" axle tube, 1/16" piano wire uprights and a slightly reshaped prototype R-Geo Midwest guide tongue:


PlateGP-10.jpg


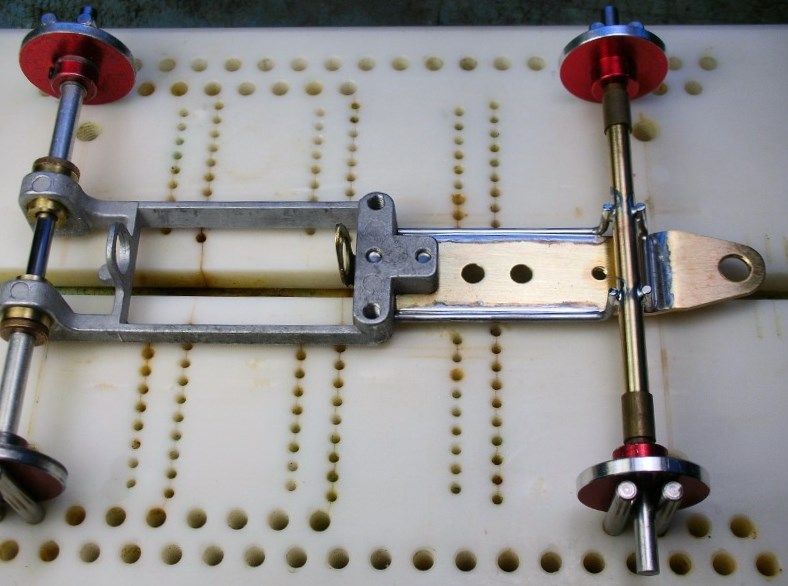
Everything soldered up in my Rick's Jig:


PlateGP-11.jpg


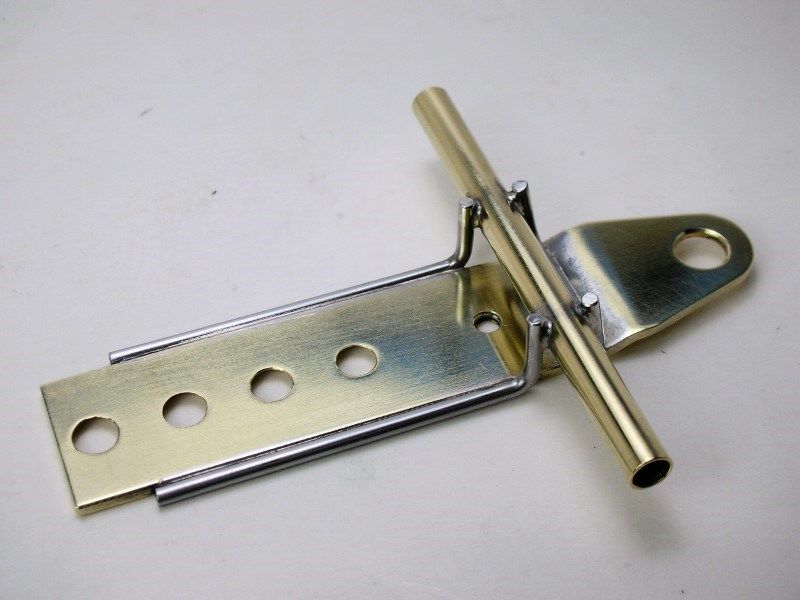
Here's the buffed up front end:


PlateGP-14.jpg


PlateGP-16.jpg


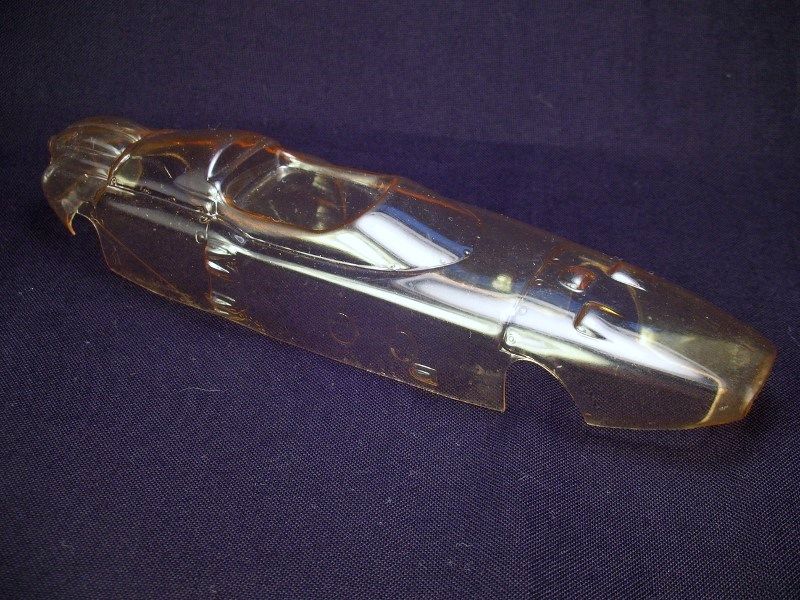
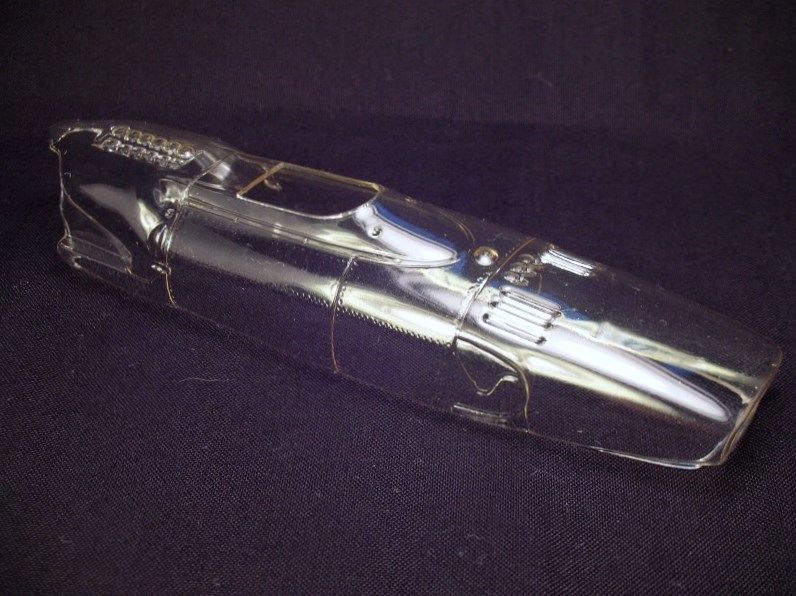
Next is a body mount for the pan.......no.......PLATE. I thinking of using either a very yellowed Revell Honda.......


PlateGP-6.jpg


.....and a Lancer 3L Ferrari:


PlateGP-2.jpg


Hmmmmmmmmmm.....................


Rick Thigpen
Check out Steve Okeefe's great web site at its new home here at Slotblog:
The Independent Scratchbuilder
There's much more to come...


#10 SlotStox#53

SlotStox#53

    Posting Leader

  • Full Member
  • PipPipPipPipPipPipPip
  • 4,084 posts
  • Joined: 13-March 13
  • Gender:Male
  • Location:TX

Posted 13 March 2014 - 04:49 PM

Wow Rick !! Totally awesome front end/axle hanger/guide tongue , has given me some great inspiration for some of the Dynamic frames I've got languishing in a dark pitbox somewhere :laugh2:


That front treatment is so much better & stronger than the standard Dynamic affair. As for the body choice, good luck !


Only thing I could offer is that you already have an R&C GP car with a Ferrari body on it , so maybe give the Honda a go? :pardon:


#11 Pablo

Pablo

    Builder

  • Administrator
  • PipPipPipPipPipPipPipPip
  • 18,437 posts
  • Joined: 20-February 06
  • Gender:Male
  • Location:Cleveland, Tennessee

Posted 13 March 2014 - 10:47 PM

I like the Ferrari.

The chassis is 100% sick, Rick :heart:


Paul Wolcott


#12 gluebomb

gluebomb

    Mid-Pack Racer

  • Full Member
  • PipPipPip
  • 131 posts
  • Joined: 30-August 10
  • Gender:Male
  • Location:Canada

Posted 14 March 2014 - 03:30 PM

Yeah, the Ferrari here as well.

And yes, that chassis is pretty sweet also I think - looking forward to sseing this one come together...


Simon Wing

#13 dc-65x

dc-65x

    Grand Champion Poster

  • Subscriber
  • PipPipPipPipPipPipPipPip
  • 6,937 posts
  • Joined: 14-February 06
  • Gender:Male
  • Location:Captain Rick: The only vintage slot car nut in SW Oregon?

Posted 14 March 2014 - 05:44 PM

Thanks for chiming in guys, it's much appreciated.   :)


.......Only thing I could offer is that you already have an R&C GP car with a Ferrari body on it , so maybe give the Honda a go? :pardon:


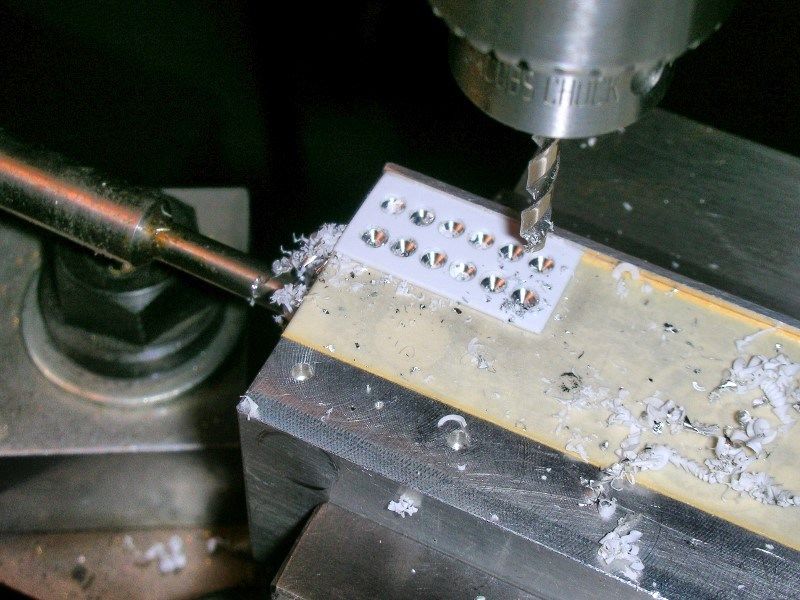
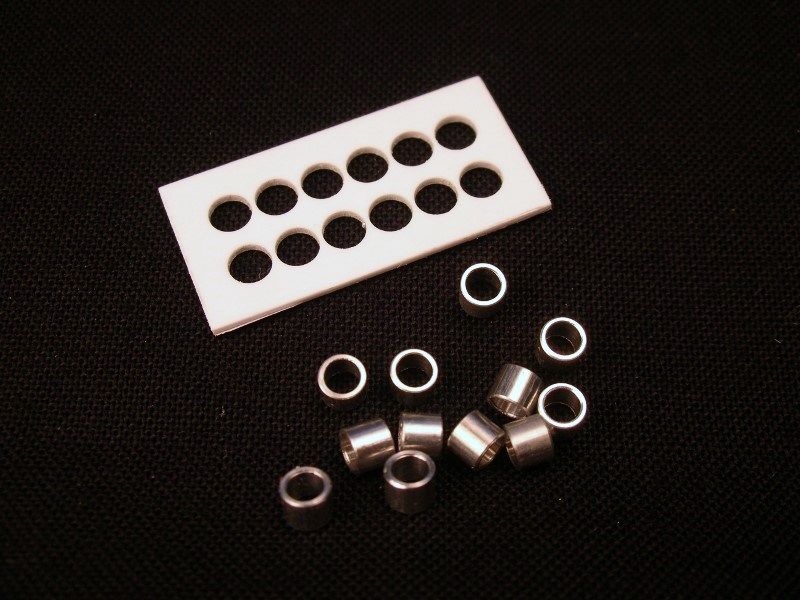
I agree Paul but I've got an idea on a "What If " Ferrari.  :crazy:  Besides, I did this.....I double sided taped down a piece of .030" thick styrene and drilled twelve 1/8" holes:


PlateGP-23.jpg


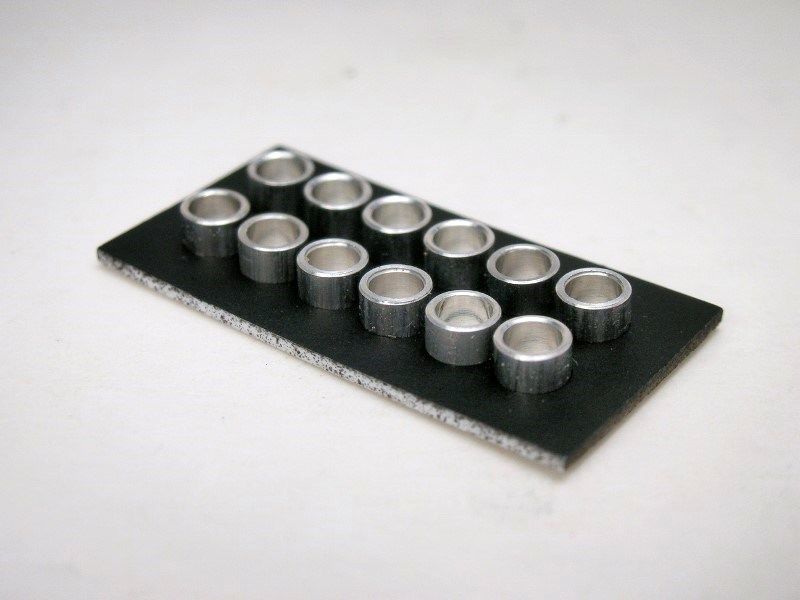
I gathered up twelve Slick 7 3/32" X .100" long axle spacers:


PlateGP-22.jpg


Here are my Ferrari "stacks" all assembled:


PlateGP-24.jpg


:dance3: :dance3: :dance3:


  • Peter Horvath likes this

Rick Thigpen
Check out Steve Okeefe's great web site at its new home here at Slotblog:
The Independent Scratchbuilder
There's much more to come...


#14 SlotStox#53

SlotStox#53

    Posting Leader

  • Full Member
  • PipPipPipPipPipPipPip
  • 4,084 posts
  • Joined: 13-March 13
  • Gender:Male
  • Location:TX

Posted 14 March 2014 - 05:50 PM

With stacks like that, Ferrari it is :D Mighty fine inlet stacks Sir :good:


#15 dc-65x

dc-65x

    Grand Champion Poster

  • Subscriber
  • PipPipPipPipPipPipPipPip
  • 6,937 posts
  • Joined: 14-February 06
  • Gender:Male
  • Location:Captain Rick: The only vintage slot car nut in SW Oregon?

Posted 21 March 2014 - 06:51 PM

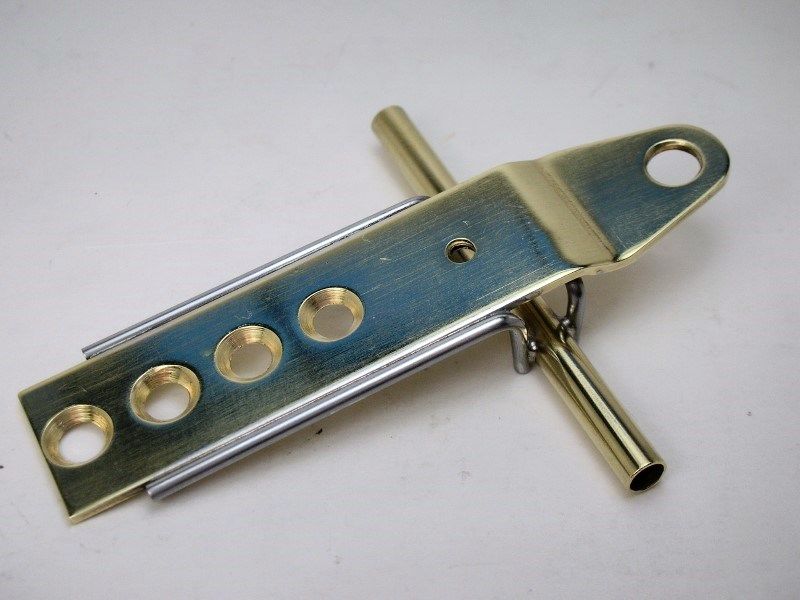
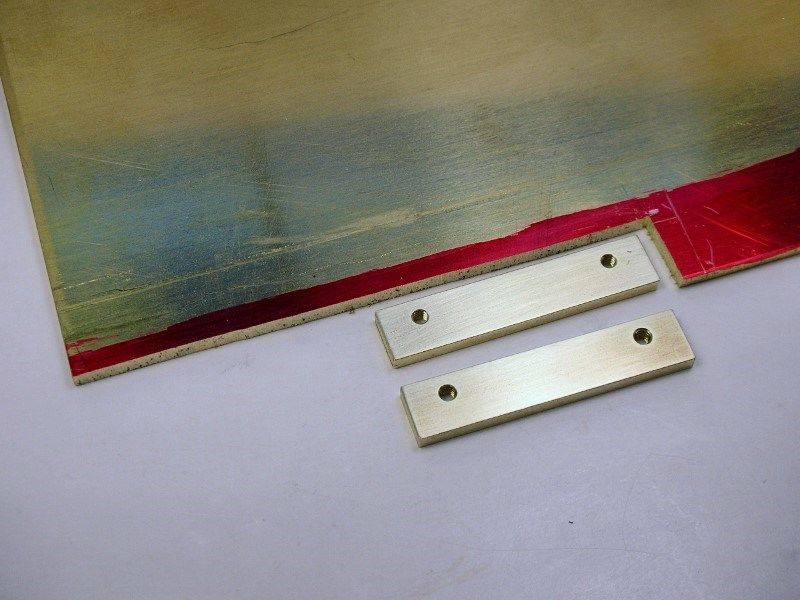
To mount the Lancer Ferrari 3L body to the pan, the pin tubes need to be raised up 3/32" to clear the guide tongue. I used some 3/32" brass plate........


PlateGP-31.jpg


...........the pin tubes are soldered on top...........


PlateGP-30.jpg


.................and the unit is screwed to the pan with 2-56 flat head screws:


PlateGP-27.jpg


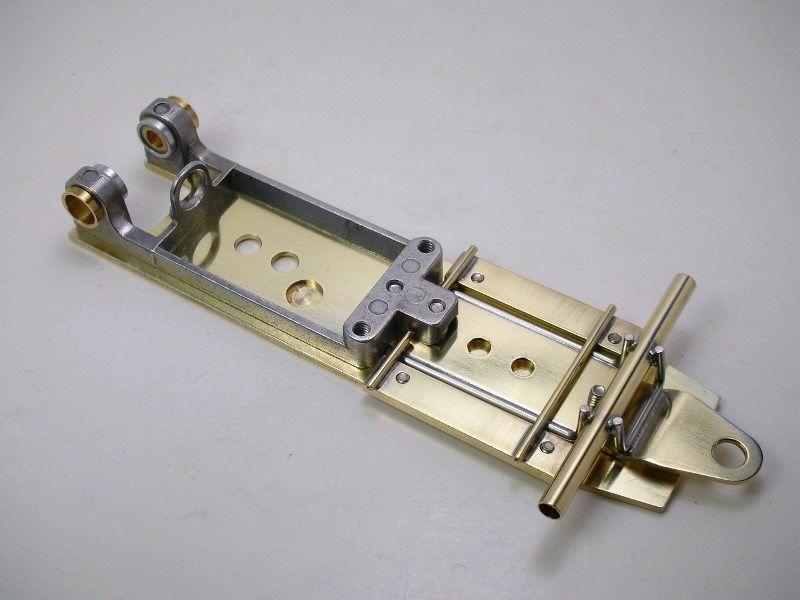
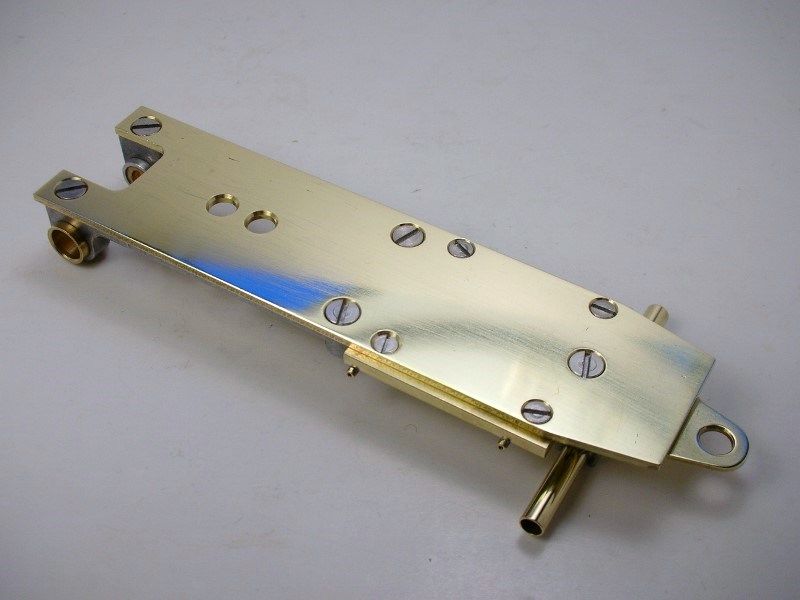
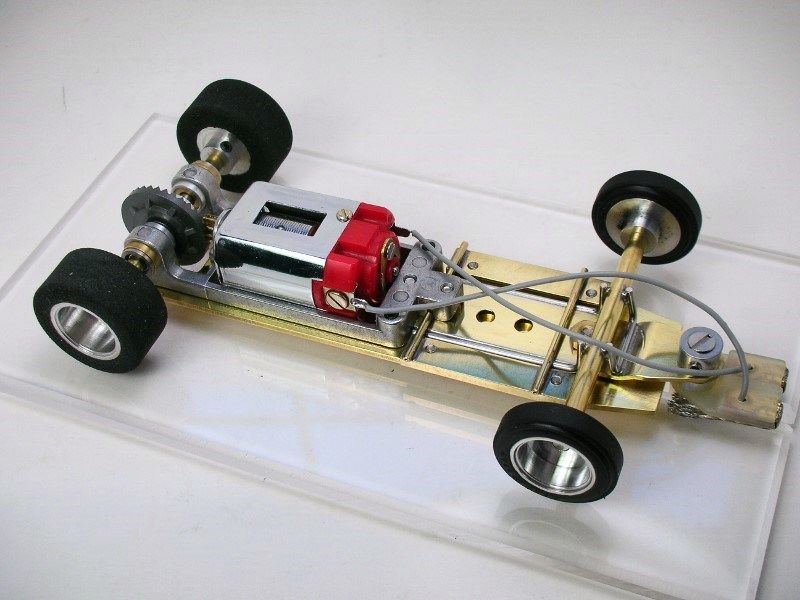
The chassis is finished:


PlateGP-29.jpg


PlateGP-25.jpg


The finished chassis weighs 2.6 ounces (74 grams). :D


  • MarcusPHagen likes this

Rick Thigpen
Check out Steve Okeefe's great web site at its new home here at Slotblog:
The Independent Scratchbuilder
There's much more to come...


#16 SlotStox#53

SlotStox#53

    Posting Leader

  • Full Member
  • PipPipPipPipPipPipPip
  • 4,084 posts
  • Joined: 13-March 13
  • Gender:Male
  • Location:TX

Posted 21 March 2014 - 07:03 PM

:D :D I likey! That is a lot of shiny brass Rick! Do the body mounts float?


#17 dc-65x

dc-65x

    Grand Champion Poster

  • Subscriber
  • PipPipPipPipPipPipPipPip
  • 6,937 posts
  • Joined: 14-February 06
  • Gender:Male
  • Location:Captain Rick: The only vintage slot car nut in SW Oregon?

Posted 21 March 2014 - 07:20 PM

Hi Paul,


The body mount is mounted rigidly to the pan and the pan floats.


Rick Thigpen
Check out Steve Okeefe's great web site at its new home here at Slotblog:
The Independent Scratchbuilder
There's much more to come...


#18 SlotStox#53

SlotStox#53

    Posting Leader

  • Full Member
  • PipPipPipPipPipPipPip
  • 4,084 posts
  • Joined: 13-March 13
  • Gender:Male
  • Location:TX

Posted 21 March 2014 - 07:23 PM

Ah I forgot that the pan/plate floats :) SHould be one very nice handling car with all that low down weight :good:


#19 Pablo

Pablo

    Builder

  • Administrator
  • PipPipPipPipPipPipPipPip
  • 18,437 posts
  • Joined: 20-February 06
  • Gender:Male
  • Location:Cleveland, Tennessee

Posted 22 March 2014 - 07:35 AM

Masterpiece Theater !  Thanks especially for showing the intake stacks method :heart:


Paul Wolcott


#20 dc-65x

dc-65x

    Grand Champion Poster

  • Subscriber
  • PipPipPipPipPipPipPipPip
  • 6,937 posts
  • Joined: 14-February 06
  • Gender:Male
  • Location:Captain Rick: The only vintage slot car nut in SW Oregon?

Posted 22 March 2014 - 10:51 AM

Thanks Pablo :)


You know Pablo, when I was drilling the holes for the intake stacks I thought of some comments made by others in your drill press search thread. They didn't see the value of an XY table for a drill press. I thought, "try doing this without one":


PlateGP-22.jpg


A master machinist like Duffy could do it with a center punch but not me!


Also, all the flat head screws used in the chassis plate have to be positioned EXACTLY or the flat head screws won't seat flush with the plate and will look like grunt.


Sorry for the thread drift babbling but I'm a tool freak :crazy:


Rick Thigpen
Check out Steve Okeefe's great web site at its new home here at Slotblog:
The Independent Scratchbuilder
There's much more to come...


#21 Bruce Wayne

Bruce Wayne

    Mid-Pack Racer

  • Full Member
  • PipPipPip
  • 197 posts
  • Joined: 02-September 11
  • Gender:Male
  • Location:Maryland Heights, MO

Posted 22 March 2014 - 09:19 PM

Can you say... "crafted like a Swiss watch?" 


Very nice Rick, jewelry in white metal, steel and brass!


 I Like it!

:)


Bruce W. Frye

#22 dc-65x

dc-65x

    Grand Champion Poster

  • Subscriber
  • PipPipPipPipPipPipPipPip
  • 6,937 posts
  • Joined: 14-February 06
  • Gender:Male
  • Location:Captain Rick: The only vintage slot car nut in SW Oregon?

Posted 24 March 2014 - 09:49 PM

Thanks Bruce :)


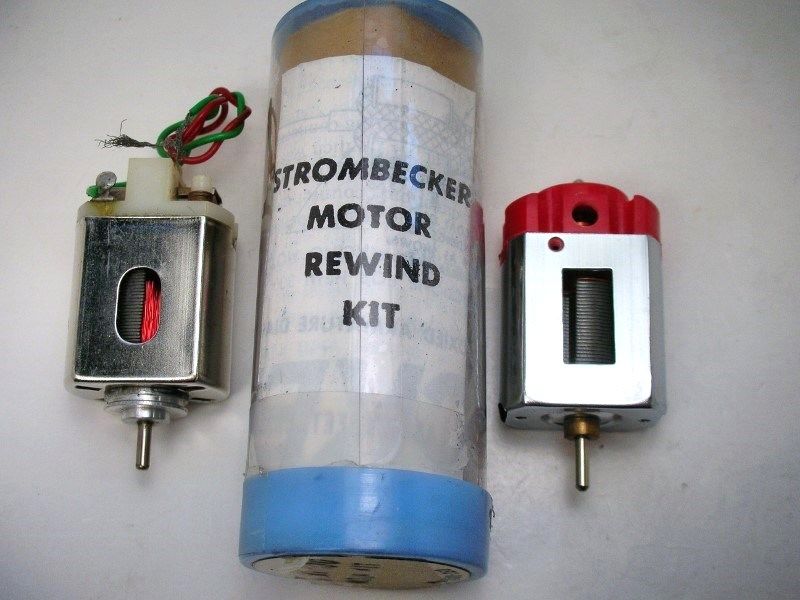
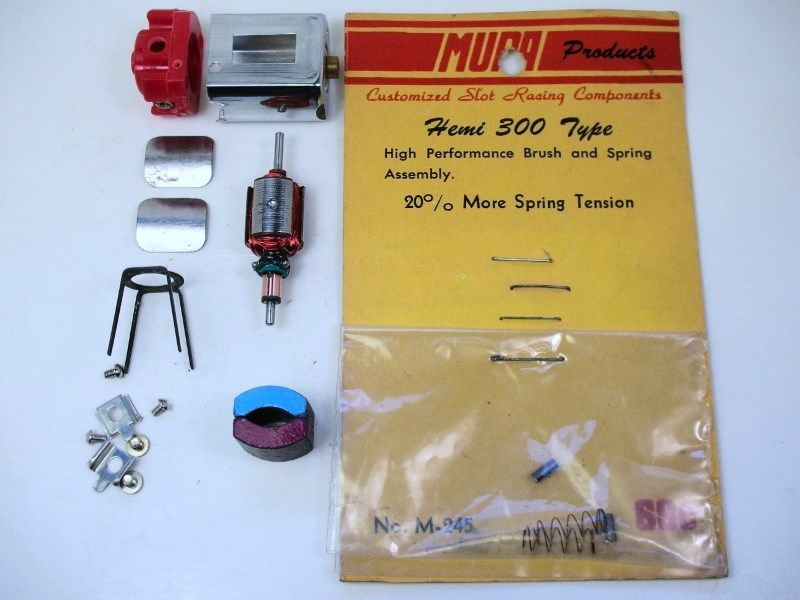
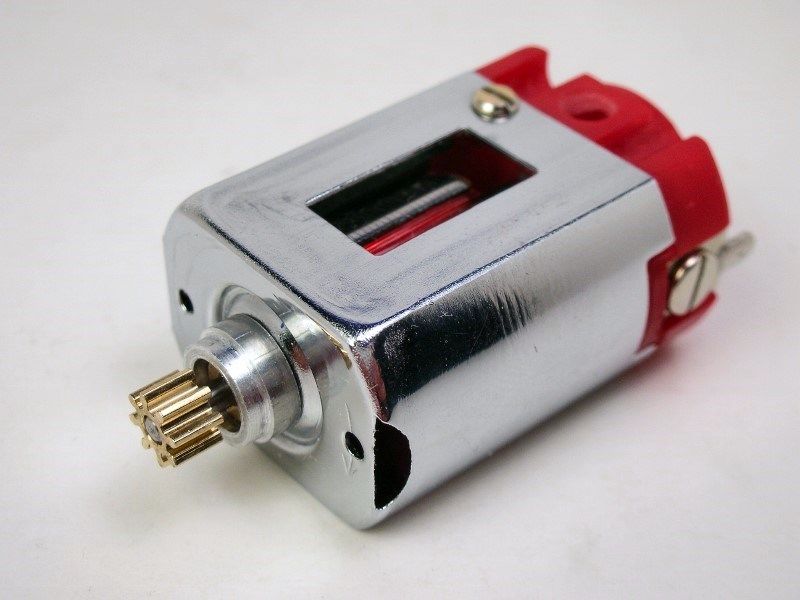
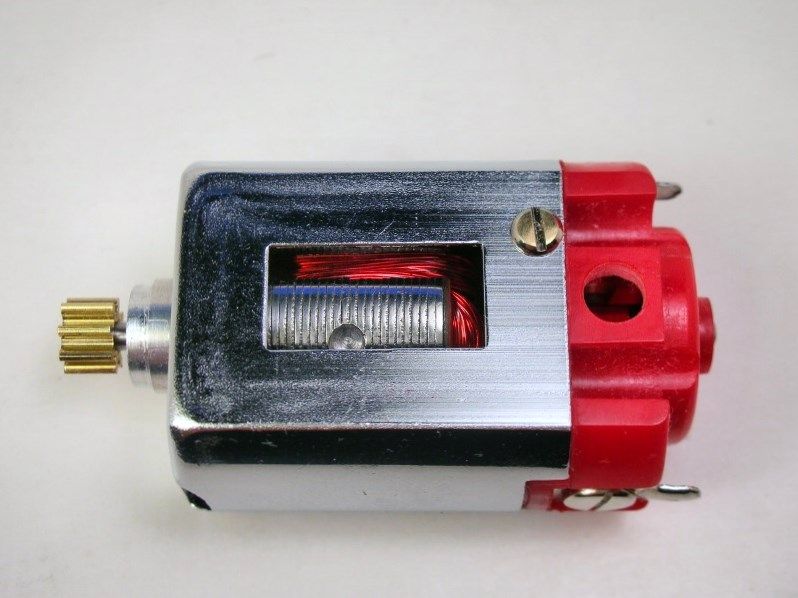
Here's my idea for a motor, a Strombecker Hemi motor kit combined with a 1968 Mabuchi armature and magnets:


PlateGP-19.jpg


The idea behind using a 1968 Mabuchi as the heart of an easy to make R&C motor is discussed in this thread:


R&C Motors Made Easy


Here are the parts to be used.


PlateGP-18.jpg


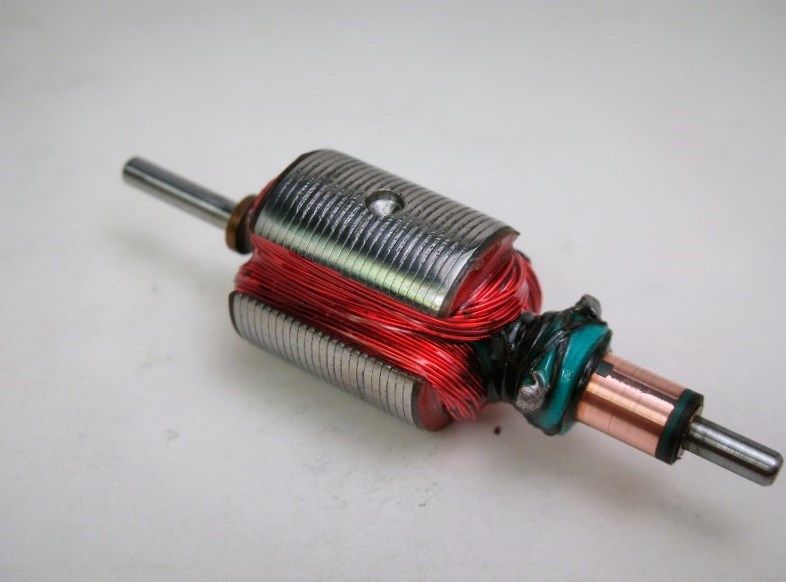
The red wire Mabuchi arm gets the "rewind look" treatment with a coat of epoxy and a static balance:


PlateGP-17.jpg


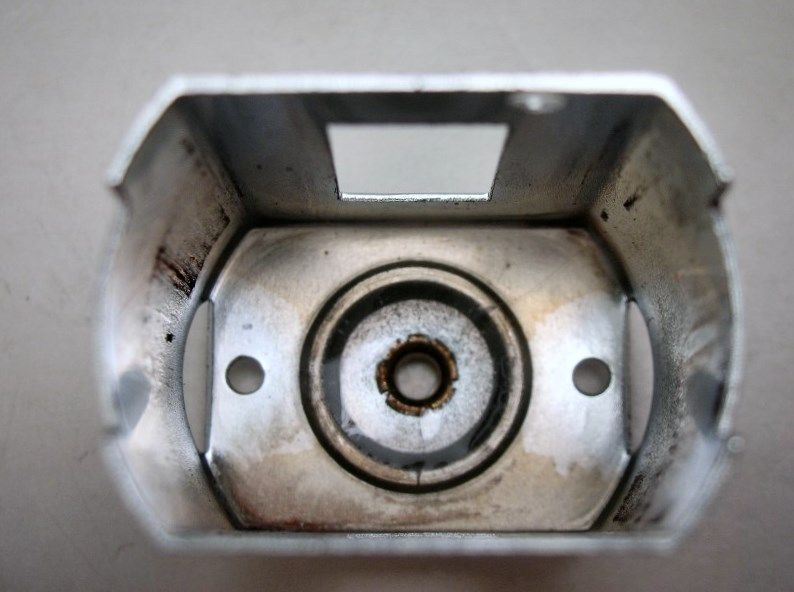
The can bearing is a weak point that is usually soldered in place. I decided to try "2 ton" epoxy to avoid getting acid flux in the porous bearing:


PlateGP-9.jpg


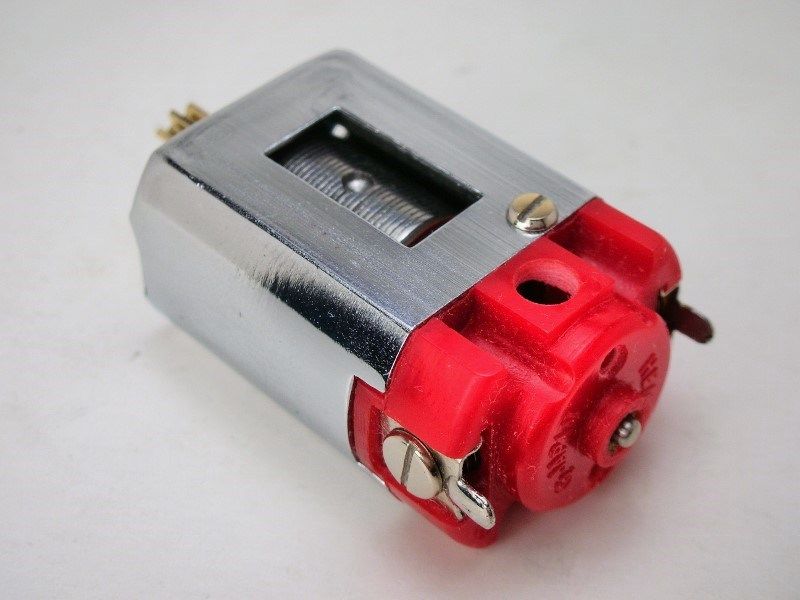
Here's the finished motor. "Hey, has that thing got a Hemi?":


PlateGP-34.jpg


PlateGP-36.jpg


PlateGP-33.jpg


The arm is set back in the case but the magnets are centered on the stack. Time to get this car on the track. :dance3:


  • endbelldrive likes this

Rick Thigpen
Check out Steve Okeefe's great web site at its new home here at Slotblog:
The Independent Scratchbuilder
There's much more to come...


#23 rewinder

rewinder

    Mid-Pack Racer

  • Full Member
  • PipPipPip
  • 155 posts
  • Joined: 09-December 09
  • Gender:Male
  • Location:Somewhere in the panhandle of TX near way too much plutonium…

Posted 25 March 2014 - 04:43 AM

real nice work Rick very good, excellent craftsmanship. best regards, clay parker


Clay Parker

#24 Regis4446

Regis4446

    On The Lead Lap

  • Full Member
  • PipPipPipPip
  • 435 posts
  • Joined: 24-March 10
  • Gender:Male
  • Location:France

Posted 25 March 2014 - 02:11 PM

:good: very elegant

plategp-29-1--44b3804.jpg
Regis Baron

#25 dc-65x

dc-65x

    Grand Champion Poster

  • Subscriber
  • PipPipPipPipPipPipPipPip
  • 6,937 posts
  • Joined: 14-February 06
  • Gender:Male
  • Location:Captain Rick: The only vintage slot car nut in SW Oregon?

Posted 29 March 2014 - 04:37 PM

Thanks guys.


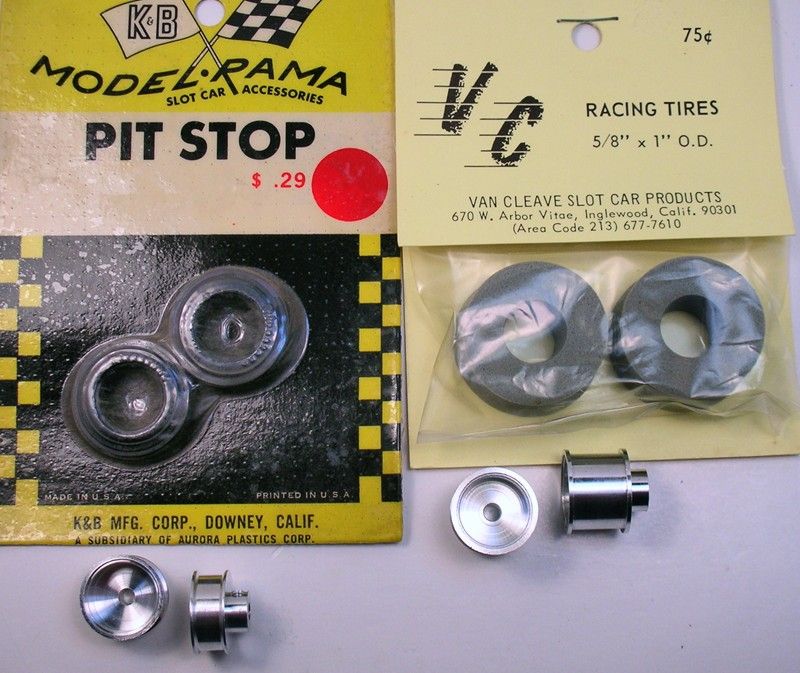
The final pieces to finish her off. Steve O and my re-popped Russkit wheels, K&B hard vinyl front tires and original VC grey foam rear tires:


PlateGP-40.jpg


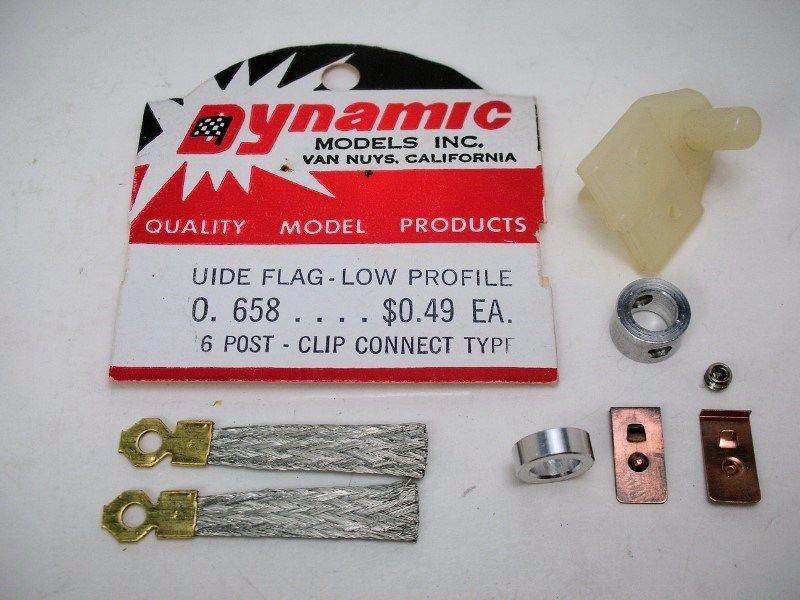
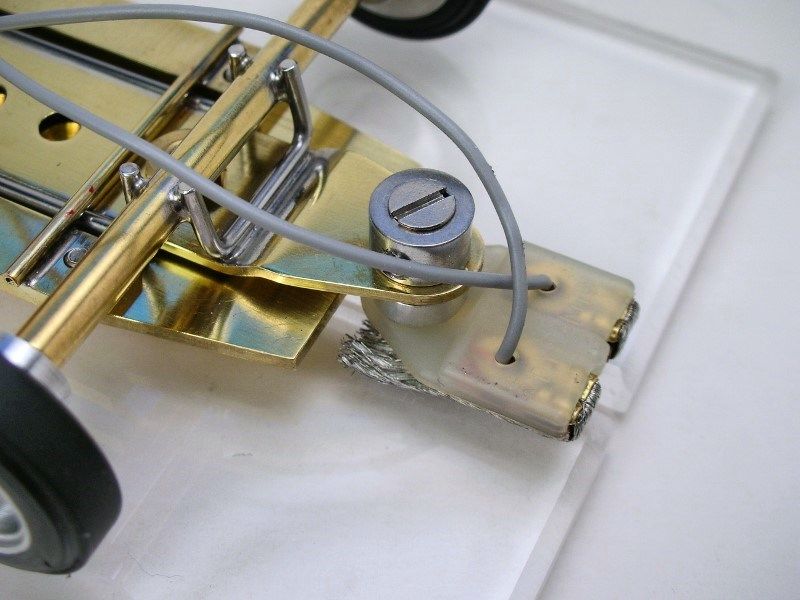
The guide and guide collar are Dynamic. The braid clips are Cox shortened .100" and the braid is Phaze III which is later than 1966. I'm using it to replicate the scarce period Cox Superflex braid. I machined an aluminum spacer shown to space the guide down "Korrectly":


PlateGP-37.jpg


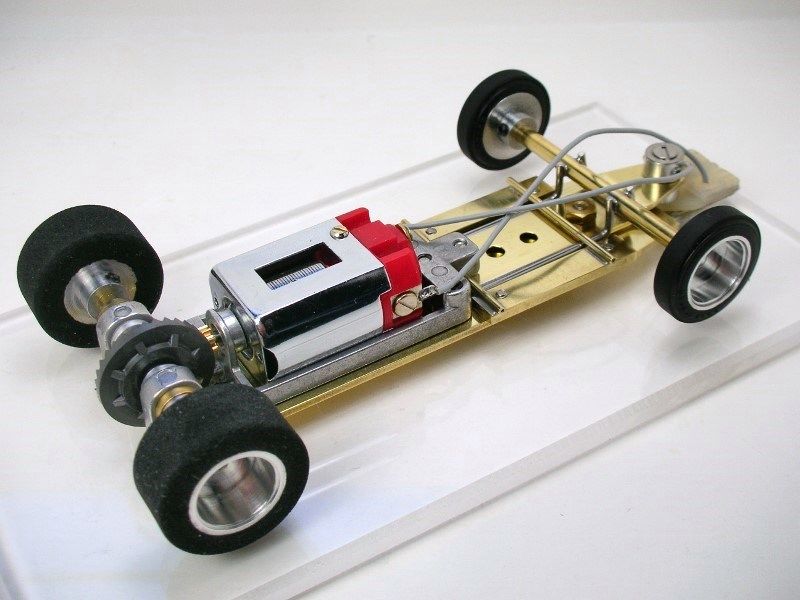
Here's the finished Roller:


PlateGP6.jpg


The car handled so well I could switch from vintage grey VC's to sticker modern Alpha Supernatural donuts. This baby is no "tilter" :dance3:


PlateGP4.jpg


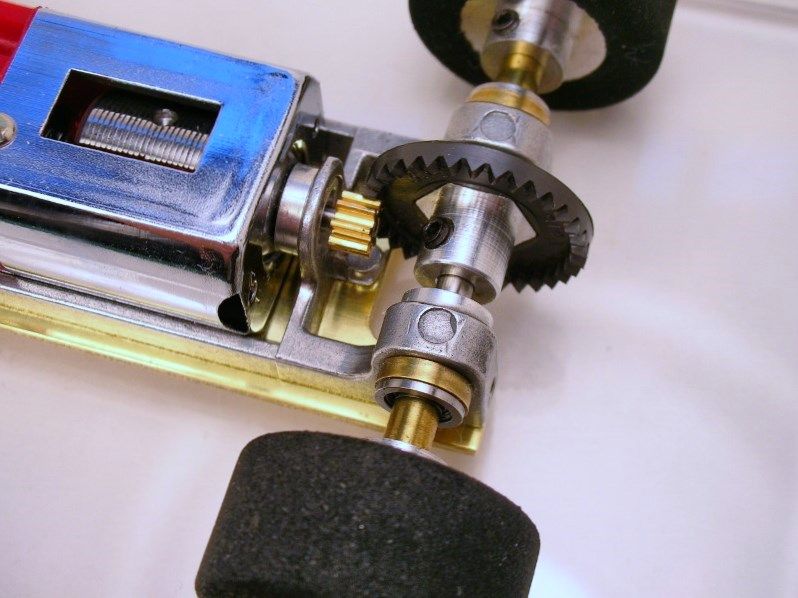
Gears are a Cox 33T with a shortened Tradeship 8T pinion. Bearings are modern VXB with the shields removed:


PlateGP2.jpg


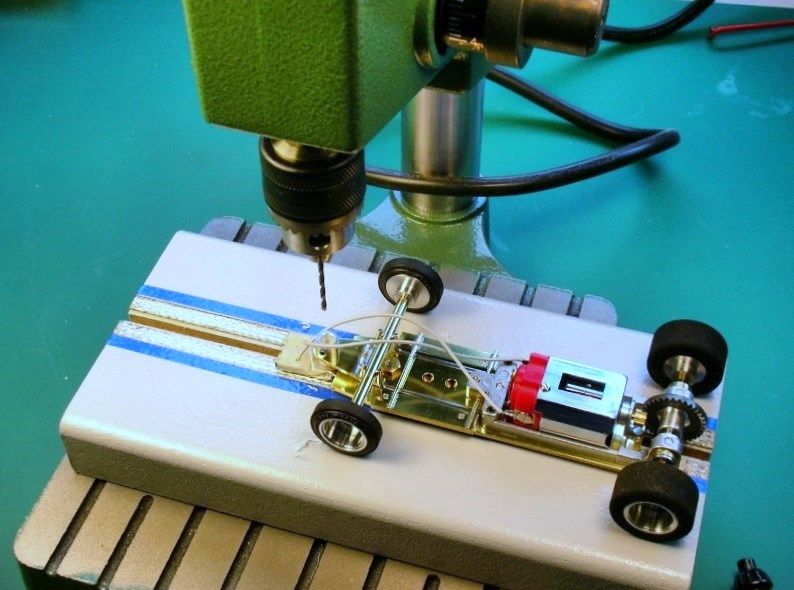
Turns out the guide had to be spaced down so far the set screw collar barely held on to it. I could have simply soldered in a nice brass tube into the guide tongue but I wanted to keep with the "screwed together" theme with a guide collar.


Soooooooooo,,,,,,,,,,,Mr. Mini Drill Press to the rescue:


PlateGP11.jpg


A 4-40 flat head screw is added insurance to lock the guide collar down:


PlateGP7.jpg


This car doesn't seem to tilt in the corners, probably because it weighs as much as my 36D R&C GT car......a full 5.65 oz (160.2g) :shok:


PlateGP9.jpg


My traditional R&C GP car.......


Race3Chassis50.jpg


.....tips the scale a full 2 oz. less at 3.65 oz. (103.5g).


Time get a body on her and see if she still hauls butt :crazy:


Rick Thigpen
Check out Steve Okeefe's great web site at its new home here at Slotblog:
The Independent Scratchbuilder
There's much more to come...


Electric Dreams Online Shop