Jump to content


Photo

Rapid Slot 3D chassis


  • Please log in to reply
67 replies to this topic

#26 Bill from NH

Bill from NH

    Age scrubs away speed!

  • Full Member
  • PipPipPipPipPipPipPipPip
  • 14,761 posts
  • Joined: 02-August 07
  • Gender:Male
  • Location:New Boston, NH

Posted 16 May 2015 - 06:52 AM

In the 60's Strombecker chassis were made of plastic. This chassis is made of plastic.


So this means they, too can be sold on eBay. :laugh2:  :laugh2:


If they catch on, I see these chassis running among themselves, rather than replacing existing classes, much like FCRs did. They should provide some fun if used that way.


Bill Fernald
 
I intend to live forever!  So far, so good.  :laugh2:  :laugh2: 


#27 Pablo

Pablo

    Builder

  • Administrator
  • PipPipPipPipPipPipPipPip
  • 18,454 posts
  • Joined: 20-February 06
  • Gender:Male
  • Location:Cleveland, Tennessee

Posted 16 May 2015 - 07:47 AM

Sam, I was the first person to ask if it was intended to be a retro class.

The reason I asked is because it's an inline. I could be off base, but seems to me that would be the only reason to make it inline.

They sure didn't do it to improve the handling or the lap times, did they ? :shok: Just askin'


Paul Wolcott


#28 Eddie Fleming

Eddie Fleming

    Posting Leader

  • Subscriber
  • PipPipPipPipPipPipPip
  • 2,925 posts
  • Joined: 27-April 14
  • Gender:Male
  • Location:Fayetteville, GA USA

Posted 16 May 2015 - 08:14 AM

Stir it up Pappy.  :)


Eddie Fleming

#29 MSwiss

MSwiss

    Grand Champion Poster

  • IRRA National Director
  • PipPipPipPipPipPipPipPip
  • 25,912 posts
  • Joined: 16-April 06
  • Gender:Male

Posted 16 May 2015 - 08:17 AM

Pablo,
I think part of it was in lines lend themselves better to just having the motor bolted in.

Mike Swiss
 
Inventor of the Low CG guide flag 4/20/18
IRRA® Components Committee Chairman
Five-time USRA National Champion (two G7, one G27, two G7 Senior)
Two-time G7 World Champion (1988, 1990), eight G7 main appearances
Eight-time G7 King track single lap world record holder

17B West Ogden Ave., Westmont, IL 60559, (708) 203-8003, mikeswiss86@hotmail.com (also my PayPal address)

Note: Send all USPS packages and mail to: 692 Citadel Drive, Westmont, Illinois 60559


#30 Eddie Fleming

Eddie Fleming

    Posting Leader

  • Subscriber
  • PipPipPipPipPipPipPip
  • 2,925 posts
  • Joined: 27-April 14
  • Gender:Male
  • Location:Fayetteville, GA USA

Posted 16 May 2015 - 08:24 AM

I started a thread a few weeks ago and made some reference to this chassis and possible other production chassis.


It has become clear to me that retro would be more accurately described as Scratch-built Retro.


That name being unhandy makes the Retro name much more acceptable.


So Retro is a builders class.


End of discussion.


Or am I wrong?


Warning  Danger of thread drift is increasing!


  • macman likes this
Eddie Fleming

#31 Pablo

Pablo

    Builder

  • Administrator
  • PipPipPipPipPipPipPipPip
  • 18,454 posts
  • Joined: 20-February 06
  • Gender:Male
  • Location:Cleveland, Tennessee

Posted 16 May 2015 - 09:11 AM

Motors screw right into a TFlex.


Paul Wolcott


#32 MSwiss

MSwiss

    Grand Champion Poster

  • IRRA National Director
  • PipPipPipPipPipPipPipPip
  • 25,912 posts
  • Joined: 16-April 06
  • Gender:Male

Posted 16 May 2015 - 10:02 AM

And what semi-serious racer doesn't also solder the motor in with a T-flex?
  • macman likes this

Mike Swiss
 
Inventor of the Low CG guide flag 4/20/18
IRRA® Components Committee Chairman
Five-time USRA National Champion (two G7, one G27, two G7 Senior)
Two-time G7 World Champion (1988, 1990), eight G7 main appearances
Eight-time G7 King track single lap world record holder

17B West Ogden Ave., Westmont, IL 60559, (708) 203-8003, mikeswiss86@hotmail.com (also my PayPal address)

Note: Send all USPS packages and mail to: 692 Citadel Drive, Westmont, Illinois 60559


#33 Pablo

Pablo

    Builder

  • Administrator
  • PipPipPipPipPipPipPipPip
  • 18,454 posts
  • Joined: 20-February 06
  • Gender:Male
  • Location:Cleveland, Tennessee

Posted 16 May 2015 - 10:06 AM

Serious racers not only solder in the motor, they remove the part of the bracket that allows it to be screwed in  :curtsey:


Paul Wolcott


#34 Mr. HP

Mr. HP

    Made in Detroit

  • Subscriber
  • PipPip
  • 80 posts
  • Joined: 08-October 07
  • Gender:Male
  • Location:Grosse Pointe Blank

Posted 16 May 2015 - 05:34 PM

The intent for the chassis was to build a beginner friendly spec class around it, not to be a retro alternative.

However with the popularity of retro and the large assortment of available parts it did make sense to make my car share some components. And the in-line layout with fixed motor placement is very robust and ideal for the novice racer.
  • Edwardo, MSwiss, Joe Mig and 3 others like this

Steve Grider


#35 Dave Crevie

Dave Crevie

    Posting Leader

  • Full Member
  • PipPipPipPipPipPipPip
  • 4,540 posts
  • Joined: 16-February 09

Posted 18 May 2015 - 04:09 PM

OK. So now down to business. Time to build this thing. From here on, I will only entertain questions and

comments about this build. Those who want to debate the politics of plastic cars, please start a new thread

for that purpose.


Steve had to remind me that the screws, pin tubes and stiffener rails are not included in the list price. He

had already done the chassis he sent me as a favor.


IMG_0318.JPG


The photo above shows one of the stiffener rails and the screw which holds it in place. The raill that came

with the chassis is .047 piano wire. It might be possible to go up to .062 by running a reamer through the

holes, but you can certainly go down to .032 if you want without any changes.


IMG_0320.JPG


This photo shows the adjustment screws that limit pan movement. This is a shaker type chassis, and the

short screws near the front control the fore and aft movement of the pans, and the long screws at the rear

control the side to side movement. 


IMG_0322.JPG


The small screws on the bottom of the pans hold the pin tubes in. These can also set the width of the pans

to get the maximum legal width or narrow them up to better fit a body.


Next, we'll assemble the front axle


  • Jencar17 likes this

#36 Dave Crevie

Dave Crevie

    Posting Leader

  • Full Member
  • PipPipPipPipPipPipPip
  • 4,540 posts
  • Joined: 16-February 09

Posted 18 May 2015 - 04:38 PM

The assembly of the front axle is simple and straightforward. I used oilite bushings to fit the axle to the chassis uprights. 

These press in snugly, and there is no need to glue them in. I used the JK 8746PF front wheels, mainly because I didn't

have a set of ball bearing fronts ready. But this will give me a chance to upgrade later and see if there is any real improvement

in lap times. 


IMG_0327.JPG


The bushings I used are flat faced, and do not have the raised boss around the axle hole. The wheels will be independent

and not locked to the axle. I will use the solder on retainers included with the wheels. The axle is .093 piano wire.

To get to the maximum legal width, .200 inch of spacers will need to be installed on each side between the bushings

and the wheels. This may be different if you use other wheels or bushings. I used a short piece of 1/8th brass tubing

and two .020 thick Koford steel spacers. One spcer goes against the bushing, and the other next to the wheel.


IMG_0329.JPG


The rear axle is pretty much the same. The ball bearings fit very snug, so I didn't use any acc glue or Loctite. Use

the axle to check the alignment of the bearings.


IMG_0324.JPG


I am going to use a 28 tooth crown gear to start with, so I went ahead and assembled the rear axle into the chassis

at this point. With the C/R ball bearings I used, I had to make up two .070 long spacers from 1/8th brass tubing to

get the legal IRRA 3.125 width.


IMG_0331.JPG


OK, enough for today. Next time I will finish the chassis up with the installation of the motor and guide flag assembly 


  • Jencar17 and garyvmachines like this

#37 John C Martin

John C Martin

    J.C Martin

  • Full Member
  • PipPipPipPipPipPip
  • 1,070 posts
  • Joined: 02-November 11
  • Gender:Male
  • Location:Smyrna, TN

Posted 19 May 2015 - 02:00 PM

Look'in good Dave ,,I did glue my rear bearings in they may spin in the chassis as mine did after some running..
Also consider using the top and bottom screw holes in the chassis,,it allows changing the motor without removing the rear axle and gear.

Edited ,, we're running hawk 6s

#38 Dave Crevie

Dave Crevie

    Posting Leader

  • Full Member
  • PipPipPipPipPipPipPip
  • 4,540 posts
  • Joined: 16-February 09

Posted 19 May 2015 - 04:40 PM

There is only one top hole on a JK Retro Hawk, the motor I am using. Removing the axle isn't such a

big thing, just a bother. I am more concerned about how well the motor screws will hold. I used flat

heads, both because the holes in the chassis are countersunk, and because flat heads tend to self lock

better than standard socket head screws. All this will shake out when I start running the car. Anyway, I

will continue to post the build as soon as I can make time, probably later in the week. 


#39 Mr. HP

Mr. HP

    Made in Detroit

  • Subscriber
  • PipPip
  • 80 posts
  • Joined: 08-October 07
  • Gender:Male
  • Location:Grosse Pointe Blank

Posted 20 May 2015 - 09:22 AM

Nice write up Dave!

When using bearings I haven't had any issues with the outer race spinning after being pressed into the chassis. With bronze bushings the fit typically isn't as tight and I would definitely recommend a tiny drop of CA glue during assembly.

On a side note, I've heard that some guys have been pre-tapping the holes then later had stripping issues. I don't recommend pre-tapping using a tap as it removes too much material and increases the chance of thread failure after repeated use. I've been using the screw to create the threads in the hole and have had zero thread failures after several chassis rebuilds. Just use a little patience threading in the screws for the first time.

For additional assembly info...
https://www.dropbox.... 888sr.pdf?dl=0


Steve Grider


#40 Dave Crevie

Dave Crevie

    Posting Leader

  • Full Member
  • PipPipPipPipPipPipPip
  • 4,540 posts
  • Joined: 16-February 09

Posted 26 May 2015 - 04:46 PM

Moving on to motor installation and finishing off the build, I used a JK Retro Hawk motor with an 8 tooth pinion

soldered on. Since I am using an 28 tooth crown, the beveled pinion is soldered on so that the motor shaft just

peeks out. This puts the mesh area centered on the tooth areas of the pinion teeth.


IMG_0332.JPG


The motor is held in with two flat head 2mm screws. The long shaft on the terminal (brush) end of the motor

should be cut even with the solder tabs for the lead wires. The shaft just bumps on the long pin tube near the

motor. I don't know if it would hit when the car is running on the track, but I could get it to hit by pushing the 

pans to the top of their travel, so I shortened it. The red positive tab also needs to be bent upwards to avoid

hitting on that same pin tube. None of this is necessary if you use a Pro-Slot motor.


IMG_0341.JPG


When mounted in place, the motor has a slight downward angle which puts the terminal end very close to

even with the bottom of the chassis, but still in line with the rear axle at the pinion end.


IMG_0342.JPG


I used a Red Fox cut down guide flag, which fits a little snug in the guide tongue, so I used a small half round

file to clean it out some. A standard 3/16 reamer run through the hole did not remove enough material for the

guide flag to move freely. With no spacers, the flag with braids installed is exactly the right height for the

slightly recessed braid on the tracks at Chicagoland. If the braid at your track is level to or slightly above the

the track surface, you might have to do a little filing on the bottom of the guide tongue to get the right height.

This all depends on the guide flag and braids you are using. I added the lead wires at this point, feeding them

through the loom under the front axle,


IMG_0335.JPG


That finishes the assembly of the chassis.


IMG_0340.JPG


I mounted a JK Ti22 MkI body. with the body on, there is no hiny yhat there is a plastic chassis under this car. 

Now off to do some testing.


IMG_0338.JPG


  • Edwardo and Jencar17 like this

#41 Dave Crevie

Dave Crevie

    Posting Leader

  • Full Member
  • PipPipPipPipPipPipPip
  • 4,540 posts
  • Joined: 16-February 09

Posted 26 May 2015 - 05:57 PM

Correction. The body is the Parma 1043 Ti-22.


#42 Bernie

Bernie

    Checkered Flag in Hand

  • Full Member
  • PipPipPipPipPipPip
  • 1,283 posts
  • Joined: 11-March 09
  • Gender:Male
  • Location:St Johns, Florida

Posted 27 May 2015 - 12:24 PM

Nice build Dave. Interested to find out how it runs on the flat track. 


Bernie Schatz

#43 Dave Crevie

Dave Crevie

    Posting Leader

  • Full Member
  • PipPipPipPipPipPipPip
  • 4,540 posts
  • Joined: 16-February 09

Posted 27 May 2015 - 04:27 PM

I will be doing both tracks. As you know, the flat track is my preference. less carnage, more driving. 


  • Bernie likes this

#44 Dave Crevie

Dave Crevie

    Posting Leader

  • Full Member
  • PipPipPipPipPipPipPip
  • 4,540 posts
  • Joined: 16-February 09

Posted 01 June 2015 - 05:20 PM

I had a chance to run some laps with this car Saturday night. I ran the car just as built on both the king and

flat tracks. The car set-up is


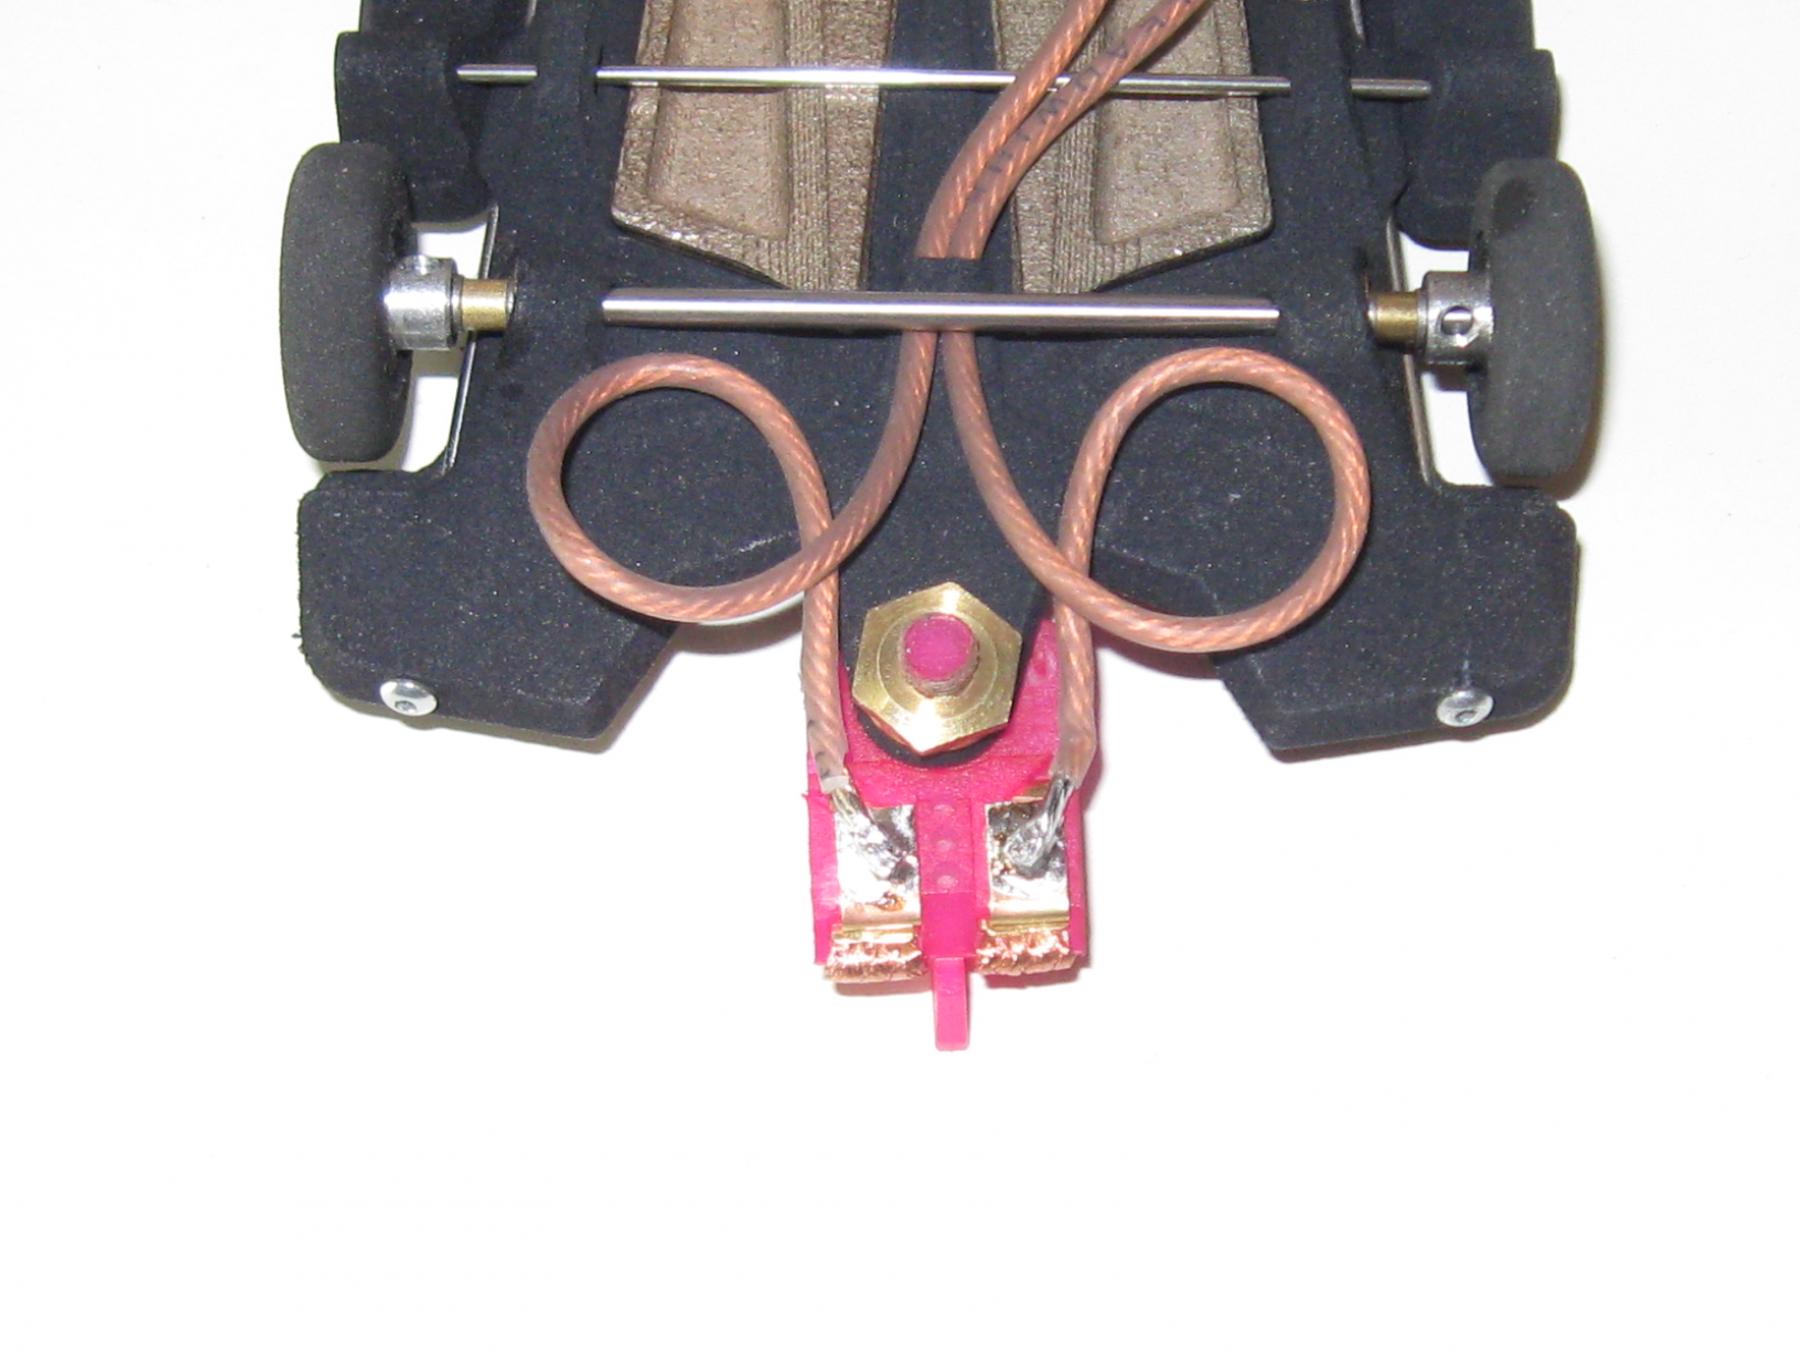
                         Weight;          120 grams total


                                                50 grams on the guide flag


                                                70 grams on the rear tires.


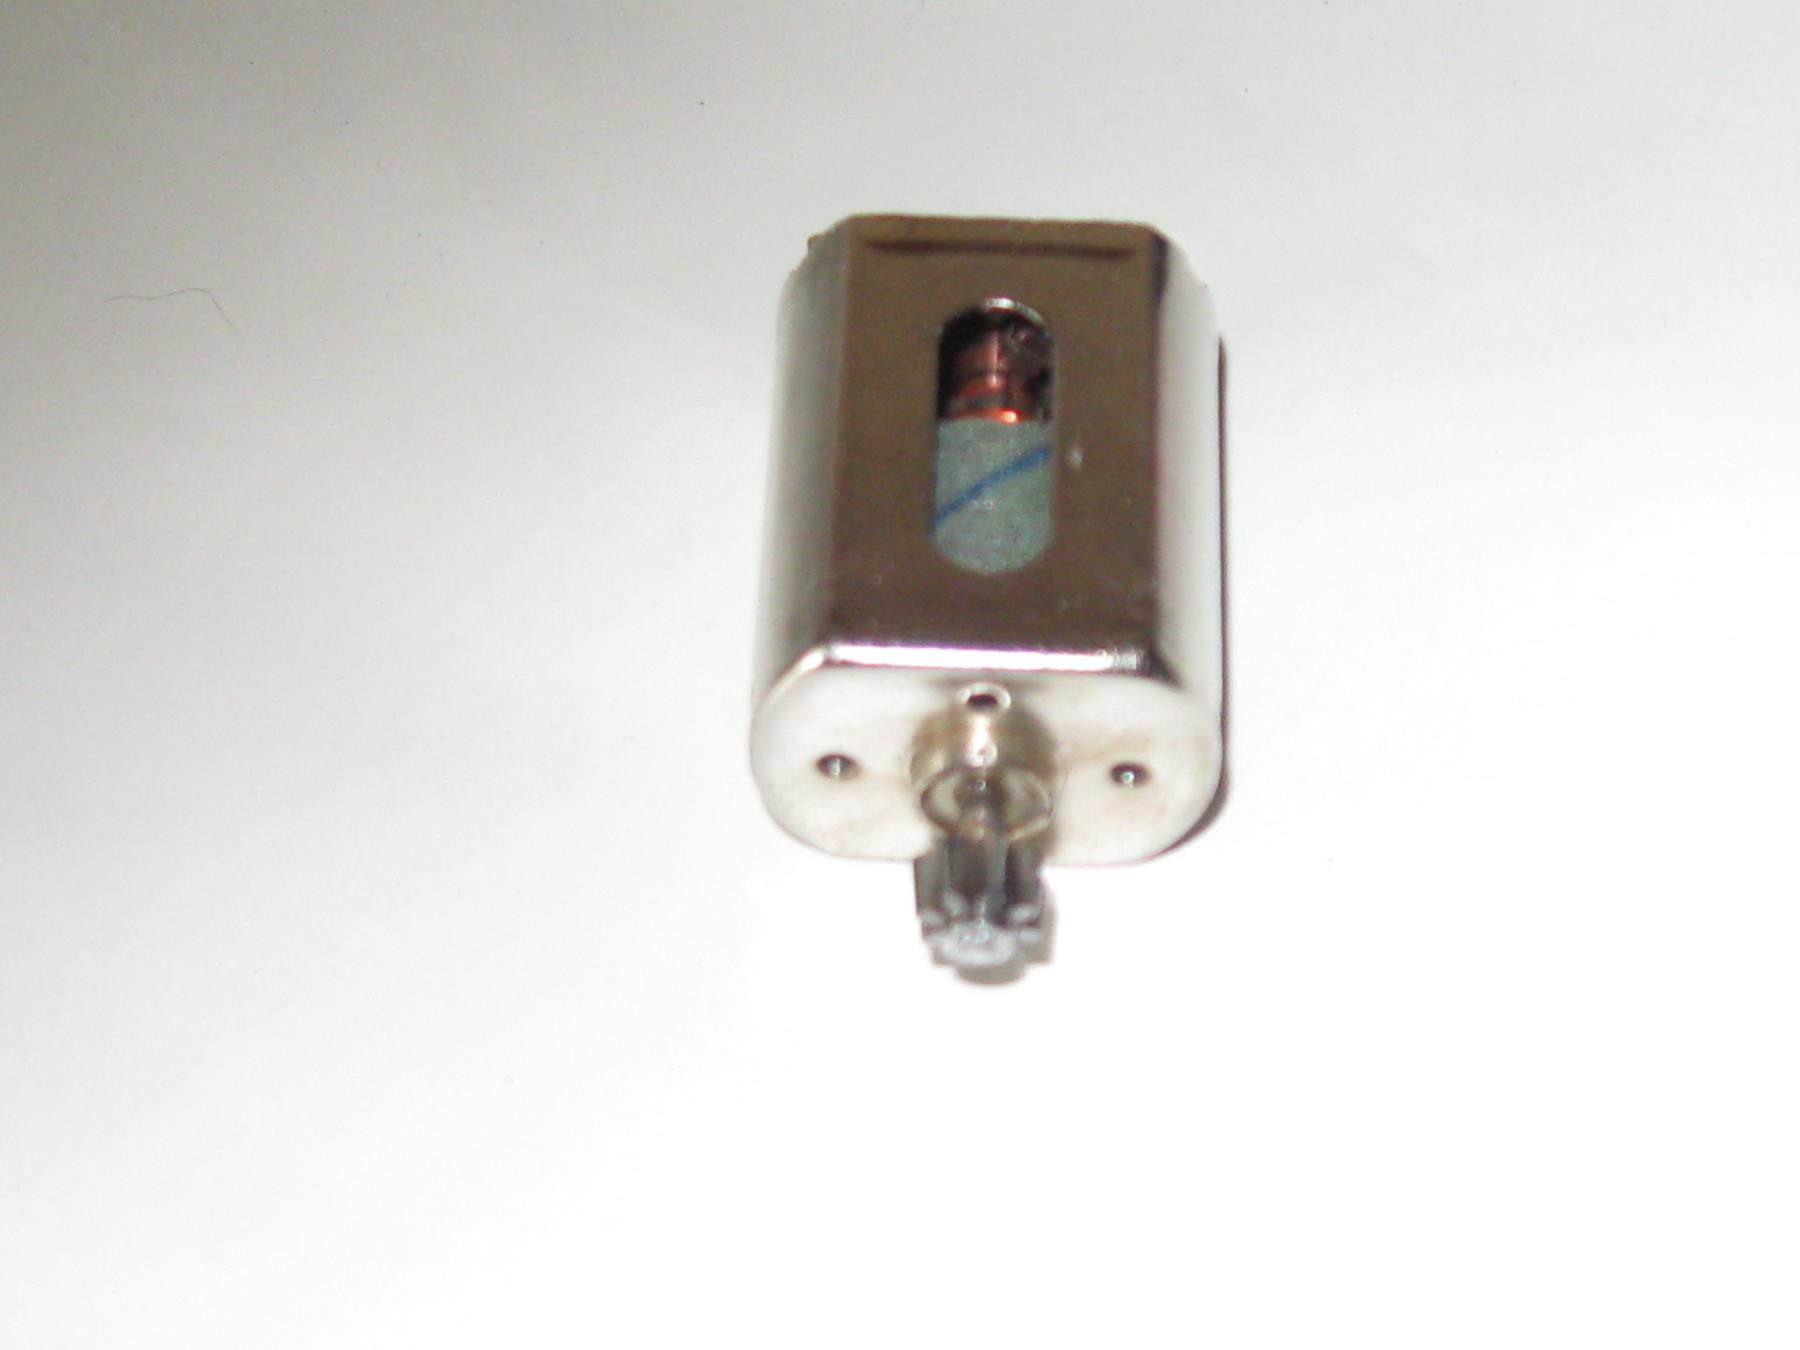
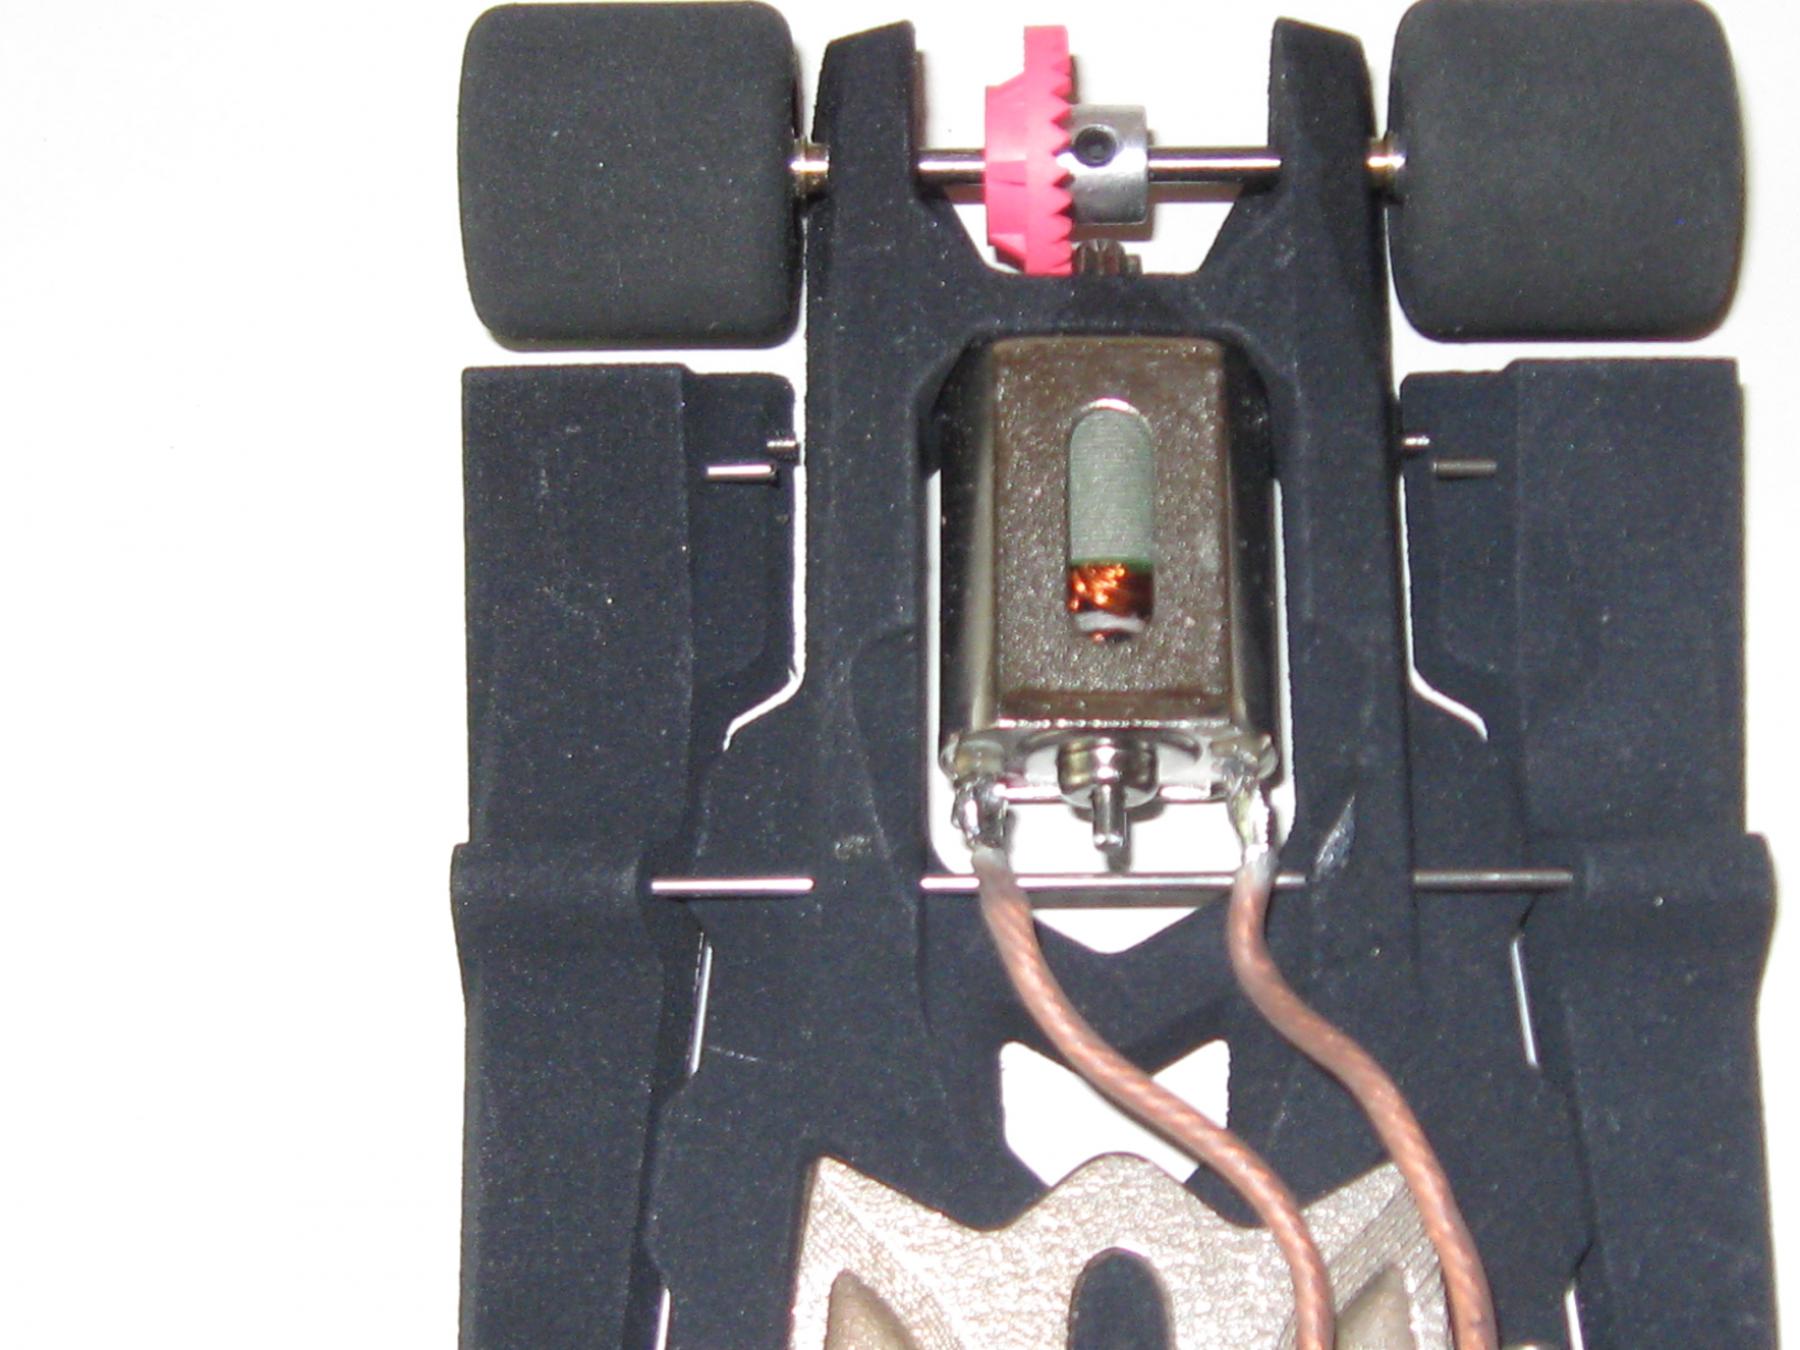
                          Motor;            JK Retro Hawk
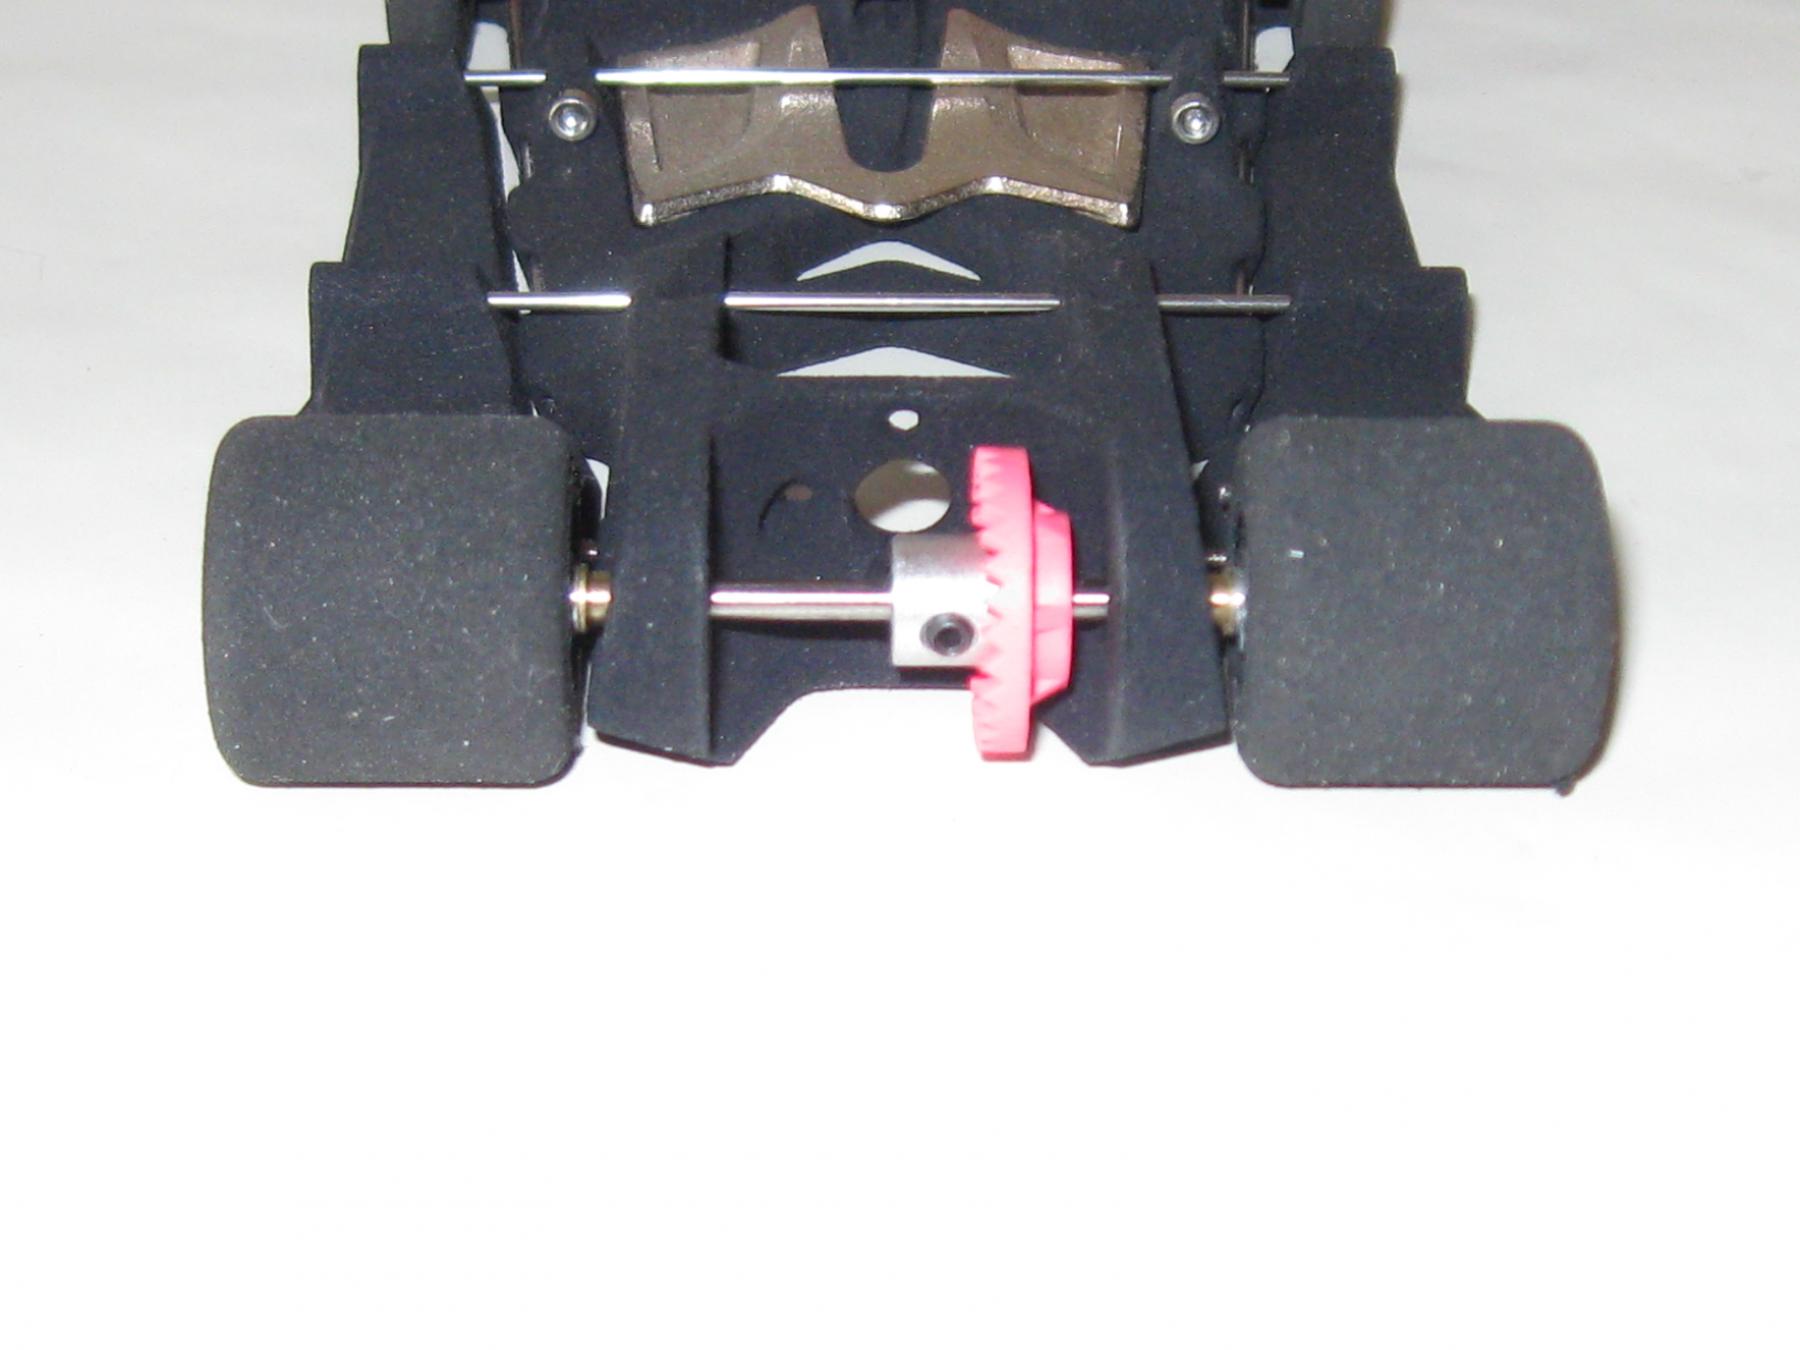
 

                          Gearing;         8 / 28


                          Rear tires;      JK 8713PP


I ran a few laps, and decided the car needed to have some break in laps put on it since everything was new, and the

car seemed a little tight. So I ran 100 laps at a not too aggressive speed to get some time on the motor and gears.

It seemed like it had improved considerably, so I started checking times as I began to push the car harder. At first

I was getting lap times in the 5.4 range, pretty slow for retro times. Eventually I had worked it down to a 5.100 even,

still pretty slow. But the car was topped out by the middle of the front straight, so I knew it had to be geared too short.

Mike Swiss tried the car and ran 4.916. The good thing was the car felt very consistent to me.


So I moved to the flat track, and with some laps managed 5.405. Mike was able to get a 5.196.


At this point, I changed the crown gear to a 26 tooth. The car definately had more straight and bank speed. But what

caught me out was how much less brakes I had. I knew it might be a little less, but I now had trouble getting through

the dead man. In fact, I stuffed it pretty seriously, bending the nose of the body to the point where it would not stay

off the track surface, even with it trimmed back. This compromised any further testing. The best time I could get was

5.120. Mike tried the car again and was only able to match his previous time. I did not run any more laps on the flat

track, I need to replace the body for that.


The car seems a little loose in the rear with the smaller crown giving more straight speed. Mike also thought a 9 tooth

pinion is needed, but I need to get the rear planted better before that. The next time i might play with weight, and

different rear tires. A compairative time for a good retro car is 4.7 to 4.8 on the king. I don't expect to get it down to

that point, but I may get close..  


#45 Race O' Rama

Race O' Rama

    Checkered Flag in Hand

  • Member at Peace
  • PipPipPipPipPipPip
  • 1,107 posts
  • Joined: 08-February 10
  • Gender:Male
  • Location:Gibsonburg, OH

Posted 01 June 2015 - 10:48 PM

I just received my 3 chassis in the mail todayDSC00348_edited.jpg now I have to build them and test them out


  • Jencar17 likes this

Karl Hoffheins

4/8/65-8/16/22
Requiescat in Pace


#46 Mr. HP

Mr. HP

    Made in Detroit

  • Subscriber
  • PipPip
  • 80 posts
  • Joined: 08-October 07
  • Gender:Male
  • Location:Grosse Pointe Blank

Posted 02 June 2015 - 03:43 PM

Dave,

Have you tried running it without the .055 rails in the center section? It will allow the chassis to flex more and should help on the flat track and plant the rear of the car.

Steve Grider


#47 Dave Crevie

Dave Crevie

    Posting Leader

  • Full Member
  • PipPipPipPipPipPipPip
  • 4,540 posts
  • Joined: 16-February 09

Posted 02 June 2015 - 04:43 PM

Not yet. I will be trying that plus different diameters of rails, along with a lot of other things. The goal is to see

just how good this chassis can be. I probably will also try a Pro Slot motor eventually.  


#48 Bryan Warmack

Bryan Warmack

    Posting Leader

  • Subscriber
  • PipPipPipPipPipPipPip
  • 4,684 posts
  • Joined: 17-July 07
  • Gender:Male

Posted 04 June 2015 - 11:21 PM

    I ran one of these recently at Buena Park Raceways on their super fast King track that Retro racer TJ Albu had put together. If I didn't know what it was I would have thought it was one of TJ's regular Retro Can Am cars as it just ran flawless!  Smooth, no chatter and no hint of anything negative. I didn't spend a lot of time with it or try it on the flat track..............certainly not Retro and I don't know what it weighed but it ran GREAT!!


  • garyvmachines likes this

#49 Dave Crevie

Dave Crevie

    Posting Leader

  • Full Member
  • PipPipPipPipPipPipPip
  • 4,540 posts
  • Joined: 16-February 09

Posted 05 June 2015 - 04:26 PM

Glad to hear it, Bryan. I respect your opinion greatly. Thanks.


#50 Dave Crevie

Dave Crevie

    Posting Leader

  • Full Member
  • PipPipPipPipPipPipPip
  • 4,540 posts
  • Joined: 16-February 09

Posted 29 June 2015 - 04:54 PM

I finally had a chance to do a little more testing and tuning on this car. I went to 8/27 gearing to make the car more

driveable for me. I need some brakes, but I still want top end and bank speed. I also changed to small hub JK rears,

and the car is a little more stuck in the rear. Then I changed to a full height rear spoiler. I usually run a slightly shorter

spoiler on the king with a Falcon or Retro Hawk to get the straight speed, but on this car the lap times dropped off

about .07 second. The car was quicker in the donut, but not enough to counter the loss on the front straight. The

biggest improvement came when I removed the stiffener rails, which is just what Steve Grider said would happen.

I didn't try the car on the flat track since it was being used for hardbody practice. Hopefully I can work in a session

when I can spend more time trying different things on this car. 


Electric Dreams Online Shop