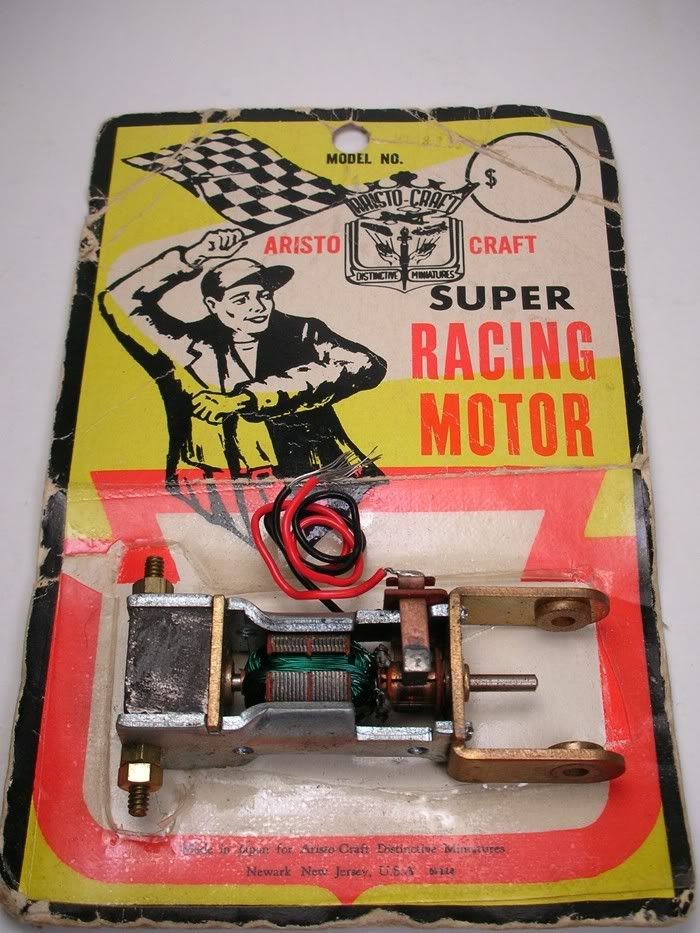
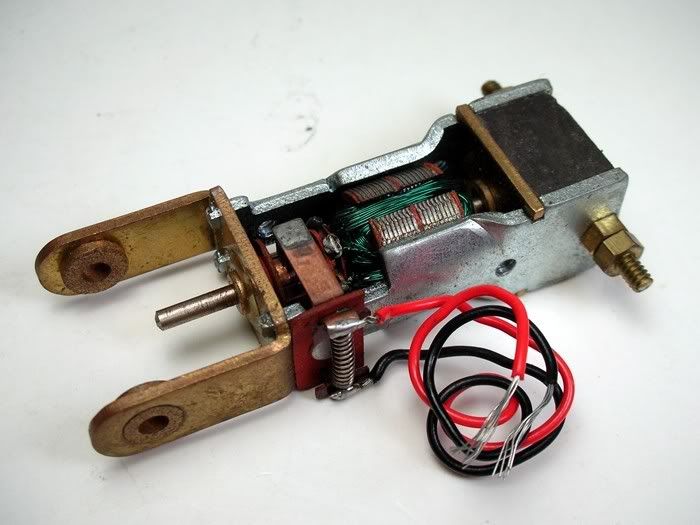
Aristo-Craft power
#1
Posted 05 March 2008 - 10:58 PM
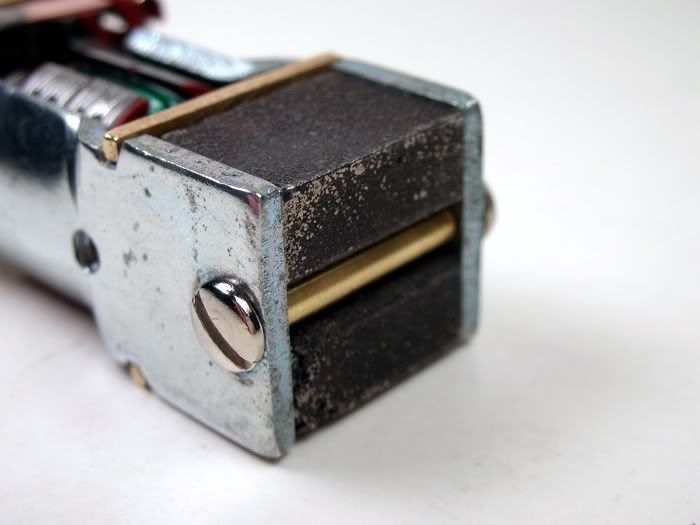
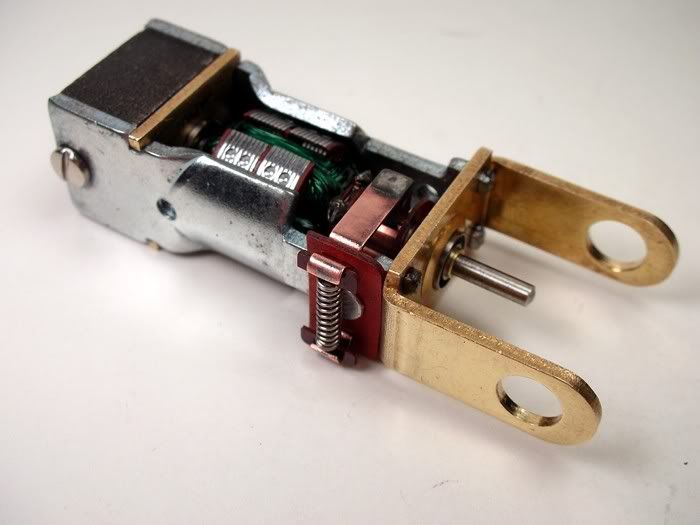
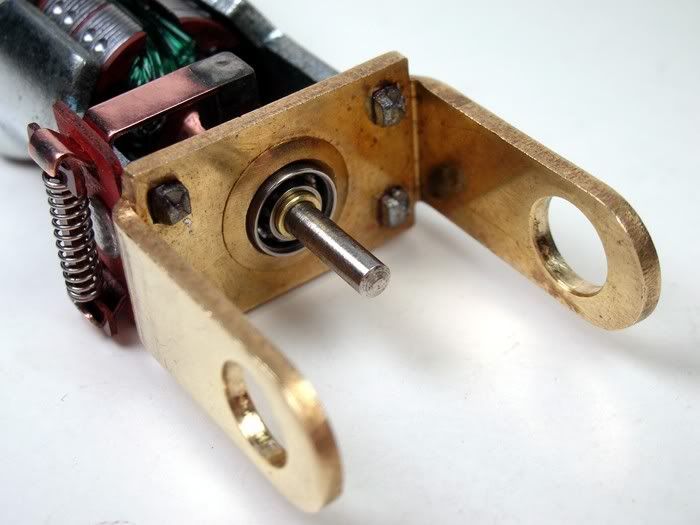
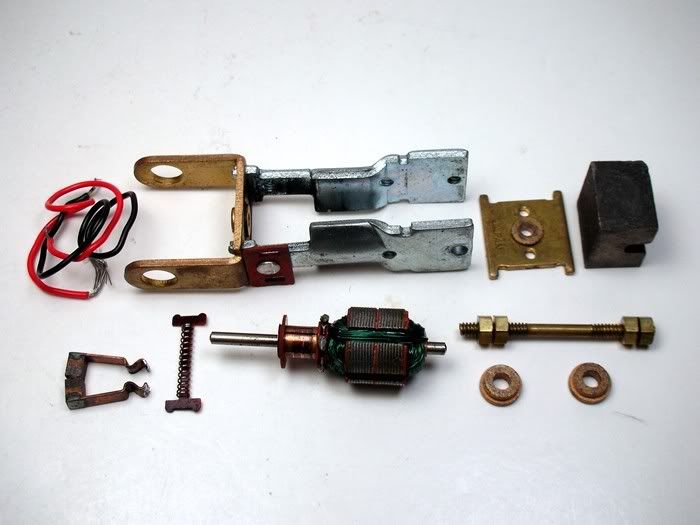
These motors were on eBay as a Buy It Now for $5 for weeks. The lady that was selling them had a ton of them and they sold very slowly. All I remember about this motor from back in the day (around 1964-5) is that they were FAST and blew up often. I decided the best thing to do with a brand-new motor was to tear it apart :
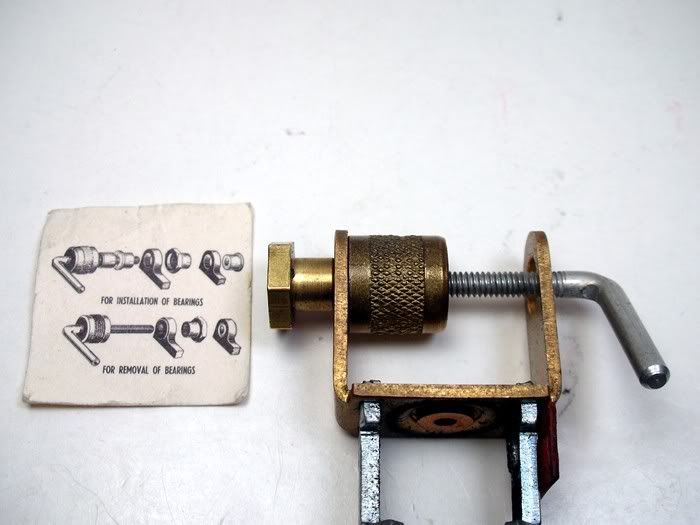
To remove the axle bearings I used this handy dandy vintage Dynamic bearing tool. It works great to remove or install press fit bearings. If you see one eBay you might want to give it a try:
Now that it was apart I need to do an early '60s "hop-up", which usually consisted of ball bearings and a stretched brush spring. The ball bearings proved to be a problem because the armature shaft is a metric size of 2.3mm or .0905". 3/32" bearings were way too sloppy and try as I might I couldn't find any 2.3mm bearings... 2mm, 2.5mm, and 3mm yes, but no 2.3mm. Maybe they are out there but I couldn't find them so I did what Bob Braverman did in one of his old R&C hop-up articles. I decided to use 1/8" bearings and make an adaptor to mate the armature to the larger bearings. I found some thick-wall brass tubing at McMaster-Carr with a 1/8" OD and a .085" ID. They also had a reamer in .0905":
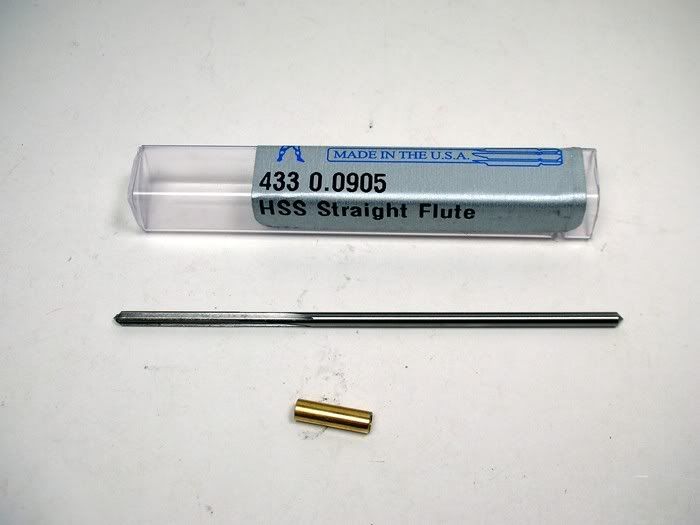
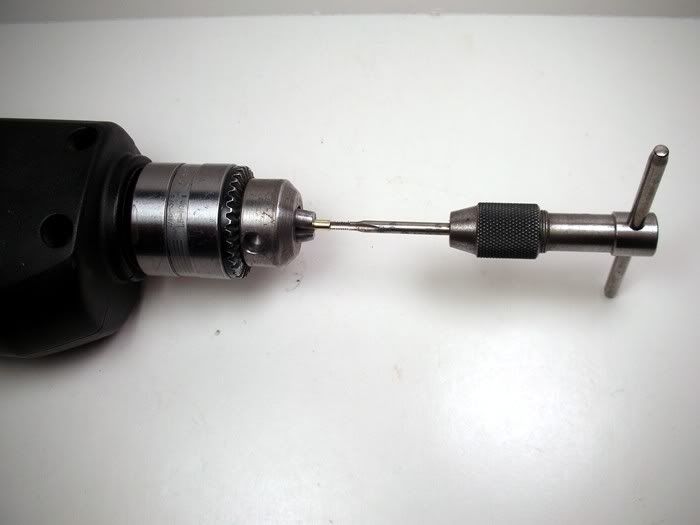
The tube fit the 1/8" ball bearings perfectly but I had to ream out the tube's ID to fit the armature shaft. Somewhere in an old slot car magazine they talked about reaming a concentric hole without a lathe. They spun the work piece backwards in a drill motor and then used a reamer in another drill to enlarge the hole. Here's what I did with a drill and my Foredom grinder:
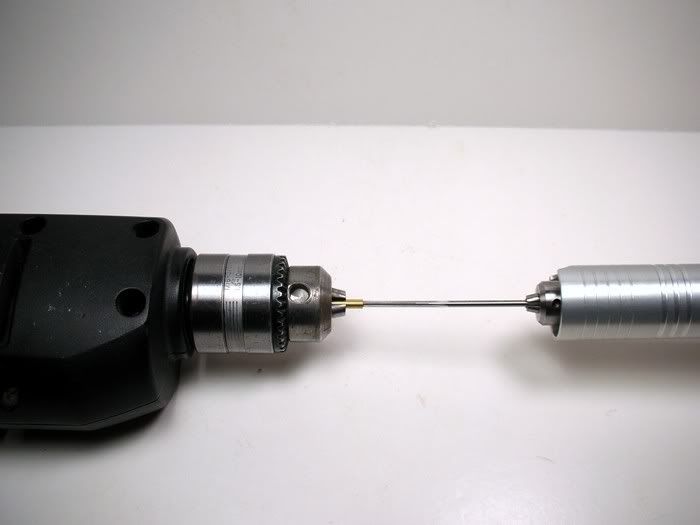
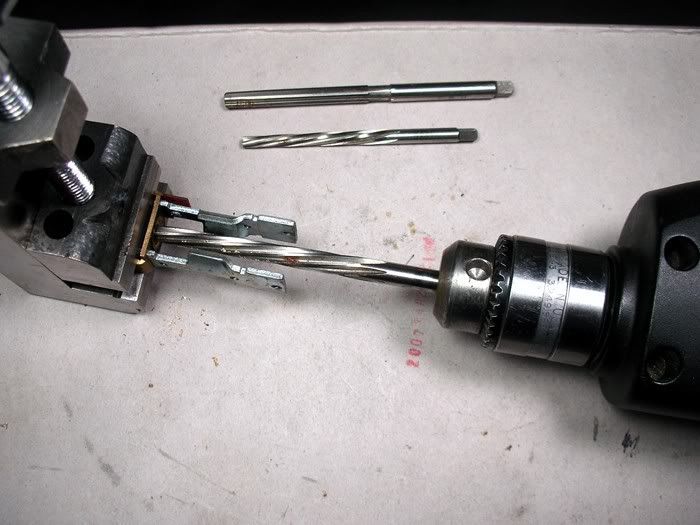
It worked like a charm and I had a couple of bushing adaptors that were a slip-fit to the armature and bearings. Next I used a taper reamer to open up the holes in the motor for the larger bearings. I finished with a 1/4" reamer:
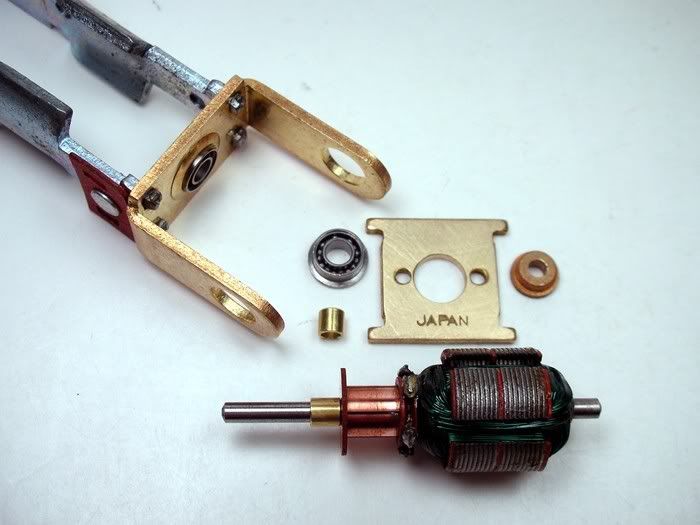
Here is the ball bearing installed the axle bracket. The enlarged rear bearing support plate, adaptor bushing, ball bearing, and stock bushing are shown for comparison:
Time for dinner . Next up, how not to static balance the armature... and one way to successfully static balance the armature...
Rick Thigpen
Check out Steve Okeefe's great web site at its new home here at Slotblog:
The Independent Scratchbuilder
There's much more to come...
#2
Posted 05 March 2008 - 11:12 PM
Jairus H Watson - Artist
Need something painted, soldered, carved, or killed? - jairuswtsn@aol.com
www.slotcarsmag.com
www.jairuswatson.net
http://www.ratholecustoms.com
Check out some of the cool stuff on my Fotki!
#3
Posted 06 March 2008 - 12:29 AM
One armature is toast... but I know why now and it won't happen again...
Onward!
Rick Thigpen
Check out Steve Okeefe's great web site at its new home here at Slotblog:
The Independent Scratchbuilder
There's much more to come...
#4
Posted 06 March 2008 - 06:37 AM
Don
PS: What do you do about remagnetizing? Don't tell me you've got one of those in your shop as well!
#5
Posted 06 March 2008 - 09:50 AM
Bob was a machinist at Northrup Aircraft here in Hawthorne CA... and all the extra magnesium he got there would go into his chassis... boy, if the Govt. knew how much scrap mag was going to slots...
But yes, he used ball bearings in everything, and whatta machinist he was then. I was the envy of all the local kids... but he was strictly a drag racer at Western Speedway in Gardena, CA, in the early '60s.
- Gator Bob likes this
8/16/49-9/18/13
Requiescat in Pace
#6
Posted 06 March 2008 - 09:57 AM
I doubt if all that scrap mag would add up to even one $600 toilet seat... I never realized that that was Bob's day job - always thought he was a full-time slot car builder and writer! Where did he find the time to do all this stuff??? (He was also building and racing motorbikes if I remember correctly).
Don
#7
Posted 06 March 2008 - 10:05 AM
A magnet zapper is on my short list. For now, I have my magnets zapped at Eddie's Slot Car World in Vallejo, CA (707-552-9085), "where track time is ALWAYS FREE!"
Oscar,
Bob was a hero to me as a kid. He was a real scratchbuilder and quite a craftsman. The fact that he was a machinist makes perfect sense. He moved away from slots about the same time I did. I remember a story he did for a motorcycle magazine in 1969 or '70 on a Honda 750-4 "hop up". That inspired me to buy one and tear into it!
Do you still have any of his cars that you could share pictures of with us?
Rick Thigpen
Check out Steve Okeefe's great web site at its new home here at Slotblog:
The Independent Scratchbuilder
There's much more to come...
#8
Posted 06 March 2008 - 10:33 AM
#9
Posted 06 March 2008 - 10:57 AM
Rick Thigpen
Check out Steve Okeefe's great web site at its new home here at Slotblog:
The Independent Scratchbuilder
There's much more to come...
#10
Posted 06 March 2008 - 11:16 AM
Bob Braverman was my friend and I was really shocked when he died so young.
Bob was a pretty good motorcycle racer and specialized in small displacement bikes. He was very good at Willow Springs, where he won his class quite often aboard his Ducati, a Parilla, and a Honda twin. In 1970 he took my own 50cc disc-valve Suzuki (the first mode of transportation I ever purchased in the USA) and fitted a factory racing kit to it, then raced it at Riverside and Willow, winning the class both times. He wrote a large number of articles for Rod & Custom and other publications. Bob also produced many vac-formed bodies that are unfortunately hard to find today.
By the way, those AristoCraft KMK (Mabuchi really...) inline motors are quite fast compared to even a 196B... you will be really surprised.
Regards,
Philippe de Lespinay
#11
Posted 06 March 2008 - 12:11 PM
I don't remember what year he passed, but I was very sad when I heard... I was friends with his son, too, but have lost touch since the '60s with them all...
Thx for the recap, PdL.
8/16/49-9/18/13
Requiescat in Pace
#12
Posted 06 March 2008 - 01:00 PM
Thanks for the info on Bob Braverman. I really admired him and his creations. I wish he was still with us. There are so many questions I wish I could ask him.
I have built one of his "magazine cars" and I have collected or I'm in the process of collecting the parts to build many more both 1/24 and 1/32 scale road racers and drag racers.
Thank you again,
Rick Thigpen
Check out Steve Okeefe's great web site at its new home here at Slotblog:
The Independent Scratchbuilder
There's much more to come...
#13
Posted 06 March 2008 - 11:43 PM
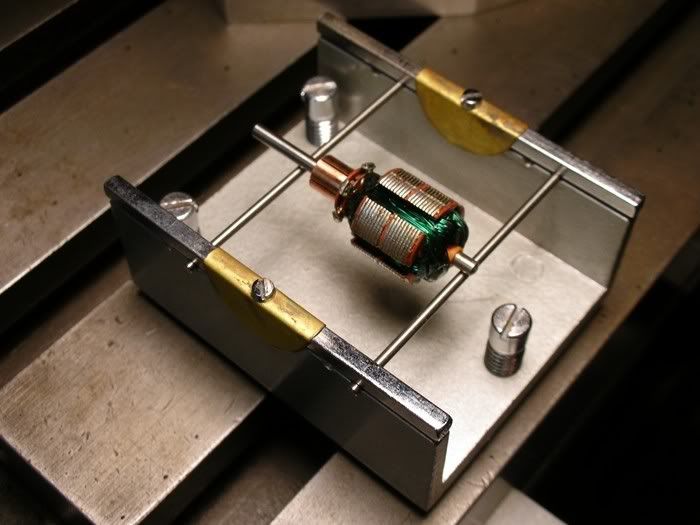
Here's the sad story. I examined the armature and it looked like it had been factory epoxied. First mistake. So I preceded to static balance it. I used my vintage Tradeship balancer:
When I touched the drill down YIKES!
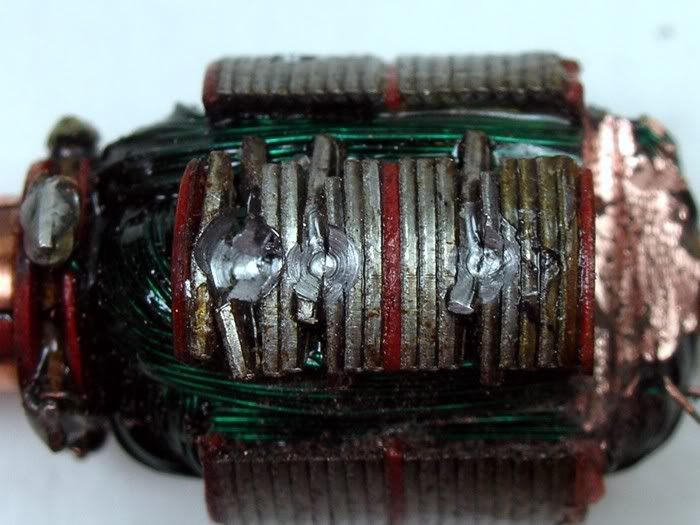
The armature laminations shifted and the arm was toast. Whatever the factory coated the windings with it was not encapsulated with epoxy (mistake number one). See the attempted balancing hole on the far right. I'll get to the other carnage in a minute:
Well, that didn't work. Time to really epoxy the armature. I used Devcon 2 Ton Epoxy to coat the windings. I mean I piled it on . I held the armature shaft in a pin vise to help control it in the process. I used a small heat gun to heat the epoxy. This get is thin at it really flows and gets sucked down into the windings. I remember Ron talking about using a vacuum chamber to cause this to happen and that's the best way. But man, I mean I really gooped tons of epoxy on and when I heated it with the heat gun it just sucked down and disappeared! REALLY!
OK, another mistake I've made. I went crazy with the heat gun on my Fly Weight GP Car project. If a little heat is good, a lot of heat must be better... wrong. I heated that arm until the sucker started smoking . Mistake... that changed the properties of the epoxy and the first time I ran the car the epoxy got soft and came flying off and locked up the motor. Moral of the story, just get the epoxy hot enough to flow. Hold the arm comm up and let any excess flow off the back. If you get excess flowing off just spin the arm against your finger to wipe any excess away and your good to go.
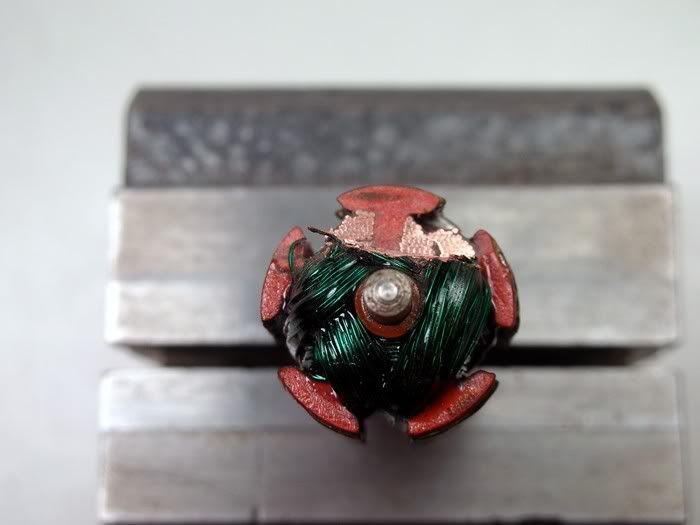
I epoxied the destroyed arm and another new one. I decided to practice drilling on the destroyed one (the two holes on the left side of the arm in the picture above). I use the same drill I've been using on Mabuchi three-pole arms. Another mistake . It was to big in diameter for the thin five-pole armature. Check out the thin web on the five-pole arm:
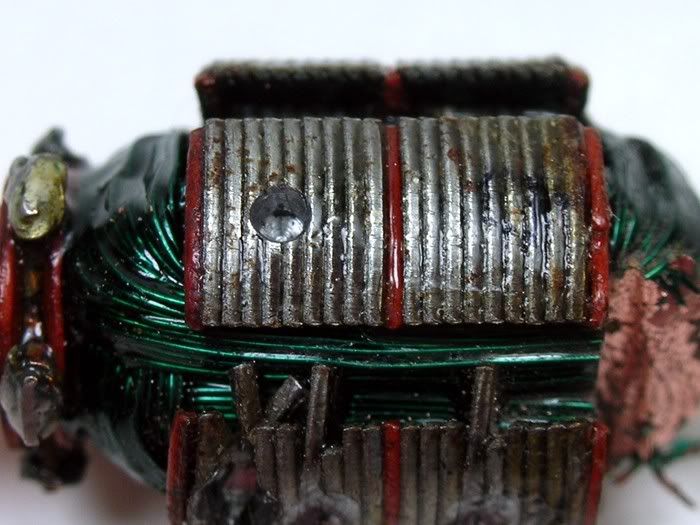
Time to use small holes:
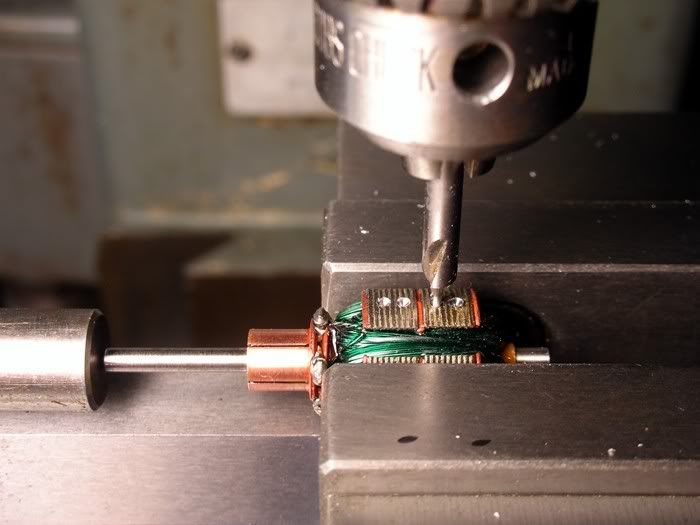
Success. Look at how deep I got away with on that hole. You can see it just starting to break through at the 12 o'clock.
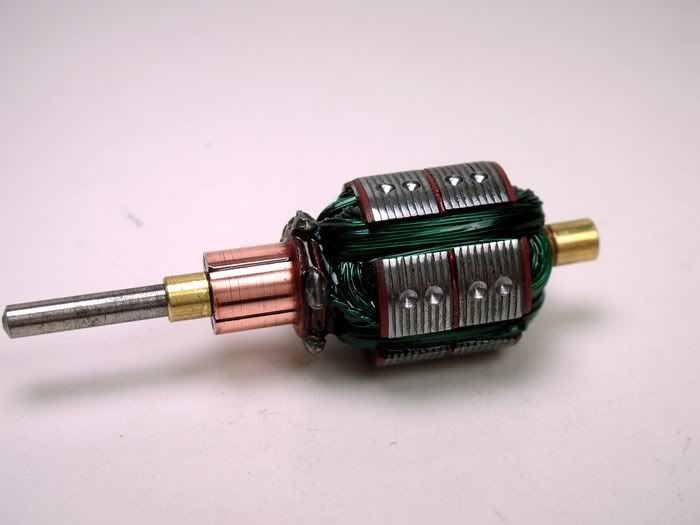
The moral of my newbie story is to epoxy the arm and drill small diameter, shallow holes into this five-pole arm. Hindsight is indeed 20-20. Here's the success story:
Onward...
Rick Thigpen
Check out Steve Okeefe's great web site at its new home here at Slotblog:
The Independent Scratchbuilder
There's much more to come...
#14
Posted 07 March 2008 - 09:37 AM
What kind of zapper is it?A magnet zapper is on my short list. For now, I have my magnets zapped at Eddie's Slot Car World in Vallejo, CA (707-552-9085), "where track time is ALWAYS FREE!"
#15
Posted 07 March 2008 - 01:20 PM
Rick Thigpen
Check out Steve Okeefe's great web site at its new home here at Slotblog:
The Independent Scratchbuilder
There's much more to come...
#16
Posted 07 March 2008 - 05:59 PM
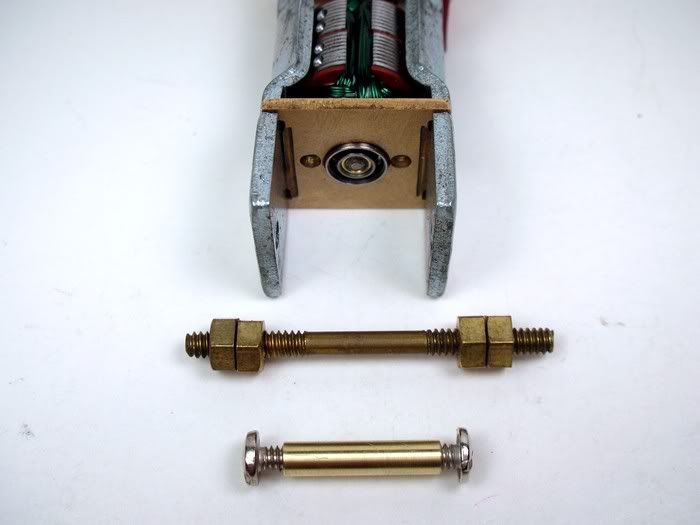
I ended up with a nice Pittman-style setup that gets rid of the stock stud and nuts:
Hey, it still runs! Here's the finished motor:
I used some red Loctite between the side plates and the rear axle bracket where it is staked. It got a little loose from all my monkeying around:
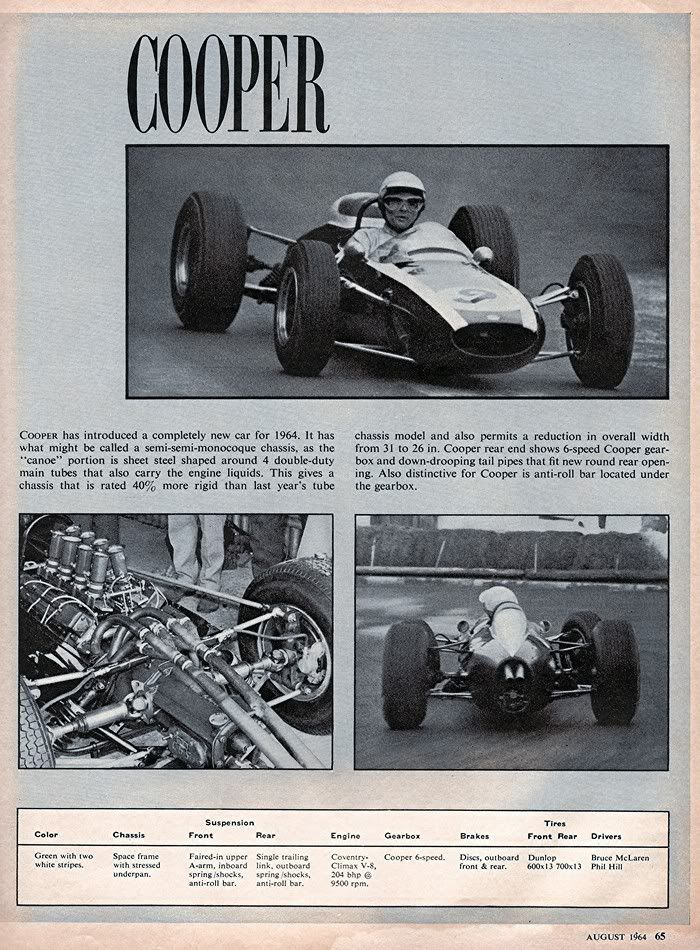
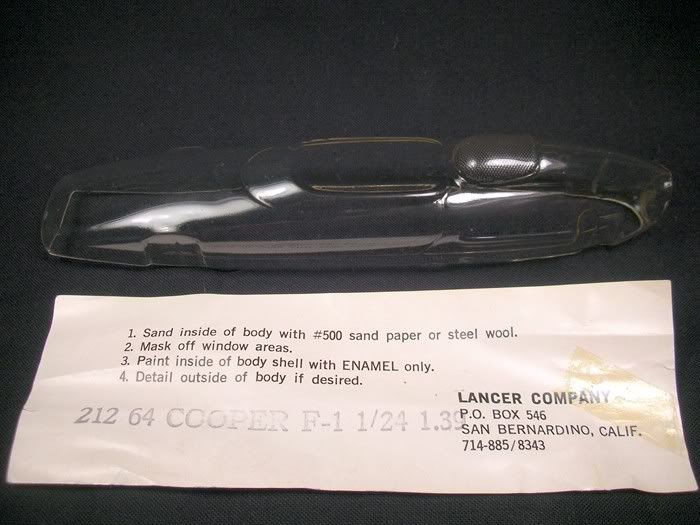
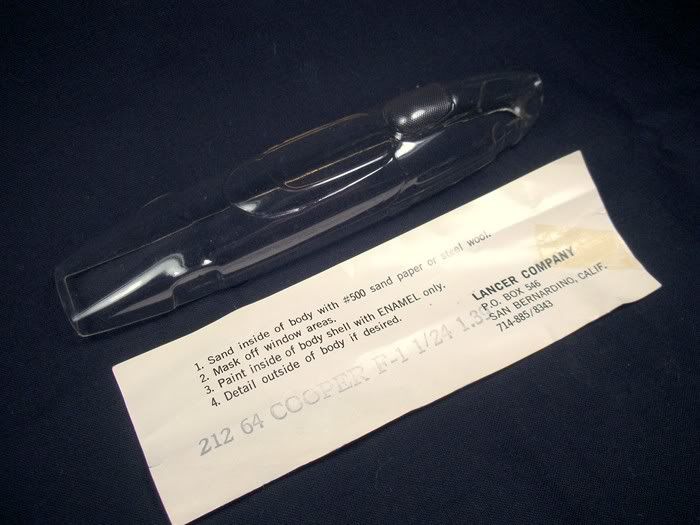
I've been thinking about what to put this in and I decided on a nice old skinny GP car... a Lancer '64 Cooper 1.5 liter GP body. Here's the only pictures I've found so far of the real car:
NEAT-O!
Rick Thigpen
Check out Steve Okeefe's great web site at its new home here at Slotblog:
The Independent Scratchbuilder
There's much more to come...
#17
Posted 07 March 2008 - 07:29 PM
If I had a nickel for all the arms I messed-up when drilling them well... I'd have a lot of nickels. :-) The new Mura blanks I've been using have really narrow cross sections so I only use 1/16" drills and I slide a piece of brass tubing on the drill to act as a depth stop. If I need more than I can get with three shallow 1/16" holes on a pole, I then use a larger bit to open up just the top of the holes... and I still messed one up a few weeks ago. C'est la vie.
#18
Posted 07 March 2008 - 09:05 PM
11/6/54-2/13/18
Requiescat in Pace
#19
Posted 08 March 2008 - 01:04 AM
An even better solution is to have a bell jar to pull a vaccum to suck the epoxy in. Pumps like the ones used here are good but you don't really need to suck it down for long. Seems like I can remember guys scavenging pumps from refrigerators.
A lot of the early armatures were balanced by scratches across the stacks, not drilled holes.
Mike Boemker
#20
Posted 08 March 2008 - 11:54 AM
I think K&B did that version of the Cooper as a hardbody. I think I have several without windscreens.
Fate
3/6/48-1/1/12
Requiescat in Pace
#21
Posted 08 March 2008 - 06:24 PM
My life fades, the vison dims. All that remains are memories... from The Road Warrior
#22
Posted 08 March 2008 - 07:36 PM
It's pretty skinny near the rear axle so I'm not positive the rather wide Aristo axle bracket will fit:
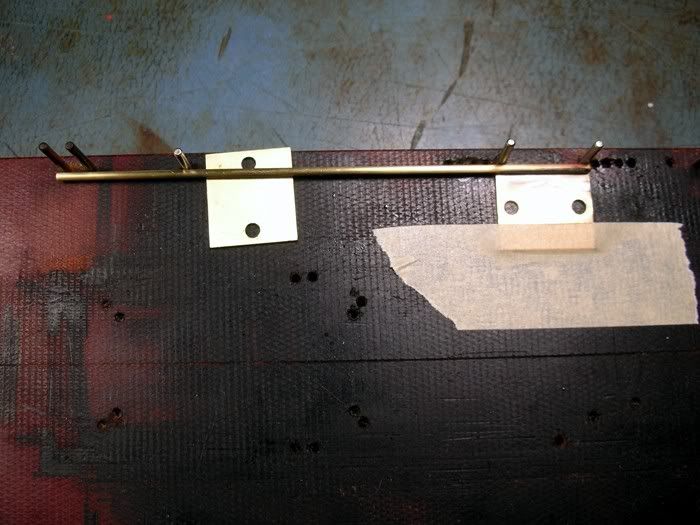
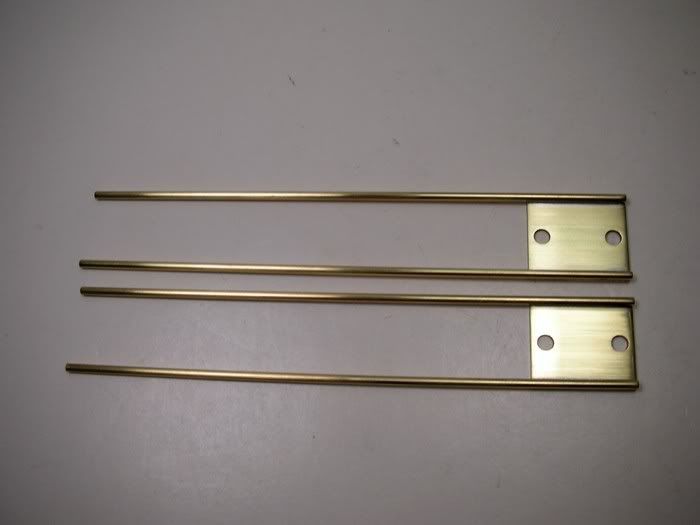
I have a backup if the Cooper doesn't work out. In the meantime I started the chassis. First thing I decided to do was solder some pin tubes to the motor mounting plates that bolt to each side of the motor. My chassis jig keeps everything lined up and a "continuous roll clamping device" (tape) holds things in place:
Here they are ready to bolt-up to the motor.
Next is some creative bending to line the pin tubes up with a front axle. I'd better go choose some front tires so I'll know what jig wheels to use.
Rick Thigpen
Check out Steve Okeefe's great web site at its new home here at Slotblog:
The Independent Scratchbuilder
There's much more to come...
#23
Posted 09 March 2008 - 12:04 PM
Well, what I have is the parts for at least two Atlas BRMS and one Cooper. I have at least a dozen of the Atlas motors and chassis, and fifteen or so of the Strombecker adjustable chassis. I have that Cooper vac as well, and a number of one-offs, Indy cars, and the like. Oh, and the Revell Lotus and BRM. I am reluctant to run the vacs when I am on my last copy, as they shatter and don't repair well. The injected bodies can be repaired if run.
We COULD do a class for these at the convention. I have threaded wheels, but not enough Russkits to do this.
Oh, and one K&B.
I am just testing the waters to see if there is interest in running these at the convention.
Fate
3/6/48-1/1/12
Requiescat in Pace
#24
Posted 09 March 2008 - 03:02 PM
Where is info on "the convention" posted here on the blog?
Thanks,
Rick Thigpen
Check out Steve Okeefe's great web site at its new home here at Slotblog:
The Independent Scratchbuilder
There's much more to come...
#25
Posted 09 March 2008 - 05:34 PM
Are they OK to use right out of the package without modifications? I planned some 1/32 scale builds with these motors. Thanks!
Glenn Orban
NJ Vintage Racing
NJ Scale Racing
C.A.R.S. Vintage Slot Car Club