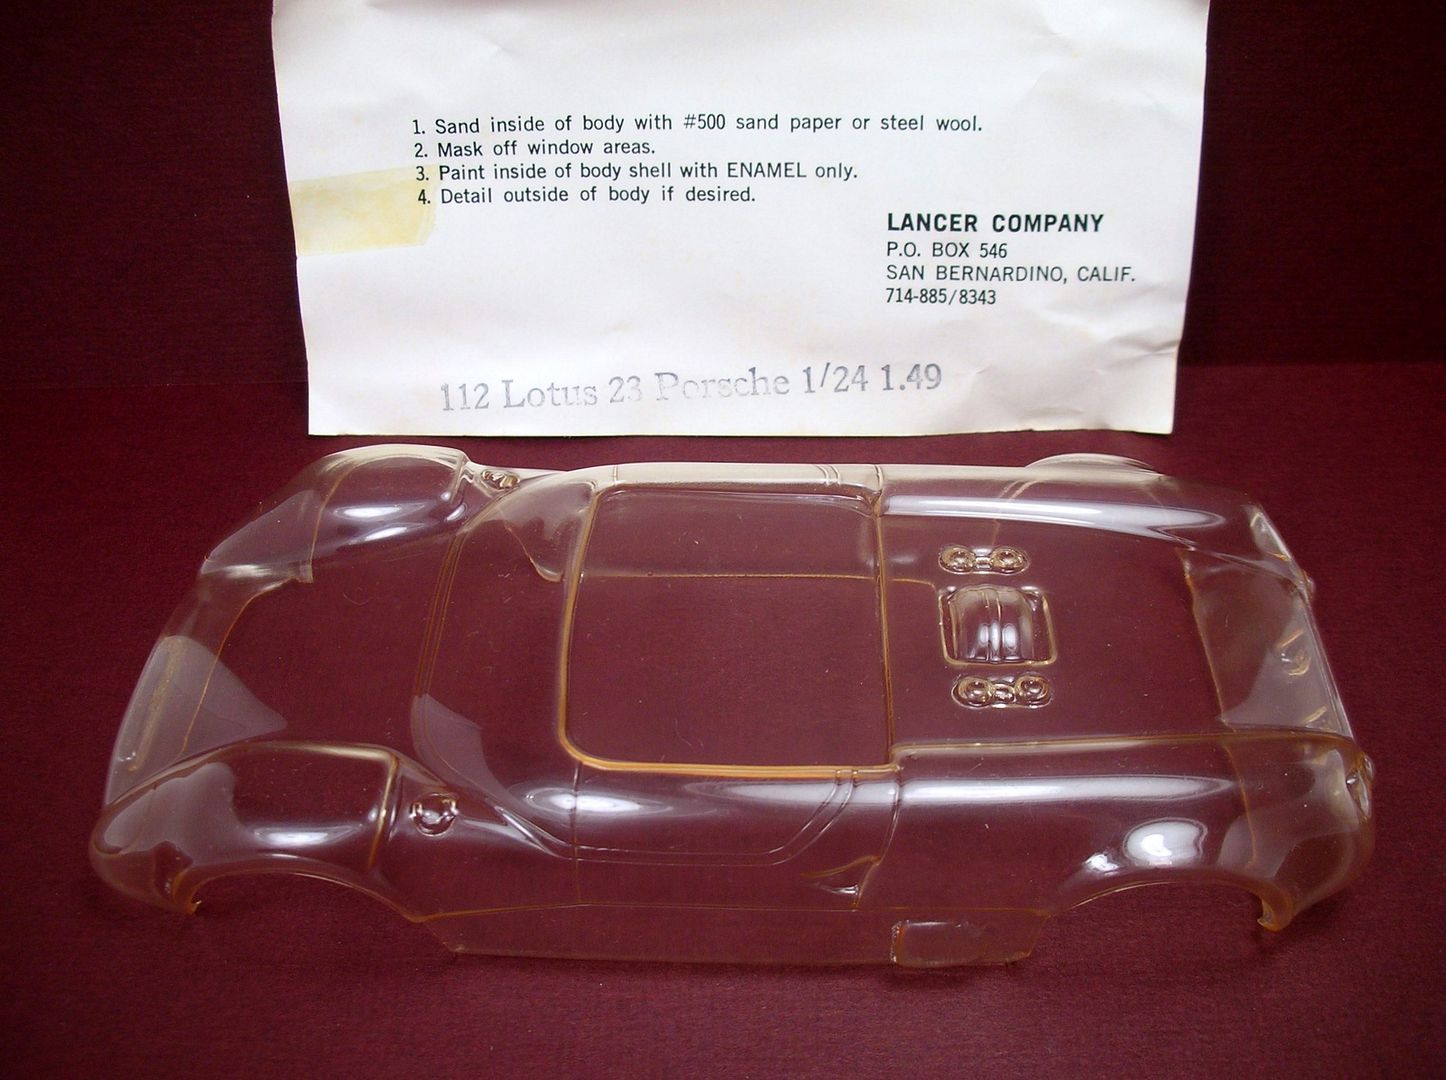
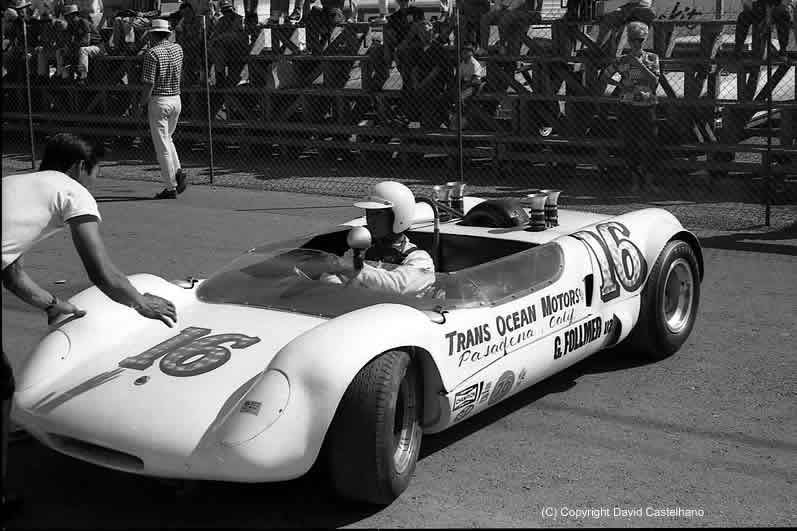
I remember when the Lancer body of the Follmer Lotus 23-Porsche showed up in our raceway display case back in the day:
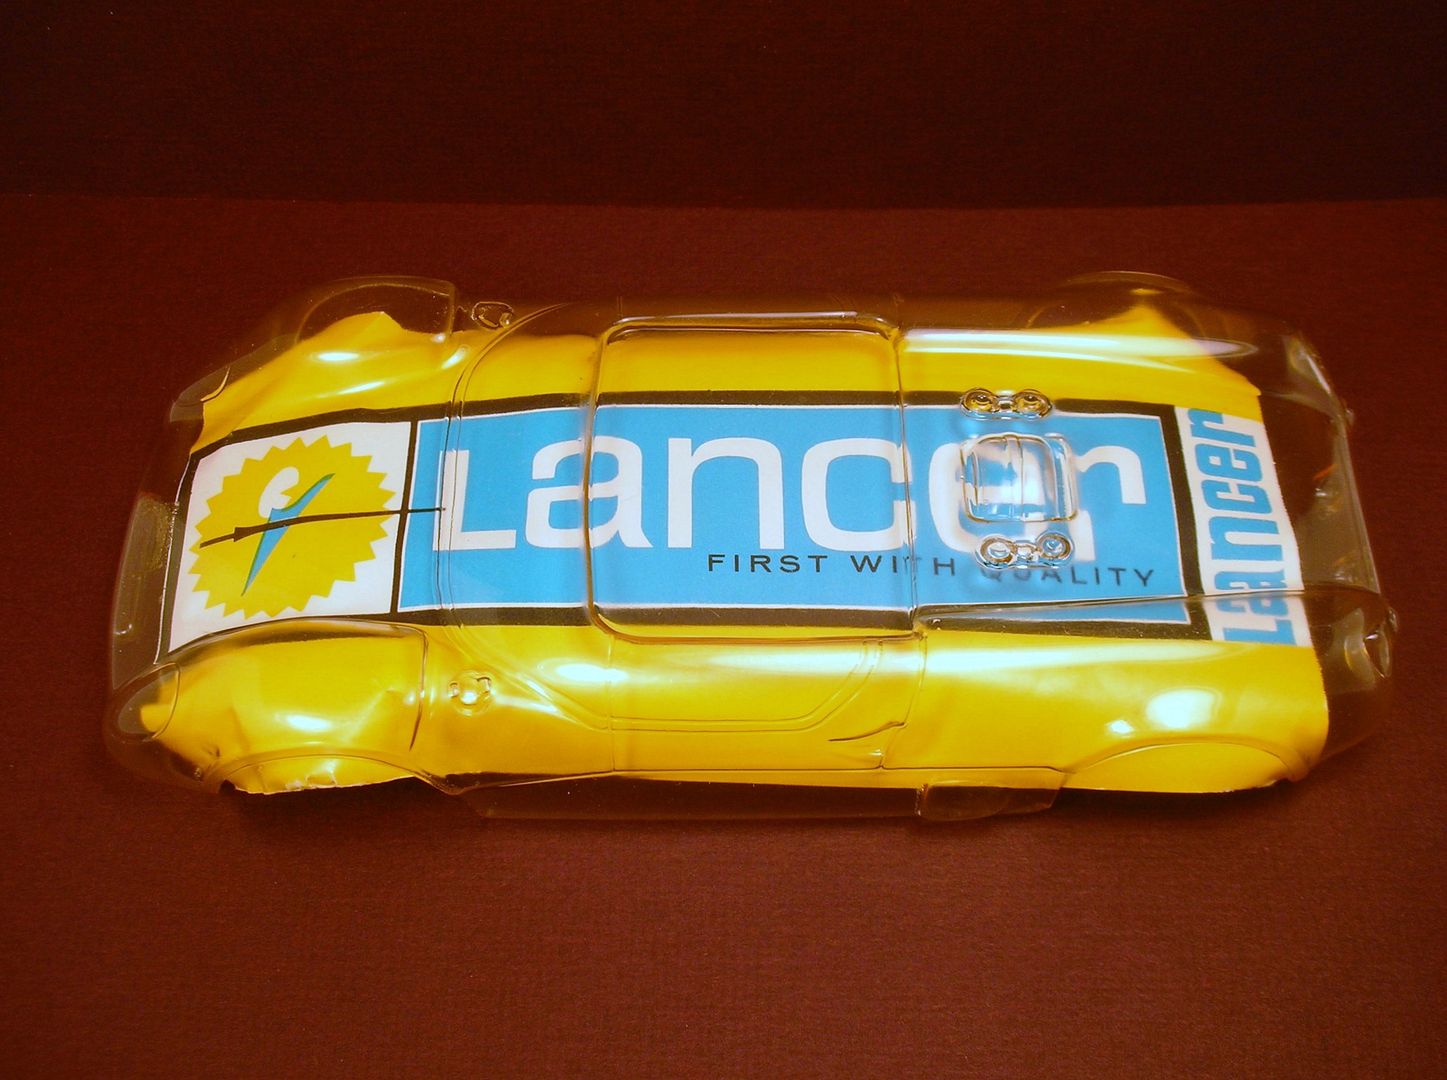
I loved it but with its small size it wouldn’t fit on any of my pro style cars and I’ve always wanted to build one:
I never attempted the build because I knew I couldn’t adequately duplicate the livery on the real car with its gold leaf numbers and Trans Ocean Motors on the sides:
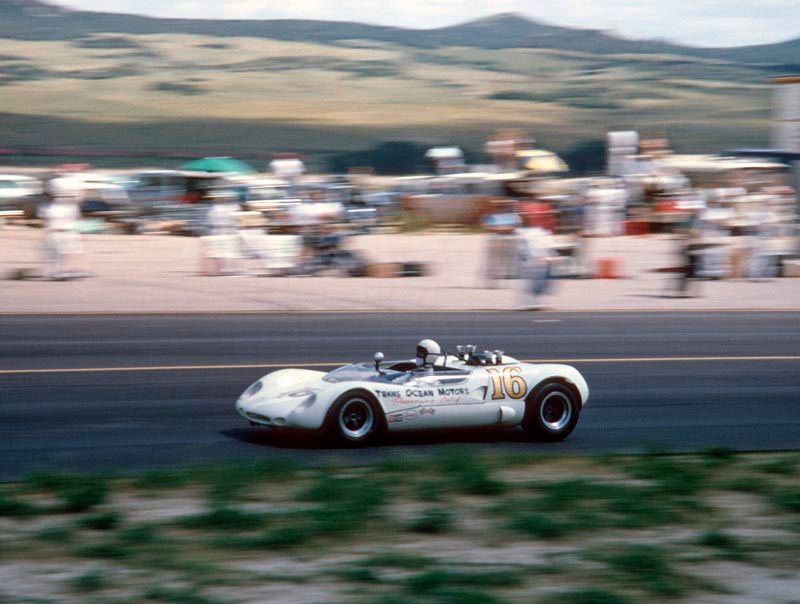
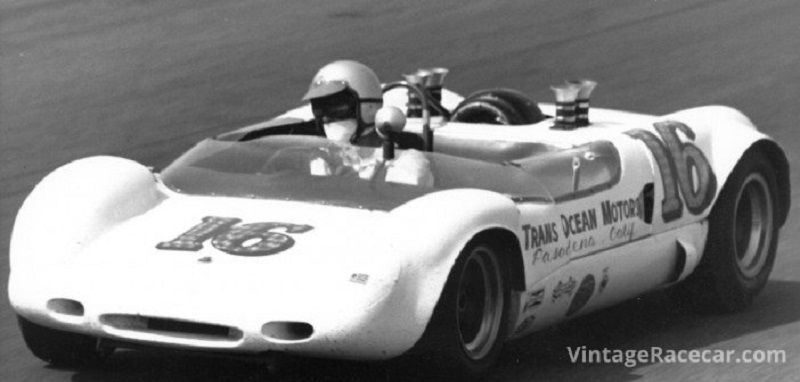
My buddy and artist Jairus Watson has agreed to help me. He's going to do the hand lettering and gold leaf numbers and let me paint the body and interior...Thanks, Jairus! ![]()
So, getting started, here's a brief history of the1965 USRRC Winner (precursor to the Can Am) George Follmer Lotus 23-Porsche Sports-Racer:
George Follmer seeking a competitive sports-racer in the under-2 liter class, ordered a new Lotus 23 without engine or radiators.
Bruce Burness, who had recently left Shelby American to return to school, suggested to Follmer that, installed in the Lotus 23, a Porsche 550 Spider engine could meet the goals of power, lightness and reliability. They began to re-engineer the chassis for the Porsche 550 engine, but soon Follmer persuaded Pasadena VW-Porsche dealer Trans-Ocean Motors to give them a powerful new 2-liter Porsche 904 engine for the project.
In its first outing at the 1964 Times Grand Prix at Riverside, the undeveloped Lotus 23-Porsche qualified last but finished 11th overall and 3rd in the Under 2-Liter, proving its tremendous potential.
Over the winter, Follmer and Burness upgraded the Lotus to full 23B specifications and beyond to accommodate the Porsche 904 engine.
Follmer then decided to compete in the top-level 1965 USRRC. Follmer, Burness and Terry Bowen towed the Lotus 23-Porsche across country to the first race of the season at Pensacola, Florida. Follmer qualified first in U-2, winning the race ahead of the more powerful cars.
Three weeks later at Riverside, Follmer finished fourth overall and first in U-2. Burness recalled years later that for the first time “we realized the [SCCA] was awarding equal championship points for the winners of both the big-bore class and the under 2-Liter class.” Follmer was leading the championship.
The team achieved a pair of class wins at Bridgehampton and Watkins Glen, keeping Follmer and the Porsche in the USRRC lead. A Second in Class at Kent, Washington was followed by another class win at Continental Divide Raceway in Colorado. AutoWeek described Follmer in the headline as “Unsinkable Trans-Ocean George”.
The championship was decided in the Road America 500 at Elkhart Lake, a race distance that the Lotus-Porsche had never attempted before.
Jim Hall, who had been racing hard all season trying to make up his early season deficit, drove both Chaparrals to assure maximum points, finishing first in one and second in the other. George Follmer finished third overall and first in U-2, clinching the USRRC Championship.
It was one of racing’s legendary David and Goliath accomplishments.
I usually post things after I've figured out what will work on the build. This time I'm going to just go for it and post pics as I go along. If something doesn't work out I'll just try something else. ![]()
![]()
Starting with the wheels and tires, I want to duplicate the cool American Racing Formula Libre mag wheels on Follmer's car:

I kit bashed a Revell Datsun 510 Trans-Am model kit and turned down the wheels to make slot car wheel inserts in my little hobby lathe:
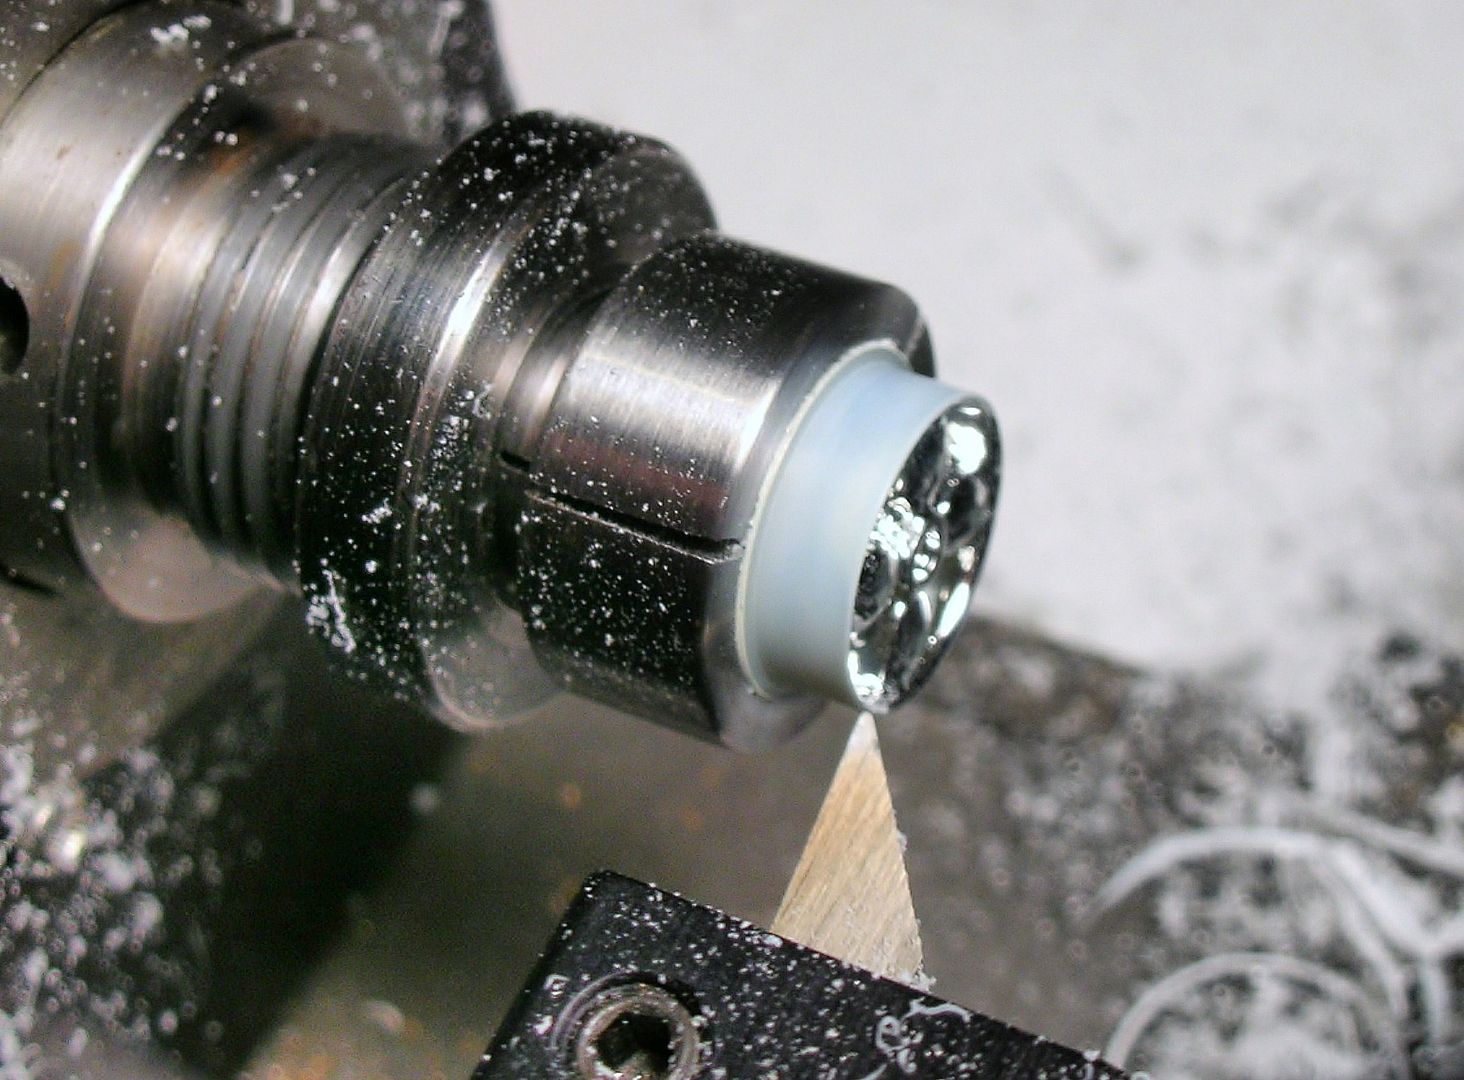
Here's the model kit wheel and the turned down wheel insert on the right:
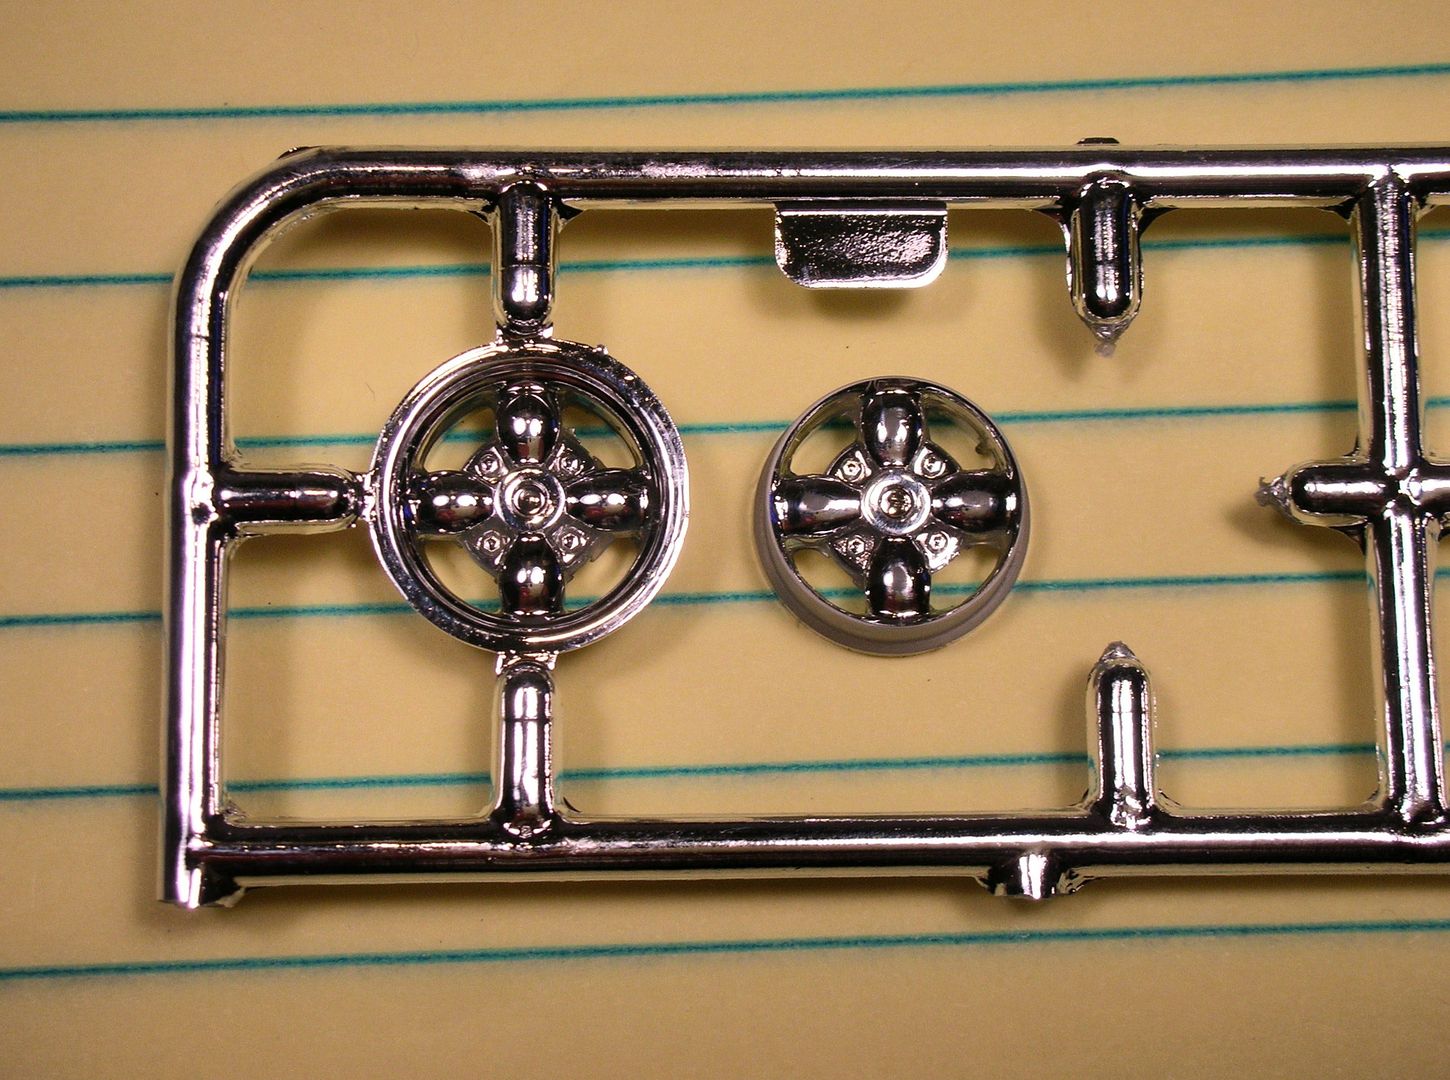
Well, that worked so the wheels and tires are next...

Giant killer! Follmer’s 1965 Lotus 23-Porsche
#1

Posted 09 December 2016 - 10:14 PM
- slotbaker, Jencar17, miko and 2 others like this
Rick Thigpen
Check out Steve Okeefe's great web site at its new home here at Slotblog:
The Independent Scratchbuilder
There's much more to come...
#2

Posted 09 December 2016 - 11:06 PM
![]()
("kit basher" ![]() )
)
Paul Wolcott
#3

Posted 10 December 2016 - 05:12 PM
My best guess is that the tire diameter on the car should be 23" front and 24" in the rear. That works out to about 15/16" fronts and 1" rears.
For wheels (front and rear) I'm using our repop Russkit standard width rears. K&B Goodyear front tires look the part but are over an inch in diameter (shown below on the right) so they were bonded to the rims with epoxy and ground down to 15/16" (shown below on the left):
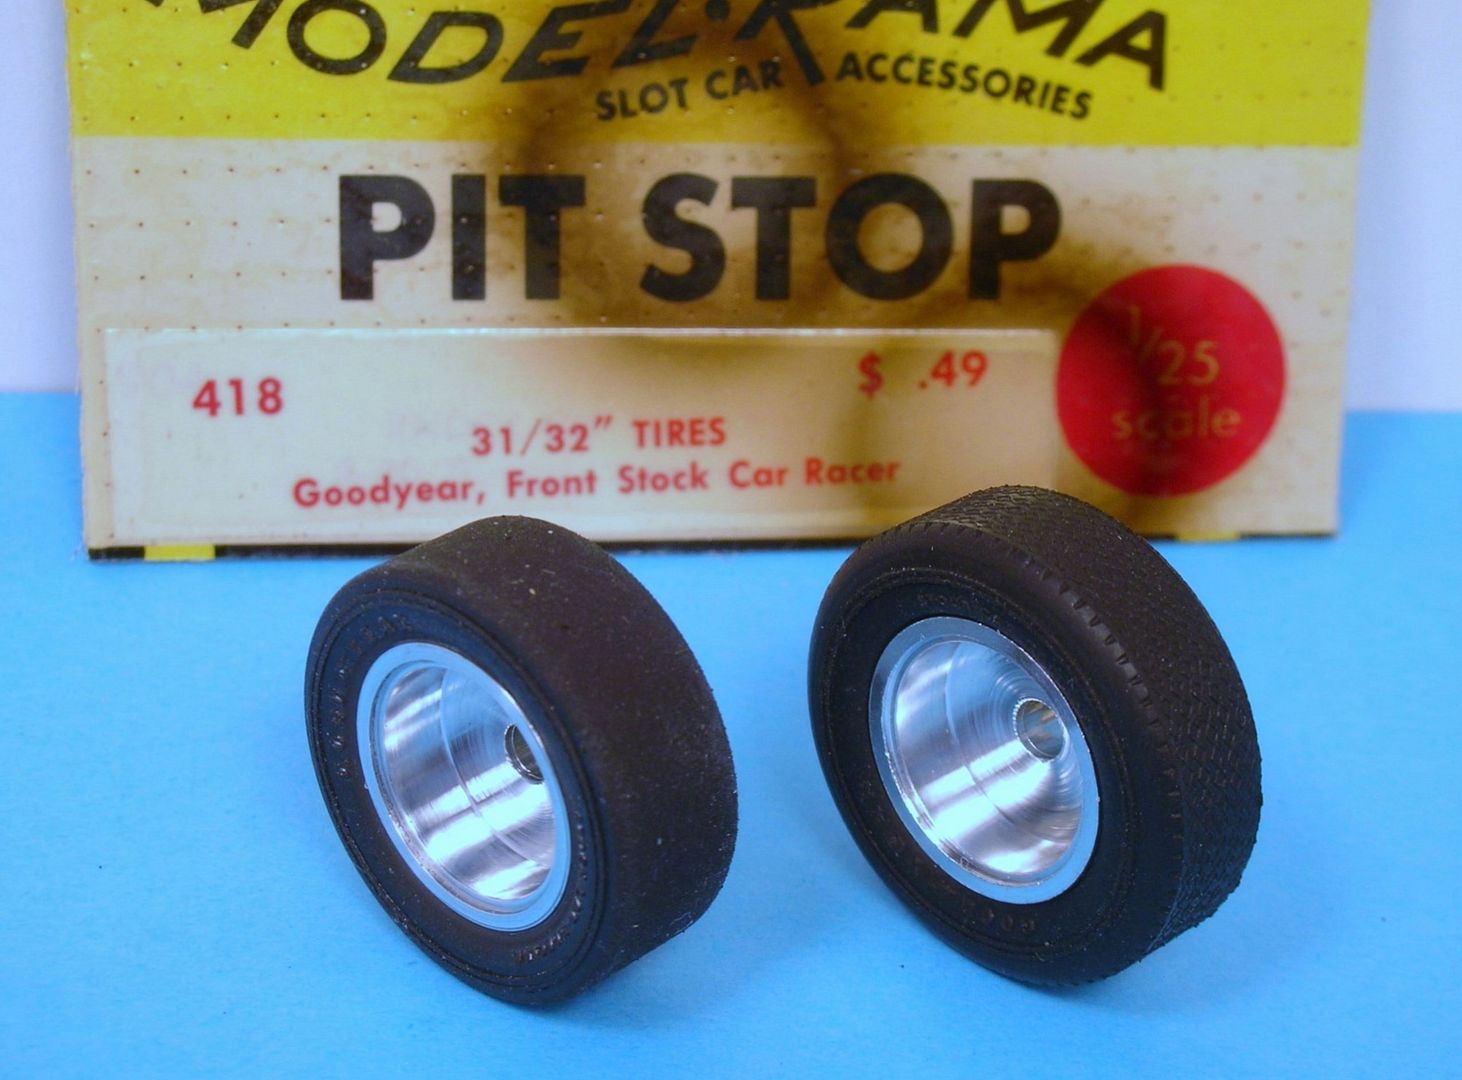
The rear tires are next. I'm going to make up several different sets...
- slotbaker, Jencar17 and Tex like this
Rick Thigpen
Check out Steve Okeefe's great web site at its new home here at Slotblog:
The Independent Scratchbuilder
There's much more to come...
#4

Posted 11 December 2016 - 01:05 PM
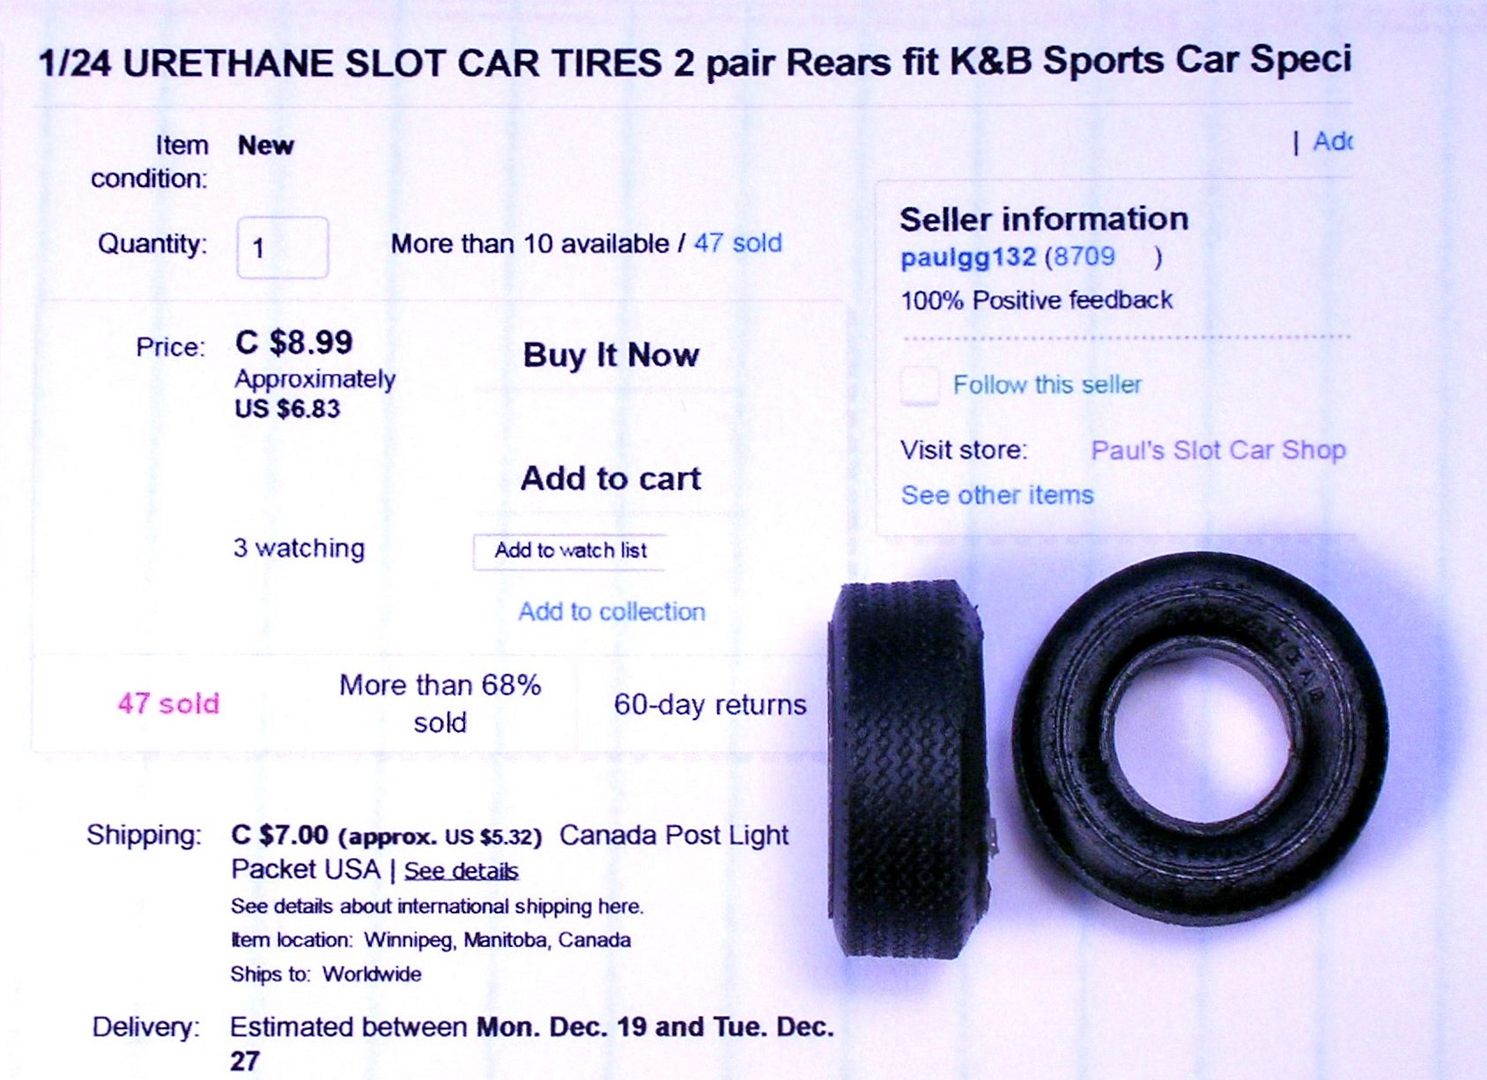
I made up four different sets of rears, using three different types of urethane tires. My go-to tires have been from Paul's Slot Car Shop of Canada. He has two different compounds, the softest being his XPG. These are open cast tires so there is a nicely finished "front" and a rough cast "back" to the tires. Really only a problem on open wheel builds.
Below is his eBay listing and the actual tires I'll be using:
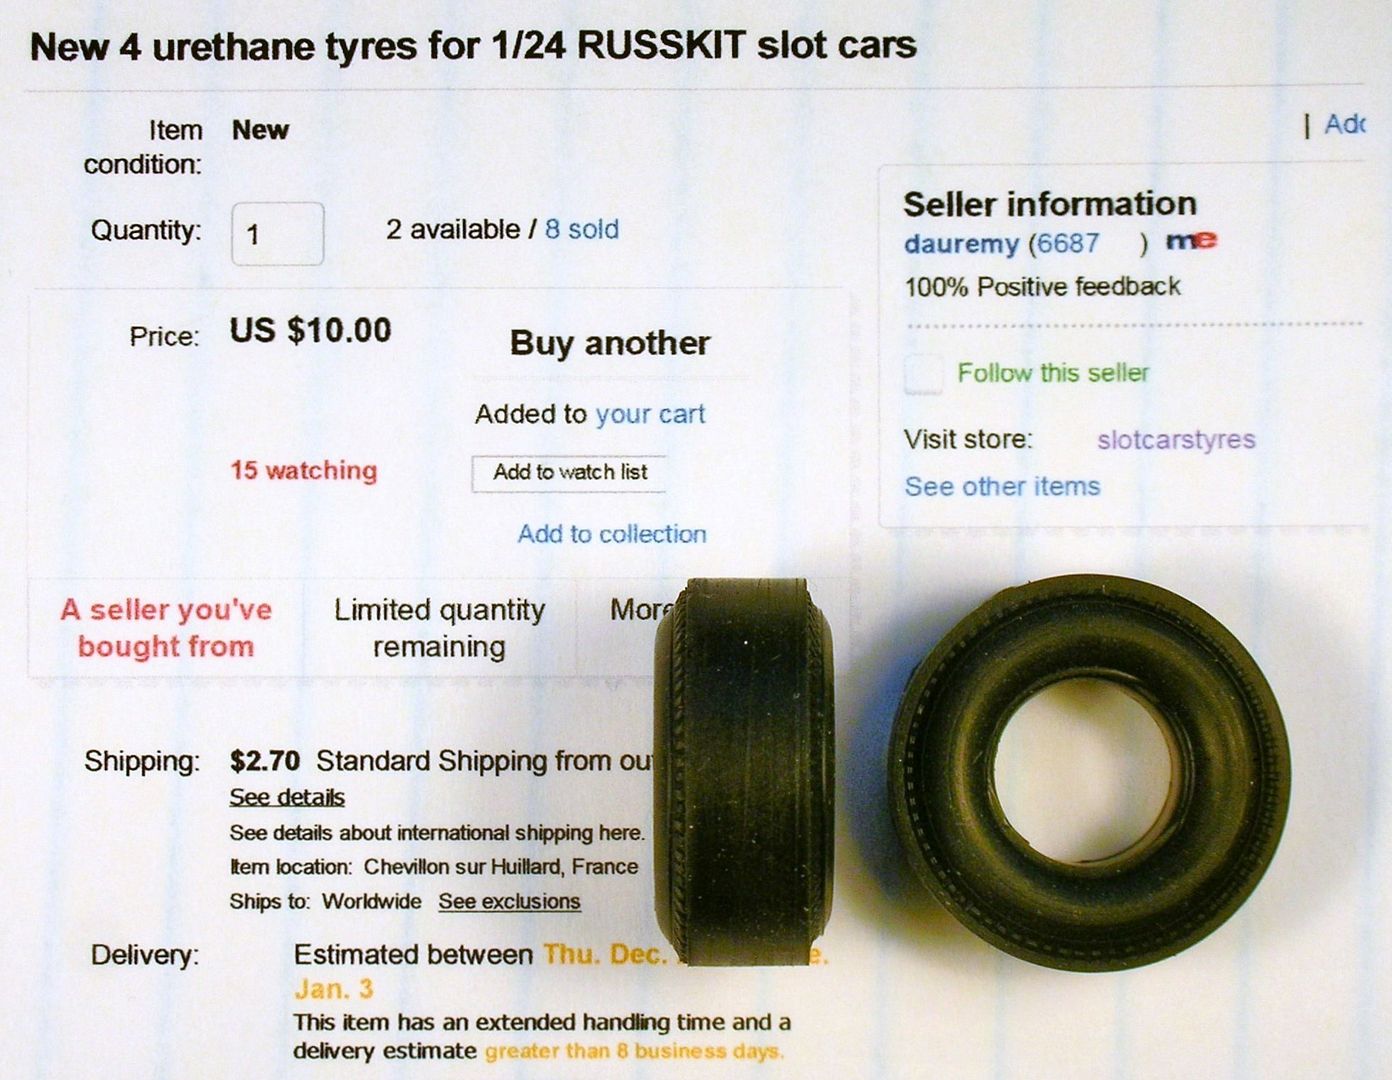
Next up are some urethane tires that are injection molded so both sides of the tire are nicely finished. They are by SlotCar Tyres out of France. Below is their eBay listing and the tires I'll be using:
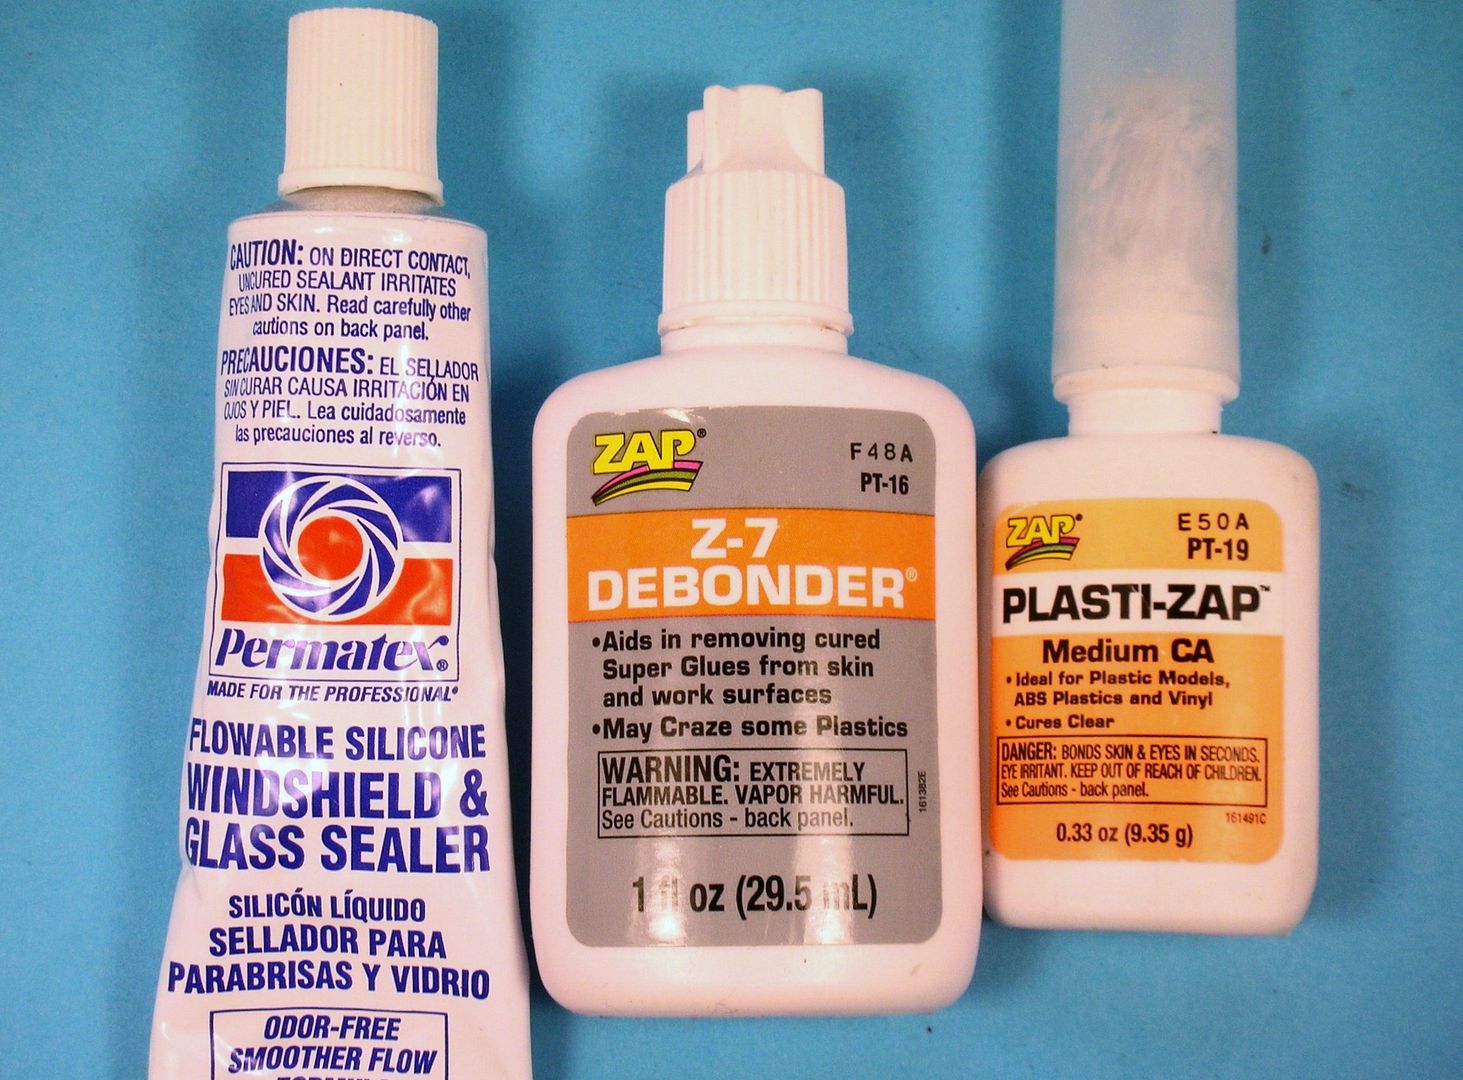
I tried medium Zap glue for both XPG and regular compound Canadian tires and the French rubber. The XPG's didn't like it but seemed to like the flowable silicone windshield sealer better:
Here's a before (left) and after grinding (right) with the French tires. I heavily rounded the corners on one pair:
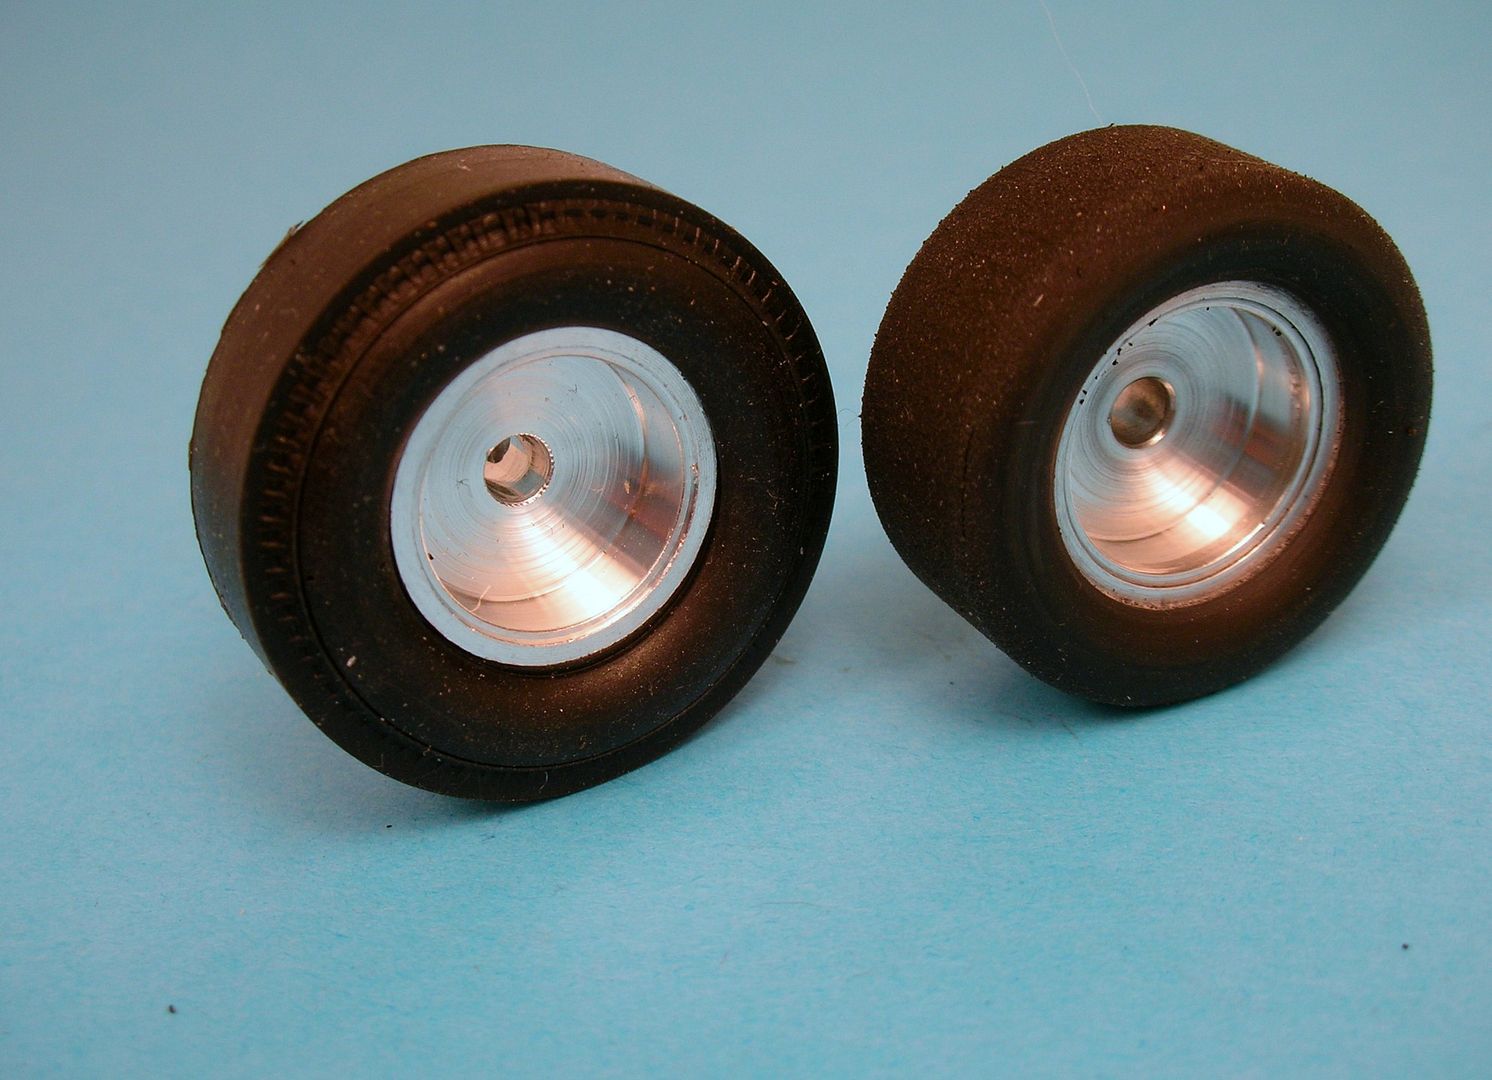
Here is the firmer version of the Canadian tire (left) and the French tire (right) without such a heavily rounded outer edge which I think looks better... we'll see how this works on the track:
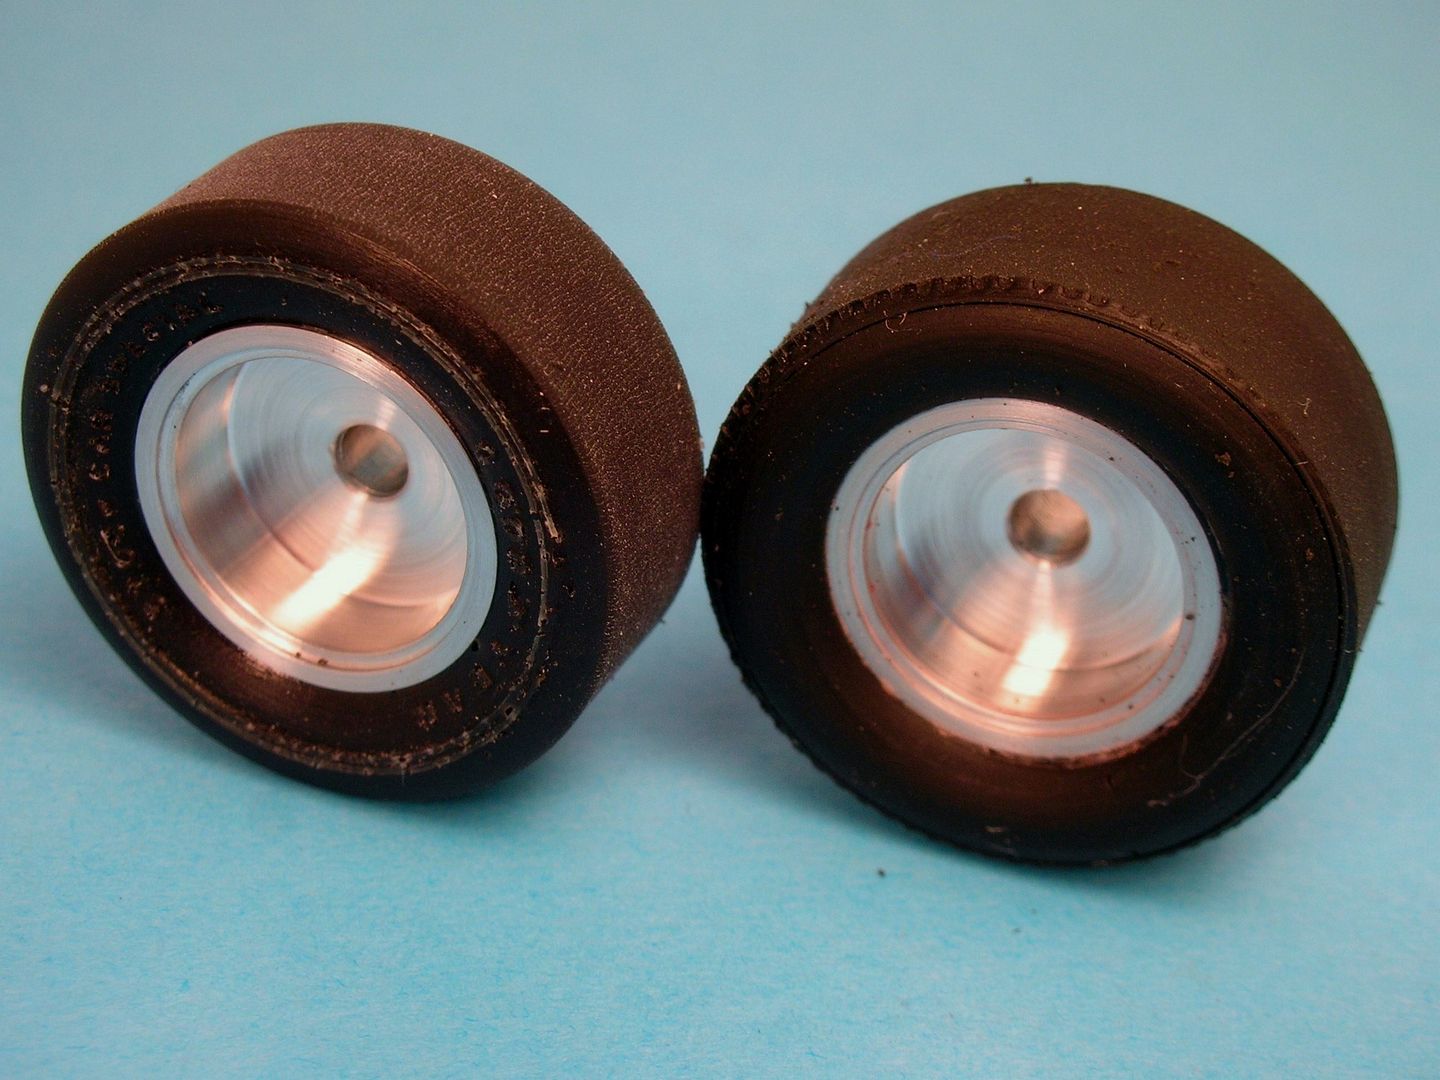
Time to start fiddling about with a motor and drive layout...
- slotbaker, Jencar17 and Tex like this
Rick Thigpen
Check out Steve Okeefe's great web site at its new home here at Slotblog:
The Independent Scratchbuilder
There's much more to come...
#5

Posted 11 December 2016 - 09:16 PM
Rick, the 1/32 guy have been using a rubber based CA glue, such as IC-2000 & Insta-Flex. Paul Gage, himself, recommends using a clear finger nail polish. A YouTube video shows using Gorilla glue for mounting urethanes. The local hard club here uses a rubber-based CA glue.
I intend to live forever! So far, so good.
#6

Posted 11 December 2016 - 09:32 PM
Hi Bill,
I saw Paul's nail polish recommendation...
I'm going to look into the rubber based CA you mentioned for the next build, thanks! ![]()
Rick Thigpen
Check out Steve Okeefe's great web site at its new home here at Slotblog:
The Independent Scratchbuilder
There's much more to come...
#7

Posted 12 December 2016 - 12:02 PM
Rolling right along in this wave of enthusiasm, I want to use a full interior, like this Auto Hobbies piece, in this little car:
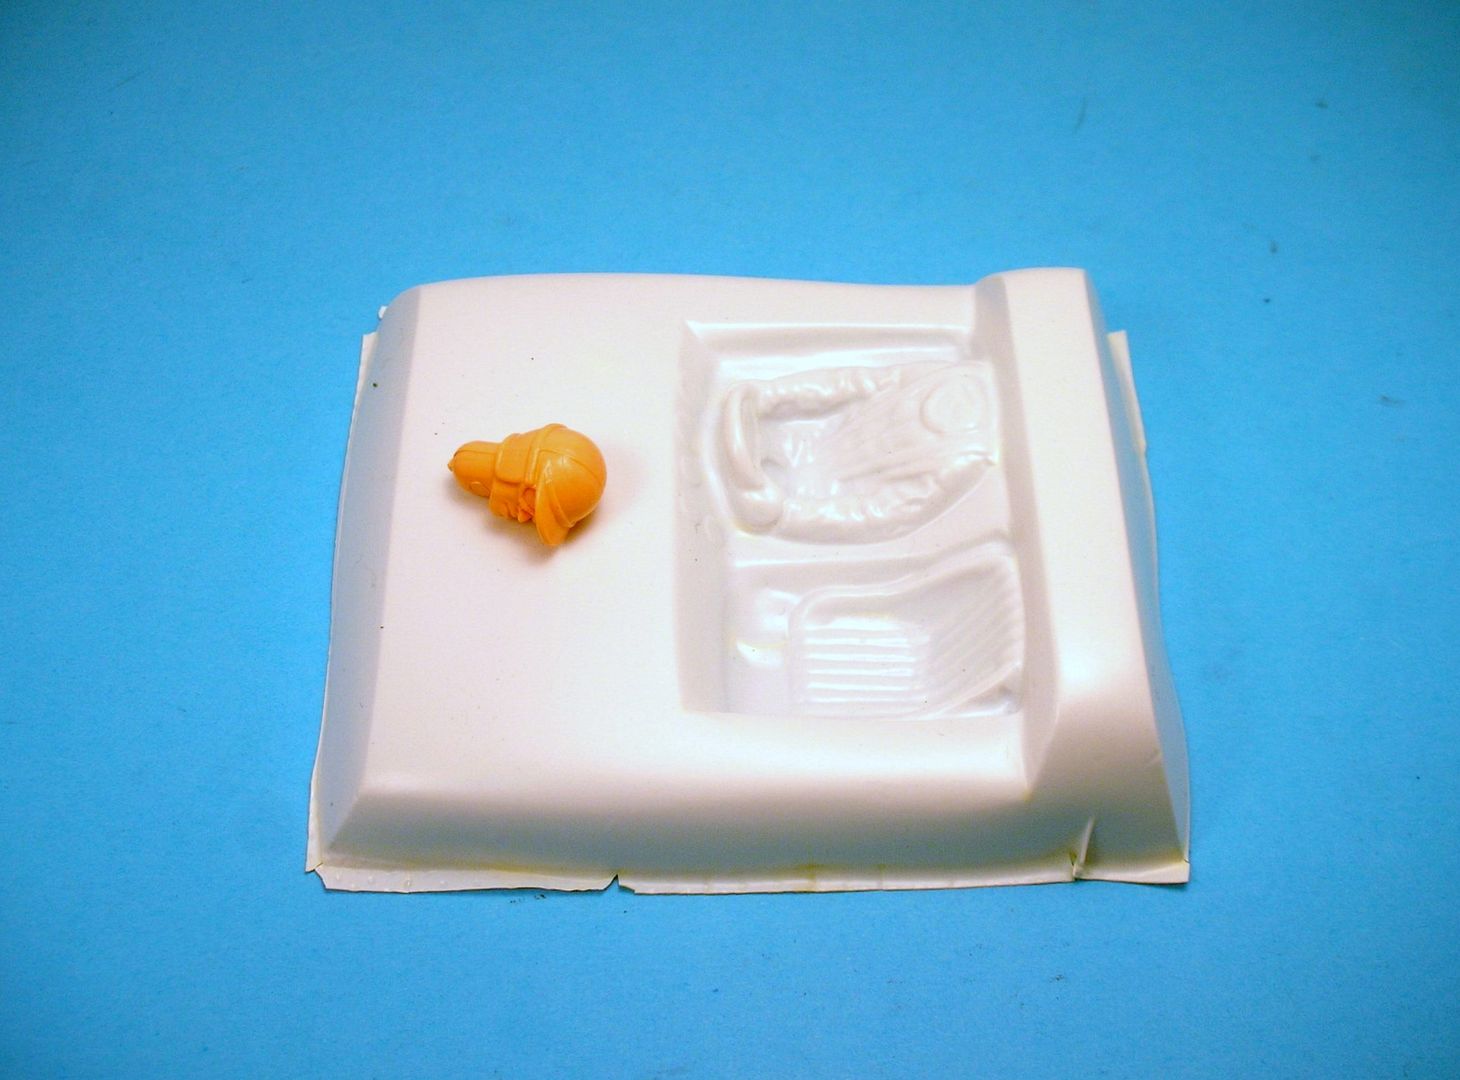
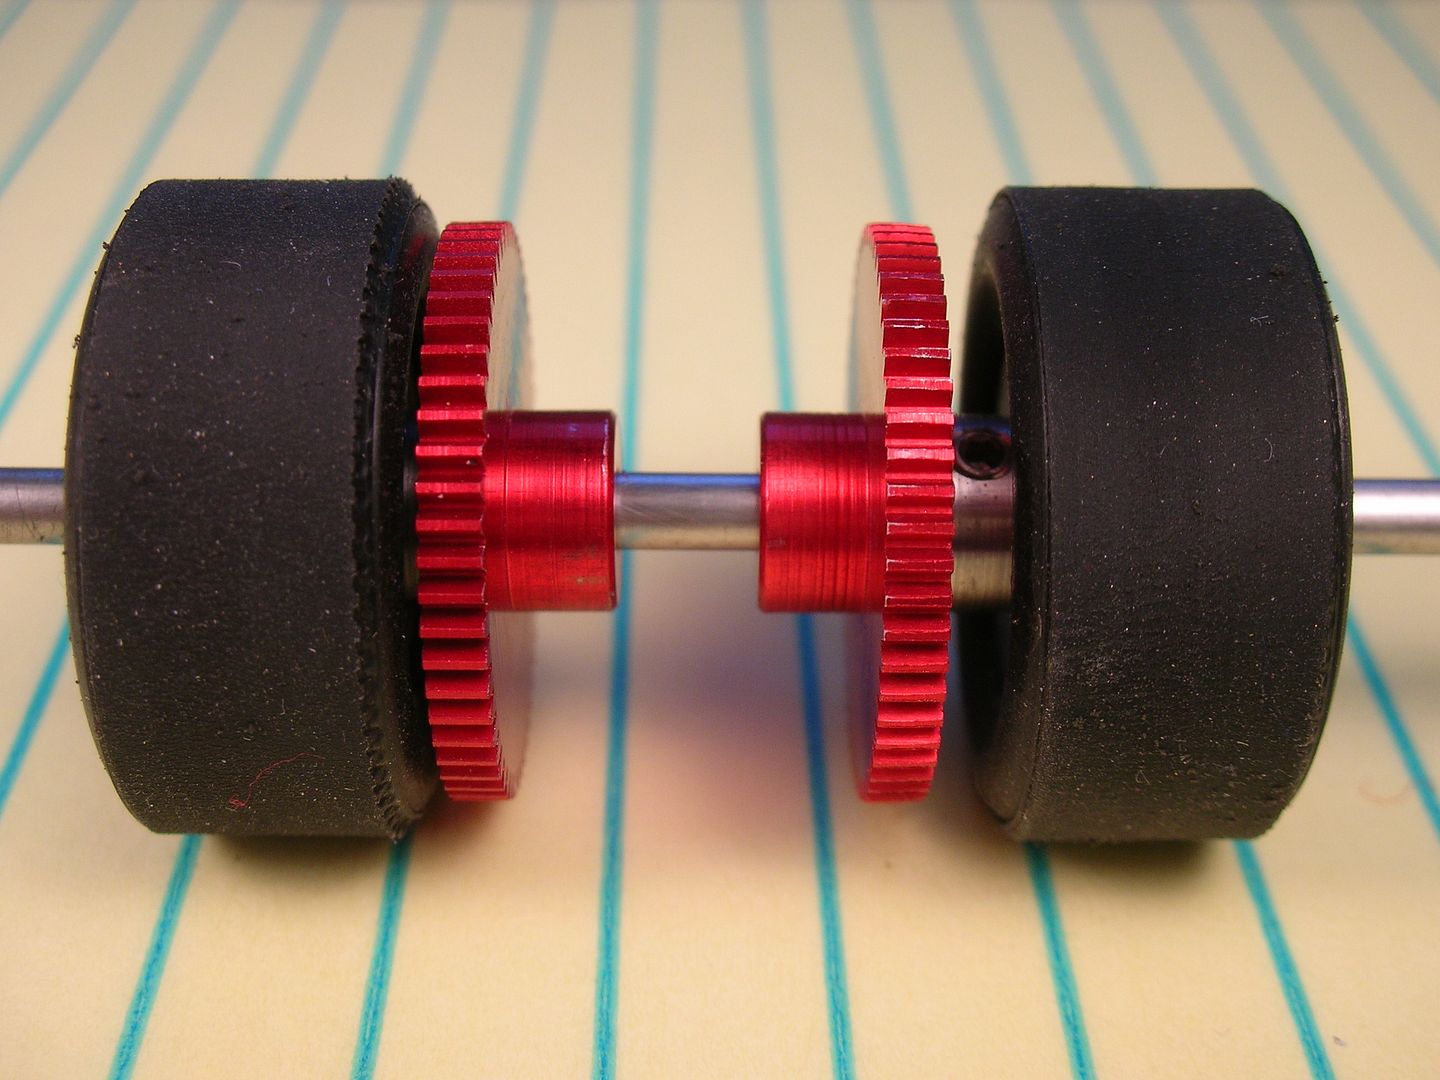
I'm going to try a full sidewinder layout. With only a 2-3/4" rear track width available I modified the spur gear as shown on the left below:
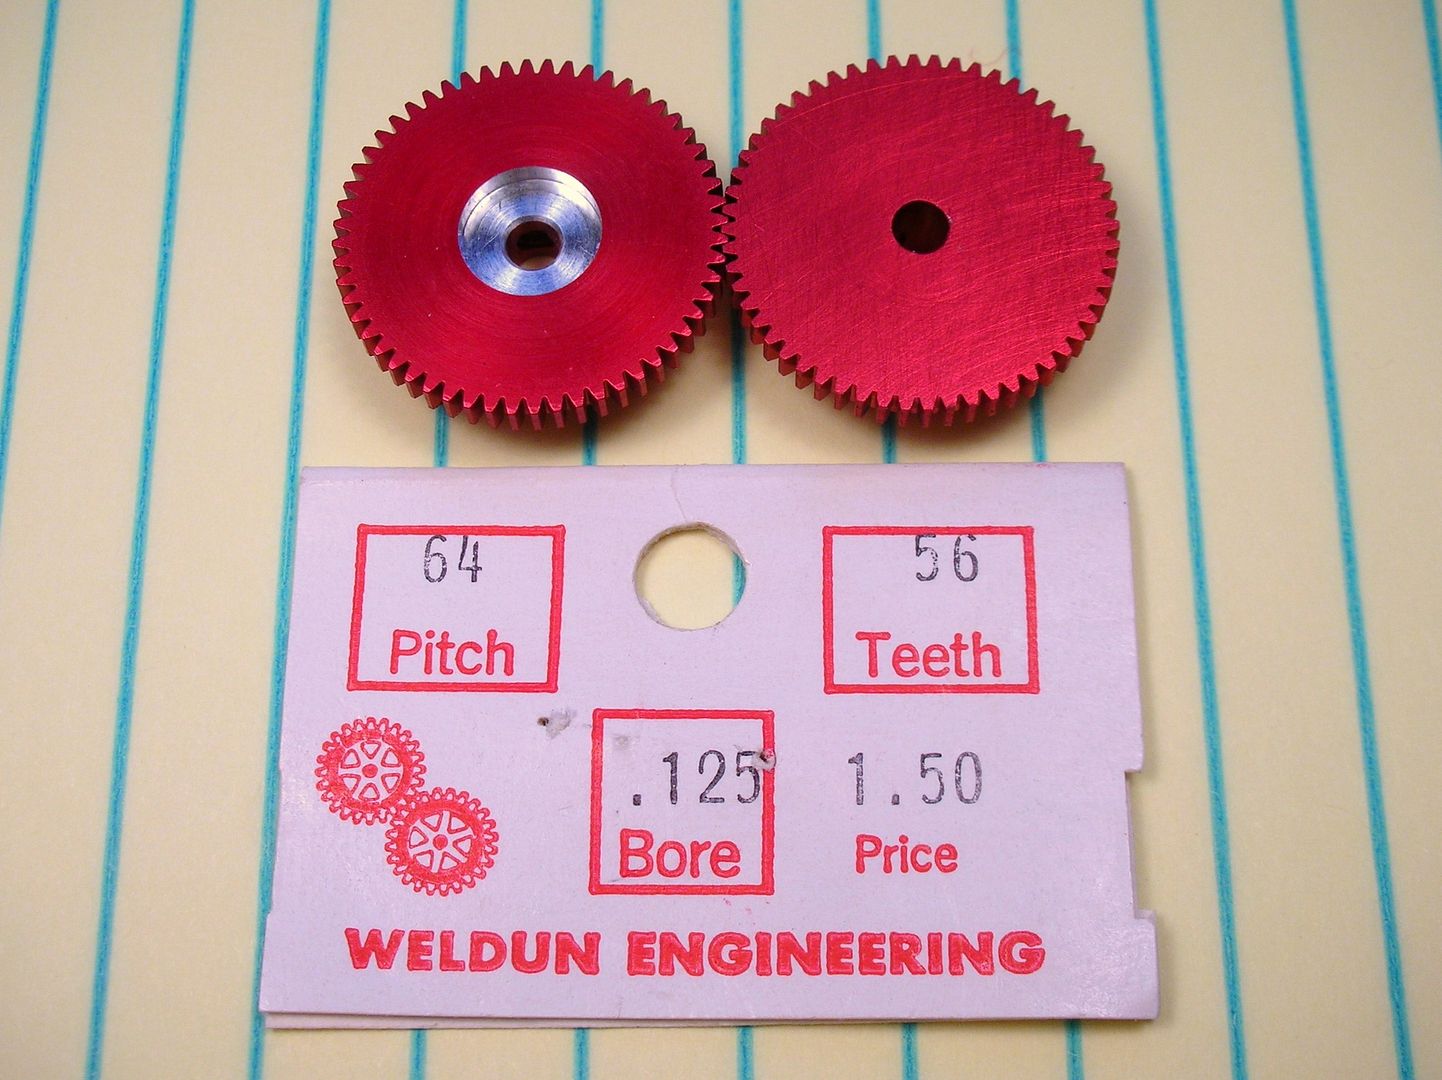
That bought me 1/16" allowing the gear to snuggle up closer to the tire:
Here's the bits to build up a period motor I hope I can make fit. ![]()
![]()
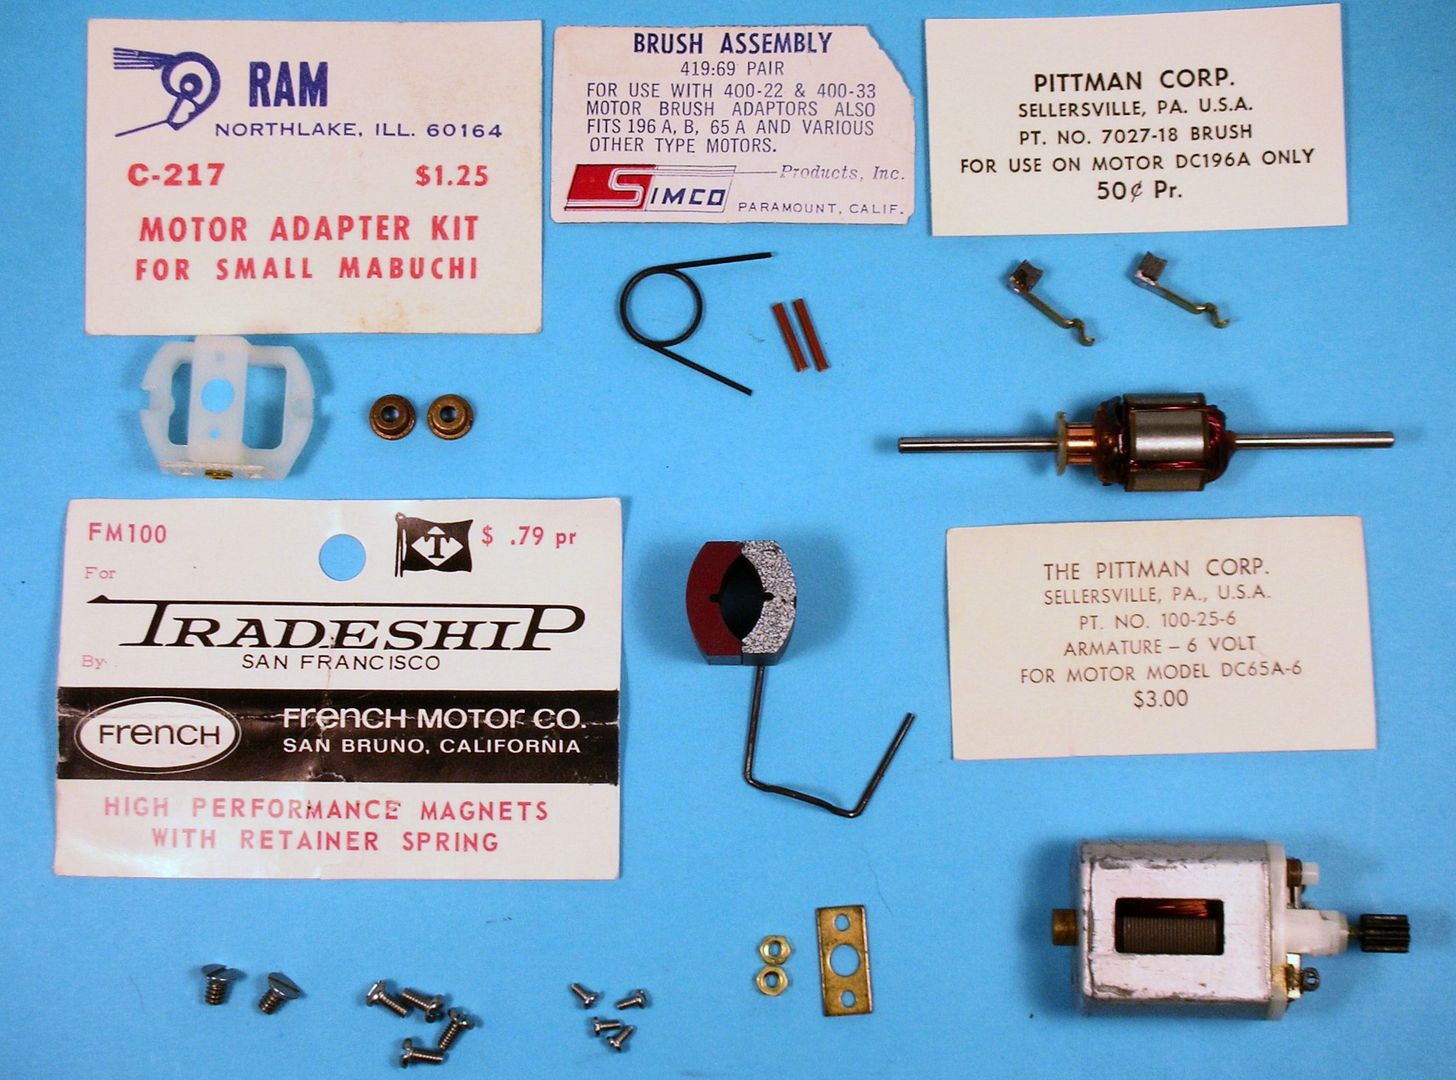
We'll see if I can make this fit...
- slotbaker, Jencar17, Tex and 3 others like this
Rick Thigpen
Check out Steve Okeefe's great web site at its new home here at Slotblog:
The Independent Scratchbuilder
There's much more to come...
#8

Posted 12 December 2016 - 12:58 PM
RAM motor adapter and 6 volt arm = vintage awesomeness. ![]()
Very interesting comparison between the two types of urethane rears.
#9

Posted 12 December 2016 - 01:44 PM
Hi Paul,
I'm hoping to promote that these urethane tires are fun for the older 1/24 cars and not just the modern1/32 cars.
I'm also hoping that I can shorten up that Mabuchi can enough to fit it into my little sidewinder project!
- hiline2 likes this
Rick Thigpen
Check out Steve Okeefe's great web site at its new home here at Slotblog:
The Independent Scratchbuilder
There's much more to come...
#10

Posted 14 December 2016 - 05:46 PM
I've been meaning to build this car for a number of years - but as usual, while I think about it, Rick gets his project going!
Very much looking forward to seeing this Rick (and Jairus), and that motor project looks great! Didn't you already try one of these 16D-65X conversions Rick, and found that it ran hot?
Don
#11

Posted 14 December 2016 - 08:48 PM
Hi Don,
Years ago I tried a similar motor with so-so results. I've been itching to give one another shot with a few different tweaks. ![]()
Rick Thigpen
Check out Steve Okeefe's great web site at its new home here at Slotblog:
The Independent Scratchbuilder
There's much more to come...
#12

Posted 16 December 2016 - 08:38 PM
The motor build started with my trusty cut-off wheel to shorten the can:
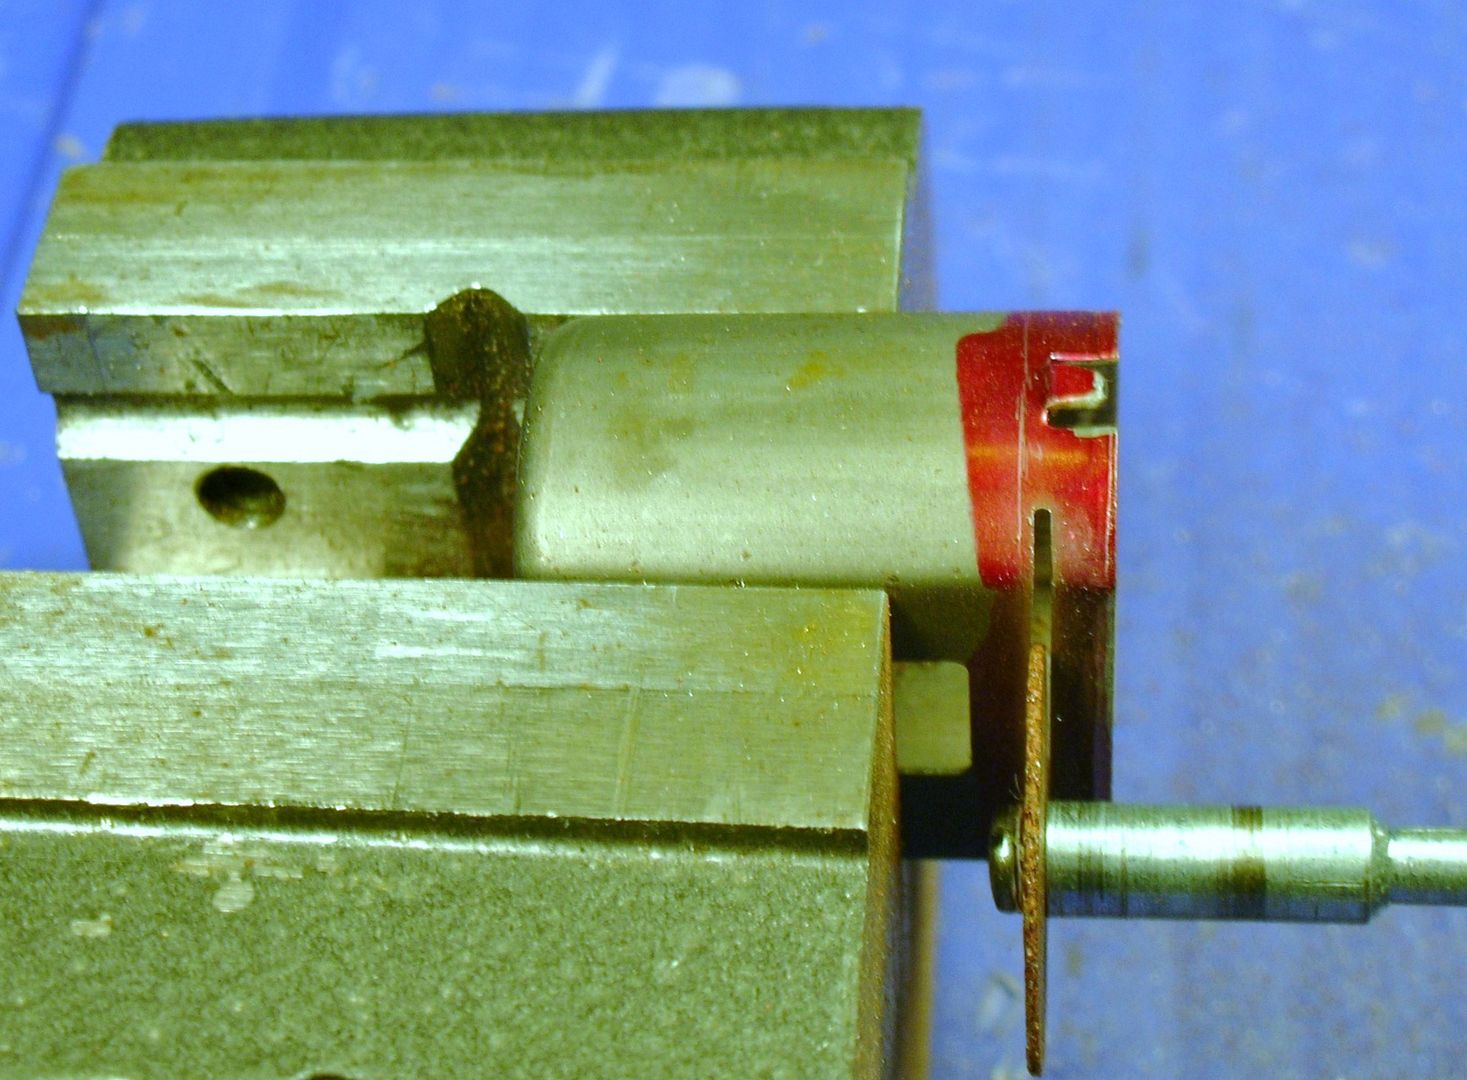
Looks like it was a one-wheel job as there's little left!
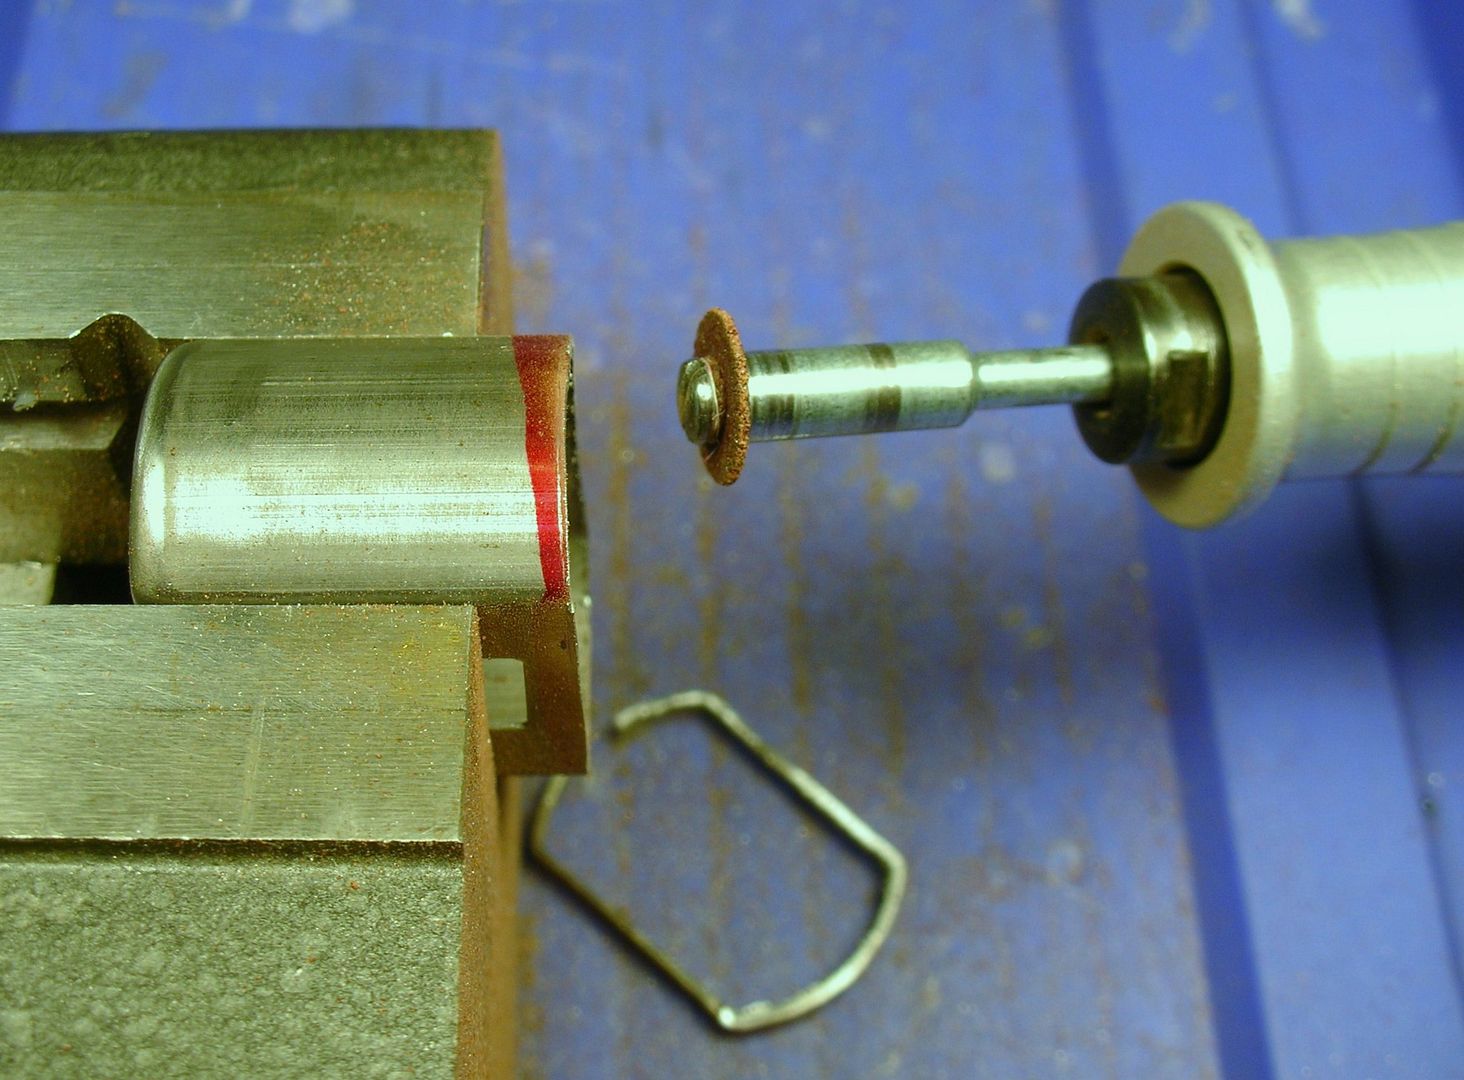
The cut-down can with the blind bearing removed, the holed reamed to 3/16", two 2-56 motor mount holes and four 0-80 end bell mounting holes drilled:
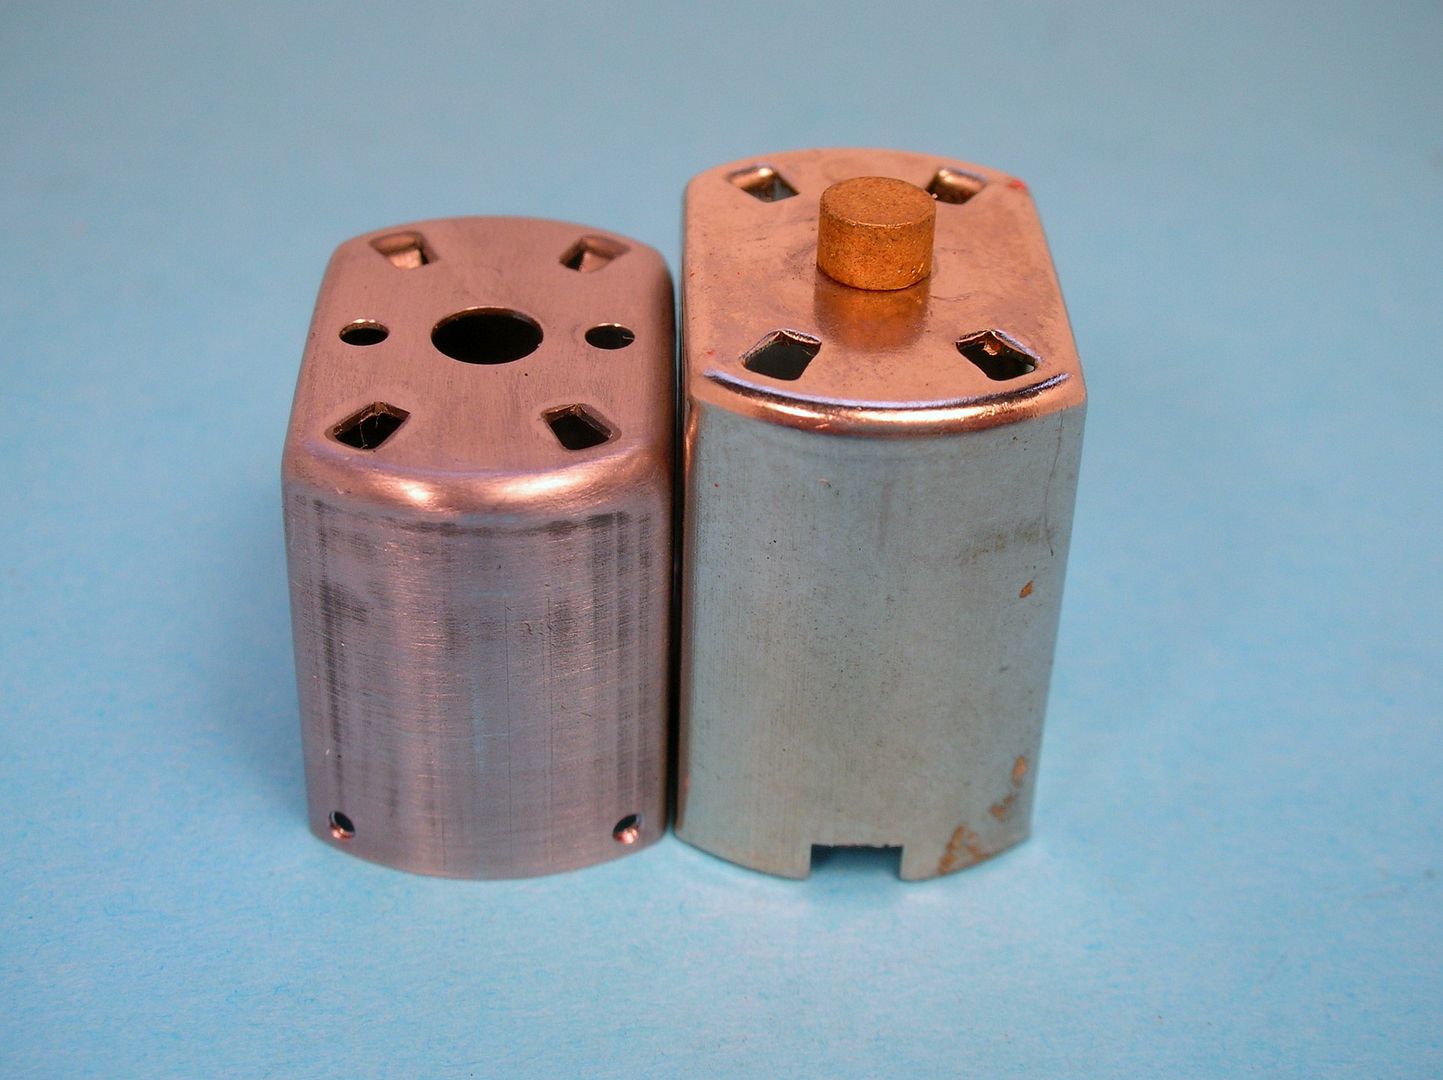
The Simco 3/32" bearing and two 2-56 nuts soldered in place...
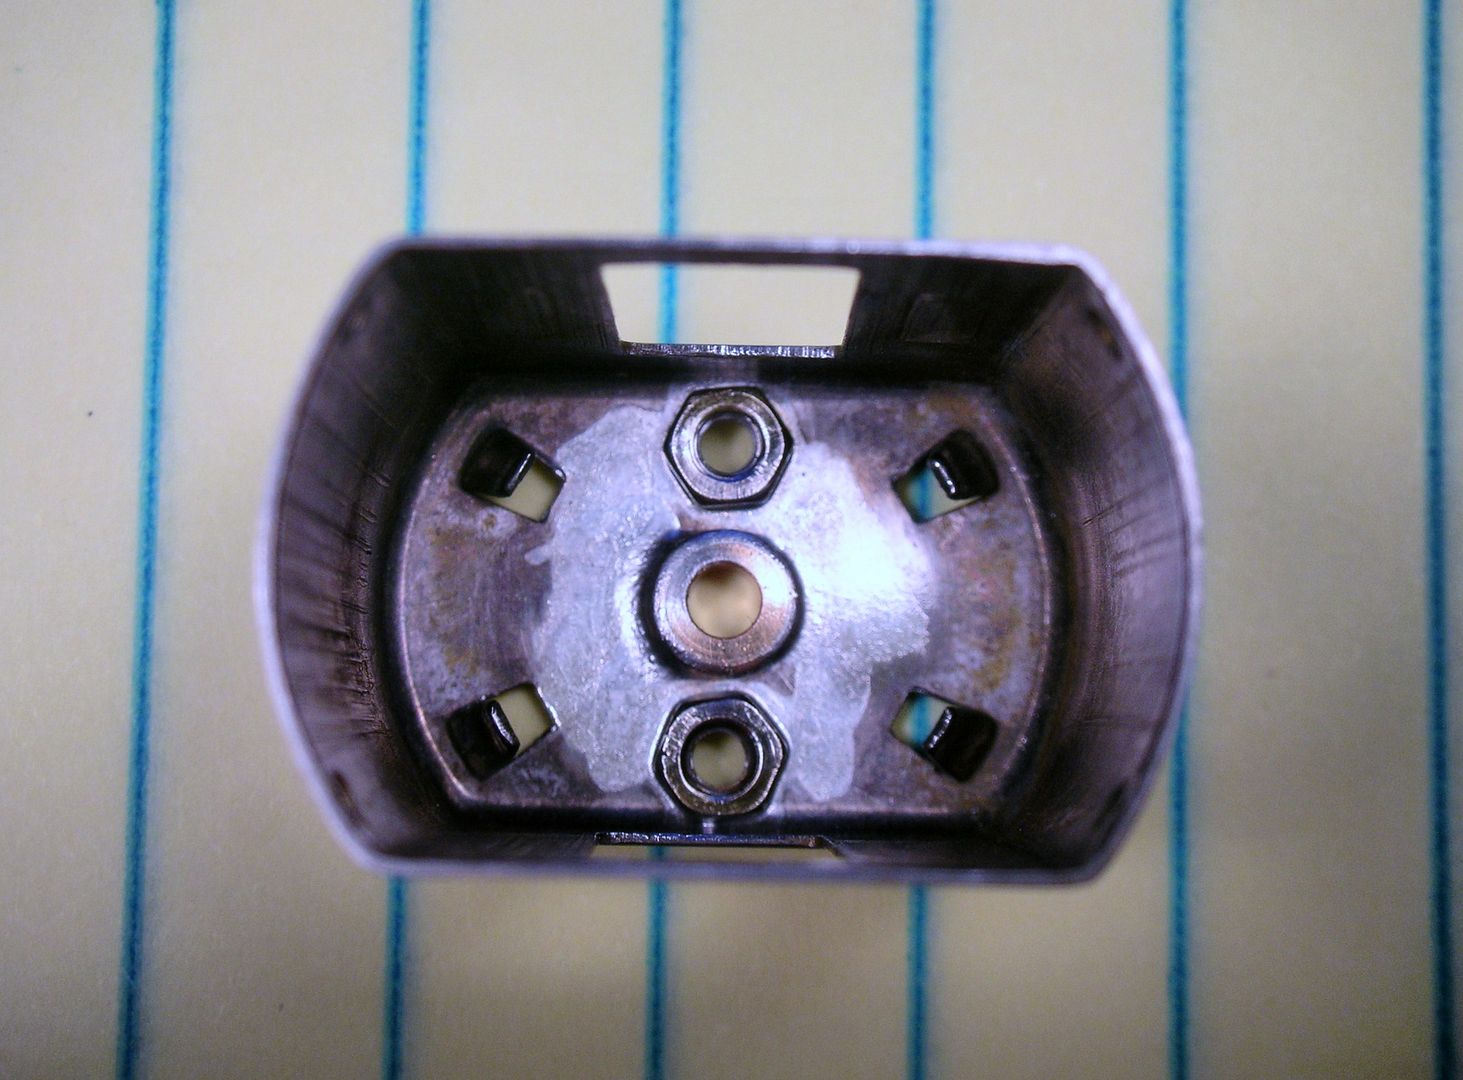
... and the can is ready for paint:
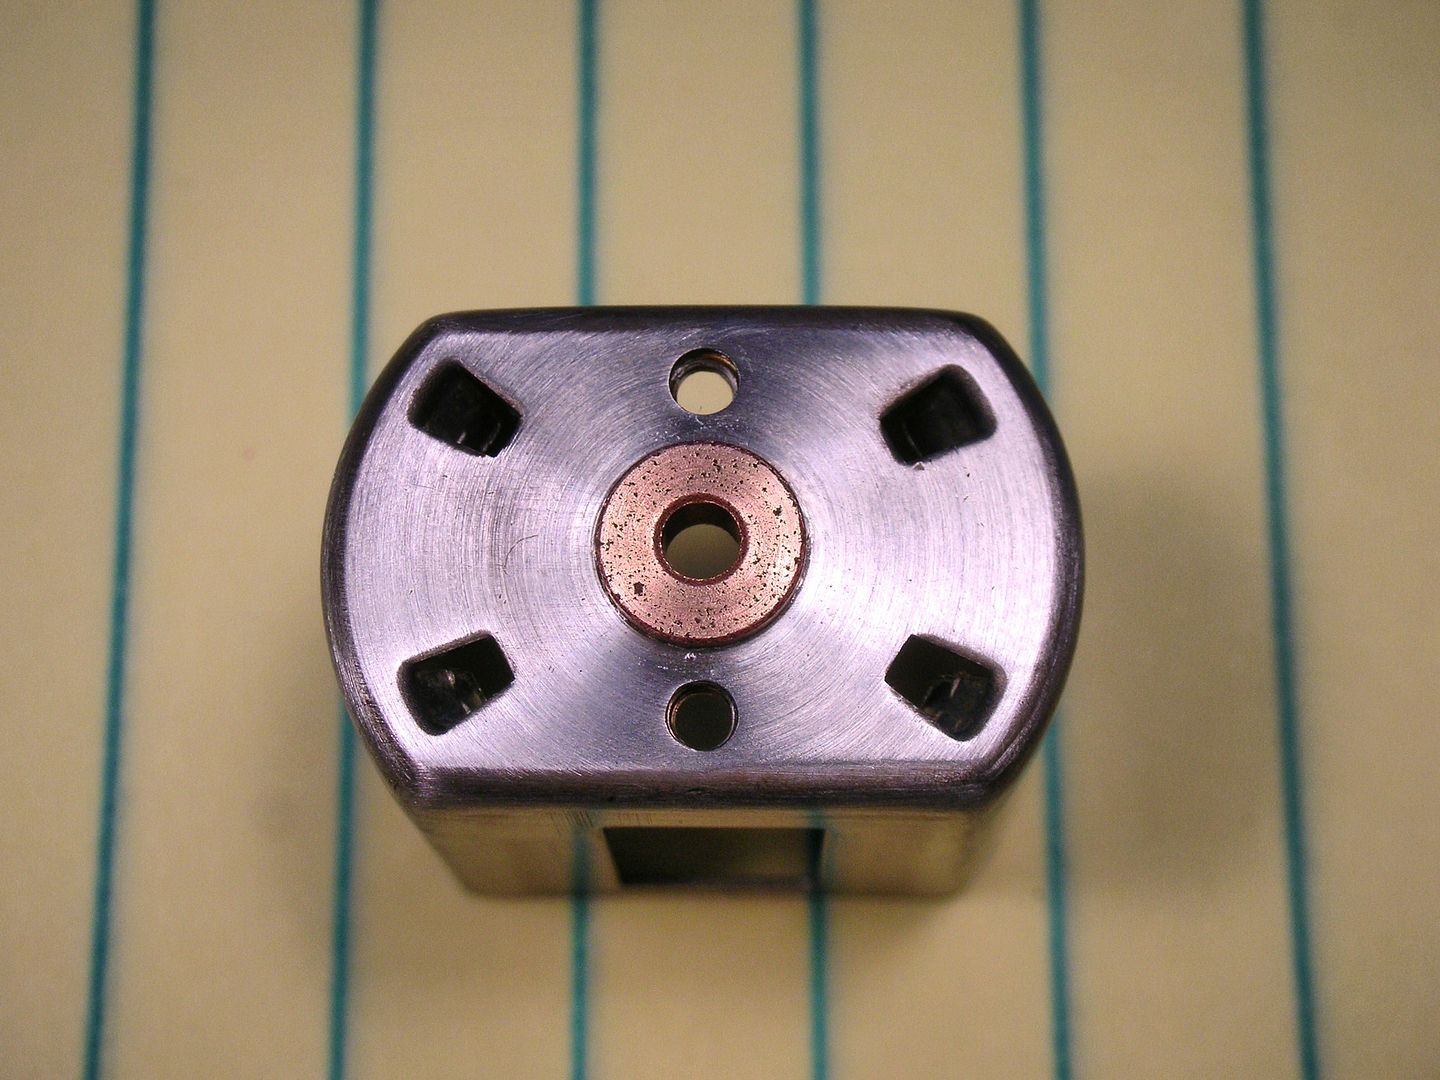
The Simco endbell also gets shortened, a notch cut for armature clearance, drilled and tapped for 0-80 mounting screws, the brush plate modified for a 4-40 undercut flat head screw, and the endbell tapped 4-40:
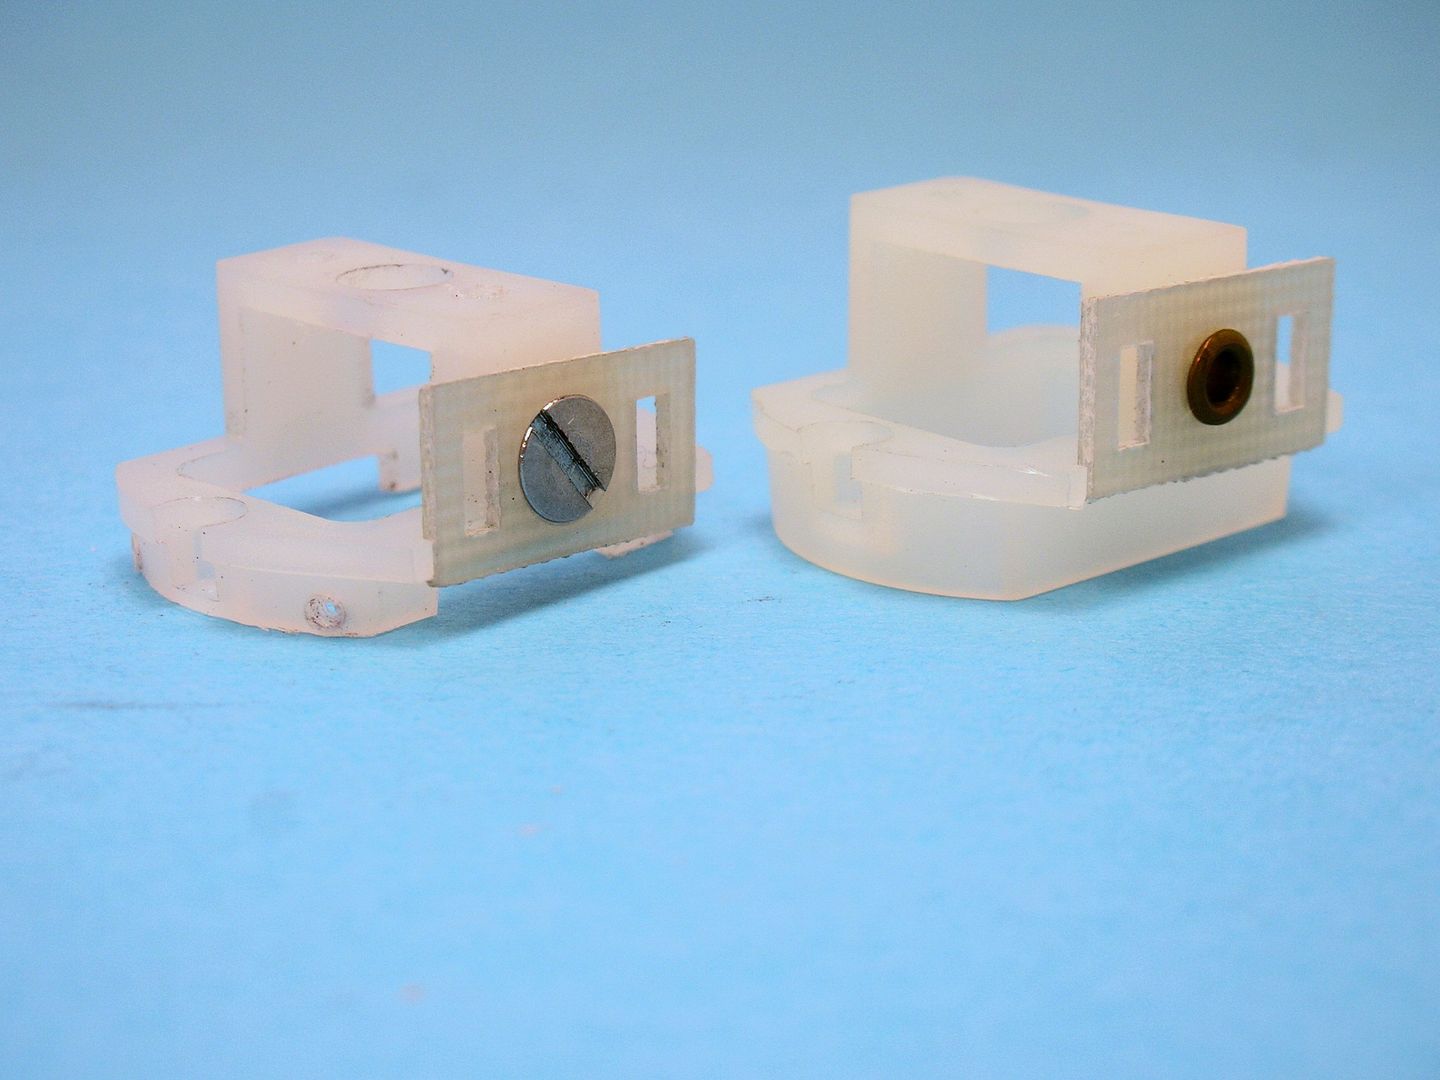
The Simco endbell bearing is soldered to the brass plate...
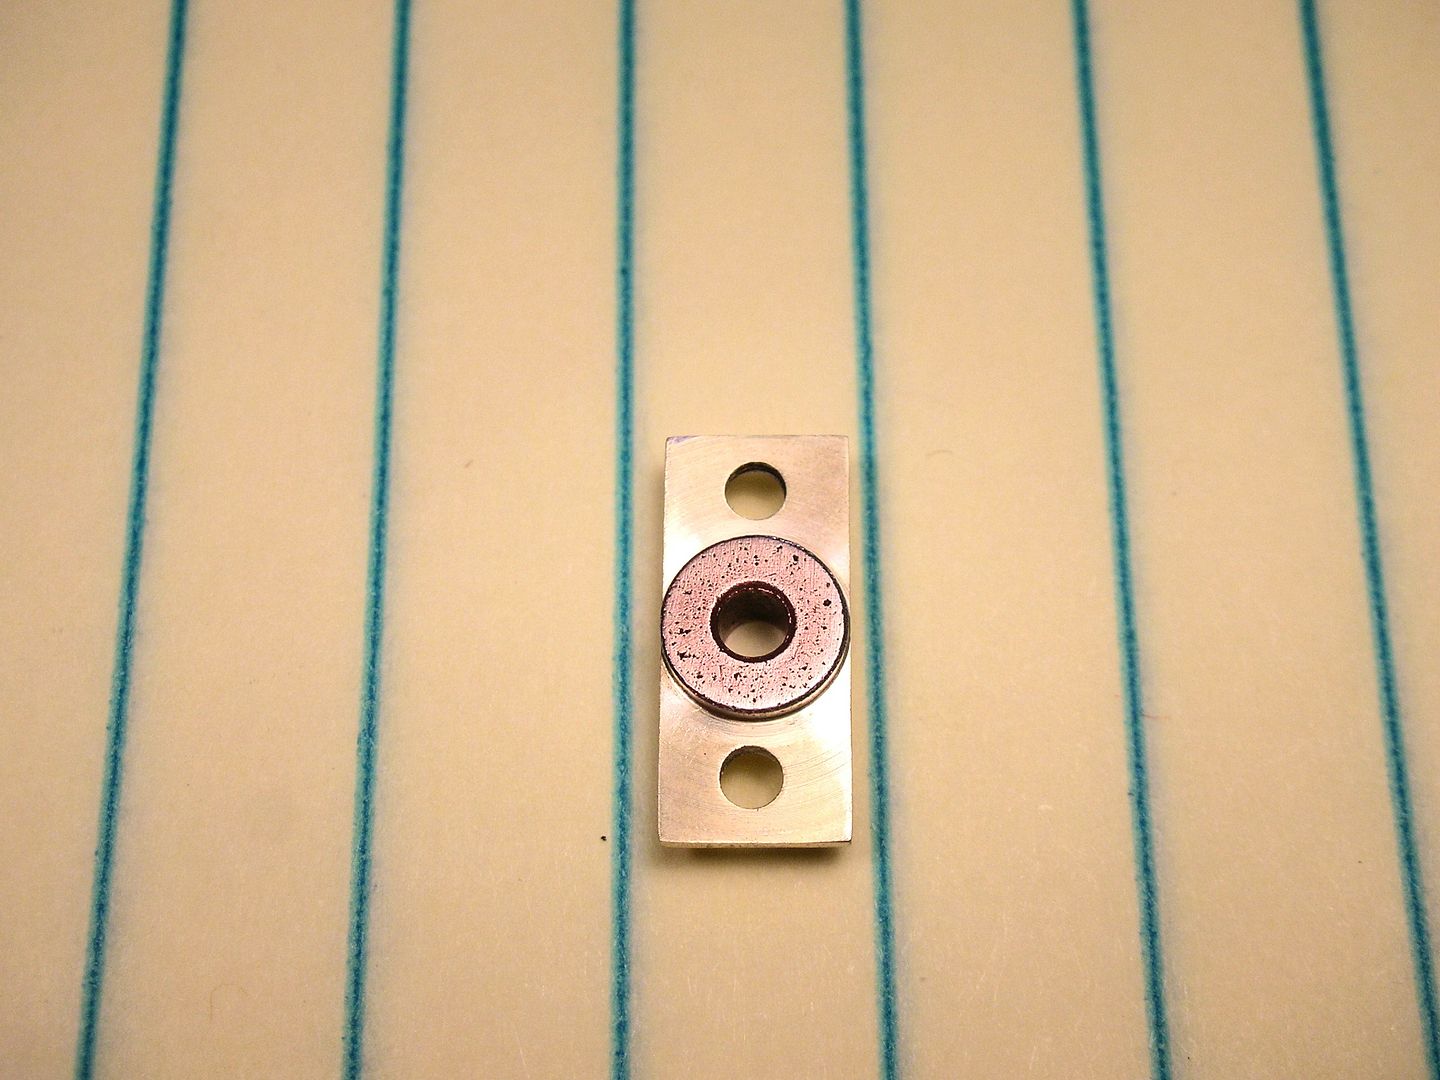
... and this has been epoxied to the endbell. It's epoxy drying time now... ![]()
- slotbaker, Pablo, Jencar17 and 3 others like this
Rick Thigpen
Check out Steve Okeefe's great web site at its new home here at Slotblog:
The Independent Scratchbuilder
There's much more to come...
#13

Posted 16 December 2016 - 09:10 PM
Rick,
You'd be my first choice if my brain ever needs surgery. ![]()
The Sano meter is pegged!
- MarcusPHagen likes this
Paul Wolcott
#14

Posted 20 December 2016 - 08:43 PM
Thanks, Pablo.
I got the armature epoxied, static balanced, and the motor assembled. It still needs paint but I'll wait until I'm done using it to build the chassis:
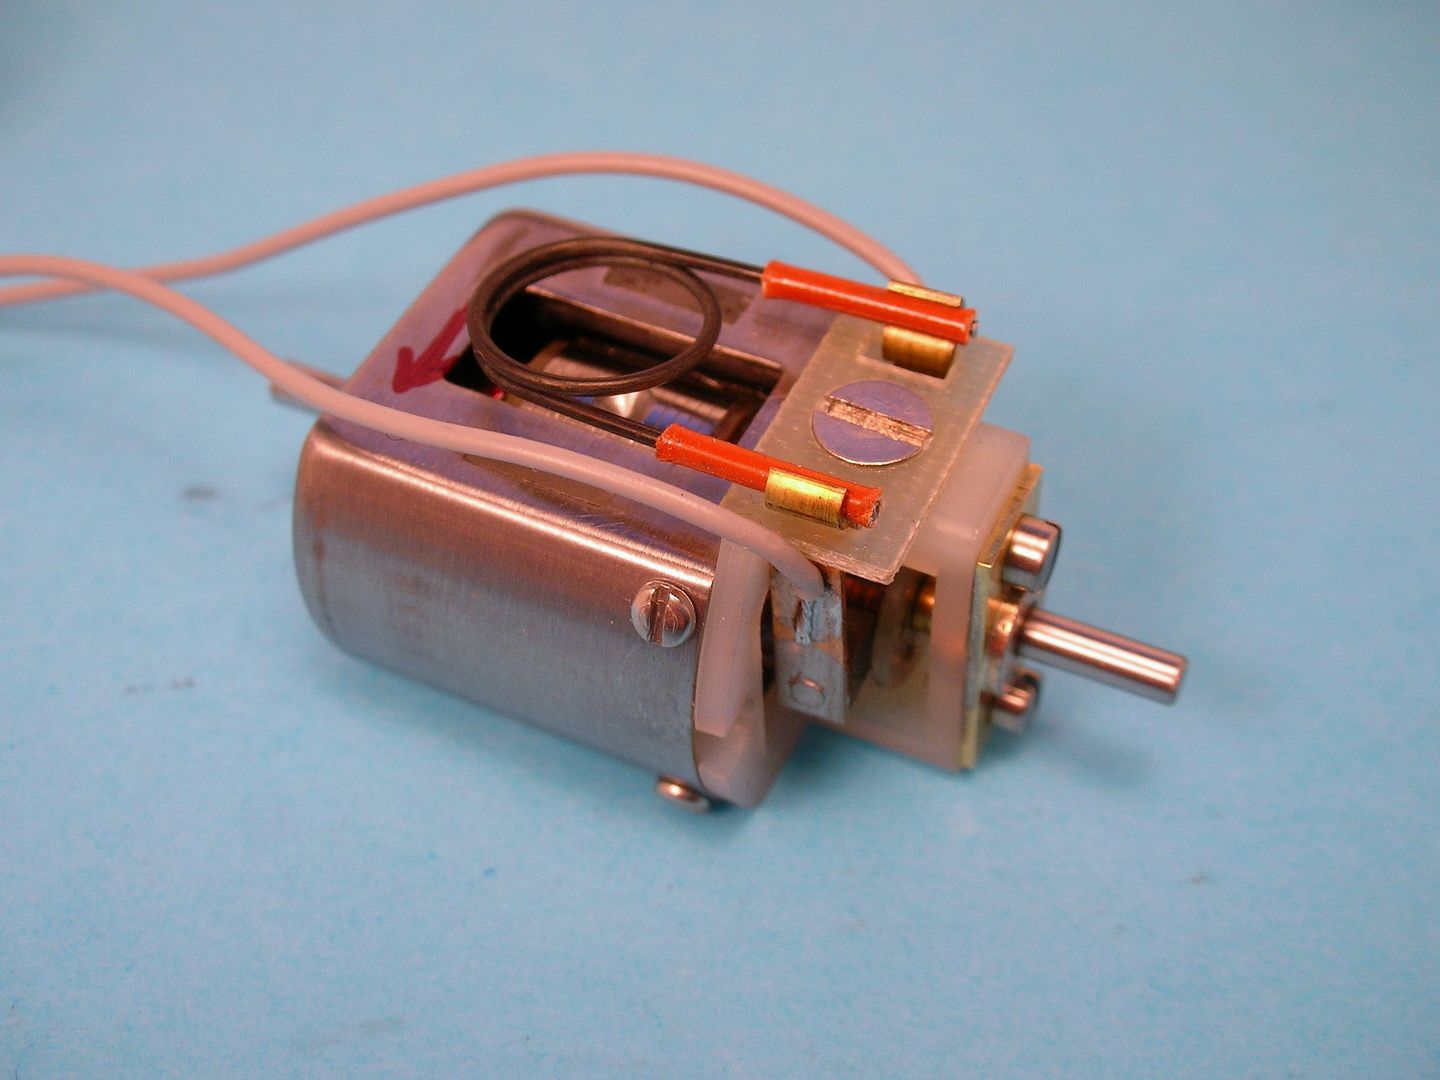
It's a good bit shorter than a standard Mabuchi:
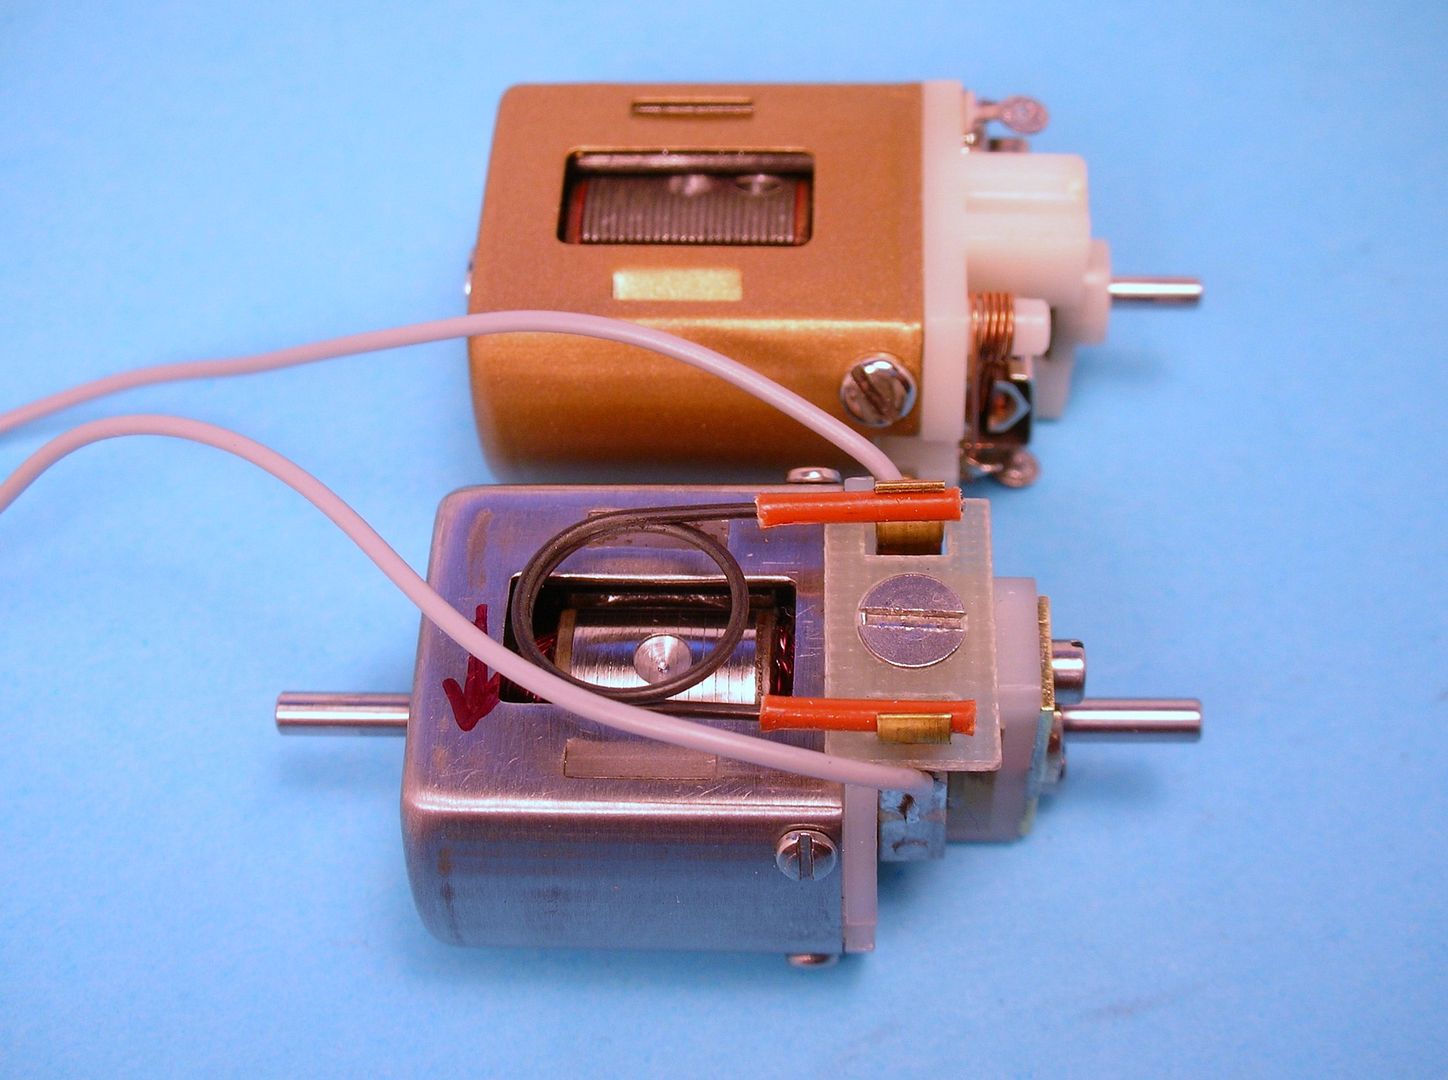
Speaking of Mabuchi, I going to give the stock magnets a try. With the Pittman arm diameter of .530" the air gap would be super tight with the thicker French-Tradeship magnets.
Anywho, with the motor together and spinning fastest CCW, it's time for the full sidewinder chassis build...
- slotbaker, Jencar17, Chris Stemman and 2 others like this
Rick Thigpen
Check out Steve Okeefe's great web site at its new home here at Slotblog:
The Independent Scratchbuilder
There's much more to come...
#15

Posted 21 December 2016 - 04:41 AM
Great-looking motor, Rick.
I was just reading one of Pete Hagenbuch's old columns from 1965 (November, with the preview of Martex products), where he talks about this type of conversion, to marry the best of Pittman and Mabuchi... he claims that the large commutators on the Pittman arm limits the RPM - does that sound right?
He's also comparing the original Mabuchi leaf type commutators (not round but a little stronger) to the later molded ones (rounder, but tend to blow up), plus using square tubing as a heat sink on the original endbells. Of course, this was around when the later FT16Ds with the heat sinks came out, changing everything.
Don
#16

Posted 13 January 2017 - 06:30 PM
I'm sorry it took so long to get back on this project. ![]()
I wouldn't be surprised if the large comms on Pittman's aren't at least part of the problem with their relatively low RPM, Don. We'll see how this one runs... soon I hope!
On with the chassis. I started with sorting through my vintage Duffys (bearing retainers):
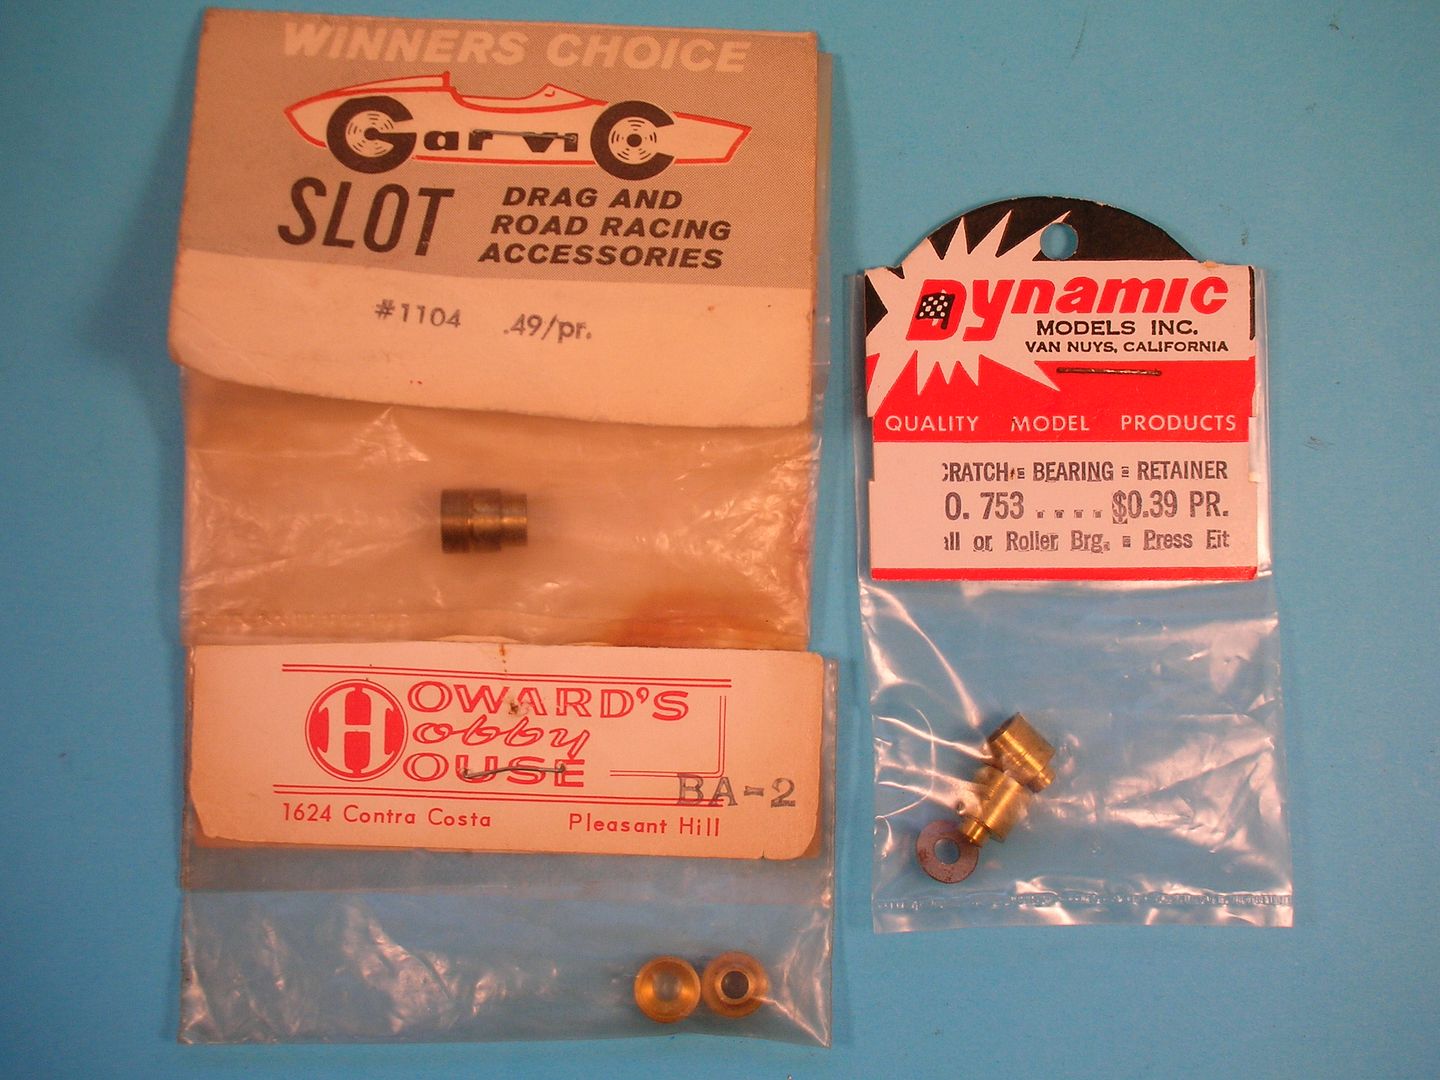
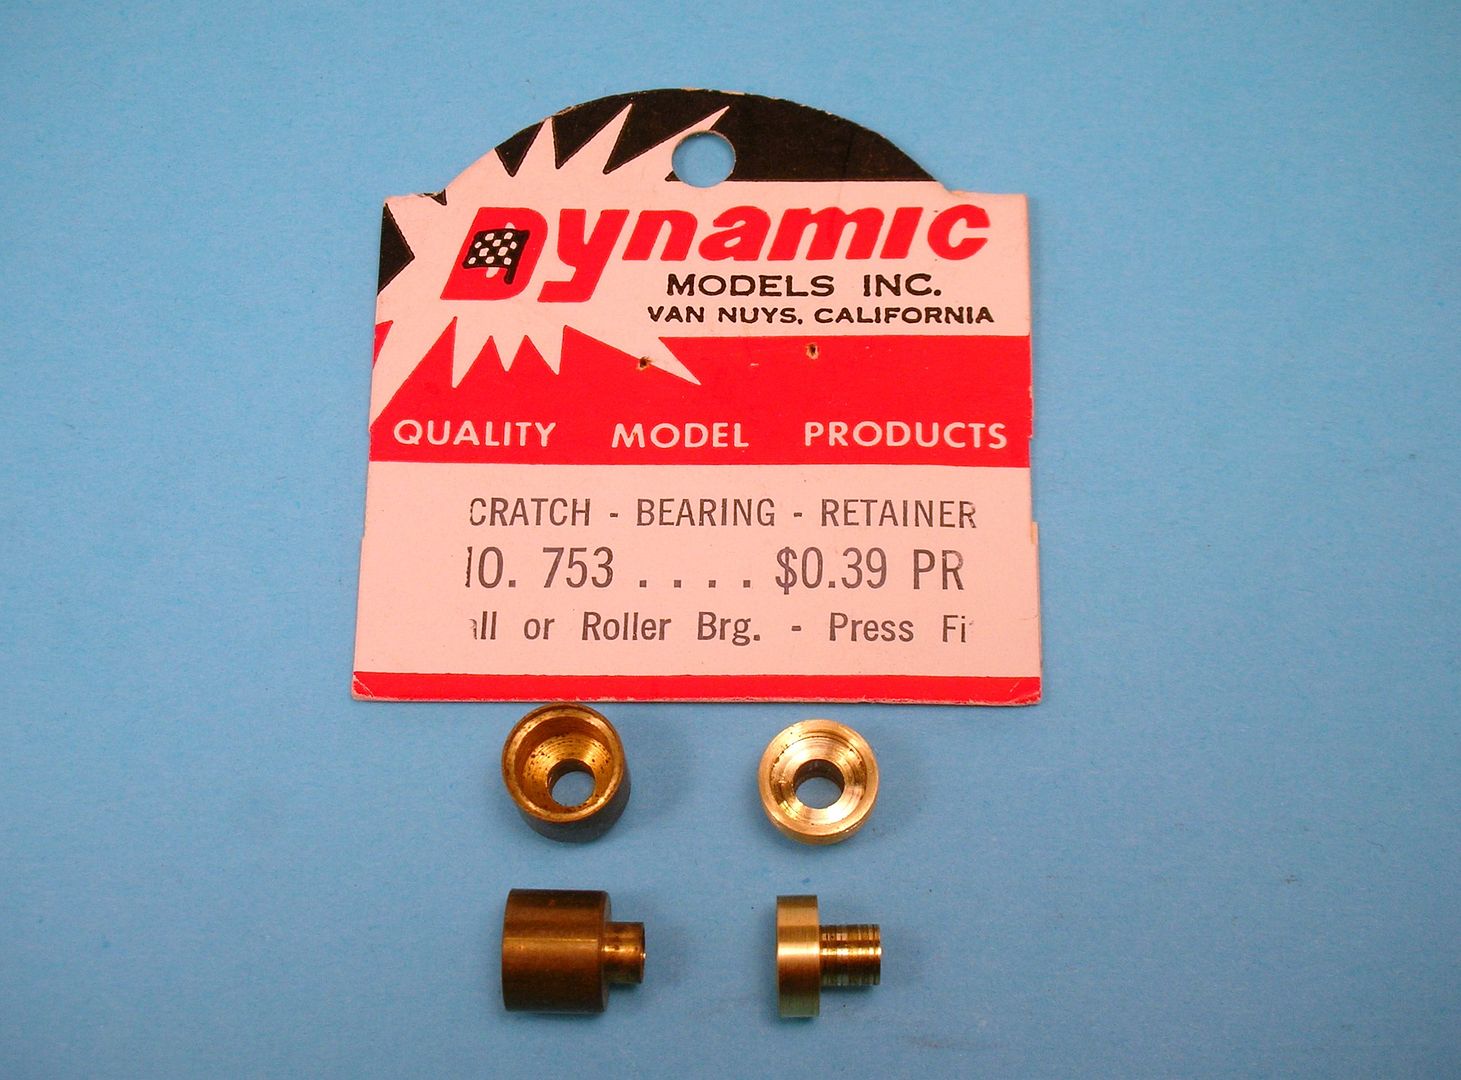
I settled on the Dynamic pieces. I cut them down as much as I could (modified on the right):
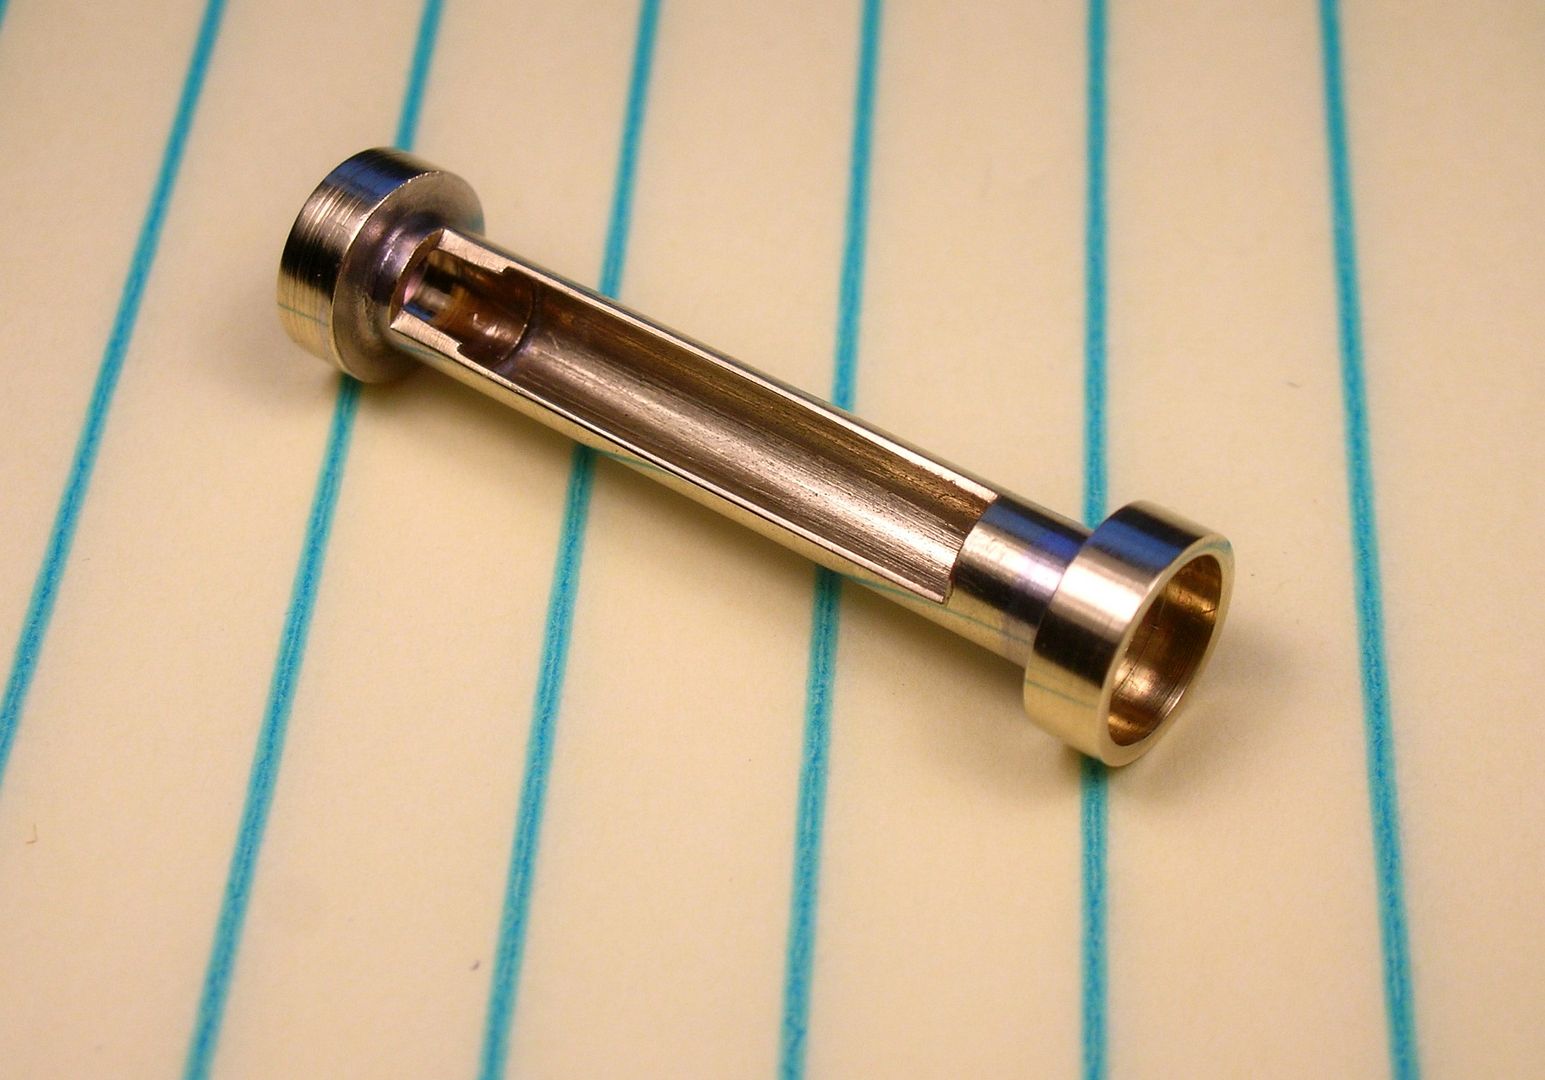
The Duffys soldered to the 3/16" tube which is cut for as much axle clearance as possible:
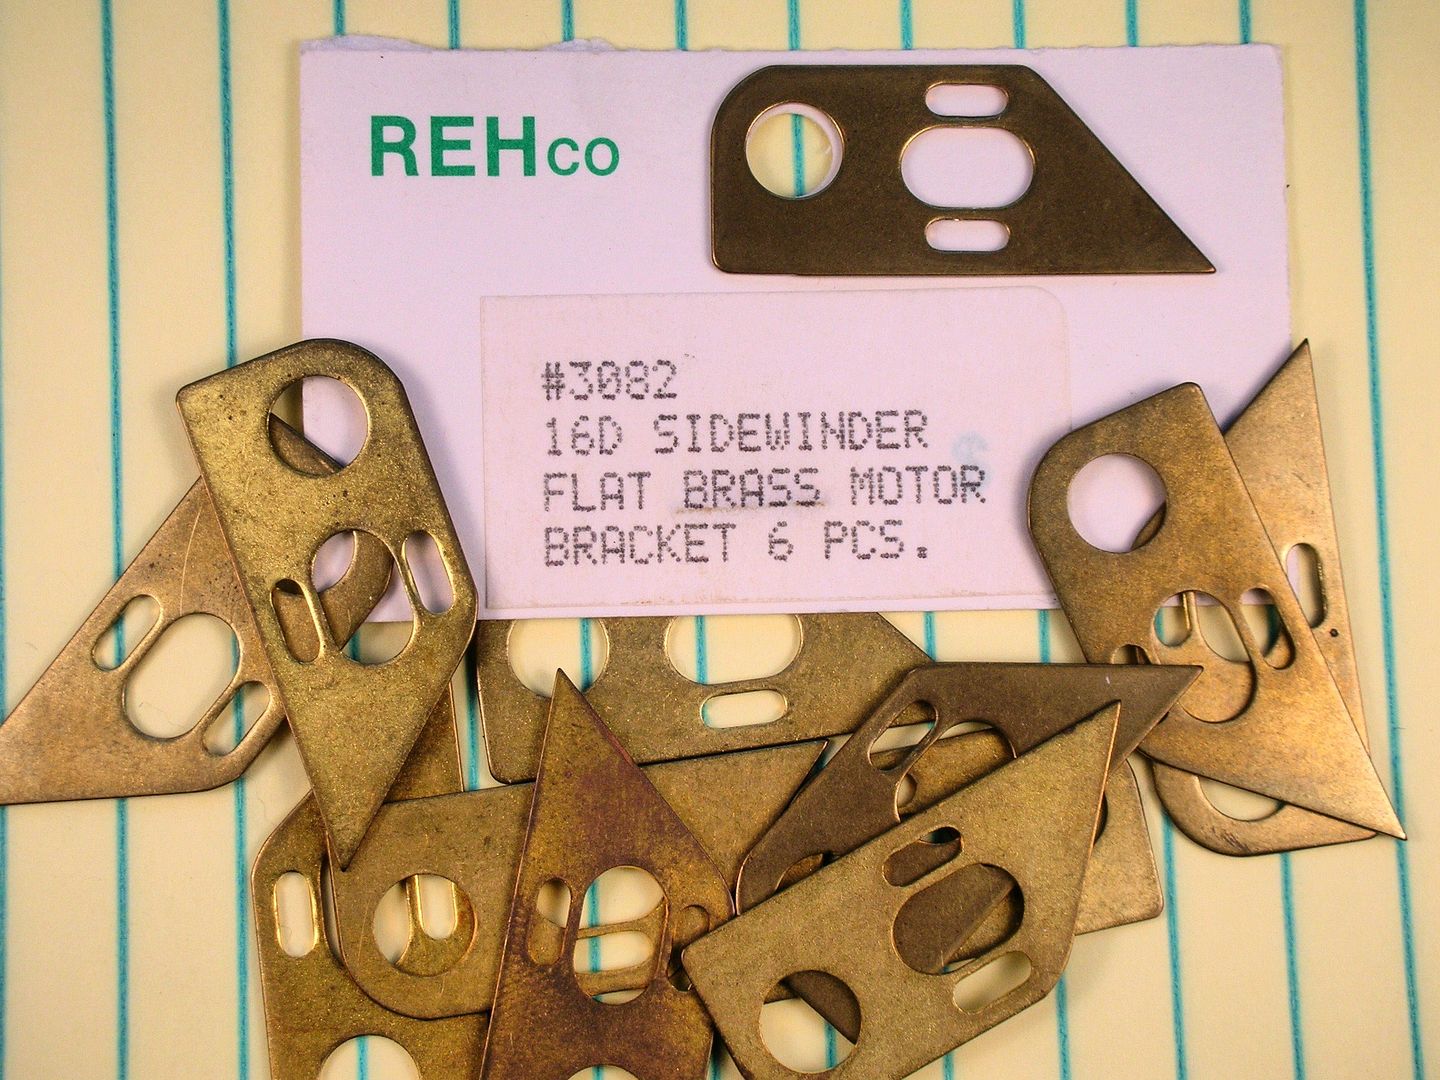
Rather than fab axle brackets from scratch, I used these Russkit Sidewinder brackets which might still be available from REH:
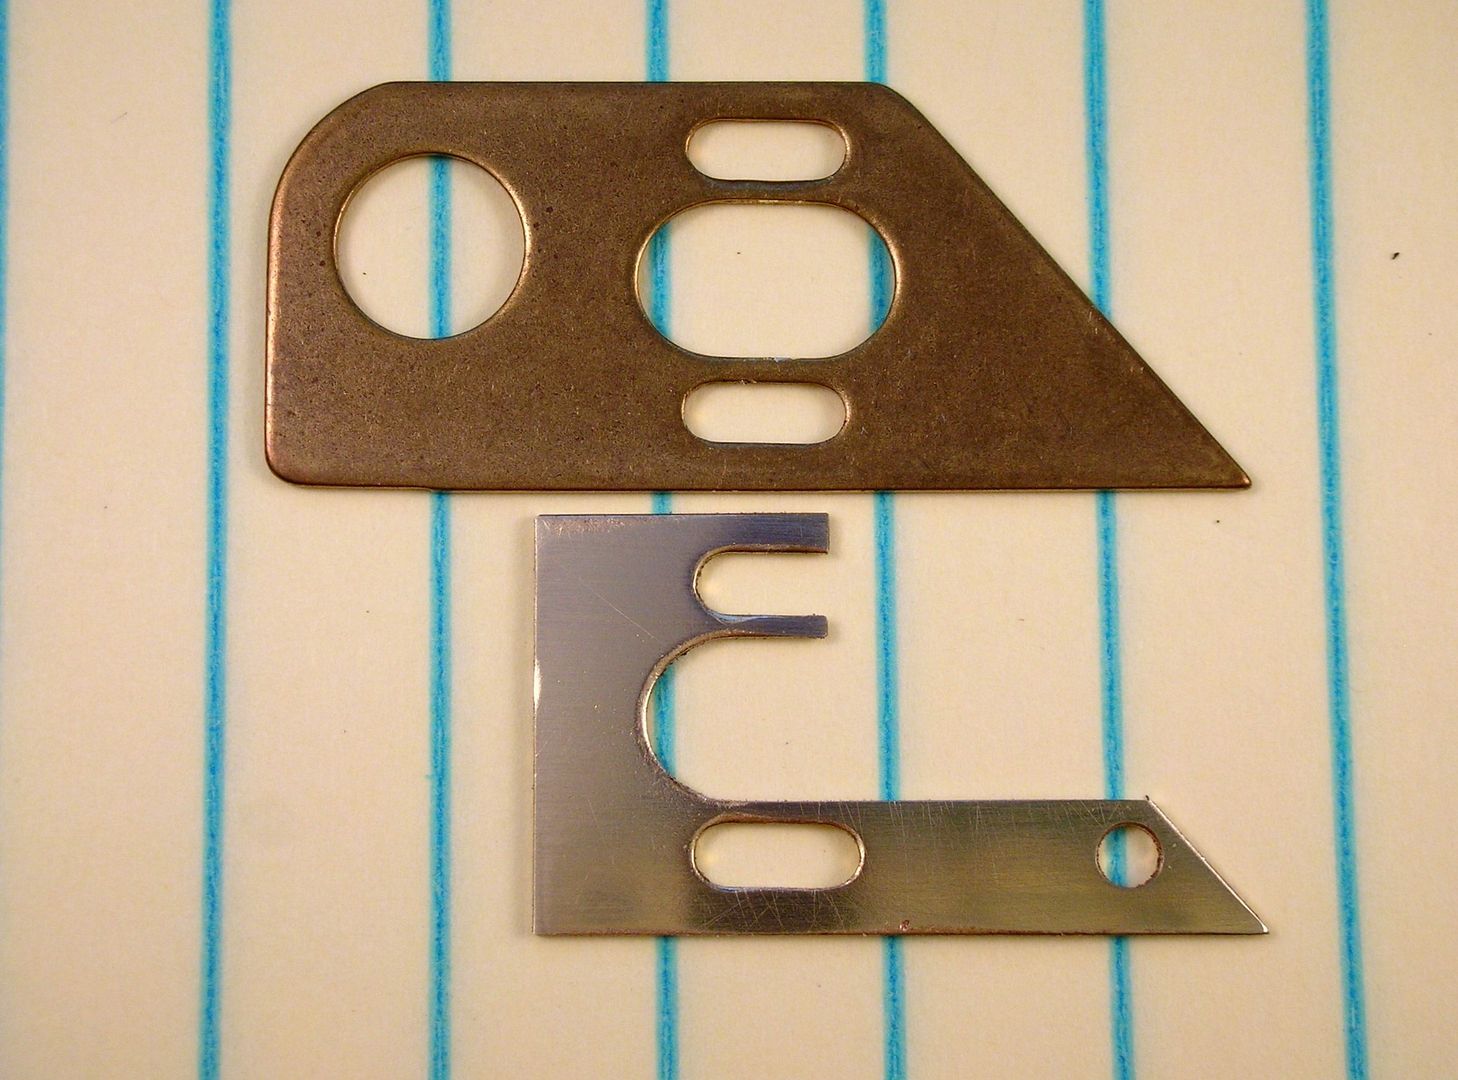
Since there will be a bracket on the front and back of the motor, the motor needs to be slid forward to be removed from the chassis. I cut up the front of the bracket to accomplish this. I also cut off the rear bearing hole which is in the wrong place for this application:
The brackets and rear axle tube set up in the jig ready to go. I also added a 3/32" tube at the front of the brackets to hopefully strengthen things a bit:
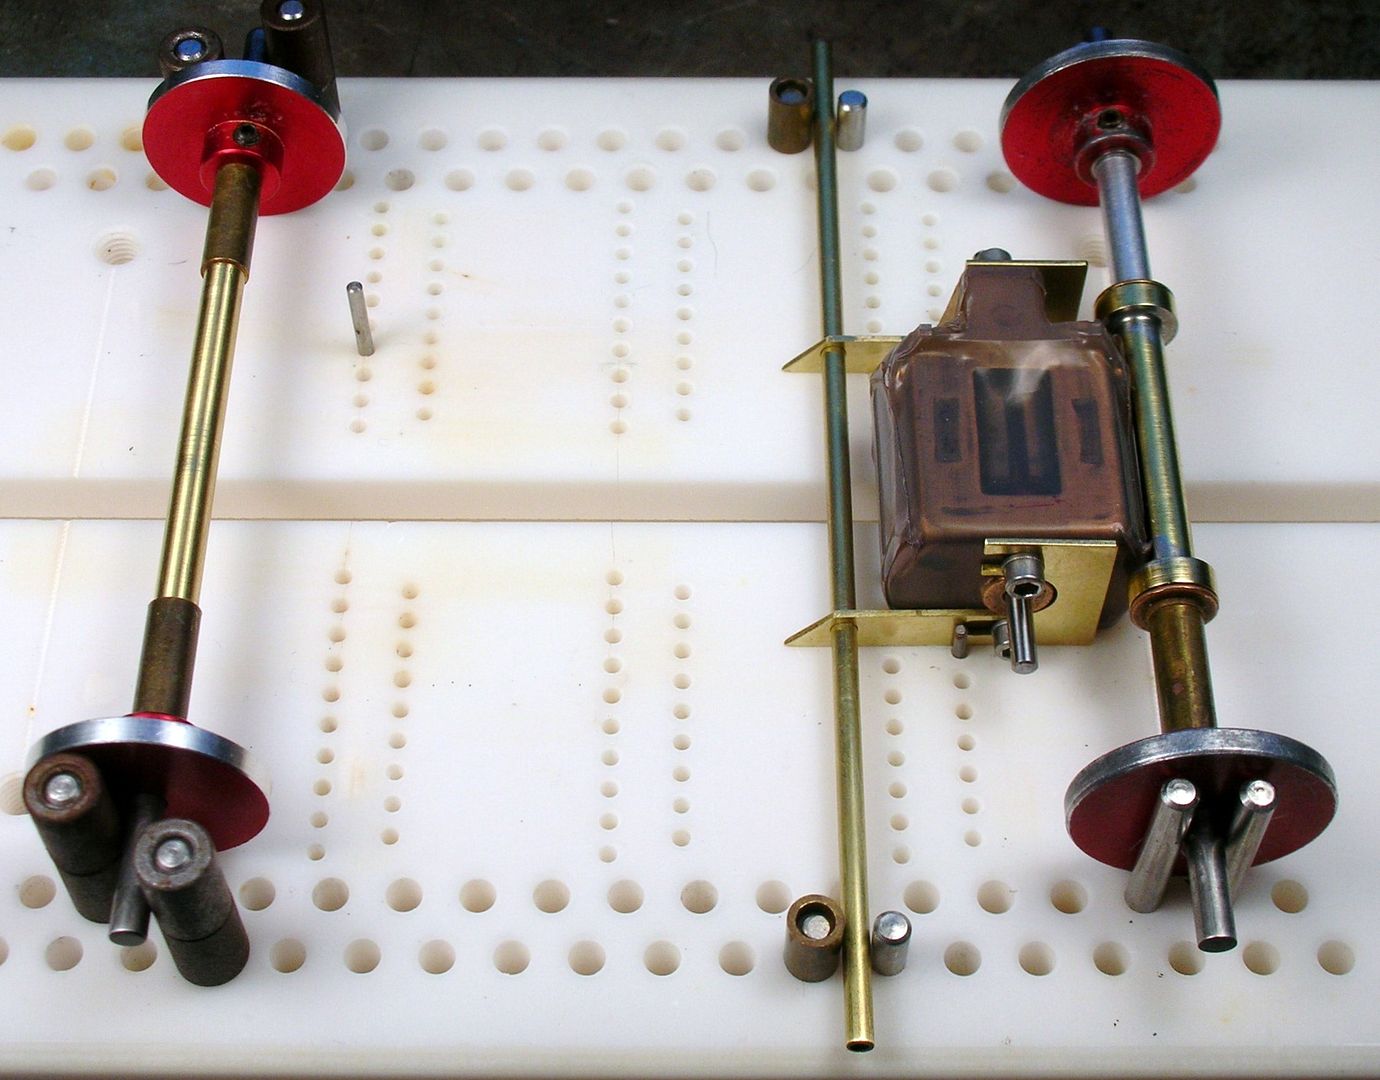
The finished rear end of the chassis:
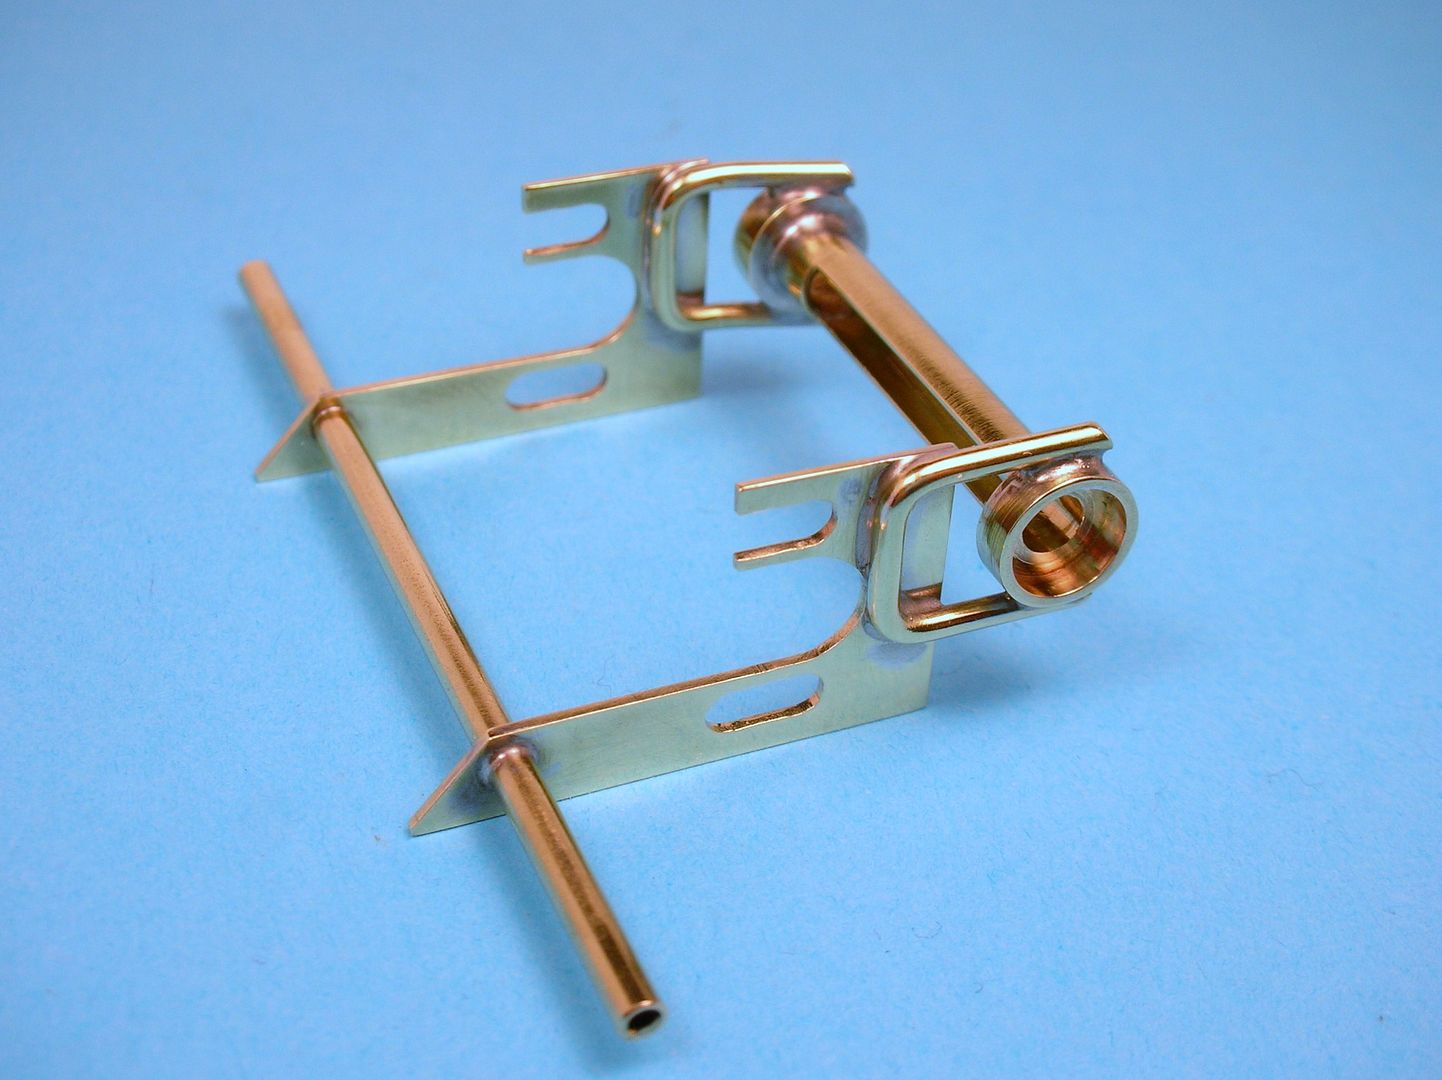
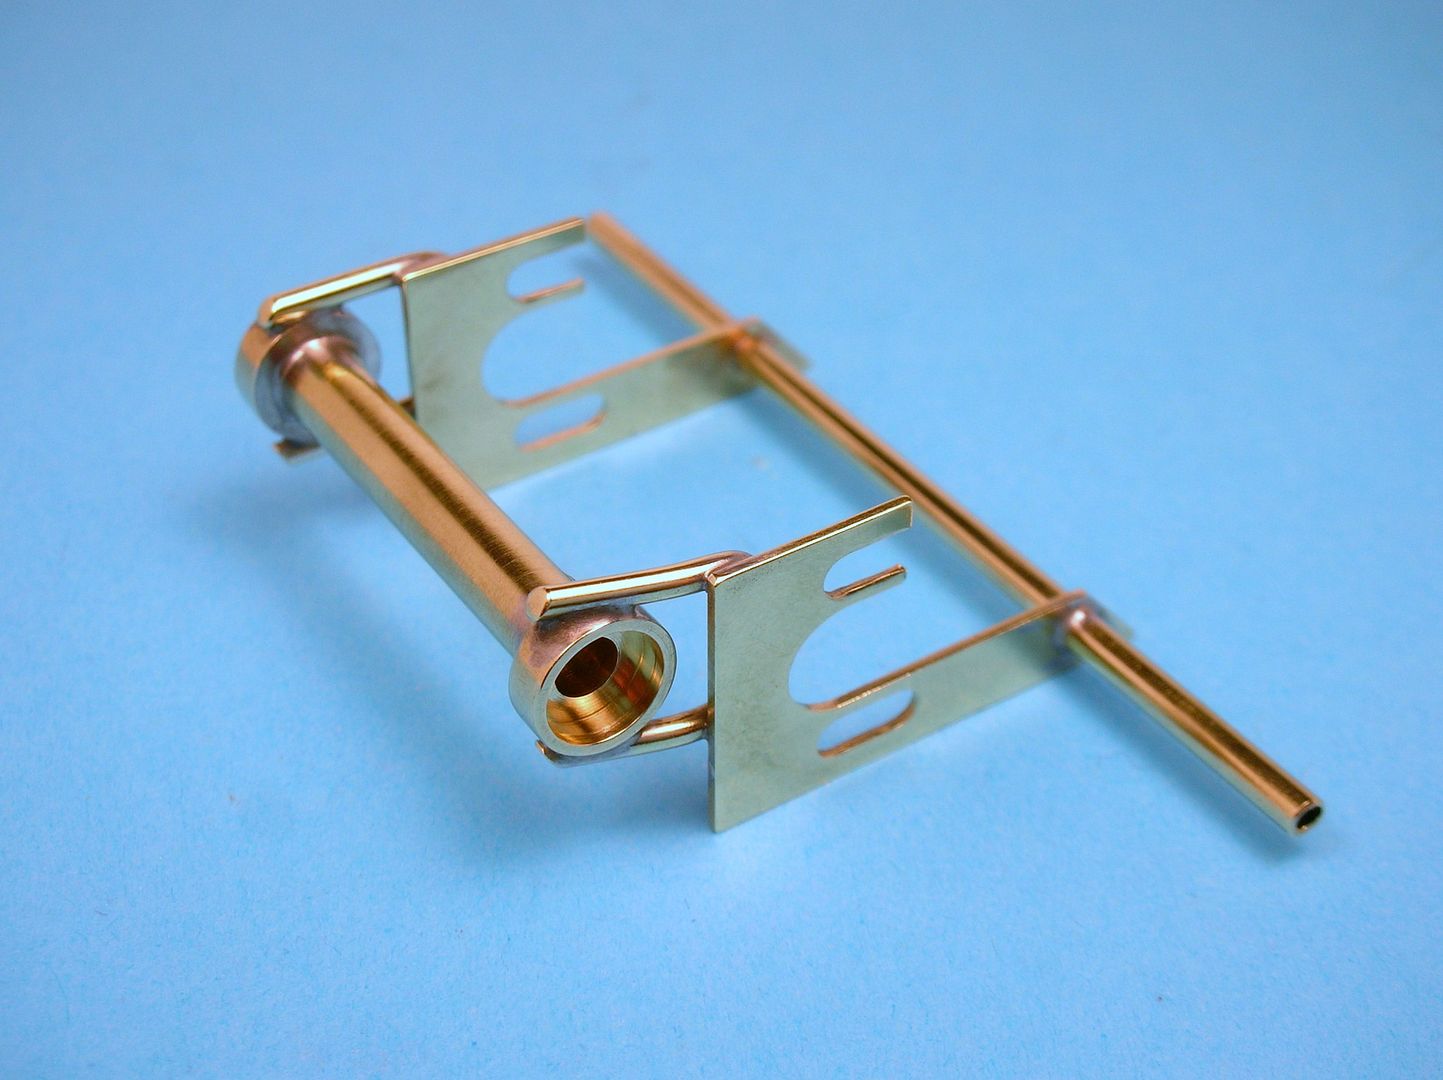
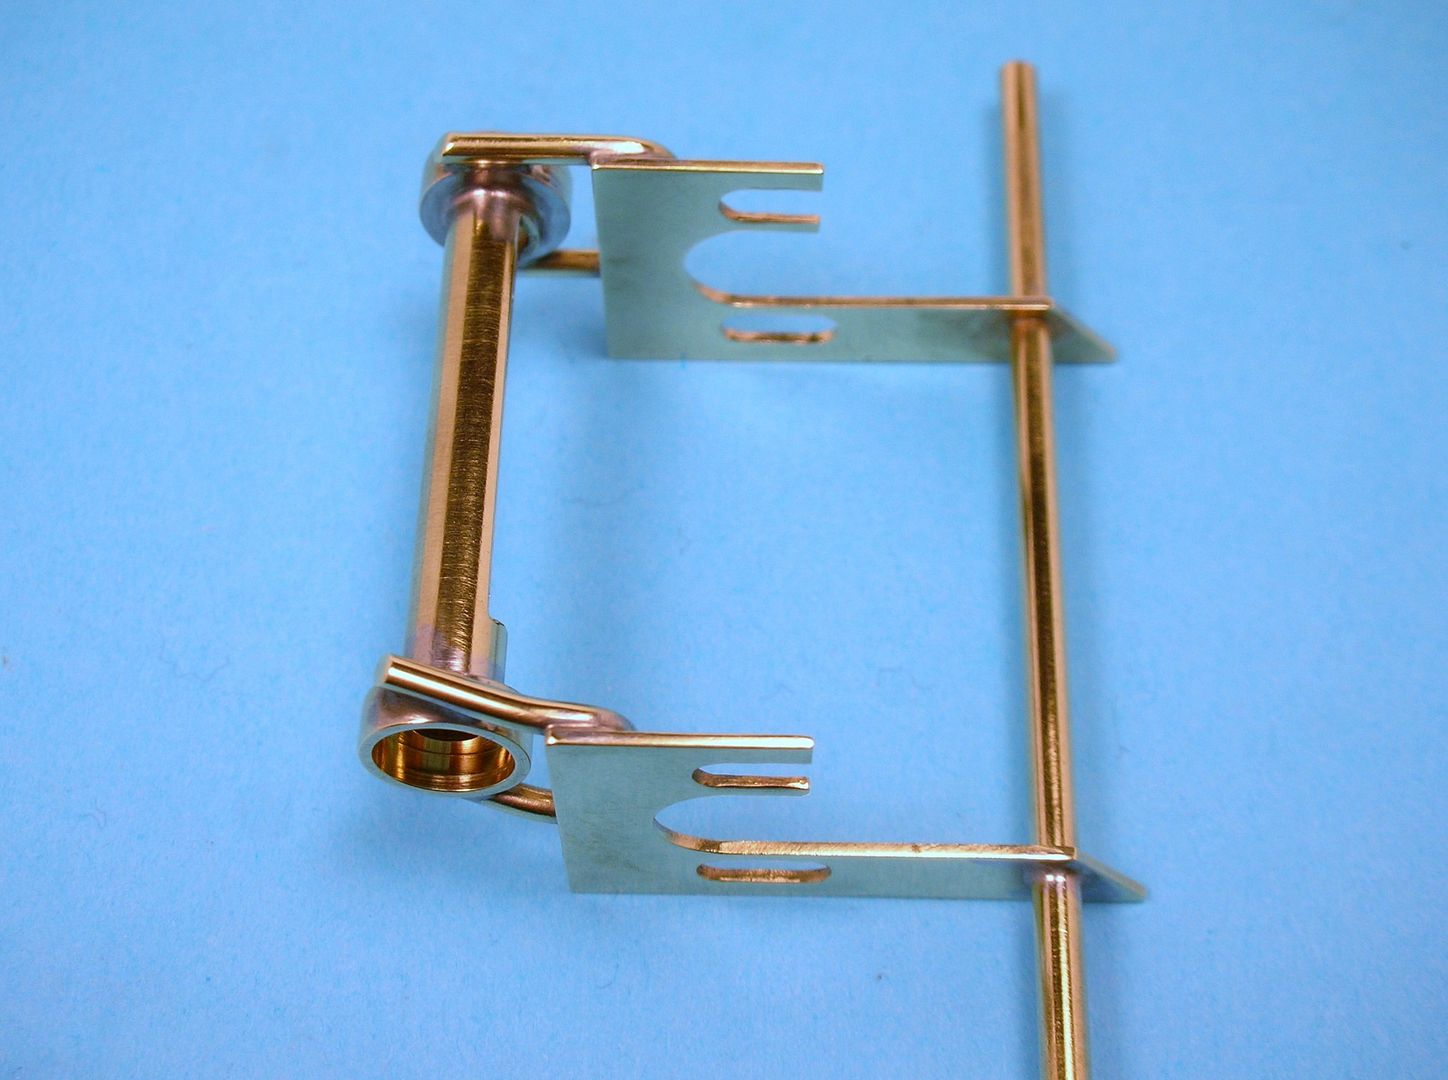
Now I have to figure out what the rest of the chassis should look like. ![]()
- slotbaker, Jencar17, Howie Ursaner and 2 others like this
Rick Thigpen
Check out Steve Okeefe's great web site at its new home here at Slotblog:
The Independent Scratchbuilder
There's much more to come...
#17

Posted 13 January 2017 - 06:51 PM
![]() Thanks for showing it, Rick.
Thanks for showing it, Rick.
Nobody comes close to your level of engineering and beauty. ![]()
Paul Wolcott
#18

Posted 13 January 2017 - 10:25 PM
Great workmanship as usual, Rick, buuut... I'd be a bit anxious about maintaining the integrity of that rear axle assembly... just doesn't have what Tex would need to survive his own driving. LOL. More beef.
I looked at the pics again and I couldn't figure out how. Let's just agree here and now that you won't ever let me drive this car and everything's cool.
Build on, McDuff!
Remember, two wrongs don't make a right... but three lefts do! Only you're a block over and a block behind.
#19

Posted 13 January 2017 - 11:33 PM
I'm fighting the temptation to take my attempt at a late 1965, early 1966 period sidewinder chassis and add to much later time period beefing up. The motor when bolted in stiffens thing up...
I can always add more bracing but I'm not coming up with what that might be and still stay '65ish?
- Tex likes this
Rick Thigpen
Check out Steve Okeefe's great web site at its new home here at Slotblog:
The Independent Scratchbuilder
There's much more to come...
#20

Posted 14 January 2017 - 08:04 AM
Send the usher to quiet down the unruly popcorn gallery, dim the lights again, and let the movie continue.
Remember, two wrongs don't make a right... but three lefts do! Only you're a block over and a block behind.
#21

Posted 04 March 2017 - 11:08 AM
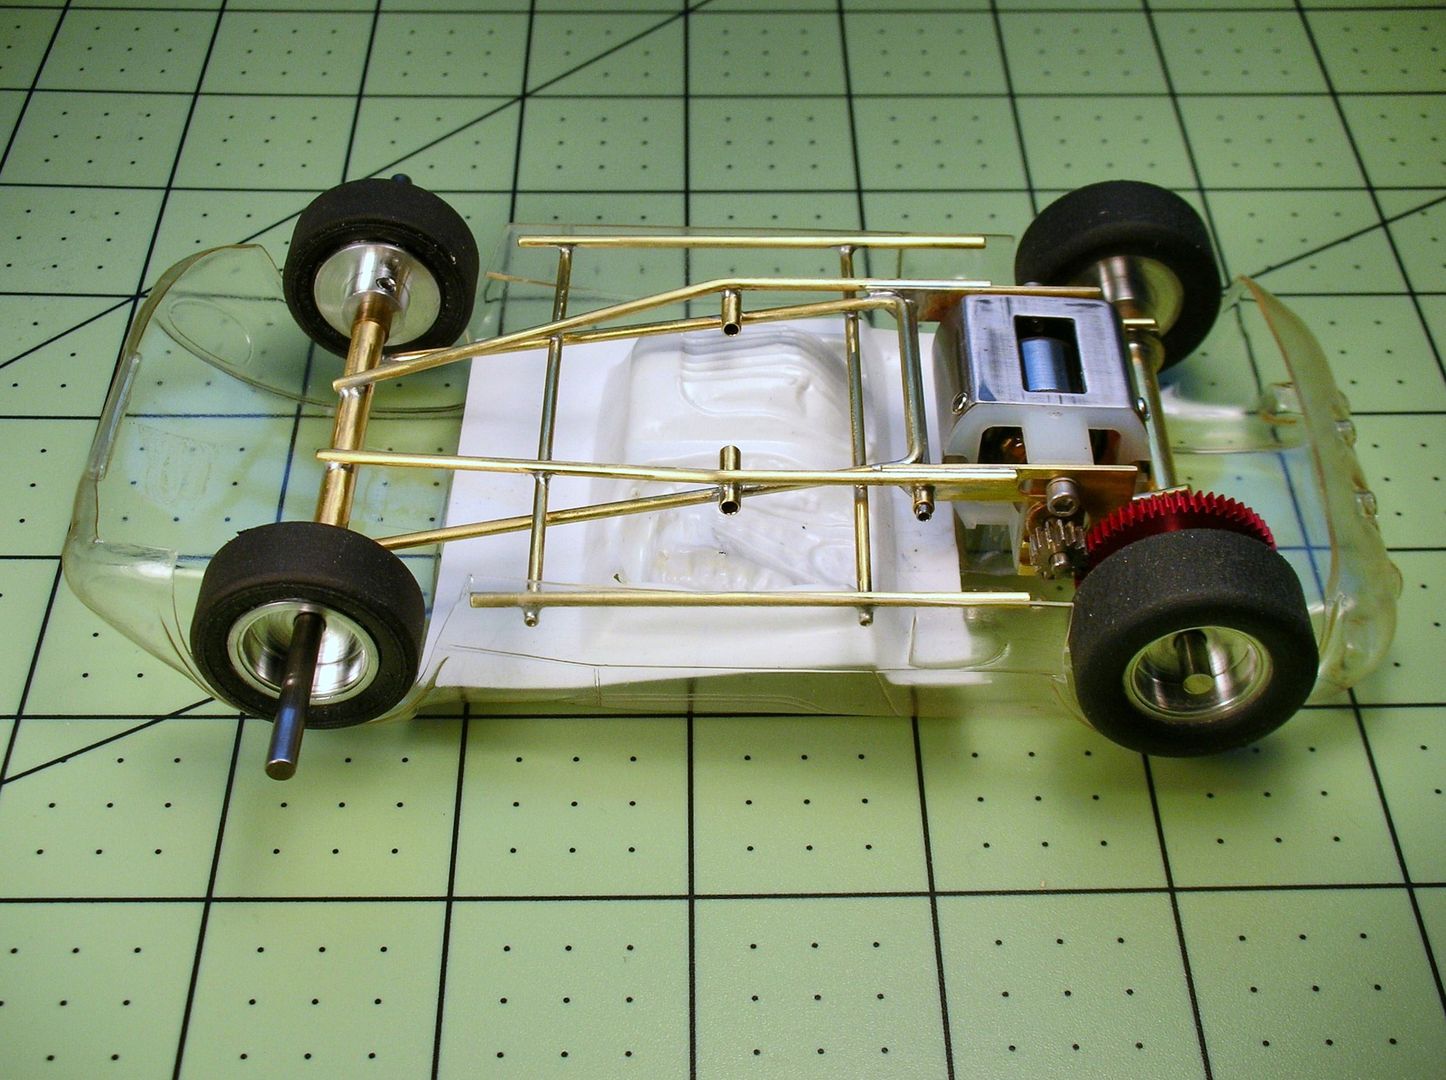
With my Dynamic Mirage finished I'm finally back on this project. ![]() I want this chassis to be a "pre-jail door" design.....a "space frame".
I want this chassis to be a "pre-jail door" design.....a "space frame".
Here's my progress so far:
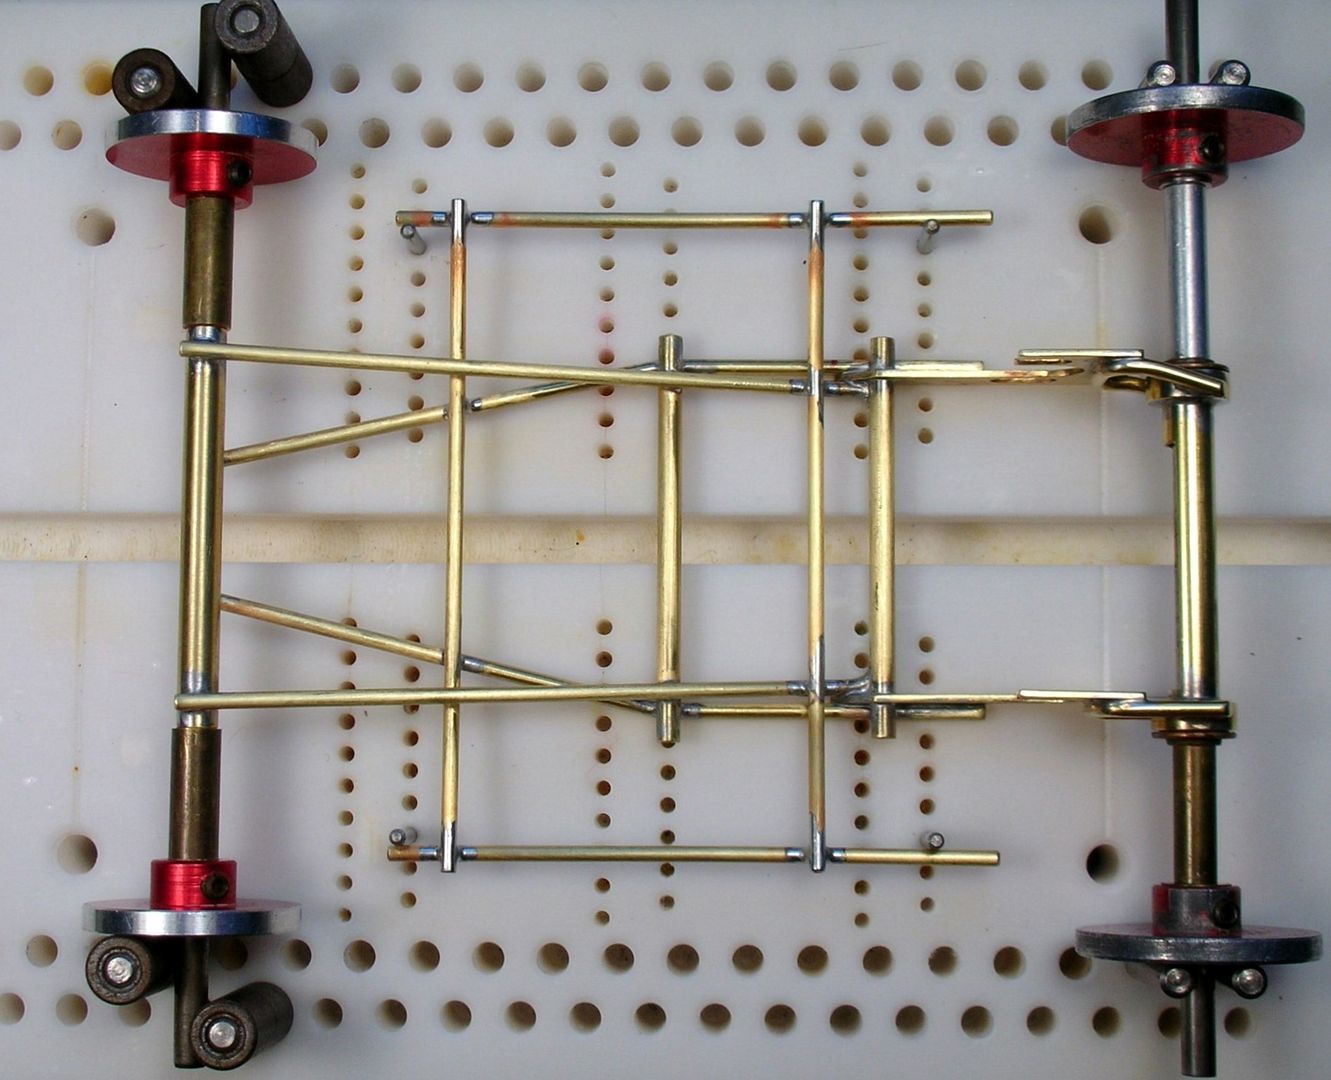
A "swinging pickup" is next..........
- Jairus, slotbaker, Jencar17 and 5 others like this
Rick Thigpen
Check out Steve Okeefe's great web site at its new home here at Slotblog:
The Independent Scratchbuilder
There's much more to come...
#22

Posted 05 March 2017 - 10:35 AM
Period early 1964 is what I see, and wondered how progress was. Very clean work.
Clarification tho, only thing I am doing is the gold leaf and some hand lettering. Rick is painting that one himself. I already sent the vinyl number masks a long time ago with painting directions.
P.S. just to get back in practice, I put gold leaf numbers on a racing shell for Nesta just last week! ![]()
Jairus H Watson - Artist
Need something painted, soldered, carved, or killed? - jairuswtsn@aol.com
www.slotcarsmag.com
www.jairuswatson.net
http://www.ratholecustoms.com
Check out some of the cool stuff on my Fotki!
#23

Posted 05 March 2017 - 12:47 PM
Hi Jairus,
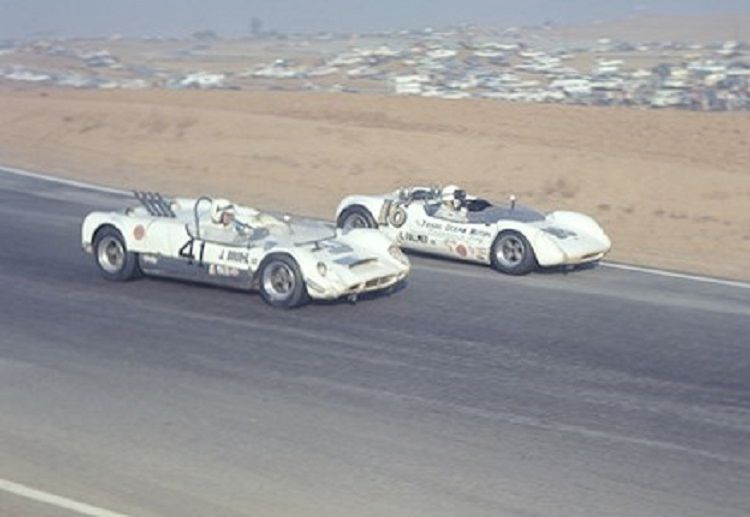
Thanks for your help with this project. I've always wanted to make this car. I never followed through with it because, in my mind's eye, it just had to have the the gold numbers and lettering on the sides of the body:
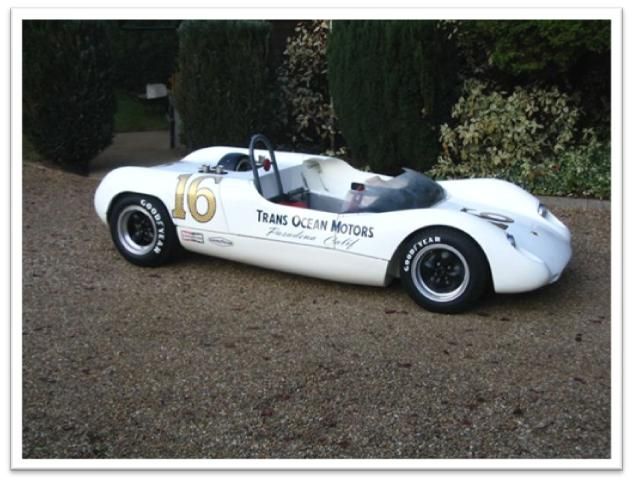
I watched Follmer race the car at Riverside International Raceway. The fabricator on Follmer's original car, Bruce Burness, did a lot of fabrication on my street-trans am Datsun 510 back in the day:
Here's the car mocked up to check that the interior clears the chassis and to set up the guide lead:
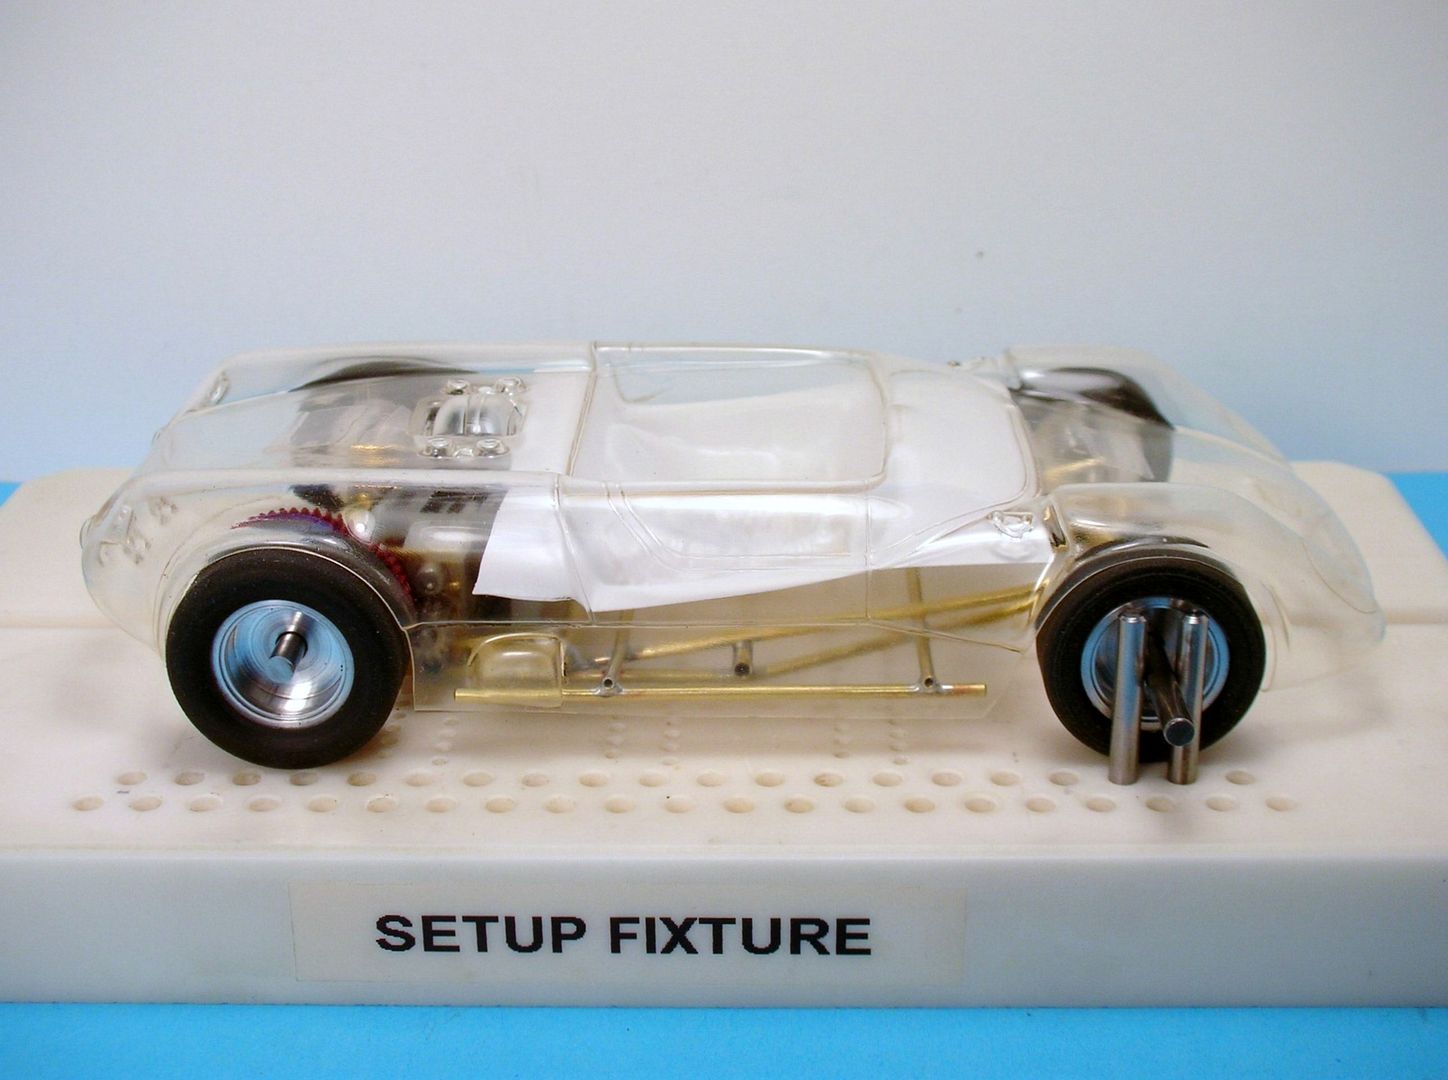
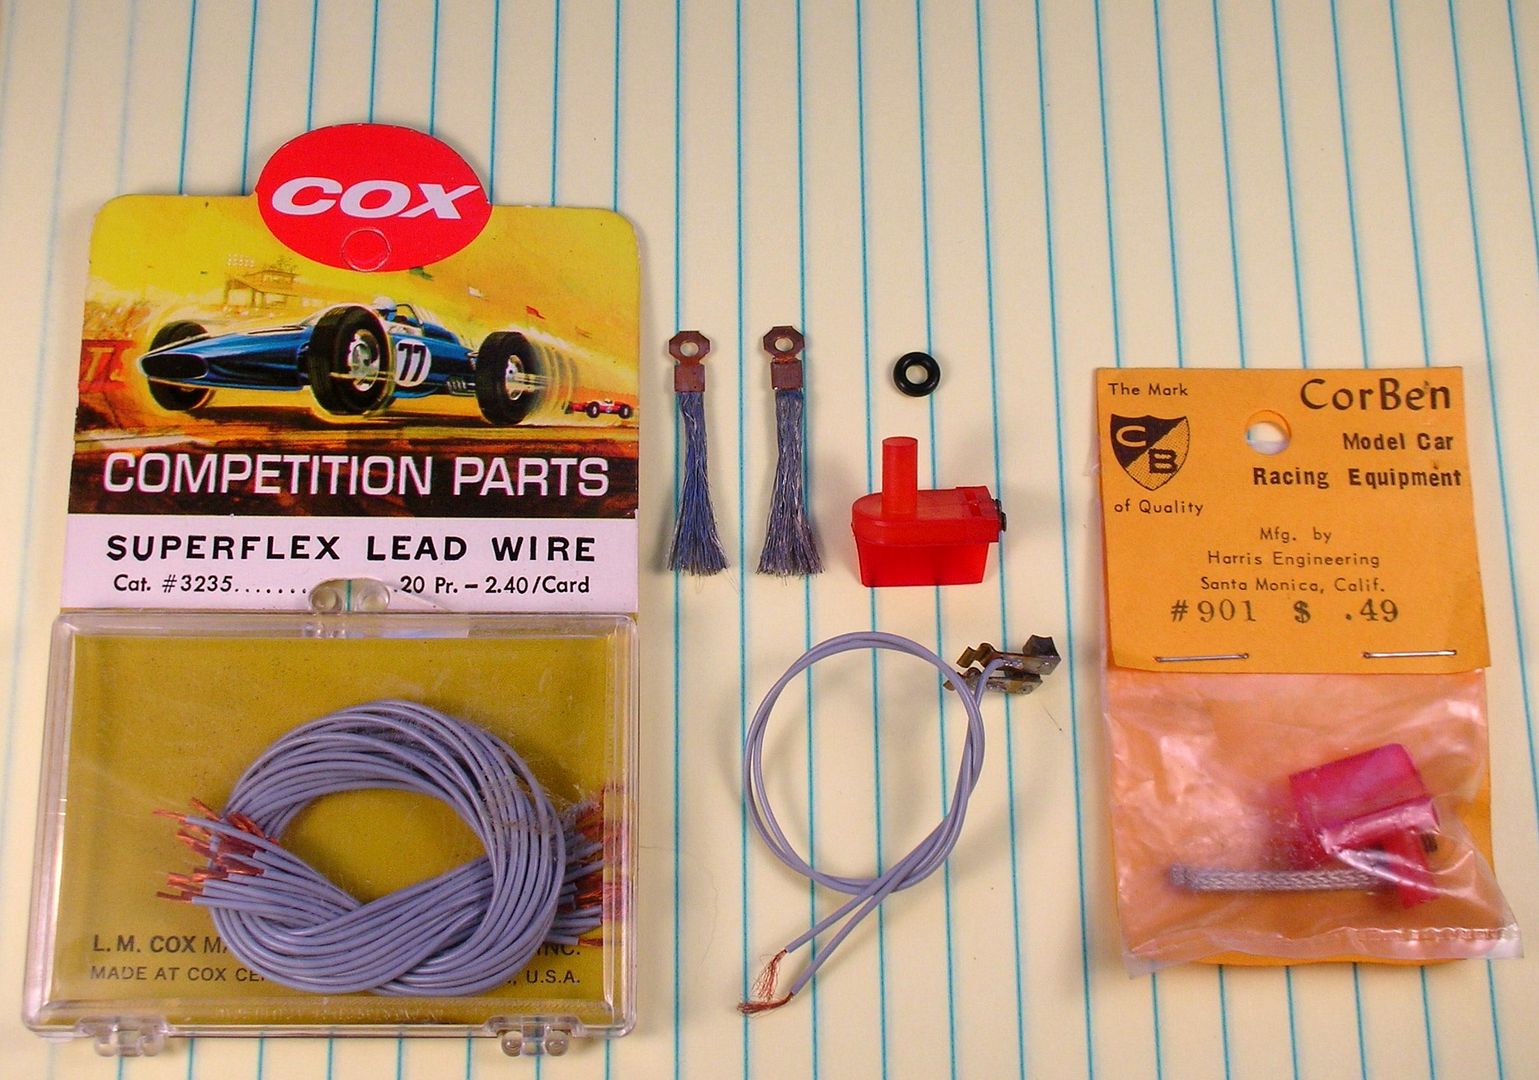
I have a bunch of these guides so that's what I'm going with. As a side note, period racer and magazine contributor Chris Chan used the CorBen guide on many of his builds. Not sure why but the guides blade is very deep>
- slotbaker, Jencar17 and Tex like this
Rick Thigpen
Check out Steve Okeefe's great web site at its new home here at Slotblog:
The Independent Scratchbuilder
There's much more to come...
#24

Posted 05 March 2017 - 07:20 PM
I was curious why the staggered axle jig pins up front in your post #21.
Now I see it - the WB is a "bastard" size - am I correct ?
Paul Wolcott
#25

Posted 05 March 2017 - 07:33 PM
Hi Pablo,
A bastard length wheelbase alright......3 11/16" which works out to a scale 88 1/2". Lotus 23's are supposed to have a 90" (3 3/4") wheelbase but the shorter length fit's my body.
Rick Thigpen
Check out Steve Okeefe's great web site at its new home here at Slotblog:
The Independent Scratchbuilder
There's much more to come...


