Jump to content


Photo

Thingie body and chassis build - Bullet


  • Please log in to reply
31 replies to this topic

#1 Pablo

Pablo

    Builder

  • Administrator
  • PipPipPipPipPipPipPipPip
  • 18,465 posts
  • Joined: 20-February 06
  • Gender:Male
  • Location:Cleveland, Tennessee

Posted 11 March 2018 - 07:50 PM

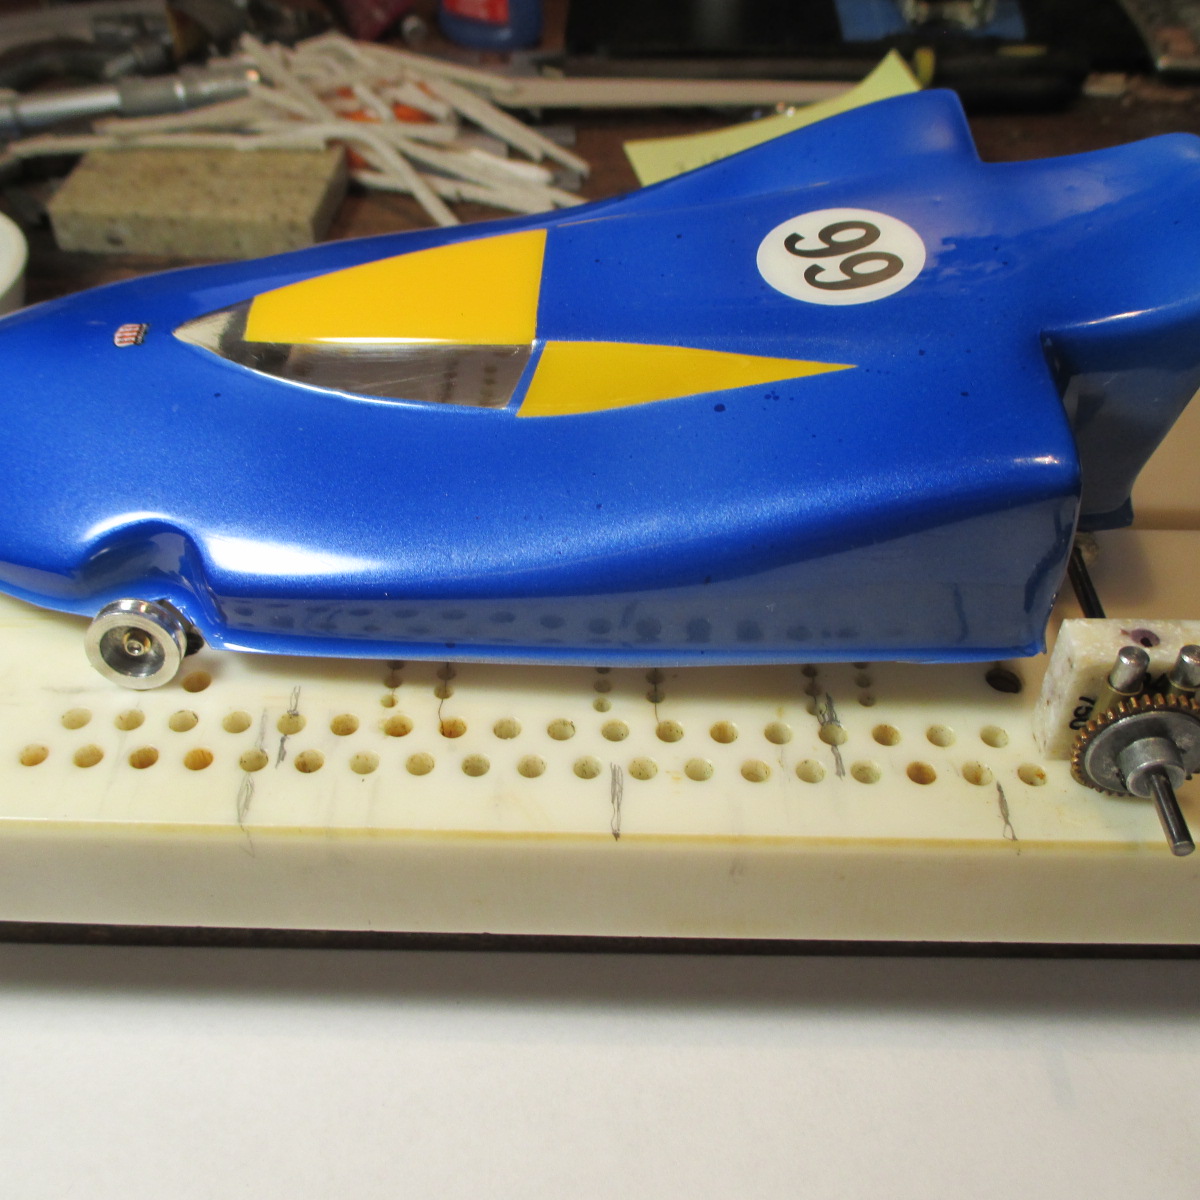
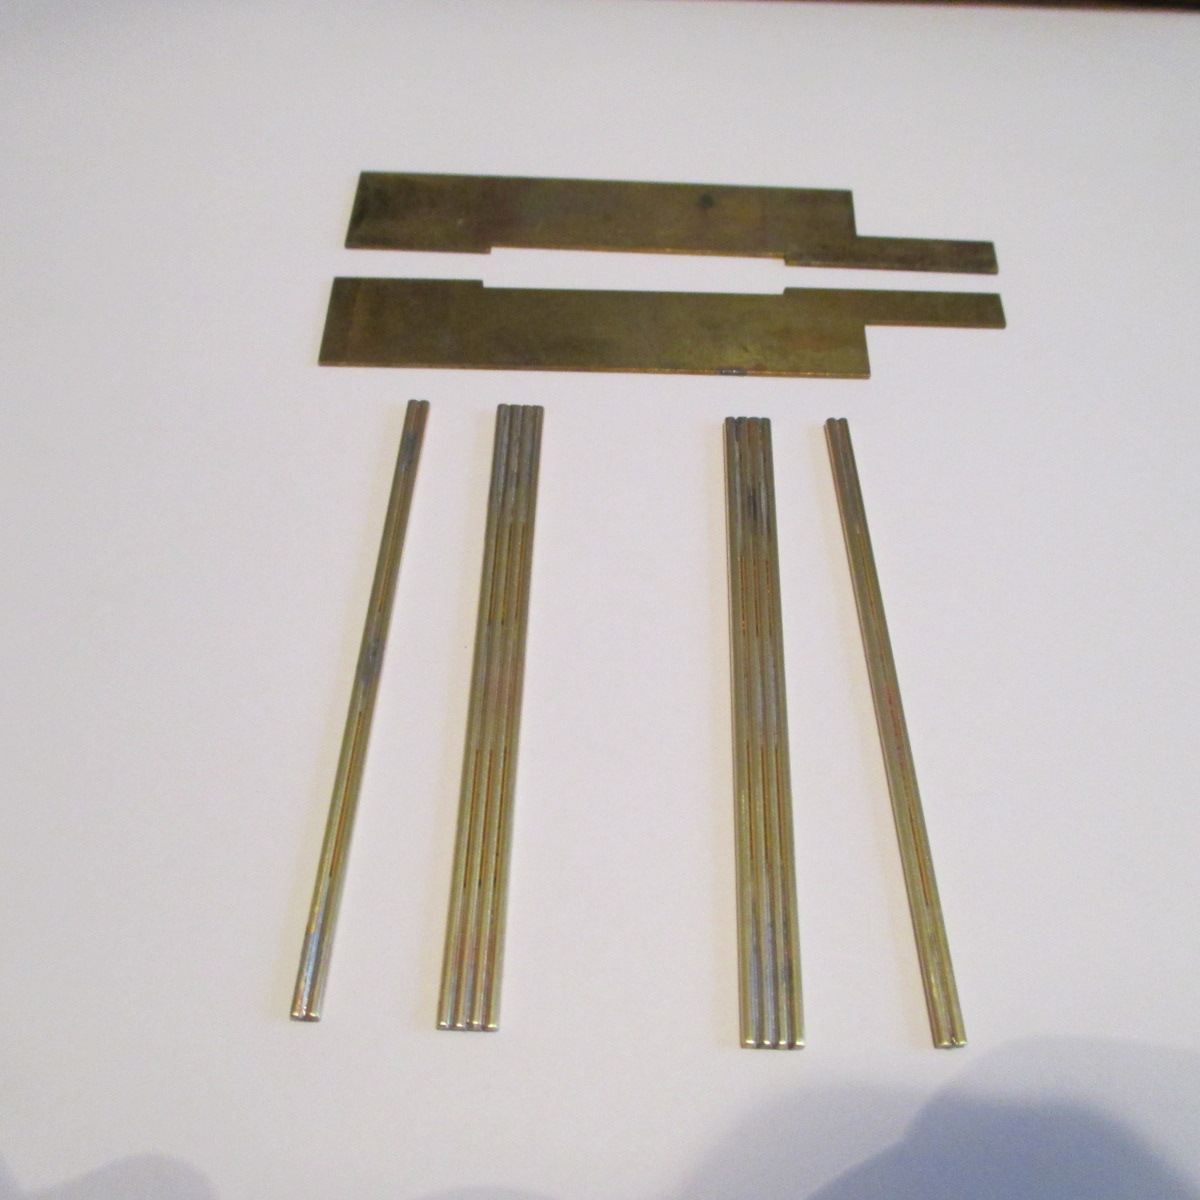
I dug this Shinoda Bullet - style Thingie body of out the dust.

Don't know where it came from or who pulled it. It's about 12 thou thick.

It is definitely not a Gene/Z1R body, but still a nice piece


IMG_8768.JPG


I'll decal it, paint it, make a custom inline chassis for it, and put it up for sale.

Owner supplies parts, assembles, and finishes it.


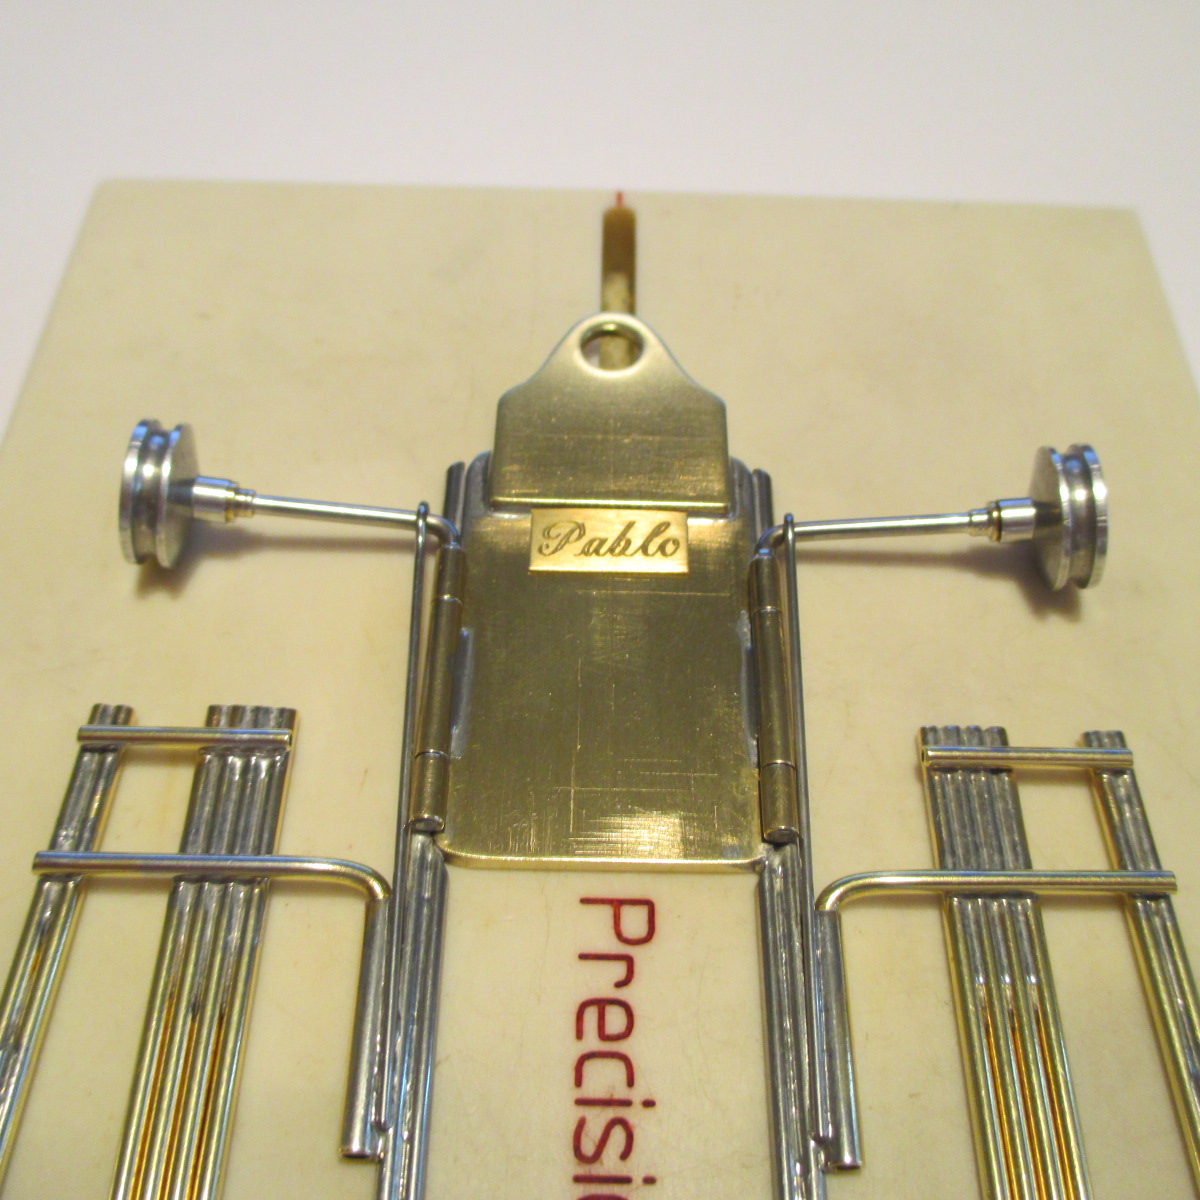
Wheelbase 4 1/2". guide lead 3/4".

Rear wheel width 3 1/8", front width 2 7/8".

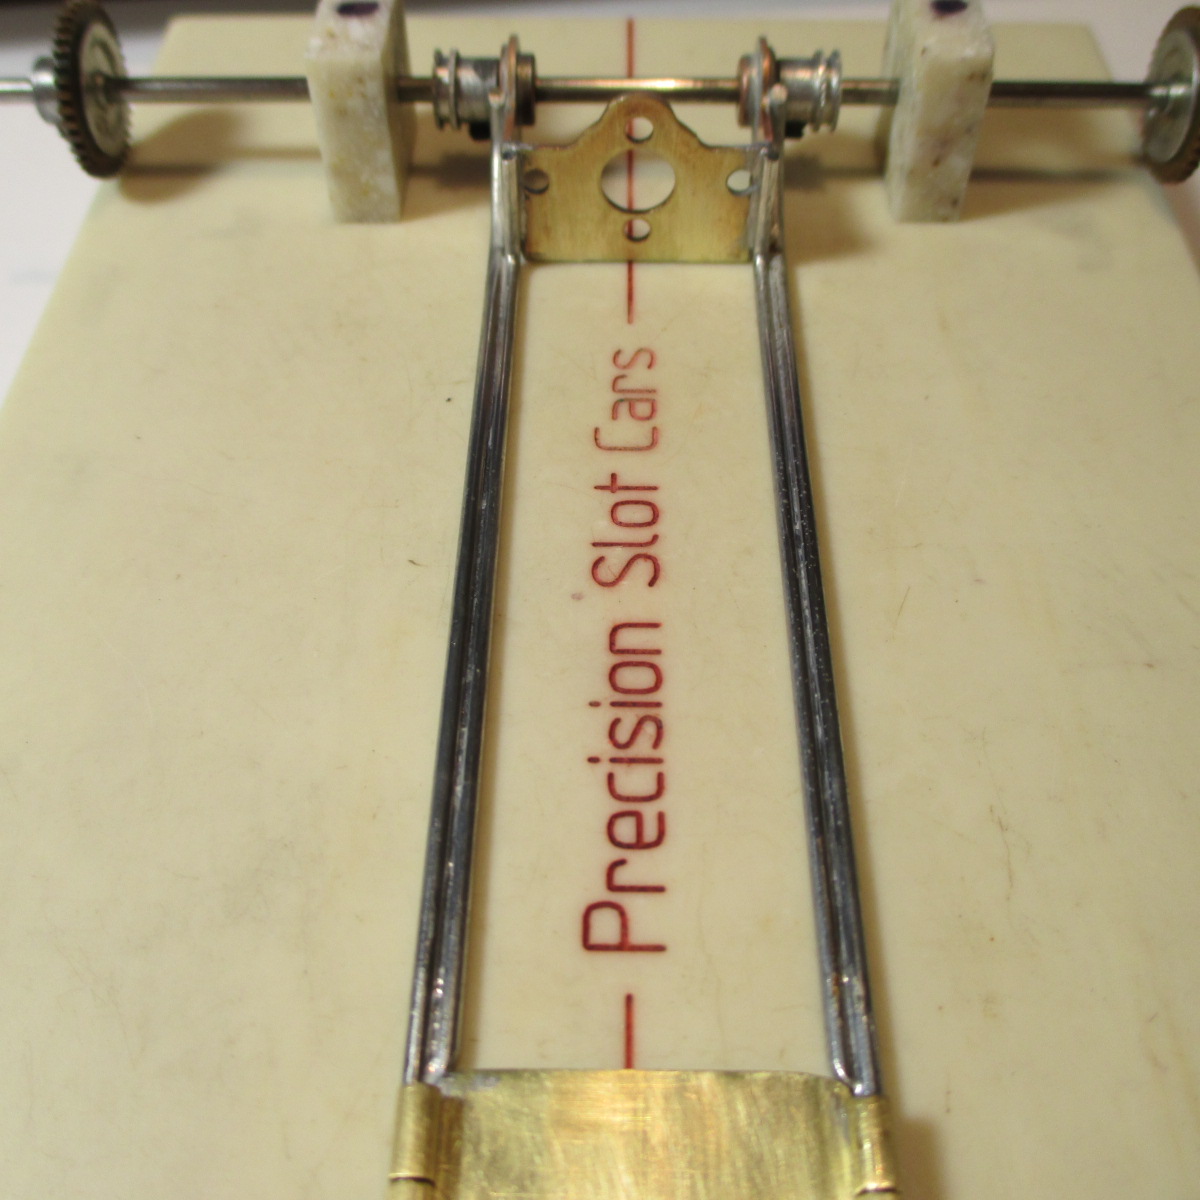
REHCO motor bracket for any FT-16D endbell drive motor (3/32 bushings will be supplied and soldered in).

Rear wheels .765" OD, 5/8" wide, overall width .775".

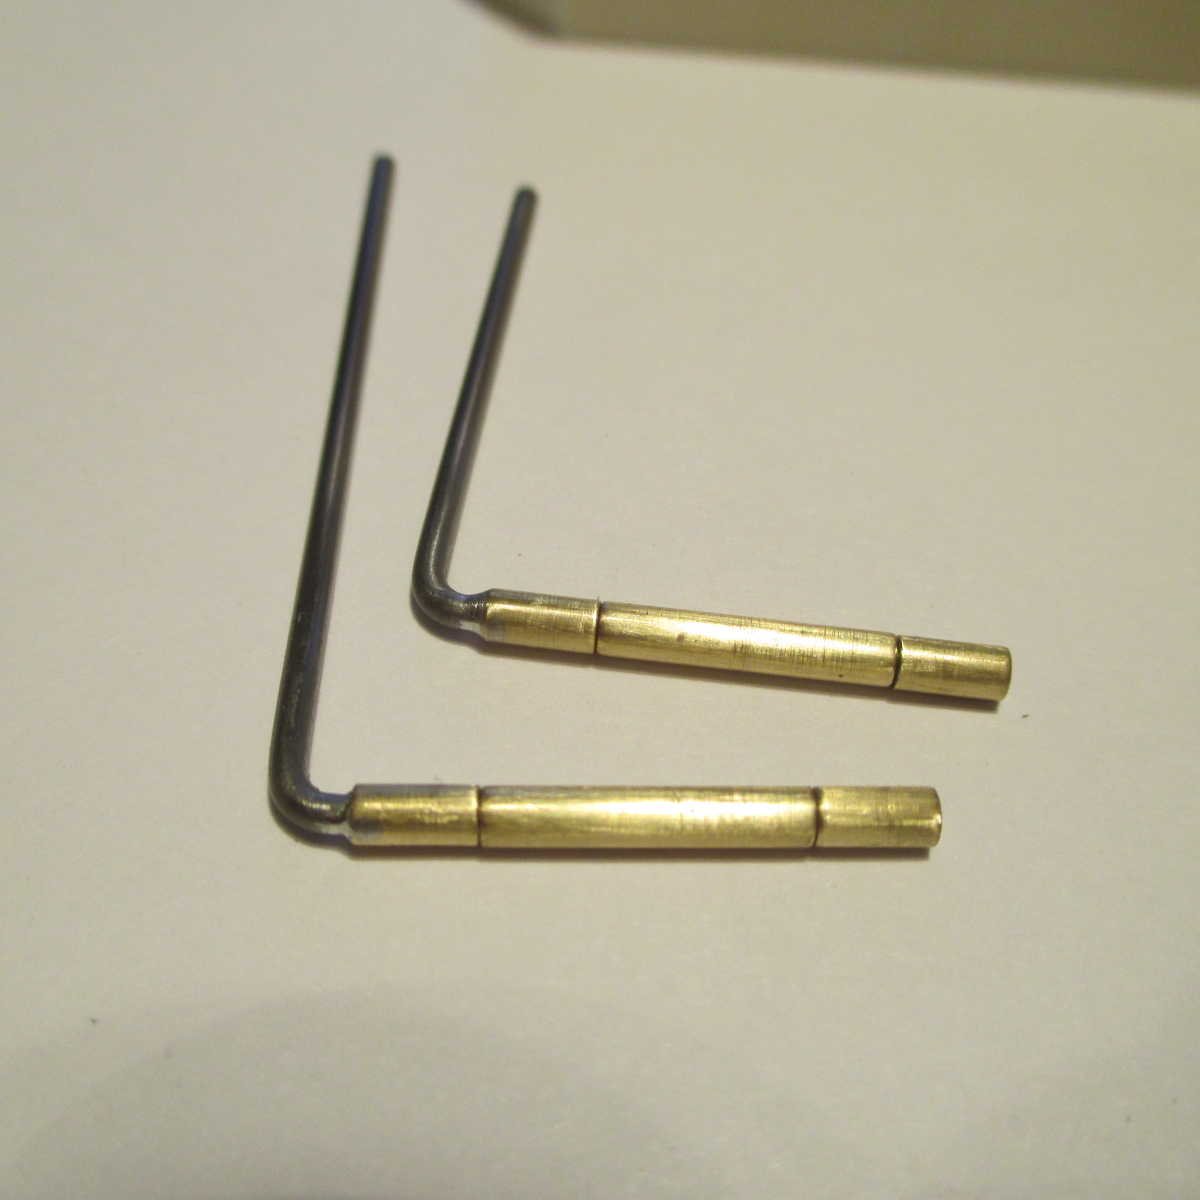
Front wheels 1/2" OD O-rings on 1/16" axle. (supplied and soldered on).

Clearances .050" rear, .032" front.

Any crown gear of 48P, 28T or less will clear .032".

Flag- Jet Flag or any with a deck height of 1/16".


  • Jencar17, MSwiss and olescratch like this

Paul Wolcott


#2 Pablo

Pablo

    Builder

  • Administrator
  • PipPipPipPipPipPipPipPip
  • 18,465 posts
  • Joined: 20-February 06
  • Gender:Male
  • Location:Cleveland, Tennessee

Posted 12 March 2018 - 09:06 PM

Decals are inside, of course. Is it #99, or #66? It's a Thingie, it's whatever you want it to be.

3 coats of Model Master acrylic Metallic Arctic blue (sorry for the freckles) :pardon:


IMG_8797.JPG


  • Jencar17, MSwiss and Jaeger Team like this

Paul Wolcott


#3 Racer36

Racer36

    Checkered Flag in Hand

  • Full Member
  • PipPipPipPipPipPip
  • 1,394 posts
  • Joined: 27-January 25
  • Gender:Male
  • Location:Ontario, Canada

Posted 13 March 2018 - 06:35 AM

I have a pink can Cukras motor that would look right at home under that rascal.......


Dennis Dominey

#4 Jairus

Jairus

    Body Painter Extraordinaire

  • Subscriber
  • PipPipPipPipPipPipPipPip
  • 10,174 posts
  • Joined: 16-February 06
  • Gender:Male
  • Location:Salem, OR

Posted 13 March 2018 - 10:16 AM

Paul, again you surprise me and paint the body first.  Looks GREAT, but hope you don't scratch it up getting her mounted.

BTW, she looks very period correct!  :good:


Jairus H Watson - Artist
Need something painted, soldered, carved, or killed? - jairuswtsn@aol.com

www.slotcarsmag.com

www.jairuswatson.net
http://www.ratholecustoms.com
Check out some of the cool stuff on my Fotki!


#5 Pablo

Pablo

    Builder

  • Administrator
  • PipPipPipPipPipPipPipPip
  • 18,465 posts
  • Joined: 20-February 06
  • Gender:Male
  • Location:Cleveland, Tennessee

Posted 13 March 2018 - 09:16 PM

Thanks guys! :)

Body mounting won't be a problem:

-Paint is 6 dried coats of blue backed up with white - it's hard and strong.

-Skirts are a straight taper from 3.00" aft of the front axle to 3.125 at the bracket, so it's an easy deal.

-I won't be mounting it :dance3:


Tongue platform is a .920" wide (matches the bracket width) chunk of 1/16" brass sheet.

Outer edges are tapered to promote solder pooling with the rail connections a la dc-65x.

(not concerned about strength - I just like to watch solder flow :sun_bespectacled:)


I'll use a Cobra tongue. They need to be trimmed to work with Jet Flags.

A combination of disc sander, Dremel abrasive wheels, sandpapers, and elbow grease fixes it.

Flag shaft hole slightly enlarged with a 3/16 chainsaw round file then smoothed with 400 wet/dry


IMG_8809.JPG


  • Jencar17 likes this

Paul Wolcott


#6 Pablo

Pablo

    Builder

  • Administrator
  • PipPipPipPipPipPipPipPip
  • 18,465 posts
  • Joined: 20-February 06
  • Gender:Male
  • Location:Cleveland, Tennessee

Posted 14 March 2018 - 12:16 AM

REHCO bracket is .032 brass, therefore doesn't need much additional bracing like an .025 Russkit.

One .047 wire "U" brace should be enough


IMG_8820.JPG


  • Jairus, Jencar17 and Jaeger Team like this

Paul Wolcott


#7 Pablo

Pablo

    Builder

  • Administrator
  • PipPipPipPipPipPipPipPip
  • 18,465 posts
  • Joined: 20-February 06
  • Gender:Male
  • Location:Cleveland, Tennessee

Posted 14 March 2018 - 06:33 PM

Tongue tools: calculator, and digital calipers which do double-duty as a scratch awl :hi:


IMG_8821.JPG


I needed a gizmo of about 7 thou to compensate for the .050/.032 clearance slope.

A piece of a Cox quickchange clip did the trick


IMG_8828.JPG


I've heard some say "never mix solder types" :laugh2: I do it all the time, and I run with scissors :secret:

Mating surfaces tinned with Koford silver solder


IMG_8831.JPG


Acid bath, minitorch, ice pick, and some short pieces of .032 60/40 at the edges to get things flowing


IMG_8834.JPG


  • Jencar17 likes this

Paul Wolcott


#8 Pablo

Pablo

    Builder

  • Administrator
  • PipPipPipPipPipPipPipPip
  • 18,465 posts
  • Joined: 20-February 06
  • Gender:Male
  • Location:Cleveland, Tennessee

Posted 14 March 2018 - 06:39 PM

My completed chunk and tongue with a hair of tilt


IMG_8835.JPG


If the Cobra is trimmed right, the flag stops at about 45 degrees


IMG_8845.JPG


  • Jencar17 and Jaeger Team like this

Paul Wolcott


#9 Pablo

Pablo

    Builder

  • Administrator
  • PipPipPipPipPipPipPipPip
  • 18,465 posts
  • Joined: 20-February 06
  • Gender:Male
  • Location:Cleveland, Tennessee

Posted 14 March 2018 - 08:01 PM

Parma #625 3/32 oilites soldered in using an oversized gage pin for perfect alignment


IMG_8848.JPG


  • Jairus, Jencar17 and Samiam like this

Paul Wolcott


#10 Pablo

Pablo

    Builder

  • Administrator
  • PipPipPipPipPipPipPipPip
  • 18,465 posts
  • Joined: 20-February 06
  • Gender:Male
  • Location:Cleveland, Tennessee

Posted 15 March 2018 - 11:27 AM

I mis-calculated the rear wheel OD, it will be .765" NOT .790


That will make the bracket face straight vertical and the motor sits level at ground zero.

Rear clearance still .050" and a 28T crown will be the best choice.


Paul Wolcott


#11 Pablo

Pablo

    Builder

  • Administrator
  • PipPipPipPipPipPipPipPip
  • 18,465 posts
  • Joined: 20-February 06
  • Gender:Male
  • Location:Cleveland, Tennessee

Posted 15 March 2018 - 05:41 PM

Pre-tinned 1/16 wire rails to start


IMG_8849.JPG


  • Jairus, Jencar17, olescratch and 1 other like this

Paul Wolcott


#12 Pablo

Pablo

    Builder

  • Administrator
  • PipPipPipPipPipPipPipPip
  • 18,465 posts
  • Joined: 20-February 06
  • Gender:Male
  • Location:Cleveland, Tennessee

Posted 15 March 2018 - 09:02 PM

The understated beauty of a thingie is, pure engineering without restraints.

I made my front axles without having to check a ruleset for compliance :)


IMG_8852.JPG


IMG_8858.JPG


  • Jencar17 likes this

Paul Wolcott


#13 Pablo

Pablo

    Builder

  • Administrator
  • PipPipPipPipPipPipPipPip
  • 18,465 posts
  • Joined: 20-February 06
  • Gender:Male
  • Location:Cleveland, Tennessee

Posted 16 March 2018 - 03:35 PM

Hand me the ATF, Bunky, we DON'T want solder wicking into the hinge :crazy:


IMG_8865.JPG


  • Jencar17 likes this

Paul Wolcott


#14 Pablo

Pablo

    Builder

  • Administrator
  • PipPipPipPipPipPipPipPip
  • 18,465 posts
  • Joined: 20-February 06
  • Gender:Male
  • Location:Cleveland, Tennessee

Posted 16 March 2018 - 05:31 PM

To make the body mounts form fit the body, I marked three points, fore, amidships, and aft.

Fore and aft mark the horizontal limits at 3.313 (3 5/16").

Fore width is 2.940, amidships is 3.115, and aft is 3.180"


The indented pencil marks are the pin tube locations at 2.5" apart


IMG_8866.JPG


  • Jencar17 likes this

Paul Wolcott


#15 Pablo

Pablo

    Builder

  • Administrator
  • PipPipPipPipPipPipPipPip
  • 18,465 posts
  • Joined: 20-February 06
  • Gender:Male
  • Location:Cleveland, Tennessee

Posted 16 March 2018 - 07:03 PM

Inner rails are .055. For this car, I think twin .063/.055 are enough, so rails are done


IMG_8870.JPG


  • Jairus, Jencar17 and mike1972chev like this

Paul Wolcott


#16 Pablo

Pablo

    Builder

  • Administrator
  • PipPipPipPipPipPipPipPip
  • 18,465 posts
  • Joined: 20-February 06
  • Gender:Male
  • Location:Cleveland, Tennessee

Posted 17 March 2018 - 04:25 PM

My 1/16 brass rod pan pieces. Just for fun, I compared weight with .032 brass sheet pans.

Sheet: 20 grams

Rod: 18 grams


Pretty much the same. But mine are old skool :D


IMG_8875.JPG


  • Jencar17 likes this

Paul Wolcott


#17 Pablo

Pablo

    Builder

  • Administrator
  • PipPipPipPipPipPipPipPip
  • 18,465 posts
  • Joined: 20-February 06
  • Gender:Male
  • Location:Cleveland, Tennessee

Posted 18 March 2018 - 07:07 PM

Rick's Jig is my best friend here


IMG_8879.JPG


  • Jairus and Jencar17 like this

Paul Wolcott


#18 Pablo

Pablo

    Builder

  • Administrator
  • PipPipPipPipPipPipPipPip
  • 18,465 posts
  • Joined: 20-February 06
  • Gender:Male
  • Location:Cleveland, Tennessee

Posted 19 March 2018 - 08:01 PM

Split .055 wire bite bars, .039 wire down stops, brass pin tube body mounts.

Lift is .025"


IMG_8885.JPG


  • Jencar17 likes this

Paul Wolcott


#19 Pablo

Pablo

    Builder

  • Administrator
  • PipPipPipPipPipPipPipPip
  • 18,465 posts
  • Joined: 20-February 06
  • Gender:Male
  • Location:Cleveland, Tennessee

Posted 19 March 2018 - 08:26 PM

A pair of Montague-style .032 wire springs for the front axle.

Time for a cleanup and overnight tumble


IMG_8894.JPG


  • Jencar17 and olescratch like this

Paul Wolcott


#20 Pablo

Pablo

    Builder

  • Administrator
  • PipPipPipPipPipPipPipPip
  • 18,465 posts
  • Joined: 20-February 06
  • Gender:Male
  • Location:Cleveland, Tennessee

Posted 20 March 2018 - 09:18 AM

Done


IMG_8909.JPG


IMG_8906.JPG


IMG_8903.JPG


  • Jencar17 and miko like this

Paul Wolcott


#21 Pablo

Pablo

    Builder

  • Administrator
  • PipPipPipPipPipPipPipPip
  • 18,465 posts
  • Joined: 20-February 06
  • Gender:Male
  • Location:Cleveland, Tennessee

Posted 20 March 2018 - 09:19 AM

IMG_8898.JPG


IMG_8899.JPG


IMG_8901.JPG


  • Jencar17 and miko like this

Paul Wolcott


#22 Jairus

Jairus

    Body Painter Extraordinaire

  • Subscriber
  • PipPipPipPipPipPipPipPip
  • 10,174 posts
  • Joined: 16-February 06
  • Gender:Male
  • Location:Salem, OR

Posted 20 March 2018 - 09:41 AM

Looking very thingie like!  
 

2v2JAfsCTxubMLY.jpg


Jairus H Watson - Artist
Need something painted, soldered, carved, or killed? - jairuswtsn@aol.com

www.slotcarsmag.com

www.jairuswatson.net
http://www.ratholecustoms.com
Check out some of the cool stuff on my Fotki!


#23 mike1972chev

mike1972chev

    On The Lead Lap

  • Full Member
  • PipPipPipPip
  • 304 posts
  • Joined: 02-April 17
  • Gender:Male
  • Location:Indy

Posted 20 March 2018 - 10:06 AM

Pablo, on 17 Mar 2018 - 9:25 PM, said:

My 1/16 brass rod pan pieces. Just for fun, I compared weight with .032 brass sheet pans.

Sheet: 20 grams

Rod: 18 grams


Pretty much the same. But mine are old skool :D


attachicon.gifIMG_8875.JPG


Quick question Mr. Pablo. Do you think using the brass rod  over the brass sheet would have any different handling characteristics in the finished car???(or vise versa???)


Michael J. Boruff


#24 Racer36

Racer36

    Checkered Flag in Hand

  • Full Member
  • PipPipPipPipPipPip
  • 1,394 posts
  • Joined: 27-January 25
  • Gender:Male
  • Location:Ontario, Canada

Posted 20 March 2018 - 10:12 AM

When will this gem hit the auction block?


Dennis Dominey

#25 Pablo

Pablo

    Builder

  • Administrator
  • PipPipPipPipPipPipPipPip
  • 18,465 posts
  • Joined: 20-February 06
  • Gender:Male
  • Location:Cleveland, Tennessee

Posted 20 March 2018 - 10:20 AM

Michael, brass rods soldered together have a slightly higher center of gravity than pans, and take more time to make. I doubt the handling suffers much. Go back and look at the 1/16 rod outriggers on my Ursaner Lotus Sports car - it handled like a million bucks.


Dennis, as soon as the JB Weld on the Pablo engraving dries, and I take a couple final photos showing how she form fits the body, it will be on Swap Shop. Probably in about 6 hours. Unless she gets spoken for before then, which wouldn't surprize me :)


  • Jaeger Team and mike1972chev like this

Paul Wolcott


Electric Dreams Online Shop