Jump to content


Photo

Ferrari V12 Grand Prix Chris Amon replica car


  • Please log in to reply
65 replies to this topic

#1 Pablo

Pablo

    Builder

  • Administrator
  • PipPipPipPipPipPipPipPip
  • 18,375 posts
  • Joined: 20-February 06
  • Gender:Male
  • Location:Cleveland, Tennessee

Posted 02 July 2018 - 07:06 PM

My intention is to do a "body and chassis" for sale.

Or if somebody wants a complete car, I can do that also.


Body is a TrueScale Racing Lexan "TSR17 Ferrari F1 Dynamic".

Chassis will be a Pablo custom endbell drive jaildoor drop arm 1968 Pro-Era style


IMG_9888.JPG


  • Pete L., miko, C. J. Bupgoo and 1 other like this

Paul Wolcott


#2 Pablo

Pablo

    Builder

  • Administrator
  • PipPipPipPipPipPipPipPip
  • 18,375 posts
  • Joined: 20-February 06
  • Gender:Male
  • Location:Cleveland, Tennessee

Posted 02 July 2018 - 09:00 PM

Chassis specs:

WB 4", GL 15/16"

Track front and rear 3", skirt width 1.60" no taper

Rear wheels 7/8" OD, 5/8" width. Front wheels 3/4" OD, 3/16" width

Clearance 1/16" level

Flag deck height 1/16" (Jet Flag or equivalent)

Rear axle bushings: vintage Champion

Motor bracket: vintage genuine Russkit


Paul Wolcott


#3 Martin

Martin

    Posting Leader

  • Full Member
  • PipPipPipPipPipPipPip
  • 3,987 posts
  • Joined: 22-February 09
  • Gender:Male
  • Location:US

Posted 03 July 2018 - 12:41 AM

clapping.gif


Martin Windmill

#4 Pablo

Pablo

    Builder

  • Administrator
  • PipPipPipPipPipPipPipPip
  • 18,375 posts
  • Joined: 20-February 06
  • Gender:Male
  • Location:Cleveland, Tennessee

Posted 04 July 2018 - 06:38 AM

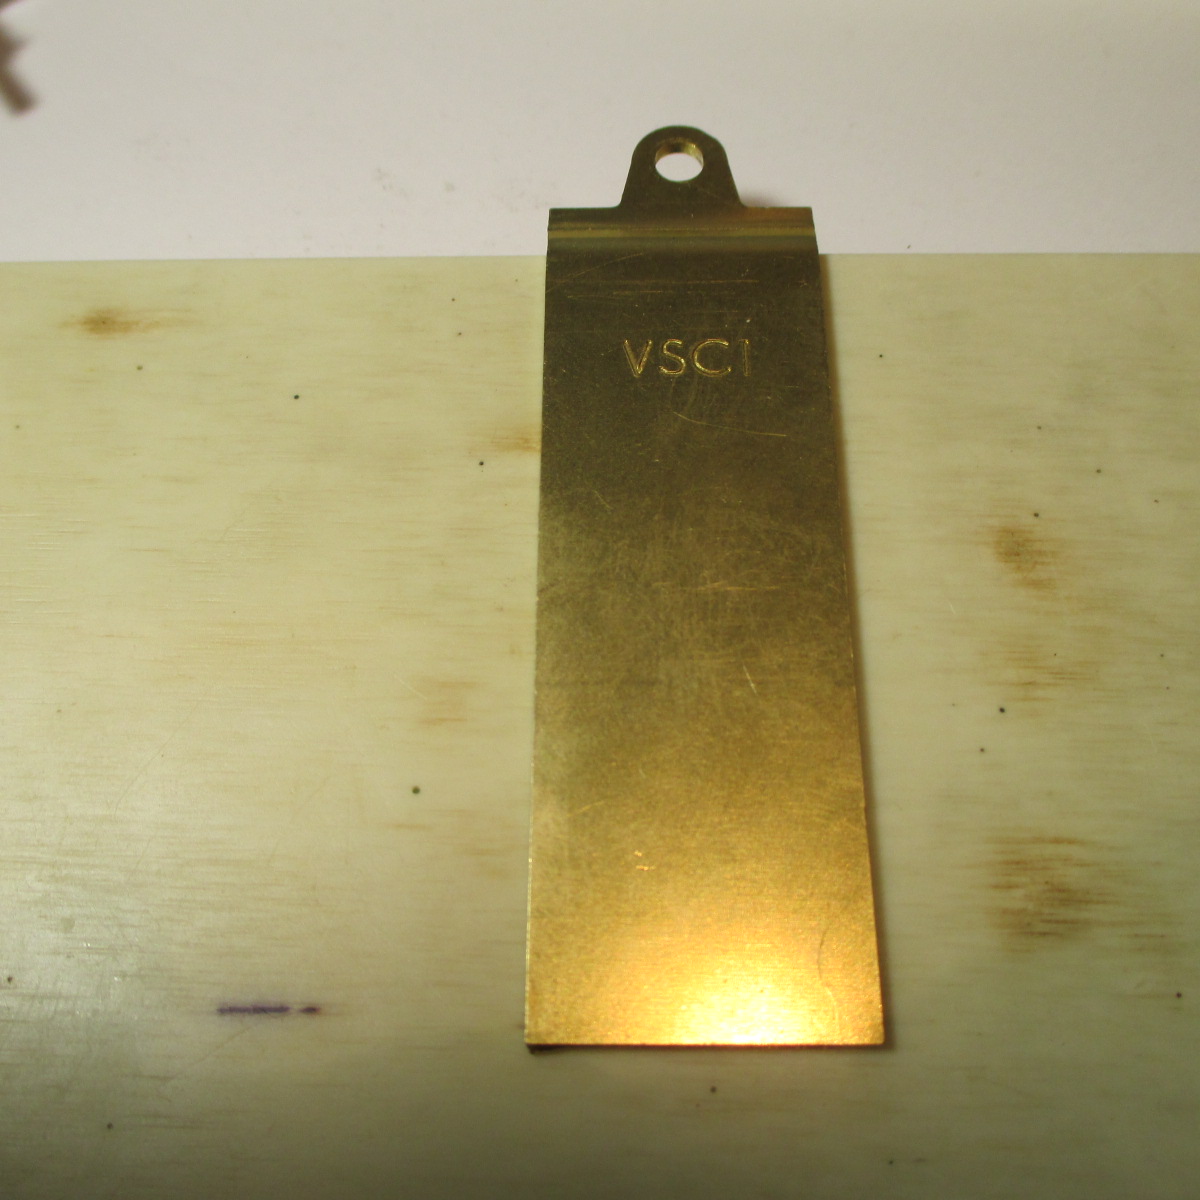
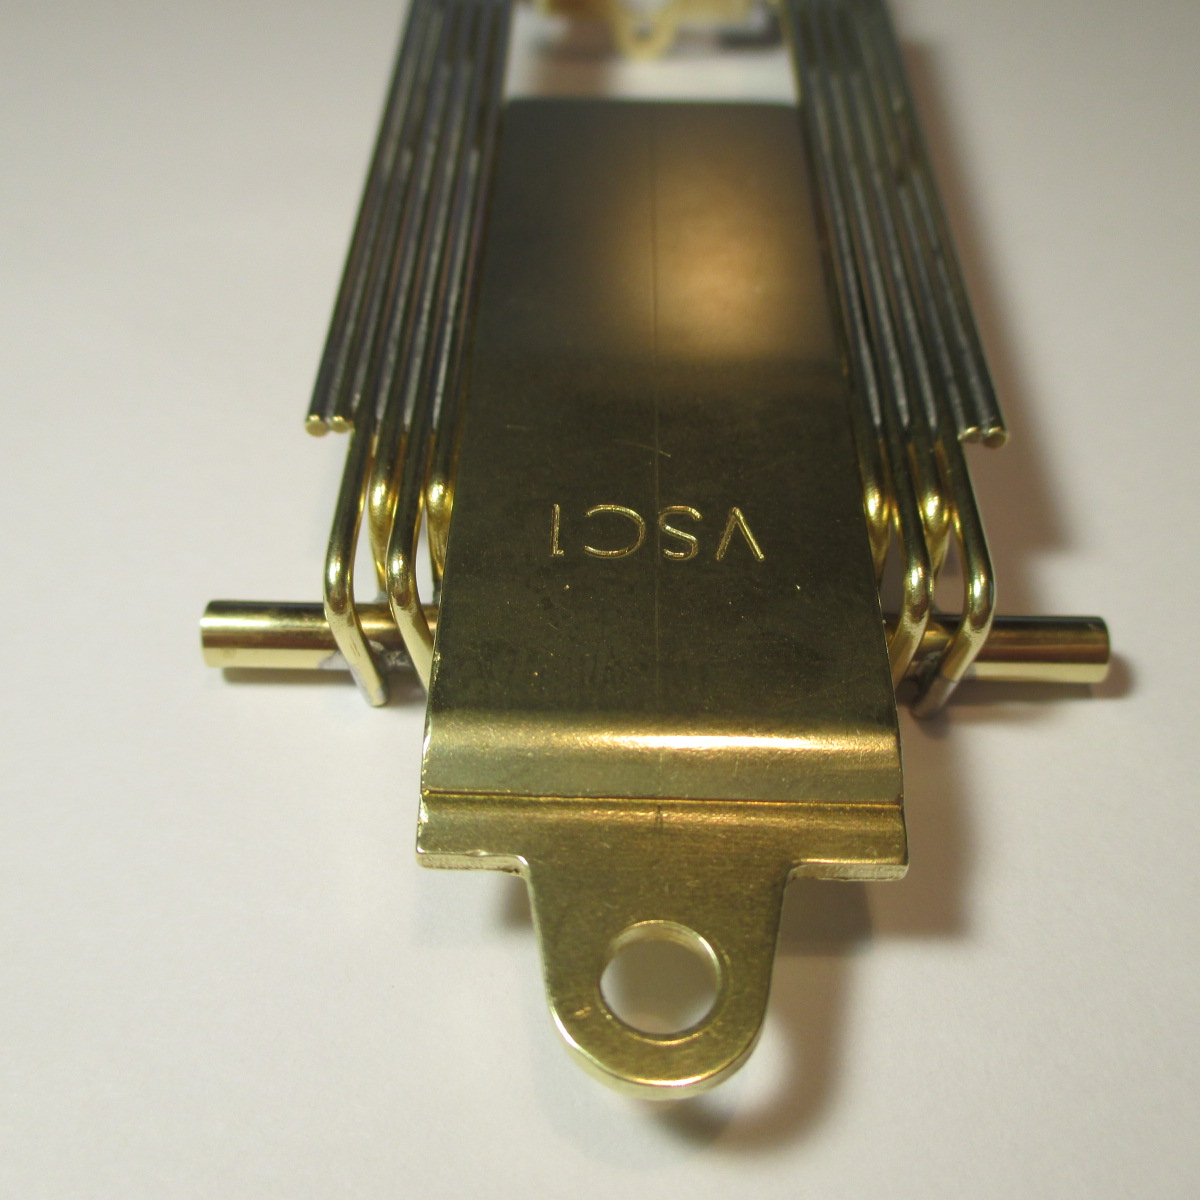
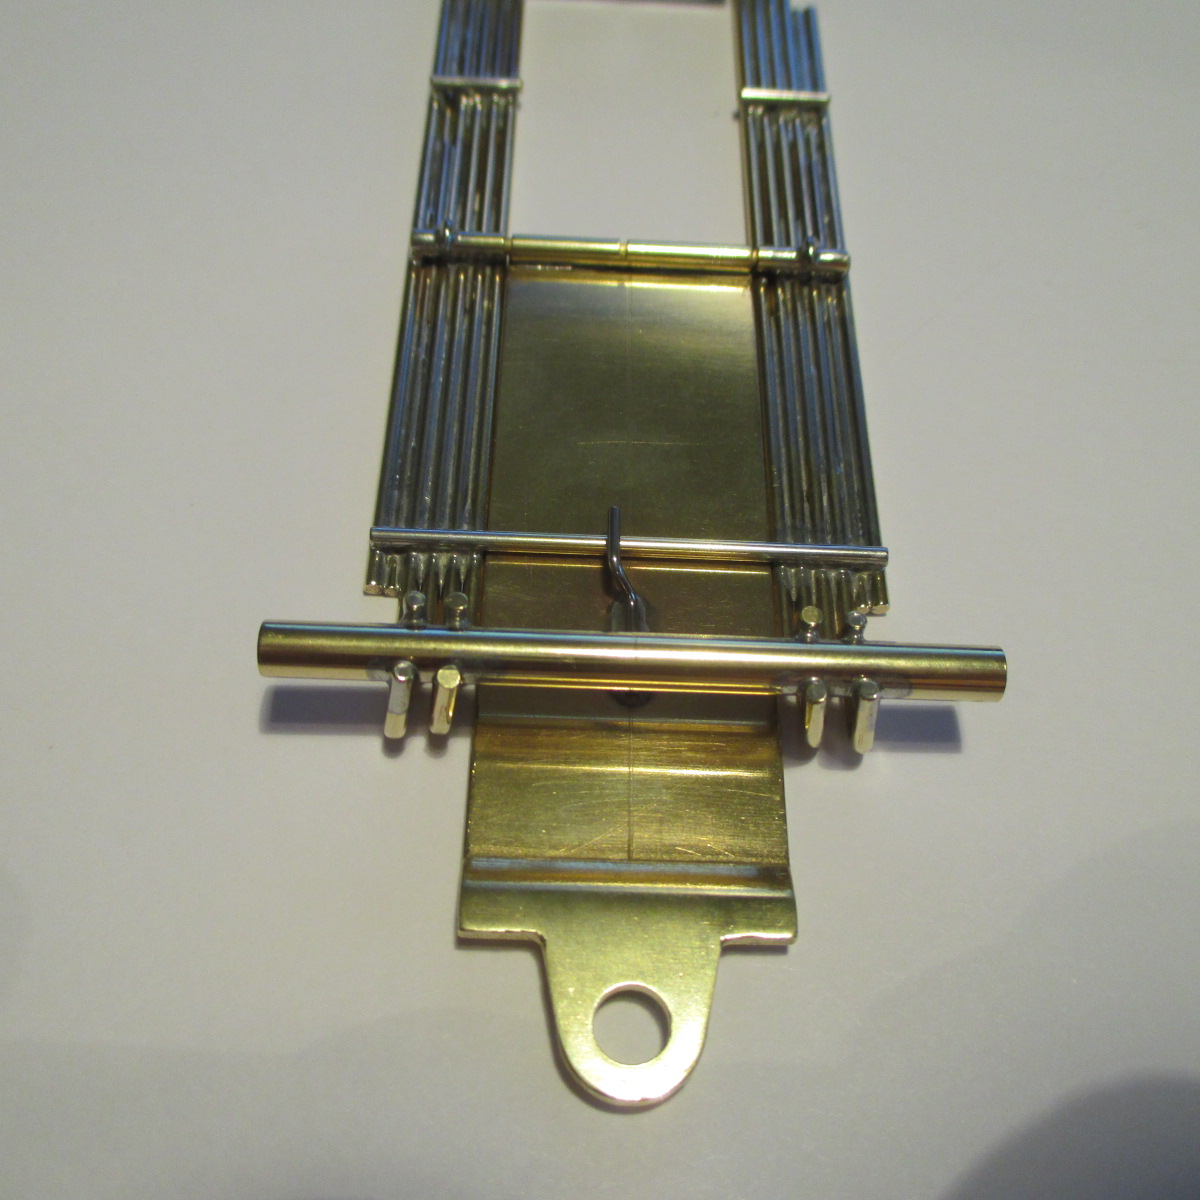
The doggone tangs on a Russkit bracket are only good for one thing - proving it's an authentic Russkit bracket :laugh2:
So here is the proof, before I start cutting :)


IMG_9896.JPG

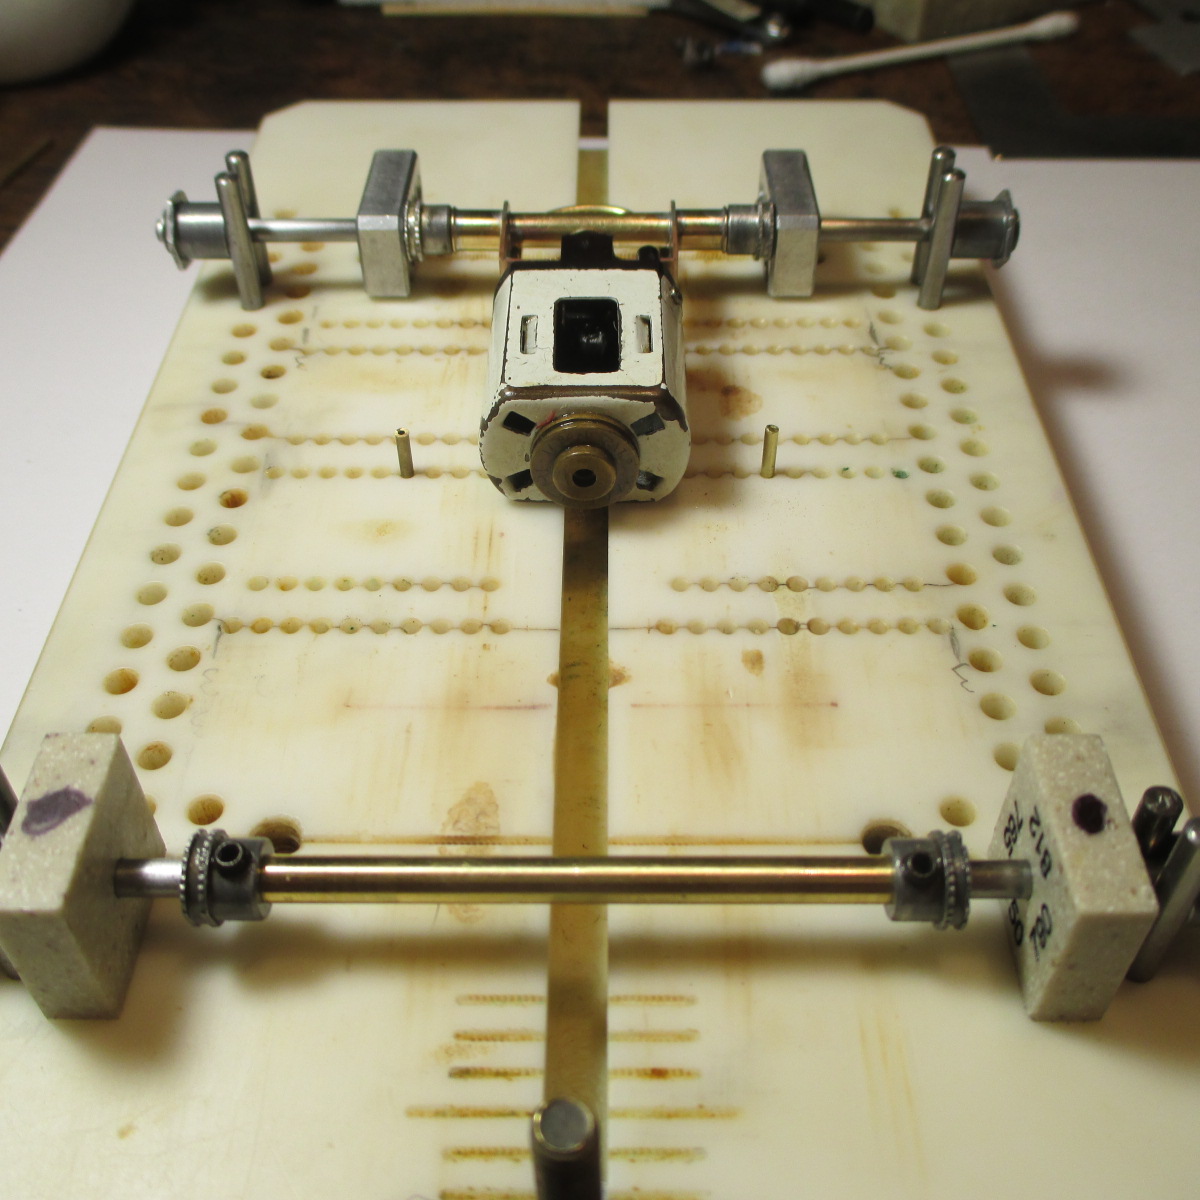
Axle management will be, hog out bracket holes, solder in 3/16 OD tubing with 7/32 tubes over them on the outside, with vintage Champion oilites soldered in. The neat thing about this build is, since it isn't intended to be a replica of any particular car in history, I can do it any way I want. As long as I stay with the theme and timeline for 1968-ish Pro Era cars, I think the VP will be fine with it.


Here is a list of the parts she will be designed to fit:

Mabuchi FT-16D type endbell drive motor

48 pitch crown gear up to 33T

1/8 axles

.875 OD X 5/8 wide rears; .750 OD X 3/16 wide fronts

Jet flag or equivalent (deck height 1/16)


Rear set screw wheels "Russkit replica X-Wide" that are .72 width with a 20 and a 10 thou spacer will give 3" width.

Front set screw wheels "Russkit replica" R721's that are .404 wide will give .095 per side slop.


  • Jencar17 and Peter Horvath like this

Paul Wolcott


#5 Martin

Martin

    Posting Leader

  • Full Member
  • PipPipPipPipPipPipPip
  • 3,987 posts
  • Joined: 22-February 09
  • Gender:Male
  • Location:US

Posted 04 July 2018 - 11:42 AM

I believe the tangs are to locate a 1/16 rod on the inside of the bracket and angle up to the axle tube, try it you might like it?


Martin Windmill

#6 Pablo

Pablo

    Builder

  • Administrator
  • PipPipPipPipPipPipPipPip
  • 18,375 posts
  • Joined: 20-February 06
  • Gender:Male
  • Location:Cleveland, Tennessee

Posted 04 July 2018 - 04:54 PM

I have tried it and it doesn't work that way. You can fidgit it to "make it work", but as designed, it doesn't work.


I've run rods inside the way you describe, but it requires removal, or at least, trimming, the tangs.

So when I want to do it that way I just remove them.


Paul Wolcott


#7 Pablo

Pablo

    Builder

  • Administrator
  • PipPipPipPipPipPipPipPip
  • 18,375 posts
  • Joined: 20-February 06
  • Gender:Male
  • Location:Cleveland, Tennessee

Posted 15 July 2018 - 05:10 PM

Cobra style 1/16 thick drop arm made by grooverunner :good:

With some trimming for my purposes, it will be perfect


IMG_9958.JPG


  • Jencar17 and grooverunner like this

Paul Wolcott


#8 Pablo

Pablo

    Builder

  • Administrator
  • PipPipPipPipPipPipPipPip
  • 18,375 posts
  • Joined: 20-February 06
  • Gender:Male
  • Location:Cleveland, Tennessee

Posted 30 July 2018 - 06:23 PM

Russkit bracket all braced, tubed, and oilited


IMG_0033.JPG


All jigged up


IMG_0041.JPG


  • Jencar17, Peter Horvath and Geary Carrier like this

Paul Wolcott


#9 Pablo

Pablo

    Builder

  • Administrator
  • PipPipPipPipPipPipPipPip
  • 18,375 posts
  • Joined: 20-February 06
  • Gender:Male
  • Location:Cleveland, Tennessee

Posted 31 July 2018 - 05:07 PM

First set of rails tacked on. Front of jig motor is elevated .032" to give it a slight downward slant,

yet still have some clearance "fudge factor". Should be smooth sailing from here on........


IMG_0051.JPG


  • Jencar17 and Peter Horvath like this

Paul Wolcott


#10 Pablo

Pablo

    Builder

  • Administrator
  • PipPipPipPipPipPipPipPip
  • 18,375 posts
  • Joined: 20-February 06
  • Gender:Male
  • Location:Cleveland, Tennessee

Posted 03 August 2018 - 04:02 PM

Rails n pin tubes done. Next-to-last set of rails are .047 brass to make the width fit the body perfectly.


IMG_0054.JPG


This will be a heavy Grand Prix chassis and it should handle like a bullet.

It will need some good beans to push it, for sure :aggressive: :wink3:


IMG_0057.JPG


  • slotbaker, Jencar17, miko and 3 others like this

Paul Wolcott


#11 Pablo

Pablo

    Builder

  • Administrator
  • PipPipPipPipPipPipPipPip
  • 18,375 posts
  • Joined: 20-February 06
  • Gender:Male
  • Location:Cleveland, Tennessee

Posted 05 August 2018 - 12:40 AM

Paint scheme - Chris Amon # 24, Ferrari red (of course) with just a few (inside waterslide) decals


IMG_0065.JPG


  • Jencar17 and Peter Horvath like this

Paul Wolcott


#12 Pablo

Pablo

    Builder

  • Administrator
  • PipPipPipPipPipPipPipPip
  • 18,375 posts
  • Joined: 20-February 06
  • Gender:Male
  • Location:Cleveland, Tennessee

Posted 05 August 2018 - 05:30 PM

Drop arm trimmed, marked, and jigged for hinge tube.

Getting it perfectly straight is simply a matter of attention to detail and hard work


IMG_0069.JPG


Tack soldered in the jig, then transferred to a wood block for some serious heat


IMG_0071.JPG


IMG_0081.JPG


  • Jencar17 and Peter Horvath like this

Paul Wolcott


#13 Pablo

Pablo

    Builder

  • Administrator
  • PipPipPipPipPipPipPipPip
  • 18,375 posts
  • Joined: 20-February 06
  • Gender:Male
  • Location:Cleveland, Tennessee

Posted 06 August 2018 - 04:53 PM

.037 wire strengthener gizmos will prevent the drop arm hinge from breakage in a severe wall shot.

The flag will snap long before the drop arm fails :aggressive: Note the gap between the hinges - this isn't a mistake - the older style rod and wire drop arms depended on the hinge for alignment - my brass sheet drop arm uses the rails to keep it in alignment. A trick I learned from looking at a Foamy retro chassis. 


IMG_0085.JPG


Time for a tumble


IMG_0084.JPG


  • slotbaker, Jencar17, Tex and 1 other like this

Paul Wolcott


#14 Pablo

Pablo

    Builder

  • Administrator
  • PipPipPipPipPipPipPipPip
  • 18,375 posts
  • Joined: 20-February 06
  • Gender:Male
  • Location:Cleveland, Tennessee

Posted 07 August 2018 - 08:32 AM

Bare chassis weighs 52 grams


IMG_0096.JPG


IMG_0104.JPG


IMG_0106.JPG


IMG_0091.JPG


  • slotbaker, Jencar17, justDave and 4 others like this

Paul Wolcott


#15 Bill from NH

Bill from NH

    Age scrubs away speed!

  • Full Member
  • PipPipPipPipPipPipPipPip
  • 14,361 posts
  • Joined: 02-August 07
  • Gender:Male
  • Location:New Boston, NH

Posted 07 August 2018 - 10:48 AM

Looks good Pablo! :)  I saw an eBay F1 chassis from the '60s yesterday that used the pointy areas of a Russkit bracket that you've been cutting off. :laugh2:


Bill Fernald
 
I intend to live forever!  So far, so good.  :laugh2:  :laugh2: 

#16 Pablo

Pablo

    Builder

  • Administrator
  • PipPipPipPipPipPipPipPip
  • 18,375 posts
  • Joined: 20-February 06
  • Gender:Male
  • Location:Cleveland, Tennessee

Posted 07 August 2018 - 04:23 PM

Maybe this will get your mind off the pointy nubs, Bill :crazy:

(the notch in the tube is an oil port)


IMG_0111.JPG


Now, where did I put that doggone Iwata? :D


  • Jencar17 and Peter Horvath like this

Paul Wolcott


#17 Bill from NH

Bill from NH

    Age scrubs away speed!

  • Full Member
  • PipPipPipPipPipPipPipPip
  • 14,361 posts
  • Joined: 02-August 07
  • Gender:Male
  • Location:New Boston, NH

Posted 07 August 2018 - 05:15 PM

I always soldered where that notch is to allow the hinge pin to only rotate at its ends. Less friction that way. I didn't cause an oiling problem when oiling at the hinge tube joints. Each to their own... :)


Bill Fernald
 
I intend to live forever!  So far, so good.  :laugh2:  :laugh2: 

#18 Pablo

Pablo

    Builder

  • Administrator
  • PipPipPipPipPipPipPipPip
  • 18,375 posts
  • Joined: 20-February 06
  • Gender:Male
  • Location:Cleveland, Tennessee

Posted 07 August 2018 - 06:55 PM

3 mist coats of Fasred


IMG_0113.JPG


  • Jencar17 likes this

Paul Wolcott


#19 Jaeger Team

Jaeger Team

    On The Lead Lap

  • Full Member
  • PipPipPipPip
  • 469 posts
  • Joined: 27-January 17
  • Gender:Male
  • Location:Palermo, Italy

Posted 08 August 2018 - 09:18 AM

I always soldered where that notch is to allow the hinge pin to only rotate at its ends. Less friction that way. I didn't cause an oiling problem when oiling at the hinge tube joints. Each to their own... :)


You might just bend it in the middle
Maurizio Salerno

#20 Bill from NH

Bill from NH

    Age scrubs away speed!

  • Full Member
  • PipPipPipPipPipPipPipPip
  • 14,361 posts
  • Joined: 02-August 07
  • Gender:Male
  • Location:New Boston, NH

Posted 08 August 2018 - 10:05 AM

Hinge pins are easier t remove if they're left straight.


Bill Fernald
 
I intend to live forever!  So far, so good.  :laugh2:  :laugh2: 

#21 Pablo

Pablo

    Builder

  • Administrator
  • PipPipPipPipPipPipPipPip
  • 18,375 posts
  • Joined: 20-February 06
  • Gender:Male
  • Location:Cleveland, Tennessee

Posted 09 August 2018 - 06:22 PM

Some outside acrylic detail paint, flat black and flat white


IMG_0128.JPG


  • Peter Horvath likes this

Paul Wolcott


#22 Pablo

Pablo

    Builder

  • Administrator
  • PipPipPipPipPipPipPipPip
  • 18,375 posts
  • Joined: 20-February 06
  • Gender:Male
  • Location:Cleveland, Tennessee

Posted 12 August 2018 - 06:50 PM

Cockpit cut out. Metallic silver enamel on engine and fuel cap. Painted Warmack mirrors at the ready.

Roll bars - I figured if I made a bunch, at least one would be perfect :)


IMG_0138.JPG


  • Jencar17, Peter Horvath and grooverunner like this

Paul Wolcott


#23 Pablo

Pablo

    Builder

  • Administrator
  • PipPipPipPipPipPipPipPip
  • 18,375 posts
  • Joined: 20-February 06
  • Gender:Male
  • Location:Cleveland, Tennessee

Posted 14 August 2018 - 03:23 PM

Roll bar and mirrors are done


IMG_0146.JPG


IMG_0147.JPG


At this point, I'm going to pause and look for a buyer. My intent was to simply sell body and chassis.

Maybe the buyer will want the body trimmed, a motor built, or even a completed car.

If I can't line something up, it will be posted as you see it here in Slotblog's "Racer Swap Shop" soon


IMG_0151.JPG


  • Jencar17, Pete L., Noose and 4 others like this

Paul Wolcott


#24 Jairus

Jairus

    Body Painter Extraordinaire

  • Subscriber
  • PipPipPipPipPipPipPipPip
  • 10,174 posts
  • Joined: 16-February 06
  • Gender:Male
  • Location:Salem, OR

Posted 14 August 2018 - 06:59 PM

Nice looking car Paul!  :victory:


Jairus H Watson - Artist
Need something painted, soldered, carved, or killed? - jairuswtsn@aol.com

www.slotcarsmag.com

www.jairuswatson.net
http://www.ratholecustoms.com
Check out some of the cool stuff on my Fotki!


#25 dc-65x

dc-65x

    Grand Champion Poster

  • Subscriber
  • PipPipPipPipPipPipPipPip
  • 6,836 posts
  • Joined: 14-February 06
  • Gender:Male
  • Location:Captain Rick: The only vintage slot car nut in SW Oregon?

Posted 15 August 2018 - 11:01 AM

Holy Smokes Pablo. Very nice paint. You'll be rivaling Jarius artwork!


Rick Thigpen
Check out Steve Okeefe's great web site at its new home here at Slotblog:
The Independent Scratchbuilder
There's much more to come...


Electric Dreams Online Shop