Last month when I posted this topic, I had intended to say something about designing a slot car body in the simple 3D software available online, free, at Tinkercad.
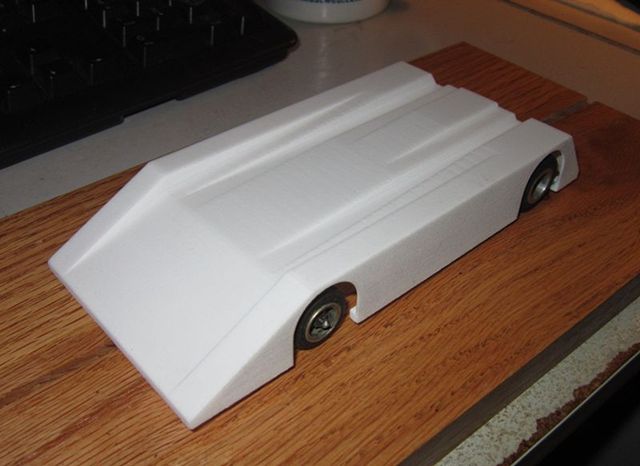
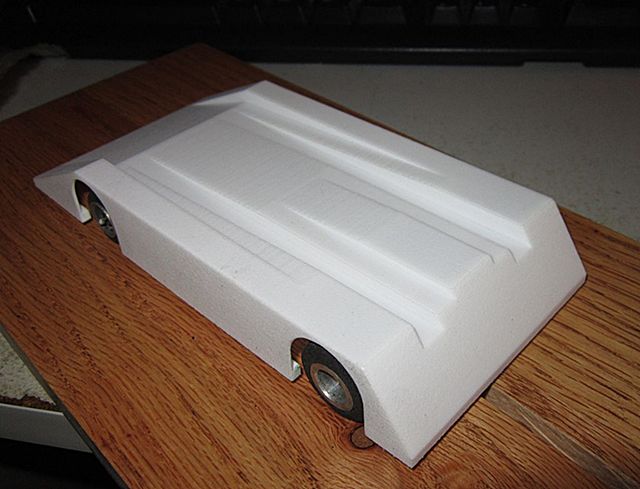
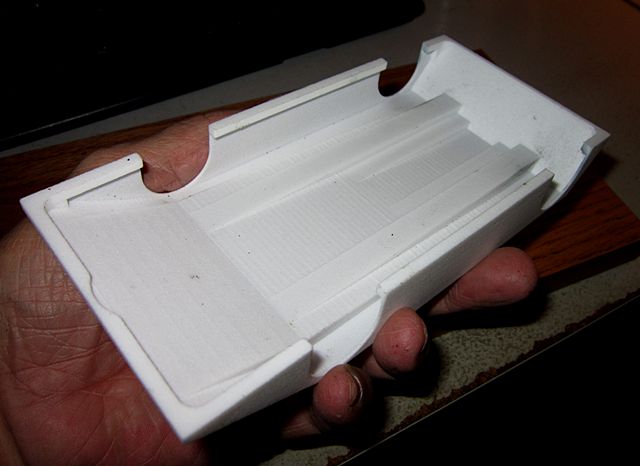
In the Tinkercad software, I can manipulate the size and orientation of a variety of simple objects - cubes, wedges, cylinders, and more. For a slot car body, I plan to assemble a variety of simple objects into a complex solid object, and then hollow it out. The resulting virtual slot car body can be exported as an .stl data file, which I upload to a 3D printer, or send to a 3D printing company, like Shapeways. The data file serves as the instructions for making a plastic model out of my virtual design. In my case, the polyamide-12 slot car body arrives by mail in about 2 weeks.
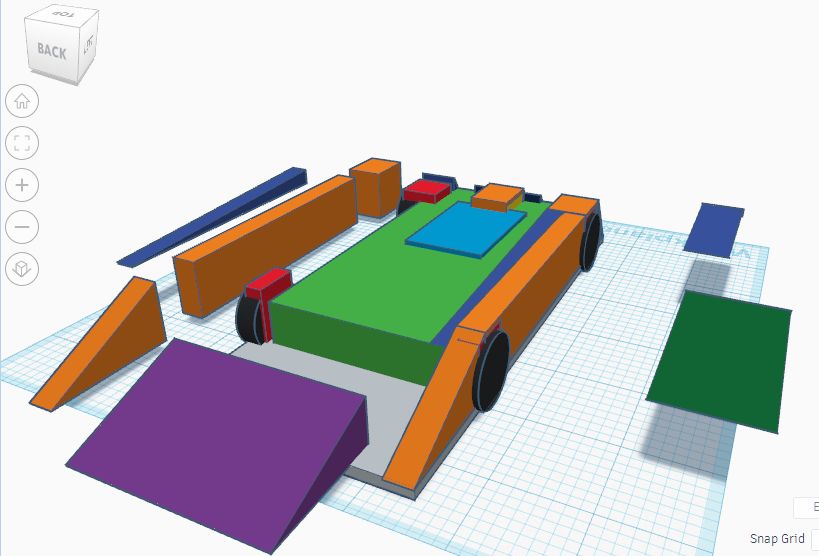
I measured the chassis that I wanted the body to cover, my replica* of a 1/24 scale jail door chassis, with 1/2 inch wide x 7/8" diameter rears, 1/4" wide x 7/8" fronts, and an inline motor. As a first drawing step, I arranged some rectangles on a graph-paper plane, to represent the minimum chassis shape that my slot car body must cover.
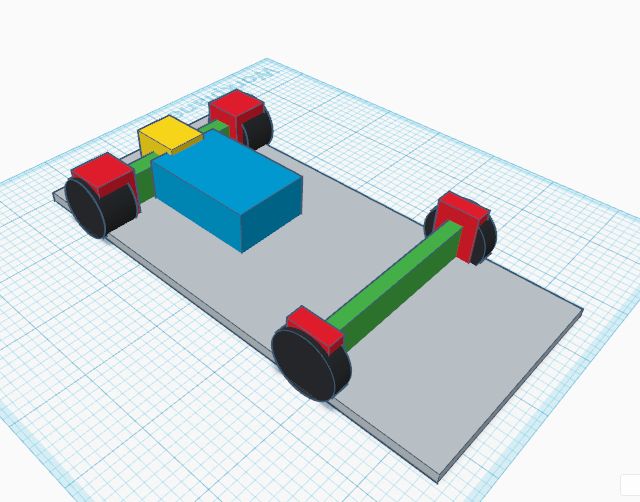
A helpful tip - I lower the virtual wheels 1/16th inch below the graph paper building plane. This allows me to build the body directly on the building plane, and still be sure to meet the 1/16 minimum clearance.
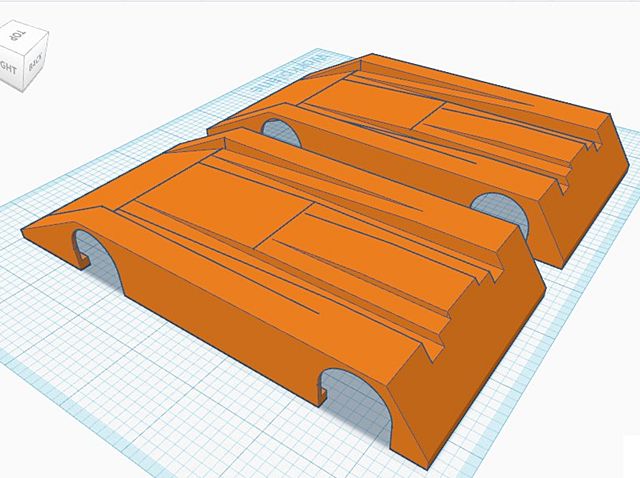
Next, I create and arrange rectangles and wedges to cover up the minimum chassis shapes. This is an easy, if somewhat tedious process: I grab a basic shape with the mouse, place it near where I want it to be. I change the dimensions and orientation by pulling on handles which appear when an object is selected. I fit the shapes together one at a time, slightly overlapping each shape to avoid gaps in the design. When the shapes on the left and right side are the same, I can make one side, and duplicate the shapes automatically, and place them carefully on the opposite side.
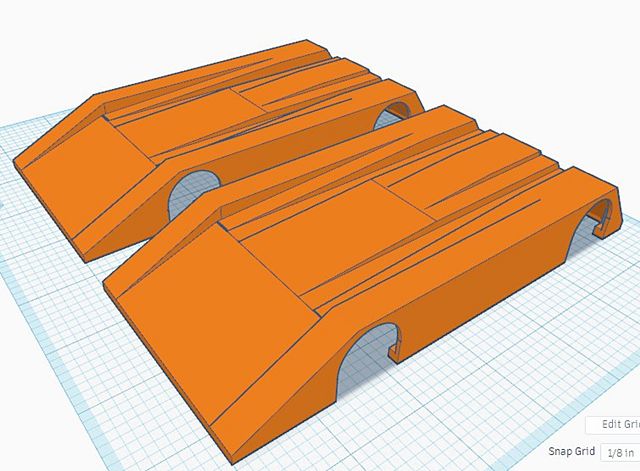
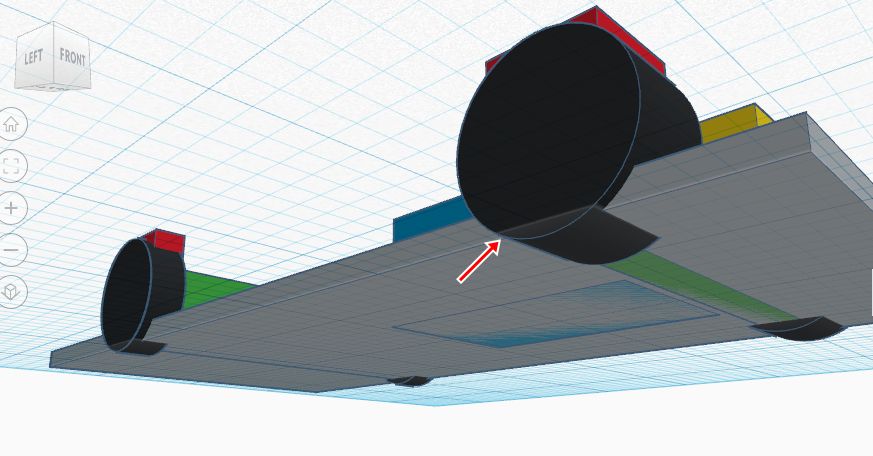
After assembling the pieces, the shape must be hollowed out. In the software, I can designate any object as a "solid" or as a "hole." To hollow out a shape, I place a hole inside a solid object, and group them together - the hole hollows out the solid.
In simple cases, a hole can be a duplicate of the object itself, scaled down by a few percent. In more complex shapes, a duplicate can be used, but each individual shape may need to be narrowed by hand. In the picture below, you can see that I duplicated the solid design, then made some surfaces 1/32 narrower. I also lowered the inside piece by slicing off 1/32" from the bottom.
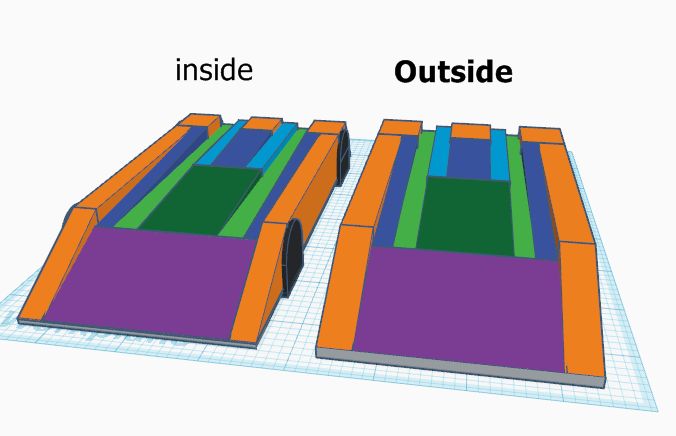
The inside object will be designated as a hole, and when the 2 shapes are overlapped and grouped together, I will have a virtual slot car body, ready to export and 3D print.
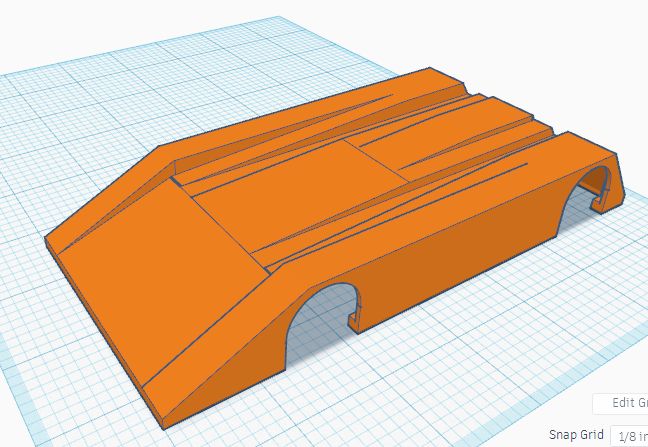
As noted in comments, this process has resulted in a body whose thickness and weight are excessive. Most of my flat surfaces ended up closer to 1/16" thick than the intended 1/32", so I made some errors somewhere. This trial and error is expensive! Never-the-less, I must say I am pleased with the outcome, and ready to try again.
-------
*You may have seen my 3D printed replica chassis in an earlier post in this Slotblog forum.