Pulled a body from my "Boxes of Horrors" and a new "no rules" build begins. Will probably use a toothbrush motor. Parts Gathering phase begins tonight 


|

Builder

Posted 20 June 2021 - 09:08 PM
Pulled a body from my "Boxes of Horrors" and a new "no rules" build begins. Will probably use a toothbrush motor. Parts Gathering phase begins tonight
Paul Wolcott
Builder
Posted 20 June 2021 - 11:29 PM
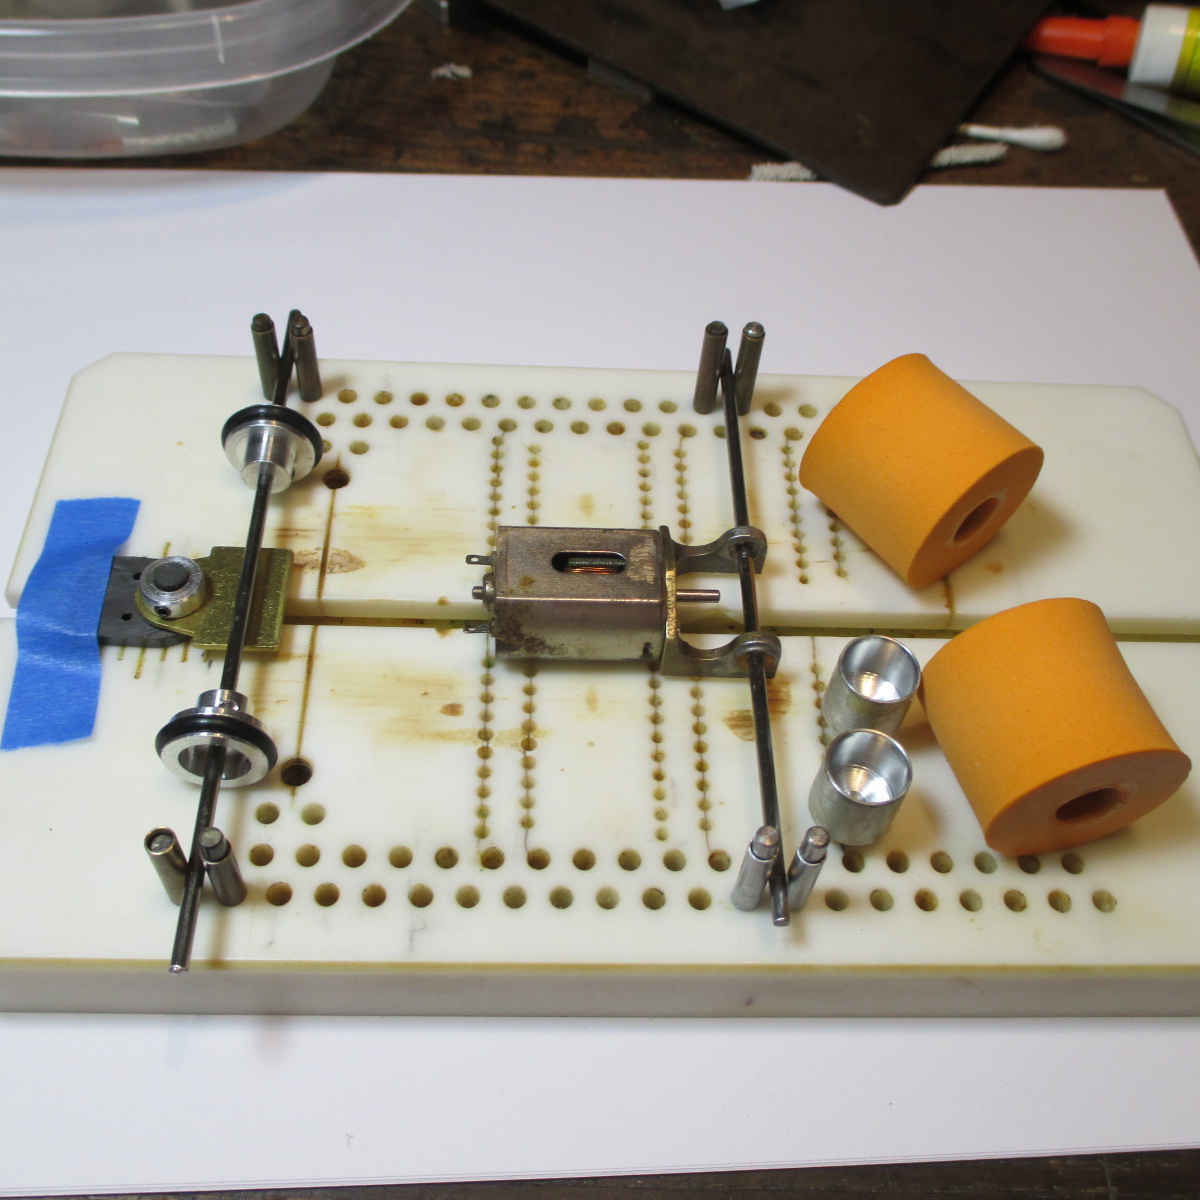
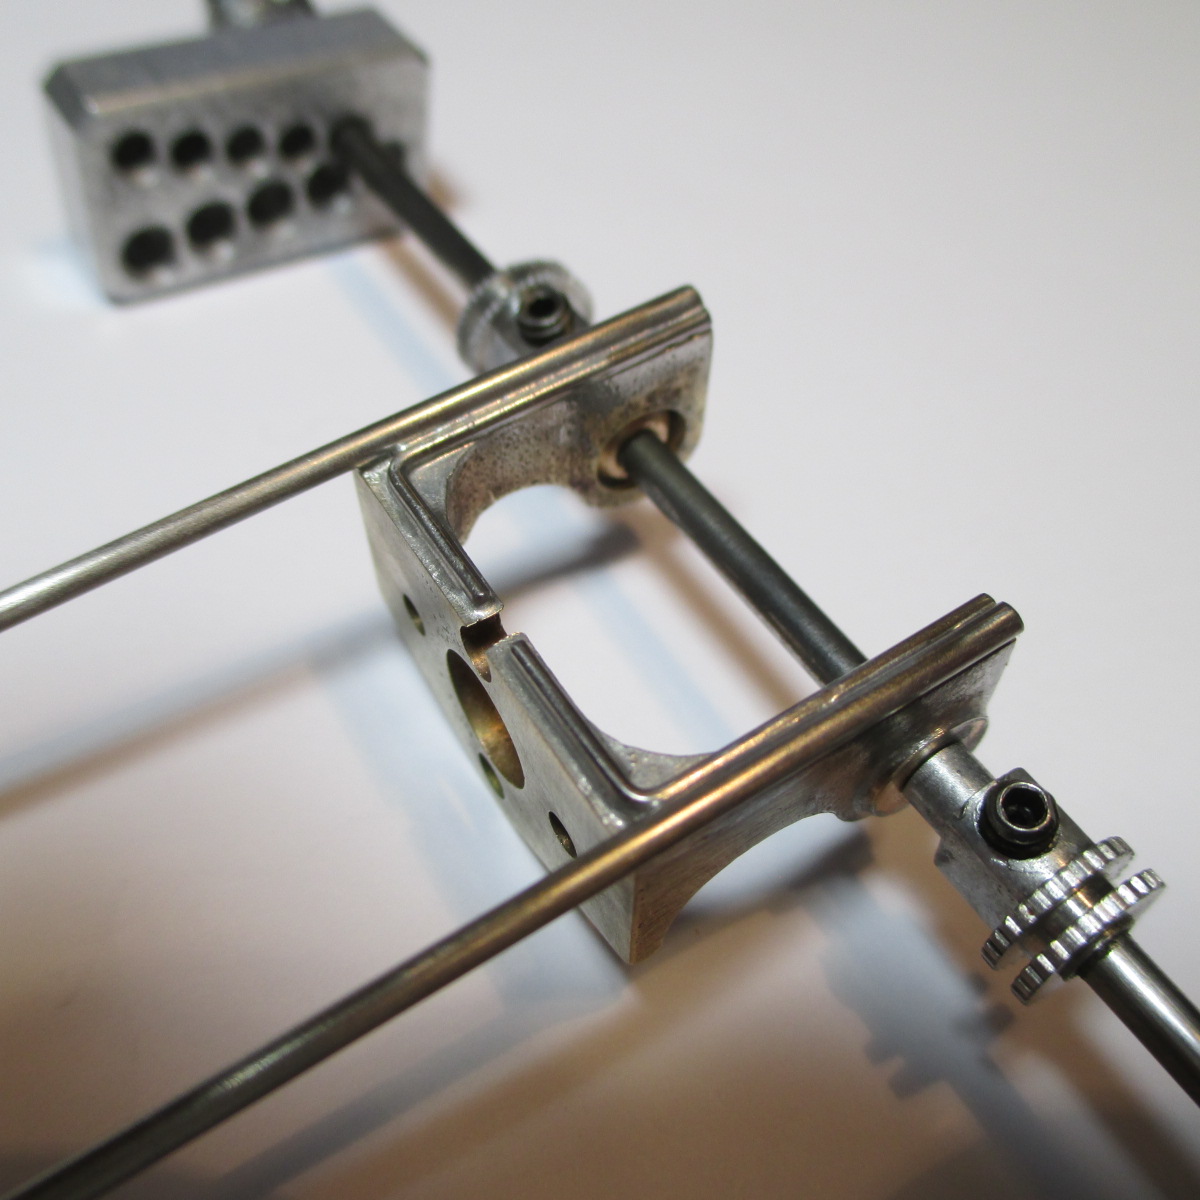
Professor Motor "BWA style" bracket with underside shaved with a FK jig motor installed. Bracket side bottoms are .063 above ground zero level with motor flat on deck. Jig blocks set for .720 wheels @ 1/16 clearance. Slick 7 racing bushings already installed.
Cox flag with clips and soft silver braids. Cobra .050 thick brass tongue

Paul Wolcott
Builder
Posted 21 June 2021 - 11:32 PM
The driving force behind the motor/bracket/rear wheel stance is going to be the crown gear. I'm shooting for a FDR of about 3.8. Slot-It gears will allow me to make this work without tilting the works up like a stinkbug. So I have some on order from Professor Motor in the 9/24 to 10/26 range. Wheel OD will be <.700
Orange donuts and narrow rear wheels, O-Ring 3/32 fronts. The alum. flag collar is just a temp - there isn't near enough room for it under the body. Specs are:
-WB 3.0, GL 15/32
-Chassis width 2.370
-Rear wheel width 2 1/2, Fronts 2 7/16
Paul Wolcott
Builder
Posted 22 June 2021 - 08:11 PM
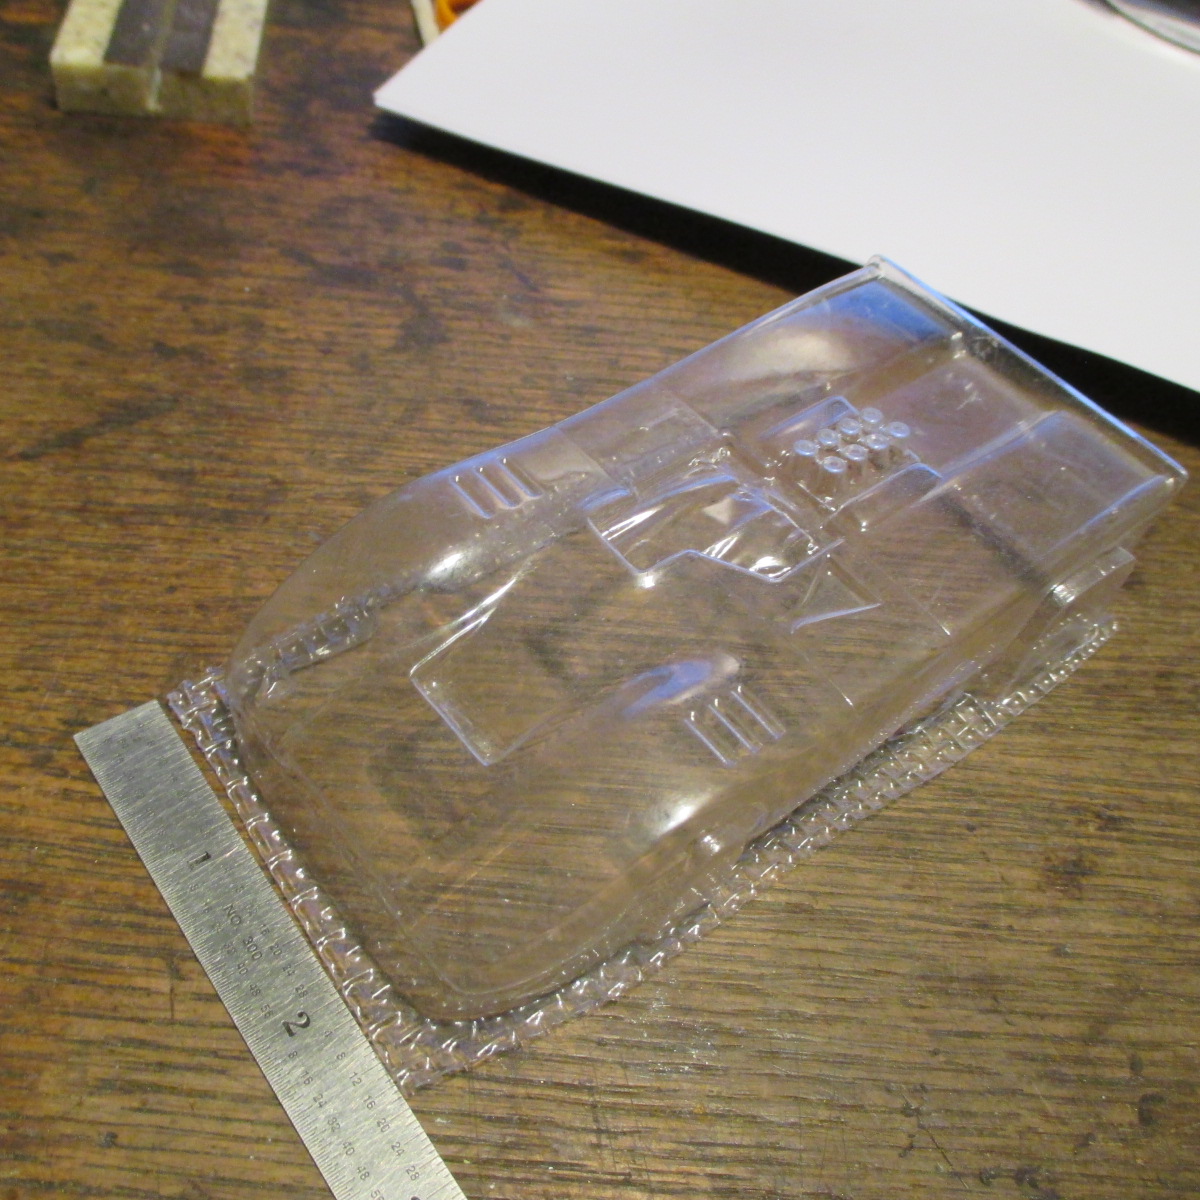
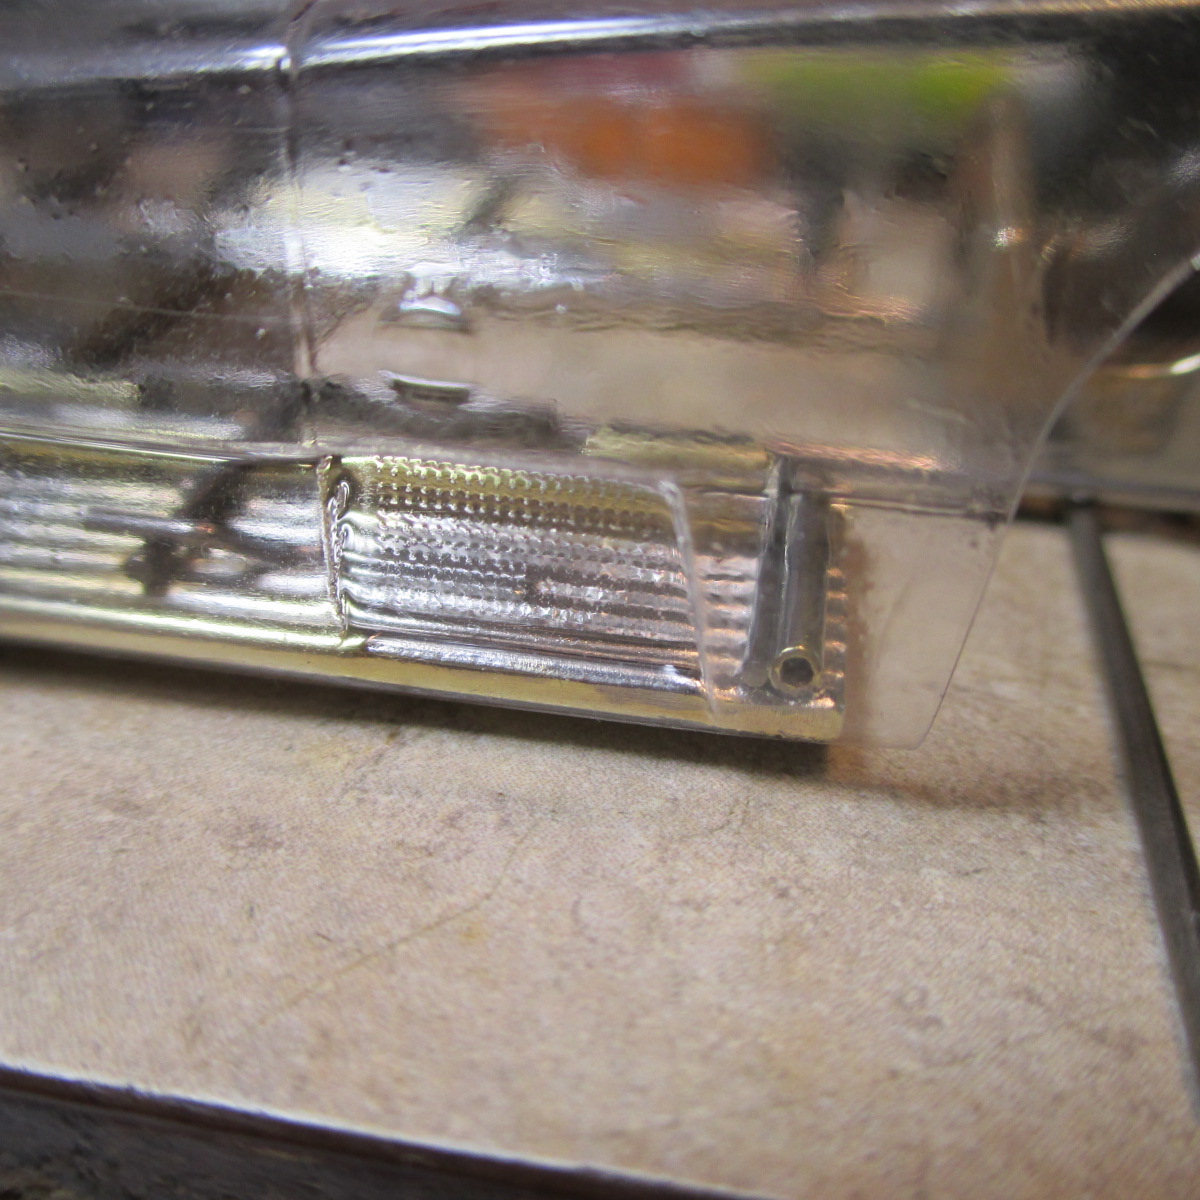
All trim work on body done, including cockpit cutout. It had some flaws in the rear end - a stress crack hole and a heavy outside scratch. I did what any speed crazed moron would do - removed the bad sections. No more parachute and no love lost. 
The wheel wells are way bigger than need be, but they were molded that way and I can't help that. Other than all that, it's a sweet body, level, straight edges, and washed with Dawn

Paul Wolcott
Builder
Posted 24 June 2021 - 11:23 AM
-Oranges glued and rough cut, left to cure for a couple more days
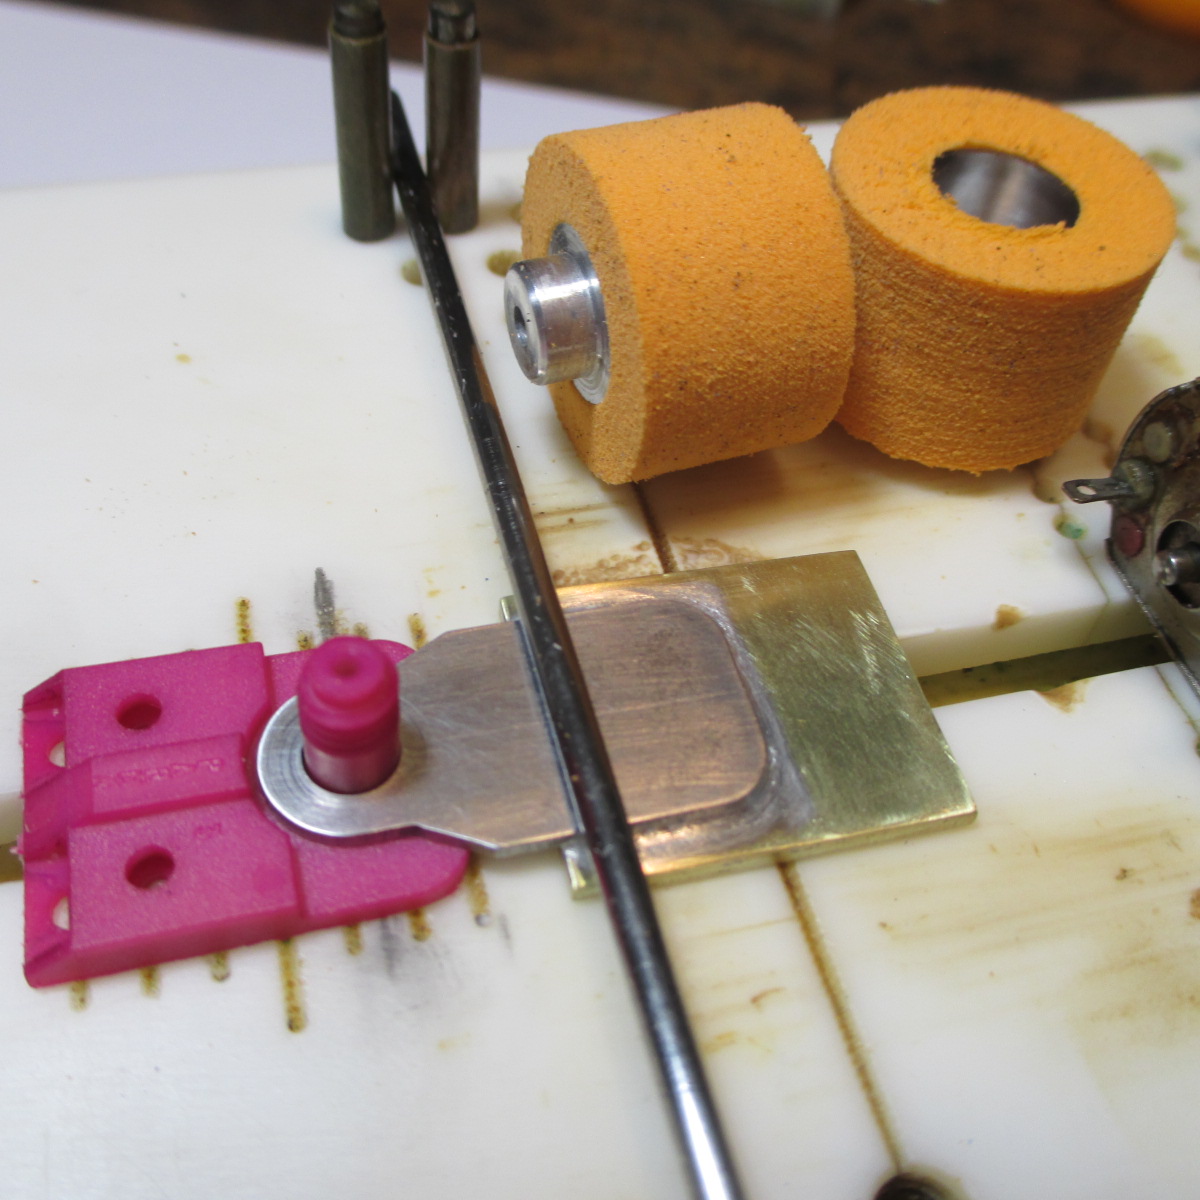
-I changed from the Cox flag to a Parma and sliced the front "blade extension" off
-Chicagoland flat steel tongue floated atop a 3/4 X 7/8 .063 brass chunk with Koford silver solder
Paul Wolcott
Builder
Posted 25 June 2021 - 07:31 PM
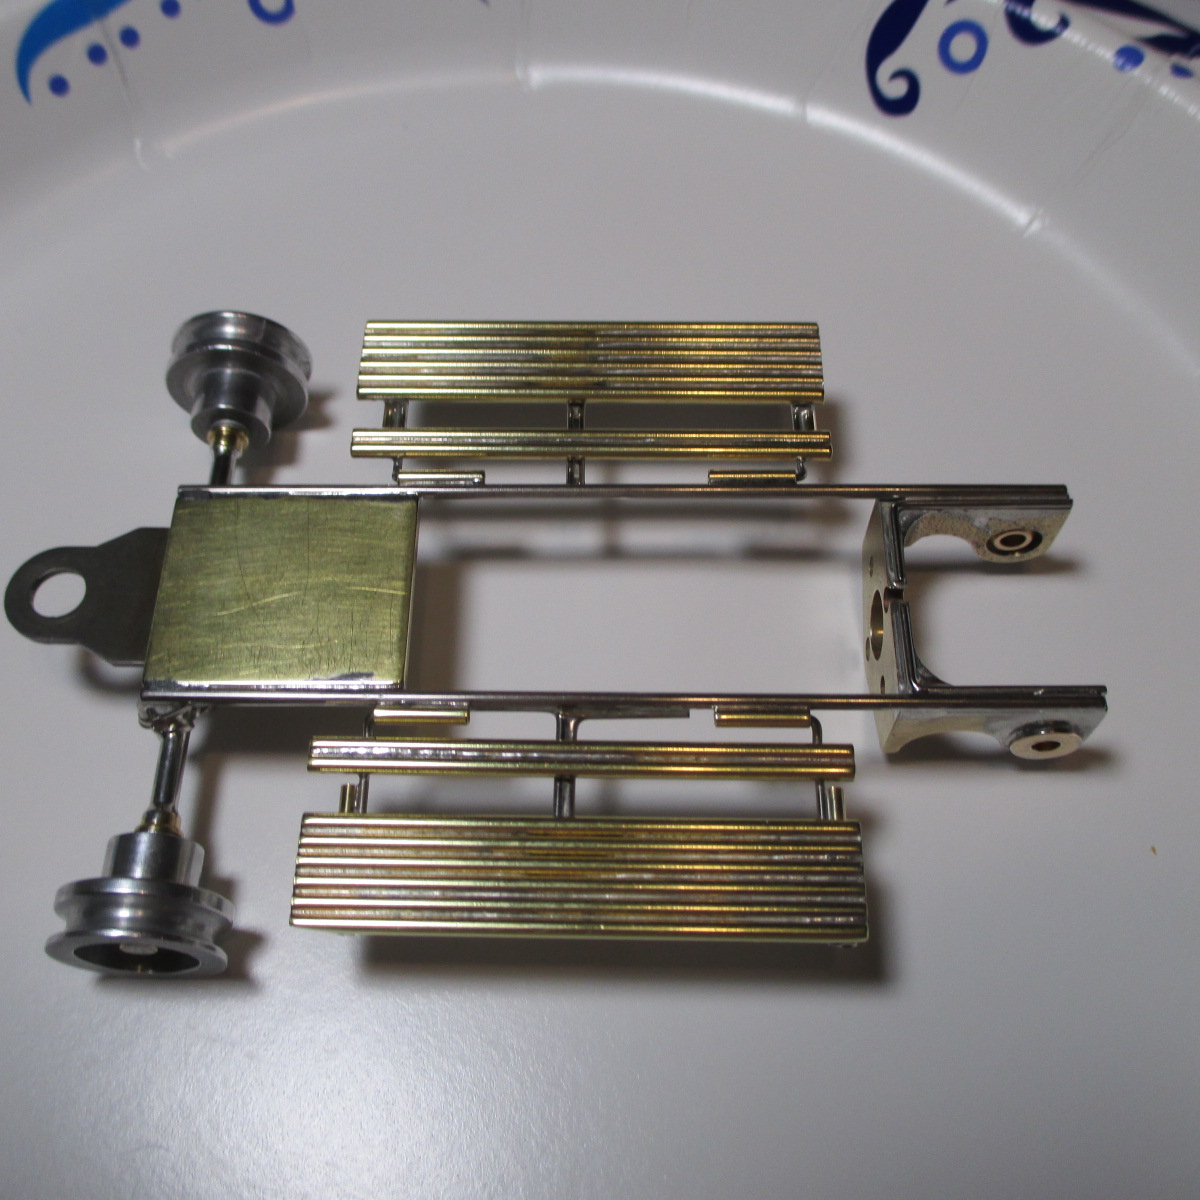
Main rails are single pair of .055 wires. The (jig) motor sits flat on deck and bracket is shaved level .063 above ground zero, giving a small gap for 60/40 to pool
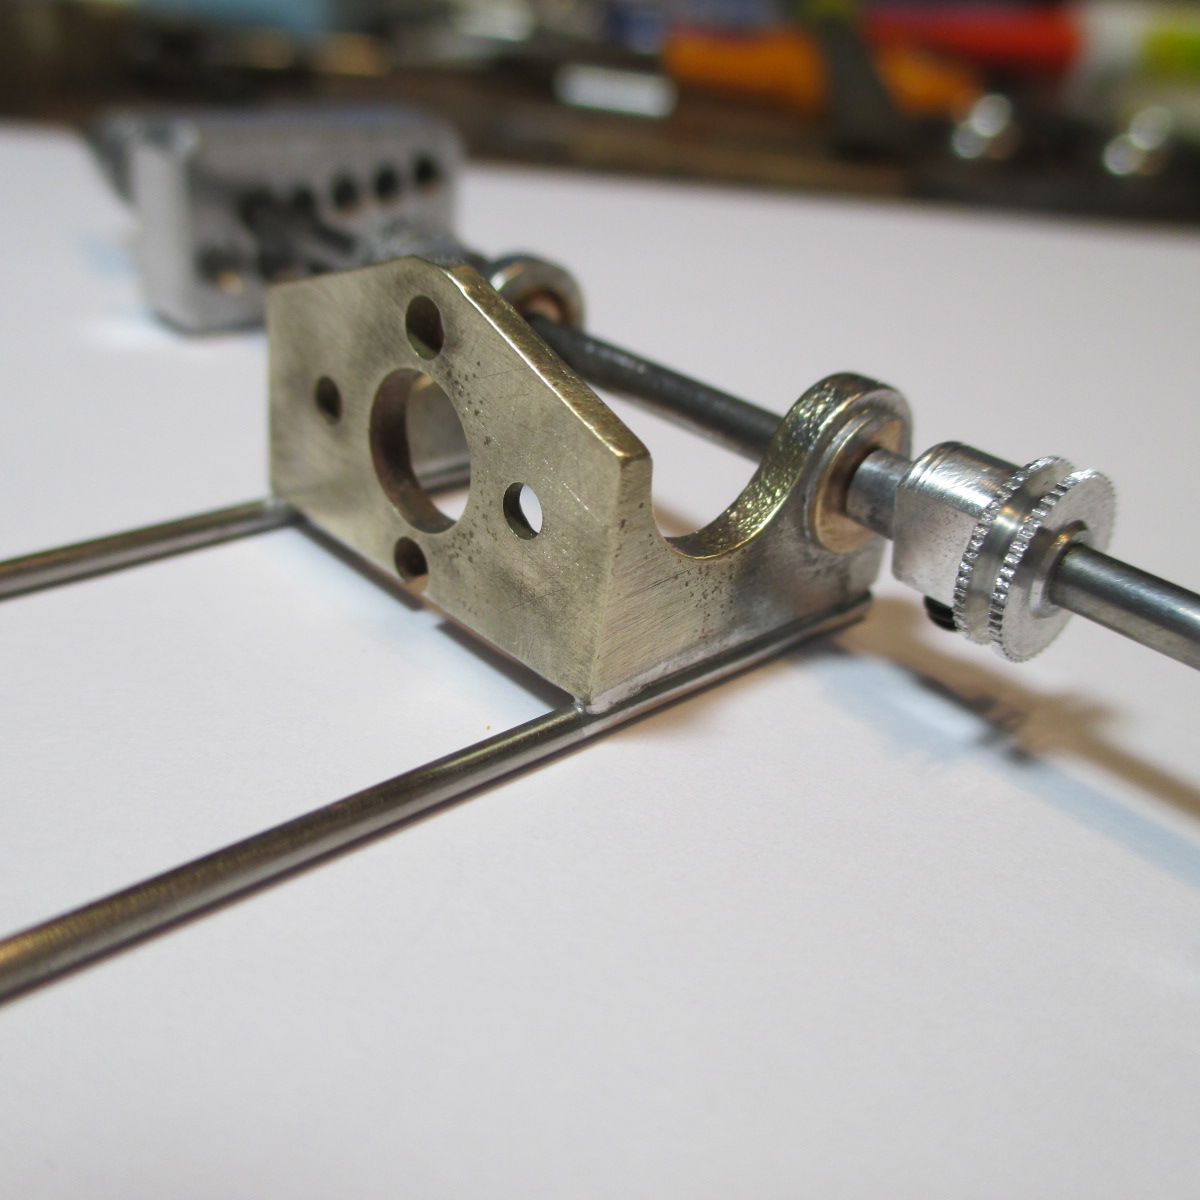
A pair of .032 "L" wires brace the bracket joint + add strength and redundancy
Paul Wolcott
Builder
Posted 28 June 2021 - 12:07 AM
Four ,047 front axle "L" uprights are straight up 90 degrees to a dummy axle. The plan is to wire wrap them to the final axle

Paul Wolcott
Builder
Posted 28 June 2021 - 06:32 PM
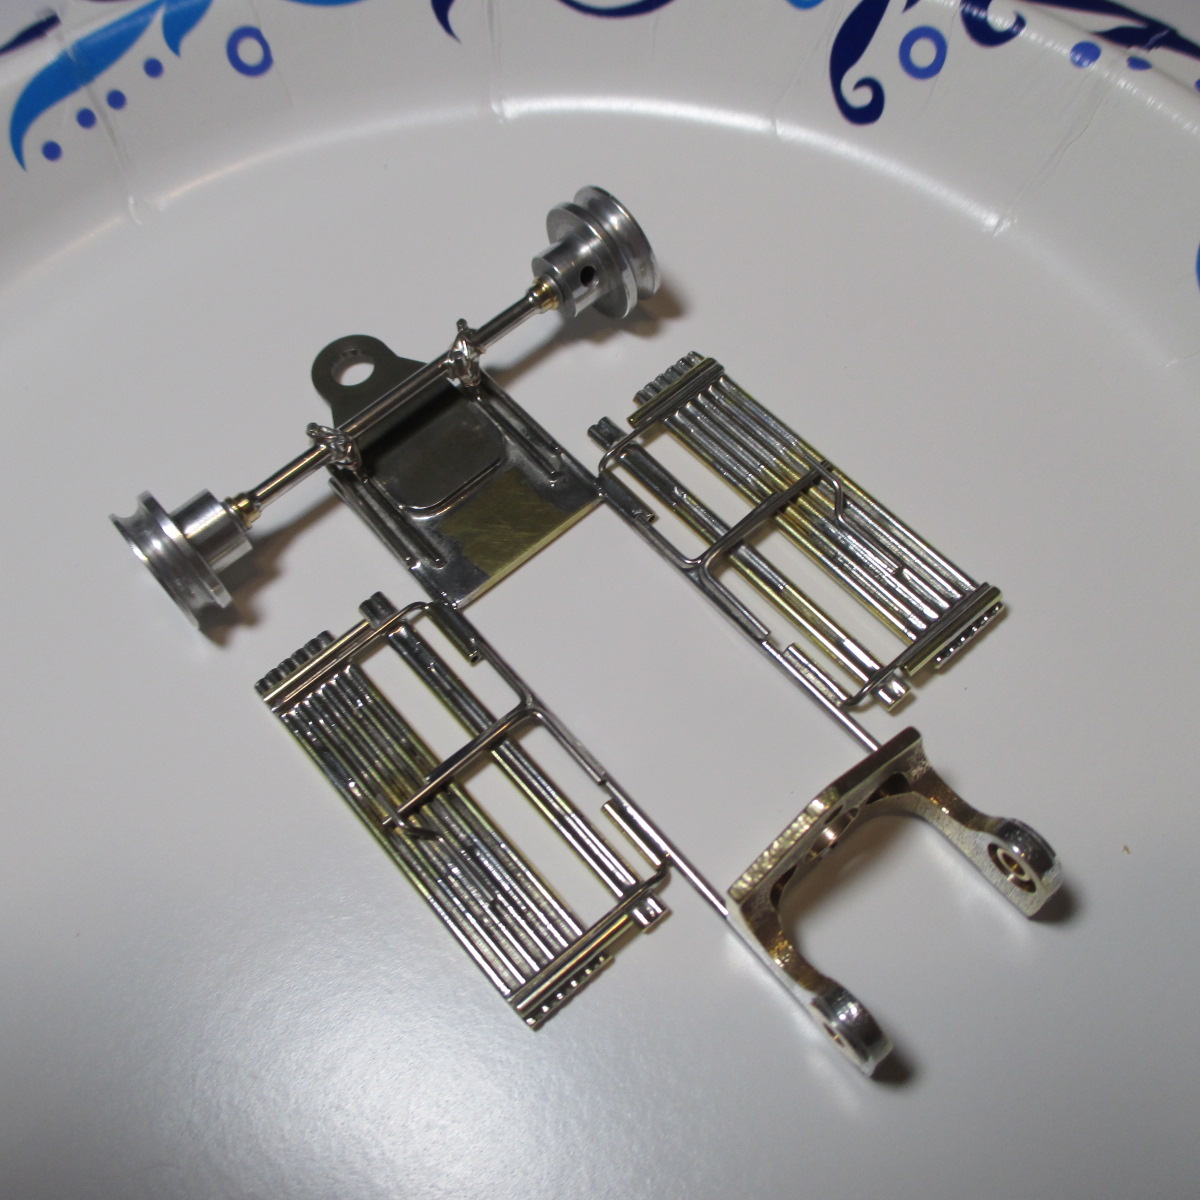
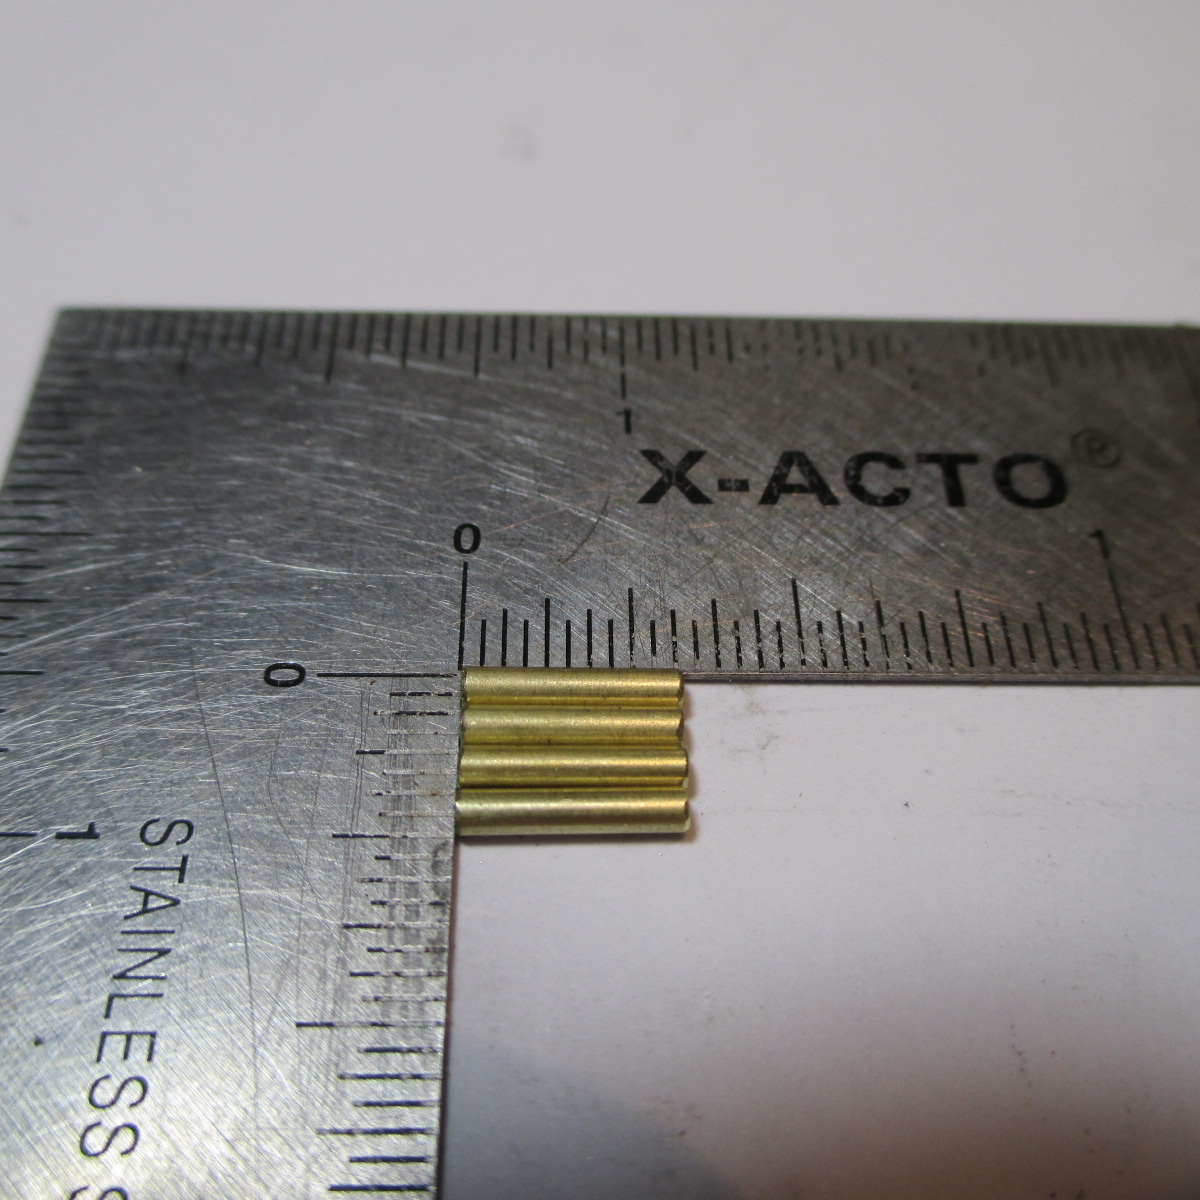
Slot-It crown gears arrived, 26, 27 and 29T. I love everything about them - color coded for # of teeth, 50-something pitch allows for a lower OD for smaller cars like 1/32, perfect mesh, lightweight aluminum hubs, and very high quality. I drill and re-tap them for standard grub screws. Whichever of them sits level at ground zero will be my choice for this car

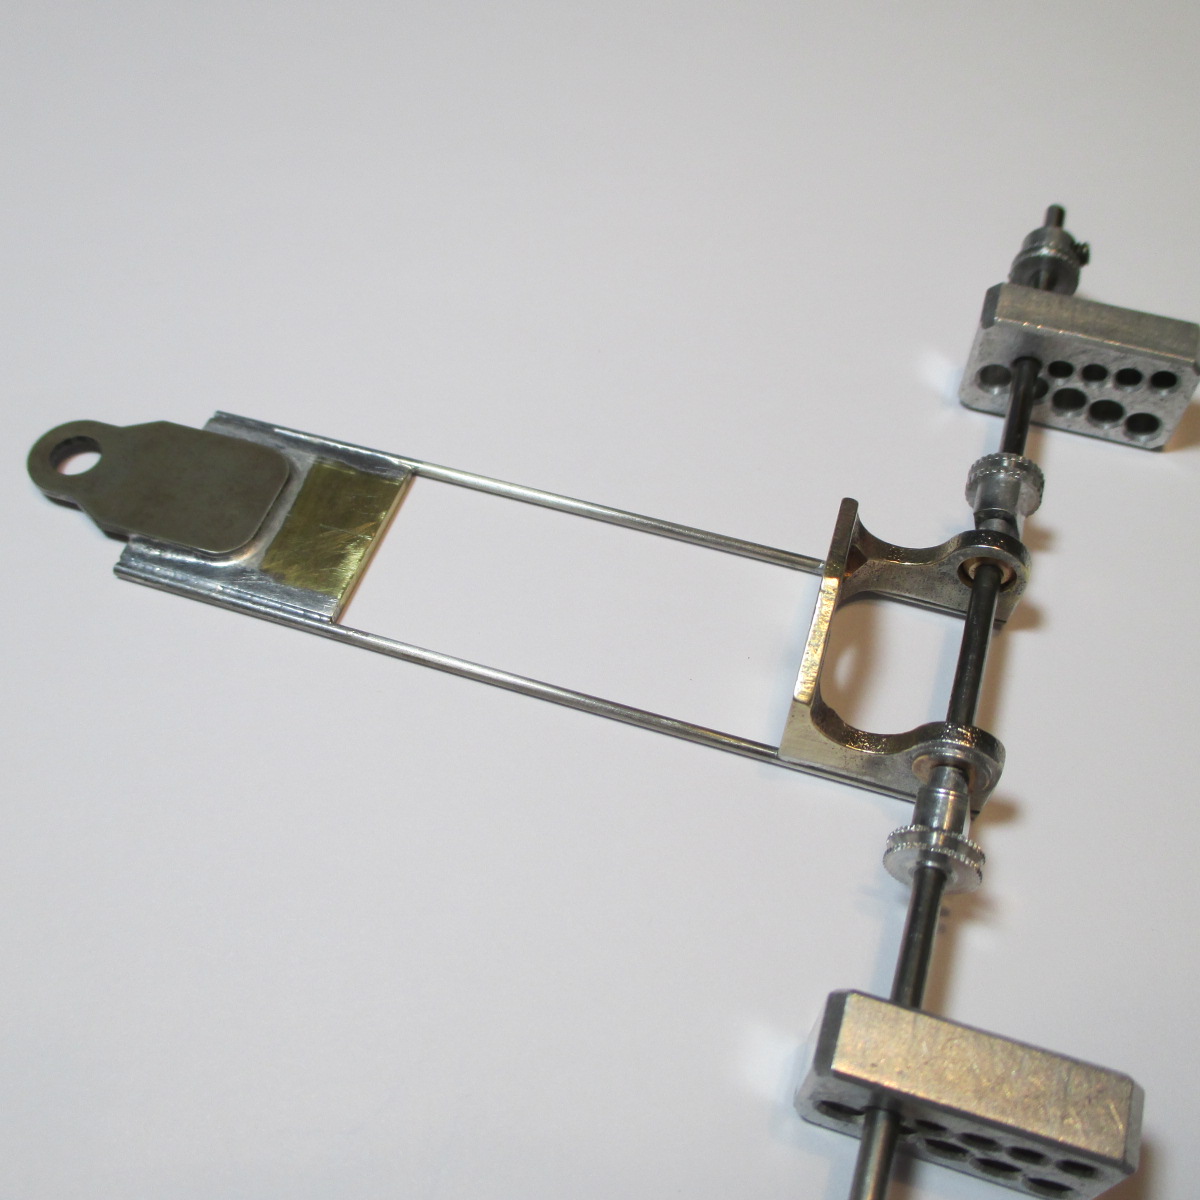
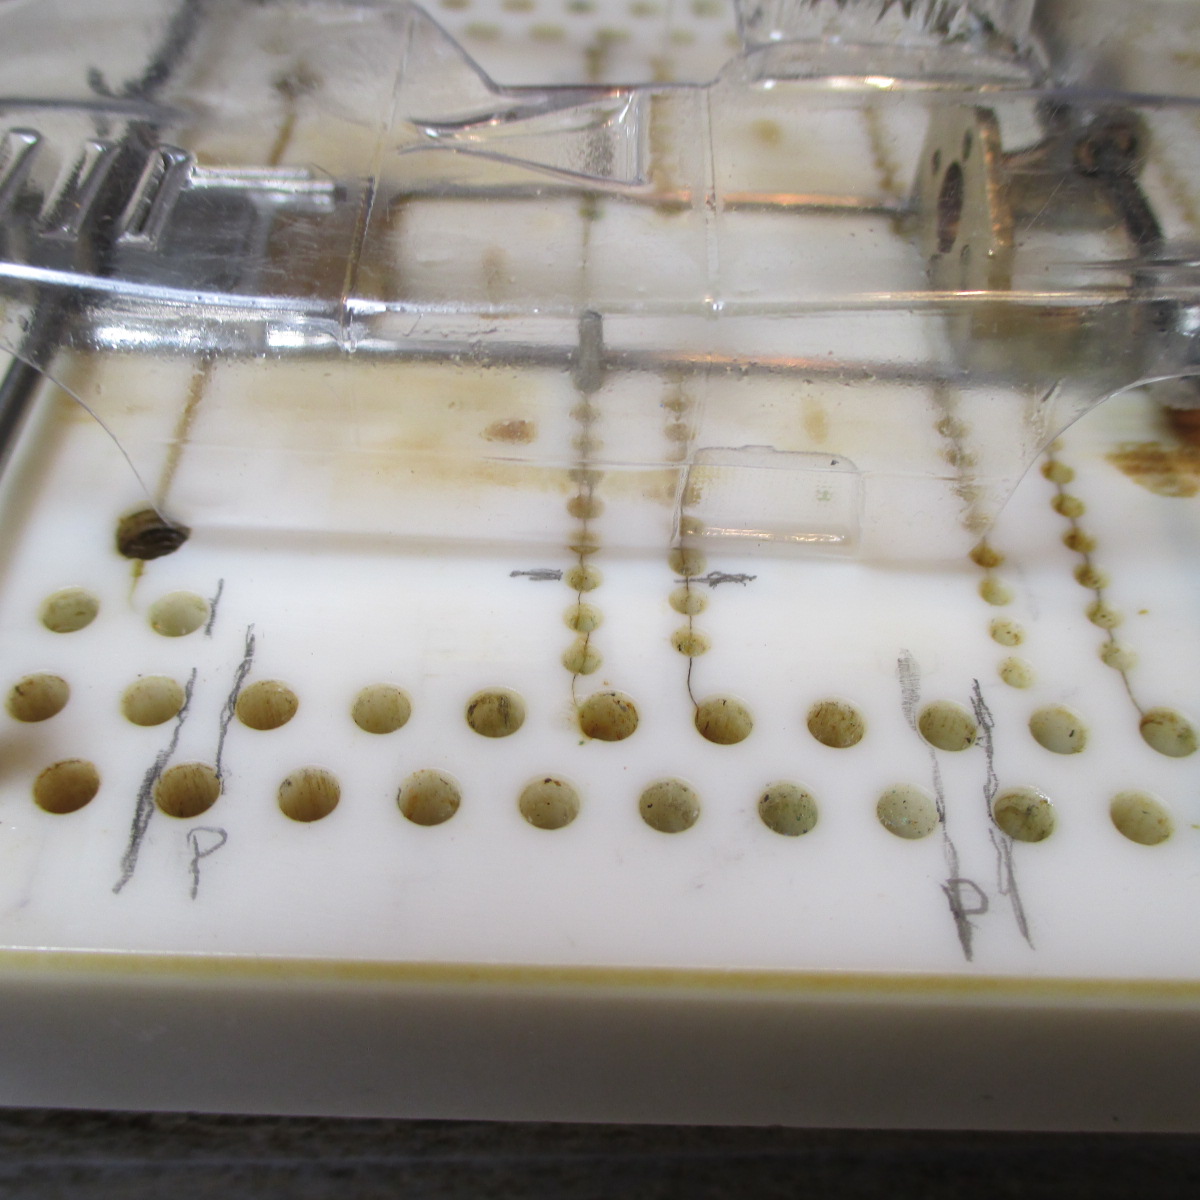
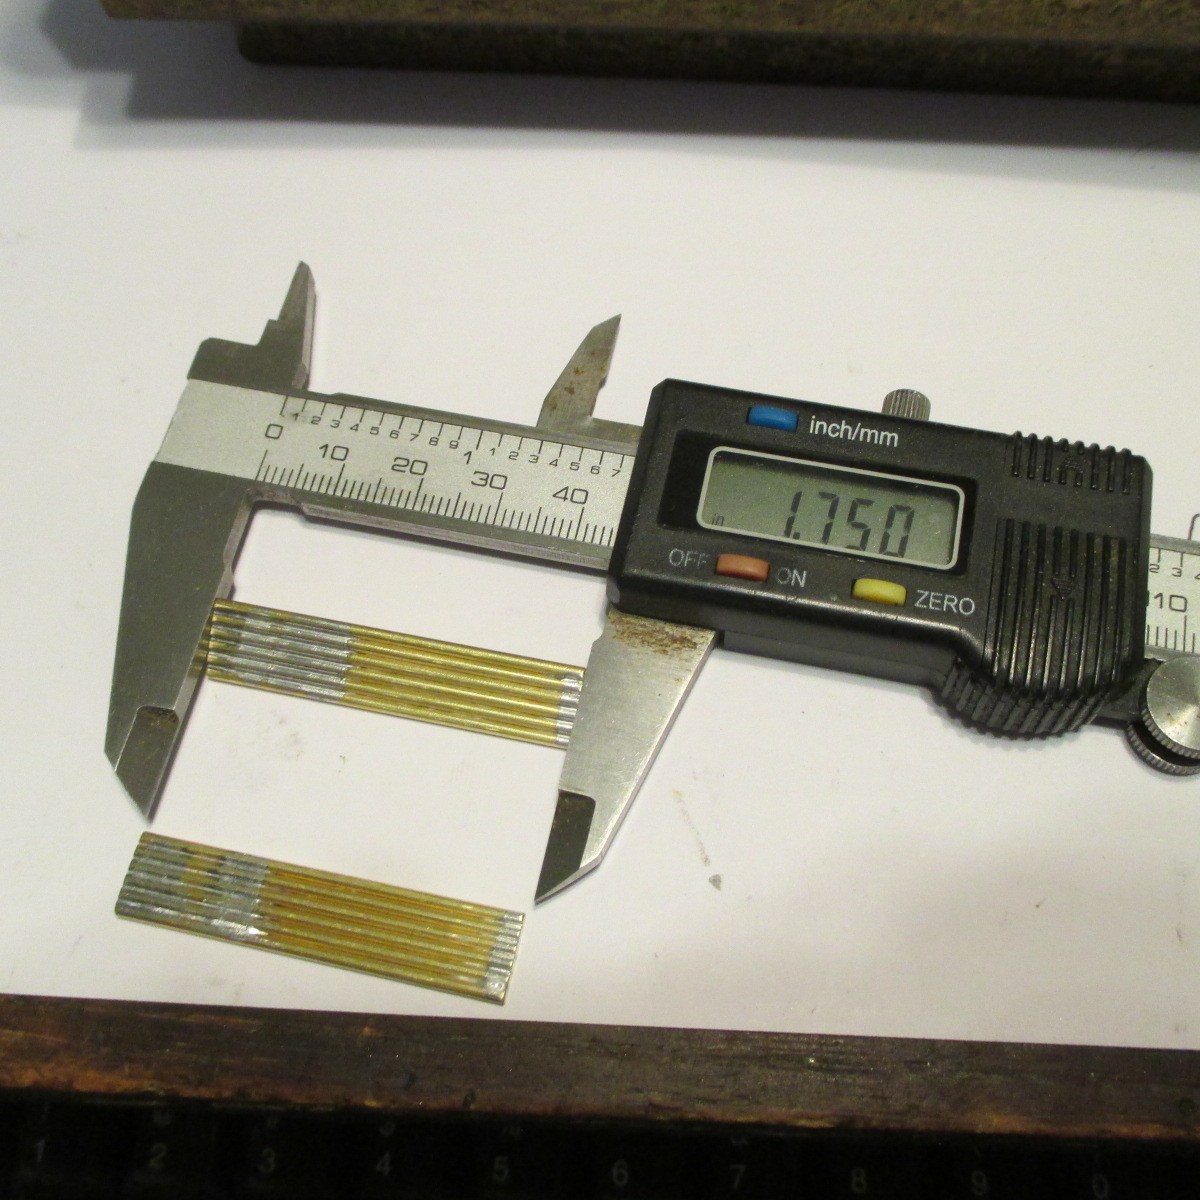
Tilting brass rod nest outriggers plan is, lengths 1.75", pin tubes 1.5" apart, overall width 2 7/16" (2.4375) (1.22" outward from centerline) as shown by pencil marks. Number of rod pieces TBD
Paul Wolcott
On The Lead Lap

Posted 29 June 2021 - 08:00 AM
Builder
Posted 29 June 2021 - 09:01 AM
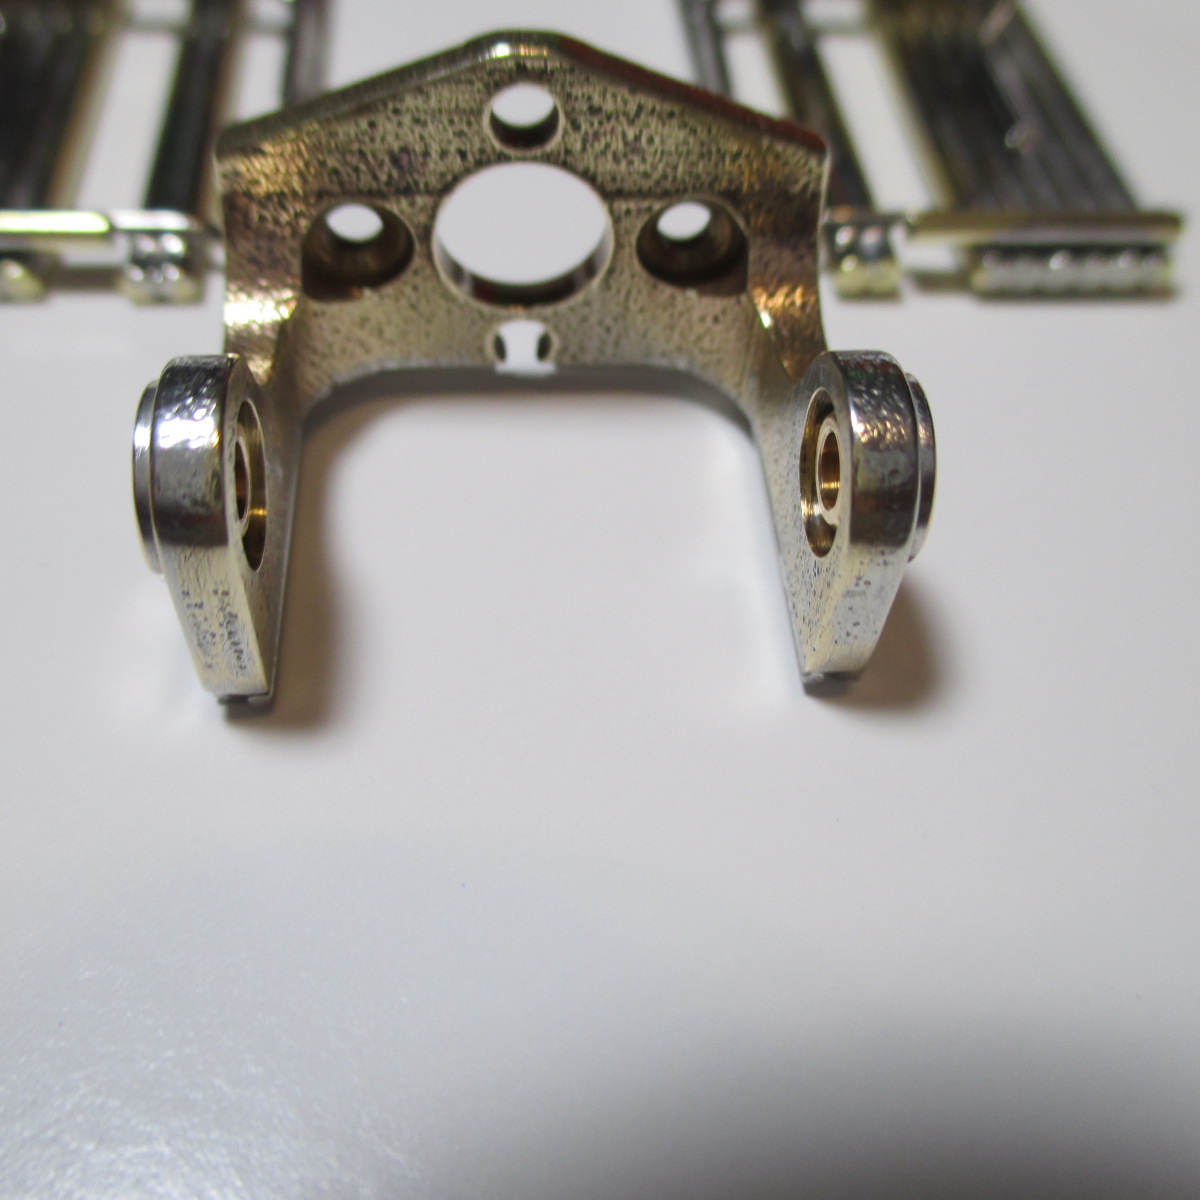
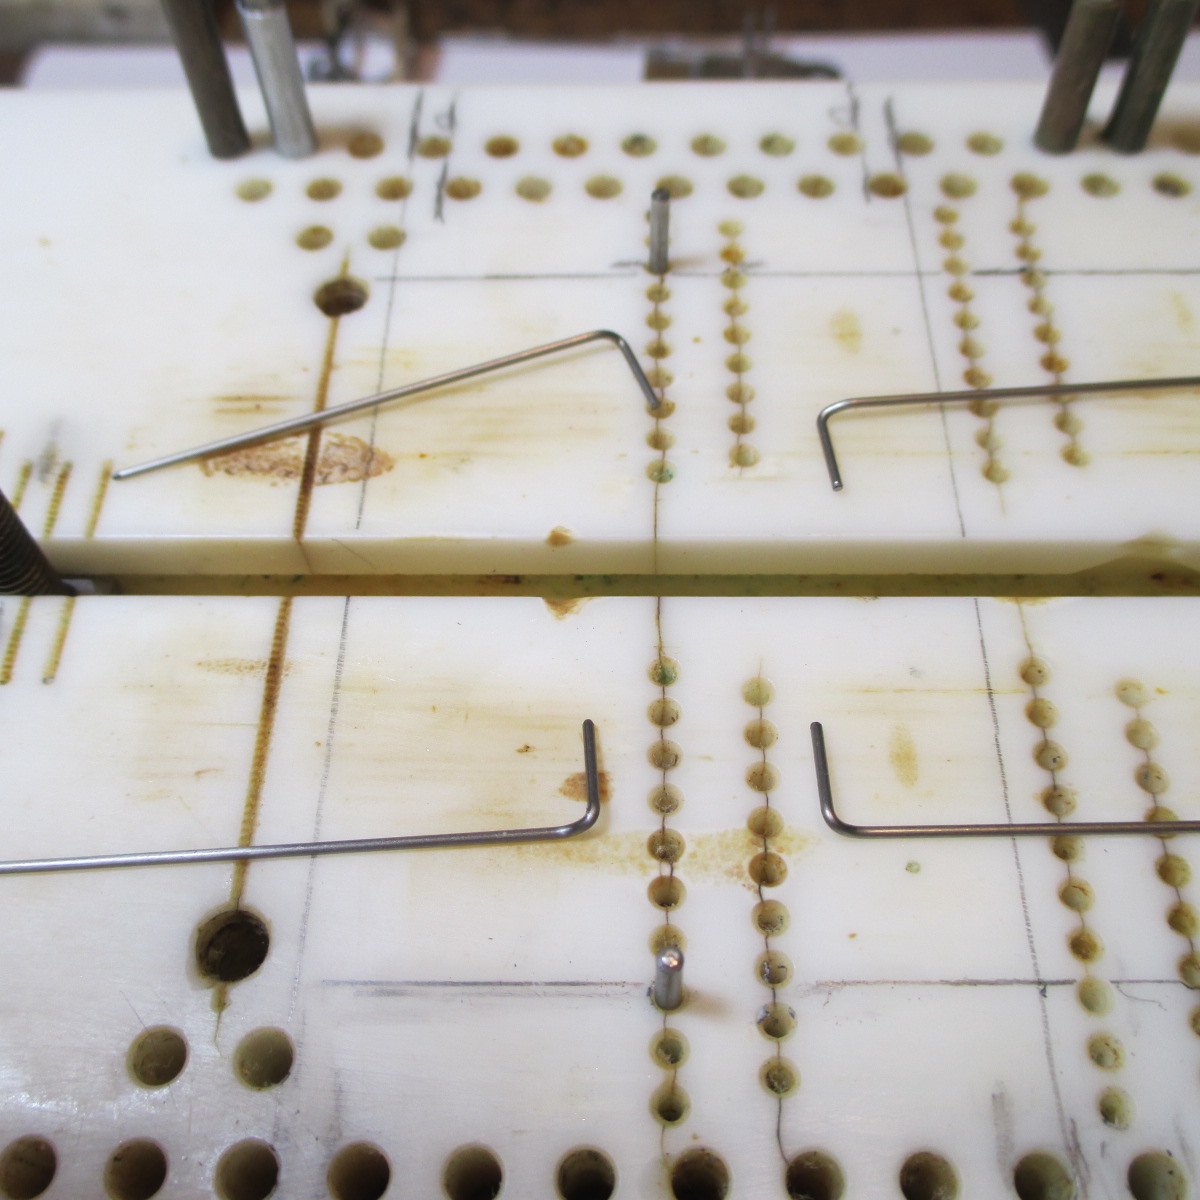
I ream the hole with a .0885" drill bit. Then tap with a 4/40, which is the correct tool for a standard slot car grub set screw.
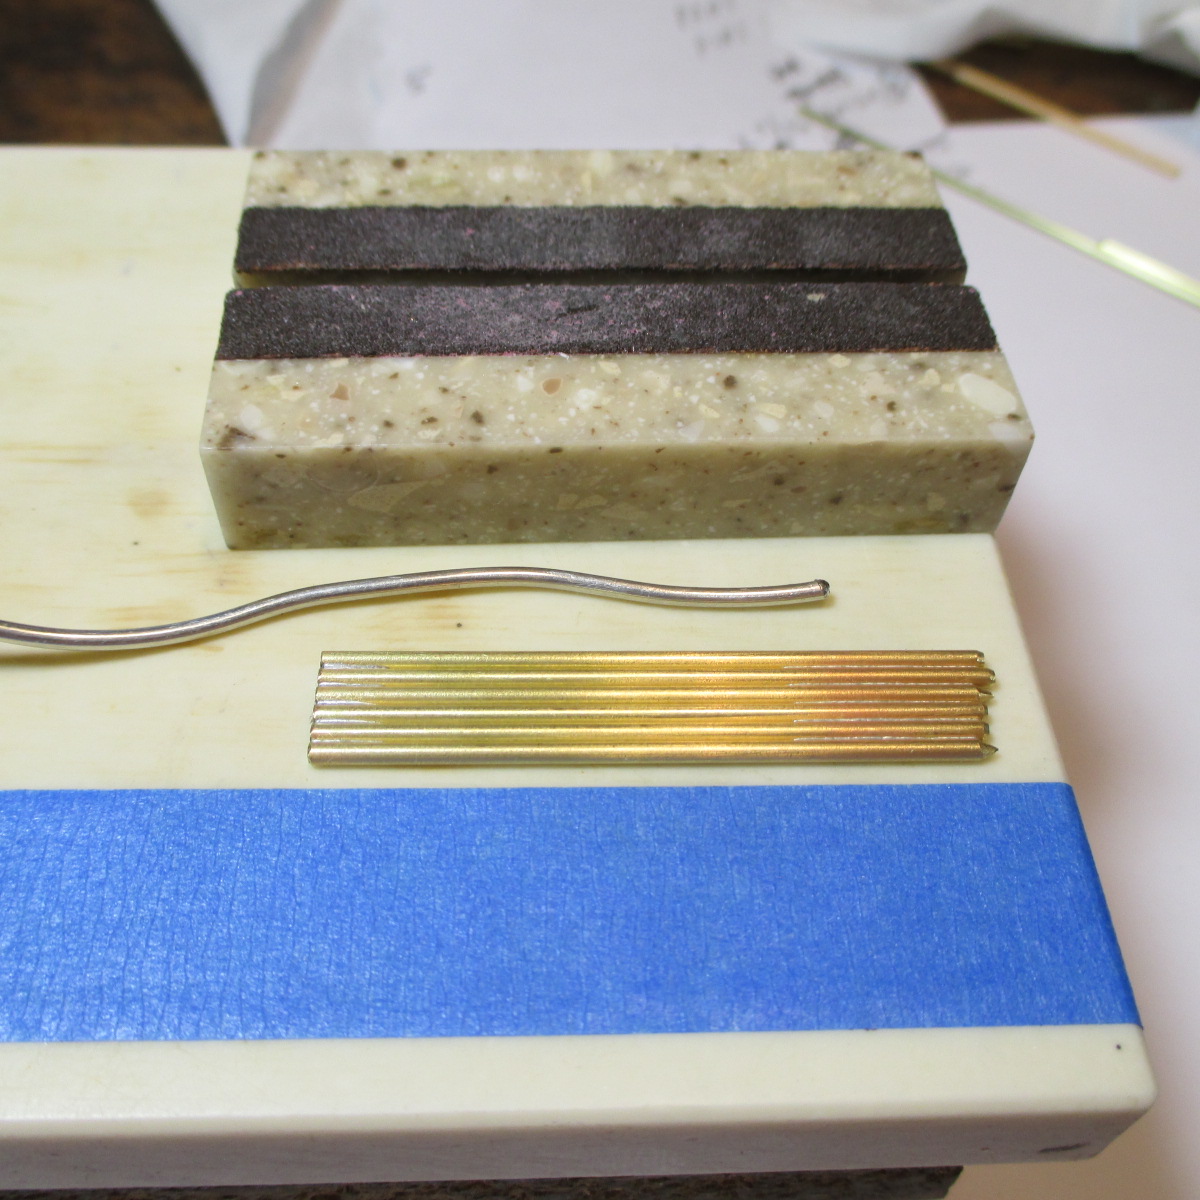
First of two 6 rod nests is rough cut long, tacked with silver solder. I like to use my flag blueprinter as an alignment tool. Tacking is done with the nest extended off the block to make it flow quicker, and avoid ruining my flattest block 
Paul Wolcott
Builder
Posted 29 June 2021 - 10:16 PM
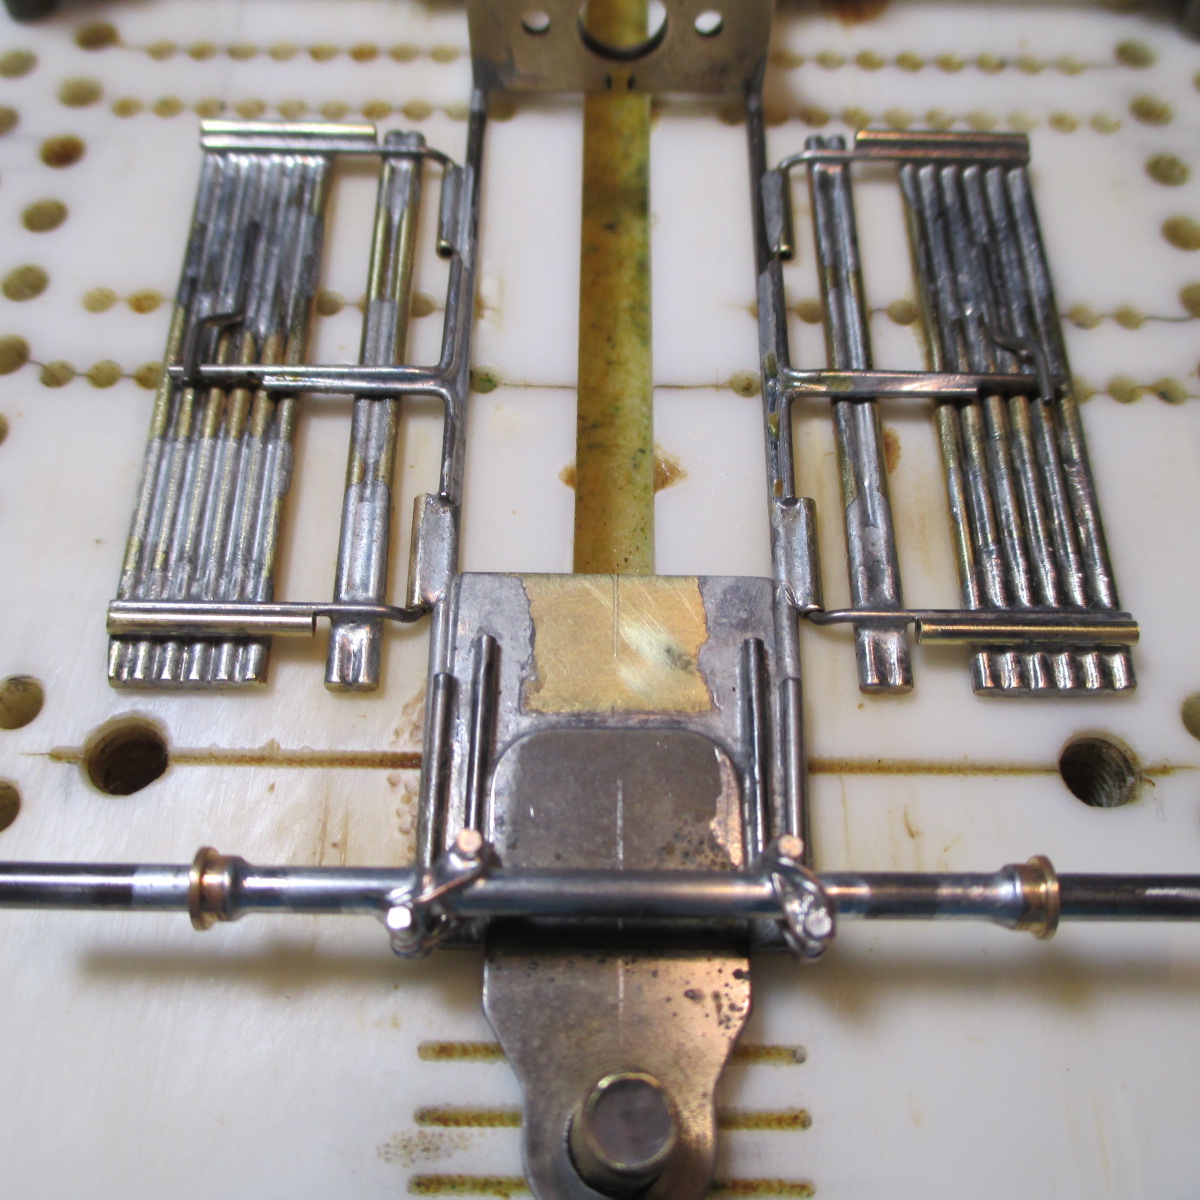
All four nests ready - here is how they will sit. Kinda looks like a Mike Katz retro stock car with rods instead of sheet, eh?

Tolerances are +/- 2 thou. That kind of precision doesn't necessarily make the car better. But it makes assembly easier for me, and I won't deny it gives me a sick thrill of accomplishment
Paul Wolcott
On The Lead Lap
Posted 30 June 2021 - 08:23 AM
I ream the hole with a .0885" drill bit. Then tap with a 4/40, which is the correct tool for a standard slot car grub set screw.
First of two 6 rod nests is rough cut long, tacked with silver solder. I like to use my flag blueprinter as an alignment tool. Tacking is done with the nest extended off the block to make it flow quicker, and avoid ruining my flattest block
On The Lead Lap
Posted 30 June 2021 - 08:24 AM
Builder
Posted 02 July 2021 - 08:51 AM
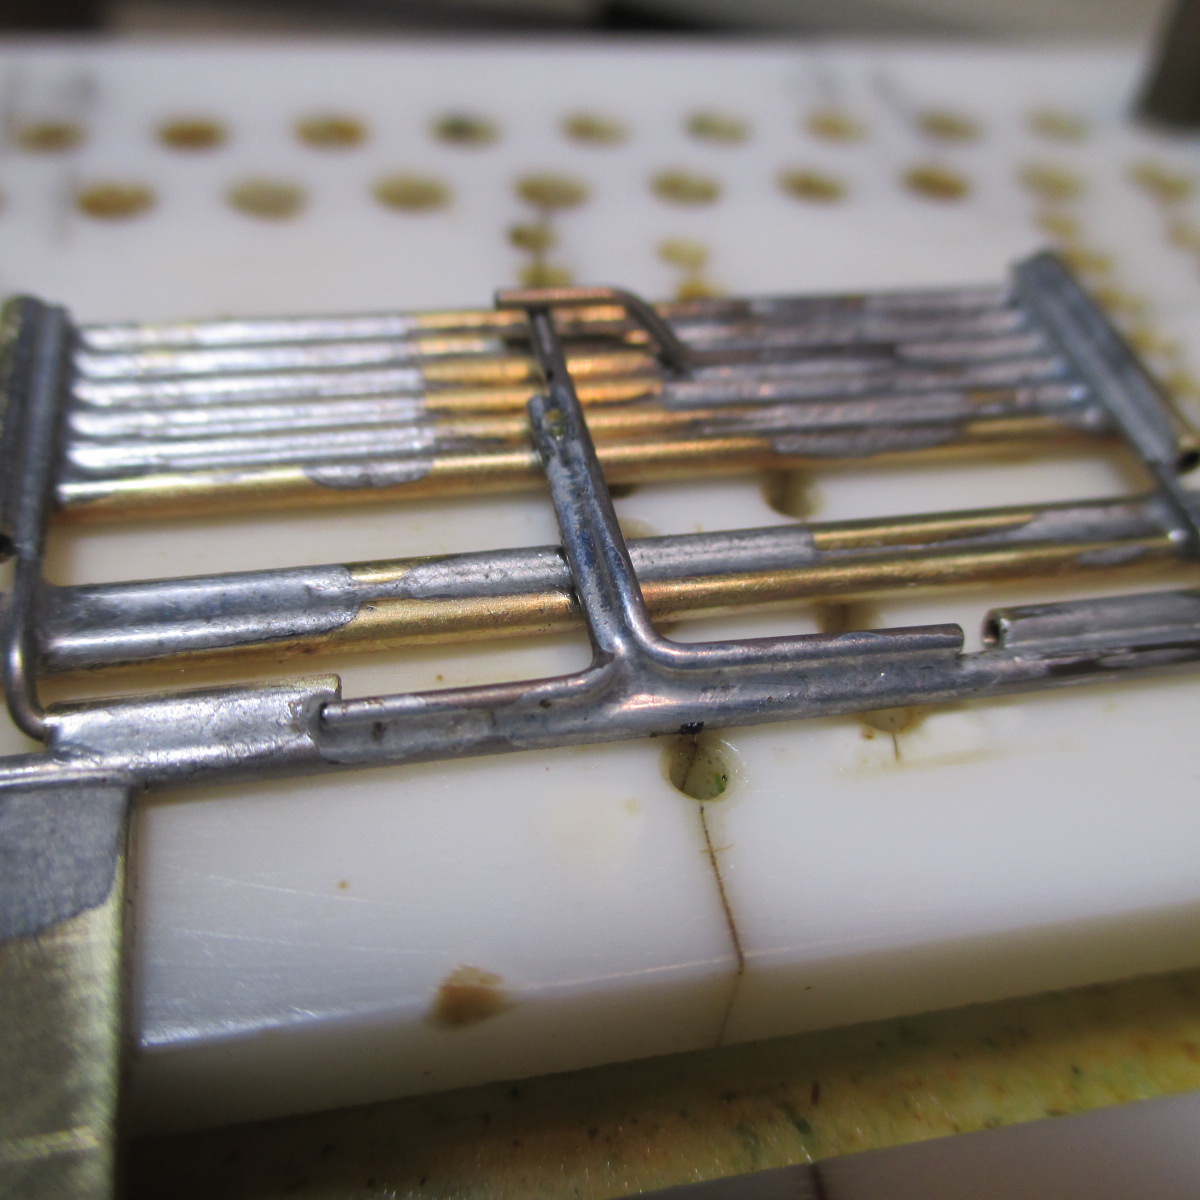
Four 5/16" long 1/16 pin hinge tubes
Four .032" plated hinge wires. I make the curl elevation bends before making the 90 degree bends perfect - because they always change anyway I pencil-marked the jig "so the blind can see", as Mike Steube said in the Tanaka video
I told you it would end up looking like a Mike Katz retro stocker 

Paul Wolcott
Age scrubs away speed!

Posted 02 July 2021 - 10:29 AM
Pin hinge tubes are 5/8".

Builder
Posted 02 July 2021 - 07:46 PM
Nope. Hinge tubes are 5/16" long.
A thousand methods to attach front wheels, but I chose this one for this car:
-.032 shims under rear and front of chassis to mimic 1/32 level clearance
-Tinned 3/32" wire axle cut long to extend beyond jig pins
-Wheels snugged up long to keep them as far away from acid splatter as possible, and I'll cover them with tape
-Tack axle to uprights, remove and clean wheels, wire wrap joints

Paul Wolcott
Age scrubs away speed!
Posted 02 July 2021 - 10:40 PM
I mis-read your enlarged square, The 1/32" marks look like 1/16" in your photo.
Builder
Posted 02 July 2021 - 11:44 PM
I forgive you, Sir. Poor photography is part of my "personality"
Paul Wolcott
Age scrubs away speed!
Posted 04 July 2021 - 07:15 AM
There's never been anything wrong with your photography.
Builder
Posted 04 July 2021 - 09:51 PM
Thanks Bill. I still get a jolt of happiness every time a customer says the car "looks even better in person"
Front axle in place with inside wheel retainers and wire wrapping done. Bite bars reinforced with more .032 "L" wire pieces
Paul Wolcott
Builder
Posted 04 July 2021 - 11:36 PM
Front wheels installed and chassis pre-scrubbed with Dawn, half an SOS pad, and baking soda. Ready for the tumbler

Paul Wolcott
Checkered Flag in Hand

Posted 05 July 2021 - 09:29 AM
Looks amazing. Great job.
Builder
Posted 05 July 2021 - 01:38 PM
Thanks Isaac As usual, I dried then sprayed it with WD-40. Oiled all moving parts, etc. Even oiled inside the pin tubes
Inserted flag clips/braids and O-ring tires to check everything. Trimmed the flag shaft as much as possible. None of my brass collars would fit, so I stayed with the aluminum one. Du-Bro made these back in the day, didn't they? Help, Jairus! LOL
There are a lot of checkpoints going on in this photo, body stance/clearances, ride heights fore and aft, flag and front wheel clearances, and flag spacing
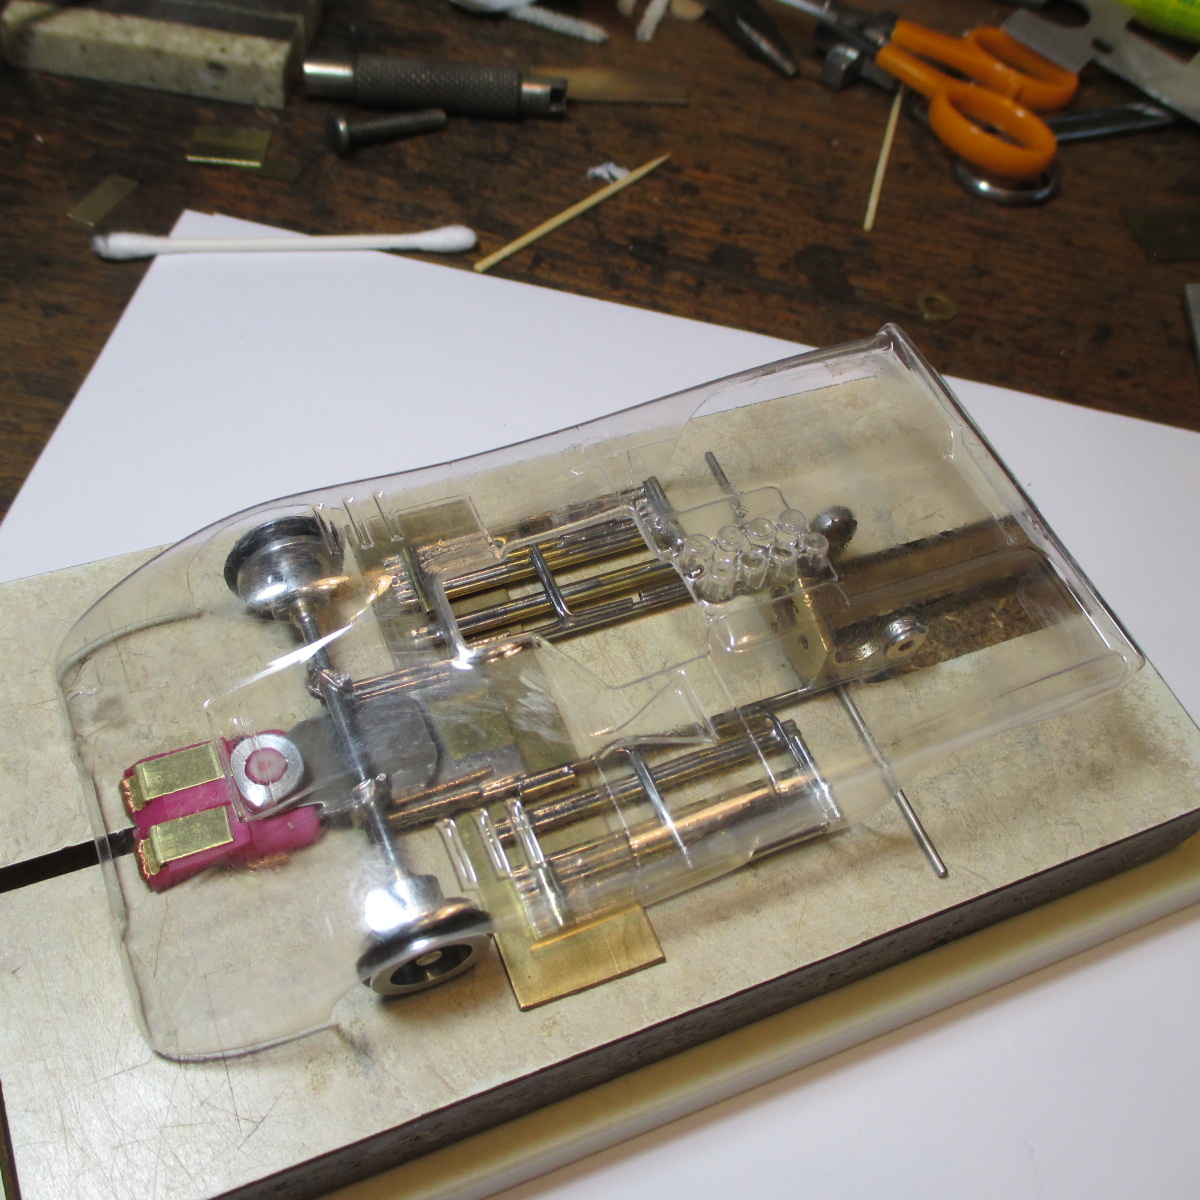
There is an indented area on the body near the rear pin tube that is a challenge to get right. Not good if it interferes with the outside edges of the rod "pans". So I have taken care to not allow that. And my check says it will be fine
Paul Wolcott
Builder
Posted 06 July 2021 - 02:36 PM
Pin holes punched - now the shell goes to Noose for paint and interior
Parma "old skool" brass flag clips and TQ 20 gauge wires. New JK Hawk 7 motor will provide plenty of power for this car. I'm not even going to break it in.
"Pablo" 16 thou emblem will be JB Welded somewhere on the rod pans, TBD

Paul Wolcott