Jump to content


Photo

Scratchbuilding a Champion 'Jail Door' Lotus 40


  • Please log in to reply
71 replies to this topic

#1 dc-65x

dc-65x

    Grand Champion Poster

  • Subscriber
  • PipPipPipPipPipPipPipPip
  • 6,949 posts
  • Joined: 14-February 06
  • Gender:Male
  • Location:Captain Rick: The only vintage slot car nut in SW Oregon?

Posted 11 December 2021 - 12:55 PM

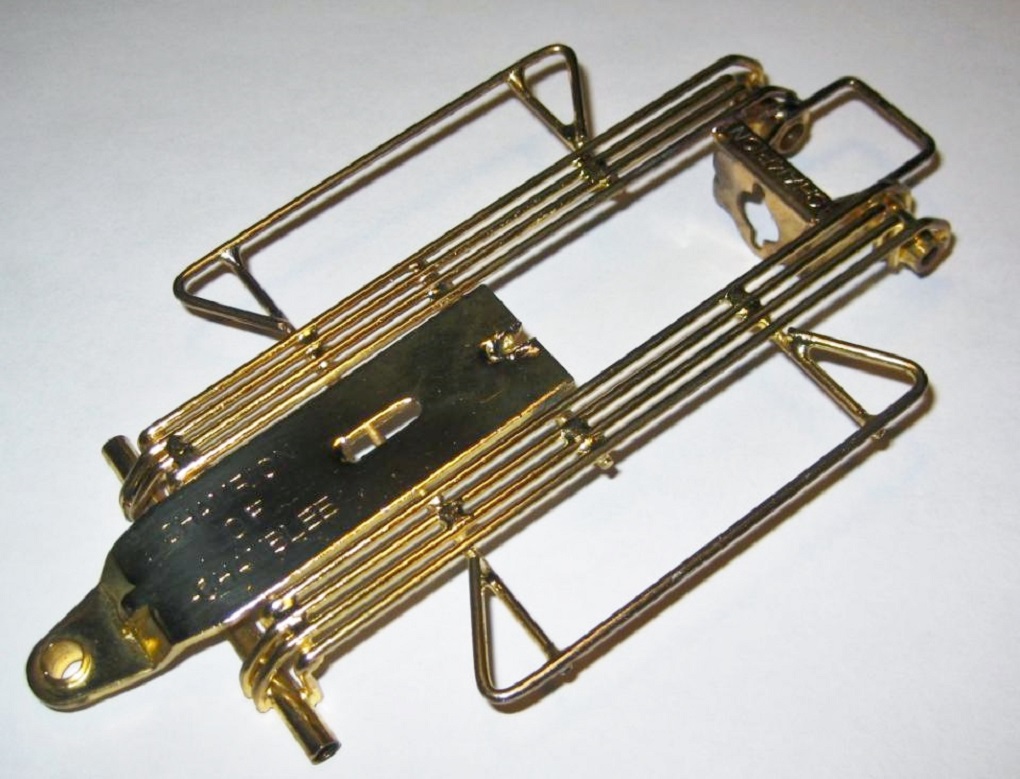
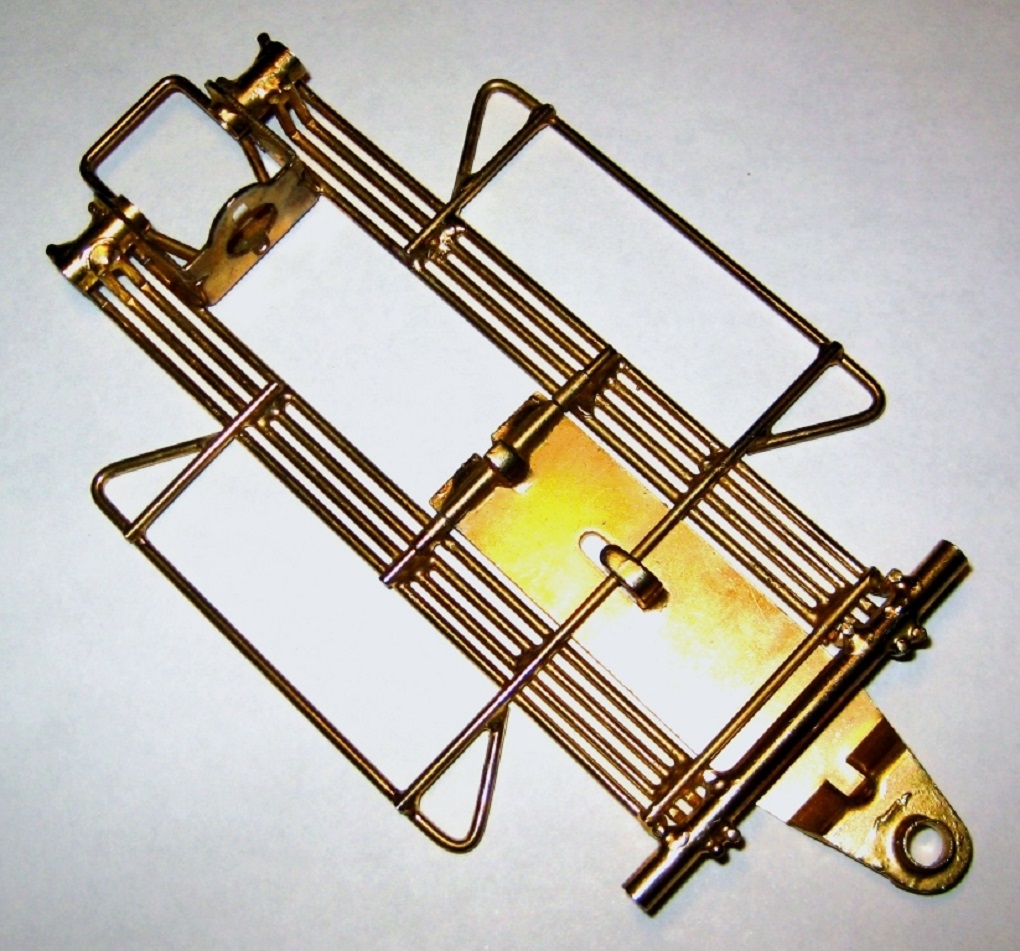
The Champion "Jail Door" chassis is very cool indeed. I especially like the later version (photos courtesy of Gator Bob):


factory champion chassis (1).jpg


factory champion chassis (2).jpg


Since I don't have one I'm going to scratch build my own.   :dance3:


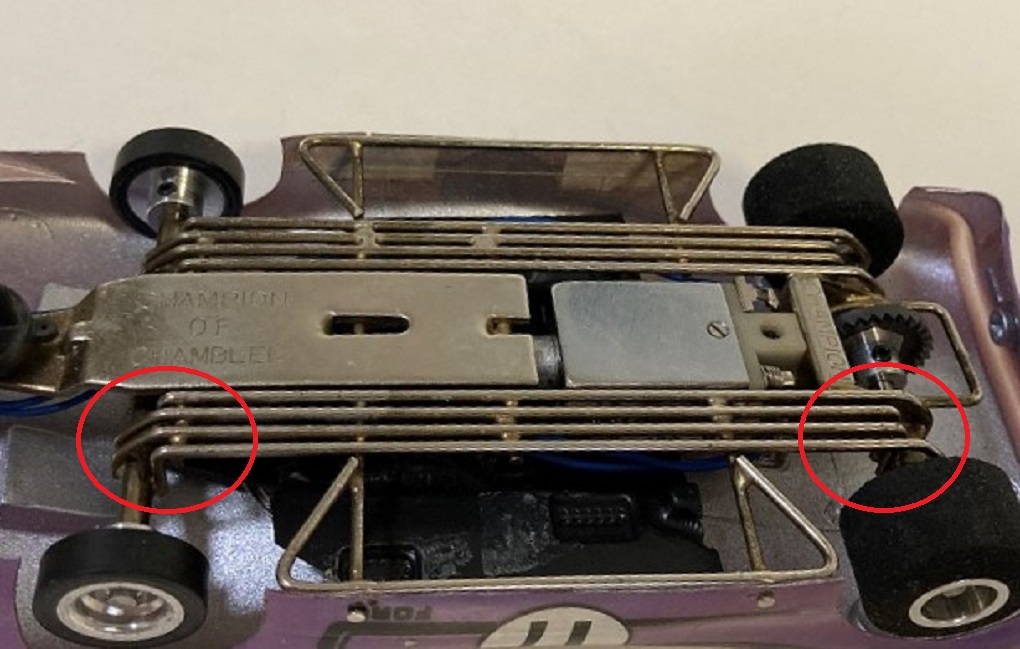
I think the neatest feature of the chassis are the main rails. Their shape and arrangement are unique. One end of the rail is a normal 90 degree bend but the other features two 45 degree bends. Half of the rails have this unique bend facing forward and the other half facing to the rear (photo courtesy of Slot Car Rod):


post-2585-0-88754900-1613592291.jpg


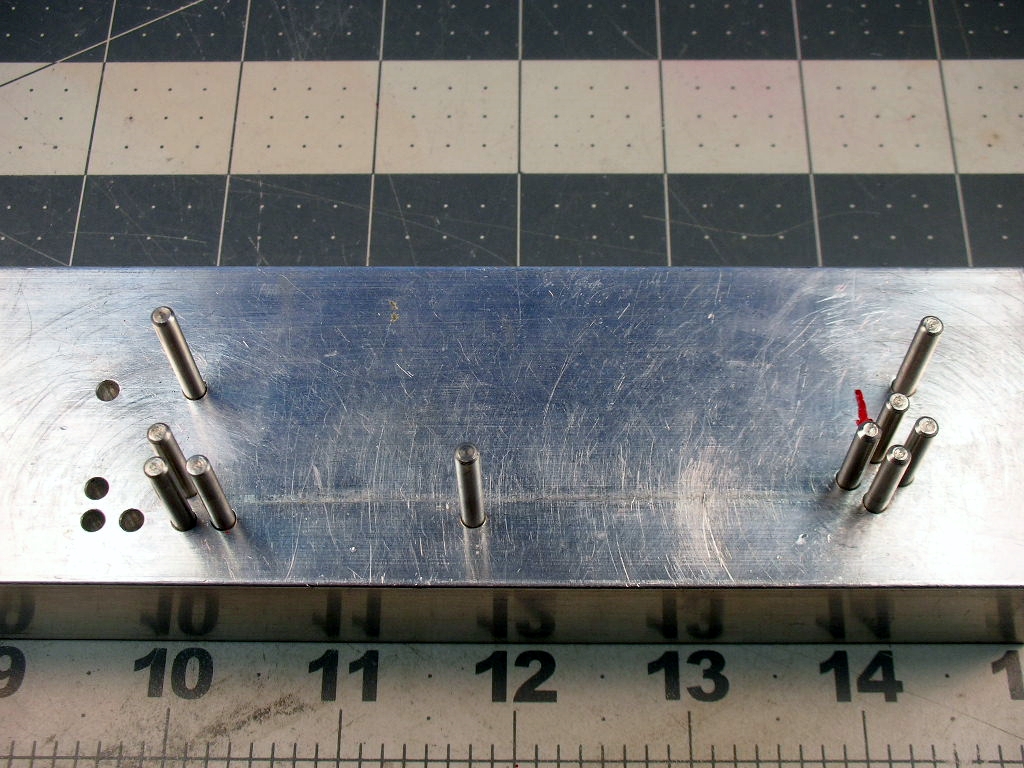
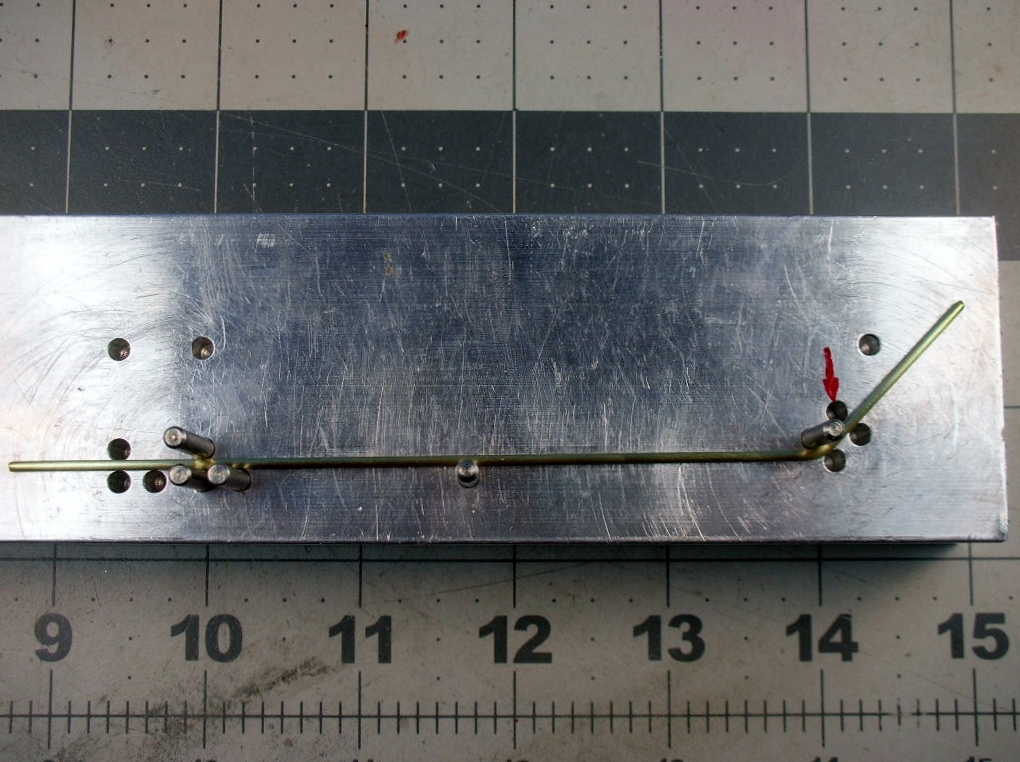
These rails can be made with just a pair of pliers but getting 8 rails with those 45 degree bends identical is difficult. I made up a bending fixture to handle the job. The fixture can make 4" and 4 1/2" wheelbase rails:


champion chassis (4).JPG


Another advantage of this fixture is the larger and smoother radius you get bending the rod around the 1/8" pins.


This is the first 45 degree bend: 


champion chassis (1).JPG


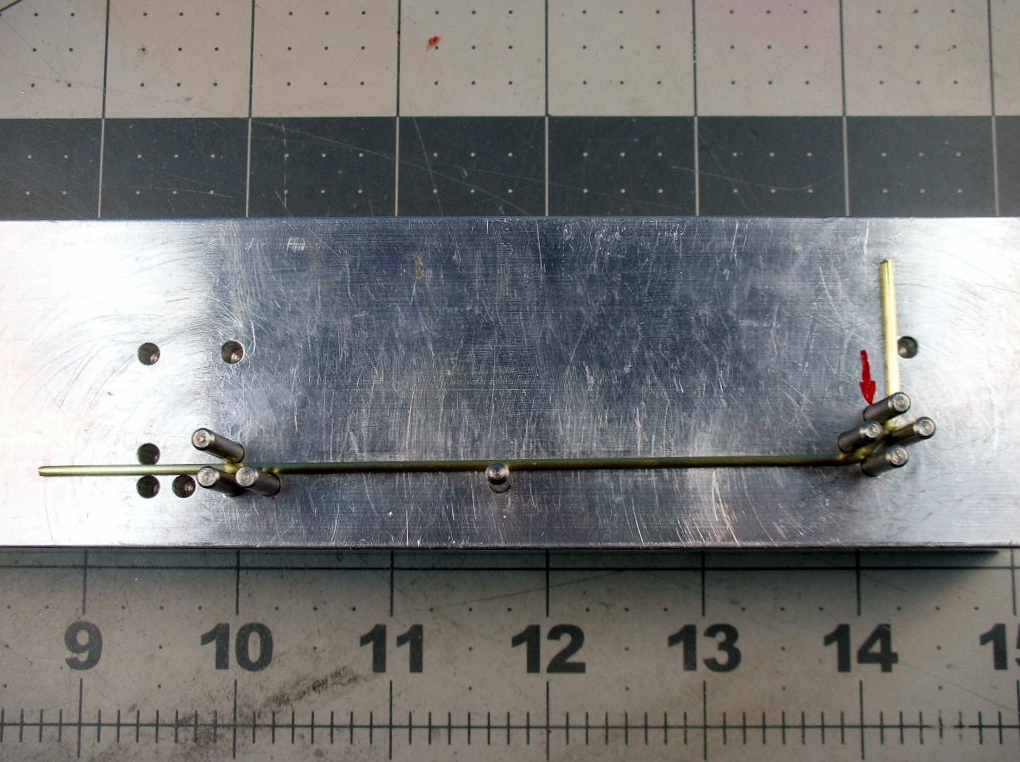
Now the second 45 degree bend:


champion chassis (2).JPG


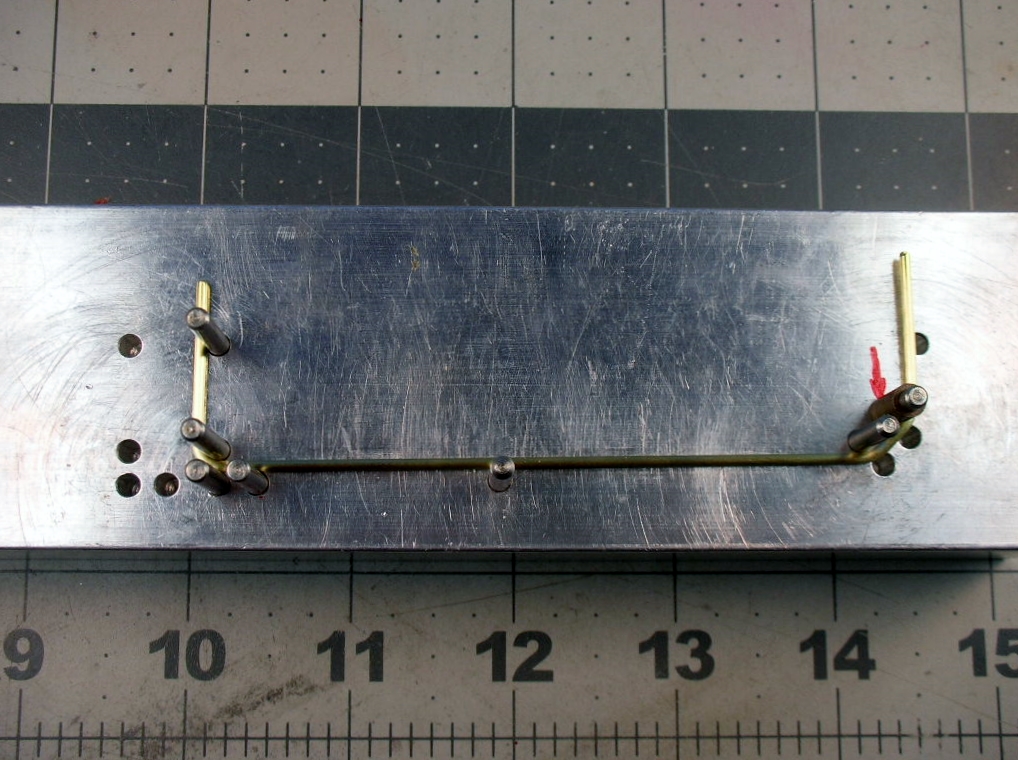
Lastly the 90 degree bend. The rail length varies by 1/16" depending if the rail is to be positioned in front or behind the rear axle tube. So a spacer is placed over the pin with the red arrow to space the bend for the longer rail:


champion chassis (3).JPG


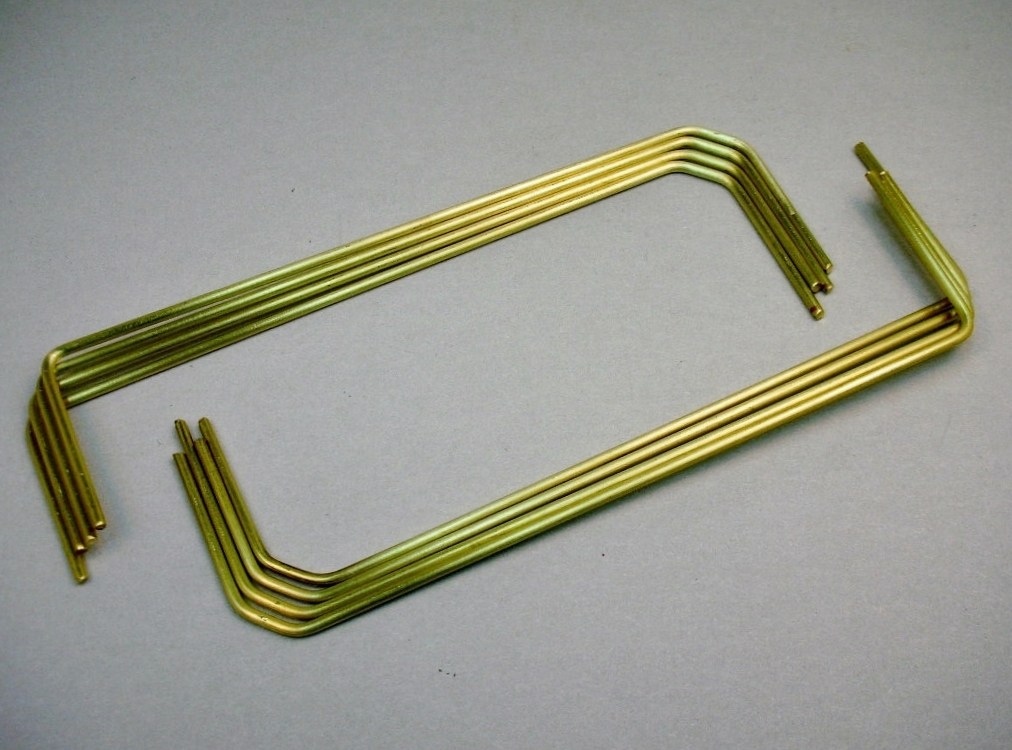
The 2 different length main rails:


champion chassis (5).JPG


That was the easy part. Now I need to trim them to length and put a nice chamfer on each cut. I could just Dremel them all at once after soldering but then they wouldn't have the smooth chamfered ends. This is going to take some time but the end result will be worth it.......


  • Pablo, vfr750, S.O. Watt and 13 others like this

Rick Thigpen
Check out Steve Okeefe's great web site at its new home here at Slotblog:
The Independent Scratchbuilder
There's much more to come...


#2 Pablo

Pablo

    Builder

  • Administrator
  • PipPipPipPipPipPipPipPip
  • 18,442 posts
  • Joined: 20-February 06
  • Gender:Male
  • Location:Cleveland, Tennessee

Posted 11 December 2021 - 01:32 PM

:whistle3:


Paul Wolcott


#3 Bill from NH

Bill from NH

    Age scrubs away speed!

  • Full Member
  • PipPipPipPipPipPipPipPip
  • 14,715 posts
  • Joined: 02-August 07
  • Gender:Male
  • Location:New Boston, NH

Posted 11 December 2021 - 03:30 PM

Another building advantage of the "Champion-type" jail door chassis is that all rails are the same length. Rick, are you using K&S brass rod for the rails. or another product?


Bill Fernald
 
I intend to live forever!  So far, so good.  :laugh2:  :laugh2: 

#4 dc-65x

dc-65x

    Grand Champion Poster

  • Subscriber
  • PipPipPipPipPipPipPipPip
  • 6,949 posts
  • Joined: 14-February 06
  • Gender:Male
  • Location:Captain Rick: The only vintage slot car nut in SW Oregon?

Posted 11 December 2021 - 04:11 PM

I just use K&S hobby shop brass for everything. Maybe Champion used some trick rod but that's OK.


As for the rail lengths, they are different for the later chassis with the 7/32" rear axle tubes than for the earlier version with 5/32" axle tubes front and rear. The rails that go behind the 7/32" rear axle tube have to be 1/16" longer than the ones positioned in front of it.


  • S.O. Watt likes this

Rick Thigpen
Check out Steve Okeefe's great web site at its new home here at Slotblog:
The Independent Scratchbuilder
There's much more to come...


#5 Aeropro

Aeropro

    Mid-Pack Racer

  • Full Member
  • PipPipPip
  • 102 posts
  • Joined: 17-April 19
  • Gender:Male
  • Location:FL

Posted 11 December 2021 - 07:54 PM

What a beautiful, classic chassis. Thanks!


Rick Franchi
Founder and owner of
Aero Racing Products 1987-2021


#6 dc-65x

dc-65x

    Grand Champion Poster

  • Subscriber
  • PipPipPipPipPipPipPipPip
  • 6,949 posts
  • Joined: 14-February 06
  • Gender:Male
  • Location:Captain Rick: The only vintage slot car nut in SW Oregon?

Posted 11 December 2021 - 08:58 PM

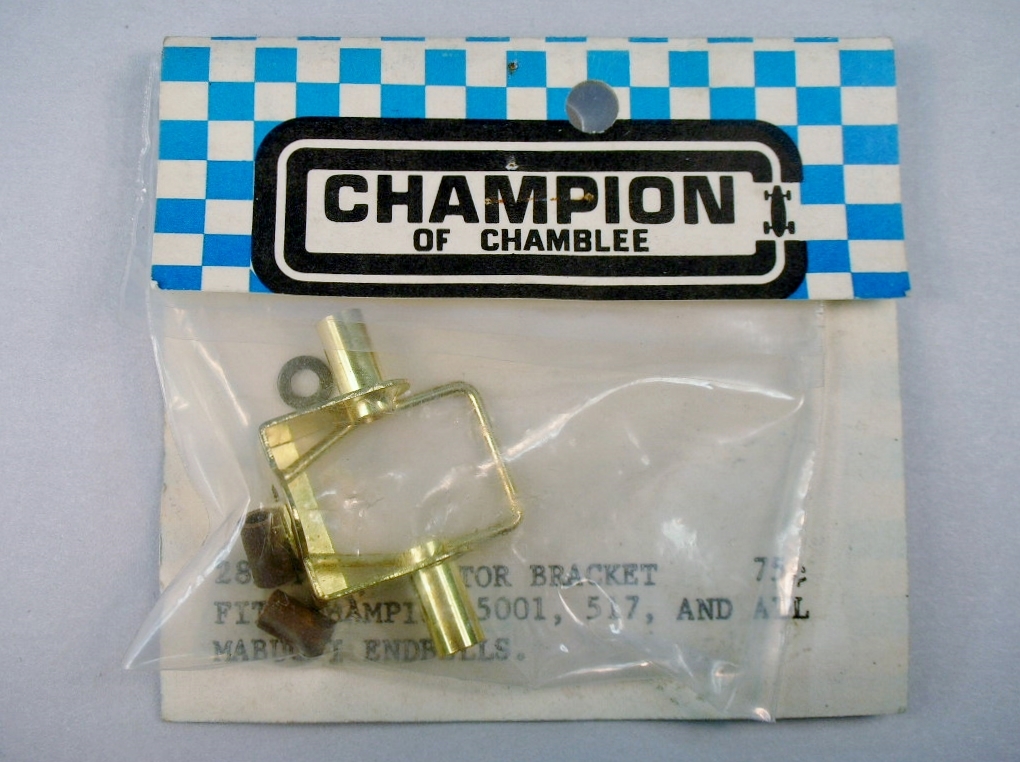
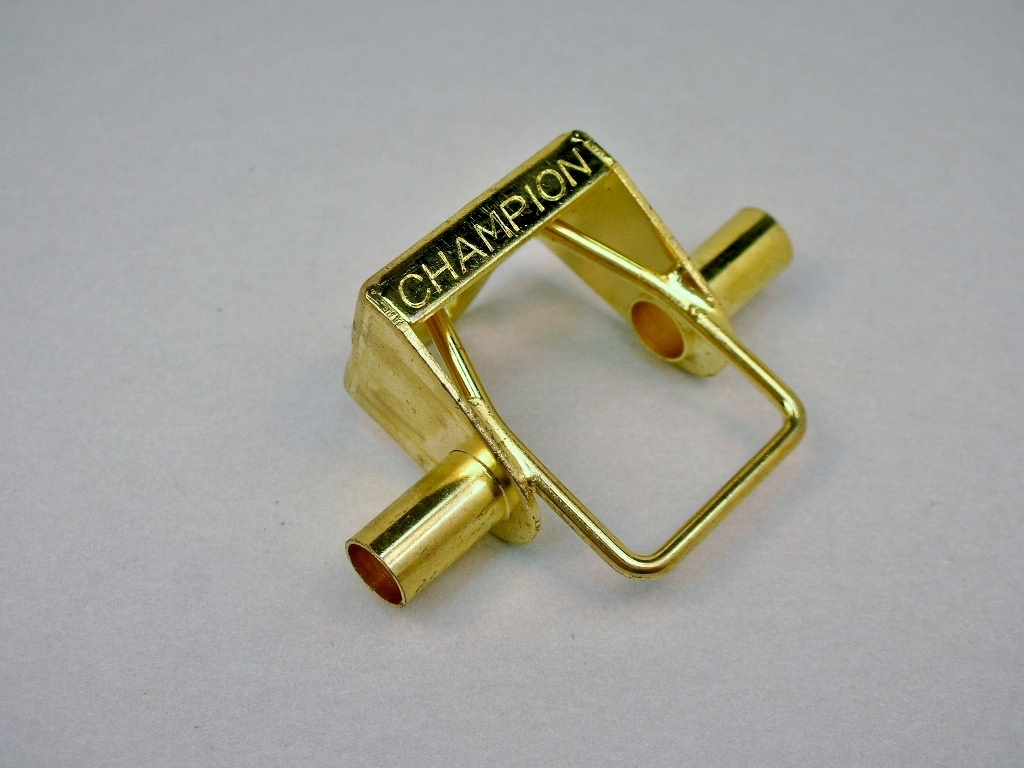
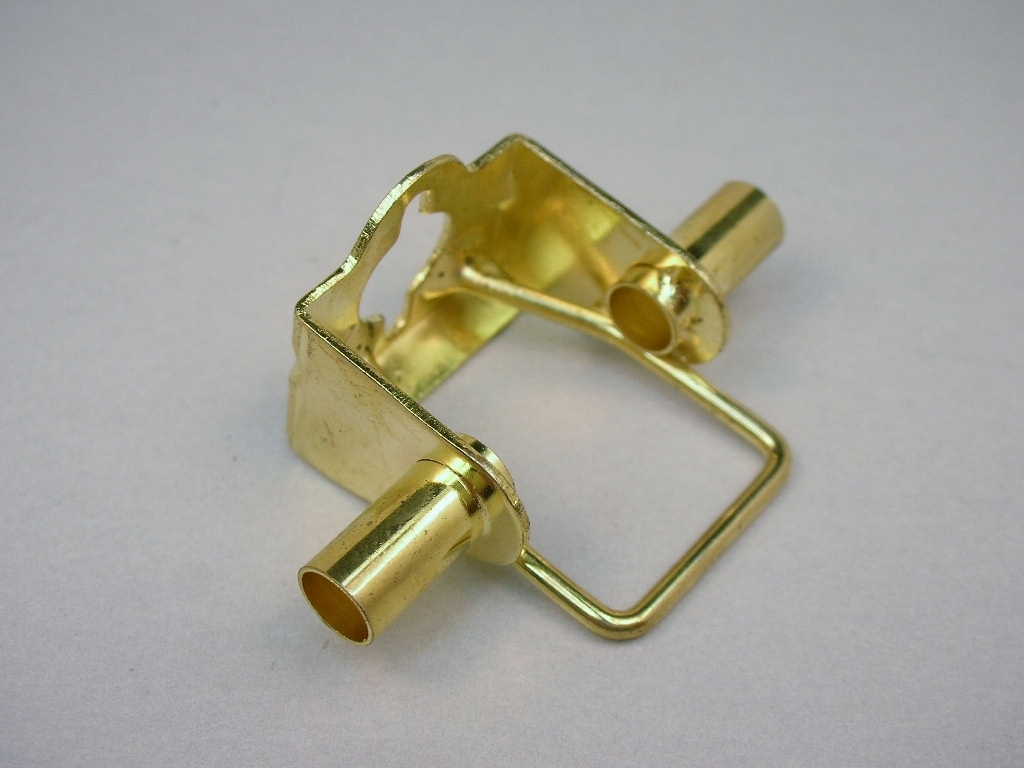
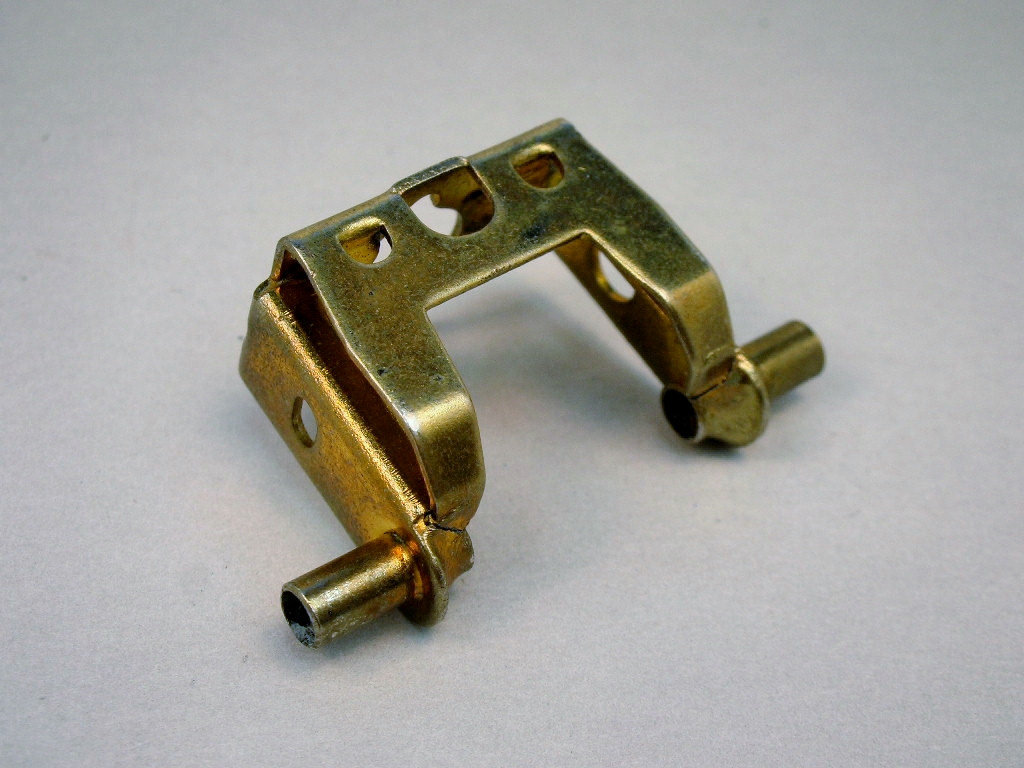
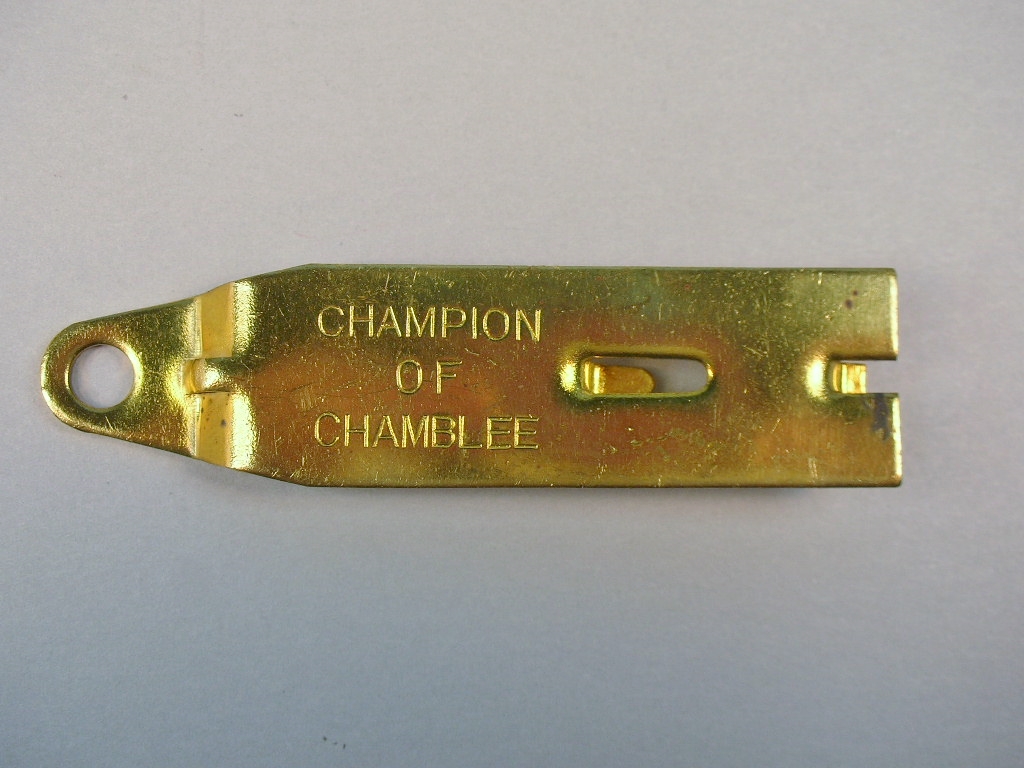
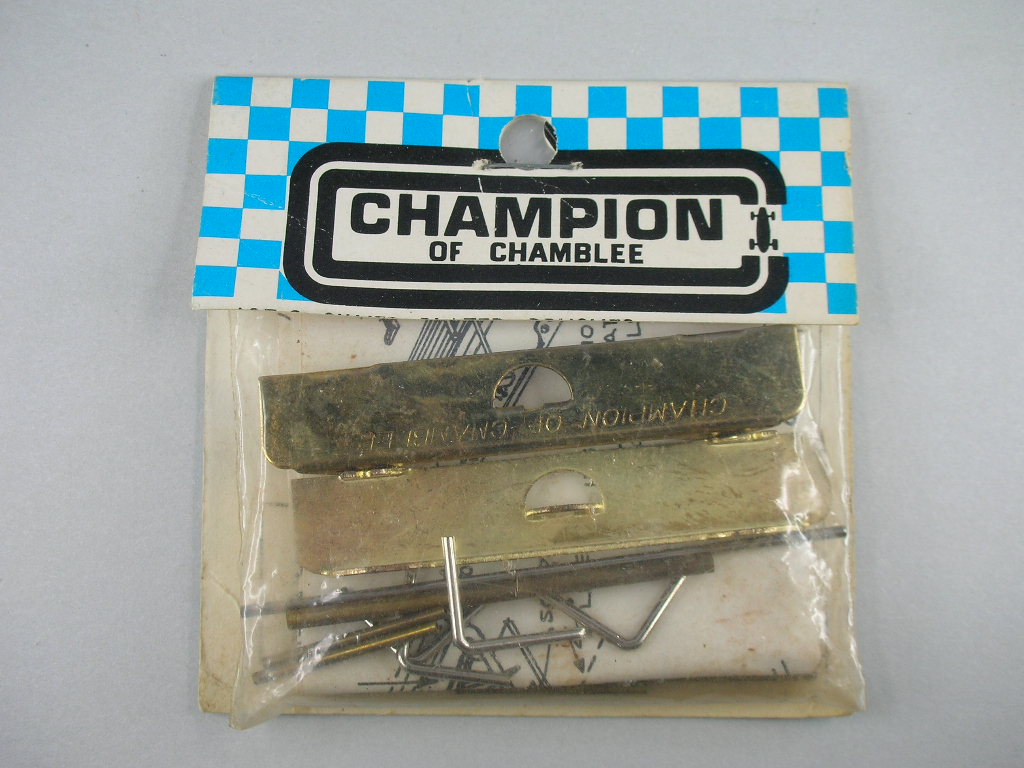
Here is another classy feature of the late Champion chassis:


champion chassis (7).JPG


The Champion name proudly displayed on the piece is a nice touch:


champion chassis (9).JPG


champion chassis (10).JPG


I've got the main rails and motor bracket. Now I need a motor so I can get things set up in the chassis jig and start building....


  • S.O. Watt and Peter Horvath like this

Rick Thigpen
Check out Steve Okeefe's great web site at its new home here at Slotblog:
The Independent Scratchbuilder
There's much more to come...


#7 Pablo

Pablo

    Builder

  • Administrator
  • PipPipPipPipPipPipPipPip
  • 18,442 posts
  • Joined: 20-February 06
  • Gender:Male
  • Location:Cleveland, Tennessee

Posted 11 December 2021 - 09:26 PM

The thing I like about those vintage Champion brackets is, new Champion endbells that fit are still available


Paul Wolcott


#8 Dave Crevie

Dave Crevie

    Posting Leader

  • Full Member
  • PipPipPipPipPipPipPip
  • 4,453 posts
  • Joined: 16-February 09

Posted 12 December 2021 - 09:35 AM

What everyone seems to have missed is the great fixture you made, Rick. I don't see any layout lines on it, so I will assume you made it by jig drilling the holes using a DRO. Great work!


  • Larry Horner likes this

#9 Bill from NH

Bill from NH

    Age scrubs away speed!

  • Full Member
  • PipPipPipPipPipPipPipPip
  • 14,715 posts
  • Joined: 02-August 07
  • Gender:Male
  • Location:New Boston, NH

Posted 12 December 2021 - 09:59 AM

The thing I like about those vintage Champion brackets is, new Champion endbells that fit are still available


Champion has a second vintage inline bracket that's different than Rick's. It uses the sleeve bushings, but is braced differently, & looks heavier. The one I have is plated silver, but it's been used on factory chassis plated in both silver & gold (yellow). I don't recall when I got it, but my guess is mine is a newer version.


Bill Fernald
 
I intend to live forever!  So far, so good.  :laugh2:  :laugh2: 

#10 dc-65x

dc-65x

    Grand Champion Poster

  • Subscriber
  • PipPipPipPipPipPipPipPip
  • 6,949 posts
  • Joined: 14-February 06
  • Gender:Male
  • Location:Captain Rick: The only vintage slot car nut in SW Oregon?

Posted 12 December 2021 - 04:38 PM

I've been getting PM's requesting me to make up sets of main rails. I only shared my little rail bending gizmo to show there are ways for us to make up vintage replica components for our builds. 


Rather than answer the PM's individually I thought I'd respond here.


I'm over 70 and my scratch building time is running short. So thank you for your interest and I'm sorry but I really want to spend the time I have left on my own projects.


  • Horsepower, S.O. Watt, Regis4446 and 1 other like this

Rick Thigpen
Check out Steve Okeefe's great web site at its new home here at Slotblog:
The Independent Scratchbuilder
There's much more to come...


#11 dc-65x

dc-65x

    Grand Champion Poster

  • Subscriber
  • PipPipPipPipPipPipPipPip
  • 6,949 posts
  • Joined: 14-February 06
  • Gender:Male
  • Location:Captain Rick: The only vintage slot car nut in SW Oregon?

Posted 12 December 2021 - 04:44 PM

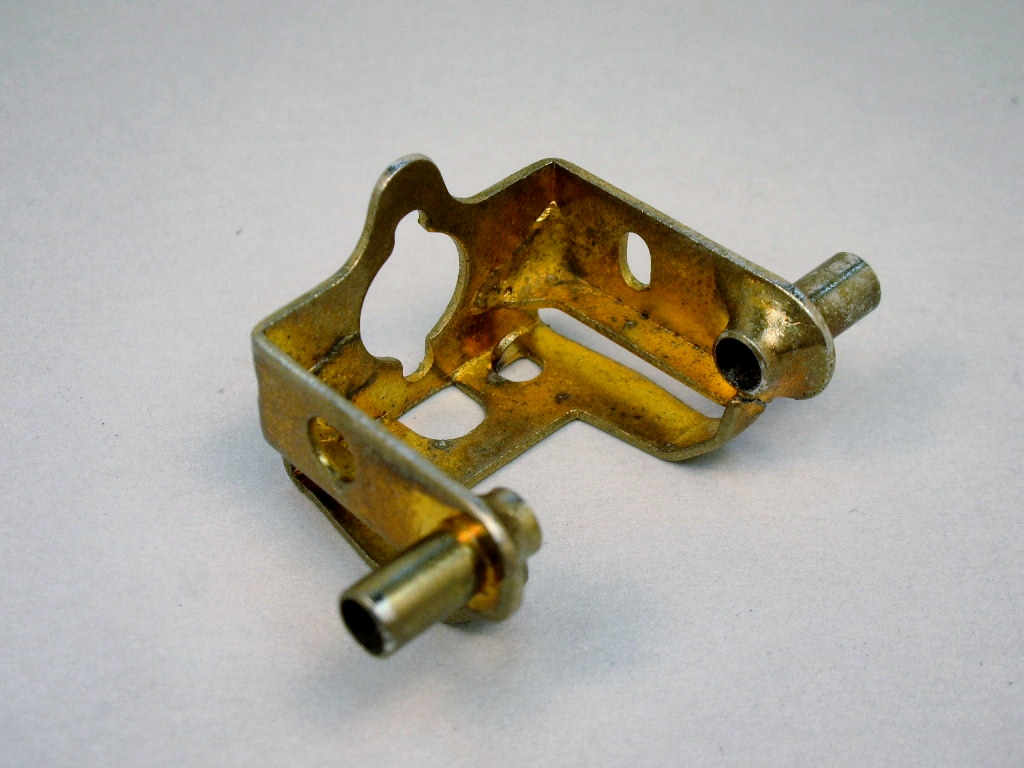
For comparison here is an earlier version of Champion's rear axle bracket:


champion chassis (12).JPG


It uses 5/32" tube for the axle bushings:


champion chassis (11).JPG


This bracket allows all the frame rails to be the same length.


  • S.O. Watt and Peter Horvath like this

Rick Thigpen
Check out Steve Okeefe's great web site at its new home here at Slotblog:
The Independent Scratchbuilder
There's much more to come...


#12 Basement Racer

Basement Racer

    Rookie Keyboard Racer

  • Full Member
  • Pip
  • 25 posts
  • Joined: 17-May 10
  • Gender:Male
  • Location:Cleveland, OH

Posted 12 December 2021 - 04:51 PM

Hey Dave. Post #8. What is a DRO?


Jim Velbeck

#13 dc-65x

dc-65x

    Grand Champion Poster

  • Subscriber
  • PipPipPipPipPipPipPipPip
  • 6,949 posts
  • Joined: 14-February 06
  • Gender:Male
  • Location:Captain Rick: The only vintage slot car nut in SW Oregon?

Posted 12 December 2021 - 05:07 PM

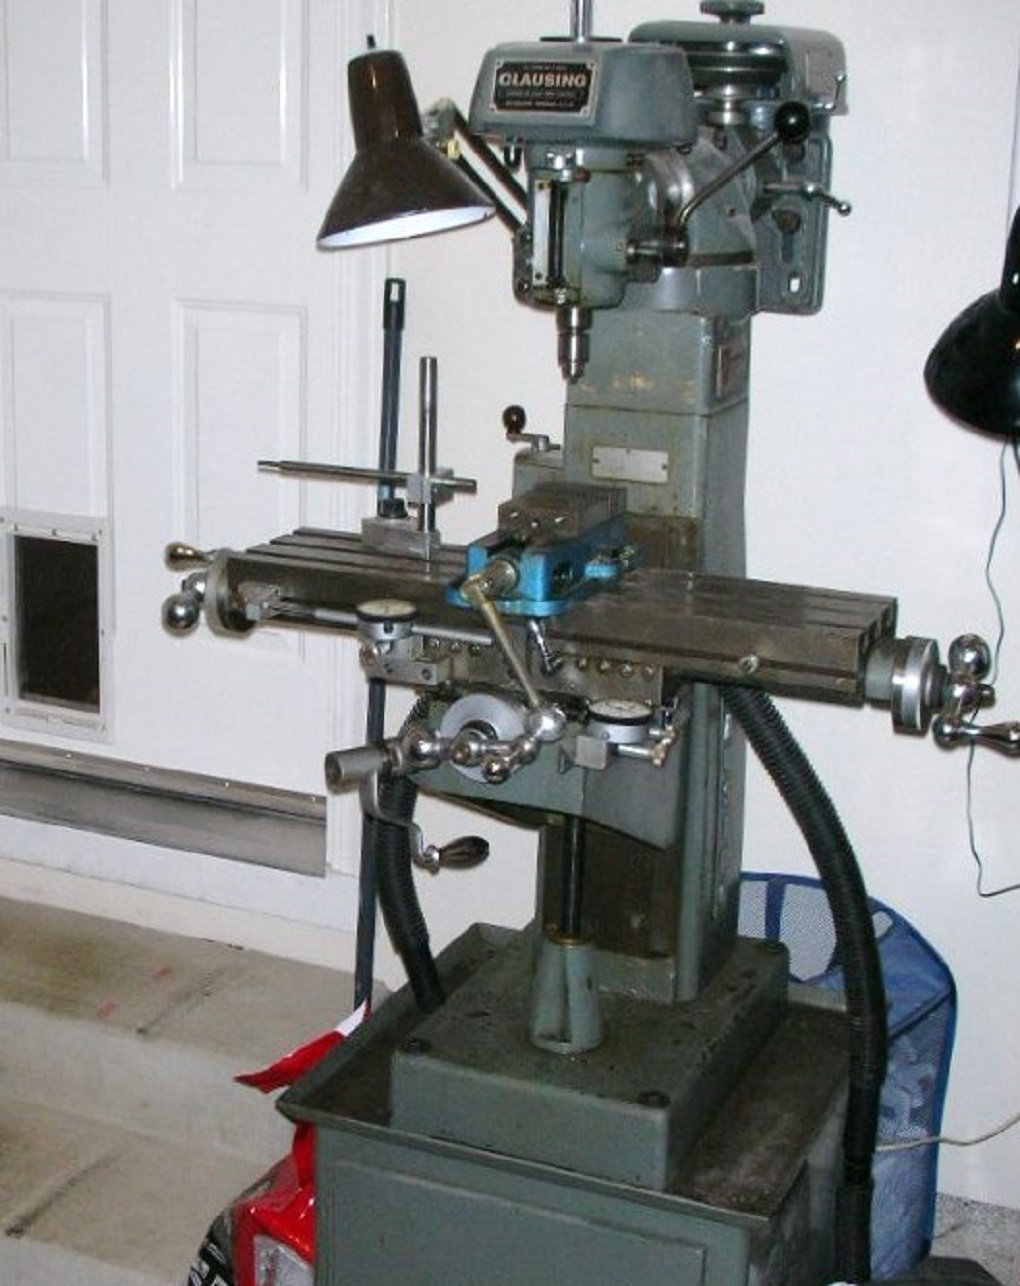
Sorry, I forgot to answer Dave's post. No DRO. I just have some dial indicators rigged up to my old Clausing mill:


clausing.jpg


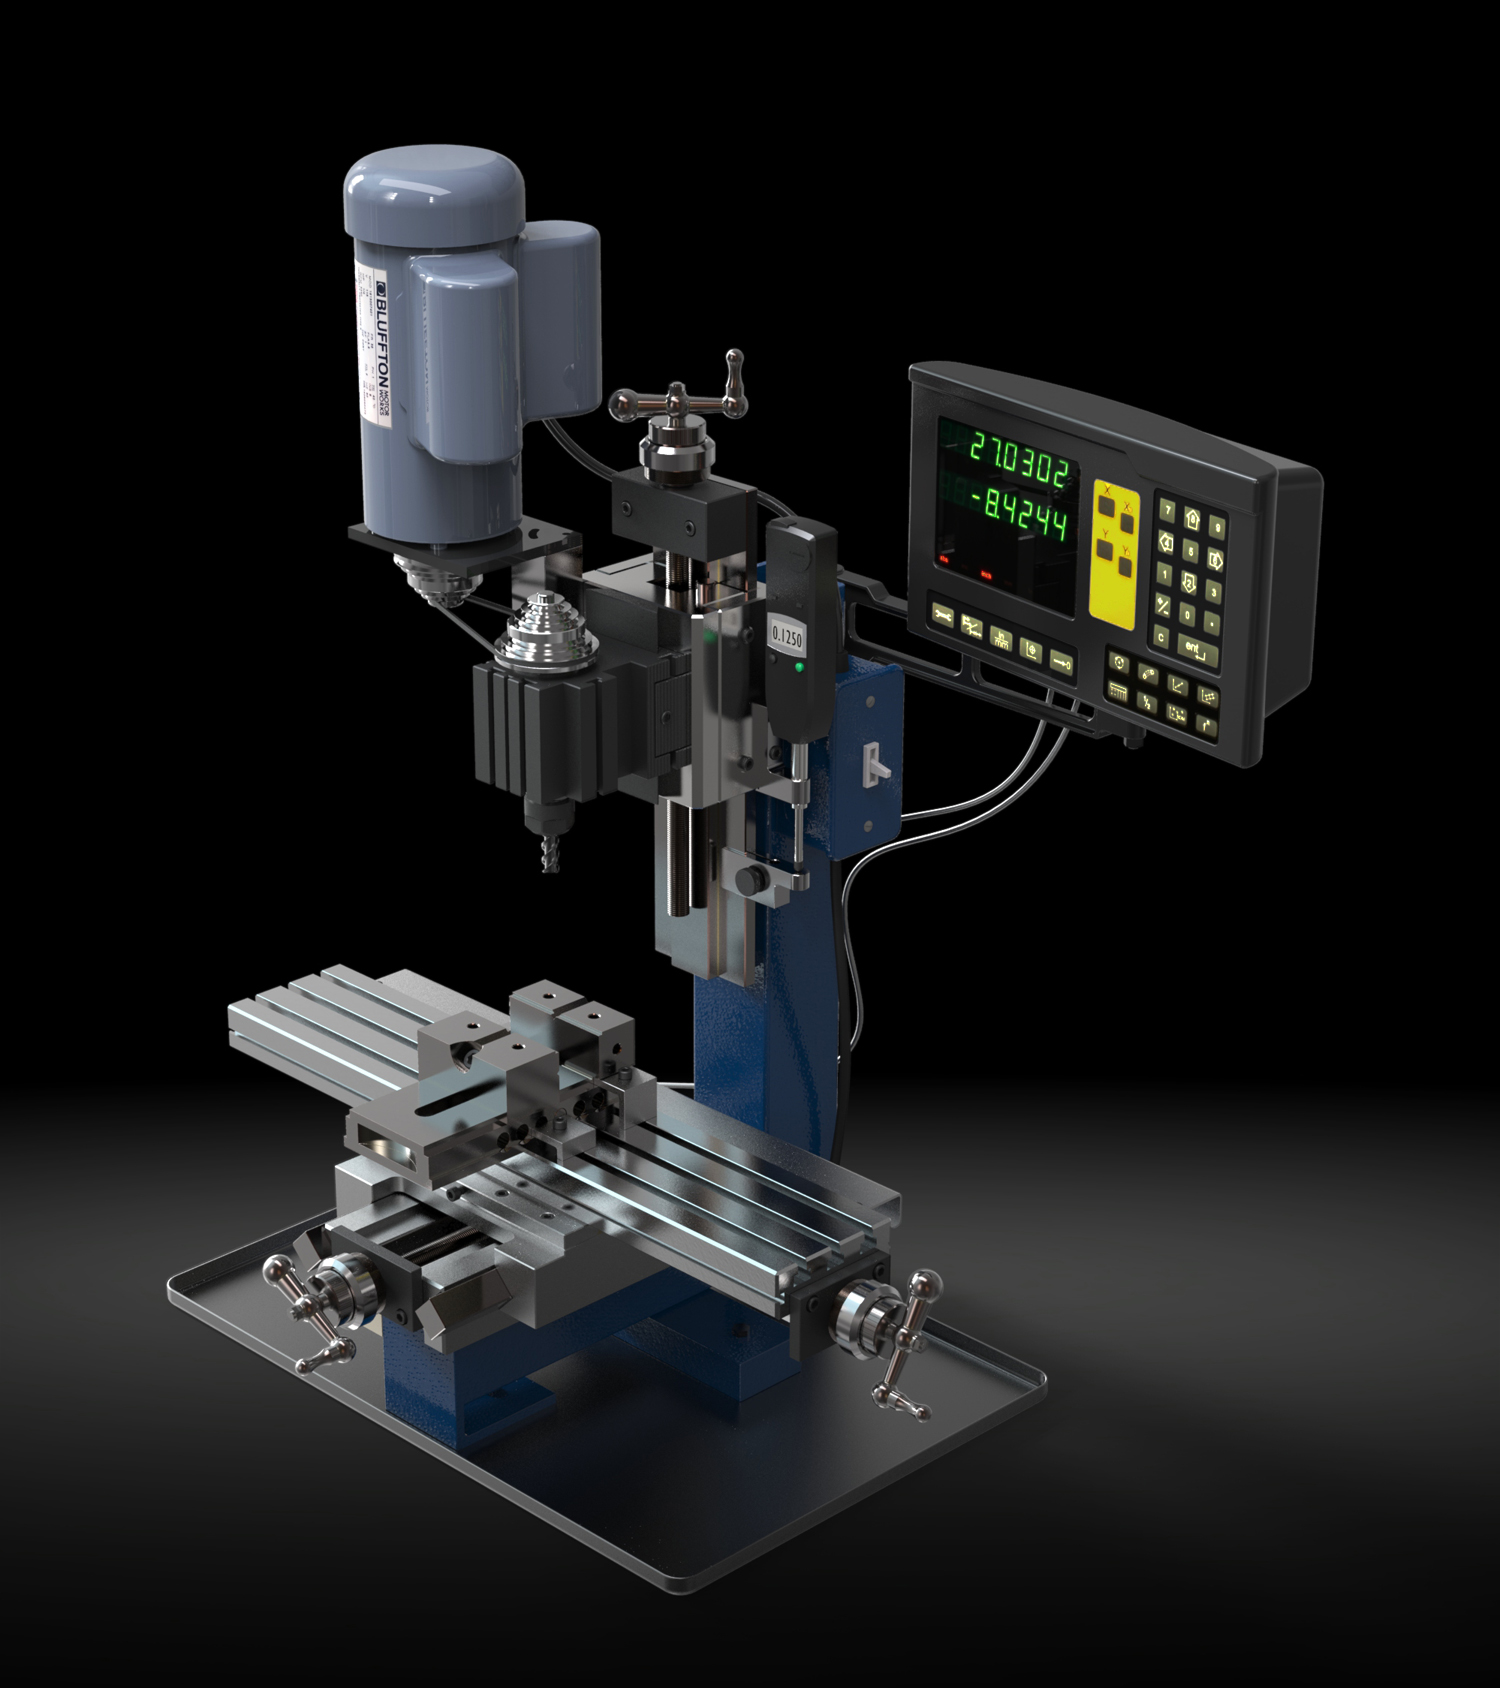
Jim, a DRO refers to a digital read out for positioning on a milling machine for example:


8-Taig Mill.141.jpg


  • NSwanberg, Peter Horvath and SpeedyNH like this

Rick Thigpen
Check out Steve Okeefe's great web site at its new home here at Slotblog:
The Independent Scratchbuilder
There's much more to come...


#14 Basement Racer

Basement Racer

    Rookie Keyboard Racer

  • Full Member
  • Pip
  • 25 posts
  • Joined: 17-May 10
  • Gender:Male
  • Location:Cleveland, OH

Posted 12 December 2021 - 07:30 PM

Thank you Rick! I always pay attention to your building posts. I have some machinery but nothing like your milling machine.


Jim Velbeck

#15 Phil Smith

Phil Smith

    Posting Leader

  • Member at Peace
  • PipPipPipPipPipPipPip
  • 3,582 posts
  • Joined: 03-November 07
  • Gender:Male
  • Location:Irving, TX

Posted 12 December 2021 - 07:46 PM

What everyone seems to have missed is the great fixture you made, Rick. I don't see any layout lines on it, so I will assume you made it by jig drilling the holes using a DRO. Great work!


Possibly the layout is on the other side? Or did you use your dial gauges, Rick?


Phil Smith
???-2/31/23
Requiescat in Pace

#16 dc-65x

dc-65x

    Grand Champion Poster

  • Subscriber
  • PipPipPipPipPipPipPipPip
  • 6,949 posts
  • Joined: 14-February 06
  • Gender:Male
  • Location:Captain Rick: The only vintage slot car nut in SW Oregon?

Posted 12 December 2021 - 07:53 PM

Phil, I used the machine dials to move from front axle pins to the rear axle pins. I have a 2" travel dial indicator on the machine's X axis and a 1" travel dial on its Y axis to locate the pin holes at each axle location.


  • Phil Smith likes this

Rick Thigpen
Check out Steve Okeefe's great web site at its new home here at Slotblog:
The Independent Scratchbuilder
There's much more to come...


#17 Bill from NH

Bill from NH

    Age scrubs away speed!

  • Full Member
  • PipPipPipPipPipPipPipPip
  • 14,715 posts
  • Joined: 02-August 07
  • Gender:Male
  • Location:New Boston, NH

Posted 12 December 2021 - 08:07 PM

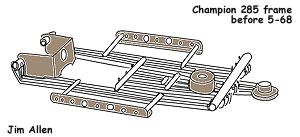
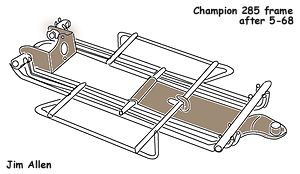
Not that it matters any, but the confusion about Champion jail door chassis is largely due to the fact that Champion sold two different configurations of their 285 chassis without changing the part number, Those made prior to May, '68 had a 5-rod brass drop arm, body mounting strips that would accept screws, & the old motor bracket Rick shows above. The chassis after May, '68 looked like Rick's first photos, a solid brass drop arm, redesigned body mounts with pin tubes, & the new motor bracket. Sketches of both configurations are below.


NH Champion 285 Frame Before May 68.jpg


NH Champion 285 Frame After May 68.jpg


(TY Jim Allen for the sketches)


  • S.O. Watt and Phil Smith like this
Bill Fernald
 
I intend to live forever!  So far, so good.  :laugh2:  :laugh2: 

#18 Martin

Martin

    Posting Leader

  • Full Member
  • PipPipPipPipPipPipPip
  • 4,189 posts
  • Joined: 22-February 09
  • Gender:Male
  • Location:US

Posted 13 December 2021 - 12:31 PM

I have always liked this chassis, great project Rick.


Will you be making a wire drop arm? I always thought it would be cool to take the best of both versions, to make an all wire version.


The stamped drop arm seemed like a cheap fix for Champion.


Martin Windmill

#19 Isaac S.

Isaac S.

    Checkered Flag in Hand

  • Full Member
  • PipPipPipPipPipPip
  • 1,507 posts
  • Joined: 02-September 20
  • Gender:Male
  • Location:USA

Posted 13 December 2021 - 01:53 PM

I would disagree with that. I would bet the tooling for the wire drop arms was cheaper than for the stamped one. And the stamped drop arm provided better weight distribution and strength. It also paved the way for the later one-piece drop arms.

However, I do agree that the wire one looks cooler.

And thanks for the comparison Rick. Very cool and great pictures.
  • Slot Car Rod likes this
Isaac Santonastaso

#20 dc-65x

dc-65x

    Grand Champion Poster

  • Subscriber
  • PipPipPipPipPipPipPipPip
  • 6,949 posts
  • Joined: 14-February 06
  • Gender:Male
  • Location:Captain Rick: The only vintage slot car nut in SW Oregon?

Posted 13 December 2021 - 03:39 PM

The great thing about scratch building is you can take a project anywhere your imagination leads you.   :D


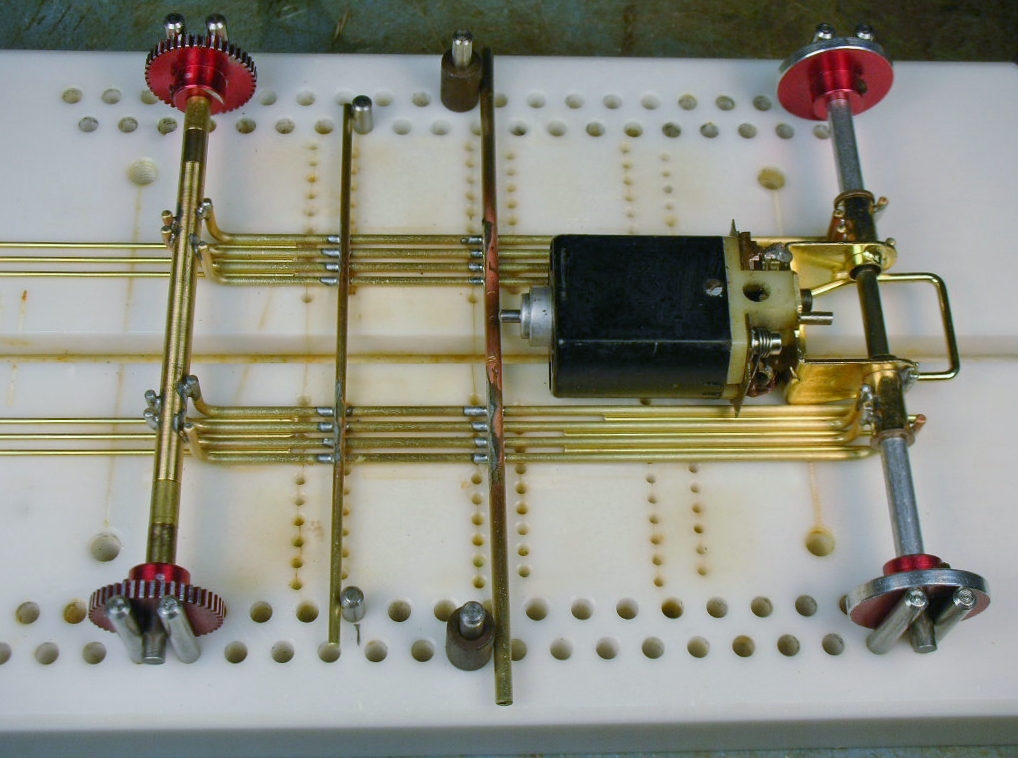
My idea for this particular build is to go with the last of the inline parts. The center section with 8 parallel rails, the last version of the inline rear bracket I showed, a 3/4" plate drop arm.........
 

champion chassis (8).JPG


.......and the floating pans:


champion chassis (6).JPG


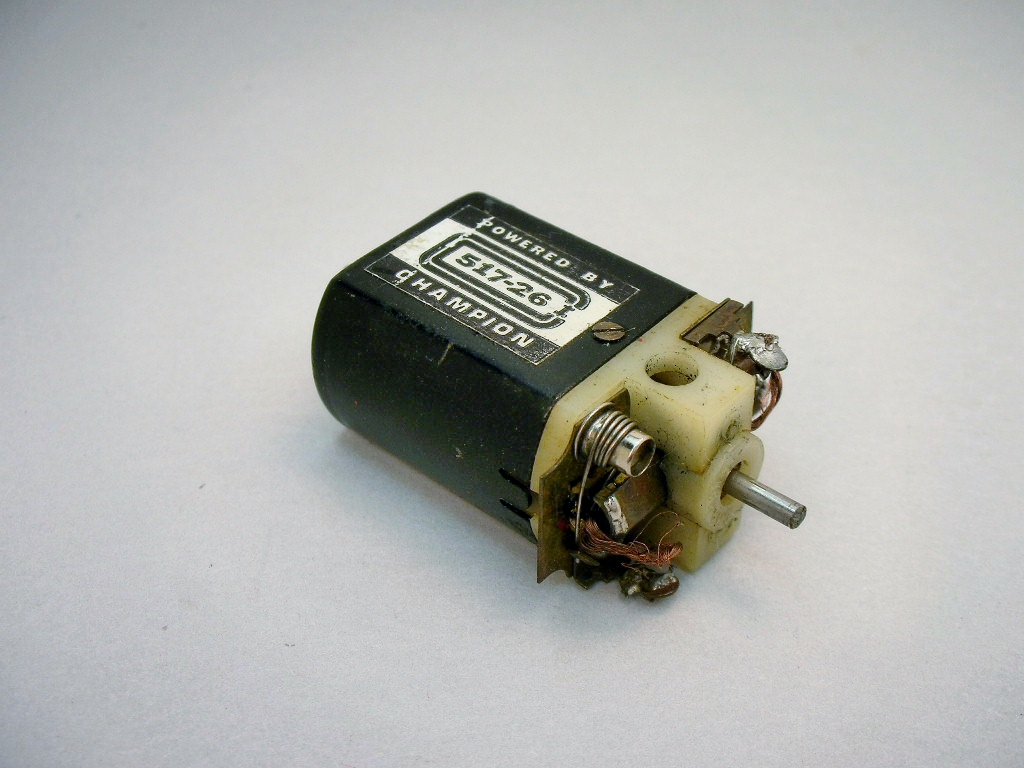
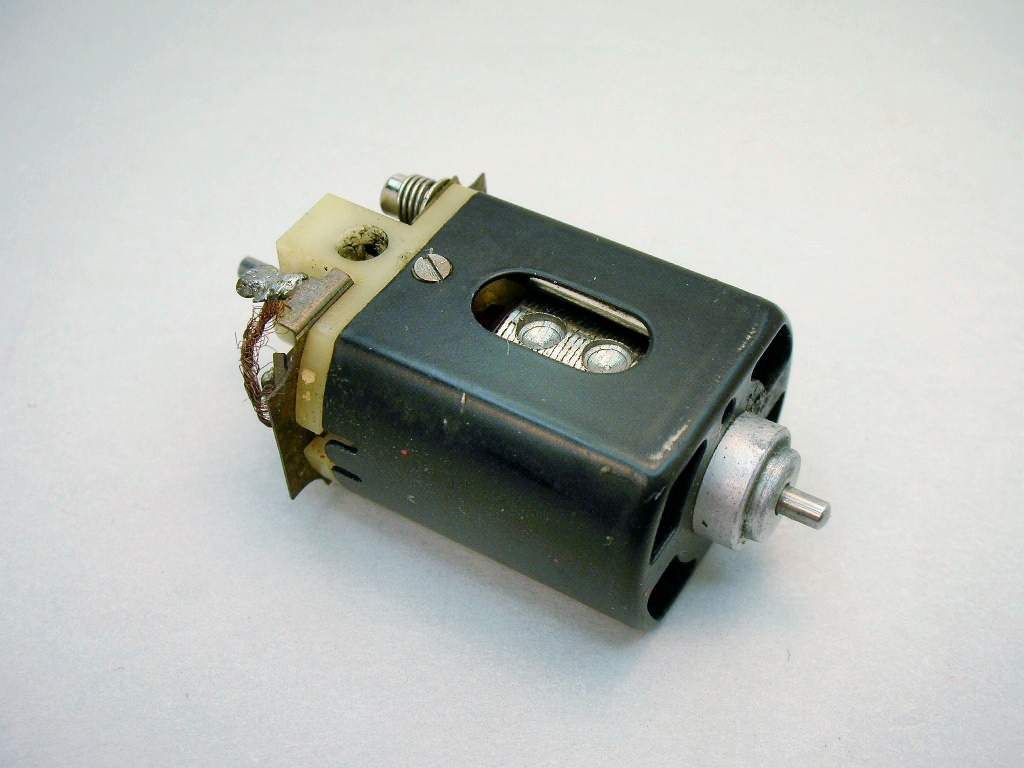
This particular versions parts were introduced well into the Pro angle winder era. But that also allows me to use this cool motor from the same timeframe:


champion motor (4).JPG


champion motor (3).JPG


I'm going to use this motor as is to build the chassis. Then I'll crack it open, show what's inside and freshen it up.


  • Pablo, NSwanberg, Peter Horvath and 1 other like this

Rick Thigpen
Check out Steve Okeefe's great web site at its new home here at Slotblog:
The Independent Scratchbuilder
There's much more to come...


#21 Martin

Martin

    Posting Leader

  • Full Member
  • PipPipPipPipPipPipPip
  • 4,189 posts
  • Joined: 22-February 09
  • Gender:Male
  • Location:US

Posted 13 December 2021 - 05:40 PM

The stamped drop arm works well with the stamped floating pans :good:


It gets my STAMP of  approval  :laugh2:


  • Pablo likes this
Martin Windmill

#22 Dave Crevie

Dave Crevie

    Posting Leader

  • Full Member
  • PipPipPipPipPipPipPip
  • 4,453 posts
  • Joined: 16-February 09

Posted 14 December 2021 - 09:35 AM

I would disagree with that. I would bet the tooling for the wire drop arms was cheaper than for the stamped one. 


While the wire drop arm would only require a fixture, the stamped drop arm would require a punching and forming die. However, the die could be run in a flywheel press, like a Walsh, and turn out a thousand or more drop arms in an hour. Even with furnace soldering, I doubt that more than 20 or so wire drop arms could be made in an hour. So the extra cost of the stamping die is offset by the man hours saved, even with a small run job like a slot car chassis. How many of those drop arms were made? I see a lot of them around, even now.


What I find as super cool is that these parts can still be found, and used by uber-enthusiasts like Rick to replicate the cars of days gone by. Jolly good show!


#23 Martin

Martin

    Posting Leader

  • Full Member
  • PipPipPipPipPipPipPip
  • 4,189 posts
  • Joined: 22-February 09
  • Gender:Male
  • Location:US

Posted 14 December 2021 - 12:52 PM


While the wire drop arm would only require a fixture, the stamped drop arm would require a punching and forming die. However, the die could be run in a flywheel press, like a Walsh, and turn out a thousand or more drop arms in an hour. Even with furnace soldering, I doubt that more than 20 or so wire drop arms could be made in an hour. So the extra cost of the stamping die is offset by the man hours saved, even with a small run job like a slot car chassis. How many of those drop arms were made? I see a lot of them around, even now.


Well said Dave, I bet you have made lots of tooling over the years. As have I. The punch press always wins given enough parts to make.


Finding these parts today is an indicator of the amount that were made back in the day. So glad they can still be found so that builders can recreate.


Build on Rick.


Martin Windmill

#24 dc-65x

dc-65x

    Grand Champion Poster

  • Subscriber
  • PipPipPipPipPipPipPipPip
  • 6,949 posts
  • Joined: 14-February 06
  • Gender:Male
  • Location:Captain Rick: The only vintage slot car nut in SW Oregon?

Posted 14 December 2021 - 01:19 PM

Okie dokie Martin   :)


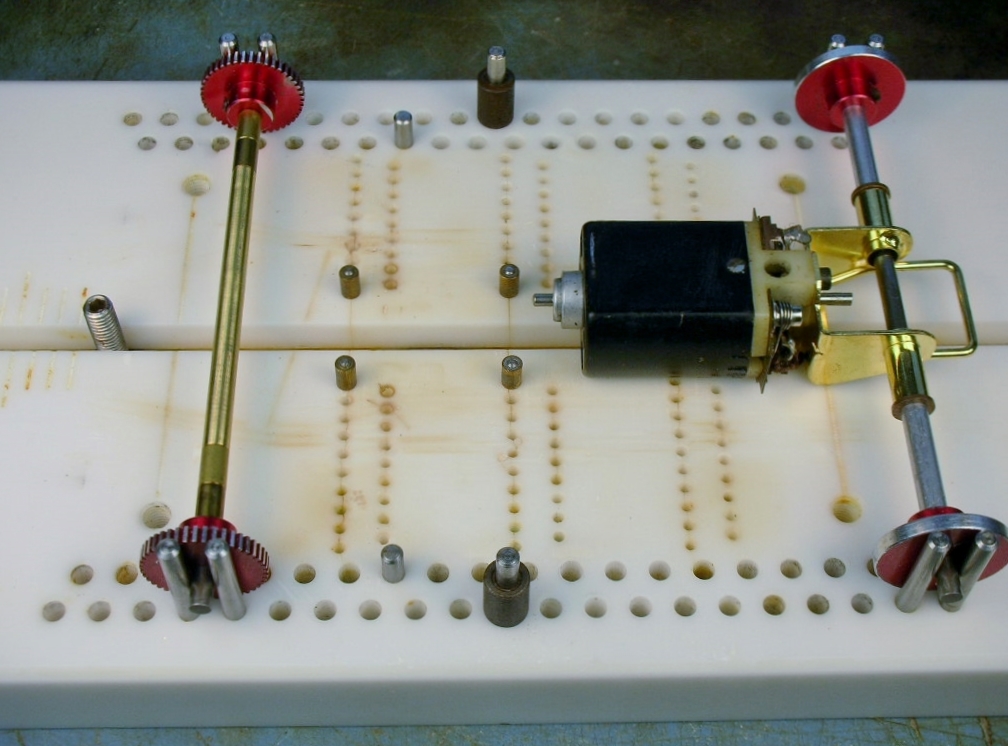
The chassis jig is set up with my 1/8" gizmos slid over the pins to give a 13/16" spacing that matches the axle bracket. The outer pins on the jig are for locating the drop arm hinge and down stop:


champion chassis (13).JPG


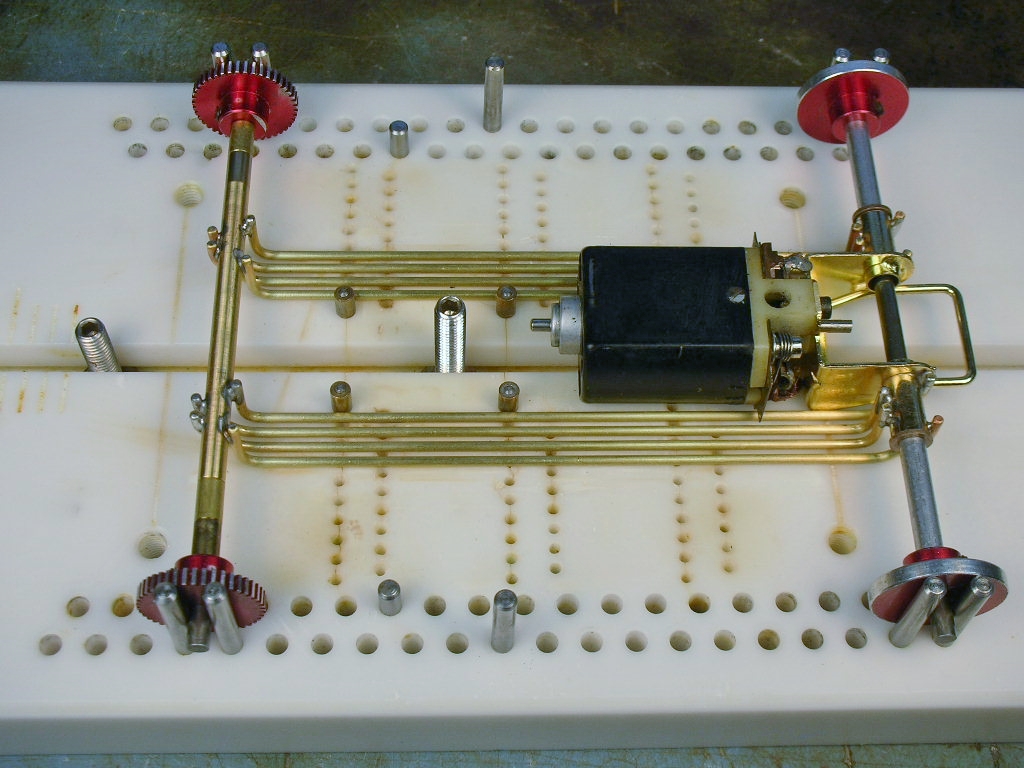
All 8 rails in place and in Champions unique orientation:


champion chassis (14).JPG


The rails were spaced with K&S 1mm brass rod:


champion chassis (15).JPG


Time to do some trimming and buffing and see how it looks........

  • Jencar17, Peter Horvath, Larry Horner and 1 other like this

Rick Thigpen
Check out Steve Okeefe's great web site at its new home here at Slotblog:
The Independent Scratchbuilder
There's much more to come...


#25 Dave Crevie

Dave Crevie

    Posting Leader

  • Full Member
  • PipPipPipPipPipPipPip
  • 4,453 posts
  • Joined: 16-February 09

Posted 14 December 2021 - 03:20 PM

It's been a long, strange road, Martin. Started as a general machinist/toolroom apprentice in the fall of 1970, but left in May of 1971 to work for the National Railroad Museum as a backshop machinist and master mechanic, restoring steam locomotives. Went back to tool and die in the fall of 1972, but continued restoring steam locos and vintage railroad equipment part time for another five years. Then concentrated on tool and die, but worked nights for Howler Welding, getting certified in every type of welding there was. I moved around to several different shops, doing different types of manufacturing, from cold work and metal stamping to plastic injection molding. I finally settled in die casting, where I worked for over 25 years. The company did a lot of defense work, so I did pretty well there. Since it is common for toolmakers to move around, we get a wealth of experience in many different fields of the industry. 


  • NSwanberg likes this


Electric Dreams Online Shop