Wow, determining that the pans were tinned from the B&W photos is a tough one but I do love the look! So I have to think that you already have a body in mind for this puppy?

George Parks 1968 Pro chassis
#51

Posted 26 September 2023 - 11:26 AM
#52

Posted 26 September 2023 - 11:52 AM
I'm not sure what soldering technique Parks used Larry. The tip of my Ungar iron just fit perfectly between the 1/16" rods. That soldered them both at the same time and left behind a smooth tinned finish.
I have a couple of different period appropriate Dynamic Handling Bodies to choose from. Both are 4" wheelbase and 3" wide. I will decide when the rolling chassis is finished.
Rick Thigpen
Check out Steve Okeefe's great web site at its new home here at Slotblog:
The Independent Scratchbuilder
There's much more to come...
#53

Posted 04 October 2023 - 04:42 PM
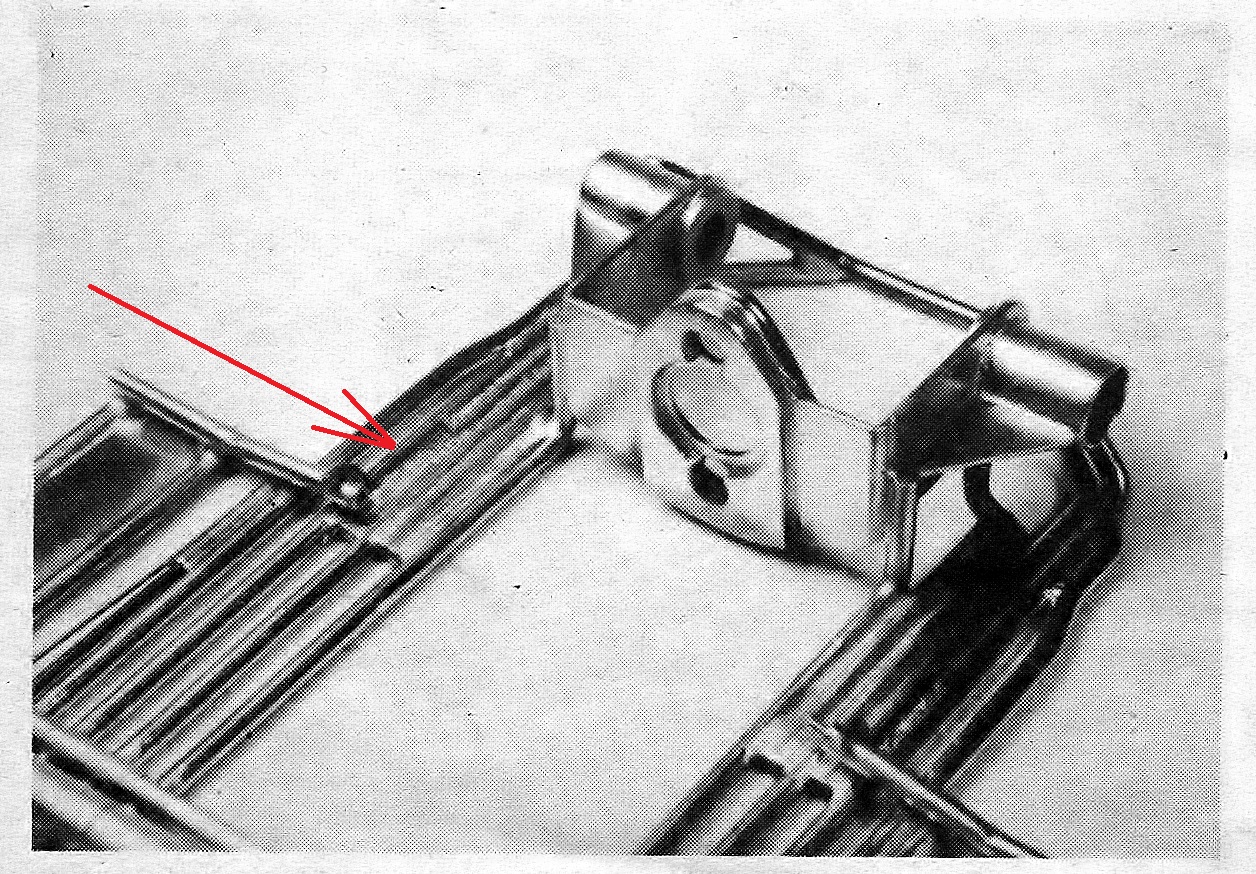
George Parks added pin tubes to his pans which he bent upward a bit to act as upward stops. For downward stops he made neat little gizmos from .030" wire (see red arrow):
My version:
Those little wire gizmos are one of the details I love about this chassis:
- Pablo, Tex, Bill from NH and 2 others like this
Rick Thigpen
Check out Steve Okeefe's great web site at its new home here at Slotblog:
The Independent Scratchbuilder
There's much more to come...
#54

Posted 06 October 2023 - 05:14 PM
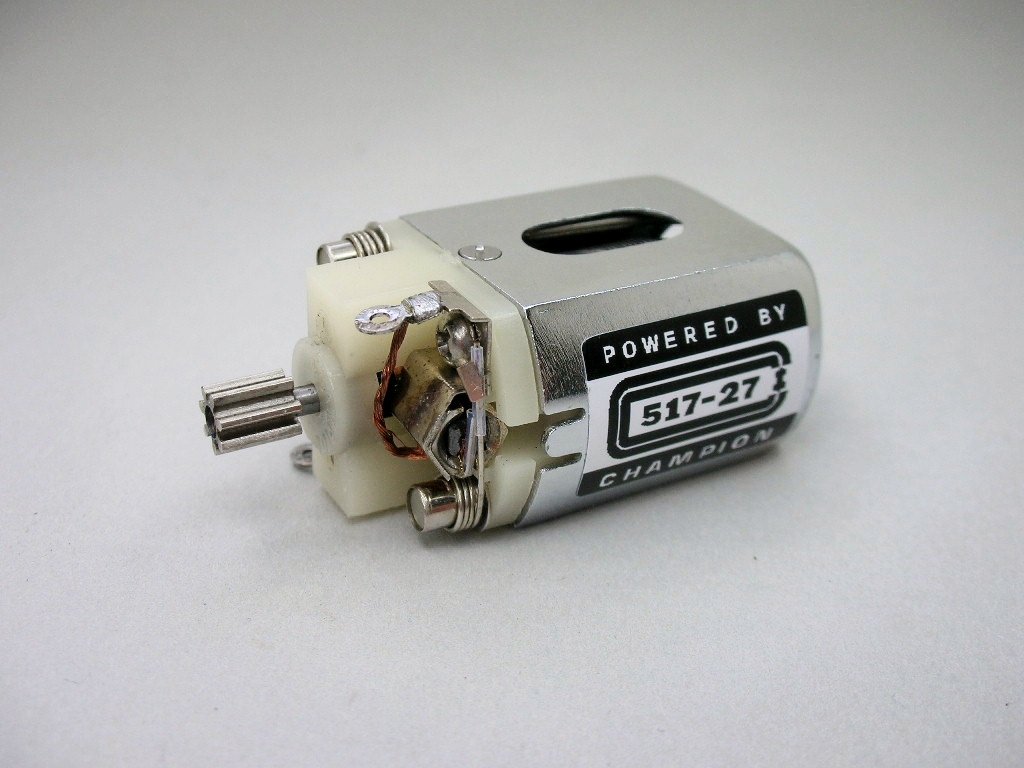
An early Champion 517 is my choice for this build. Nothing fancy, just careful assembly with new end bell and brushes.
Starting out with the can, magnets and shim:
The initial guass reading:
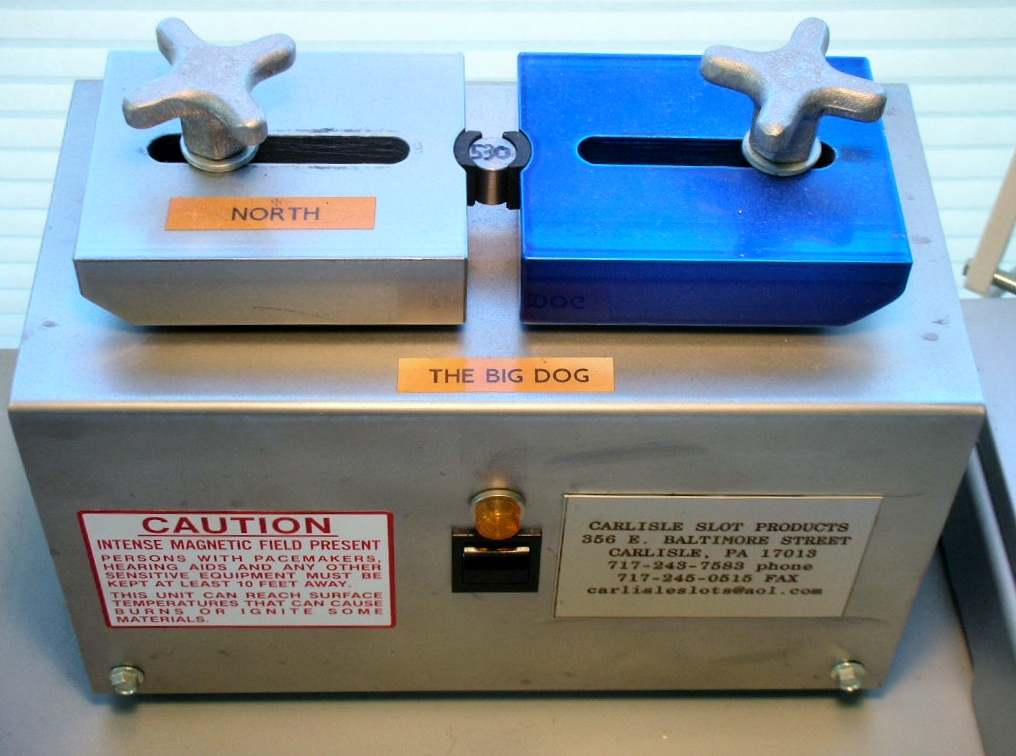
The "Big Dog" Carlisle zapper did it's thing:
The ARCO magnets got a nice boost:
The finished can:
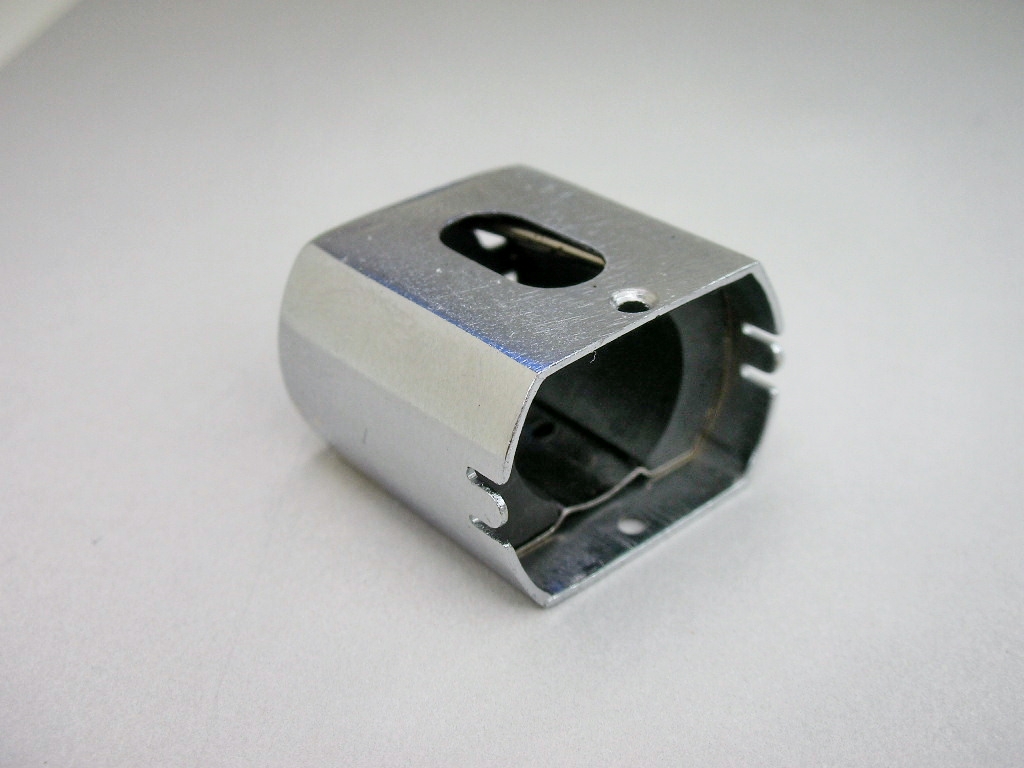
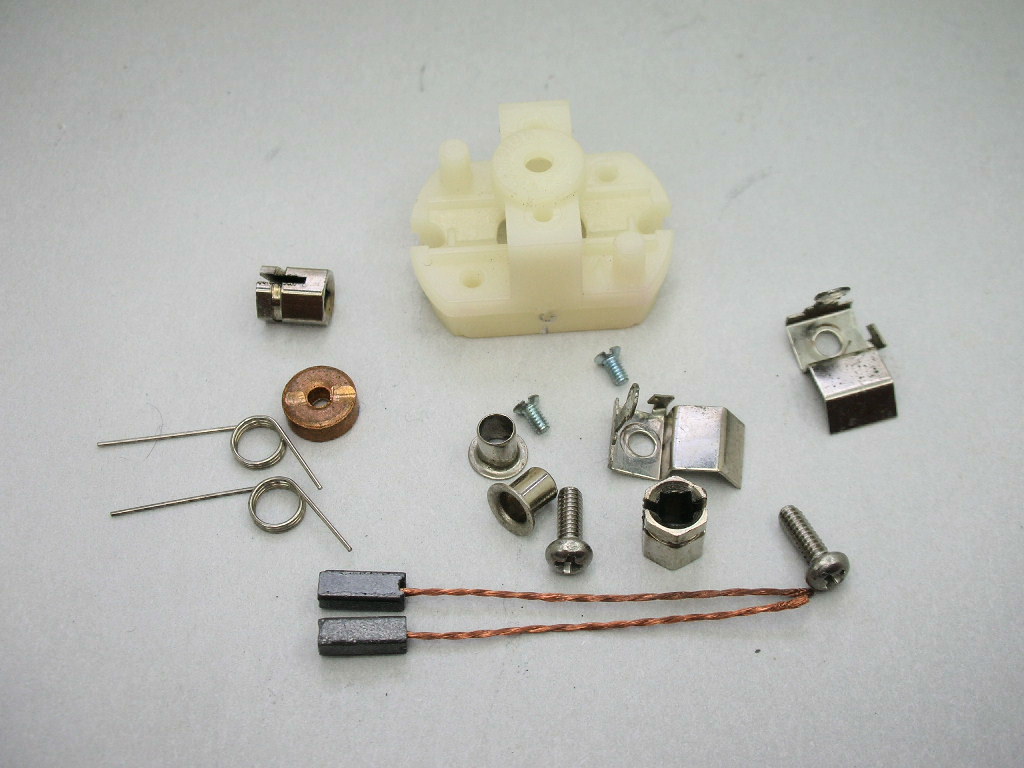
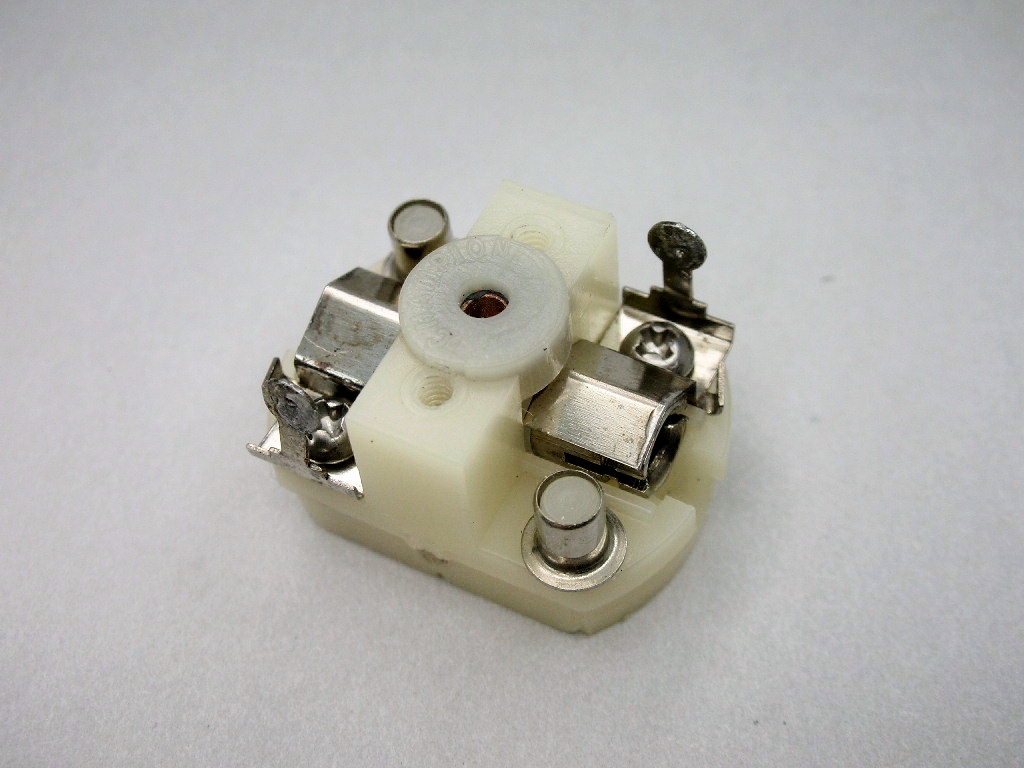
The end bell and all the bits and pieces including 2-56 stainless steel machine screws and shunted 26D brushes:
The new bearing was bonded in place with JB Weld and the hex brush holders soldered to the brush hoods:
Next up is my one and only grinder balanced armature.........
- Pablo, Tex and Slot Car Rod like this
Rick Thigpen
Check out Steve Okeefe's great web site at its new home here at Slotblog:
The Independent Scratchbuilder
There's much more to come...
#55

Posted 07 October 2023 - 08:37 AM
hey Captain,
what kind of steel do you use for your zapper slugs?
Steve Lang
#56

Posted 07 October 2023 - 10:16 AM
Hi Steve,
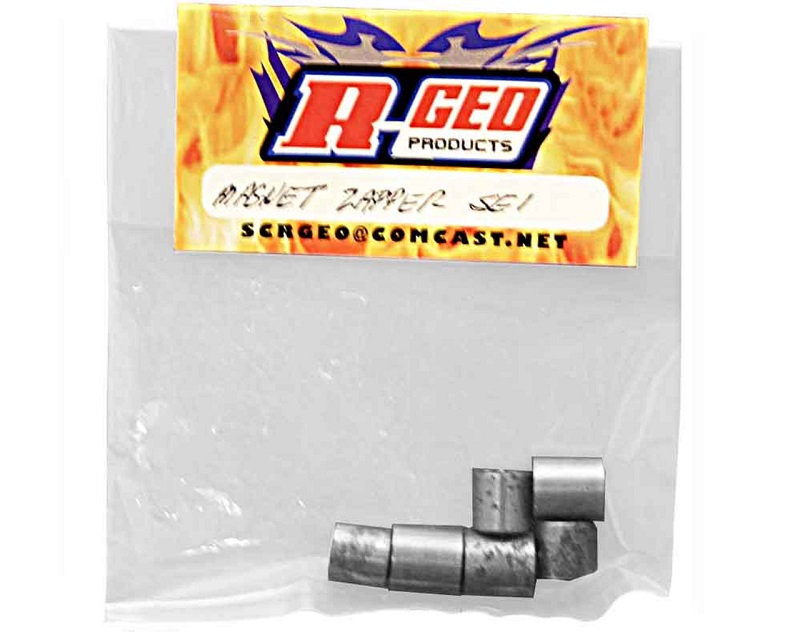
I'm using the R GEO Magnet Zapper Set:
I don't know what kind of steel they are made from.
Rick Thigpen
Check out Steve Okeefe's great web site at its new home here at Slotblog:
The Independent Scratchbuilder
There's much more to come...
#57

Posted 07 October 2023 - 10:36 AM
hey Captain,
what kind of steel do you use for your zapper slugs?
One of the best materials for zapper slugs is the lowest carbon content steel you can find, 1010 low carbon steel is a good choice.
Jay Guard
IRRA Board of Directors (2022-Present),
Gator Region Retro Racing Director (2021-Present)
SERRA Co-Director (2009-2013)
IRRA BoD advisor (2007-2010)
Team Slick 7 member (1998-2001)
Way too serious Retro racer
#58

Posted 07 October 2023 - 11:17 AM
Or nodular/ductile iron.
#59

Posted 07 October 2023 - 08:04 PM
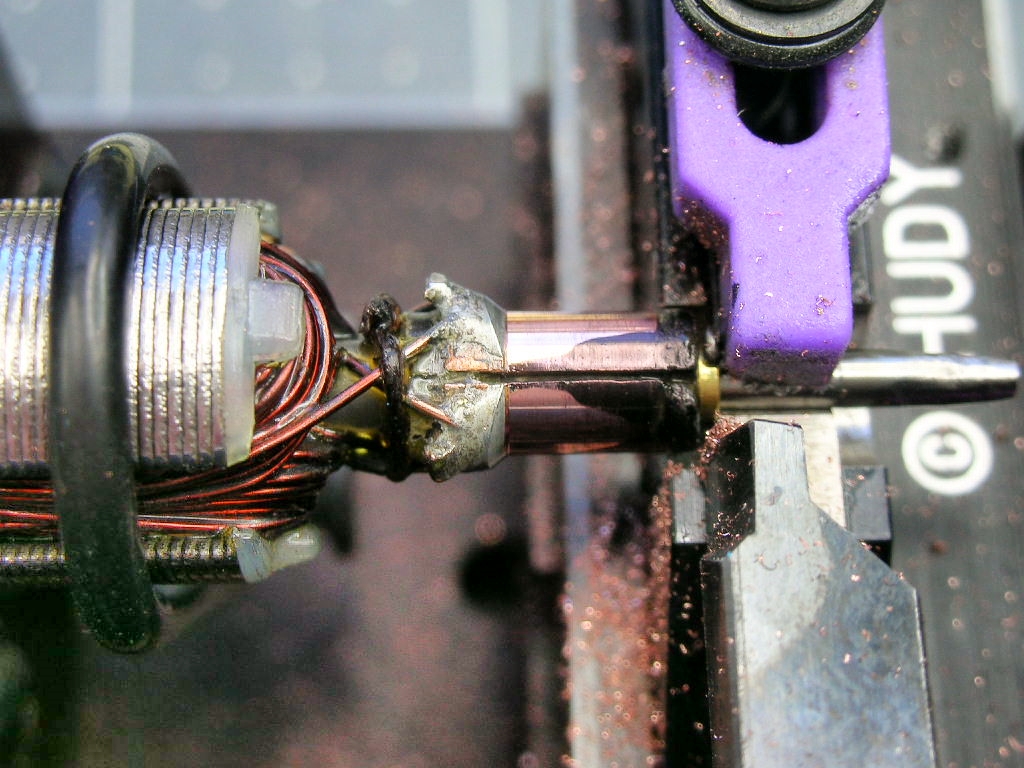
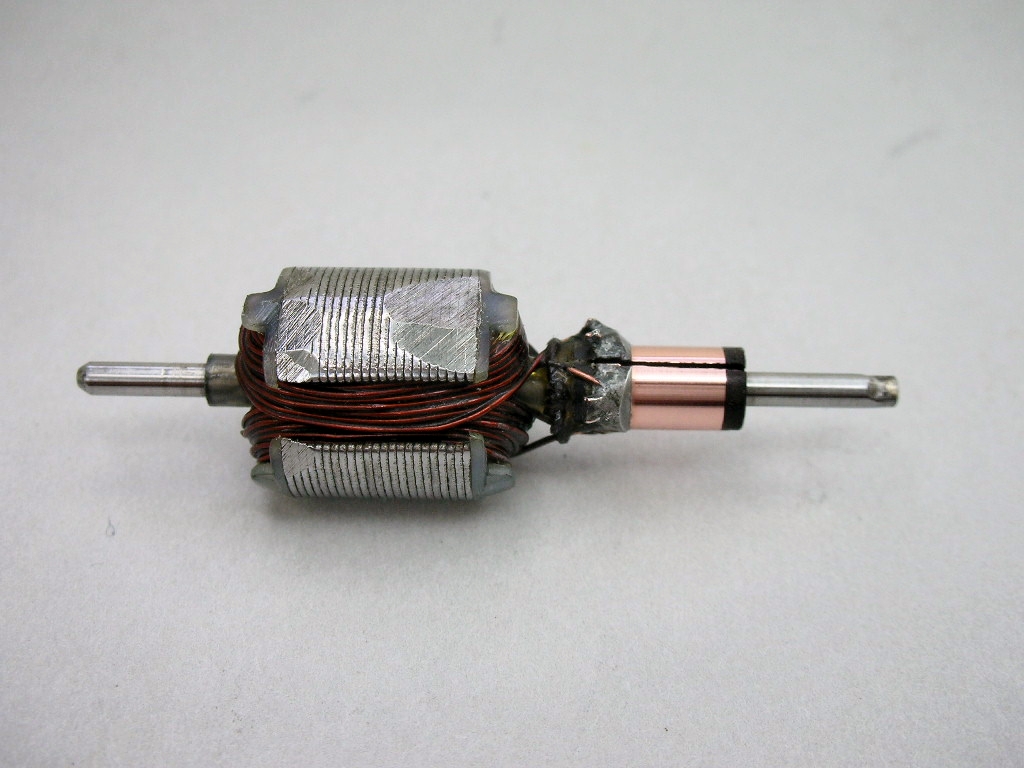
I'm using my one and only ground stack balanced Champion armature. It's in sad shape. Here's what the comm looked like after the first cut:
In fact it could very well be a customer wound Champion armature rewind kit that was sent in for factory balancing.
Luckly, most of it will be hidden inside the setup and the ground stack balancing will be visible through can vent hole for that early Champion look.
It reads .2 to .3 ohms and it's time to get it in the setup and see what happens......fingers crossed. ![]()
- Pablo and Tex like this
Rick Thigpen
Check out Steve Okeefe's great web site at its new home here at Slotblog:
The Independent Scratchbuilder
There's much more to come...
#60

Posted 09 October 2023 - 02:55 PM
Did you check the (static) balance before assembly? I have to wonder about that old grinder job.
#61

Posted 09 October 2023 - 03:59 PM
Champion had a balancer & it wasn't static. Mark Greene in PA (former owner of Keystone Raceway) bought it 6 or 8 years ago on eBay, The last I knew, he still had it.
At one time, I think Alpha was doing grind balsncing in addition to using drills. I know Camen was when Joel was healthy.
I intend to live forever! So far, so good.
#62

Posted 09 October 2023 - 07:18 PM
I know others have commented (was it you Bill?) that the armature's balance can change after 50 years.
So far I have never "rebalanced" a vintage balanced armature. I want the arm to look original and not have any possibily nonmatching balancing holes in it. I don't think Rodney has his arms rebalanced and he's restored a zillion old "rewound" motors.
I check the armature shaft for relative straightness, true the worn comm, give the arm a good cleanup and run them. So far, I haven't had any restored vintage motors display any balance problems. But I'm just having fun and not hard core racing.
Here's the restored motor:
For a 50 year old arm it actually seems quite smooth sounds really nice on the power supply. And yes, the armature shaft was butched in its past life. I have about 60% engagement with the pinion. Again, this isn't a hard core race motor......just trying to get piece of slot car history up and running again:
The Champion sticker is a reproduction and I just guessed at the "27" designation:
Here's a link to the stickers on eBay:
CHAMPION 517-26 • 517-27 • 517-28 • 2 Each Reproduction Slot Car Motor Stickers
- Pablo, Jencar17 and Slot Car Rod like this
Rick Thigpen
Check out Steve Okeefe's great web site at its new home here at Slotblog:
The Independent Scratchbuilder
There's much more to come...
#63

Posted 09 October 2023 - 09:41 PM
On arm balancing, I might have mentioned that the old arms didn't have today's more stable epoxies, so when they were run & heated up, the winds could shift & throw the arm out of balance. When I used to race the old motors, I never raced a 'green arm'. I first ran them on a battery charger to get hot & go out of balance so I could send them out to a reconditioner. I also never ran a used arm twice without first getting it rebalanced. Arms of the last 20 or 25 years have better epoxy so they can be raced several times between rebalancing. Most of my racing was done in full glue conditions. but i never built motors to be used in vintage collectables. So do what works for you. ![]()
I intend to live forever! So far, so good.
#64

Posted 13 October 2023 - 06:51 PM
With the chassis and motor done it's time to gather up all the other necessary components before body mounting.
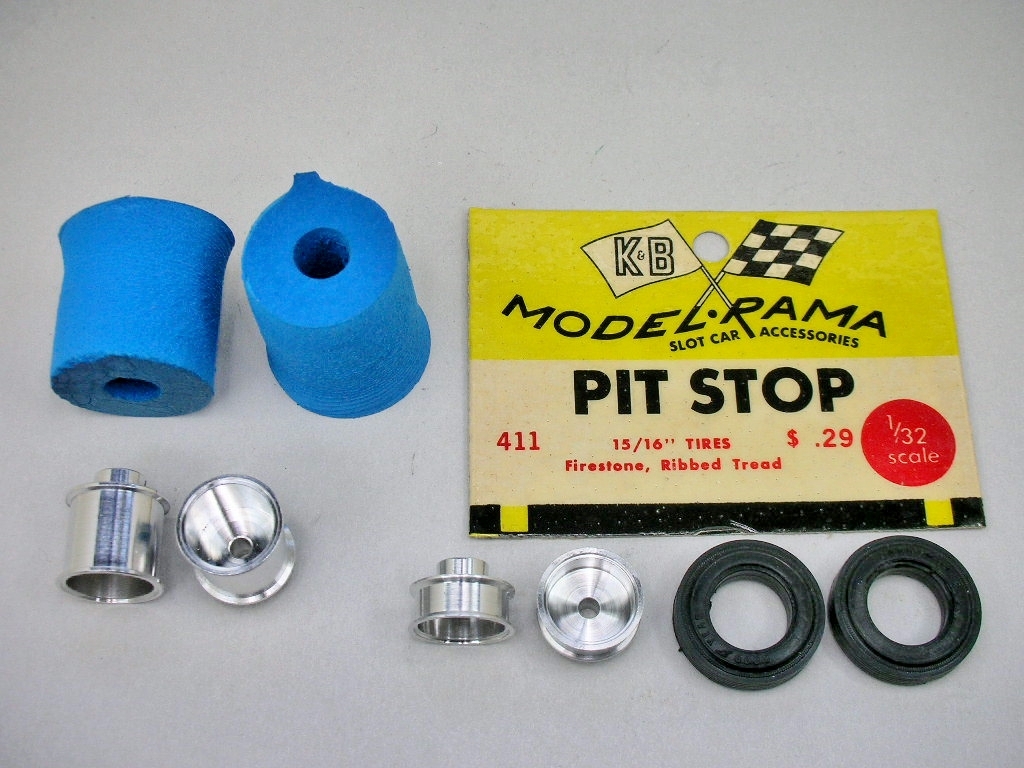
Front wheels are Russkit with K&B hard vinyl tires. Rear wheels, in lieu of the virtually unobtainable Weldun's, are the "mythical" super wide Russkit's with Alpha blue tires:
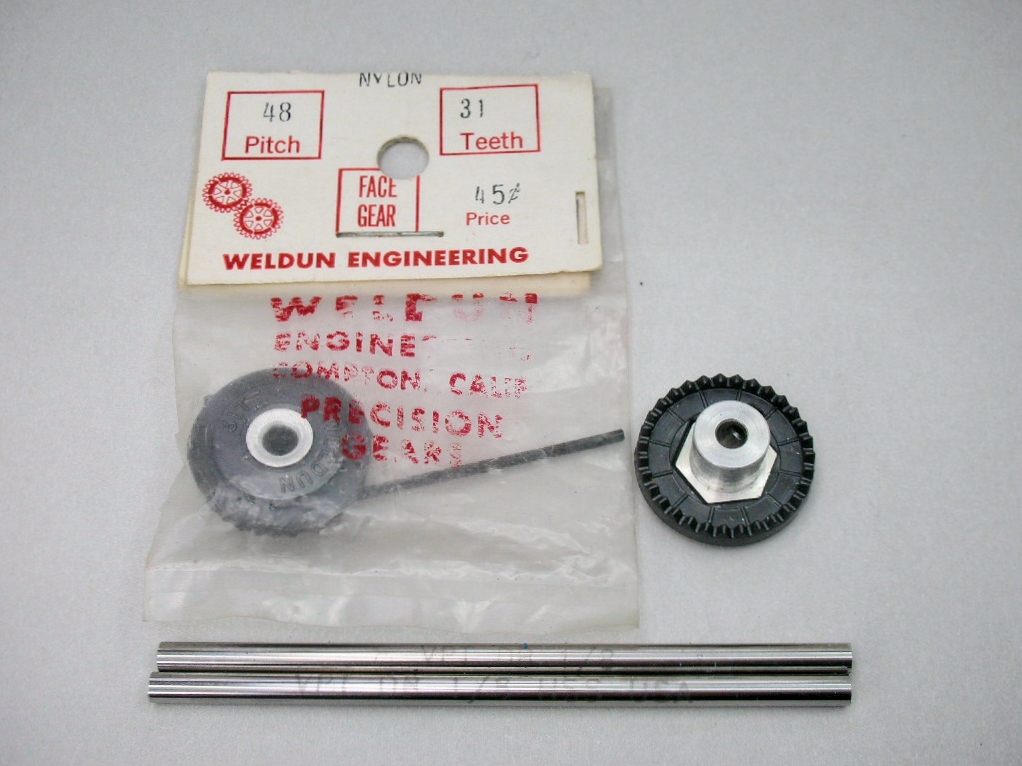
Weldun 31T crown gear and drill blank axles:
Cox quick change guide and Cobra braid:
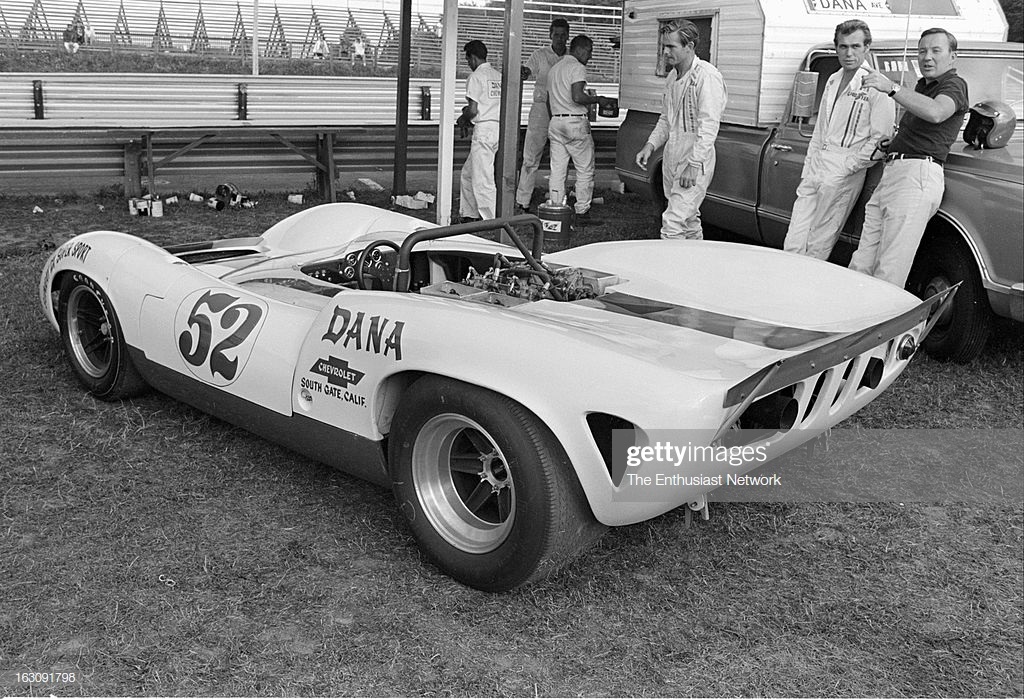
This is from the cover of the Model Car Journal issue the George Parks chassis was featured in:
For a body, I'll give that one a go.
- Pablo, Jencar17 and Tex like this
Rick Thigpen
Check out Steve Okeefe's great web site at its new home here at Slotblog:
The Independent Scratchbuilder
There's much more to come...
#65

Posted 18 October 2023 - 10:54 AM
Here's the Dynamic Lola T-70 body shown being used in the post above:
This is the 1st gen version also shown being used in other race reports during the early 1968 "end of the inline" era:
Here's the 1st gen or "short nose" body (the blue tape under the nose is a template I used to lightly trim for guide clearance):
There was also a 2nd gen or "long nose" Dynamic Lola T-70 brought out later in 1968. As Dynamic had done before, the part number and name of the body were unchanged.
This is the 2nd gen version shown being used in race reports later in 1968's "early angle winder" era:
The 2nd gen body:
Here's a comparison of the two versions:
Those exposed exhaust headers are an easy way to identify the 1st gen............
..............from the 2nd gen body:
The 1st gen Lola is mounted as low possible without cutting the bottom half of the nose off and adding a diaplane:
As I suspected this took much fiddling and handling of the chassis with my "piss fingers" to get things right. Before I start painting I'll break the car down and do a final polish on the chassis before posting it.
- Jencar17, Slot Car Rod, Regis4446 and 3 others like this
Rick Thigpen
Check out Steve Okeefe's great web site at its new home here at Slotblog:
The Independent Scratchbuilder
There's much more to come...
#66

Posted 18 October 2023 - 04:08 PM
Got's to get you some of those white gloves for Christmas.
Great info on the Dynamic bodies. Sure does help understand the "pro car" evolution.
#67

Posted 18 October 2023 - 07:58 PM
Thanks Martin. Dynamic made changes, especially to the front end of the 2nd gen body, to increase performance. I think the 2nd gen makes a great looking car though and Victor of TrueScale made a beautiful repop of it too.
I made this one over 20 years ago and it's still one of my favorite cars:
I built the chassis from Mike Steube's Frogwinder how-to article in Model Car Journal:
- Jencar17, slotcarone, olescratch and 1 other like this
Rick Thigpen
Check out Steve Okeefe's great web site at its new home here at Slotblog:
The Independent Scratchbuilder
There's much more to come...
#68

Posted 18 October 2023 - 09:40 PM
Rick, did you notice that one of Mike's bare signed Frogwinder chassis sold for $285 last week?
I intend to live forever! So far, so good.
#69

Posted 19 October 2023 - 10:30 AM
Hi Bill,
I saw the listing but I didn't follow it. Nice to see that one of his customer chassis survived.
Rick Thigpen
Check out Steve Okeefe's great web site at its new home here at Slotblog:
The Independent Scratchbuilder
There's much more to come...
#70

Posted 19 October 2023 - 01:00 PM
Rick, slight distraction from this build thread but is the Frogwinder chassis above in your Slotblog dc-65x channel? I did a search and couldn't find it.
#71

Posted 19 October 2023 - 01:06 PM
Larry I'm pretty sure I built that car pre-Slotblog and before I even had a digital camera. I'm feeling an urge to build another one though. ![]()
- Larry Horner likes this
Rick Thigpen
Check out Steve Okeefe's great web site at its new home here at Slotblog:
The Independent Scratchbuilder
There's much more to come...
#72

Posted 19 October 2023 - 04:29 PM
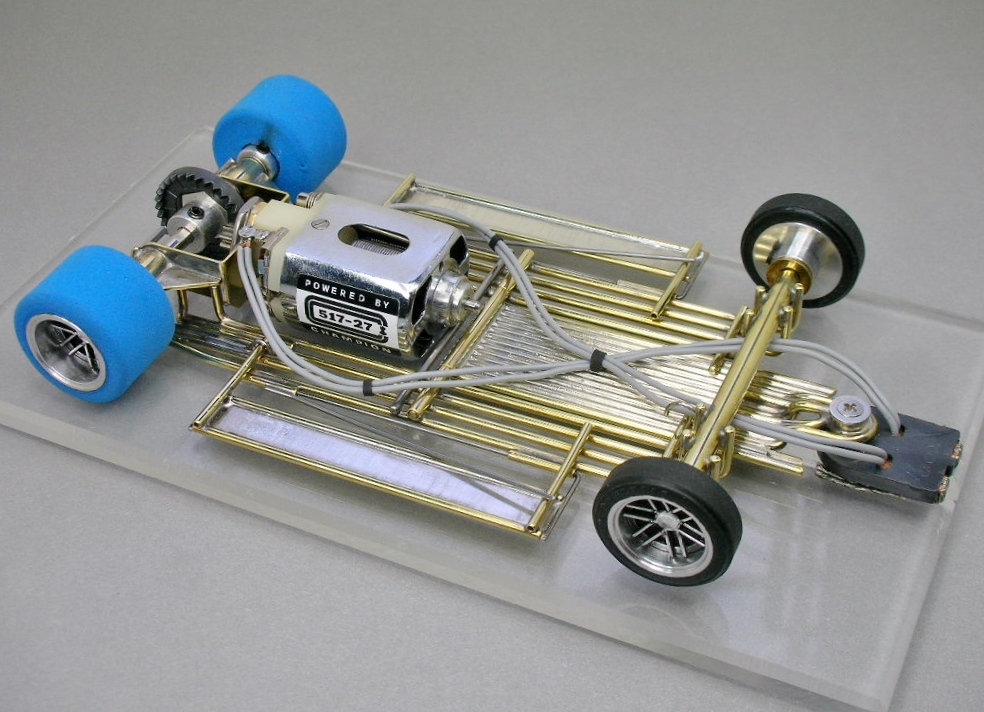
The finished chassis compared to George Parks beautiful original:
I really enjoyed building this George Parks chassis. I spent many enjoyable hours sweating the details and trying to make a nice tribute to the original.
Time to assemble the finished roller.
- Tex, Half Fast, ajd350 and 4 others like this
Rick Thigpen
Check out Steve Okeefe's great web site at its new home here at Slotblog:
The Independent Scratchbuilder
There's much more to come...
#73

Posted 19 October 2023 - 05:28 PM
You had me at the uber cool oilites and axel tube braces but it just kept getting better and better ... nicely done!
- olescratch likes this
#74

Posted 22 October 2023 - 11:50 AM
Thanks Larry. Here's the finished roller:
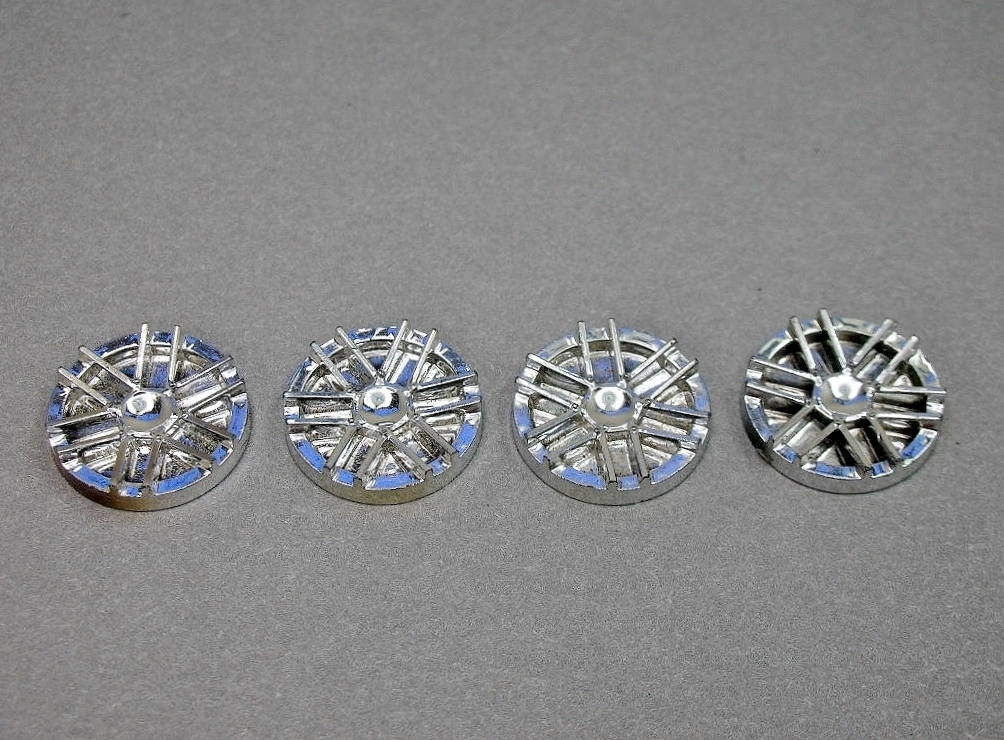
The wheel inserts are Russkit...........
........with a little black wash to bring out the detail:
I resorted to a flat head screw to get the guide to fit under the nose. The Cox aluminum guide washer was countersunk for the screw head:
I also tried cutting a slot in the guide for the dual lead wires. The slots are a little bigger than needed for the slim Cox lead wire. Next time I'll try a smaller 1/16" end mill for the slot instead of the 5/64" shown:
The slot allowed the lead wires to fit easily into the guide without twisting them together. The little copper clips were super easy to install and the wires laid down flatter.
I also installed a light spring to the pans like Parks had on his chassis:
My favorite vintage rear end using a Russkit bracket all geared up and ready to go:
Ready for the body.....
- Jencar17, Tex, ajd350 and 3 others like this
Rick Thigpen
Check out Steve Okeefe's great web site at its new home here at Slotblog:
The Independent Scratchbuilder
There's much more to come...
#75

Posted 27 October 2023 - 07:46 PM
Here is the "inspired by" Lola T-70 livery I'm going with:
I have decals from Patto's Place............
..........and Fred Cady:
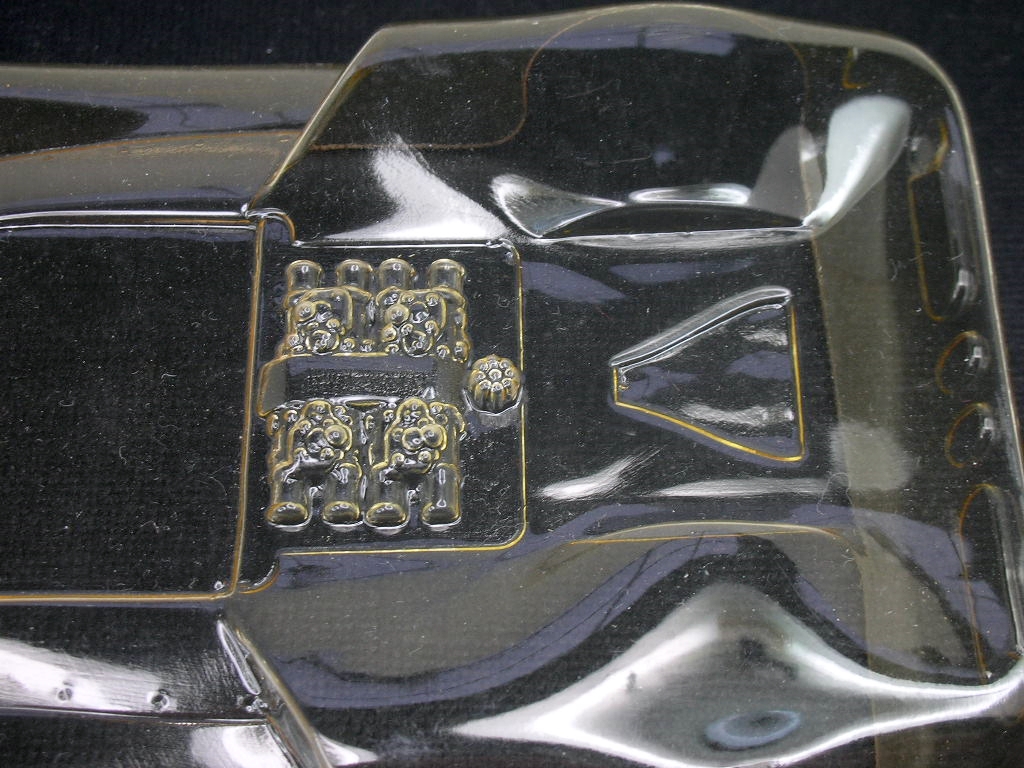
The body is all trimmed and the inside the body detail painting is done:
The Dynamic interior is mostly finished and the lone detailing item, exhaust pipes, are ready to go:
Depending on the weather, I should have the body in paint in a day or two.
- Pablo, Tex, Samiam and 2 others like this
Rick Thigpen
Check out Steve Okeefe's great web site at its new home here at Slotblog:
The Independent Scratchbuilder
There's much more to come...


