I have what Dave recommended above, the ZZ class .061 to .250 inch diameter "minus" set that cost me $65 in 2022. ![]()

MESAC Super-Coupe class
#26

Posted 12 June 2024 - 05:58 PM
Rick Thigpen
Check out Steve Okeefe's great web site at its new home here at Slotblog:
The Independent Scratchbuilder
There's much more to come...
#27

Posted 13 June 2024 - 08:54 AM
Gage pins were available individually, maybe they still are. I think it was cheater who mentioned using them when setting rear bushing heights on a flexi.
They are. But at an average price of $5.00,(depending on size) it won't be long before you have exceeded the price per set if you buy the size you need, plus one .001 under if you are making the hole, and want to know when you are getting close to size. Once you start using them, you find yourself using them for all sorts of measurements.
Rick did the right thing here. Proof he is on top of this precision measuring business.
#28

Posted 13 June 2024 - 01:32 PM
A machinist needs a full set, as a slot car hobbyist since 1963, I never have. If I had a set, I'd spend more time keeping rust off them than actually using them. My machinist friends have other neat tools that I don't. Some of them I might find a use for, others, no. Rick also has a Bridgeport miller in his garage, another thing I've not needed. But remember, Rick was a professional machinist. I did buy a Unimat in 1970, still use it occasionally. As a woodworker, I don't need a set of 8 or 10 chisels when I most often use 1/4" & 1/2".
I intend to live forever! So far, so good.
#29

Posted 13 June 2024 - 07:43 PM
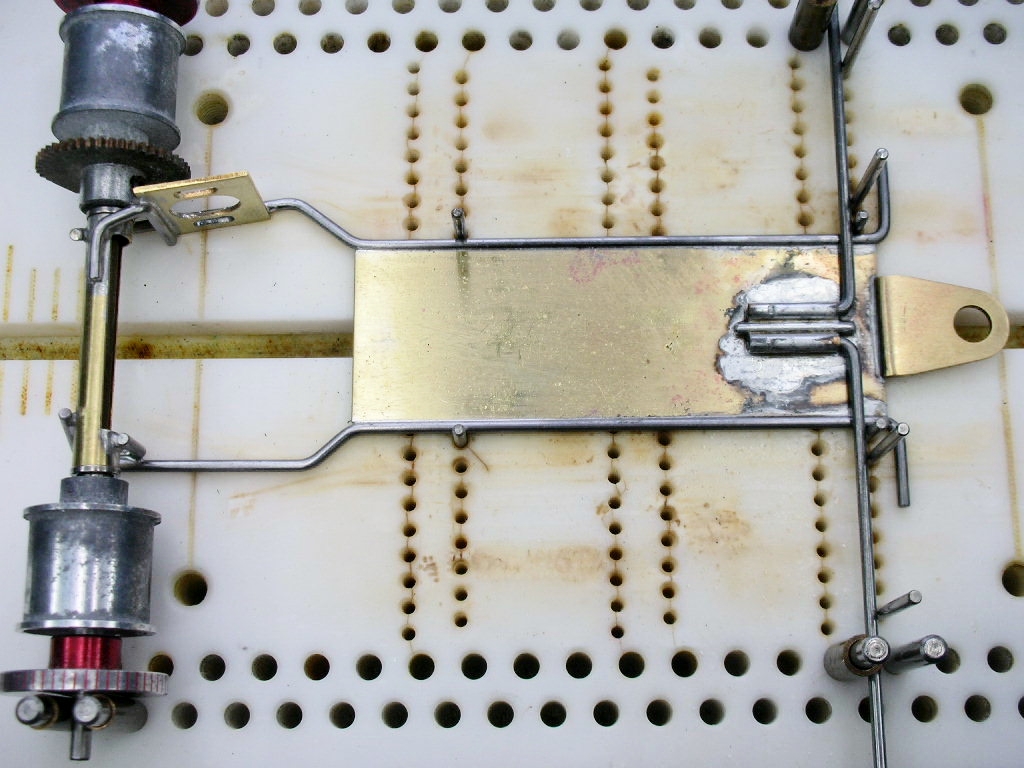
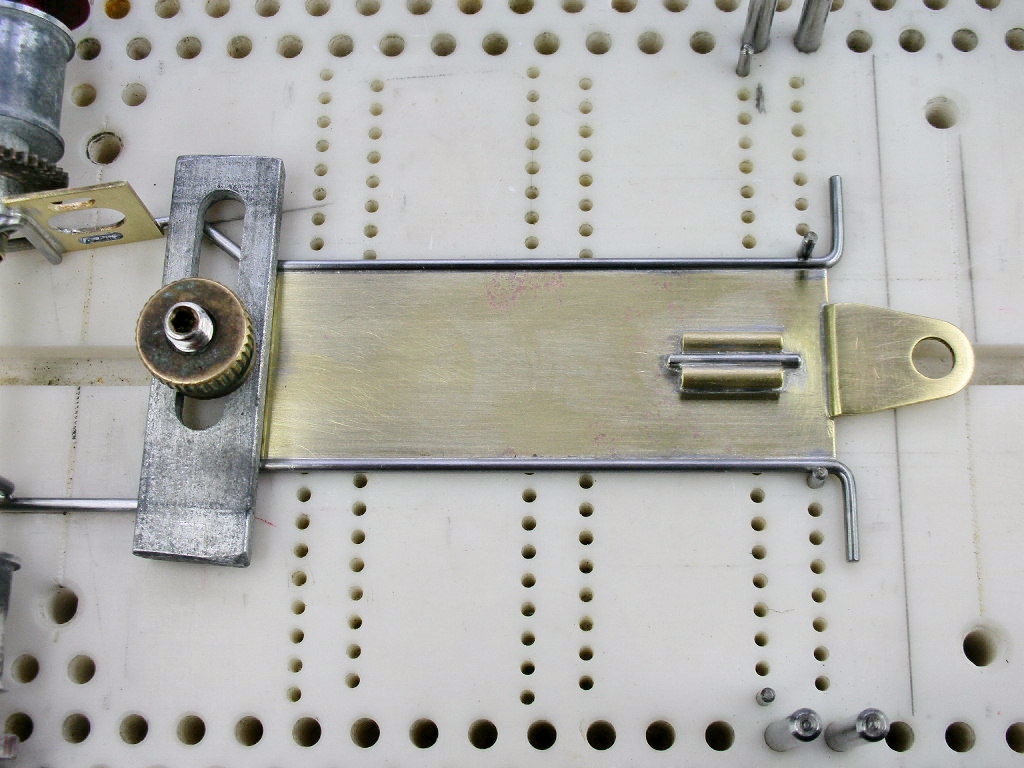
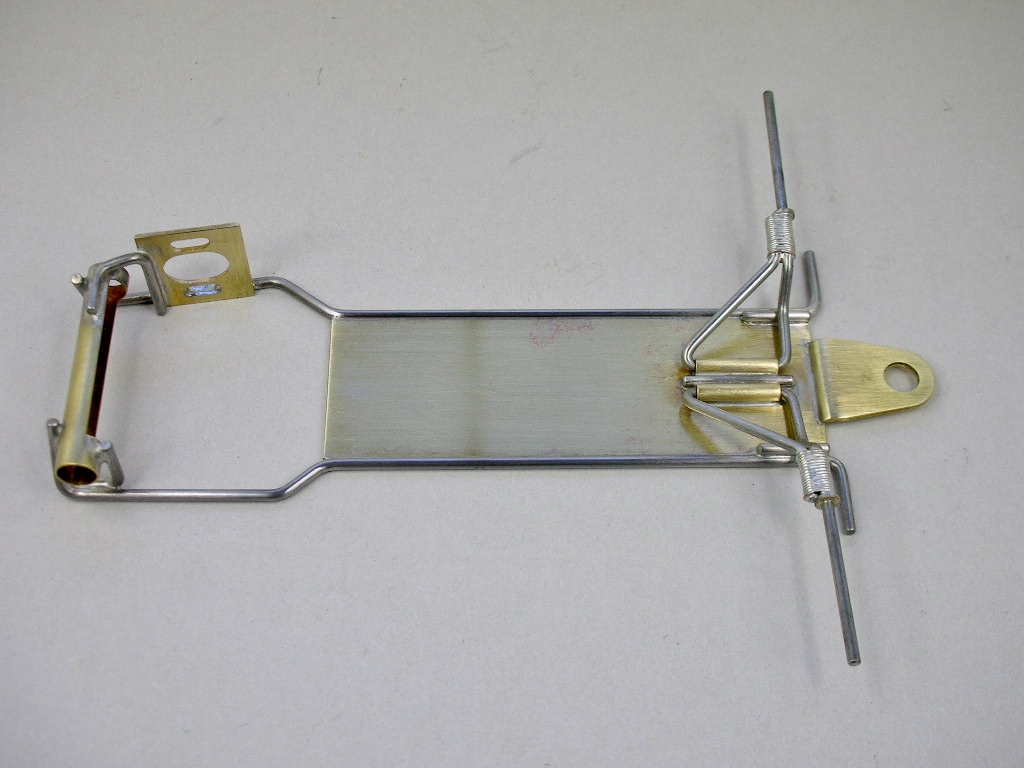
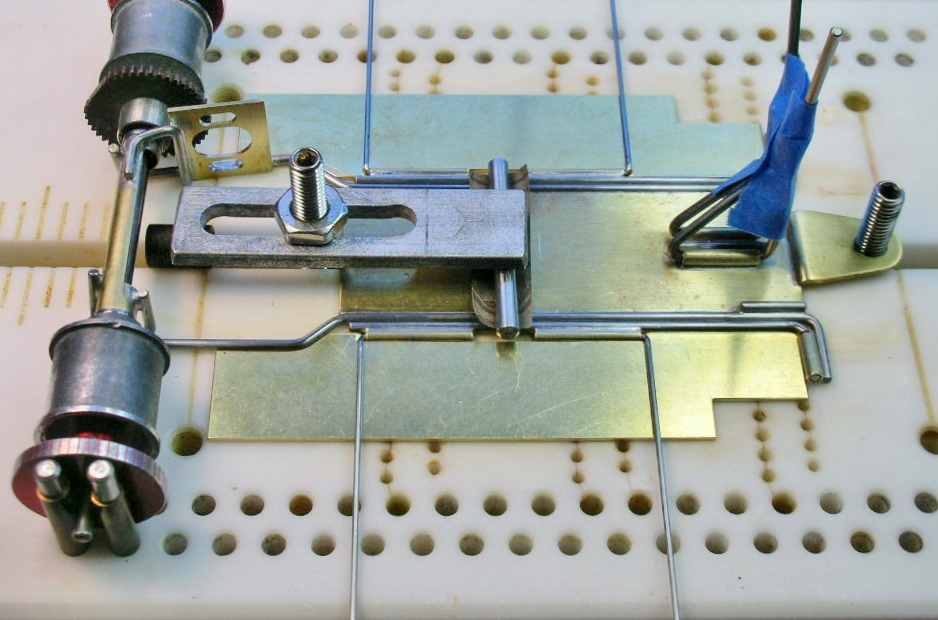
Two extra long L-arm were used to align the hinge tubes and a center brace:
Hinge tubes are all cleaned up and ready to go:
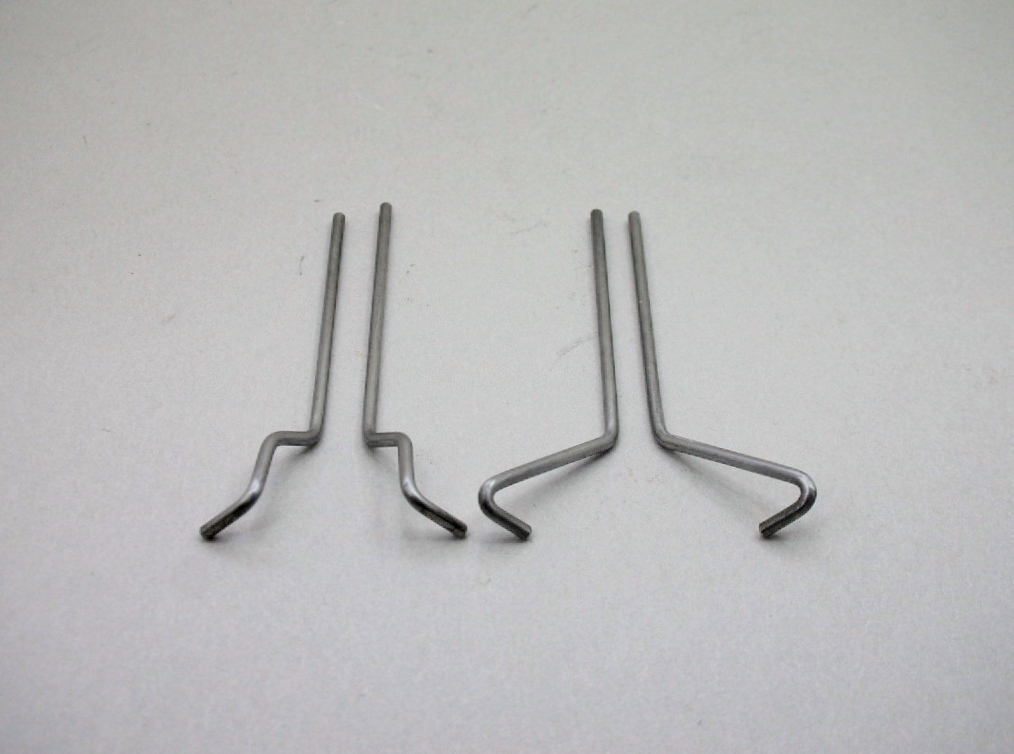
Time to bend up some suspension arms. They will be more complex than simple L-arms
Rick Thigpen
Check out Steve Okeefe's great web site at its new home here at Slotblog:
The Independent Scratchbuilder
There's much more to come...
#30

Posted 14 June 2024 - 10:35 AM
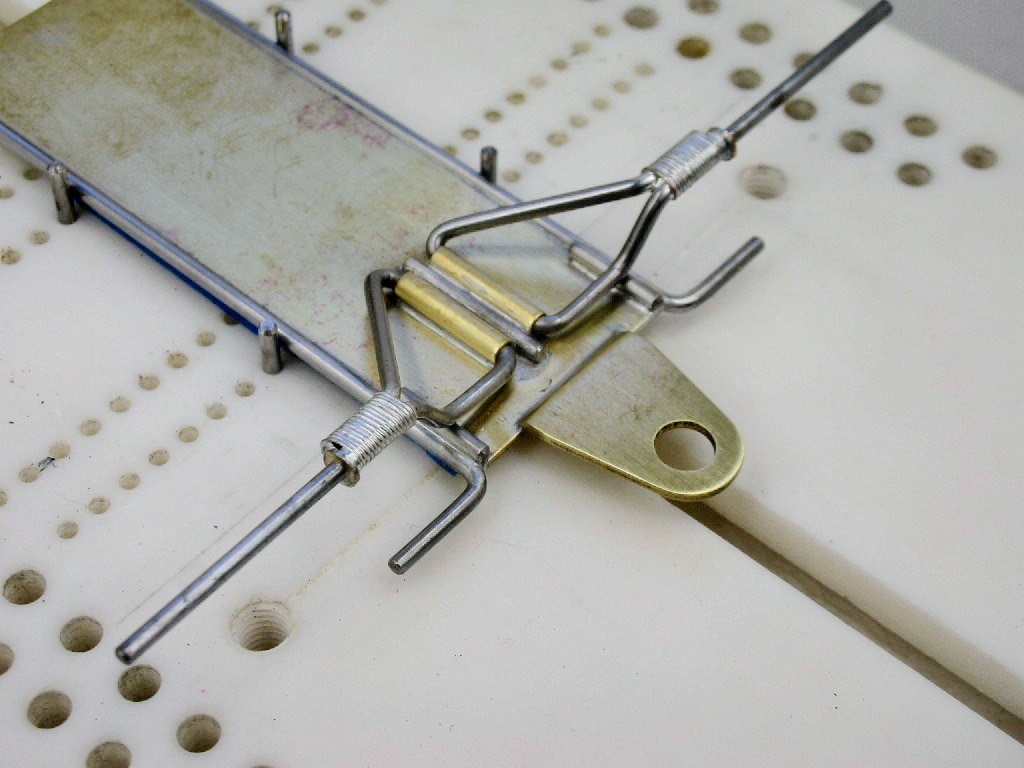
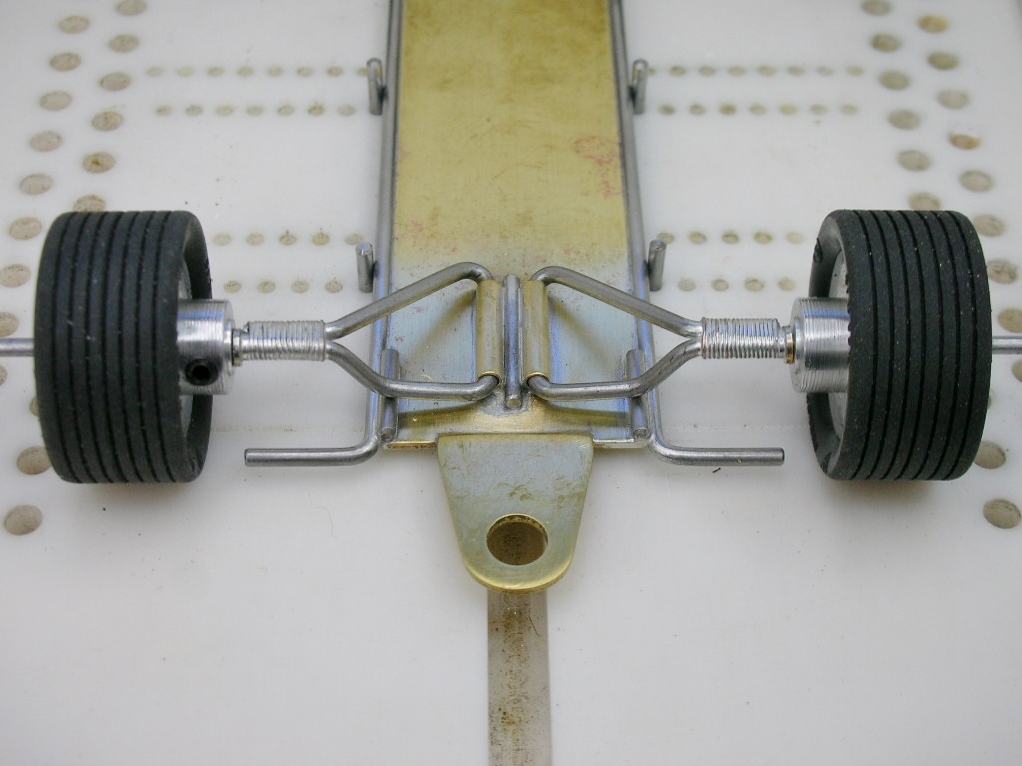
Here are the suspension arms:
The arrangement is kind of a mix of an L-arm and a PdL style "diamond":
The L-arm has a "drop axle" bend to accommodate a down stop for the large 7/8" diameter tires:
When spring loaded, the suspension arms will rest against the down stop and the chassis will have it's required 1/16" track clearance:
- Steve Okeefe, Slot Car Rod, Regis4446 and 3 others like this
Rick Thigpen
Check out Steve Okeefe's great web site at its new home here at Slotblog:
The Independent Scratchbuilder
There's much more to come...
#31

Posted 14 June 2024 - 02:29 PM
Ok, the Porsche will end up being pretty awesome too but having that wishbone front suspension on display in a F1 car would be uber cool ... just sayin!
- Fergy likes this
#32

Posted 14 June 2024 - 08:49 PM
Go for it Larry!
I intend to live forever! So far, so good.
#33

Posted 14 June 2024 - 09:11 PM
Super clean Rick. ![]()
![]()
![]()
![]()
#34

Posted 15 June 2024 - 08:26 PM
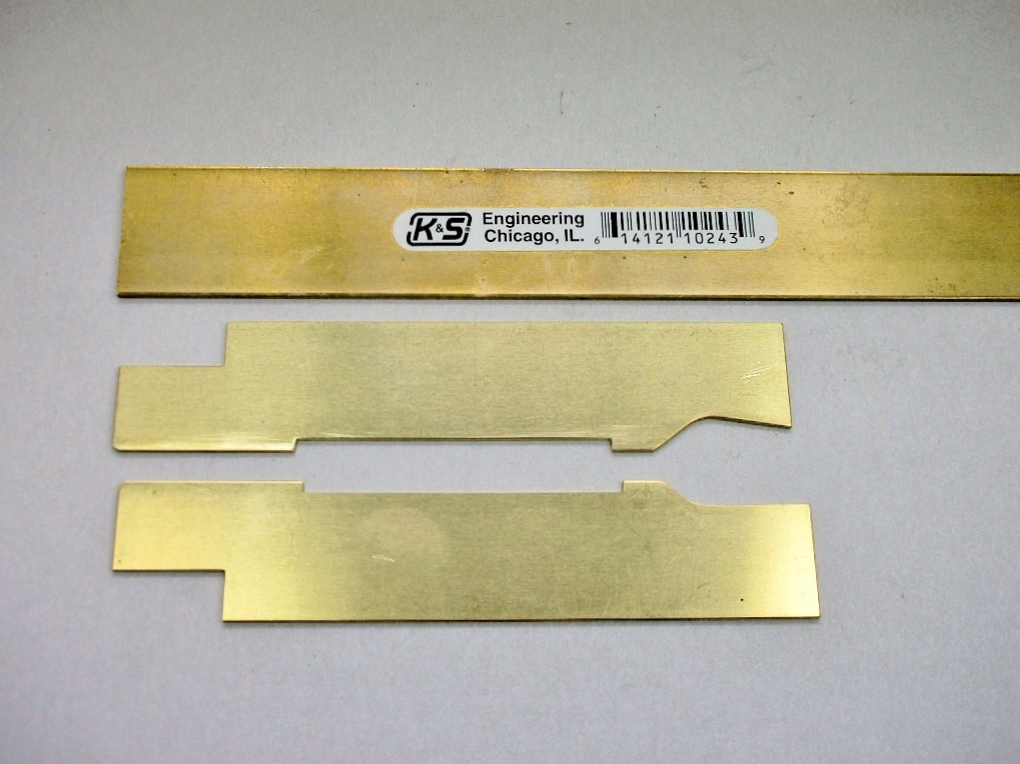
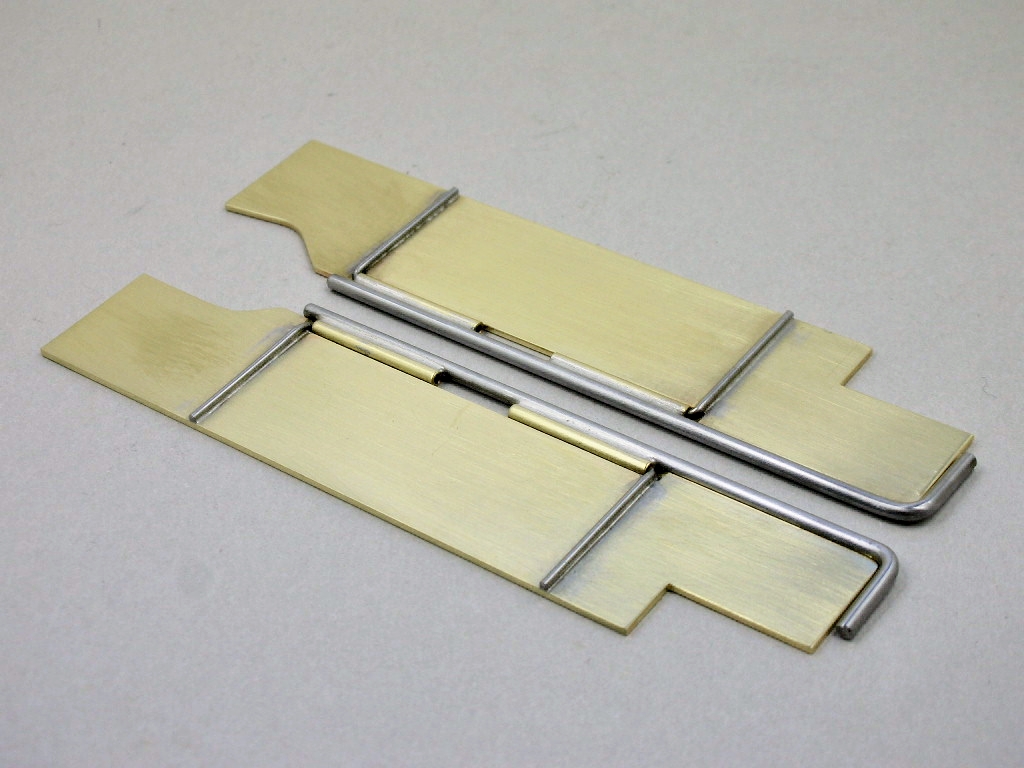
Okie dokie guys........time to cut out some pans from K&S .750" X .032" brass strip. The finished pan width is .688":
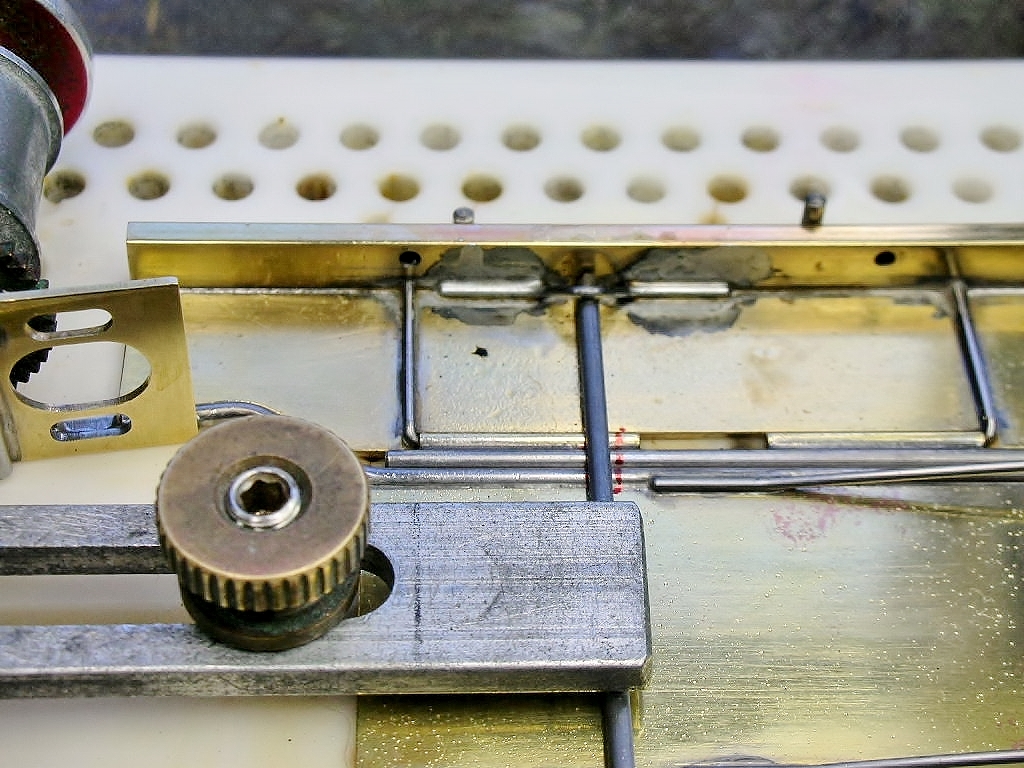
Simple L-shaped .062" piano wire plumber rails, .062" pan hinge tubes and .032" piano wire pan hinges in the jig and ready to solder:
All cleaned up:
There is lots more to do on these pans.......
- Steve Okeefe, Tex and Larry Horner like this
Rick Thigpen
Check out Steve Okeefe's great web site at its new home here at Slotblog:
The Independent Scratchbuilder
There's much more to come...
#35

Posted 17 June 2024 - 10:13 AM
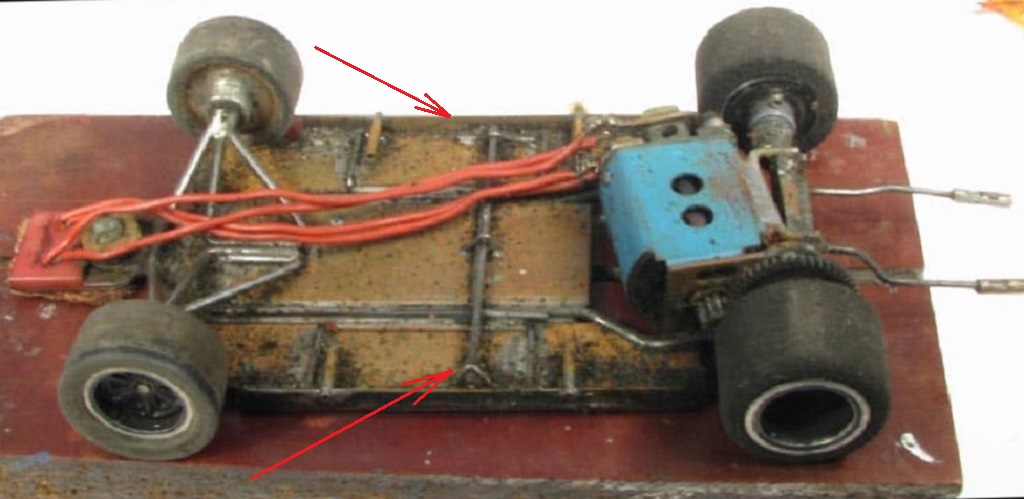
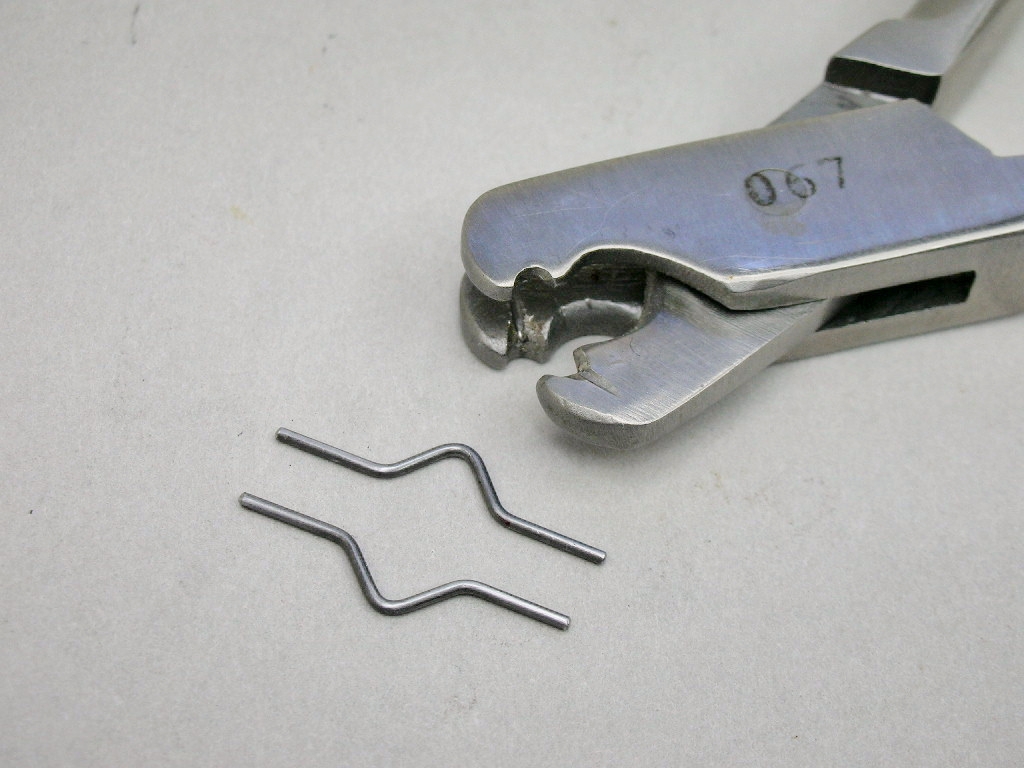
Next up with the pans is the piano wire down stop and a vertical brass strip along the sides as shown with the red arrows below:
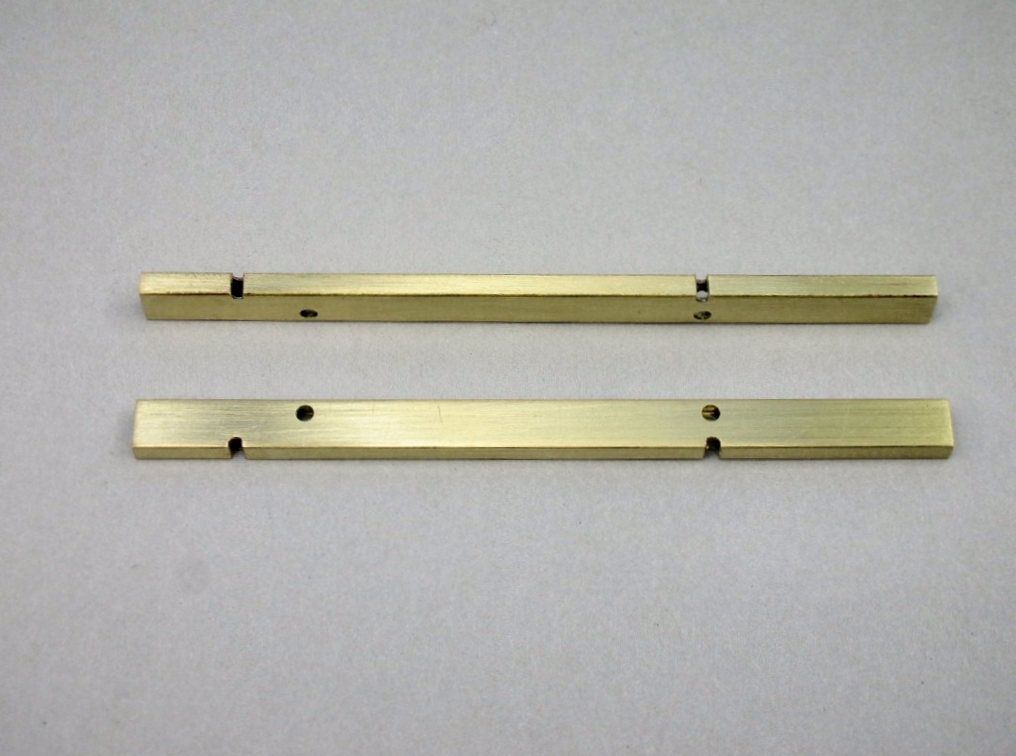
I can't tell what is used on the original pan with all the rubber dust and dirt. I decided to use 3/32" X 3/16" rectangular tube with holes drilled for body mount pin tubes and notches cut to clear the pan hinge wires:
"Fancy lad" pliers make bending the pan down stops a bit easier:
Soldering things up:
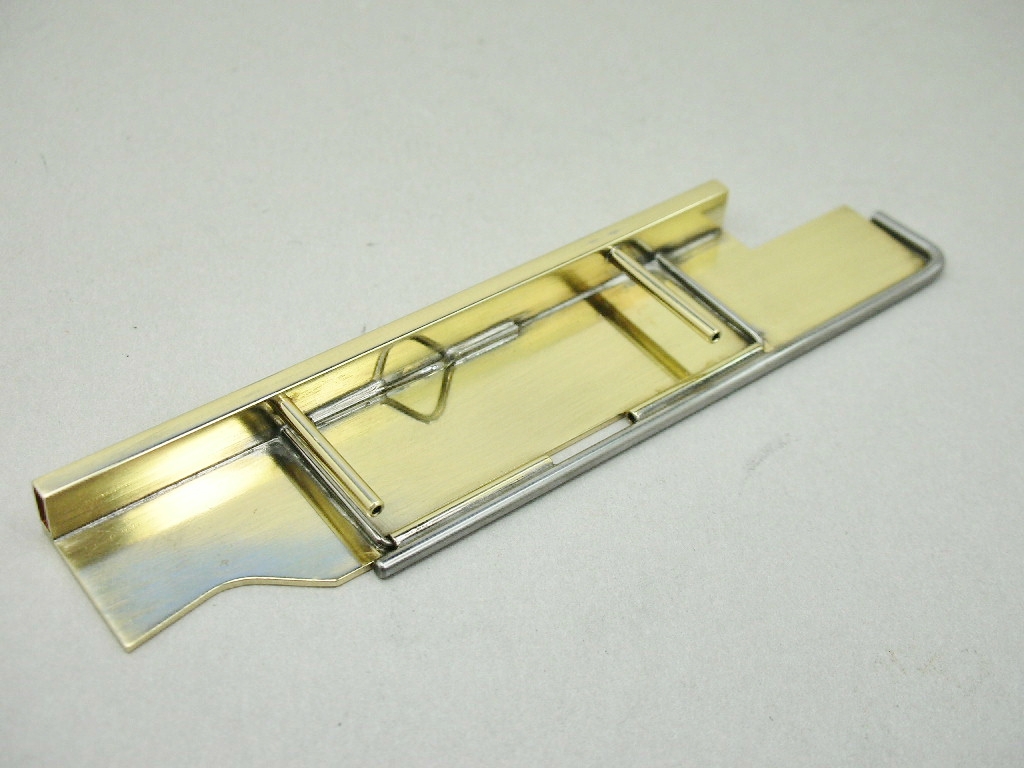
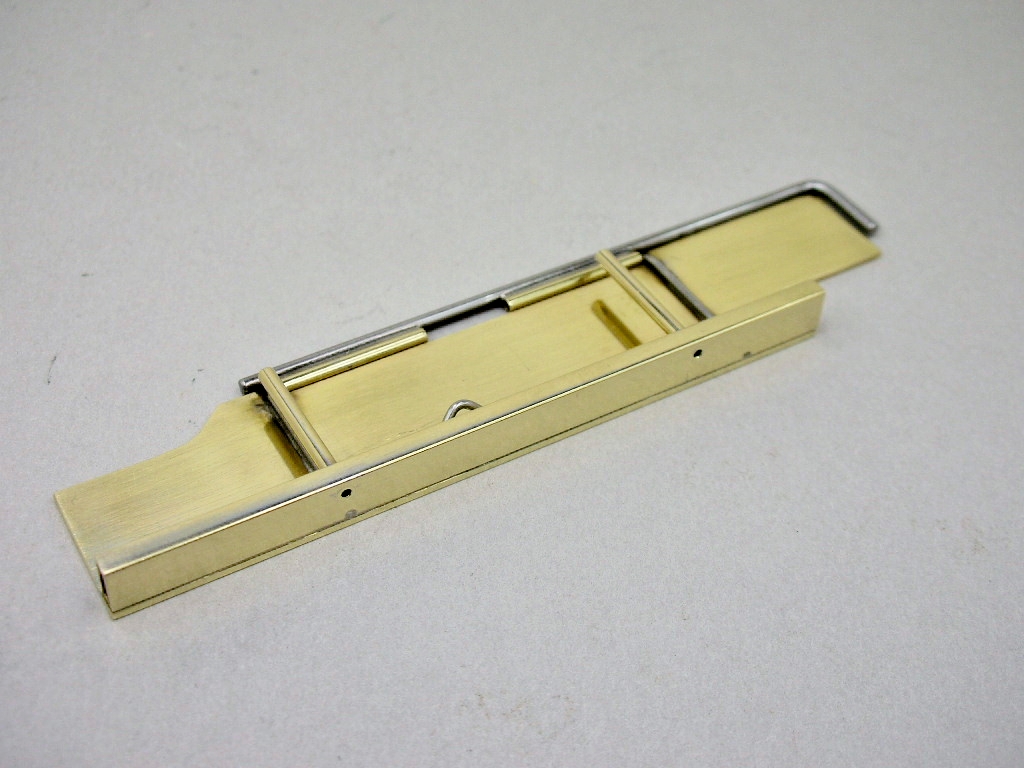
The finished pans:
- Steve Okeefe, Jencar17, Fergy and 1 other like this
Rick Thigpen
Check out Steve Okeefe's great web site at its new home here at Slotblog:
The Independent Scratchbuilder
There's much more to come...
#36

Posted 19 June 2024 - 07:40 PM
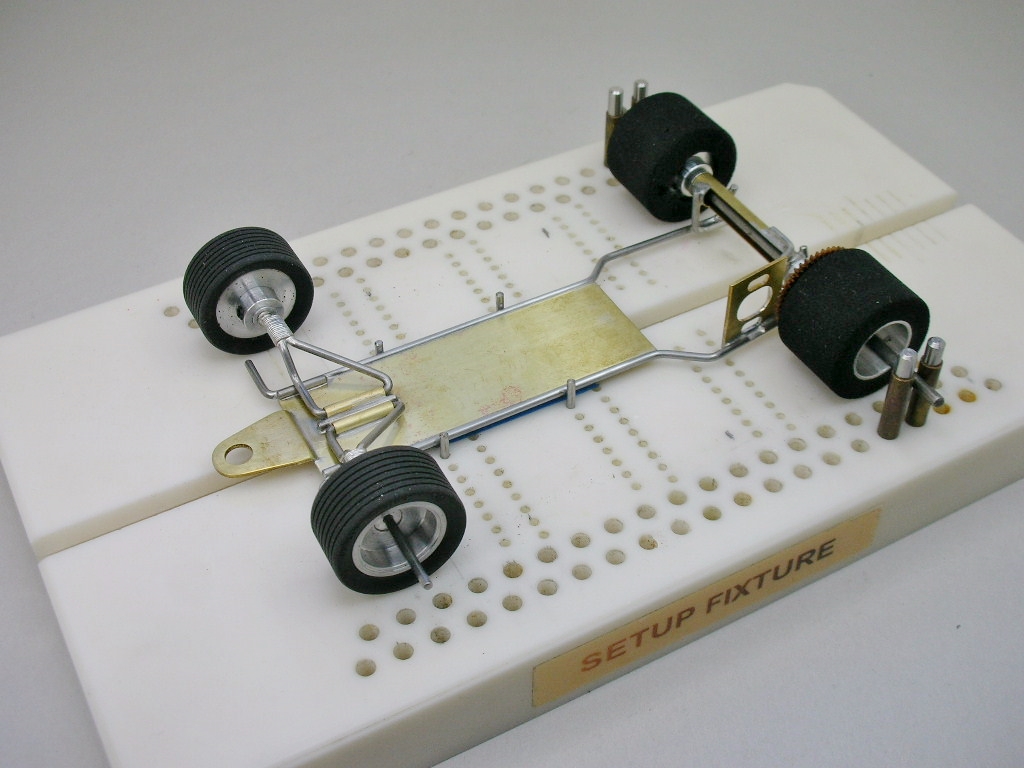
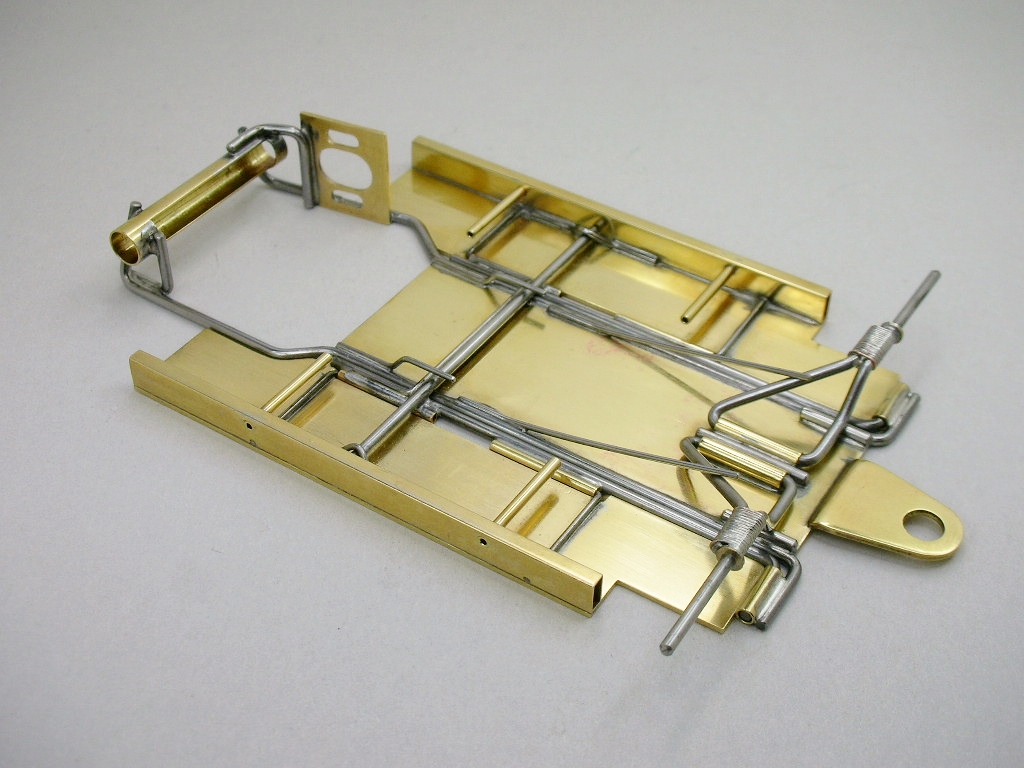
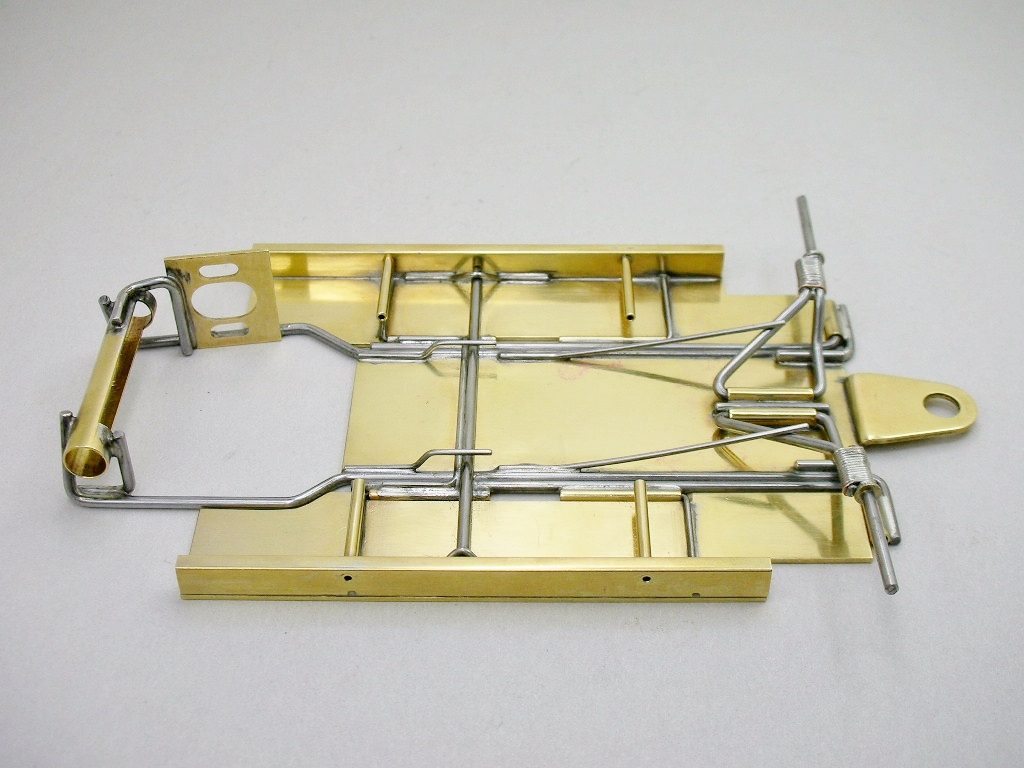
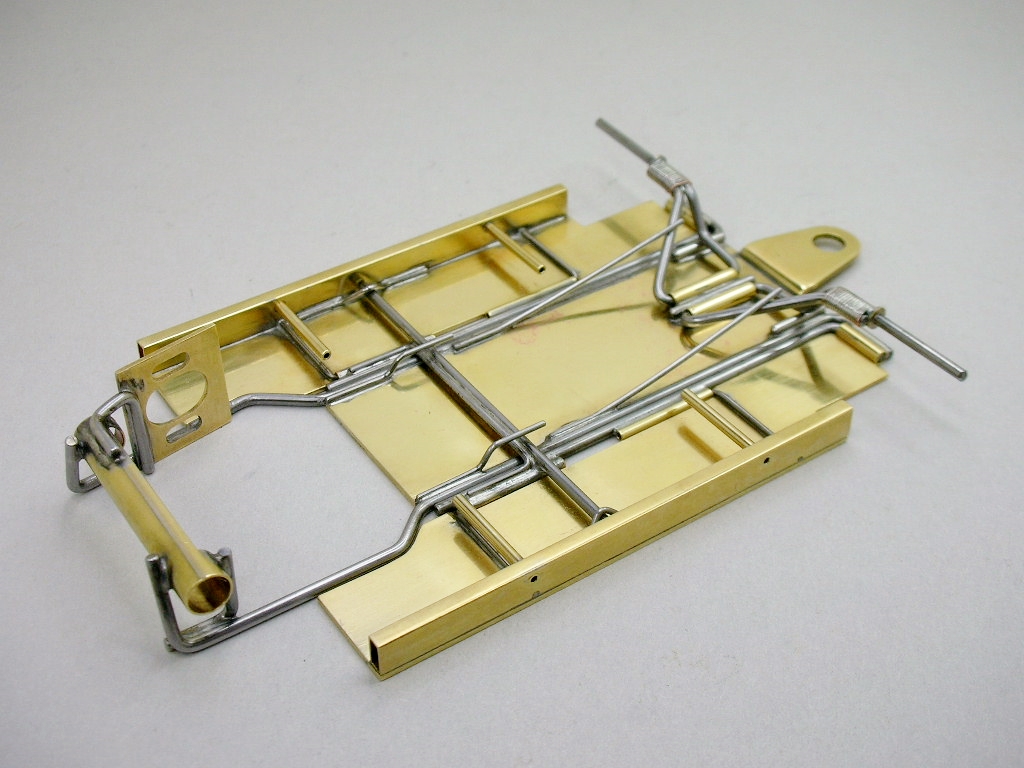
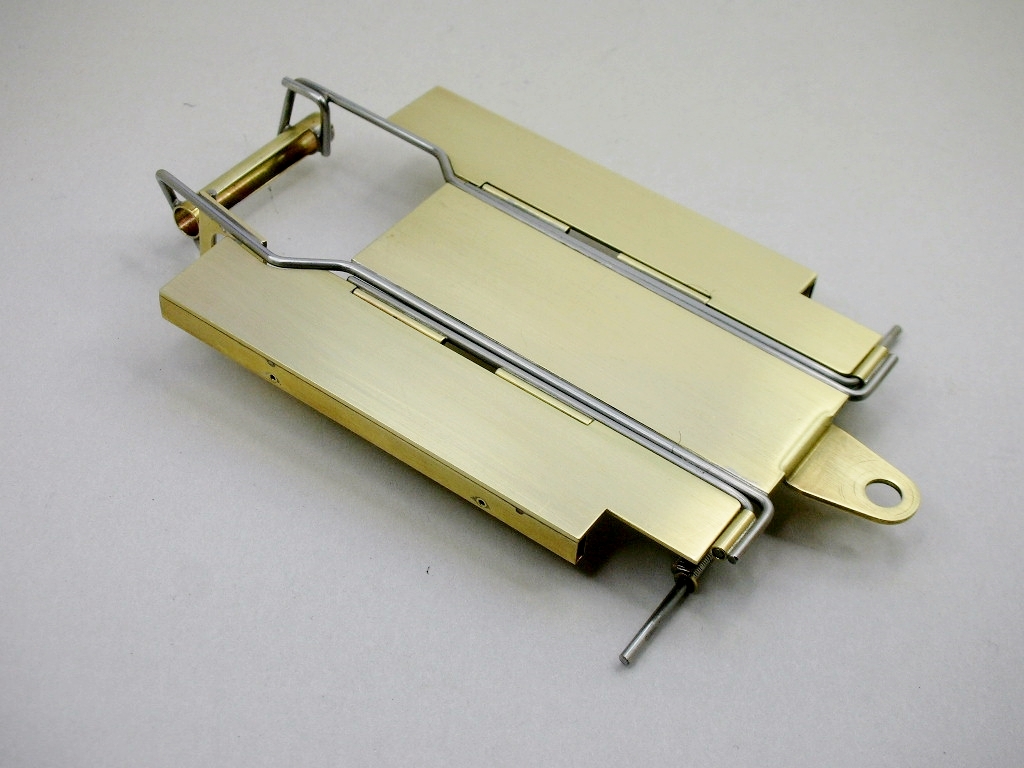
Attaching the plumber and pans was the last step for chassis construction. ![]()
I had it all polished but it needed a WD40 soak which dulled the brass and darkened the solder a bit:
Running the spring up to the front L-arm and under the rear suspension arm would have looked better.
But this way it is so easy to slip the spring off the arm to swing the arm up out of the way and just as easy to reconnect it.
- Steve Okeefe, Jencar17, Fergy and 5 others like this
Rick Thigpen
Check out Steve Okeefe's great web site at its new home here at Slotblog:
The Independent Scratchbuilder
There's much more to come...
#37

Posted 20 June 2024 - 11:47 PM
I really like the bottom view Rick. Its beautiful and clean. Love the front suspension too. Well done. ![]()
#38

Posted 21 June 2024 - 10:37 AM
Thanks Martin, that's my favorite view too. ![]()
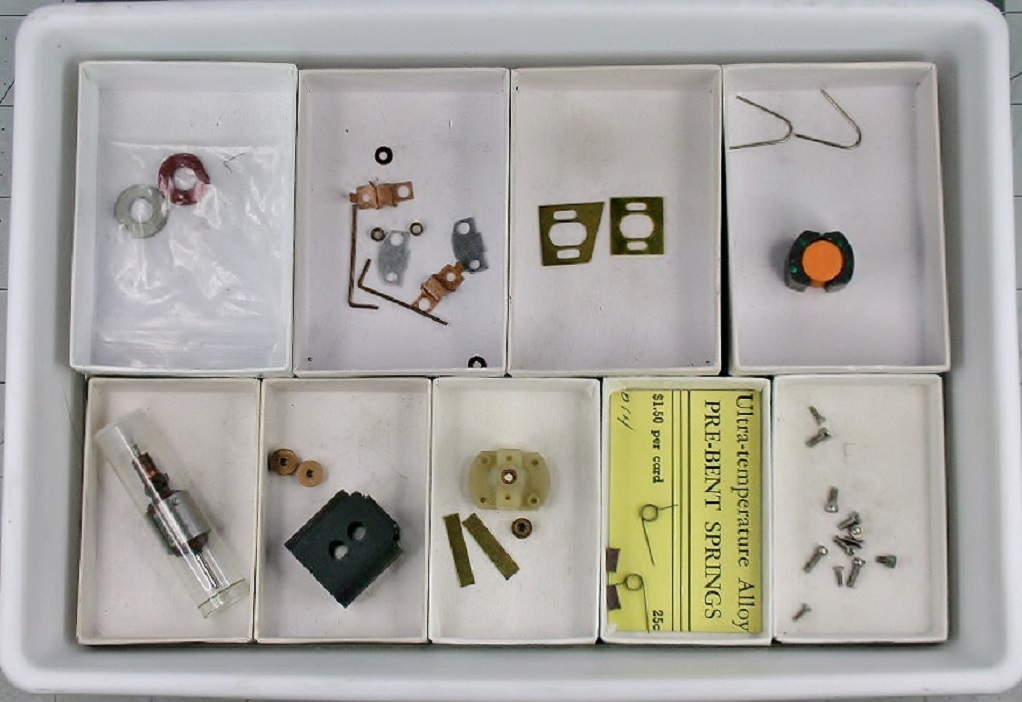
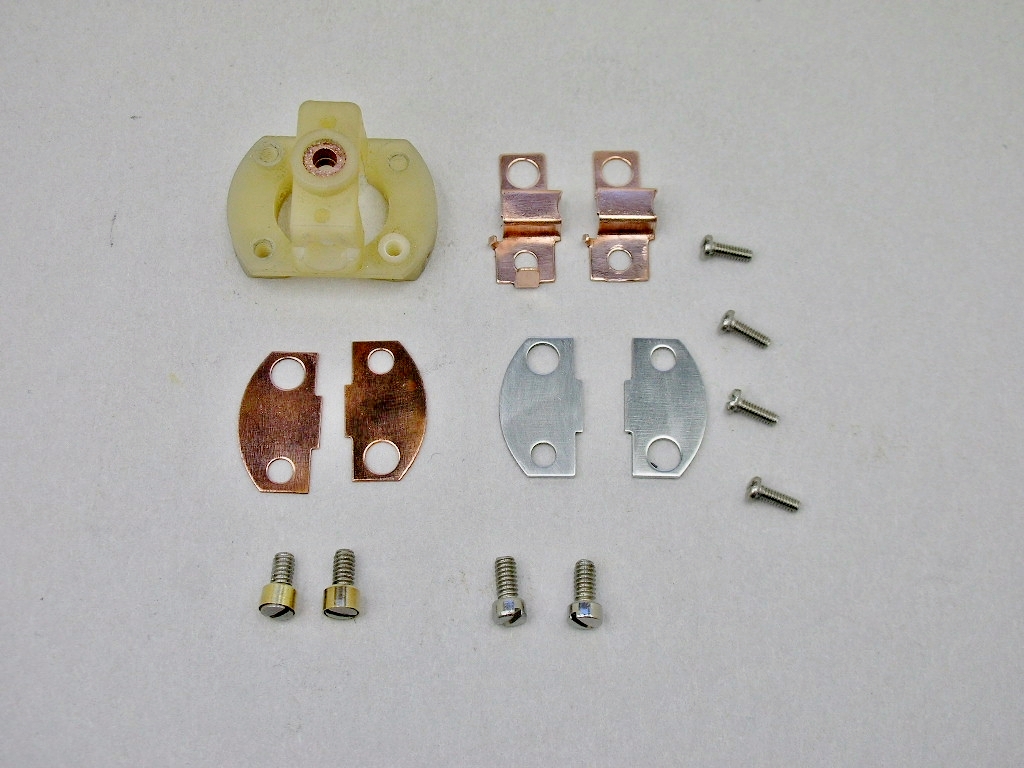
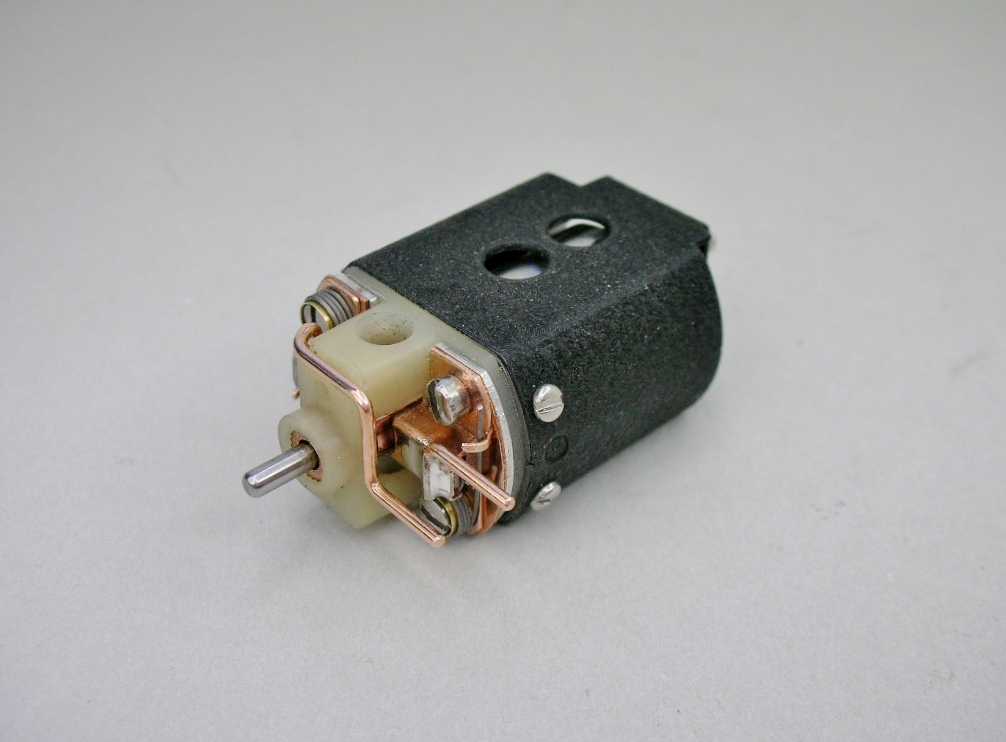
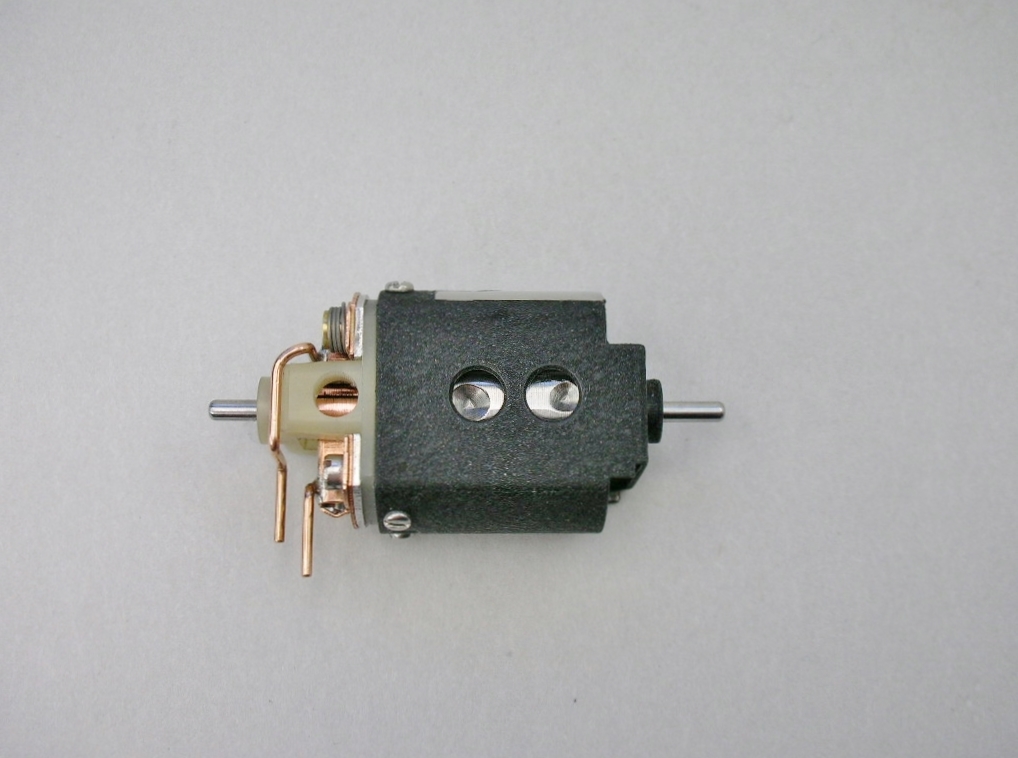
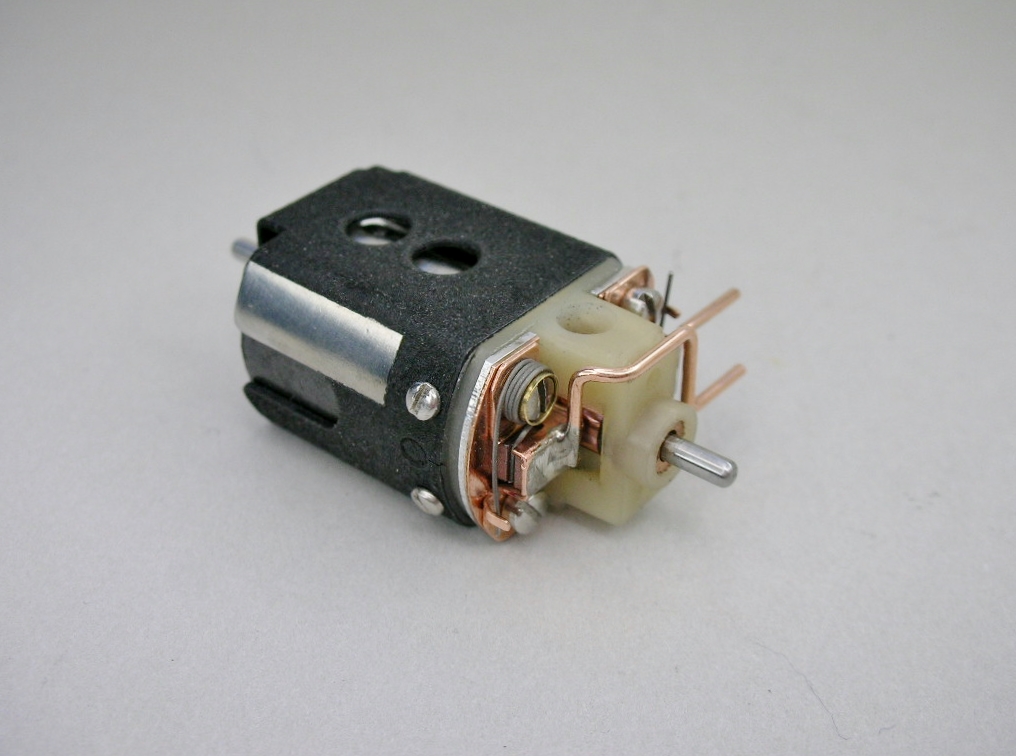
Time to finish the motor, a Mura C-can with the early style modified B-can "small bearing" endbell and buss bars:
The parts gathered up in my "build box" for the motor project:
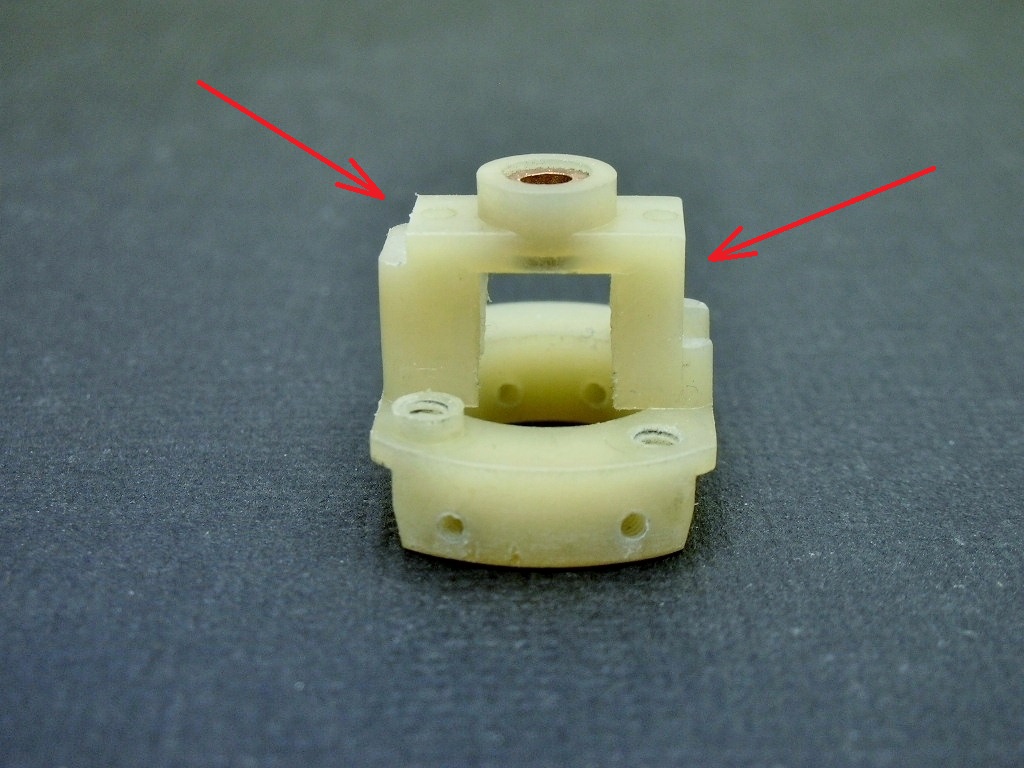
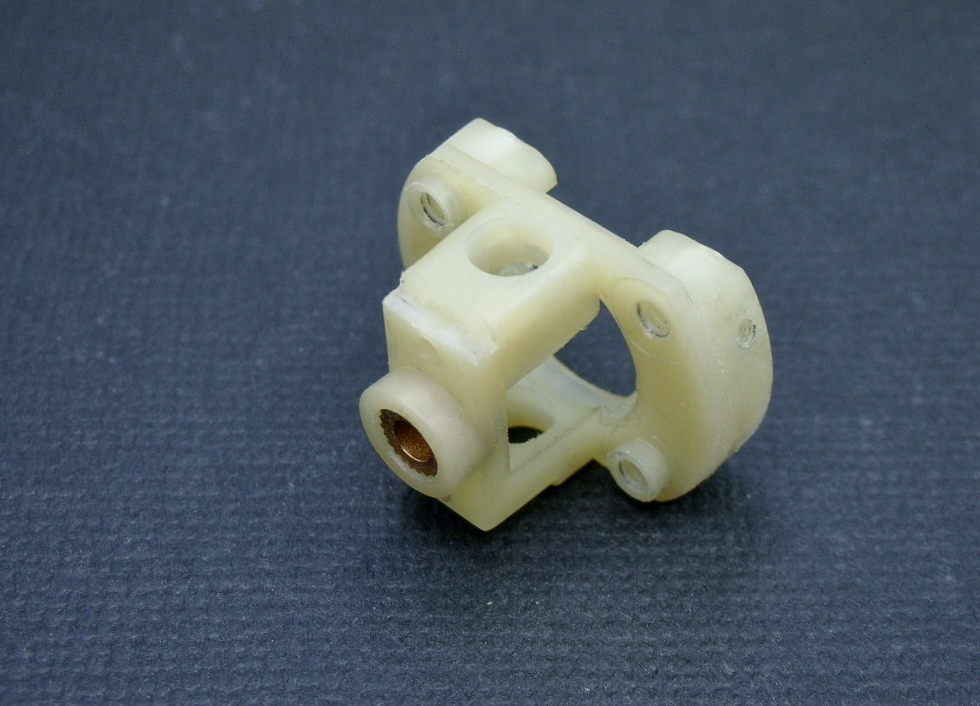
The endbell needs a relief cut to clear the frame main rail and an optional one for the buss bar......
...........and a couple of "comm inspection holes" like the original car had:
The modified endbell, Mura parts and stainless steel machine screws:
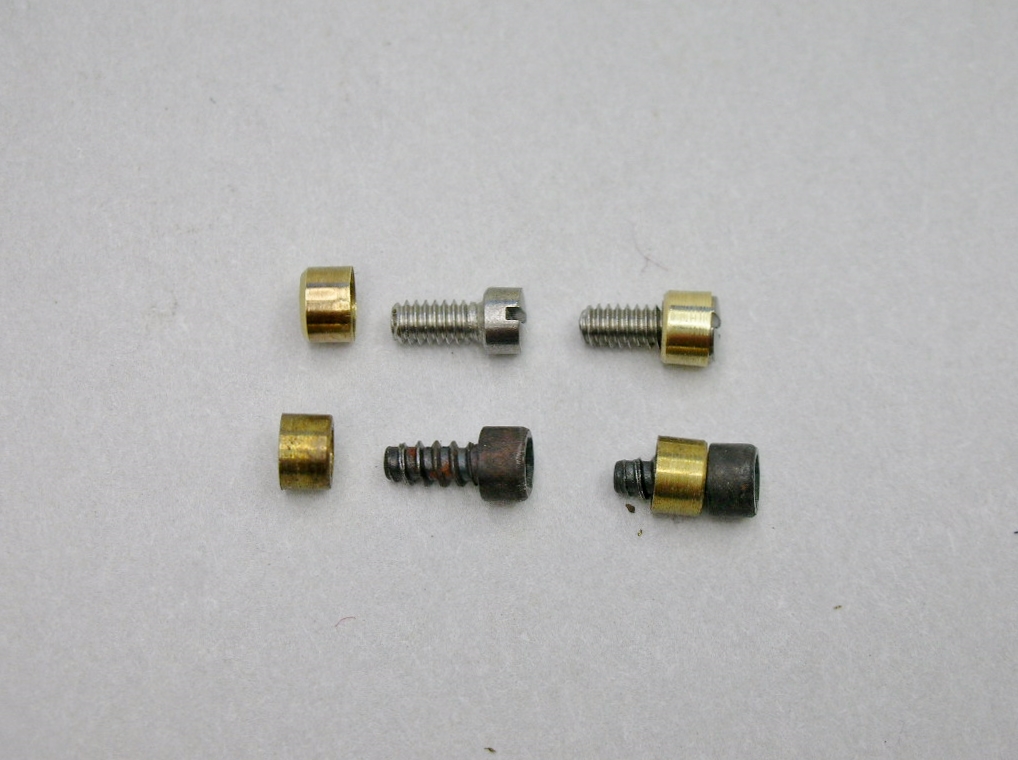
I also modified the "spring post" from the overly long Mura style (bottom) to a more compact version (top):
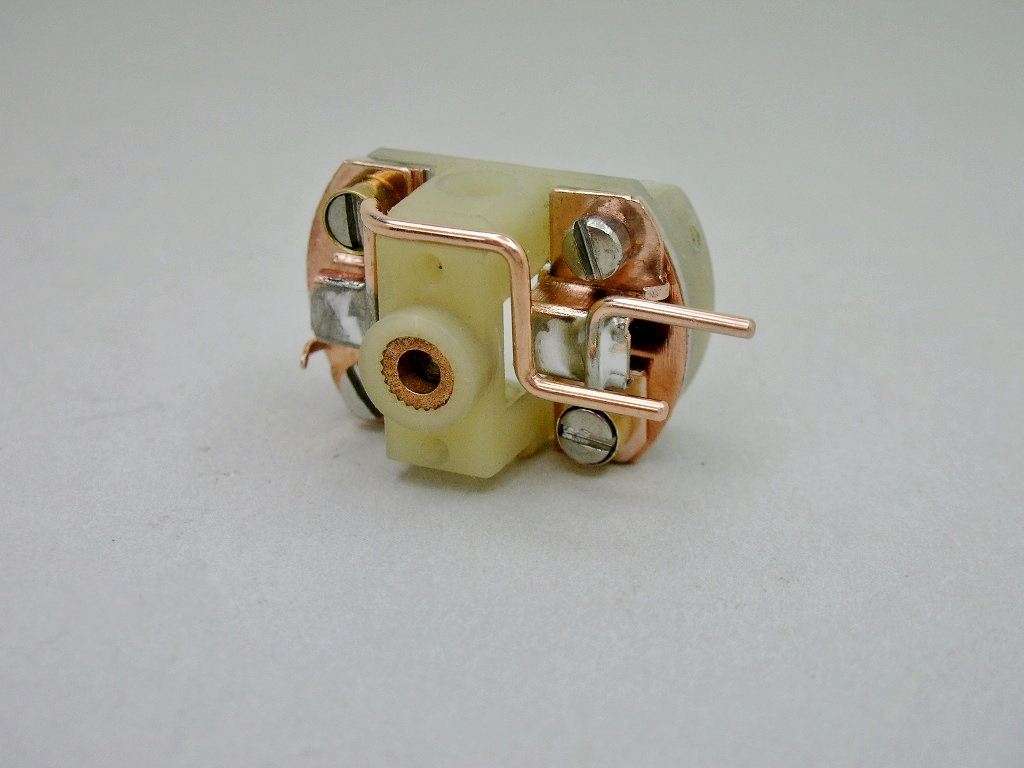
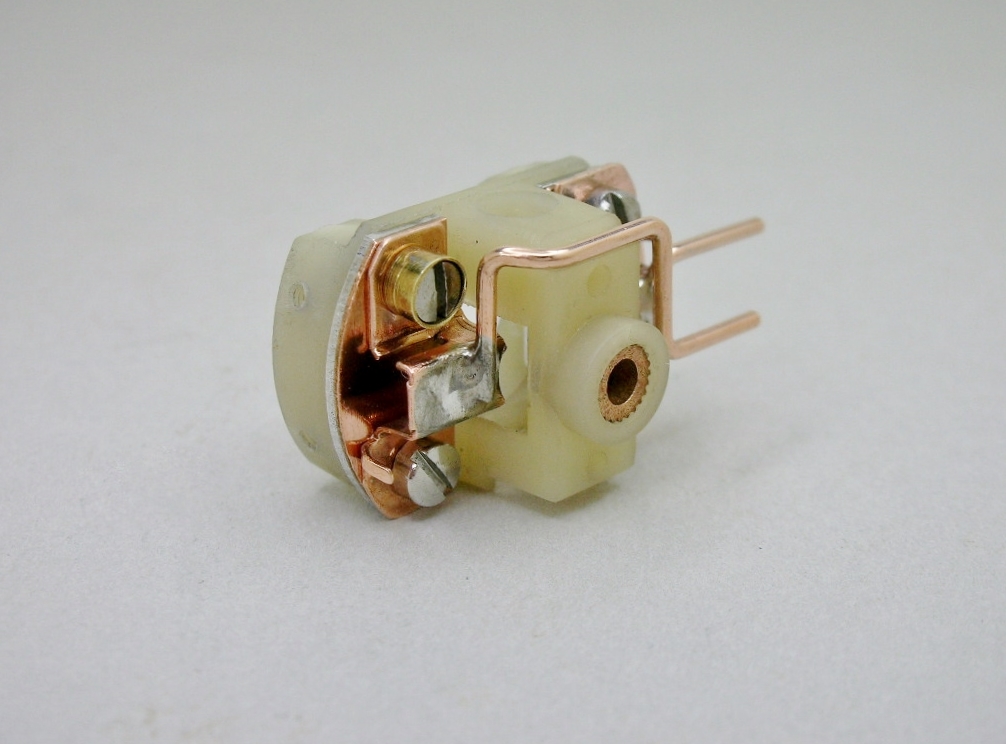
The finished endbell:
- Jencar17, Tex and Larry Horner like this
Rick Thigpen
Check out Steve Okeefe's great web site at its new home here at Slotblog:
The Independent Scratchbuilder
There's much more to come...
#39

Posted 21 June 2024 - 10:49 AM
Shiny copper sure is purdy! Hey, I was thinking about tapping the end bell mounting holes on a Russkit 16D motor I acquired and was wondering what thread size you used?
#40

Posted 21 June 2024 - 11:43 AM
0-80 for the can mounting, 2-56 for the endbell hardware.
- Larry Horner likes this
I intend to live forever! So far, so good.
#41

Posted 21 June 2024 - 11:45 AM
Hi Larry,
I use 2-56 screws ("for endbell geeks") like Lee Gilbert spoke of in his multi-issue Pro car articles in Car Model Magazine.
For me the old Mabuchi endbells are especially prone to cracking. I like cutting the threads with a tap instead of driving in a wedge like self tapping screw.
Tap drill size is #50 (.070").
And, as Bill said, 0-80 for endbell to can mounting.
- Regis4446 and Larry Horner like this
Rick Thigpen
Check out Steve Okeefe's great web site at its new home here at Slotblog:
The Independent Scratchbuilder
There's much more to come...
#42

Posted 23 June 2024 - 10:33 AM
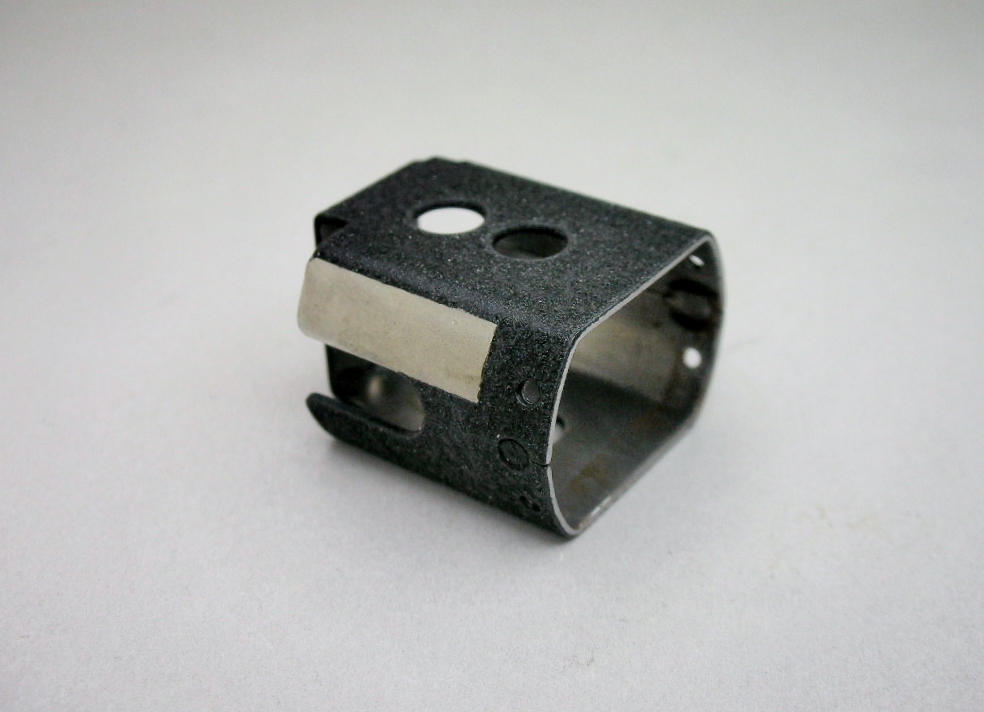
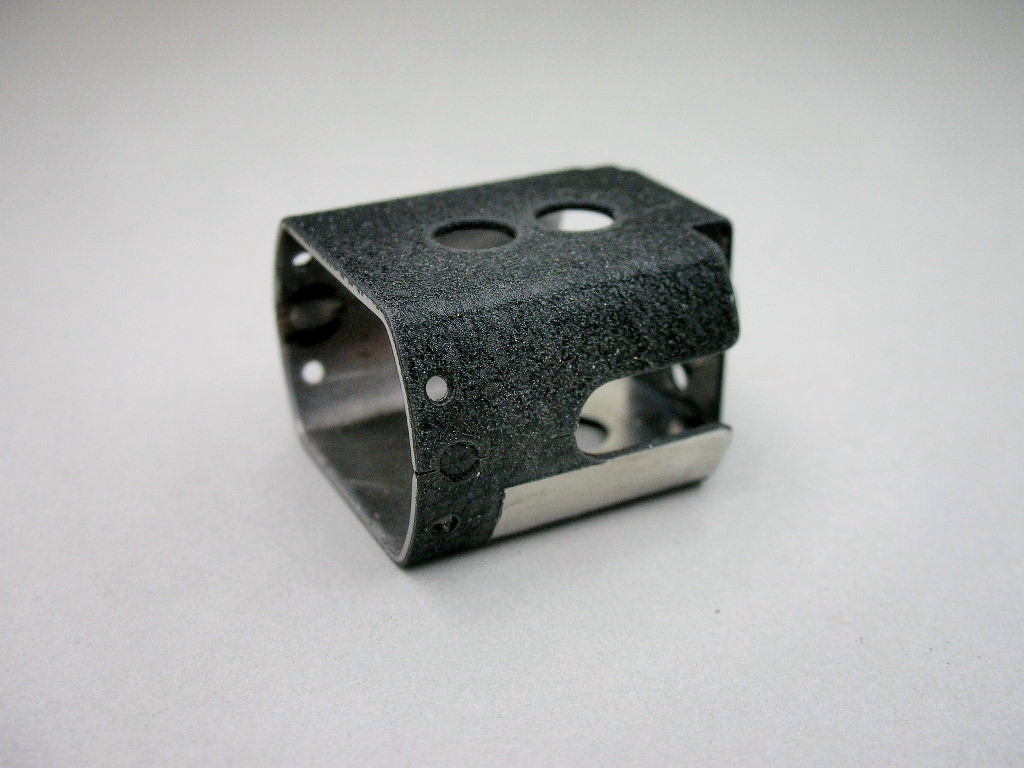
I modified the Mura C-can early on in the build to use it for my jig motor. Now it has a coat of my favorite motor can paint.......good old black wrinkle finish:
The area where it will be soldered to the rear axle tube was tinned and masked off:
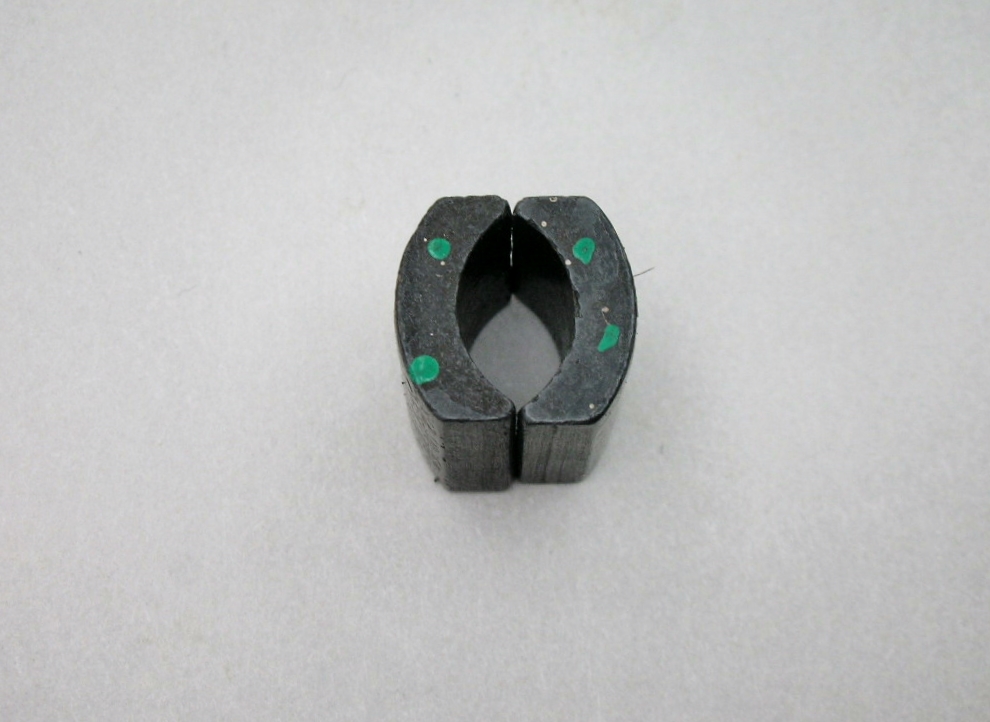
I have these "Green Dot" magnets that I'm installing. I seem to remember seeing these advertized by Champion in the mid 70's but?????
I want to save my Champion DZ's and Blue Dots for earlier period builds.
- Tex likes this
Rick Thigpen
Check out Steve Okeefe's great web site at its new home here at Slotblog:
The Independent Scratchbuilder
There's much more to come...
#43

Posted 23 June 2024 - 03:37 PM
I've often heard the only difference between DZs, Blue Dots, & White Dots was the color of the dots. I don't recall Green Dots & someone once mentioned Orange Dots so perhaps there are others too.
I intend to live forever! So far, so good.
#44

Posted 23 June 2024 - 08:35 PM
Hi Bill,
I looked through the 1975 and 1977 Champion catalogs and it was all "White Dots". ![]()
Rick Thigpen
Check out Steve Okeefe's great web site at its new home here at Slotblog:
The Independent Scratchbuilder
There's much more to come...
#45

Posted 23 June 2024 - 10:47 PM
The succession was DZs, late '60s, Blue Dots, early '70s, White Dots, mid-'70s. I don't have the exact dates, but I was still running White Dots in the early '80s.
I intend to live forever! So far, so good.
#46

Posted 24 June 2024 - 10:14 AM
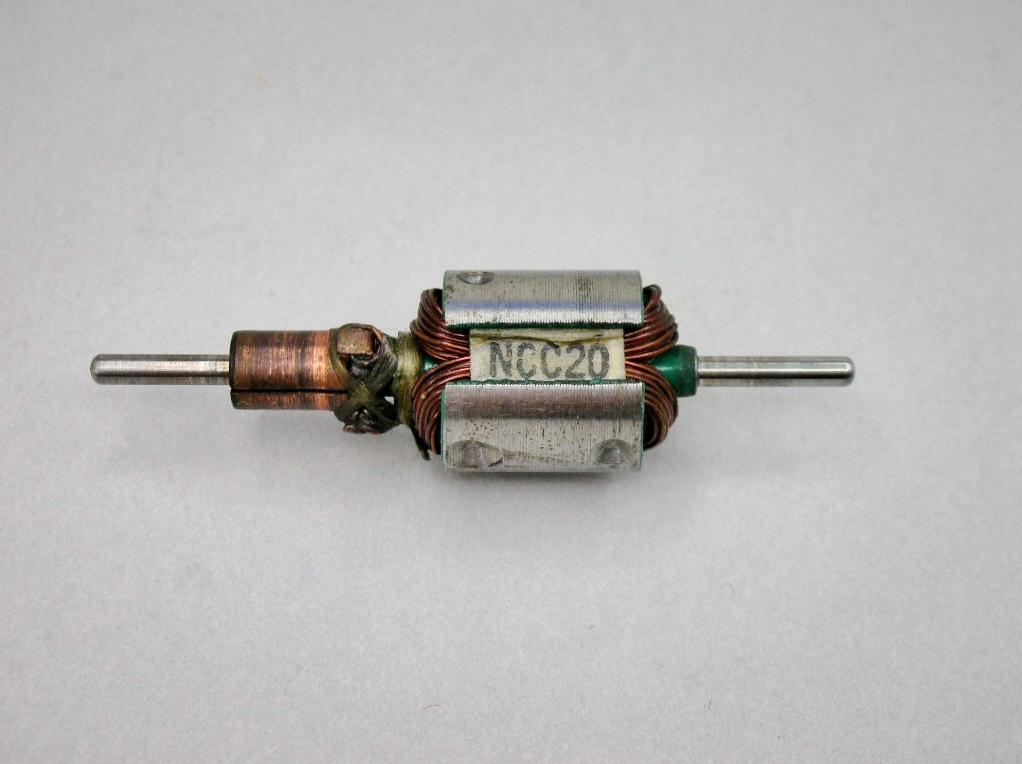
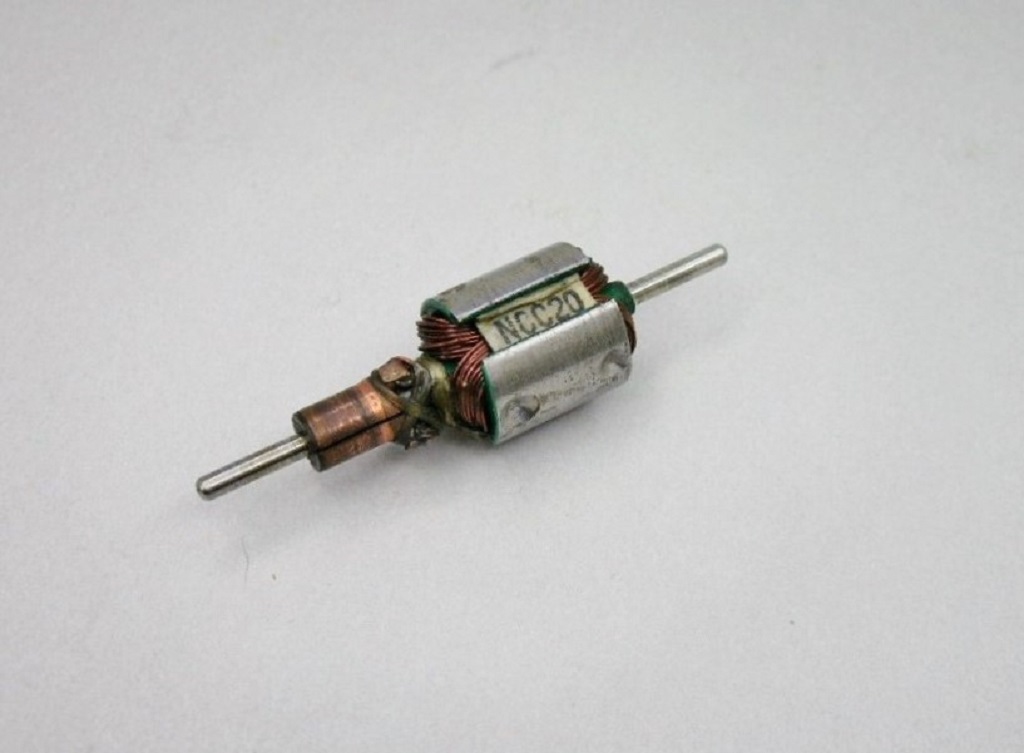
The MESAC Super-Coupe class used the tried and true NCC20 armature. Below is a well used example to be freshened up for my motor:
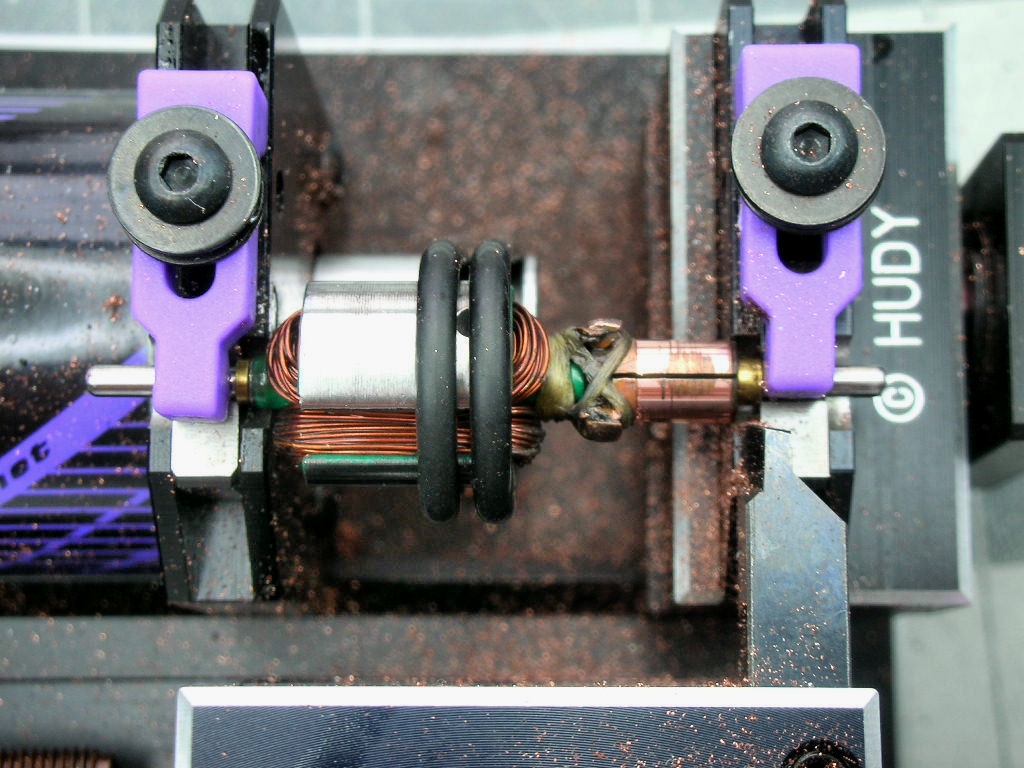
The comm needed a light cut:
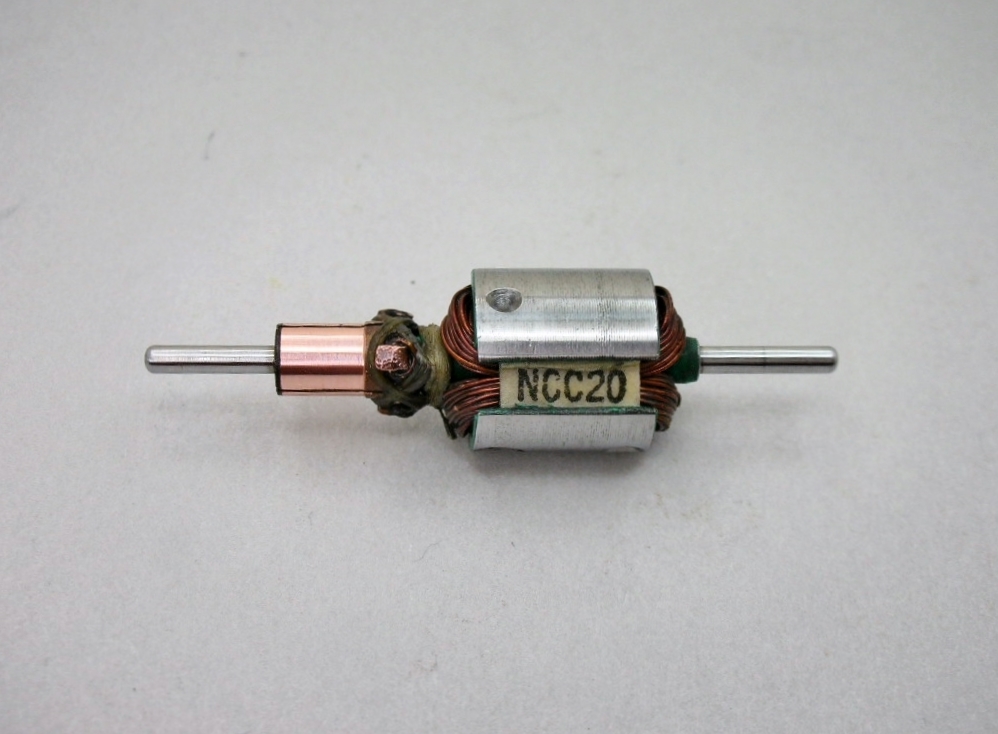
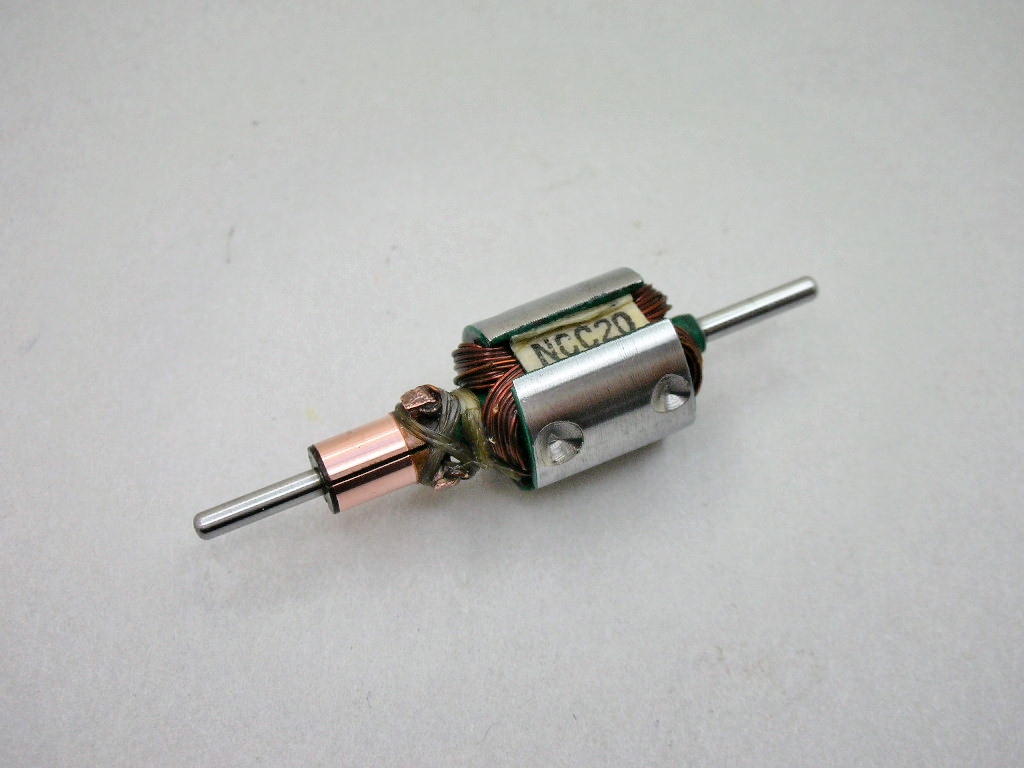
The shaft and laminations are polished and then a good cleaning with automotive electrical contact cleaner:
Of course the arm could be sent the arm out to have this done and rebalanced to boot.
But I enjoy this process. You can really see the arm come back to all its former glory.
- SpeedyNH likes this
Rick Thigpen
Check out Steve Okeefe's great web site at its new home here at Slotblog:
The Independent Scratchbuilder
There's much more to come...
#47

Posted 24 June 2024 - 11:45 AM
My two NCC20 arms are ugly compared to yours. I don't see any tail end paint spots on yours used with a strobe light for balancing. Could your arm have been wound & balanced by someone other than Mura? It appears to be wound on a Mura stack.
I intend to live forever! So far, so good.
#48

Posted 24 June 2024 - 12:23 PM
I have ugly NCC20 arms too Bill. ![]() At my age (74), I'm using up my nicest stuff first.
At my age (74), I'm using up my nicest stuff first.
It has a small, vertical painted strip on 2 of the poles for the balancing strobe light. I have it in the can now so no pictures.
- Bill from NH likes this
Rick Thigpen
Check out Steve Okeefe's great web site at its new home here at Slotblog:
The Independent Scratchbuilder
There's much more to come...
#49

Posted 25 June 2024 - 10:19 AM
- Jencar17, Slot Car Rod, Regis4446 and 2 others like this
Rick Thigpen
Check out Steve Okeefe's great web site at its new home here at Slotblog:
The Independent Scratchbuilder
There's much more to come...
#50

Posted 25 June 2024 - 02:07 PM
I think the Mura "Green" c-cans are some of the straightest cans on the market. Those that I have checked with a straightening slug have required little, if any, work right from the package to make everything straight. They're the complete opposite of a Champion c-can.
I intend to live forever! So far, so good.


