Jump to content


Photo

Team Russkit R&C Iso Grifo 4WD


  • Please log in to reply
91 replies to this topic

#26 Hworth08

Hworth08

    Posting Leader

  • Member at Peace
  • PipPipPipPipPipPipPip
  • 3,563 posts
  • Joined: 16-February 06
  • Gender:Male
  • Location:Springfield, TN

Posted 09 April 2010 - 08:24 AM

Hi Don. Do you mean how wide to make them for a given body?


Right! I have quite a bit of trouble fitting the mounts with the older, much more scale bodies that have the undercuts. Most of the time, as the body is mounted lower, the mounts need to be wider as the older bodies often get wider above the rocker panels.

I usually just fit the body by trimming the four mounting tubes as soon as the frame reaches that point, then add any braces or rails to the mounting tubes.

Always in search of better methods though and this frame's mounts are quite attractive! :)
Don Hollingsworth
11/6/54-2/13/18
Requiescat in Pace


#27 Regis4446

Regis4446

    On The Lead Lap

  • Full Member
  • PipPipPipPip
  • 428 posts
  • Joined: 24-March 10
  • Gender:Male
  • Location:France

Posted 09 April 2010 - 08:58 AM

nice work
I'm really impressed by the works presented on this forum

Régis Baron

#28 dc-65x

dc-65x

    Grand Champion Poster

  • Subscriber
  • PipPipPipPipPipPipPipPip
  • 6,825 posts
  • Joined: 14-February 06
  • Gender:Male
  • Location:Captain Rick: The only vintage slot car nut in SW Oregon?

Posted 09 April 2010 - 11:55 AM

Hi Régis and welcome to the forum :) .

I usually just fit the body by trimming the four mounting tubes as soon as the frame reaches that point, then add any braces or rails to the mounting tubes.


Yup Don, cut and fit. On the old “Dawn of Time” bodies with the curved sides that seems to be what I end up doing most often. If I know where the pin tubes are going to end up height wise I’ll mark the body at that point. Then measure on the outside of body across the two points and subtract 2X the material thickness. I cut a pin tube to that length and then test fit it inside the body.

Wheel and tire time. To have some fun with my lathe more than any other reason I modified the front and rear rims as shown above (stock rims on the bottom):

Posted Image

I’m having “tilting” problems with my lightweight R&C Team Russkit Lotus 40 sports car and Lotus 25 GP. I’m running our replica Russkit wheels so I’m looking to find donuts (not finished wheels and tires) that have less bite that the Alpha Huge Supernatural’s I’m running now. My buddy Rodney has had good luck with letting the softest donuts “age” (dry out) to firm them up a bit.

I emailed Paul Pfeiffer of Alpha Slot car Products and he suggested his Wonder Rubber donuts. They are a wing car tires so their small diameter was a concern as I need a finished .938”. Luckily, when mounted on Russkit rims they grow to just over an inch. Here are they are before grinding. Rears on the top and fronts on the bottom:

Posted Image

Man, what are those donut made out of :blink: ……Kevlar :shok: ! I could grind the OD’s with the Hudy OK, but trying to sand the sides flush with the rims inside and out was painful. It would just melt the 320 grit wet or dry sandpaper I usually use. I ended up getting some 100 grit aluminum oxide sandpaper from my garage that would cut the stuff.

Here are the finished wheels and tires. They are a little oversized for final trimming:

Posted Image

Onward to motor building time………

Rick Thigpen
Check out Steve Okeefe's great web site at its new home here at Slotblog:
The Independent Scratchbuilder
There's much more to come...


#29 Hworth08

Hworth08

    Posting Leader

  • Member at Peace
  • PipPipPipPipPipPipPip
  • 3,563 posts
  • Joined: 16-February 06
  • Gender:Male
  • Location:Springfield, TN

Posted 09 April 2010 - 01:16 PM

The diamond coated manicure files work well on wonder rubber. Pretty expensive at 30 to 50 bucks each but they last a long time and make very smoothly rounded edges.

Wonder doughnuts are a little more apt to curl and dip after mounting so the longer a person can wait to do the "final grind" the better.
Don Hollingsworth
11/6/54-2/13/18
Requiescat in Pace

#30 dc-65x

dc-65x

    Grand Champion Poster

  • Subscriber
  • PipPipPipPipPipPipPipPip
  • 6,825 posts
  • Joined: 14-February 06
  • Gender:Male
  • Location:Captain Rick: The only vintage slot car nut in SW Oregon?

Posted 10 April 2010 - 10:03 PM

Thanks for the tip Don. I'll be picking up a diamond nail file ASAP ;) .

Motors, I need motors! :shok:

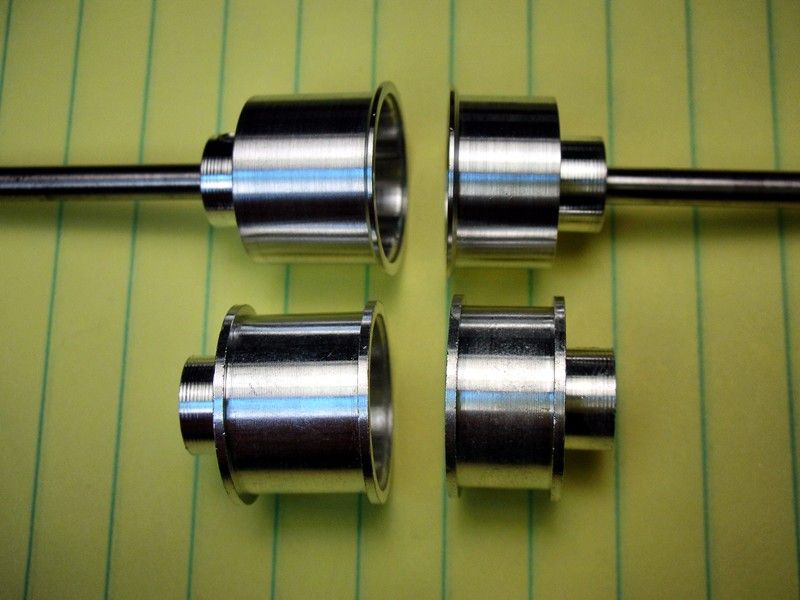
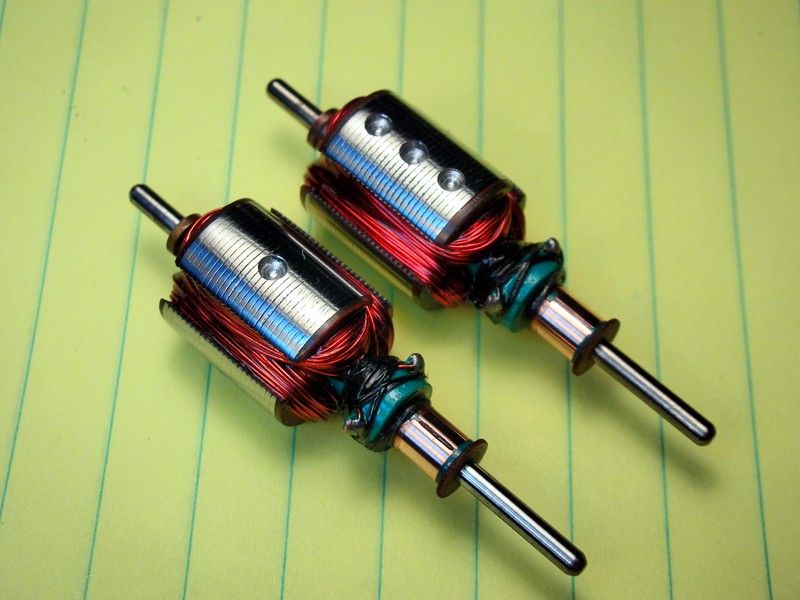
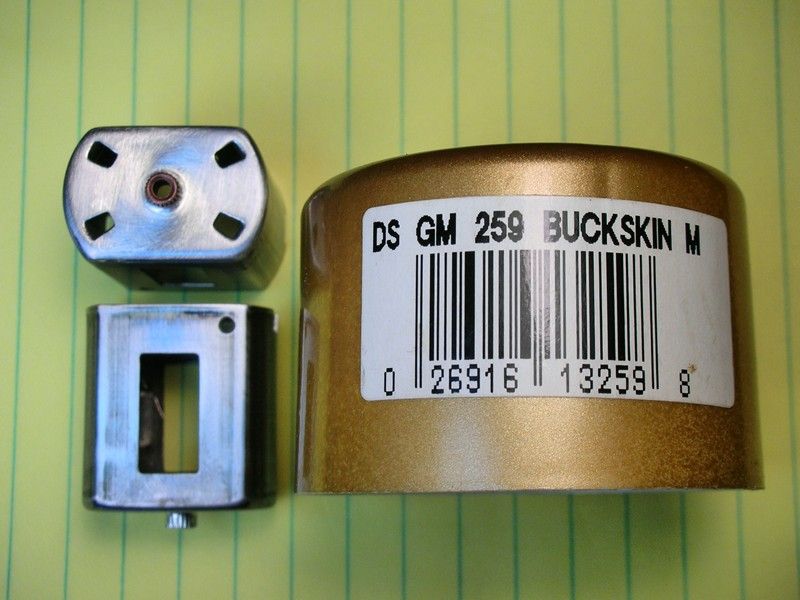
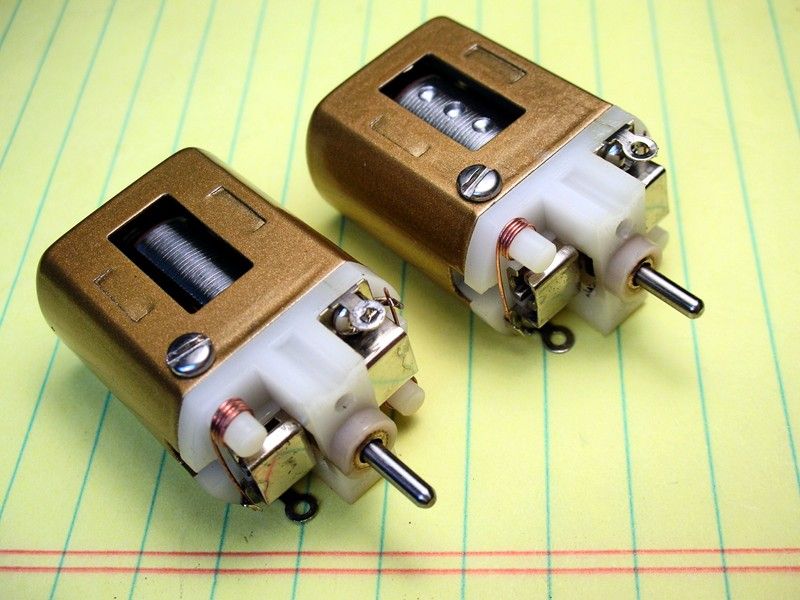
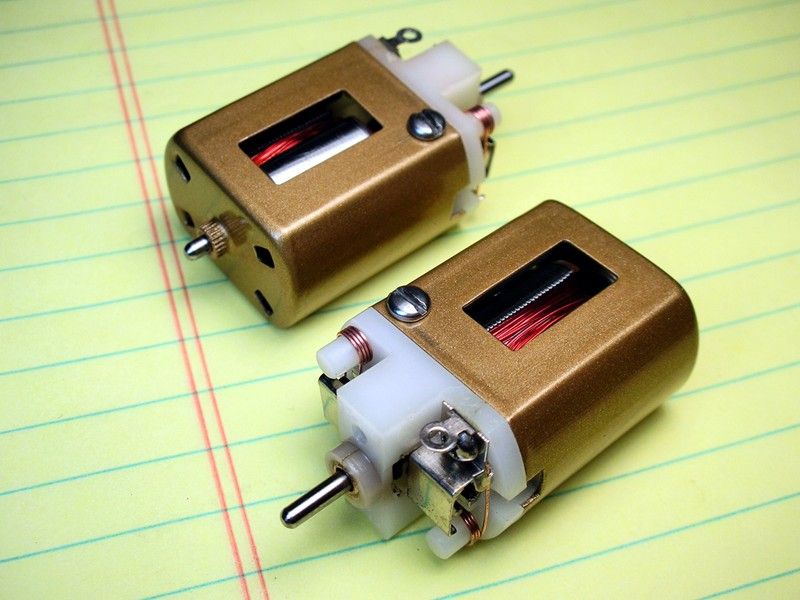
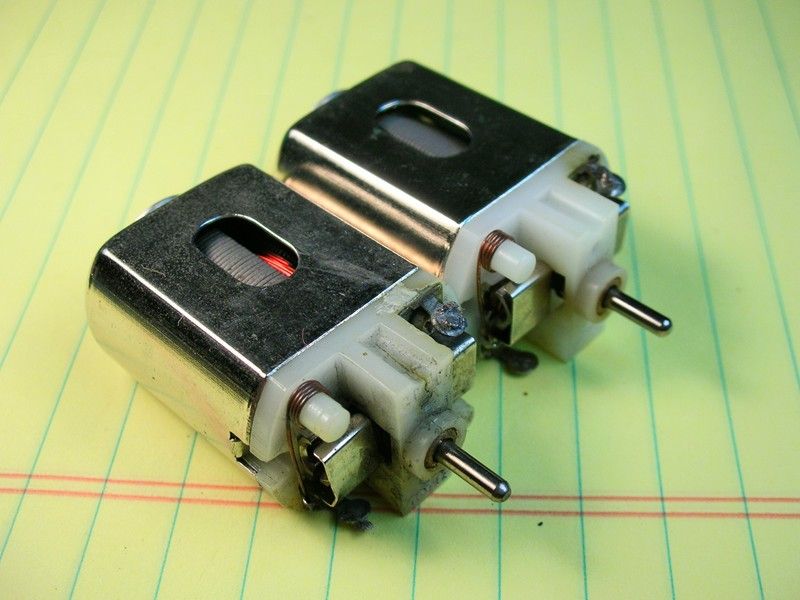
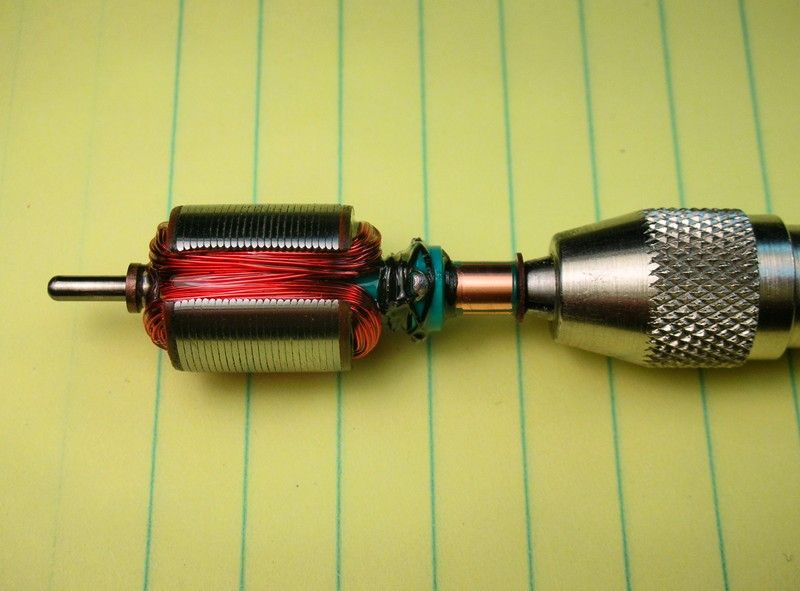
What I'm starting out with is a motor that I like very much for the 1966 Pro type cars. It's the 1968 Mabuchi but it will be fitted to a Russkit 23 style can and epoxied and balanced to look like a period rewind. I buzzed up several of them and these two sounded very similar. One is well used and the other is like new:

Posted Image

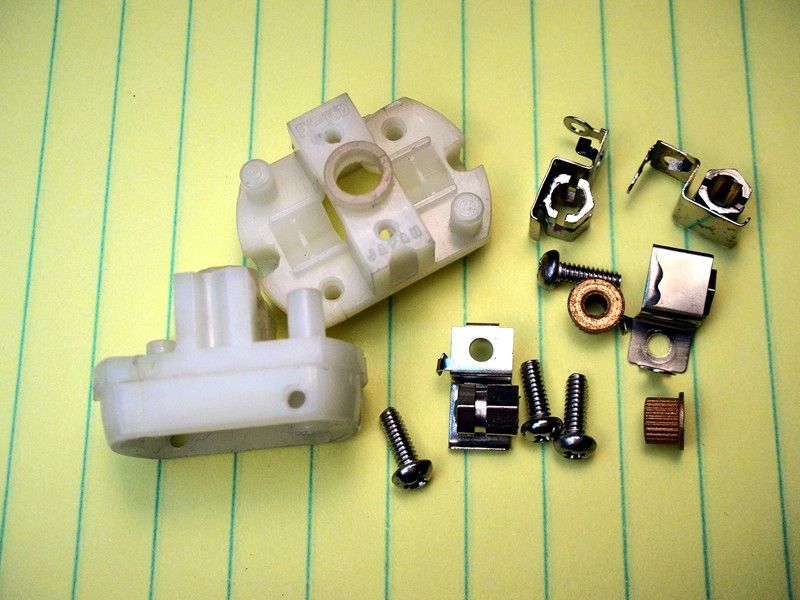
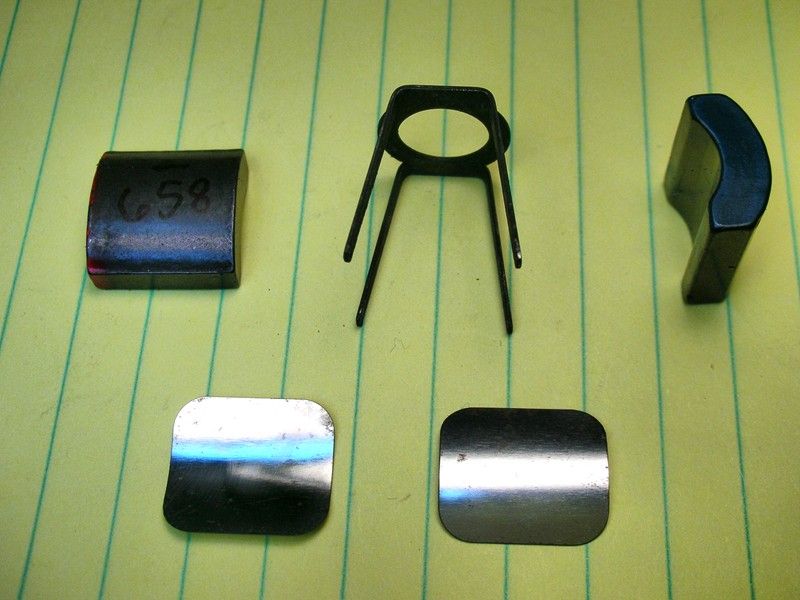
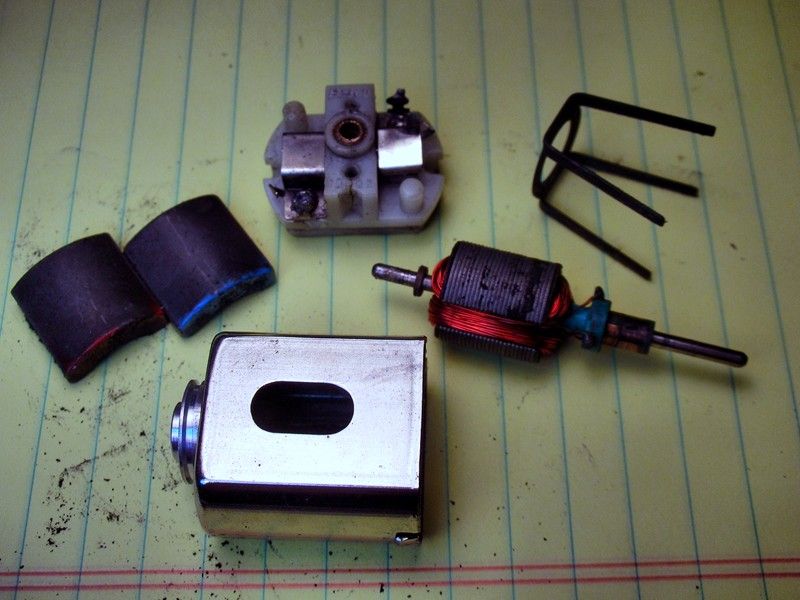
Here's what the used one looks like torn down:

Posted Image

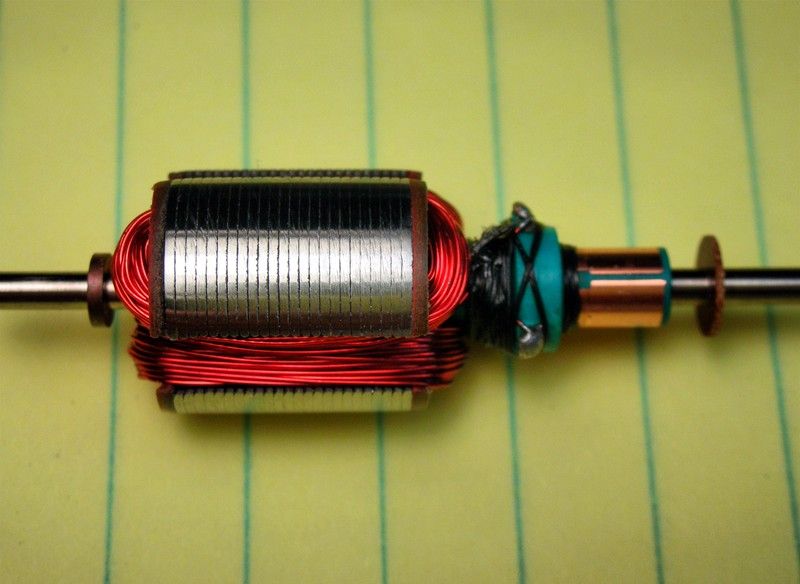
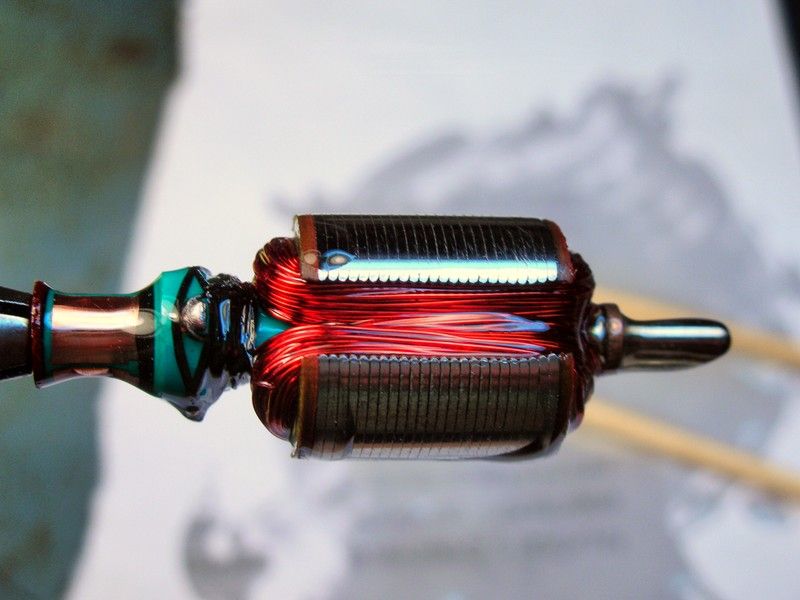
I asked our pal Fate what he thought the wind was and he said one wind used was 65 turns of 30 ga wire. That's a milder wind for the R&C races and that's what I want. Here's a shot of the arm with a piece of 30 ga Simco wire laid along side and above the factory wire:
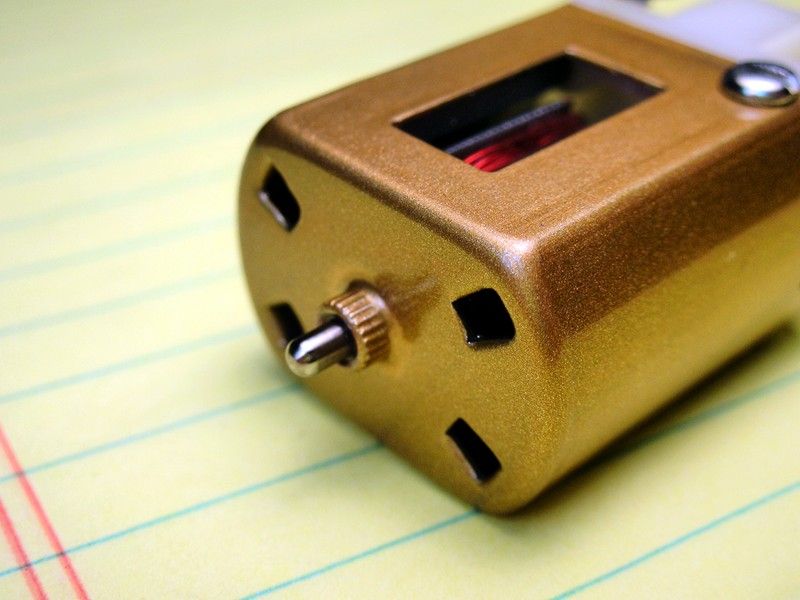
Posted Image

Closer.........

Posted Image

I could only measure the wire on the factory arm with dial calipers instead of a micrometer. When I measured some Simco and La Ganke 30 ga wire I found over .001" variation between all three. Maybe there is a difference in wire coating thickness? Anyway, it LOOKS like 30 ga :) .

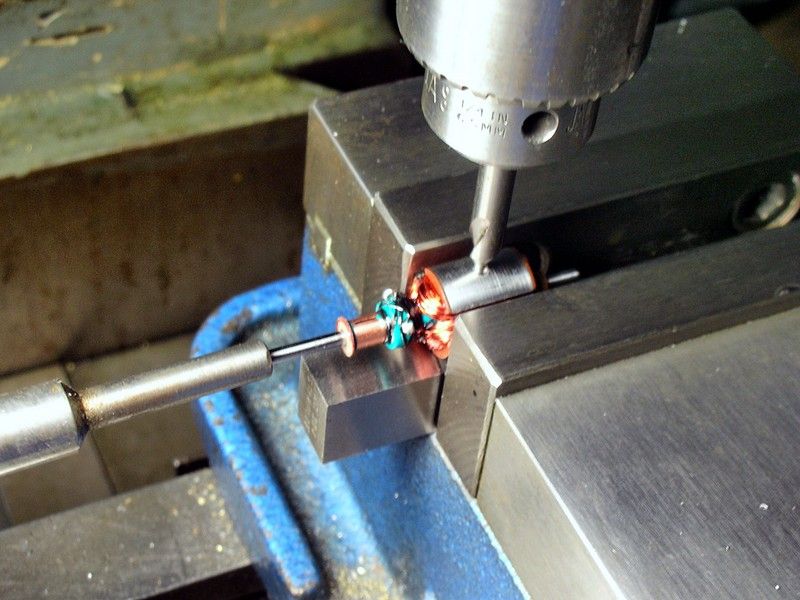
After cleaning I very lightly cleaned up the comms on the Hudy:

Posted Image

You can see how out of round it was. The dull area on the left hasn't come in contact with the cutter yet and the shiny area on the right has:

Posted Image

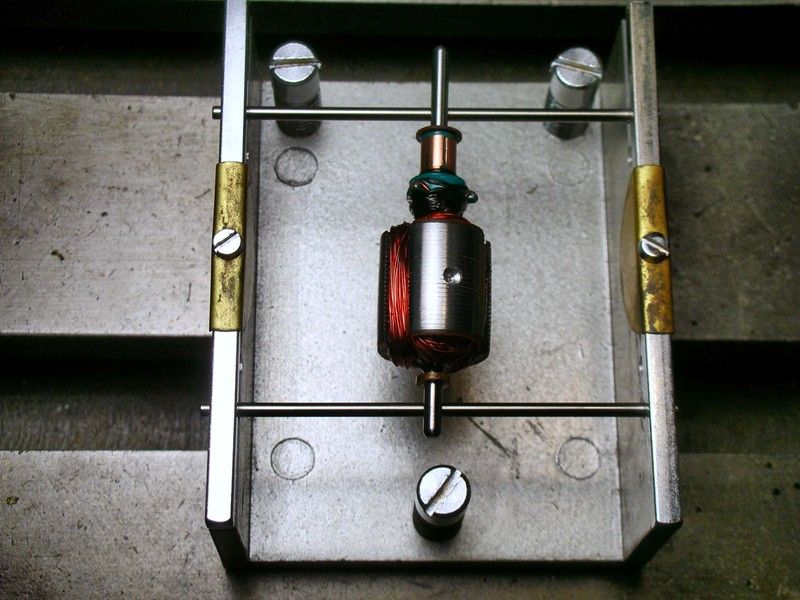
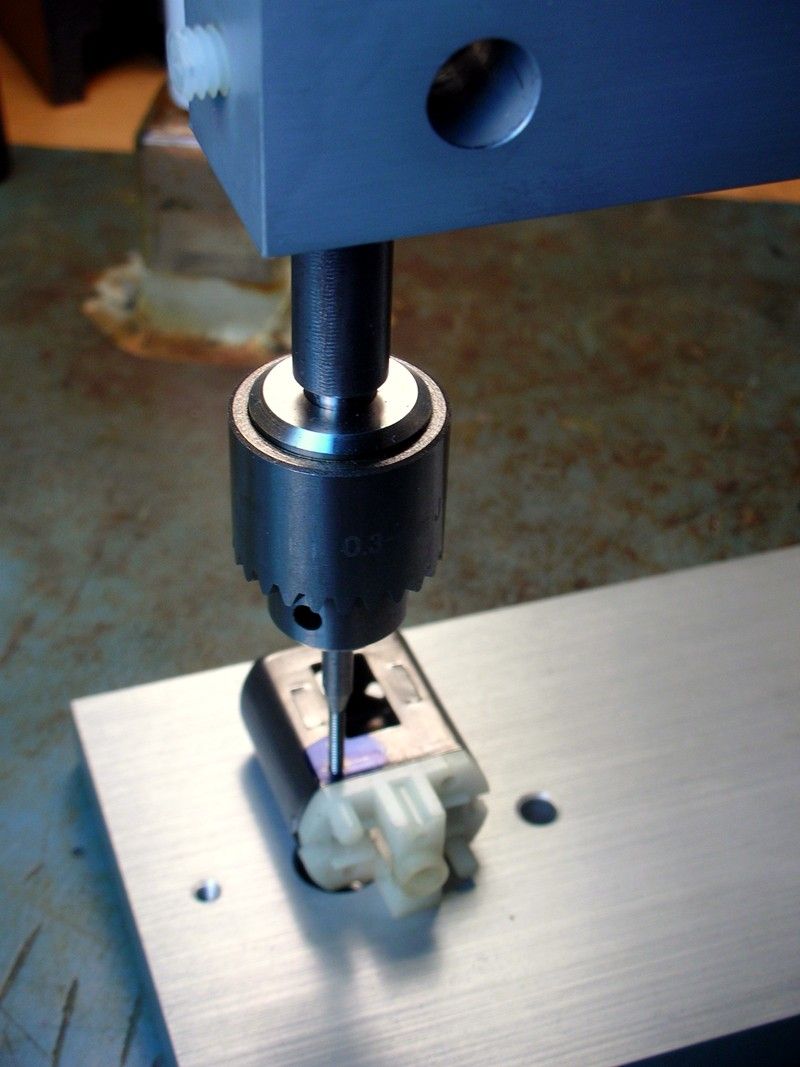
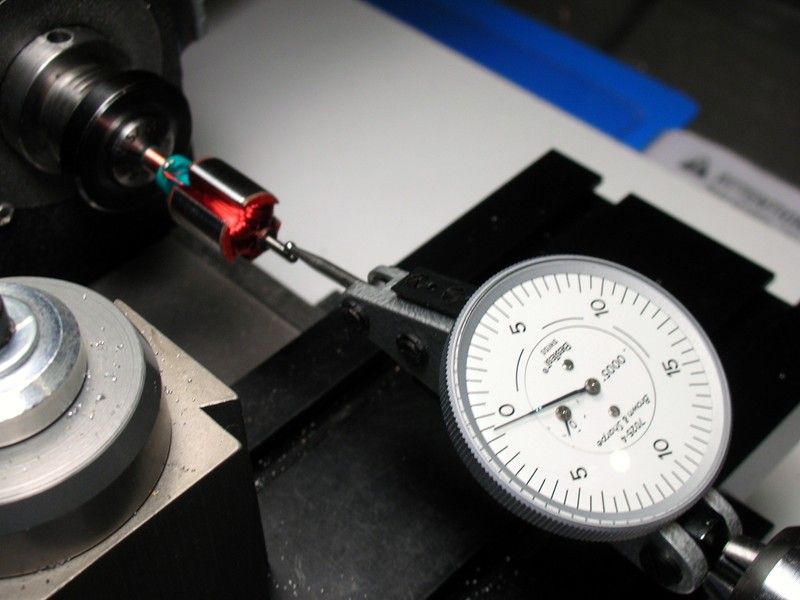
I also thought I'd check out how straight the armature shafts were. Into the lathe collet and Mr. Dial Indicator will tell the tale:

Posted Image

YIKES :o .009" out:

Posted Image

After some careful persuasion, less than .001" out:

Posted Image

I got some Kevlar thread..........

Posted Image

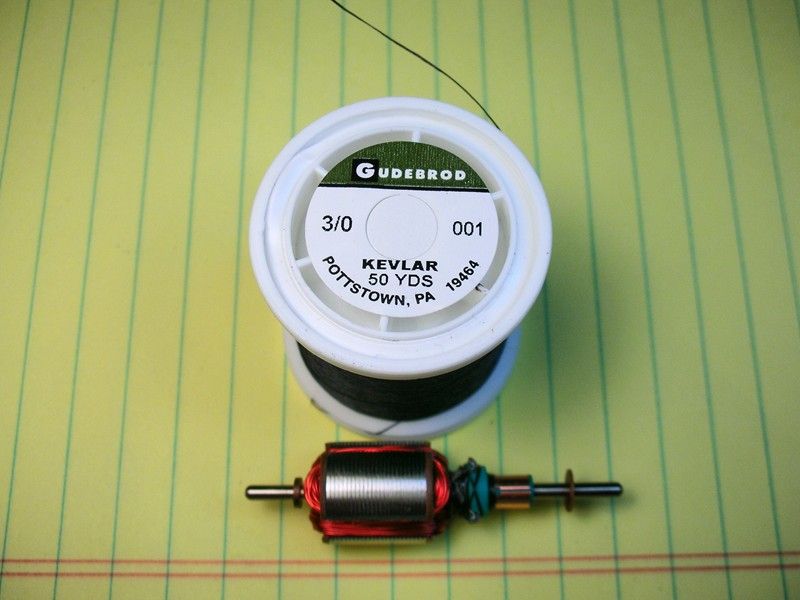
........and wrapped the wires leading to the comm tabs and the comm itself. I also got a fiber "oil slinger" washer ready to epoxy onto the end of the comm:

Posted Image

I use Devcon 2-Ton epoxy on these early arms. In the day the magazines all told us to use "Klinks" epoxy so I'm thinking Devcon is the modern hardware store "Klinks" :laugh2: 
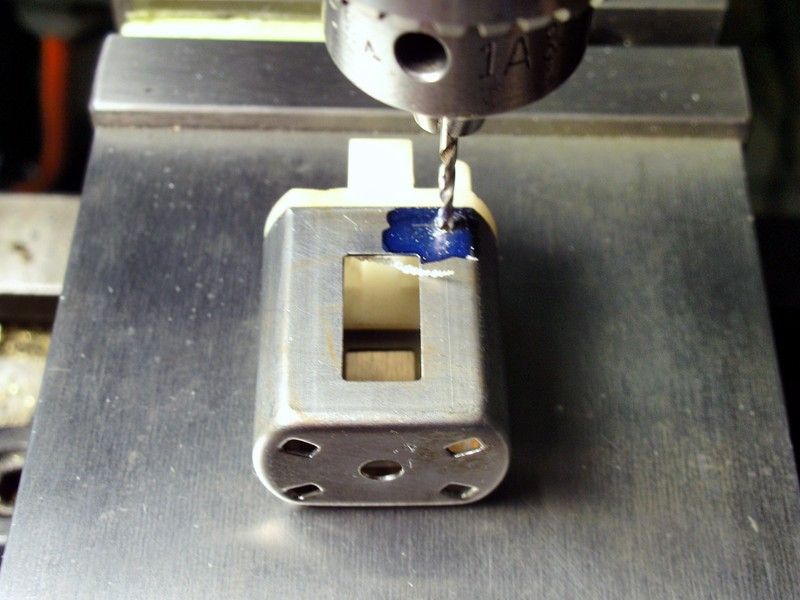
. Anywho, I goop on a pile of epoxy.....

Posted Image

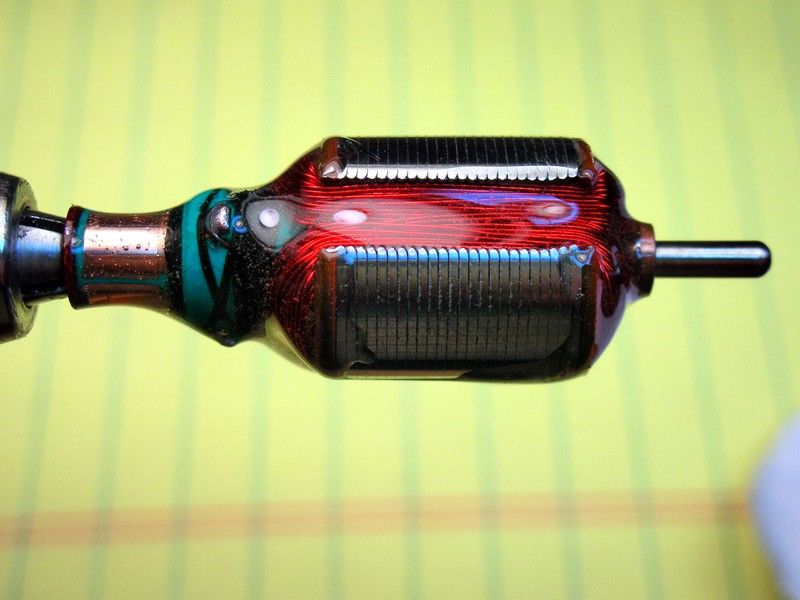
.....then hit it with a heat gun while I rotate it and let the epoxy sink into the windings....

Posted Image

........wipe any extra off with your finger and bake in your toaster oven:

Posted Image

One thing though...the heat makes the epoxy flow like water but it also accelerates the curing process. You have to work fast once you put the heat to it. Also, don't overheat the epoxy. If it starts smoking you're gone too far and your screwed........I did that ONCE...it's a funny story.

Onward

Rick Thigpen
Check out Steve Okeefe's great web site at its new home here at Slotblog:
The Independent Scratchbuilder
There's much more to come...


#31 havlicek

havlicek

    OCD Rewinder

  • Subscriber
  • PipPipPipPipPipPipPipPip
  • 11,198 posts
  • Joined: 20-August 07
  • Gender:Male
  • Location:NY

Posted 11 April 2010 - 08:05 AM

Lovely lovely lovely Rick. This thing just keeps getting better and better! If I can make a few suggestions regarding those neat-o Mabuchis, it's about sequence. Truing up those coms is delicate business because of how thin the metal is, and you did a splendiferous job! A small detail is that, if you are going to true the shaft and com, it's always better to true the com after truing the shaft. Reason for this sequence is that the com will be cut using the shaft and the com's position on the shaft as it's center reference. Going from .009" runout to .001" (which is freakin' aces!) means that the center of the com's rotation may have changed by somewhere near 1/2 of .008" or .004". If you cut the com after truing the shaft, it may have been that the com needed almost no truing, or more truing or "different truing". In other words, the com's "centricity" is always relative to the shaft it's mounted on. Better to true the com relative to a straight shaft than to true it to a shaft with runout and then straighten the shaft afterwards. In the end, I have no doubt that arm will spin better than it ever did thanks to your superb craftsmanship anyway! Right on!

-john

PS, I forgot to mention that using one end of the shaft chucked-up to true the shaft (I wish I had a freakin' lathe darnit), might not tell the whole story depending on where along it's length the shaft is out. I've done this and found out that when I swapped ends, things were either still out or worse. Then again, I'm dealing with tooling that's not nearly as precise as yoursPosted Image

PPS, Of course, because the com is trued while the arm is supported at both ends, the total amount of "error" in the shaft is most likely not being transferred to the com when cutting it...but I think the sequence is still at least worth considering
John Havlicek

#32 Prof. Fate

Prof. Fate

    a dearly-missed departed member

  • Member at Peace
  • PipPipPipPipPipPipPipPip
  • 6,580 posts
  • Joined: 20-February 06
  • Gender:Male
  • Location:Salt Lake City, UT

Posted 11 April 2010 - 12:14 PM

Hi

Over the last 15 or so years, I have found that the cheap Parma donuts do the job as far as appropriate traction and workability. Though I recently got some from JK that I like.

In the day, of course, we did grey and orange and so on. And, in the day, I usually used black anyway. There WAS a period in 68/9 when the orange by assoicated worked better in pro on my local track, but mostly, I didn't find testable differences for ME.

As I said on the winds, in the day with that can/motor, a 27 was really common. But there is an inverse/square relationship in the thing. The difference in a 30 and a 27 in that motor is significant, about 15% in power, but in times, not so dramatic. What is different is that a 27 needs a rebuild every hour, and a 30 will give 20 or 30 hours with only light maintainence.

similarly, the stock brushes go away pretty much in 30 minutes. In the day, I replaced the small 16d holders with larger carriers from the 36d. Somtimes the motor would use up the brushes before then 4th heat!

Fate
Rocky Russo
3/6/48-1/1/12
Requiescat in Pace

#33 dc-65x

dc-65x

    Grand Champion Poster

  • Subscriber
  • PipPipPipPipPipPipPipPip
  • 6,825 posts
  • Joined: 14-February 06
  • Gender:Male
  • Location:Captain Rick: The only vintage slot car nut in SW Oregon?

Posted 11 April 2010 - 02:24 PM

Hi John,

Of course you are ab-so-toot-ly "Korrect" about sequence. I wasn't planning on trying to straighten the armature shaft. But after truing the comm I remembered I had my neato new collet set for the lathe. So I put the arm in and set up a dial test indicator. I couldn't believe how far out it was! I couldn't help myself......I started pushing on the high spot until it read under .001 then flipped it around and check from the other end.

PPS, Of course, because the com is trued while the arm is supported at both ends, the total amount of "error" in the shaft is most likely not being transferred to the com when cutting it...but I think the sequence is still at least worth considering


Yes I think the arm being pulled down into vee blocks by double o-rings in the Hudy lessened any errors during comm cutting.

So what do you think about this for the "Korrect" sequence:

straighten armature shaft

tie and epoxy windings

grind stack to make it "purdy"

turn comm

balance

Rick Thigpen
Check out Steve Okeefe's great web site at its new home here at Slotblog:
The Independent Scratchbuilder
There's much more to come...


#34 Hworth08

Hworth08

    Posting Leader

  • Member at Peace
  • PipPipPipPipPipPipPip
  • 3,563 posts
  • Joined: 16-February 06
  • Gender:Male
  • Location:Springfield, TN

Posted 11 April 2010 - 02:48 PM

Not practicial where the arm is not to be rewound but any other time the FIRST step is to change the shaft to a drill blank! Philippe once described the Mabuchi shaft as being made of "play steel".

A lot of the shafts were bent by using a screw driver to pry the pinion gear off. Others were bent using various methods to pry a pinion back on! :)

Getting a good mesh with a brass pinion on a bent shaft mating to a Cox gear that had a half inch of runout... No wonder so many shops closed in 1968.
Don Hollingsworth
11/6/54-2/13/18
Requiescat in Pace

#35 dc-65x

dc-65x

    Grand Champion Poster

  • Subscriber
  • PipPipPipPipPipPipPipPip
  • 6,825 posts
  • Joined: 14-February 06
  • Gender:Male
  • Location:Captain Rick: The only vintage slot car nut in SW Oregon?

Posted 11 April 2010 - 06:37 PM

More progress today. The armatures are checked for static balanced on my Tradeship gizmo.....

Posted Image

.....Mr. Mill slams some holes in the heavy poles.......

Posted Image

........and these two are ready to rock 'n roll :)

Posted Image

Time to build up the setups.......

Rick Thigpen
Check out Steve Okeefe's great web site at its new home here at Slotblog:
The Independent Scratchbuilder
There's much more to come...


#36 TSR

TSR

    The Dokktor is IN

  • Full Member
  • PipPipPipPipPipPipPipPip
  • 42,284 posts
  • Joined: 02-February 06
  • Gender:Male
  • Location:Marxifornia

Posted 11 April 2010 - 06:51 PM

Grandma Buchi would approve... :)

Philippe de Lespinay


#37 Bill from NH

Bill from NH

    Age scrubs away speed!

  • Full Member
  • PipPipPipPipPipPipPipPip
  • 14,319 posts
  • Joined: 02-August 07
  • Gender:Male
  • Location:New Boston, NH

Posted 11 April 2010 - 06:56 PM

I hope John notices the center drill bit. :laugh2: :laugh2:
Bill Fernald
 
I intend to live forever!  So far, so good.  :laugh2:  :laugh2: 

#38 havlicek

havlicek

    OCD Rewinder

  • Subscriber
  • PipPipPipPipPipPipPipPip
  • 11,198 posts
  • Joined: 20-August 07
  • Gender:Male
  • Location:NY

Posted 11 April 2010 - 07:27 PM

So what do you think about this for the "Korrect" sequence:

straighten armature shaft

tie and epoxy windings

grind stack to make it "purdy"

turn comm

balance


..seems right to me Rick. This is one teensy area (sequence) where machinist's work is closely related to cabintry or even general carpentry and even though I had it drilled into me by a very skilled carpenter (at the top of his lungs sometimes!), I still have had to learn and relearn it by screwing upPosted Image

Yes I think the arm being pulled down into vee blocks by double o-rings in the Hudy lessened any errors during comm cutting.


...sure, but also just the fact that the arm is supported on both ends means that the arm will be fighting itself to run true. So the com lathe has a built-in error correction just because of it's design. Those motors will run better than anything Mr. Mabuchi could have dreamed about...splendid!

Not practicial where the arm is not to be rewound but any other time the FIRST step is to change the shaft to a drill blank! Philippe once described the Mabuchi shaft as being made of "play steel".


I don't think that is necessarily so. If I had a true-running lathe, I'd surely be spending less money on drill blanks. Sure the shaft material is soft, but at least it can be straightened. Drill blanks can be and sonetimes are out too and there goes a couple of bucks. If a person doesn't plan on running a car hard or competitively (no wall shots), there's no reason why a straightened shafty like what Rick has won't run beautifully for as long as the motor lasts.

I hope John notices the center drill bit.


10-4 BillPosted Image But anyone who has drill balanced an arm using whatever type of bit you like either has...or will drill too deep and screw up an otherwise good arm. A wide diameter bit like that makes it MUCH more likely, even more so without a depth stop (which I'm sure Rick has provided for). The Mura solution of using endmills is the best I've seen, but I can't use that method...sigh.Posted Image

-john
John Havlicek

#39 TSR

TSR

    The Dokktor is IN

  • Full Member
  • PipPipPipPipPipPipPipPip
  • 42,284 posts
  • Joined: 02-February 06
  • Gender:Male
  • Location:Marxifornia

Posted 11 April 2010 - 07:41 PM

John,
Mura did not use end mills. They used sheet-metal drills. :)

Philippe de Lespinay


#40 havlicek

havlicek

    OCD Rewinder

  • Subscriber
  • PipPipPipPipPipPipPipPip
  • 11,198 posts
  • Joined: 20-August 07
  • Gender:Male
  • Location:NY

Posted 11 April 2010 - 07:47 PM

OK Philippe...then those flat-bottom-hole-producing-things for us carpentersPosted Image
John Havlicek

#41 Duffy

Duffy

    a dearly-missed departed member

  • Member at Peace
  • PipPipPipPipPipPipPip
  • 3,791 posts
  • Joined: 25-January 09
  • Gender:Male
  • Location:Geographically Brooklyn, Politically Berkeley

Posted 11 April 2010 - 08:18 PM

YIKES :o .009" out:

Posted Image


Well, this may be obscenely redundant, but--do you have a shaft you know is flat and straight, that you can check runout of the collet? I've never had a chuck like this that didn't run out; usually the manufacturer claims within .002" (and you get .004") TIR, and axial runout isn't uncommon. Perspiring minds &all, y'know.

Duffy
Michael J. Heinrich
1950-2016
Requiescat in Pace
 
And I am awaiting
perpetually and forever
a renaissance of wonder

#42 dc-65x

dc-65x

    Grand Champion Poster

  • Subscriber
  • PipPipPipPipPipPipPipPip
  • 6,825 posts
  • Joined: 14-February 06
  • Gender:Male
  • Location:Captain Rick: The only vintage slot car nut in SW Oregon?

Posted 11 April 2010 - 08:39 PM

Speaking of drills :) here Mr. Mill is being used like a drill press. I scribed lines and center punched for the endbell screws:

Posted Image

This neato Micro Mark tapping fixture works great for tapping the 2-56 screw holes nice and perpendicular to the can:

Posted Image

The old plastic endbells all seem to split where the self tapping screw were used. They act like a wedge and over the years split the endbell. I tried to flow some ZAP glue in the splits then drilled and tapped for 2-56 machine screws. I also drilled and tapped the motor mounting holes.

Here are the endbells and their hardware. The hex brush holders are soldered to the brush hoods. The enbells were also split at the bearing cups. I decided to epoxy in the bearing into the endbell. Hopefully that will hold the whole mess together :laugh2: . The screws are stainless steel round head phillips that pretty closely matches the Mabuchi jobs:

Posted Image

Endbell bearings are soldered into the cans and they ready for some Duplicolor auto touchup paint:

Posted Image

I went through my magnets and zapped and matched up 2 pair at about 650 gauss. I added .005" shims because, well, in 1966 you HAD to shim the magnets :D :

Posted Image

I broke them in at 4V for 20 minutes. They draw .4 amps and were cool as could be. I forgot to mention the arms both checked out at .8 ohms and had 5 or so degrees of CCW timing. As much as I tried to keep things the same the motor on top with the 3-balancing hole sounds faster :blink: :

Posted Image

Maybe that's a good thing :unsure: . I'll put it up front so the front wheels will be turning fastest as has been suggested ;) :

Posted Image

Here's a shot at how clean the endbell bearing in the can is:

Posted Image

OH SNAPS! I forgot to trim the armature shafts :o . They'll be bump'n booty with each other in the frame.........

I'll fix it for next time. Onward

Rick Thigpen
Check out Steve Okeefe's great web site at its new home here at Slotblog:
The Independent Scratchbuilder
There's much more to come...


#43 dc-65x

dc-65x

    Grand Champion Poster

  • Subscriber
  • PipPipPipPipPipPipPipPip
  • 6,825 posts
  • Joined: 14-February 06
  • Gender:Male
  • Location:Captain Rick: The only vintage slot car nut in SW Oregon?

Posted 11 April 2010 - 08:43 PM

Well, this may be obscenely redundant, but--do you have a shaft you know is flat and straight, that you can check runout of the collet? I've never had a chuck like this that didn't run out; usually the manufacturer claims within .002" (and you get .004") TIR, and axial runout isn't uncommon. Perspiring minds &all, y'know.

Duffy


Duffy, of course my lathe is perfection as if taken down from the Ideal Realm itself......well.....maybe I should check :unsure: . Thanks, you Master Tool & Die Maker you :) .

Rick Thigpen
Check out Steve Okeefe's great web site at its new home here at Slotblog:
The Independent Scratchbuilder
There's much more to come...


#44 Duffy

Duffy

    a dearly-missed departed member

  • Member at Peace
  • PipPipPipPipPipPipPip
  • 3,791 posts
  • Joined: 25-January 09
  • Gender:Male
  • Location:Geographically Brooklyn, Politically Berkeley

Posted 11 April 2010 - 08:48 PM

. Thanks, you Master Tool & Die Maker you :) .


You're lucky, you can just turn off the computer. Forget my co-workers, my WIFE can't stand to listen to me!

Digital-Retentive (as Freud should've named us) Duffy
Michael J. Heinrich
1950-2016
Requiescat in Pace
 
And I am awaiting
perpetually and forever
a renaissance of wonder

#45 dc-65x

dc-65x

    Grand Champion Poster

  • Subscriber
  • PipPipPipPipPipPipPipPip
  • 6,825 posts
  • Joined: 14-February 06
  • Gender:Male
  • Location:Captain Rick: The only vintage slot car nut in SW Oregon?

Posted 11 April 2010 - 09:12 PM

Okie Dokie, I have one gage pin and I bought it in armature shaft diameter. It has seen a bit of a rough life though. Anywho, using it I get .001" runout as suggested by Sir Duffster. For reference a human hair is about .003"....unless it's red :shok: but that's another story :laugh2: . So the collet in question is pretty good but not sent down from above...SNAPS!

Rick Thigpen
Check out Steve Okeefe's great web site at its new home here at Slotblog:
The Independent Scratchbuilder
There's much more to come...


#46 Jairus

Jairus

    Body Painter Extraordinaire

  • Subscriber
  • PipPipPipPipPipPipPipPip
  • 10,174 posts
  • Joined: 16-February 06
  • Gender:Male
  • Location:Salem, OR

Posted 12 April 2010 - 12:12 AM

The above posts are the very reason I took up art and enjoy breathing lacquer fumes...... :rolleyes:

Jairus H Watson - Artist
Need something painted, soldered, carved, or killed? - jairuswtsn@aol.com

www.slotcarsmag.com

www.jairuswatson.net
http://www.ratholecustoms.com
Check out some of the cool stuff on my Fotki!


#47 Duffy

Duffy

    a dearly-missed departed member

  • Member at Peace
  • PipPipPipPipPipPipPip
  • 3,791 posts
  • Joined: 25-January 09
  • Gender:Male
  • Location:Geographically Brooklyn, Politically Berkeley

Posted 12 April 2010 - 03:59 AM

Okie Dokie, I have one gage pin...using it I get .001" runout ....SNAPS!

Darn good & you're lucky. I'm assuming you read that right next to the collet, then backed off maybe an inch and read again, to see if the collet's bore was running dead straight to the lathe's axis? (This should send Jairus straight to sniffing MEK!)

Duffy


Michael J. Heinrich
1950-2016
Requiescat in Pace
 
And I am awaiting
perpetually and forever
a renaissance of wonder

#48 havlicek

havlicek

    OCD Rewinder

  • Subscriber
  • PipPipPipPipPipPipPipPip
  • 11,198 posts
  • Joined: 20-August 07
  • Gender:Male
  • Location:NY

Posted 12 April 2010 - 05:36 AM

Bah humbug...it's all well past the point where it even mattersPosted Image

Darn good & you're lucky. I'm assuming you read that right next to the collet, then backed off maybe an inch and read again, to see if the collet's bore was running dead straight to the lathe's axis?


If the collet's bore were't true to the lathe's axis, it would still be showing up as runout at the armature shaft. So considering that .001" is actually the total runout of the entire "system"...lathe/collet/armature shaft...then even the most anal-retentive-pocket-protector-and-taped-glasses-wearing engineer should be dancing a jig!Posted Image

-john

PS, a better test would be to loosen the chuck, rotate the arm shaft 90 degrees a couple of times, rechecking each time. That way you could be sure that any runout of the arm shaft or the gauge pin wasn't being cancelled by opposing runout in the lathe. Then again, what are the chances that two pieces (the gauge pin and the arm shaft) would both register as being within .001" if it were just coinkydink? Of course, this is all stuff for people with waaaaay too much time on their handsPosted Image
John Havlicek

#49 Hworth08

Hworth08

    Posting Leader

  • Member at Peace
  • PipPipPipPipPipPipPip
  • 3,563 posts
  • Joined: 16-February 06
  • Gender:Male
  • Location:Springfield, TN

Posted 12 April 2010 - 08:05 AM

Make life simple, use a drill blank shaft. .003 is probably about the maximum that a drill blank can bend, more than that and the shaft will snap.

Actually I pretty much agree with John that unless the car is intended for serious racing a drill blank shaft isn't necessary. We took our racing very serious in the '60s and now a new arm with a drill blank is only $5 higher.
Don Hollingsworth
11/6/54-2/13/18
Requiescat in Pace

#50 dc-65x

dc-65x

    Grand Champion Poster

  • Subscriber
  • PipPipPipPipPipPipPipPip
  • 6,825 posts
  • Joined: 14-February 06
  • Gender:Male
  • Location:Captain Rick: The only vintage slot car nut in SW Oregon?

Posted 12 April 2010 - 09:00 AM

Now this discussion is all well and good and very informative but I think we're all missing the real point here......"AIN'T THEY PURDY!"

Posted Image

Beauteous Russkit metallic gold paint, big old school slotted pan head can screws and lookie at dem shiny bright copper brush springs. I soaked them in Tarnex to make the look like new again. Even the cracks at the brush hood screws are sealed with ZAP glue.

"I THINK THEMS REAL PURDY!" :laugh2:
  • MarcusPHagen likes this

Rick Thigpen
Check out Steve Okeefe's great web site at its new home here at Slotblog:
The Independent Scratchbuilder
There's much more to come...


Electric Dreams Online Shop