Building some Jail Door chassis
#1
Posted 05 August 2010 - 08:11 PM
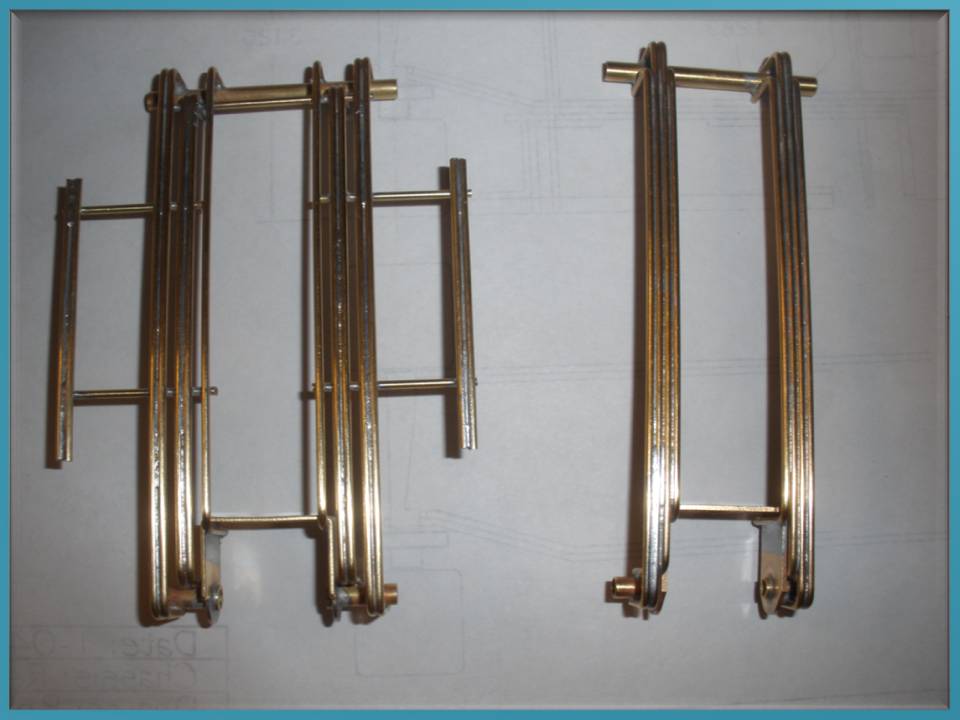
Building a JD sports and JD F1 for Ramcat Larry, one F1 for Bill ( does my machine work ) and the last F1 is mine.
All I can say I would rather build just about any Retro chassis other than these. One of the hardest builds ever. I haven't figured out how to keep all the rods from falling over on top of each other before using the jigs clamp? Worse yet was trying to figure out where I wanted the brass rods to go? Normally I would have used ACad, but was scolded by PM that you don't CAD JD chassis
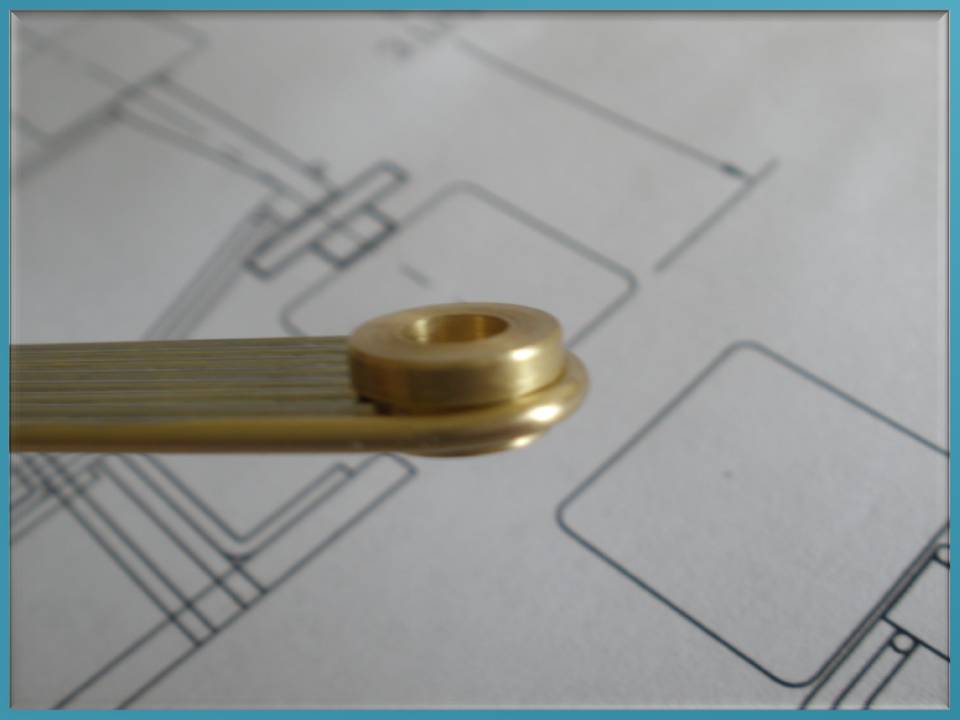
Next will be adding the pin tubes to the F1's and make and bend the drop arms.
#2
Posted 05 August 2010 - 08:27 PM
Awwww Rob, I sympathize! But I dropped out of Slots at the very eve of this technology, and it was a great place to dip back in when I surfaced last May.
As far as keeping the rods in place--well, what's the best analogy? "Herding Cats" or the scene in Alice where they're playing Quoits with flamingos? Depending on which jig you have, the solid crossclamp with a layer of door insulation underneath will hold everything well enough. You just tighten up to SNUG and then, when all's right, clamp down and start tacking. Anything moves, you adjust.
It's building WITHOUT the comfort of preprogrammed precision. But, if you free yourself from the dependence on fancy tooling, you'll be amazed at how much your HANDS really know.
You will be kinking drop arms sometime next week, if the bridge don't wash out.
Duffy The Scolder
1950-2016
Requiescat in Pace
And I am awaiting
perpetually and forever
a renaissance of wonder
#3
Posted 05 August 2010 - 08:36 PM
Depending on which jig you have, the solid crossclamp with a layer of door insulation underneath will hold everything well enough. You just tighten up to SNUG and then, when all's right, clamp down and start tacking. Anything moves, you adjust.
It's building WITHOUT the comfort of preprogrammed precision. But, if you free yourself from the dependence on fancy tooling, you'll be amazed at how much your HANDS really know.
The clamp does hold it down very nice, but you have to put all the rods in before using the clamp. That's when they fall over.
I do like my crutch
#4
Posted 05 August 2010 - 08:40 PM
Nesta
Nesta Szabo
In this bright future you can't forget your past.
BMW (Bob Marley and the Wailers)
United we stand and divided we fall, the Legends are complete.
I'm racing the best here at BP but Father time is much better then all of us united.
Not a snob in this hobby, after all it will be gone, if we keep on going like we do, and I have nothing to prove so I keep on posting because I have nothing to gain.
It's our duty to remember the past so we can have a future.
Pistol Pete you will always be in my memory.
#5
Posted 05 August 2010 - 09:02 PM
Are you going to post more pic's?
Nesta
When I build some more of it.
Here is a picture of the bottom. I like the way the rails look at the back of the chassis. Looks like a waterfall or Art Deco. Don't know if it make a difference how the rails are layed out or spaced so I just did what I thought looked cool?
Started making one tongue and using Rick's widget's
Maybe a little more surfing the web and then back to the workshop
#6
Posted 05 August 2010 - 09:10 PM
1950-2016
Requiescat in Pace
And I am awaiting
perpetually and forever
a renaissance of wonder
#7
Posted 05 August 2010 - 09:13 PM
#8
Posted 05 August 2010 - 10:06 PM
11/27/57-8/12/22
Requiescat in Pace
#9
Posted 05 August 2010 - 10:21 PM
Your drawing was handy since that's what I was going to build next until sidetracked by these JD chassis.
#10
Posted 05 August 2010 - 10:22 PM
Nesta
Nesta Szabo
In this bright future you can't forget your past.
BMW (Bob Marley and the Wailers)
United we stand and divided we fall, the Legends are complete.
I'm racing the best here at BP but Father time is much better then all of us united.
Not a snob in this hobby, after all it will be gone, if we keep on going like we do, and I have nothing to prove so I keep on posting because I have nothing to gain.
It's our duty to remember the past so we can have a future.
Pistol Pete you will always be in my memory.
#11
Posted 05 August 2010 - 10:27 PM
-Richie
Obsessed is the word the lazy use to describe the dedicated.
- Richie Austin
#12
Posted 05 August 2010 - 10:33 PM
#13
Posted 05 August 2010 - 11:37 PM
I have an order for a few "bundle of rods" laying here now. It's tougher to bend it all up than it is to solder it all up. LOL Looks like you did a real fine job.
Rick Bennardo
"Professional Tinkerer"
scrgeo@comcast.net
R-Geo Products
LIKE my Facebook page for updates, new releases, and sales: Rgeo Slots...
Lead! The easy equalizer...
#14
Posted 06 August 2010 - 12:46 AM
??? I don't get it. Can't you just secure it with a small piece of masking tape, then tack solder it ?how to keep all the rods from falling over on top of each other
Or hold it in place and tack it ?
Those clamps scare me...as soon as you remove the clamp, the piece goes "sproing".
Rods should lay relaxed, not under duress....same as retro
Paul Wolcott
#15
Posted 06 August 2010 - 01:27 AM
No clamping.
He just hold rails down with his fingers.
I've tried it and it can be done.
You have to be quick but once you have one end tacked in,
you tack in the opposite end.
You can then go back and forth and get a good joint just being careful
there is always somewhere along the joint where the solder isn't molten.
It's also a lot easier holding down an .047 rail vs. an .063.
Mike Swiss
Inventor of the Low CG guide flag 4/20/18
IRRA® Components Committee Chairman
Five-time USRA National Champion (two G7, one G27, two G7 Senior)
Two-time G7 World Champion (1988, 1990), eight G7 main appearances
Eight-time G7 King track single lap world record holder
17B West Ogden Ave., Westmont, IL 60559, (708) 203-8003, mikeswiss86@hotmail.com (also my PayPal address)
Note: Send all USPS packages and mail to: 692 Citadel Drive, Westmont, Illinois 60559
#16
Posted 06 August 2010 - 06:22 AM
11/4/49-1/23/15
Requiescat in Pace
#17
Posted 06 August 2010 - 06:50 AM
I feel your pain in building the JD cars,as I've only built one of the F1's it was by far the hardest lesson learned in bending all the brass evenly.
Great Job!...keep us informed of the development process.
Slots-4-Ever
Brian McPherson
REM Raceway
"We didn't realize we were making memories, we just knew we were having FUN!"
#18
Posted 06 August 2010 - 07:10 AM
Anthony 'Tonyp' Przybylowicz
5/28/50-12/20/21
Requiescat in Pace
#19
Posted 06 August 2010 - 08:36 AM
Those clamps scare me...as soon as you remove the clamp, the piece goes "sproing".
Rods should lay relaxed, not under duress....same as retro
I always felt it best to have the rails as Pablo states, relaxed.
The modern jigs allow for nice frames. When we used the extremely popular Russkit jig you had to blueprint the JIG and then build most of the frame. A Russkit jig wasn't wide enough to hold the wide multi-rod frames so a builder installed the last rod out of the jig.
But the Russkit jig sure was better than graph paper! No telling the number of folks that Mike Morrissey taught to build through the magazine articles.
11/6/54-2/13/18
Requiescat in Pace
#21
Posted 06 August 2010 - 01:06 PM
Larry D. Kelley, MA
retired raceway owner... Raceworld/Ramcat Raceways
racing around Chicago-land
Diode/Omni repair specialist
USRA 2023 member # 2322
IRRA,/Sano/R4 veteran, Flat track racer/MFTS
Host 2006 Formula 2000 & ISRA/USA Nats
Great Lakes Slot Car Club (1/32) member
65+ year pin Racing rail/slot cars in America
#22
Posted 06 August 2010 - 01:18 PM
Jairus H Watson - Artist
Need something painted, soldered, carved, or killed? - jairuswtsn@aol.com
www.slotcarsmag.com
www.jairuswatson.net
http://www.ratholecustoms.com
Check out some of the cool stuff on my Fotki!
#23
Posted 06 August 2010 - 02:07 PM
I bend all the main rails at once, but I solder them in one at a time, so I don't have to worry about alignment. As long as the jig is holding the bracket and the front axle tube in the right spot, this works fine.
Having a bending jig makes this part of the job much easier - I use the jig that's in the middle of my Backtrack jig, but I build on my Rick jig so I can insert pins in the holes to manage the rails spacing.
The drop arms are the real pain IMO. I have made a separate jig just for building them. I will take a photo over the weekend as I am building some JD cars right now.
#24
Posted 06 August 2010 - 02:30 PM
I also bent all the rails at one time. I use the Backtrack bender. Seemed real simple.
I just set my jig for my desired wheelbase and put in the axles with tubes suspended by the jig wheels. If I wanted the rals to be outside to outside the tubes I took the measurement, set the bender and bent them. If I wanted the rails inside the tubes I took the measurement and subtracted .125, set my bender and bent them. Like I said real easy with some simple math and a good tool.
Maybe I'll take some photos when I make the drop arms. My plan in my mind it doesn't seem like it will be any harder
#25
Posted 06 August 2010 - 03:17 PM
Dennis:
I also bent all the rails at one time. I use the Backtrack bender. Seemed real simple.
I just set my jig for my desired wheelbase and put in the axles with tubes suspended by the jig wheels. If I wanted the rals to be outside to outside the tubes I took the measurement, set the bender and bent them. If I wanted the rails inside the tubes I took the measurement and subtracted .125, set my bender and bent them. Like I said real easy with some simple math and a good tool.
Maybe I'll take some photos when I make the drop arms. My plan in my mind it doesn't seem like it will be any harder
Rob,
I don't do inside-to-inside or outside-to-outside. I do all the rails outside-to-inside so they all are bent to one length, except the very inner set which I bend up inside the motor bracket. That way, I can set the Backtrack bender once.