I think I'll get that polishing kit and try it. I could move on to #2 if I don't get the results I'm after......I think that is "Korrect"?
We thank you Jairus!
Any guess as to how long to wait before I try to sand the Tamiya lacquer?

Posted 23 February 2014 - 10:15 PM
I think I'll get that polishing kit and try it. I could move on to #2 if I don't get the results I'm after......I think that is "Korrect"?
We thank you Jairus!
Any guess as to how long to wait before I try to sand the Tamiya lacquer?
Rick Thigpen
Check out Steve Okeefe's great web site at its new home here at Slotblog:
The Independent Scratchbuilder
There's much more to come...
Posted 23 February 2014 - 10:35 PM
I'd wait a few days just make sure.
Not completely convinced that the paint is lacquer, but rather an acrylic lacquer that would take longer to cure than an old school lacquer.
You could take a sharp item and poke at it in a day or so to see if it's totally hard all the way through. Use magnifiers to see the effect for sure.
Or... you could just try to wet sand (block sand) and if you get any boogers building up, stop!!! Then wait for the paint to totally dry before sanding further.
This is why I hate painting hard bodies and why I quit building model cars.
Jairus H. Watson
3/12/59-5/19/25
Requiescat in Pace
Posted 24 February 2014 - 12:17 PM
This is why I hate painting hard bodies and why I quit building model cars.
Does that mean you won't paint my Cox Gurney Stocker replica? ![]()
Just kidding! I know you're tired of the hard bodies.........although if you ever change your mind I'd be first in line ![]()
Thank you again for your help. ![]()
Rick Thigpen
Check out Steve Okeefe's great web site at its new home here at Slotblog:
The Independent Scratchbuilder
There's much more to come...
Posted 24 February 2014 - 04:37 PM
Rick, I've been building model cars since 1968. Painting them since the mid 70's and never had fun doing it. Screwed up more paint than I made work. Mostly due to lack of patience or good body prep.
Actually managed "best paint" award a few times... and been passed over when I thought my paint was actually better.
But the best paint award that I lost to one year in Salt Lake City was given to a guy, a friend, who simply rattle canned it.
We talked later and he said he rarely airbrushes or rubs out the paint.
His trick? Warming the can of paint in a pan of hot tap water and always using a fresh new can for each project.
Guess I forgot to mention that.
It also helps if you paint in a dry non-humid climate where the temp is 60 to 75 degrees.
More misc. ramblings.
Prep is also very important as these are plastic bodies which attract dust like a magnet.
So I wash the body prior to painting and let it air dry in a dust free area. Then bag the thing so no dust can fall on it till you are ready to shoot paint. But don't ever let plastic bags touch the clear coat. That willl leave marks.
Some guys actually use a dehydrator to cure the paint.
You know... the plastic stackable kind? They cut out the centers of enough rings to allow a body and the paint stand to fit inside and then fire the thing up. It cures the paint in half the time and keeps dust out.
Me, I just use a wire hanger for a paint stand.
I bend it so it holds the body right side up and can be hung upside down with the hook still in place. I use an abandon plant hanger hook on the celing of the bunker. That way it's out of the way for at least a week to allow the paint to cure.
I heard that Testors has a new forumula for their Lacquer Glosscote. I stopped by the hobby shop a week ago and they were out and it was on order.
After I get the decals on my "Total Performance '64 Galaxie NASCAR" I'll be needing some of that new paint.
I'll start a thread soon as the clear is curing and then I can start soldering up the chassis.
Jairus H. Watson
3/12/59-5/19/25
Requiescat in Pace
Posted 06 April 2014 - 06:49 PM
Waffle, waffle, waffle........I've been waffling long enough about repainting the car because of a small sag in the rear fender. ![]()
I'm not a hard body guy. I decided to quit while I was ahead. Meaning, the body is painted red and I decided to move forward with what I had rather than repaint it and maybe make it worse. ![]() Besides the Tamiya paint shrunk up quite a bit over the weeks so the sag a lot smaller.
Besides the Tamiya paint shrunk up quite a bit over the weeks so the sag a lot smaller. ![]()
It was decal time:
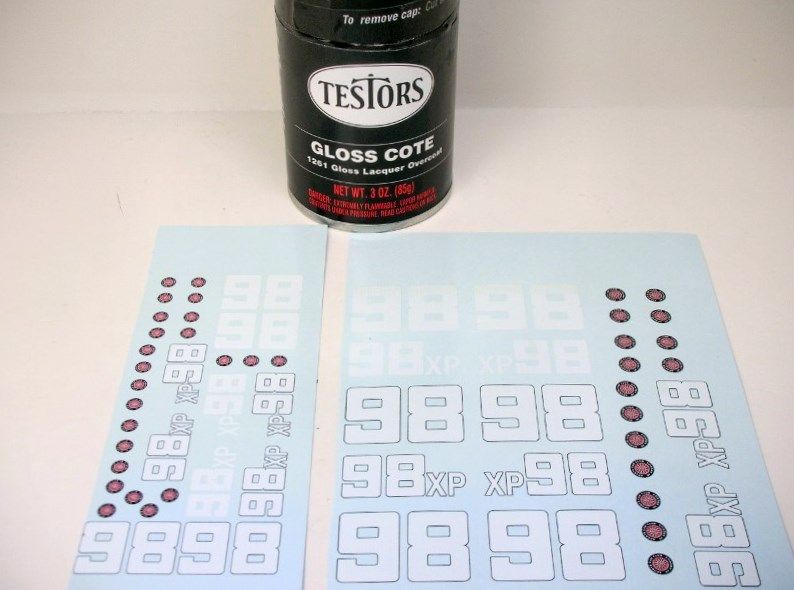
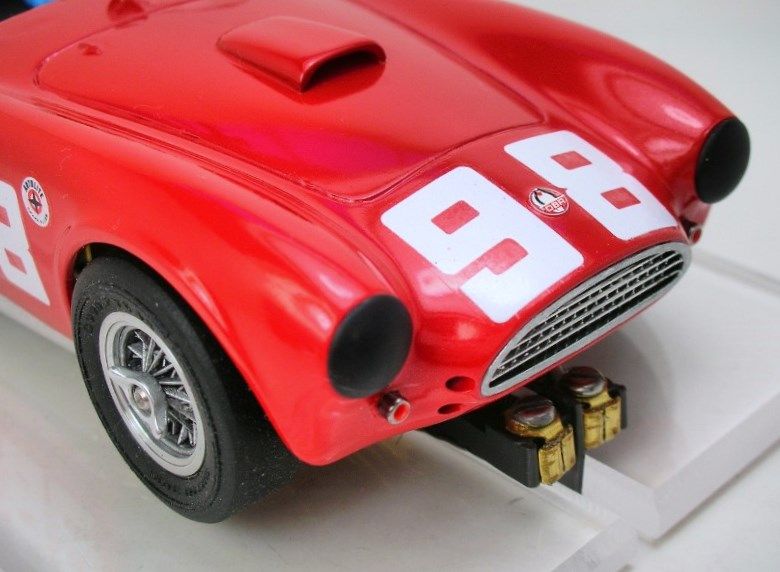
I'm using Patto's Place Krause Cobra decals sprayed with a coat of Testors Gloss Coat Lacquer. The proportions of the AMT body required me to use 1/24 side number decals but the nose and tail decals were too big. I for that, I used the smaller 1/32 numbers:
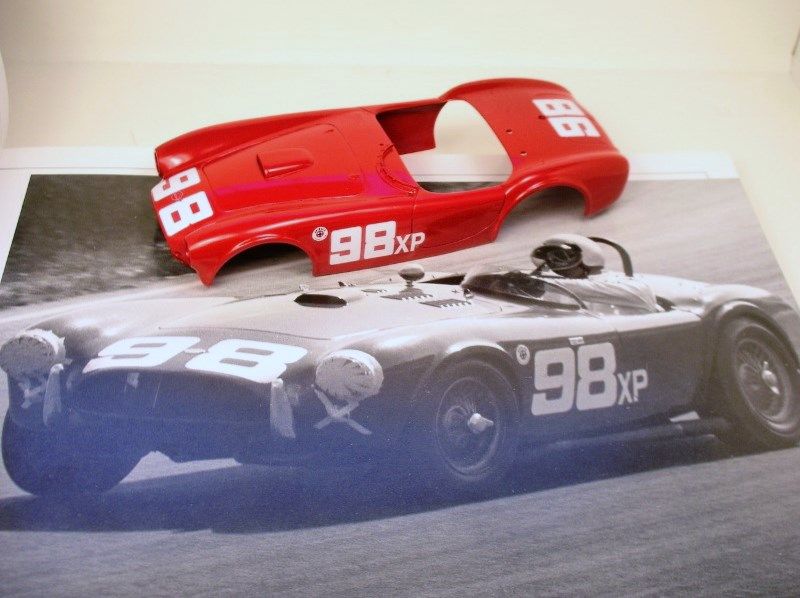
I was quite surprised to find that Microscale Micro Set Decal Solvent attacked the well cured paint. ![]() Luckily I caught it in time and it's all good.
Luckily I caught it in time and it's all good.
Time to put all the pieces together........... ![]()
Rick Thigpen
Check out Steve Okeefe's great web site at its new home here at Slotblog:
The Independent Scratchbuilder
There's much more to come...
Posted 06 April 2014 - 08:05 PM
Looks good Rick! You are well on your way now.
Jairus H. Watson
3/12/59-5/19/25
Requiescat in Pace
Posted 07 April 2014 - 07:14 PM
Great job Rick!
Mikey
Mike DiVuolo
C.A.R.S. Vintage Slot Car Club
"Prosecutors will be violated"
Posted 07 April 2014 - 08:33 PM
Thanks guys. I feel like I'm mostly trying to keep from ruining the darn thing as I "progress" from one part of construction to another. It is kind of fun though. ![]()
Since I'm a real hardbody nubie I'm going to show a few things that I think look kind of neat that any bone head like me can do. It will probably make any real modeler cringe though! ![]()
Rick Thigpen
Check out Steve Okeefe's great web site at its new home here at Slotblog:
The Independent Scratchbuilder
There's much more to come...
Posted 07 April 2014 - 08:39 PM
Looking great Rick! Only done a couple of hard body kits before and painting them can be a real pain in the *** ![]()
Have heard of warming the rattle can up in water before, Dad used to do that when he did auto paint repair at home, seemed to work great ![]()
Posted 07 April 2014 - 08:52 PM
Hi Paul,
Yup, I heat a rattle can too. Jairus gave some really good tips on rattle can painting on the previous page. Knowing what to do is a bonus for sure, thanks Jairus. ![]()
Rick Thigpen
Check out Steve Okeefe's great web site at its new home here at Slotblog:
The Independent Scratchbuilder
There's much more to come...
Posted 08 April 2014 - 03:34 PM
Posted 12 April 2014 - 06:34 PM
Thanks guys. I feel like I'm mostly trying to keep from ruining the darn thing as I "progress" from one part of construction to another. It is kind of fun though.
Since I'm a real hardbody nubie I'm going to show a few things that I think look kind of neat that any bone head like me can do. It will probably make any real modeler cringe though!
OK, here is some "bone head" modeling, not to be compared to what REAL modelers are showing on Slotblog......PLEASE ![]()
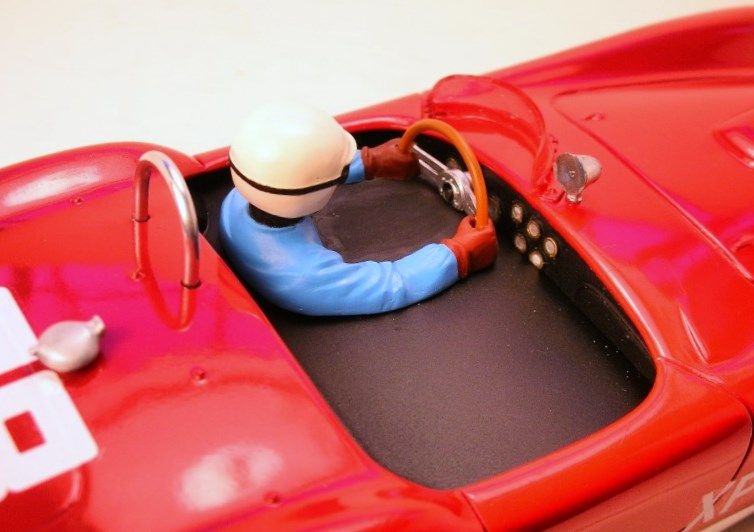
I cut the top most part off the front and rear of the model kit interior and glued them to a piece of sheet plastic. That's an unknown model kit steering wheel cut up, a Monogram driver's figure cut from some interior piece and an unknown drivers head.
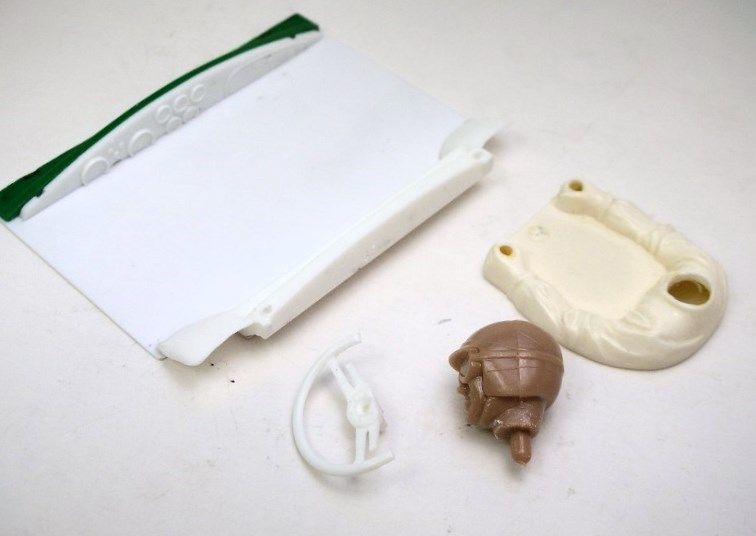
I've seen master modelers do fantastic things to dash board gauges with a technique called, I think, "dry brushing". Here's my "bone head" approach. Stick on some of my wife's craft stickers and spray the whole thing with Testors dull coat:
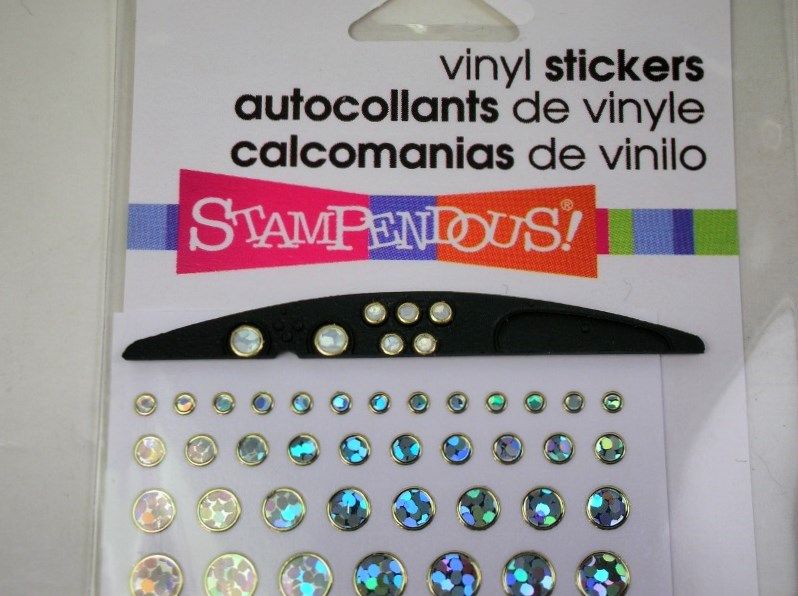
Hey, at least the gauges are filled in with something. ![]()
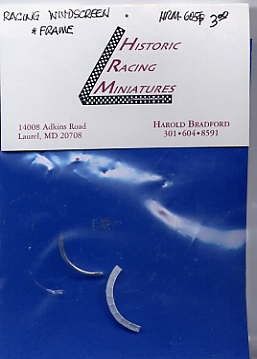
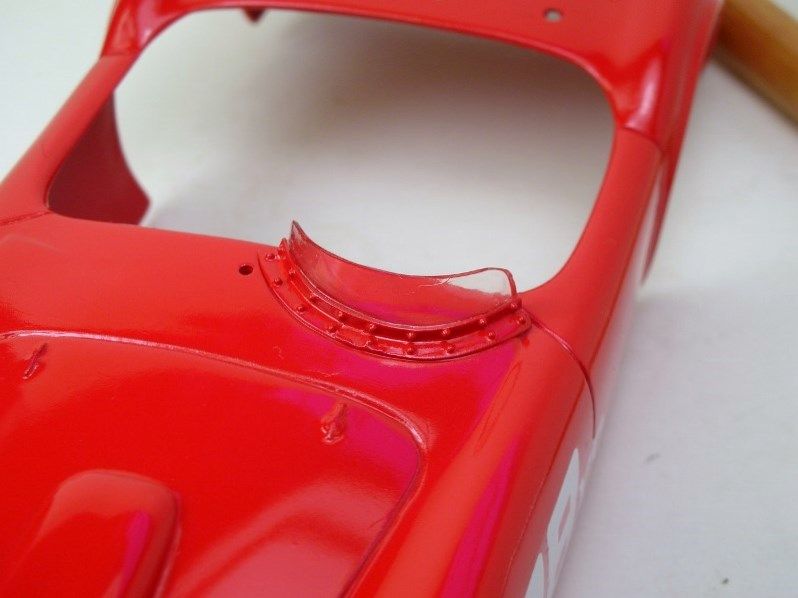
Moving on, thank goodness for this little aftermarket resin racing windshield and frame:
Simply gluing it in place and it's just like the real car:
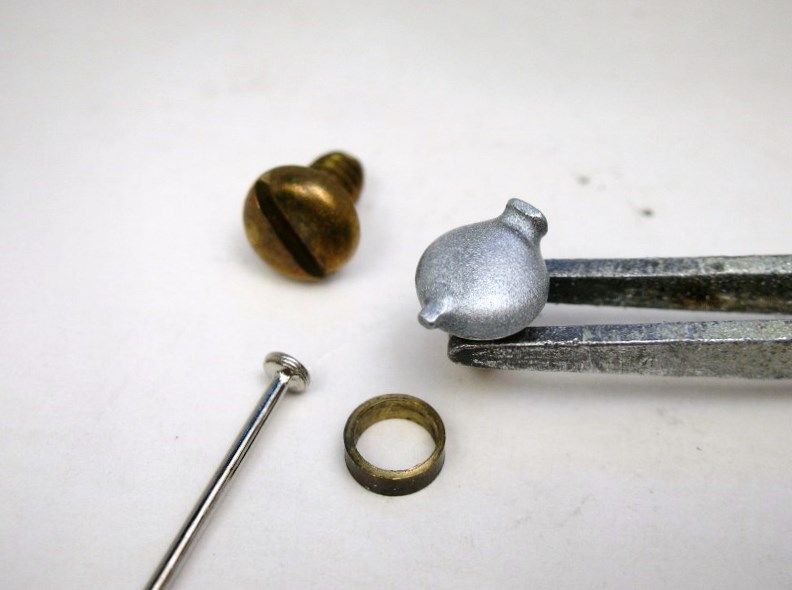
I thought the model kit racing gas cap was a P.O.S. so I did some soldering and filing to make my own:
I tired something to help my crappy paint and decal job look better and it worked beyond my wildest dreams:
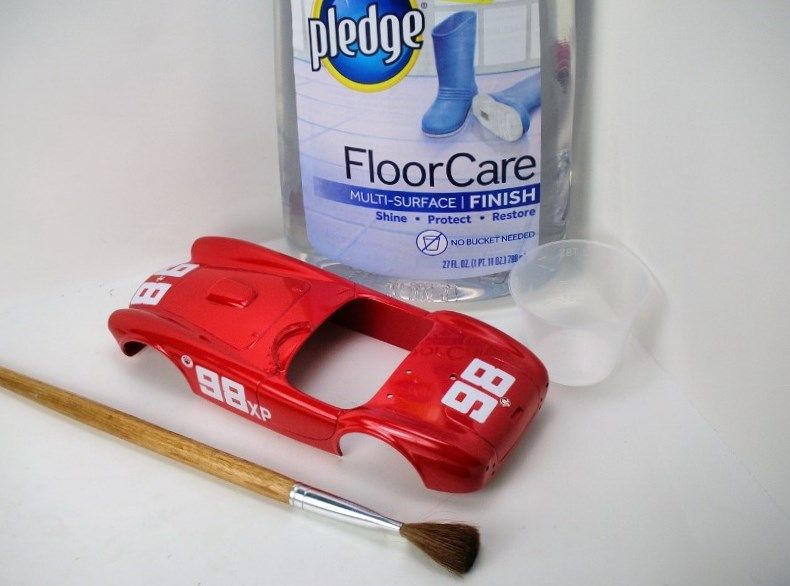
A brushed on coat of floor wax worked miracles. The paint took on a high gloss. The decals blended much better into the paint and the cast resin windscreen became crystal clear...........amazing! ![]()
Sticking on sticks, with this stuff, all the detail parts to be painted made things easier for my shaky paint brush:
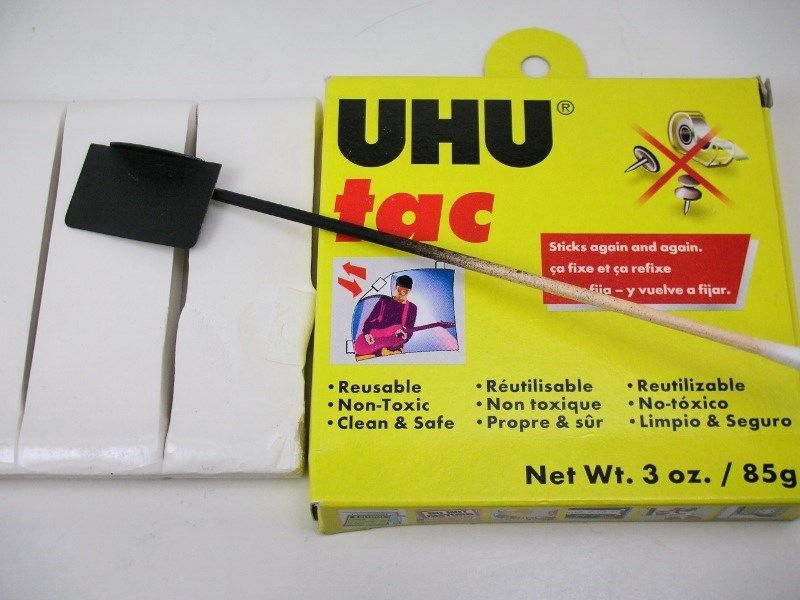
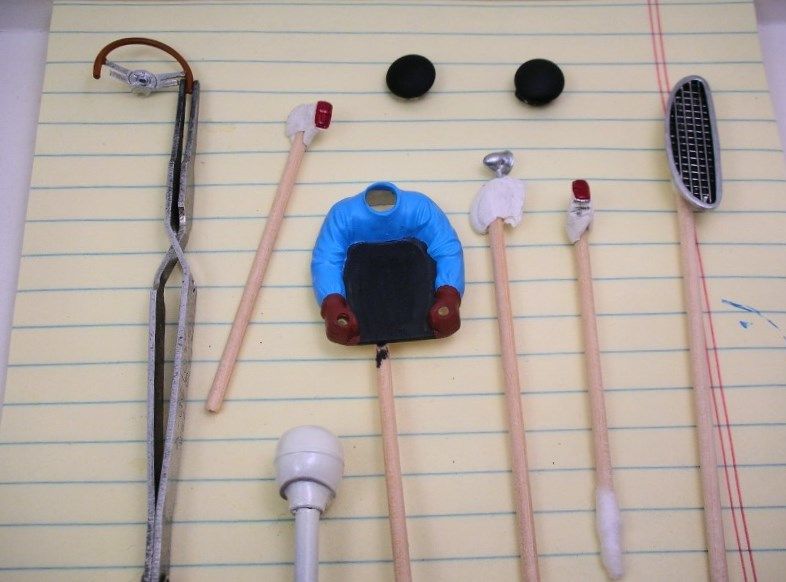
I put all the pieces together, trying to rescue the project from disaster from one part to the next. ![]() I used too much ZAP glue on the dash board to body install and had to touch up the paint. Too much glue again on a tail light and it got all over the fender. Maybe I should USE LESS GLUE!
I used too much ZAP glue on the dash board to body install and had to touch up the paint. Too much glue again on a tail light and it got all over the fender. Maybe I should USE LESS GLUE! ![]() Then I nicked a number decal installing the gas cap.
Then I nicked a number decal installing the gas cap.
The good news is it's finished and held at arms length I like it ![]()
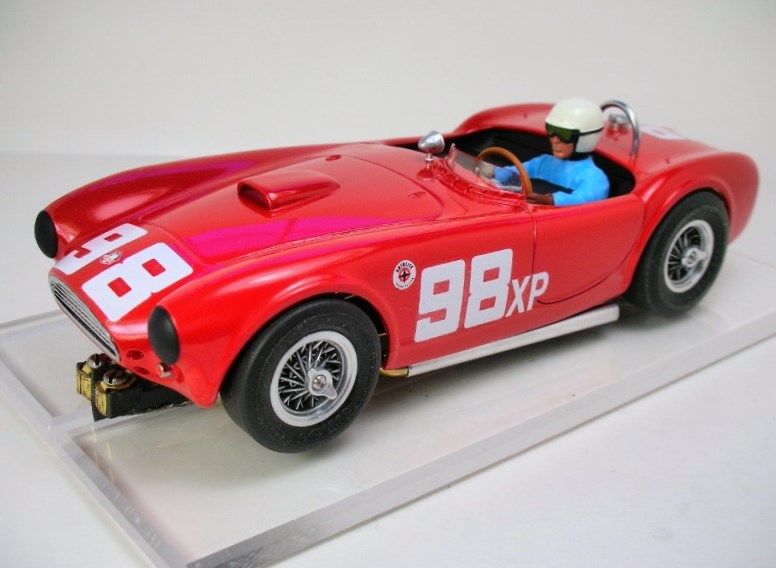
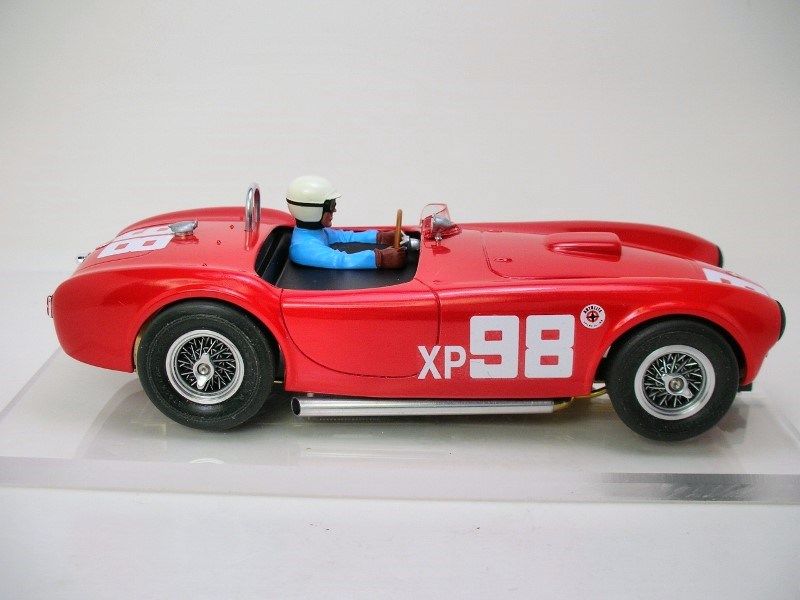
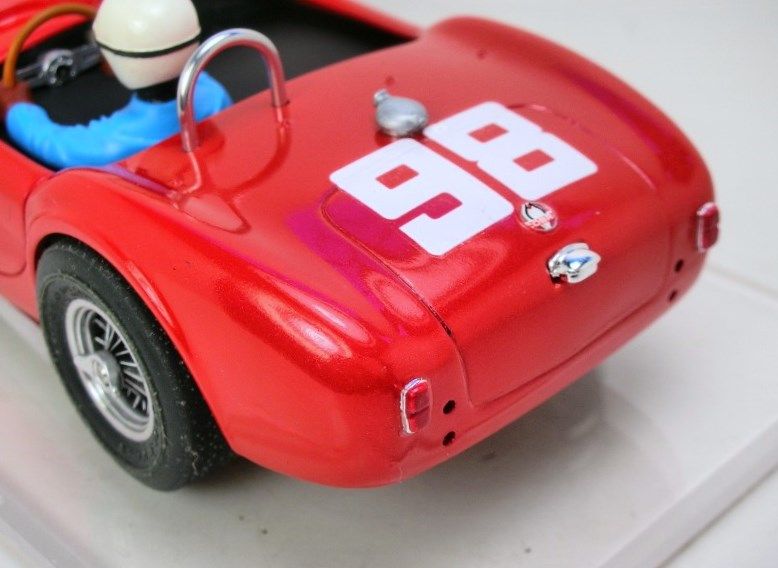
The model kit turn signals were junk so I use some polished and painted stainless steel socket head cap screws:
1/16" aluminum rod for a roll bar:
Best of all, with this running gear........
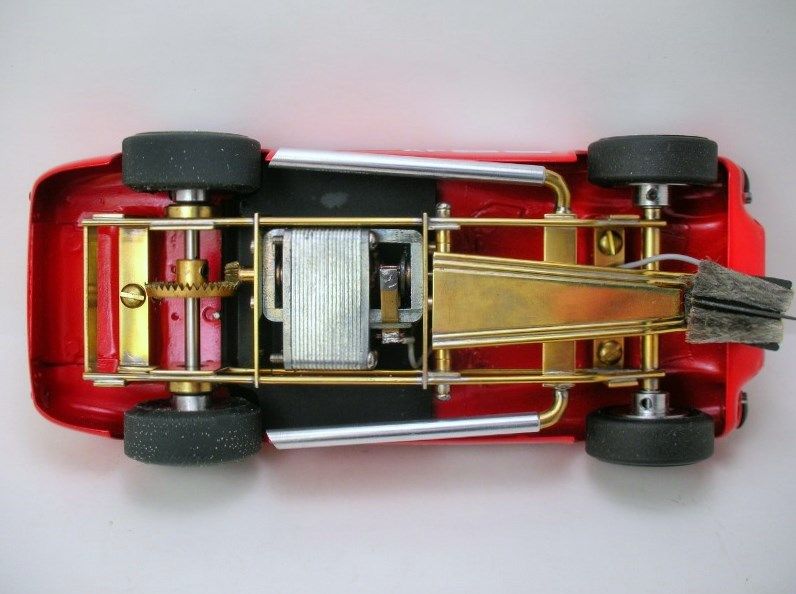
.....it runs great!
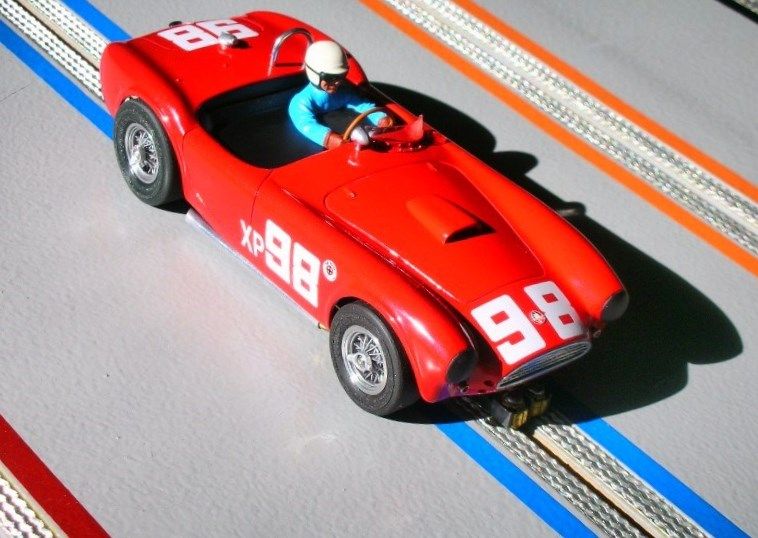
Thanks for looking ![]()
Onward...........
Rick Thigpen
Check out Steve Okeefe's great web site at its new home here at Slotblog:
The Independent Scratchbuilder
There's much more to come...
Posted 12 April 2014 - 06:54 PM
Outstanding!!!
![]()
Mike DiVuolo
C.A.R.S. Vintage Slot Car Club
"Prosecutors will be violated"
Posted 12 April 2014 - 06:56 PM
Rick, don't beat yourself up over any perceived mess ups or hick ups you've encountered! Take it from me your Cobra looks a millions $$$ ![]()
![]()
![]() I Love it.
I Love it.
That little resin windshield & mount really did the trick & subtle use of Mrs. Rick's crafting supplies ![]()
![]() The dials really look like dials .
The dials really look like dials .
Posted 12 April 2014 - 07:11 PM
Thanks. It's just that all the boo boos should have been easily avoided.......But, I guess hindsight really is 20/20.
Rick Thigpen
Check out Steve Okeefe's great web site at its new home here at Slotblog:
The Independent Scratchbuilder
There's much more to come...
Posted 12 April 2014 - 07:15 PM
Remember seeing your wonderful "filler caps" on your 4wd Iso R&C build , thought it was the neatest/simplest little touches.... May try it sometime ![]()
Posted 12 April 2014 - 07:27 PM
Rick don't sell yourself short. I have yet to see something come out of the Captain's Quarters that doesn't make me drool...LOL! ![]()
I think the only one that made me wince was the Harvey that got all bent up, but even the picture of destruction looked better than any of my best builds!
Mike DiVuolo
C.A.R.S. Vintage Slot Car Club
"Prosecutors will be violated"
Posted 12 April 2014 - 07:56 PM
Rick,
Super job on a real classic racer !!!
Posted 12 April 2014 - 10:49 PM
That looks great!
A lot of guys would add a tarp cover over the passenger seat to avoid the interior details and smooth out the air flow. Just a suggestion.
Sort of like this....
But... not exactly of course. ![]()
Jairus H. Watson
3/12/59-5/19/25
Requiescat in Pace
Posted 13 April 2014 - 02:51 AM
Rick how deep is that beauty geared 4.5 or so ?
Posted 13 April 2014 - 10:12 AM
Mark, that gear does look big! I had to go back and check and she's geared 4:1.
Putting the all the pieces together: The loose tires are urethane K&B repops from Pauls Slot Car Shop of Canada:
Hi Jairus,
Neat Rat Rod!
Could you please tell me how to make a tonneau cover like that? This car raced without one but I need one for an upcoming build. It really looks super on your model.
Rick
Rick Thigpen
Check out Steve Okeefe's great web site at its new home here at Slotblog:
The Independent Scratchbuilder
There's much more to come...
Posted 13 April 2014 - 01:46 PM
How I would do it is use the plunge method (Not vacuum), by stretching a sheet of PETG over a frame and warming it over a stove burner till it started drooping.
Then drop the frame over the model car. After cooling, trim to suit and cut a hole for the driver to stick out of.
The one and only way to keep the model car body from melting is to coat the inside with modeling clay. That way the heat is sinked out of the plastic quickly and won't melt the plastic body.
That tonneau cover was from an AMT Parts Pac for a fuel altered. The body, tonneau and steering wheel were all from that kit.
Jairus H. Watson
3/12/59-5/19/25
Requiescat in Pace
Posted 13 April 2014 - 02:12 PM
That Cobra is bad to the Bone, Capt Rick it doesn't get any more SANO than that ![]()
![]()
Paul Wolcott
Posted 13 April 2014 - 04:26 PM
Thanks Pablo ![]()
Holy Smokes Jairus! ![]() Thanks for the info...but.....I think I really didn't want a tonnaue cover anyway
Thanks for the info...but.....I think I really didn't want a tonnaue cover anyway ![]()
Rick Thigpen
Check out Steve Okeefe's great web site at its new home here at Slotblog:
The Independent Scratchbuilder
There's much more to come...
Posted 13 April 2014 - 06:08 PM
Could you please tell me how to make a tonneau cover like that? This car raced without one but I need one for an upcoming build. It really looks super on your model.
Another suggestion I've seen on a modelling site, but can't find the link again.
They stretched some kitchen cling film over the body, using as support, then cut a large enough piece from one of the girlfriend's old stockings and tape it in place, then coat it with araldite, or some other resin.
When set, cut it to the desired shape/size and paint.
![]()
Steve King