Jump to content


Photo

Premier Cyclone Avenger: body mounting hole dimensions?


  • Please log in to reply
21 replies to this topic

#1 mike1972chev

mike1972chev

    On The Lead Lap

  • Full Member
  • PipPipPipPip
  • 298 posts
  • Joined: 02-April 17
  • Gender:Male
  • Location:Indy

Posted 03 April 2017 - 08:51 AM

Hey guys,


I love building and fabricating of the older ones and this is my very first post. :) Glad to have found this place . 


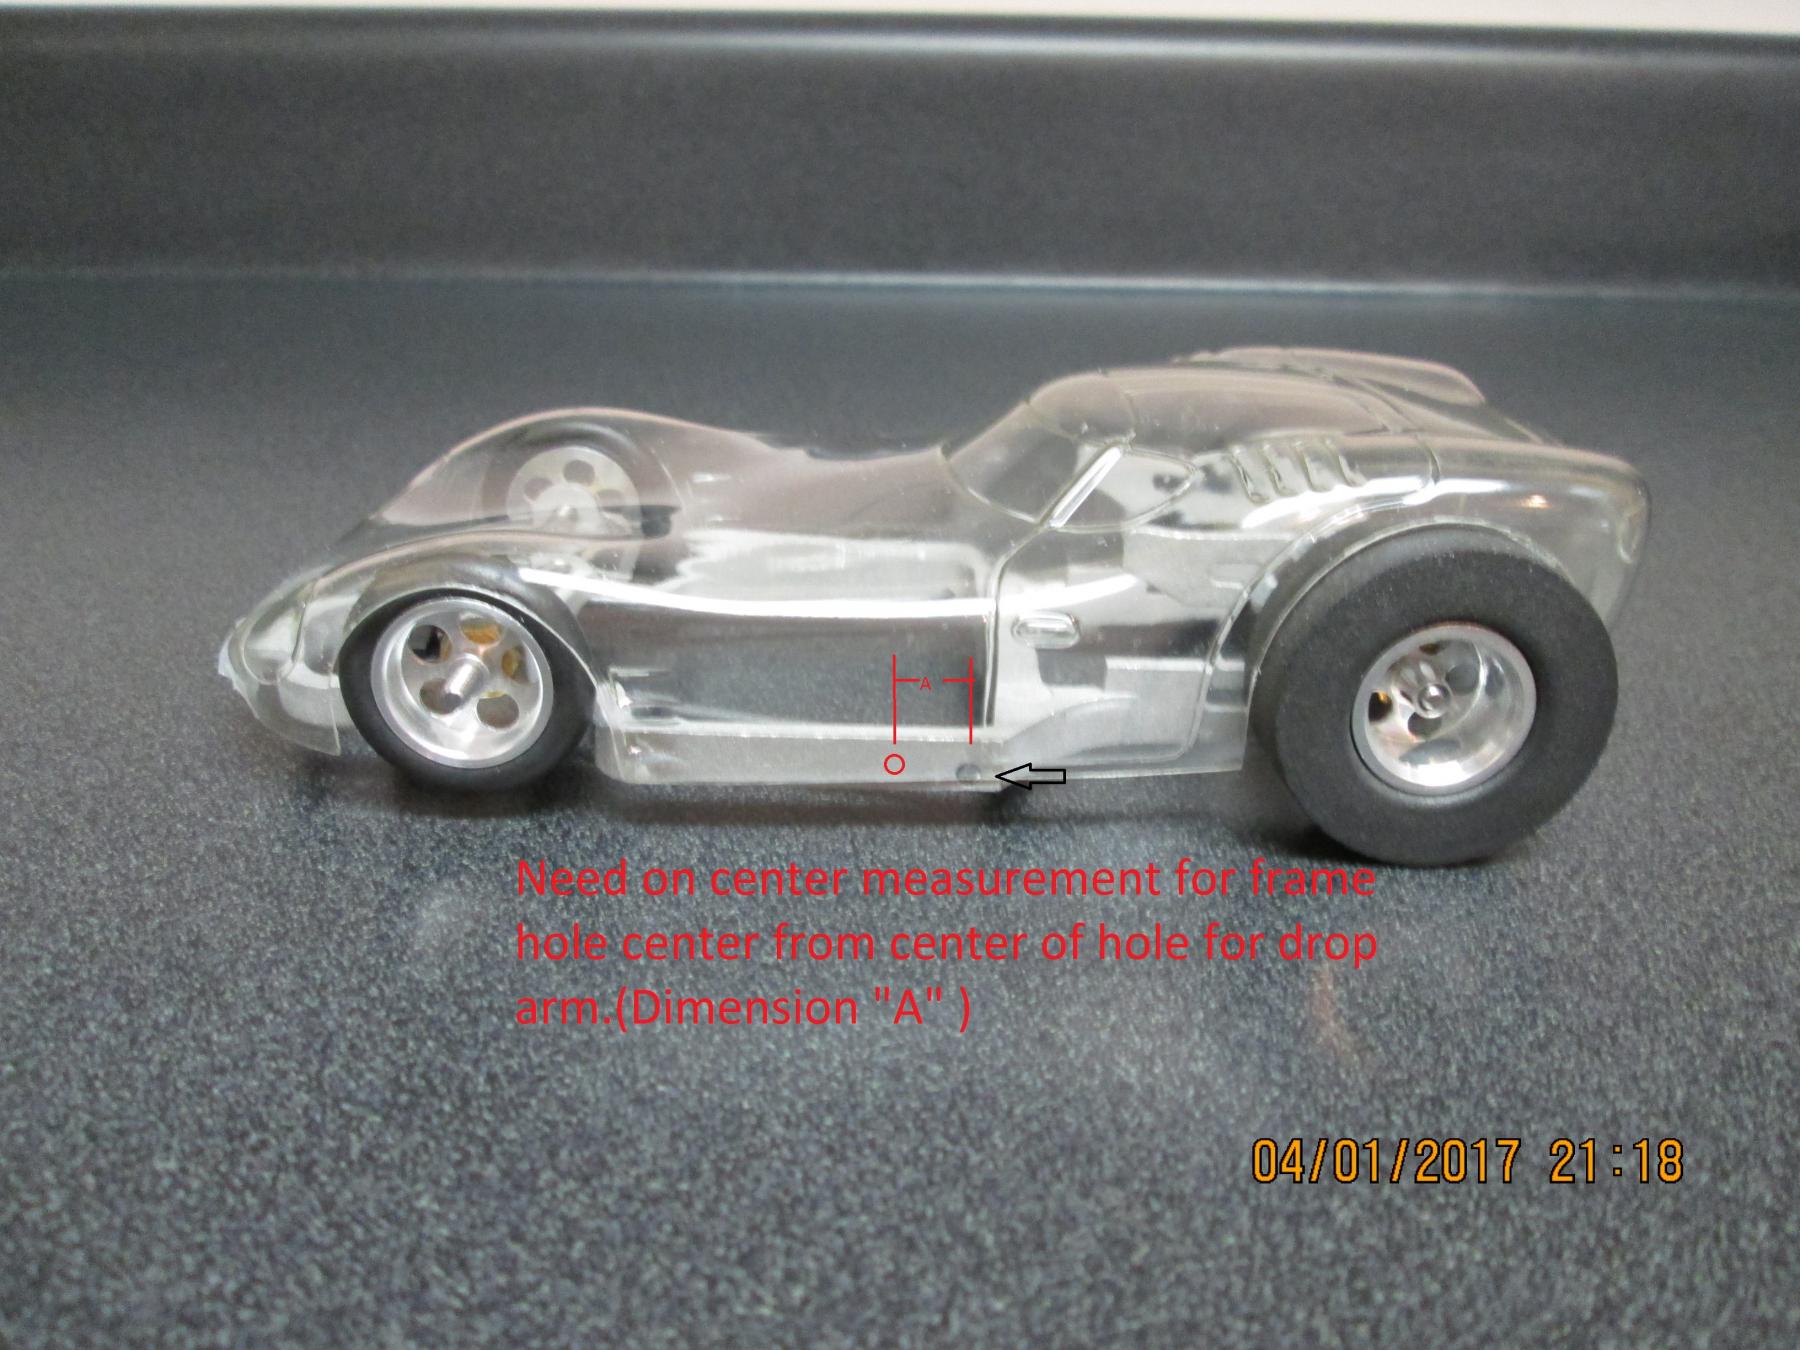
OK, to the business at hand. Due to the photos I have seen from members on here and the "coolness factor" of them, I have chosen to build a Cyclone Avenger. Man these " thingies" look awesome! LOL. I had the body jigged in its final resting place and all the wheel well radii finished. (Please ignore the body sitting loose in the attached photo and the incorrect axle. Photo was taken for illustration purposes only.  :) )


Like many, since I bought mine as an NOS kit, the body mounting holes are not drilled in the frame and me being a bit anal, I am wanting to place them in the same place Premier did it back in the factory in the day. All I know at this point is that they go some where ahead of the doors???  :/


Does anyone here on the blog own an original Avenger and can you give me a really good measurement from swing arm hole center to body mount hole center??? (See attached photo)


Thanks much!


IMG_1456.JPG


  • Maximo likes this

Michael J. Boruff


#2 Pablo

Pablo

    Builder

  • Administrator
  • PipPipPipPipPipPipPipPip
  • 18,448 posts
  • Joined: 20-February 06
  • Gender:Male
  • Location:Cleveland, Tennessee

Posted 03 April 2017 - 10:39 AM

This info will help:
 
Premier "Cyclone Avenger"
 
Here is how I did mine:
 
H Power Cyclone Avenger

Paul Wolcott


#3 Martin

Martin

    Posting Leader

  • Full Member
  • PipPipPipPipPipPipPip
  • 4,213 posts
  • Joined: 22-February 09
  • Gender:Male
  • Location:US

Posted 03 April 2017 - 11:08 AM

Hey Mike,

I have my original Avenger in hand and I get a measurement of 5/16" or .312" measured with a dial vernier caliper. Hope this helps.

Let me know if you need more info.
Martin Windmill

#4 mike1972chev

mike1972chev

    On The Lead Lap

  • Full Member
  • PipPipPipPip
  • 298 posts
  • Joined: 02-April 17
  • Gender:Male
  • Location:Indy

Posted 03 April 2017 - 11:56 AM

This info will help:
 
Premier "Cyclone Avenger"
 
Here is how I did mine:
 
H Power Cyclone Avenger


Looks great, Pablo.Your car came out amazing. I like your tubing idea, but I am going to use a machine screw and drill/tap them in the same place as the factory cars.


Hey Mike,

I have my original Avenger in hand and I get a measurement of 5/16" or .312" measured with a dial vernier caliper. Hope this helps.

Let me know if you need more info.


Thanks sooo much, Martin.


I forgot to ask, do you think those screws mounting the body are #2 size sheet metal screws with a oval pan head on them??? (Hard to determine from photos.)  


Michael J. Boruff


#5 Martin

Martin

    Posting Leader

  • Full Member
  • PipPipPipPipPipPipPip
  • 4,213 posts
  • Joined: 22-February 09
  • Gender:Male
  • Location:US

Posted 03 April 2017 - 12:26 PM

Hey Mike,


This is what Philippe had to say:


"The front wheels look a bit like the small Dynamic with pointed edge tires found on the Ferrari P3 kit by Dynamic, but they are unique to this car and do not look like any by any manufacturer I am aware of.
The rears are somewhat clones of some of the K&B but are not the same... and the tires are very plain, hard rubber and slick surfaces.
These wheels are unique to these models and were likely made by Premier.
The spare chassis sold in the clear bags with the Premier tag do not have mounting holes, you are supposed to drill your own. The screws are self-tapping # 1".


I actually measured the screws in my car and they match a #2 screw like the pic below, only plated, not SS, and they only have .170" of thread. But all other dimensions are the same.


Material 18-8 Stainless Steel Screw Size No. 2 Screw Size Decimal Equivalent 0.086" Length 1/4" Head   Diameter 0.167" Height 0.053" Drive Style Slotted Drill Bit Size No. 48 Drill Bit Size Decimal Equivalent 0.076" Maximum Drilling Thickness 0.025" Approximate Threads per Inch 32 Thread Direction Right Hand Threading Fully Threaded Tapping Method Thread Forming Tapping Screw Type A/AB Head Type Rounded Rounded Head Profile Standard Rounded Head Style Pan Tip Type Pointed Shank Cross Section Round.


Made from 18-8 stainless steel, these screws are chemical resistant and may be mildly magnetic. They penetrate 0.025" and thinner sheet metal. Length is measured from under the head.

91632a077l.gif
The information in this 3D model is provided for reference only.


I looked on line to see what size hole you would drill and got conflicting info on drill size. I could see what size drill fits in the hole in my car or if you have the screws but I would do some test holes in similar material and see what works best.


Martin Windmill

#6 mike1972chev

mike1972chev

    On The Lead Lap

  • Full Member
  • PipPipPipPip
  • 298 posts
  • Joined: 02-April 17
  • Gender:Male
  • Location:Indy

Posted 03 April 2017 - 06:47 PM

Thanks very much, Martin. That is a lot of great info.


I can see already that I am going to love Slotblog.


Michael J. Boruff


#7 Martin

Martin

    Posting Leader

  • Full Member
  • PipPipPipPipPipPipPip
  • 4,213 posts
  • Joined: 22-February 09
  • Gender:Male
  • Location:US

Posted 03 April 2017 - 09:03 PM

There are plenty of very knowledgeable enthusiast here on Slotblog always willing to help  So welcome to Slotblog.


If you have time I for one would like to here your story and how you got involved with vintage slot cars.


  • Cheater likes this
Martin Windmill

#8 mike1972chev

mike1972chev

    On The Lead Lap

  • Full Member
  • PipPipPipPip
  • 298 posts
  • Joined: 02-April 17
  • Gender:Male
  • Location:Indy

Posted 04 April 2017 - 06:28 PM

Well Martin, I don't know if I am allowed to get into too much detail on how I got into the hobby on this thread? Maybe off subject? Moderator and another member have already sent PMs to me about too many words being used on here and adding too much "fluff"  :/


Michael J. Boruff


#9 Bill from NH

Bill from NH

    Age scrubs away speed!

  • Full Member
  • PipPipPipPipPipPipPipPip
  • 14,745 posts
  • Joined: 02-August 07
  • Gender:Male
  • Location:New Boston, NH

Posted 04 April 2017 - 08:50 PM

Mike, I'd like to hear how you got started in the hobby too. I, myself, built static model car kits in the late 50's.  The model car mags in the day also covered some slot cars too. I got a 1/25 home track in 1963, started 1/24 commercial racing in 1967,& have been involved in the hobby ever since. I've been reading most of your posts & haven't found you to be verbose. That moderator was probably just having a bad day. :laugh2: I was a moderator on here for three years in the past.


Bill Fernald
 
I intend to live forever!  So far, so good.  :laugh2:  :laugh2: 

#10 mike1972chev

mike1972chev

    On The Lead Lap

  • Full Member
  • PipPipPipPip
  • 298 posts
  • Joined: 02-April 17
  • Gender:Male
  • Location:Indy

Posted 05 April 2017 - 08:29 AM

OK guys if you are REALLY,truly interested ,here are the real facts about my "car fetish"  :(Honestly   :D )


I wasn't even born in the "Heyday" of the vintage cars,but remember the neighbor kids having an older 1/24 scale set in the early 70's when I was a TINY child at the time. I was always fascinated with cars since for ever.My Dad had a garage as a source of income and I was taken along with him  to work all the time.(I still have the roller stool I used at 4-5 yrs old that I sat on and cleaned wheel bearings to be repacked.).  My mother even commented how I would point to the cars on the cover of  Super Stock and Drag Racing and the likes on the magazine racks at the store.I have been lucky as to have ridden in,driven and worked on  a HUGE amount of muscle cars from that era and have owned a few. I was lucky to have been given some OLD home tracks by my Dad's cousin and others that were considered pretty much junk in the 70's and I was hooked !(I know one of them was an ELDON racetrack complete with cars) My first car I bought  outright in the early 80s was  was a PARMA Womp 1974 Camaro that was N.O.S. and I still own.(As I own a Real 74 Camaro drag car as well. ) I originally have owned several full size cars at one time ,but sold many and enjoy doing the 1/32  and 1/24  scale model thing better.They are easier to garage and maintain!   :yes3:  During the 70s,80s 90's I was into HO scale Aurora,Tyco and TCR cars and still have my favorite cars of those,but they never matched my love of the bigger 1/32 and 1/24 scale cars .I have amassed quite a few older 1/32 and 1/24 cars now. My focus is collecting a few Womp's and MOSTLY a HUGE fan of CLASSIC industries cars (The original Manta Ray,Viper,and ASP/Competition ASP being my absolute favorites! I have some really nice versions of those.) I even crave all of the details of the CLASSIC INDUSTRIES history and have even messages TSR about even more,gritty details of the history of one of my FAVORITE slot car brands.Even the Box art on the Classic brand ,Garvic,and several others is just insane !!! I have started building a few cars recently from N.O.S parts and some from scratch.The "thingies" are just sooo damned cool! The Cyclone Avenger I am starting on is just so sleek and well engineered I am impressed. I also just built a 55 chev hard body that I have had in a box for over 30 years now!!!(Chassis is a "one off" from scratch) I have a cabinet full of chassis,bodies,wheels,tires,axles ,ETC ready to be started now and accumulating more ,but JUST about have all I am looking for minus a few parts. I am currently building a Dubro Cheetah and of course the Avenger we are talking about here. And as SURE as I am saying I have just about alI need,ANOTHER cool car/parts kit  will come up for purchase and I will start checking my PayPal balance to see if I can finance it ! lol   Anyone else on here have a problem with the collecting bug???   :laugh2:


I will always be excited about ANYTHING that deals with automobiles/machinery and big horsepower.   :)   It is one of the things on this planet Earth that keeps my attention. 


Michael J. Boruff


#11 Bill from NH

Bill from NH

    Age scrubs away speed!

  • Full Member
  • PipPipPipPipPipPipPipPip
  • 14,745 posts
  • Joined: 02-August 07
  • Gender:Male
  • Location:New Boston, NH

Posted 05 April 2017 - 09:35 AM

Nice write-up Mike. I'd like to see some photos of that 55 when it's done. Even before it's done. :)


Bill Fernald
 
I intend to live forever!  So far, so good.  :laugh2:  :laugh2: 

#12 mike1972chev

mike1972chev

    On The Lead Lap

  • Full Member
  • PipPipPipPip
  • 298 posts
  • Joined: 02-April 17
  • Gender:Male
  • Location:Indy

Posted 05 April 2017 - 01:25 PM

Bill,I have all of the photos from start to end.It is not the most complicated build,but it turned out EXACLY as I planned.(She's a DRAG car . :D ) Where would be the appropriate place to post them on Slot Blog?


Michael J. Boruff


#13 Bill from NH

Bill from NH

    Age scrubs away speed!

  • Full Member
  • PipPipPipPipPipPipPipPip
  • 14,745 posts
  • Joined: 02-August 07
  • Gender:Male
  • Location:New Boston, NH

Posted 05 April 2017 - 02:17 PM

Mike, I would put them in the 1/24 Vintage Cars Forum,  under the Amateur 1/24 Vintage Cars Subforum.


I had a friend who built a couple '55 Chevies in 1967 using clear butyrate bodies. I sort of recall his were built with brass chassis, 36D motors, 1.25" rear tires & maybe drop arms.. I want to see how yours compares to how I remember his. If my memory is right, I think I may have a '55 or '57 body squirreled away in the attic. On the other hand, the hard body 1/24 club I sometimes run with has recently been drag racing too.


Bill Fernald
 
I intend to live forever!  So far, so good.  :laugh2:  :laugh2: 

#14 Martin

Martin

    Posting Leader

  • Full Member
  • PipPipPipPipPipPipPip
  • 4,213 posts
  • Joined: 22-February 09
  • Gender:Male
  • Location:US

Posted 06 April 2017 - 11:14 PM

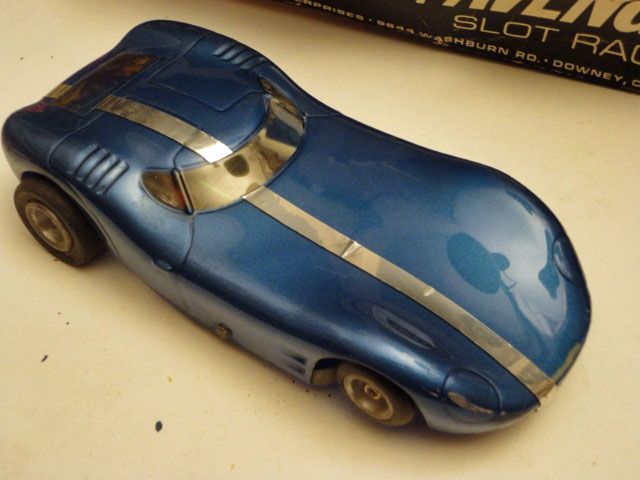
Hi Mike, here is my Avenger, not perfect but all there. Notice all the cars I have seen have that off center stripe. Too bad some of mine is missing. It is as purchased.

Attached Images

  • P1150255.JPG

Martin Windmill

#15 mike1972chev

mike1972chev

    On The Lead Lap

  • Full Member
  • PipPipPipPip
  • 298 posts
  • Joined: 02-April 17
  • Gender:Male
  • Location:Indy

Posted 07 April 2017 - 06:12 AM

Looks nice Martin. I like the color. STILL gotta decide what colors mine is going to be???  I AM liking the offset racing stripe more and more. Obviously I want my Cyclone sporting the  "vintage" look. 


Hey,since you have your car out , Could you give me the exact O.D. of those front tires on your car???   Reason I am asking is I know with the frame construction the way it is, tire clearance is TIGHT on mine . 


Michael J. Boruff


#16 Martin

Martin

    Posting Leader

  • Full Member
  • PipPipPipPipPipPipPip
  • 4,213 posts
  • Joined: 22-February 09
  • Gender:Male
  • Location:US

Posted 07 April 2017 - 12:42 PM

The rears are 1.1"d. and the fronts are just under one inch at .975"d. The outside width of of the front tires is 2.75"(track) so they do sit inside of the body. Hope this helps. I cant say someone before me has not changed things on this car. I noticed my front tires are grooved and are flat 3/16" across the tread whereas the ones Philippe shows are V shape. As we all know the best way to identify stock is to find 2 or more mint in the box.

That's not what I have for sure.

When I do the stripe over I like the chrome tape with the black on top as shown in the museums boxed cars.


Martin Windmill

#17 mike1972chev

mike1972chev

    On The Lead Lap

  • Full Member
  • PipPipPipPip
  • 298 posts
  • Joined: 02-April 17
  • Gender:Male
  • Location:Indy

Posted 07 April 2017 - 07:20 PM

Drilling/tapping holes in frame for mounting body and motor spacer.  :D


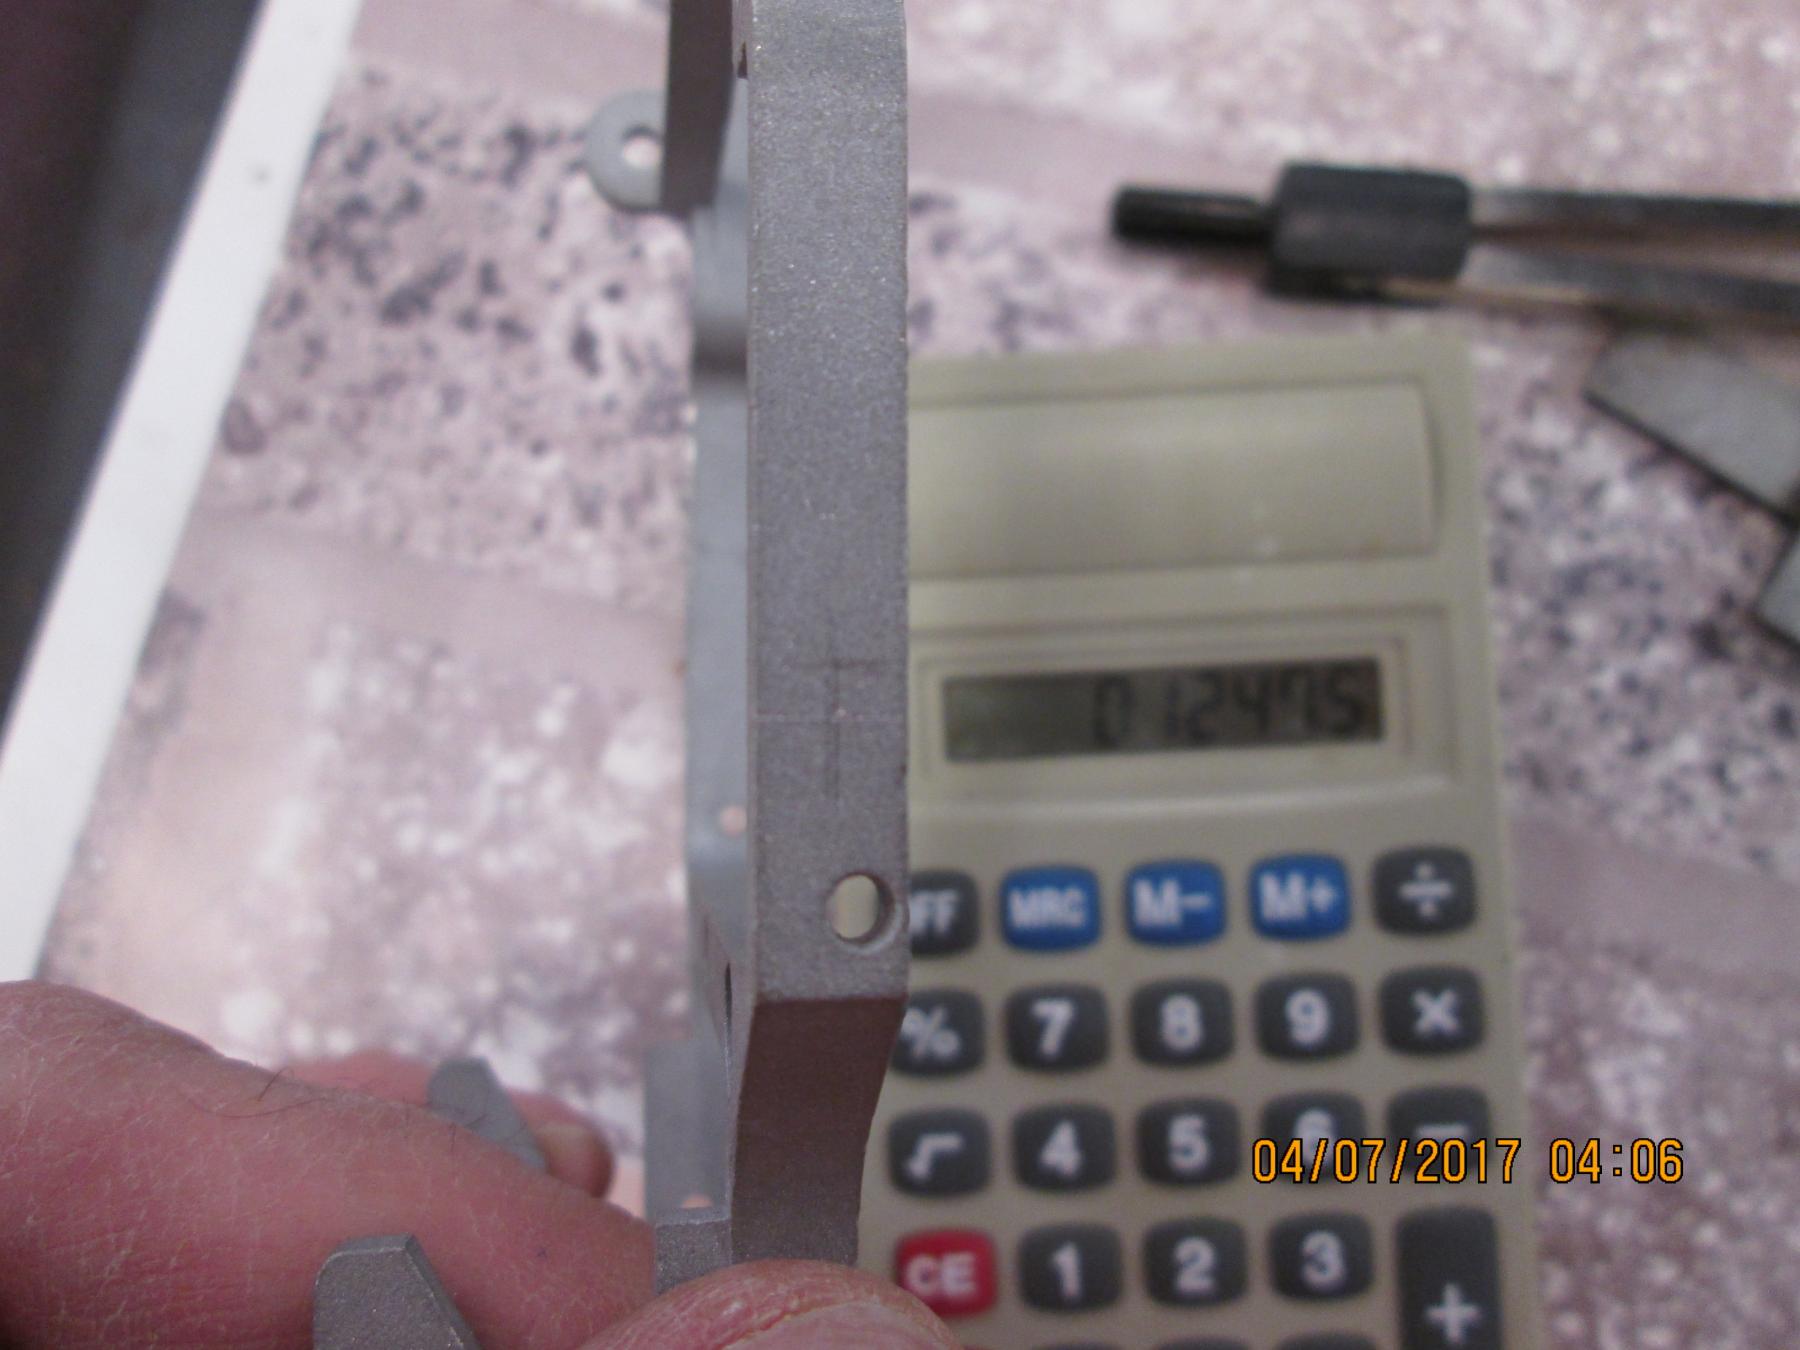
OK,Thanks to my Slot Blog bud Martin,I have the hole location in the left and right frame rails at 5/16"  from the hole centers of the drop arm pivot points.


I located the hole centers  by passing a transfer punch point through both pivot holes so as to have a fairly accurate center point to measure from. (How jealous am I of you guys with Bridgeports with X and Y axis . :) ) At .3125 we scribe a tiny line.


IMG_1532.JPG


IMG_1533.JPG


I measured the frame height .2495. Then divided by 2 ,I make 2 smaller vertical scribes. (I am wearing my magnifying head gear to see this process. ) A TEENY center punch and I am centered.
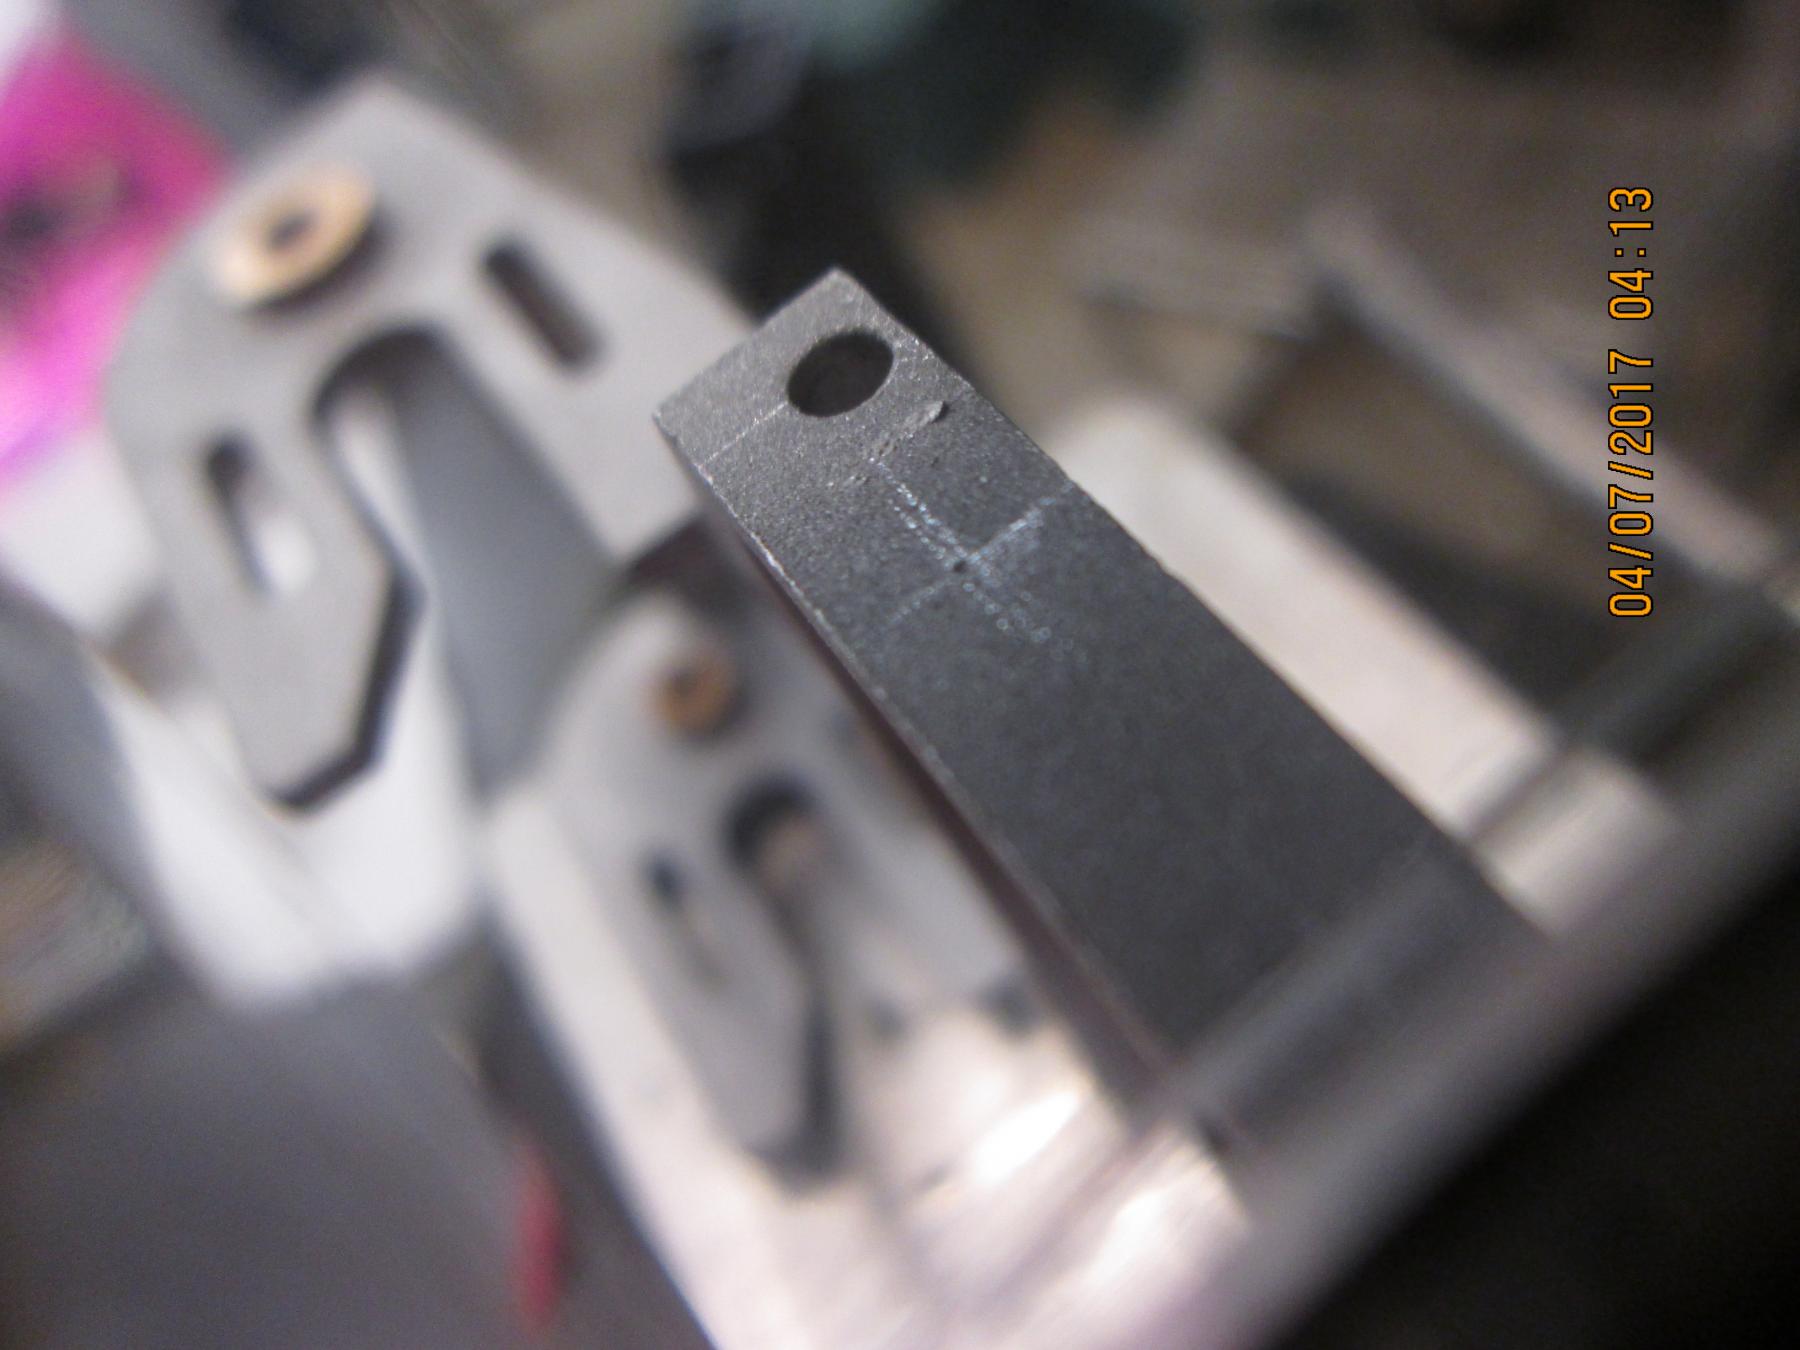
 

IMG_1536.JPG


IMG_1535.JPG


I decided I didn't want to go with the standard #2  metal screws. I opted for 2-56 button head machine screws.Why? I think they do a better job. Several times on and off with the body using standard metal screw threads, I usually  see a bit of shaving dust. Sometimes stripped out thread holes in light gauge metal frames. ...... and for the "cool factor".   :dirol:   So now that I purchased new 2-56 taps,my tap/die set is ALMOST fully complete.


IMG_1542.JPG


IMG_1539.JPG


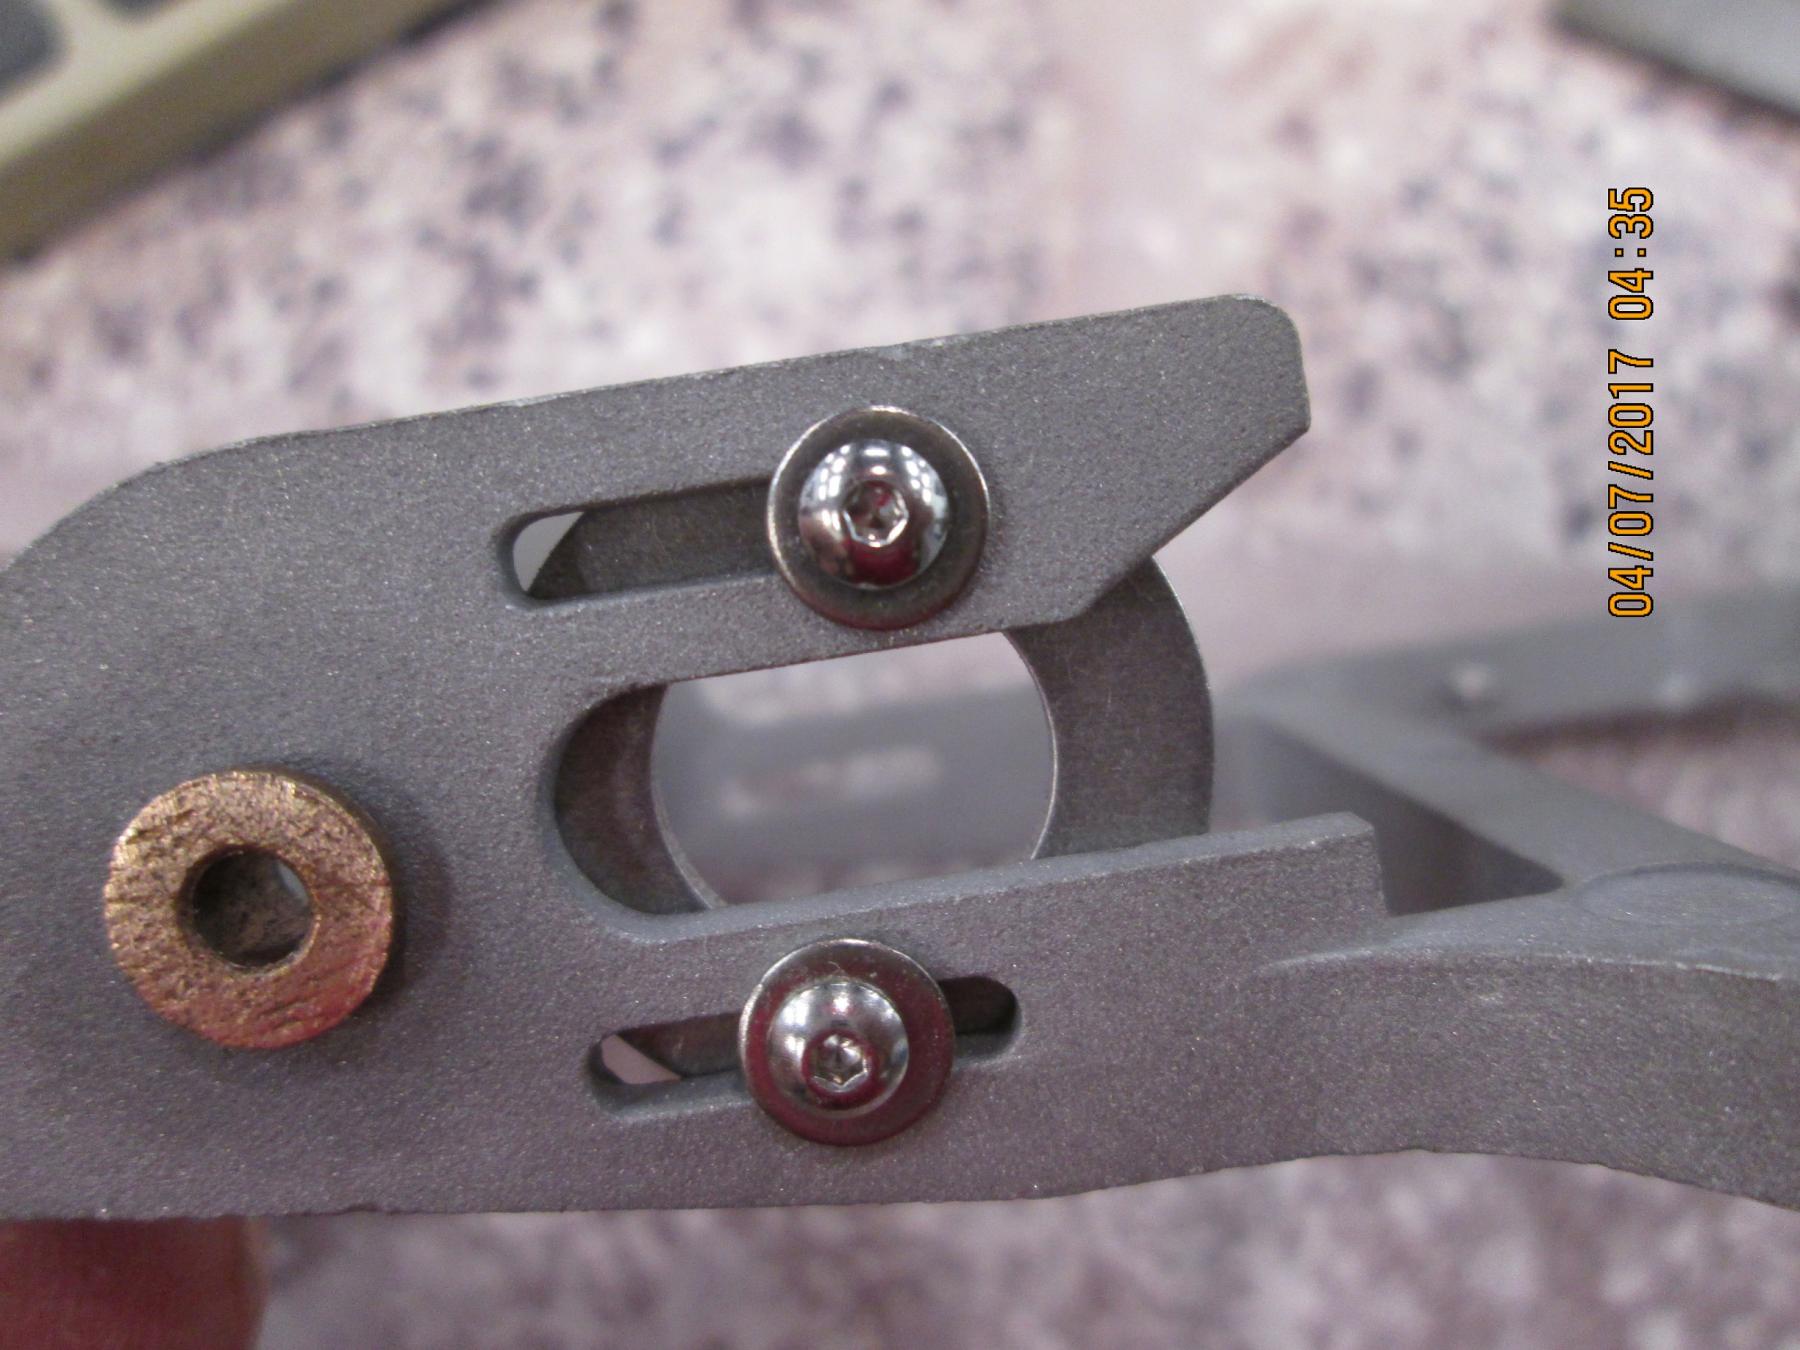
OK,now the other reason I decided for the 2-56s. I did both the motor can bushing spacer/retainer and the end bell. This is a brand new motor with the end bell never having any screw ran in it,so it came out great. Tightens down VERY well .....and I think looks COOL!  hehe


IMG_1529.JPG


IMG_1530.JPG


A little work with the Dremel to make sure the screws going through the frame securing can bushing spacer are not digging into the motor can and we are done for today.
 

IMG_1544.JPG


IMG_1543.JPG  


IMG_1547.JPG


IMG_1546.JPG


IMG_1545.JPG


I loved Pablo's body pinning idea he used on his Cyclone. I scribed a ghost line across the rear frame pad to probably put another threaded hole where he placed one of his body pins on his Cyclone build. (Probably will end up using it!) I just thought this looks a bit more "old school" vintage . minus the modern button heads. Those can be changed easily if someone wants though to those slotted pan head screws. I will also be using 'teeny" #2 plastic washers on the body screws to keep from marring the body up.


IMG_1548.JPG


I am very satisfied with the results. Overkill? TOO anal??  IDK?    


Thoughts? Opinions???


Michael J. Boruff


#18 Mike Patterson

Mike Patterson

    Village Luddite

  • Subscriber
  • PipPipPipPipPipPipPip
  • 2,566 posts
  • Joined: 14-October 07
  • Gender:Male
  • Location:Zanesville, OH

Posted 07 April 2017 - 08:51 PM

Mike,


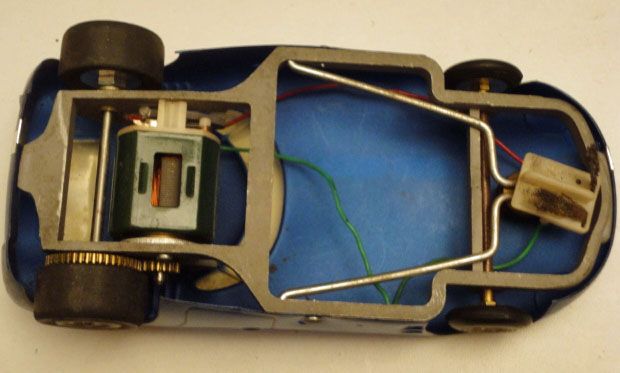
IIRC, there is a third body mount, and its located in the middle of the rectangular frame protrusion that you pictued:


Picture 3.png


There's a flat area on the lower back of the body that should be touching the chassis there when the body is mounted correctly.


Or this could be just another false memory/senior moment/brain fart. :D


I am not a doctor, but I played one as a child with the girl next door.


#19 mike1972chev

mike1972chev

    On The Lead Lap

  • Full Member
  • PipPipPipPip
  • 298 posts
  • Joined: 02-April 17
  • Gender:Male
  • Location:Indy

Posted 07 April 2017 - 09:07 PM

Looking at the photos of the ORIGINAL cars sent by Martin and TSR there was NOT originally a screw there. That pad just acts as a body locator. However,Pablo added a mounting point there on his(He made a custom pinning there.)  


I might be adding another machine screw there if my body doesn't co operate  when I finish it ????? :wink2:


Michael J. Boruff


#20 Martin

Martin

    Posting Leader

  • Full Member
  • PipPipPipPipPipPipPip
  • 4,213 posts
  • Joined: 22-February 09
  • Gender:Male
  • Location:US

Posted 08 April 2017 - 12:22 AM

Nice upgrade, as you noticed there is no rear screw. It seems to rely on the clamping at the sides screws. So its some what adjustable, but 3 mounting points is more secure. Build on, have fun.

Just had a thought(that's the second one today)if you did not want the rear screw, a small piece of double sided tape on that raised boss would have a similar effect and retain the adjustable factor to set tire clearance.


Martin Windmill

#21 mike1972chev

mike1972chev

    On The Lead Lap

  • Full Member
  • PipPipPipPip
  • 298 posts
  • Joined: 02-April 17
  • Gender:Male
  • Location:Indy

Posted 02 September 2017 - 01:38 AM

I just got this very car finished today. I will do a complete write up on it now. 


Michael J. Boruff


#22 don.siegel

don.siegel

    Grand Champion Poster

  • Subscriber
  • PipPipPipPipPipPipPipPip
  • 5,840 posts
  • Joined: 17-February 06
  • Gender:Male
  • Location:Paris, France

Posted 02 September 2017 - 06:15 AM

Hi Mike, 


Thought I had already posted these, but maybe they're somewhere else. Here's my Cyclone, all original I think, with the box, but not sure about the rear wheels. You're right, there are no front or rear mounts, but those slight bumps on the chassis seem to provide a pressure mount, since my chassis doesn't rock back and forth at all, even with the two screws...


Great project and thanks for sharing your story. You do some very neat work! 


Don 


Premier%20Cyclone%20Avenger_zps32eigixl.


Premier%20Cyclone%20Avenger%20chassis_zp


  • mike1972chev likes this


Electric Dreams Online Shop