Jump to content


Photo

Tony P's '68 Super Bat Pan Plumber


  • Please log in to reply
71 replies to this topic

#1 dc-65x

dc-65x

    Grand Champion Poster

  • Subscriber
  • PipPipPipPipPipPipPipPip
  • 6,972 posts
  • Joined: 14-February 06
  • Gender:Male
  • Location:Captain Rick: The only vintage slot car nut in SW Oregon?

Posted 01 June 2008 - 05:53 PM

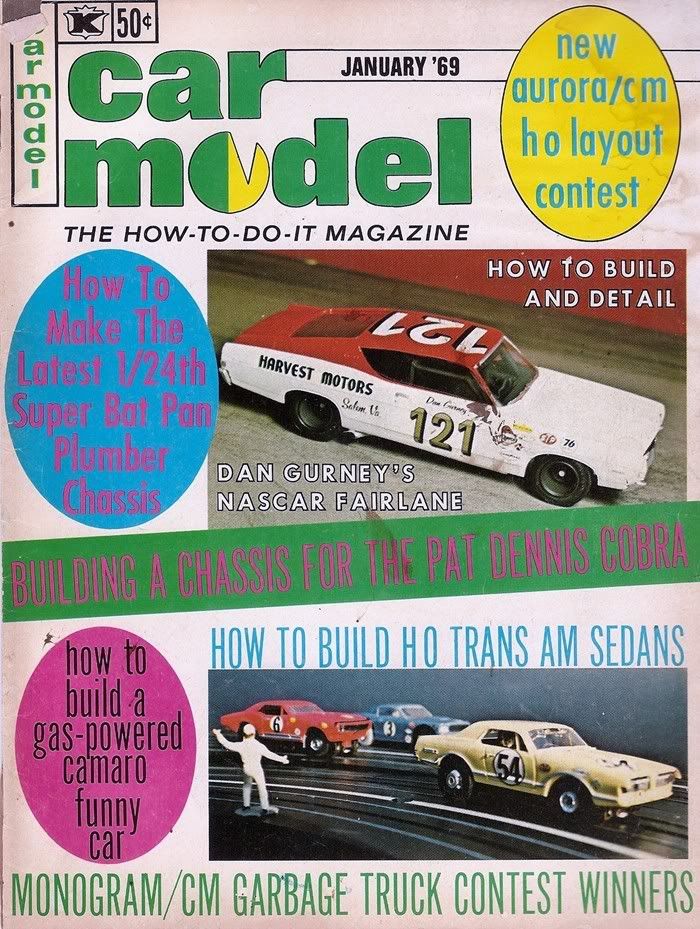
I was searching through old magazines looking for what to build next when.... BAM!:

Posted Image

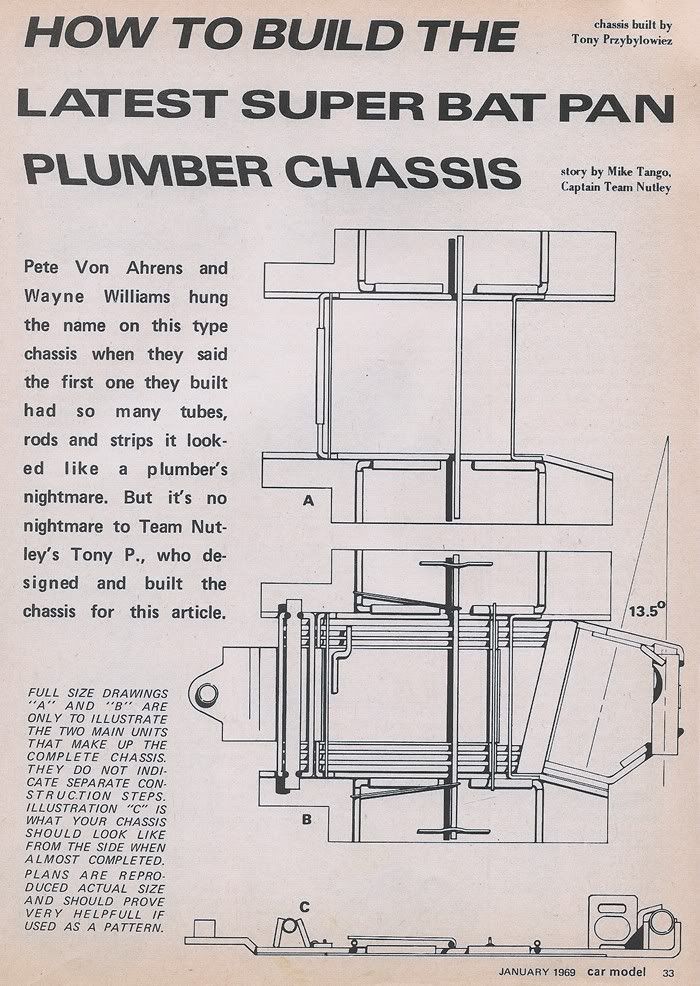
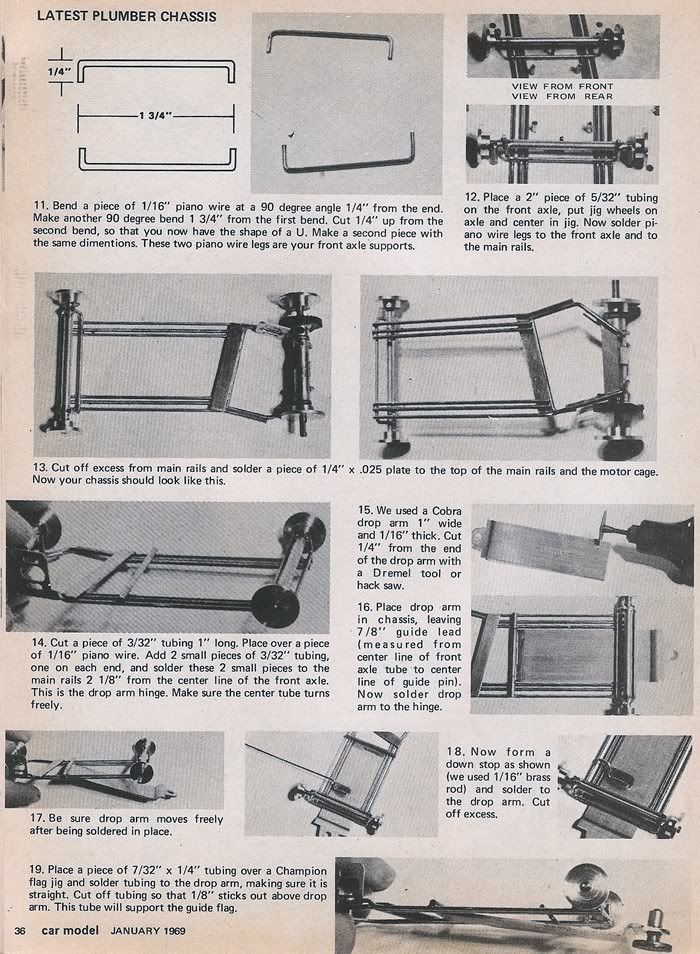
No, not Dan Gurney's NASCAR Fairlane (it is nice though) rather "How To Make The Latest 1/24th Super Bat Pan Plumber Chassis":

Posted Image

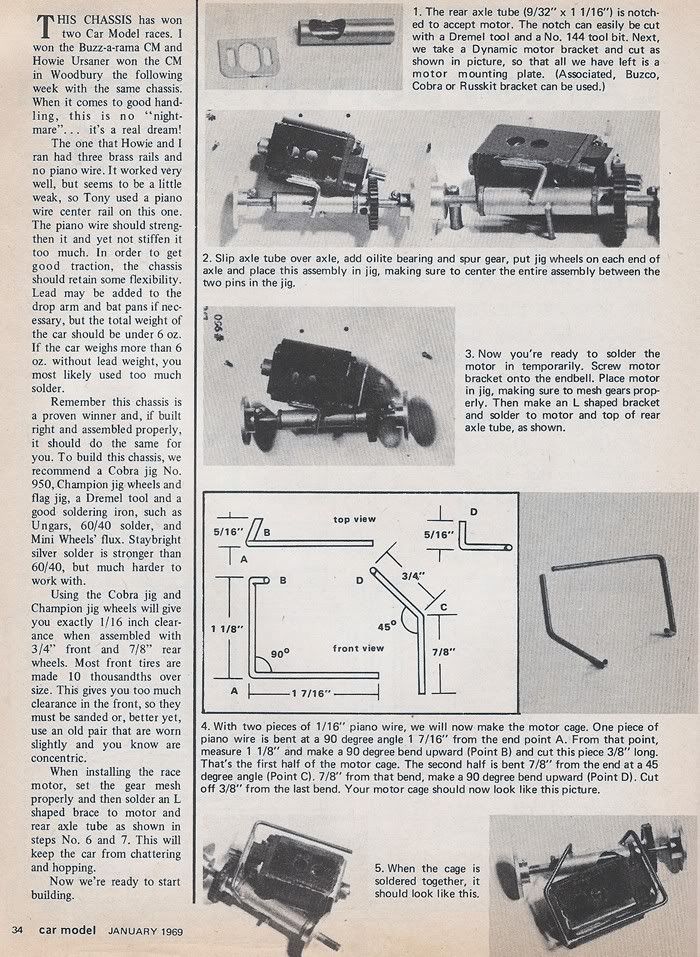
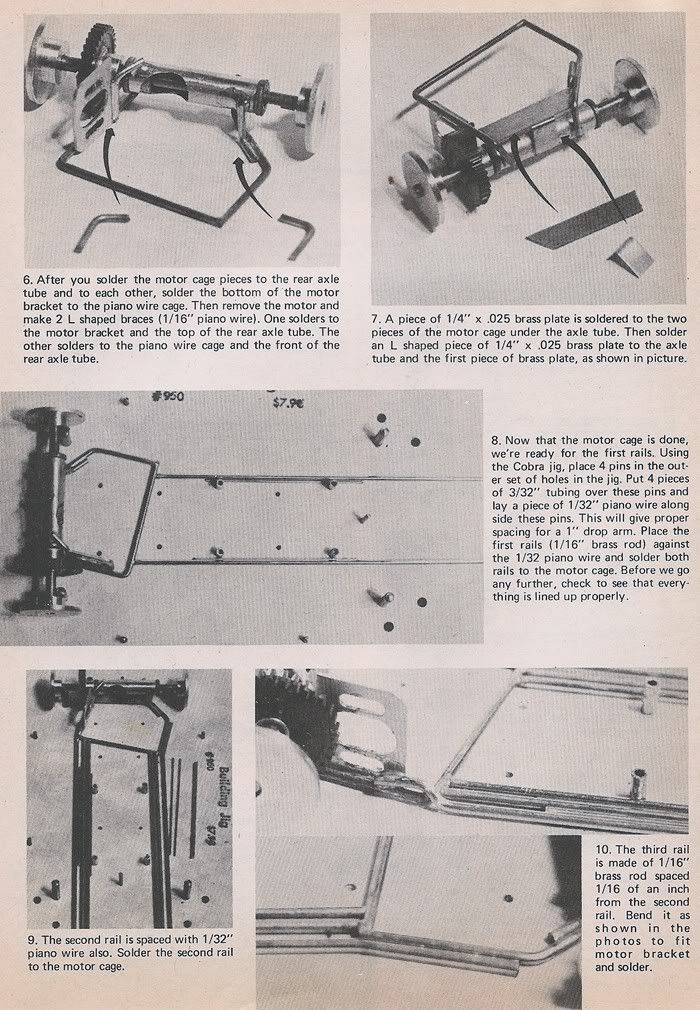
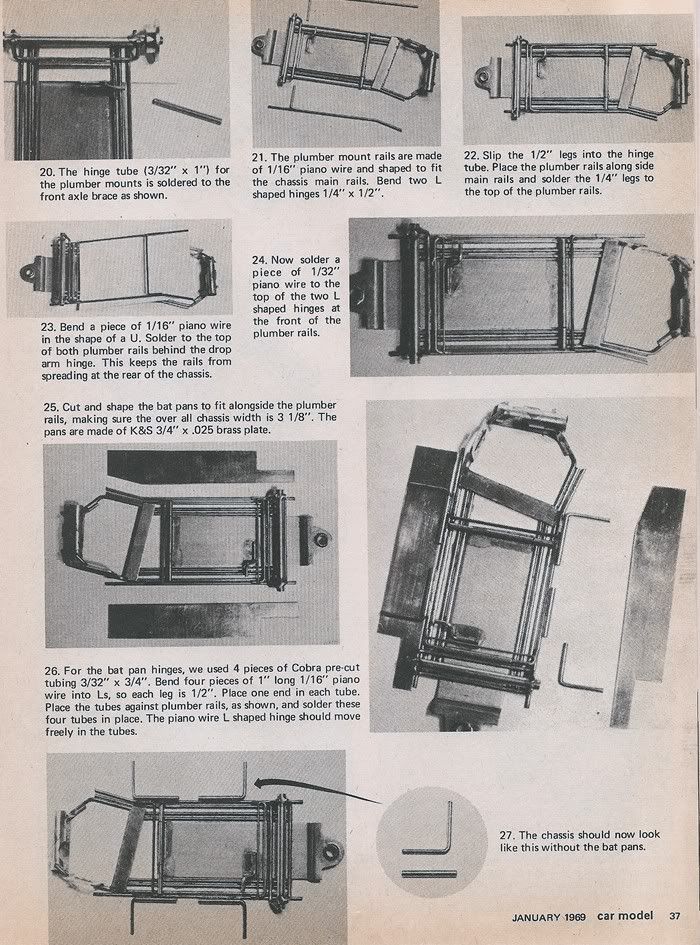
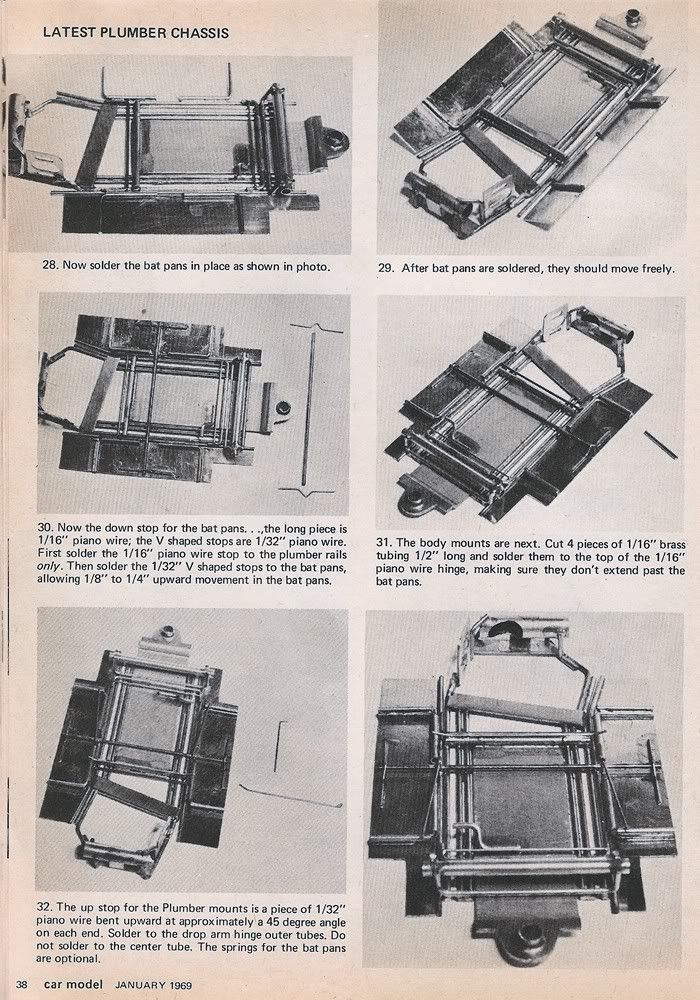
A Tony P how to article :) , sounds like fun to me ;) . Here's the rest of it:

Posted Image

Posted Image

Posted Image

Posted Image

Posted Image

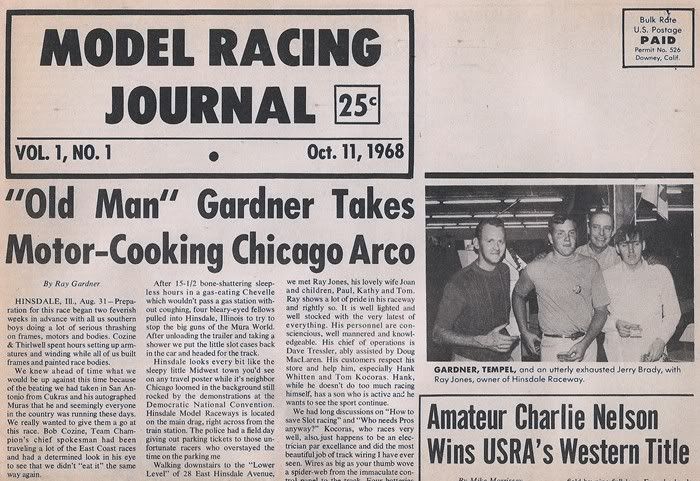
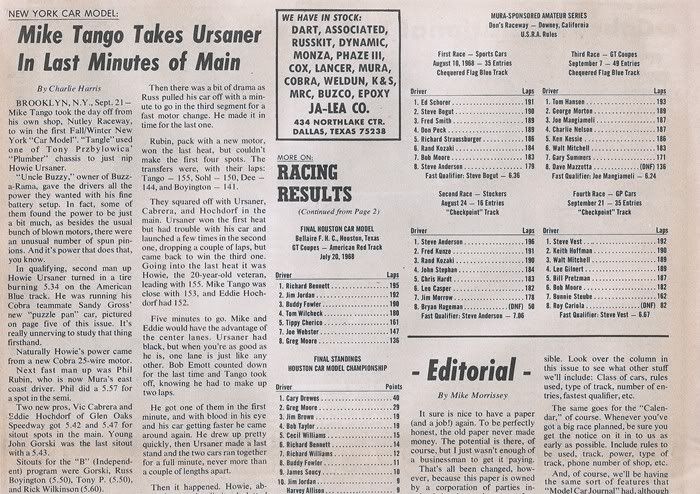
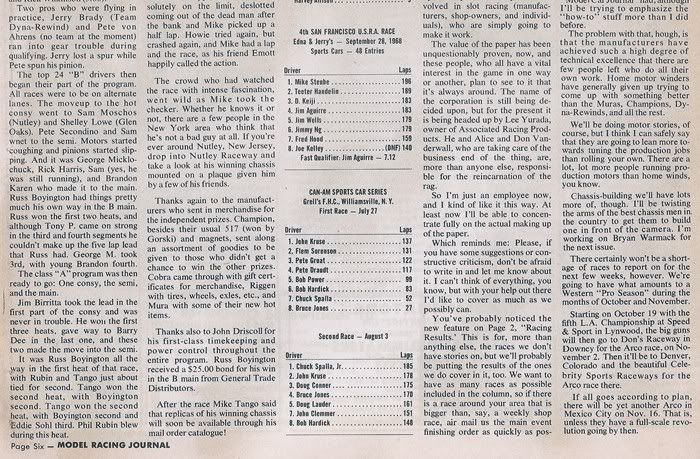
Here is the race report the author, Mike Tango Captain of Team Nutley, won a New York Car Model Magazine race with this Tony P designed and built chassis:

Posted Image

Posted Image

Posted Image

Time to start building...

Rick Thigpen
Check out Steve Okeefe's great web site at its new home here at Slotblog:
The Independent Scratchbuilder
There's much more to come...


#2 Jairus

Jairus

    Body Painter Extraordinaire

  • Subscriber
  • PipPipPipPipPipPipPipPip
  • 10,174 posts
  • Joined: 16-February 06
  • Gender:Male
  • Location:Salem, OR

Posted 01 June 2008 - 06:03 PM

Ah... but the question is, are you going to bend that motor bracket from one piece (like I know you can) of wire or build it like the directions show? ;)

Jairus H Watson - Artist
Need something painted, soldered, carved, or killed? - jairuswtsn@aol.com

www.slotcarsmag.com

www.jairuswatson.net
http://www.ratholecustoms.com
Check out some of the cool stuff on my Fotki!


#3 dc-65x

dc-65x

    Grand Champion Poster

  • Subscriber
  • PipPipPipPipPipPipPipPip
  • 6,972 posts
  • Joined: 14-February 06
  • Gender:Male
  • Location:Captain Rick: The only vintage slot car nut in SW Oregon?

Posted 01 June 2008 - 06:20 PM

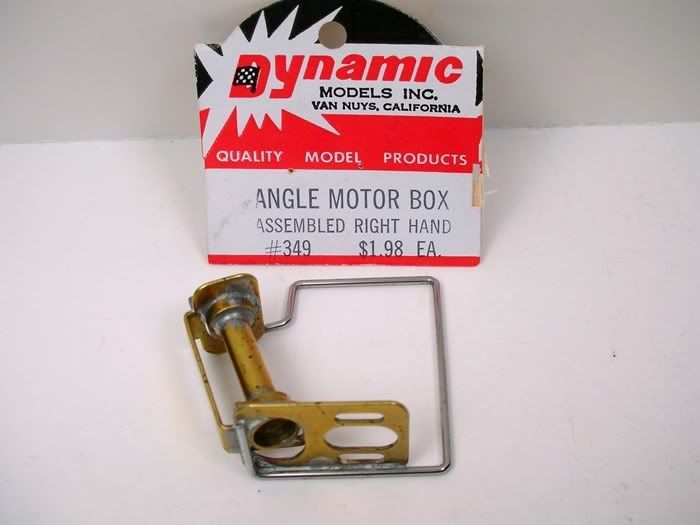
First up in the how to article is the motor bracket and rear axle tube. Here's the Dynamic bracket used before it is cut off:

Posted Image

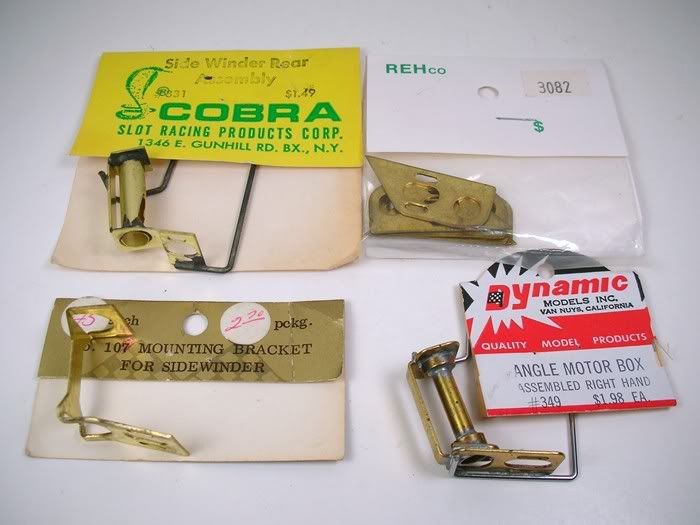
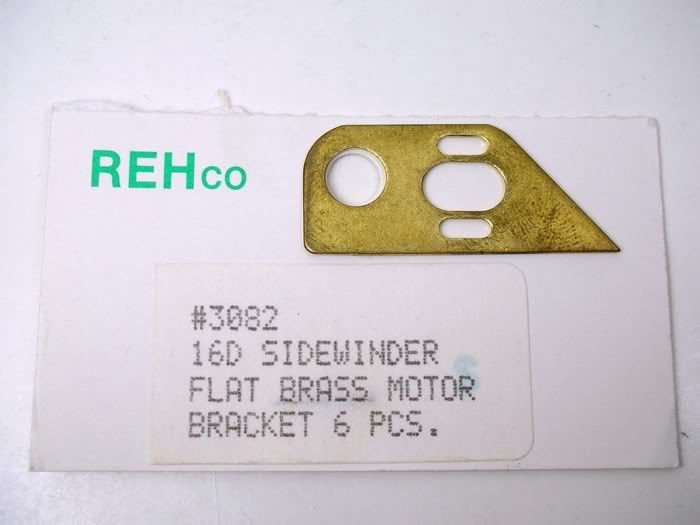
Here are some of the alternative brackets the article talks about. The REH bracket is a Russkit and is still available today:

Posted Image

Posted Image

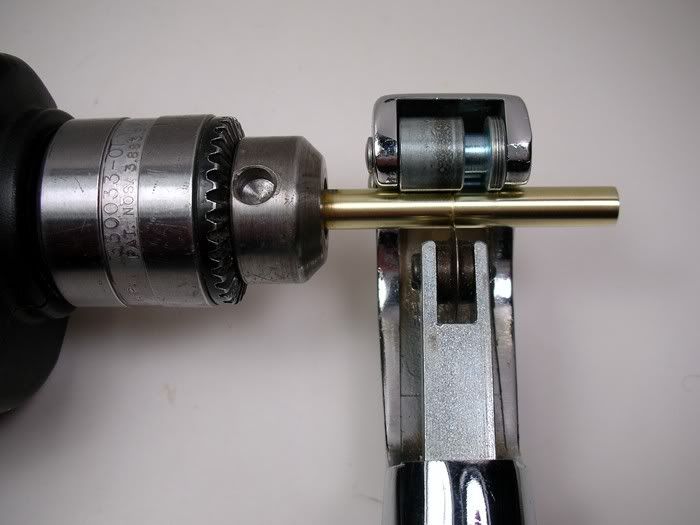
Here's a simple way to cut the tube so the cut is nice and square to the tube. Slowly spin the tube in your drill and cut it off with a tube cutter using light pressure so you don't distort the tube:

Posted Image

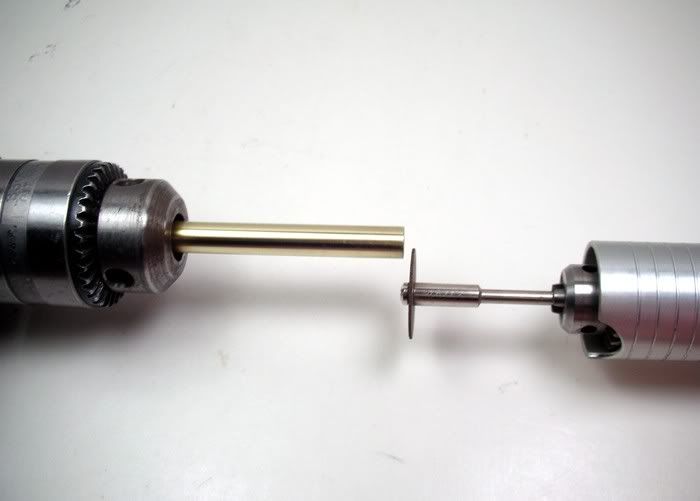
You should NEVER use the side of a Dremel cut of wheel to grind as it can easily explode with too much pressure. But spinning the tube in a drill while touching the cut with the side of the Dremel wheel sure does true it up as if it were done in a lathe ;) :

Posted Image

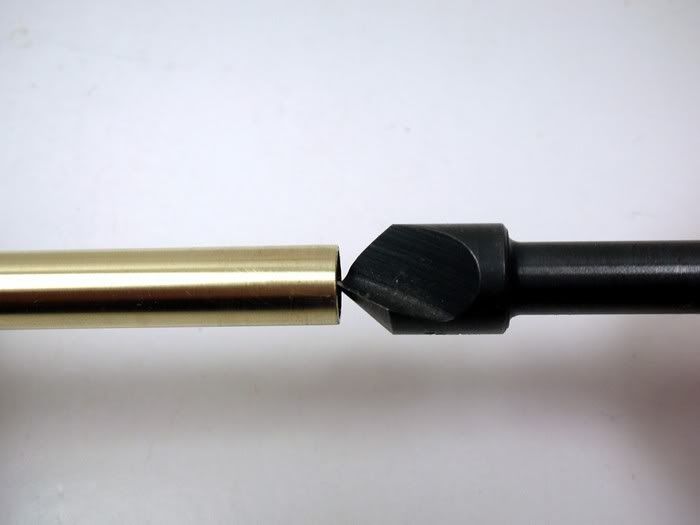
A little deburr action:

Posted Image

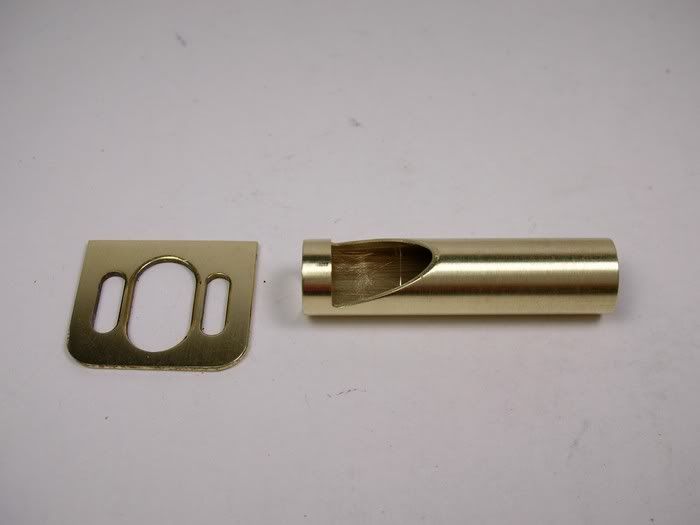
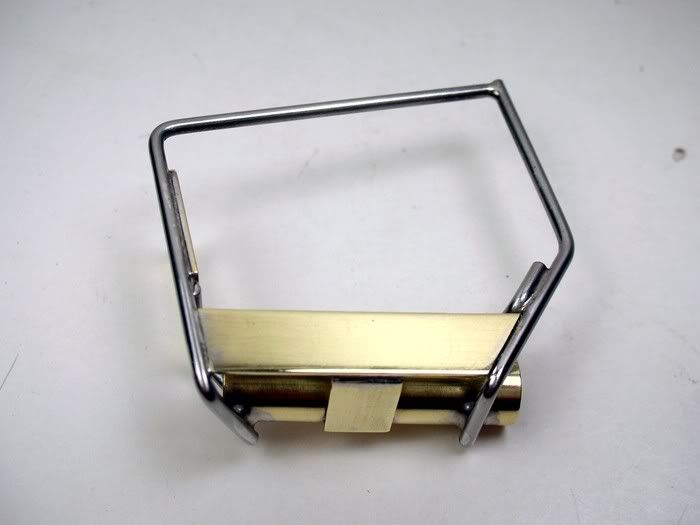
Here are the tube and bracket ready to go:

Posted Image

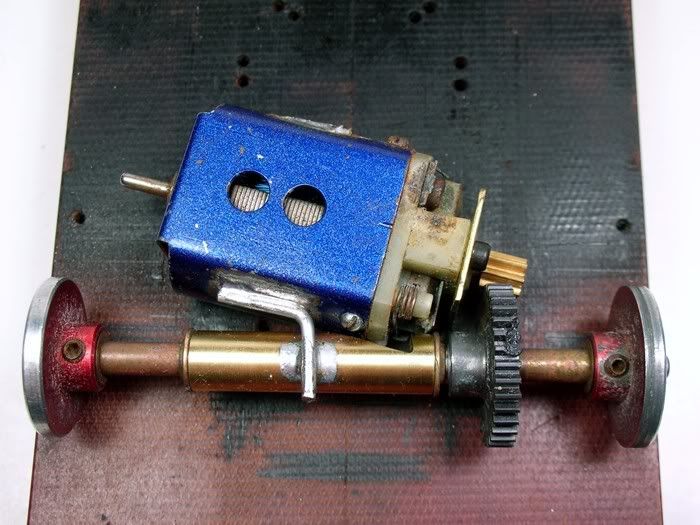
Double-check the tube length with the wheels, gear, bearings, and spacers you intend to use:

Posted Image

I temporarily soldered in the motor per the article:

Posted Image

I took everything out of the jig and set it on top of the article's full-size drawing. So far it looks good...

Rick Thigpen
Check out Steve Okeefe's great web site at its new home here at Slotblog:
The Independent Scratchbuilder
There's much more to come...


#4 dc-65x

dc-65x

    Grand Champion Poster

  • Subscriber
  • PipPipPipPipPipPipPipPip
  • 6,972 posts
  • Joined: 14-February 06
  • Gender:Male
  • Location:Captain Rick: The only vintage slot car nut in SW Oregon?

Posted 01 June 2008 - 06:26 PM

Ah... but the question is, are you going to bend that motor bracket from one piece (like I know you can) of wire or build it like the directions show? ;)

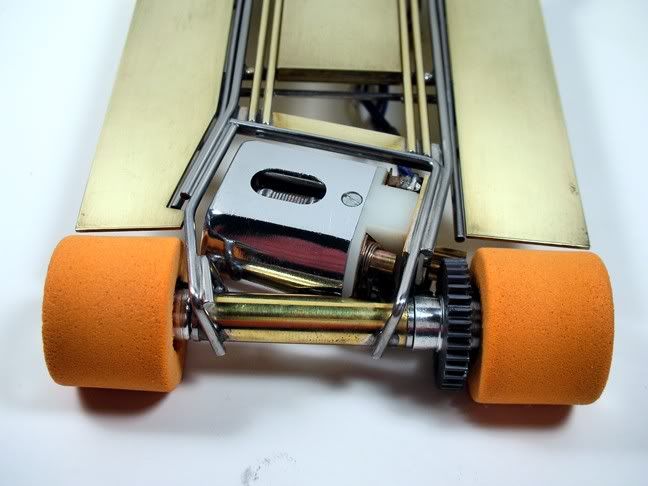
I HATE MAKING ONE-PIECE MOTOR BOXES! Just ask Steve Okeefe, he made a bunch up for me. I like Tony's two-piece design. I used it on my 26D anglewinder and it works great and is easy to build:

Posted Image

Rick Thigpen
Check out Steve Okeefe's great web site at its new home here at Slotblog:
The Independent Scratchbuilder
There's much more to come...


#5 Jairus

Jairus

    Body Painter Extraordinaire

  • Subscriber
  • PipPipPipPipPipPipPipPip
  • 10,174 posts
  • Joined: 16-February 06
  • Gender:Male
  • Location:Salem, OR

Posted 01 June 2008 - 06:46 PM

:laugh2: :laugh2:

Build on, Cap'n! Build on...

Jairus H Watson - Artist
Need something painted, soldered, carved, or killed? - jairuswtsn@aol.com

www.slotcarsmag.com

www.jairuswatson.net
http://www.ratholecustoms.com
Check out some of the cool stuff on my Fotki!


#6 tonyp

tonyp

    Grand Champion Poster

  • Member at Peace
  • PipPipPipPipPipPipPipPip
  • 15,325 posts
  • Joined: 12-February 07
  • Gender:Male
  • Location:Sanford, FL, land of lizards and big roaches

Posted 02 June 2008 - 06:48 AM

Cool...

Anthony 'Tonyp' Przybylowicz

5/28/50-12/20/21
Requiescat in Pace


#7 JerseyJohn

JerseyJohn

    Jersey John

  • Subscriber
  • PipPipPipPipPipPipPip
  • 4,196 posts
  • Joined: 05-September 07
  • Gender:Male
  • Location:Northern NJ

Posted 02 June 2008 - 06:54 AM

I'm feeling a new IRRA class. :D :D :D :D
 

John Chas Molnar

"Certified Newark Wise Guy since 1984" (retired)
"Certified Tony P Chassis God 2007.2023

Retro Chassis Designer-Builder

Jerseyjohnchassis

blog.jpg


#8 Ron Hershman

Ron Hershman

    Grand Champion Poster

  • Full Member
  • PipPipPipPipPipPipPipPip
  • 22,051 posts
  • Joined: 16-February 06
  • Gender:Male
  • Location:Indyanna

Posted 02 June 2008 - 06:41 PM

Don't start that... some think we have enough now. :laugh2: :laugh2: :laugh2: :laugh2:

#9 dc-65x

dc-65x

    Grand Champion Poster

  • Subscriber
  • PipPipPipPipPipPipPipPip
  • 6,972 posts
  • Joined: 14-February 06
  • Gender:Male
  • Location:Captain Rick: The only vintage slot car nut in SW Oregon?

Posted 02 June 2008 - 09:41 PM

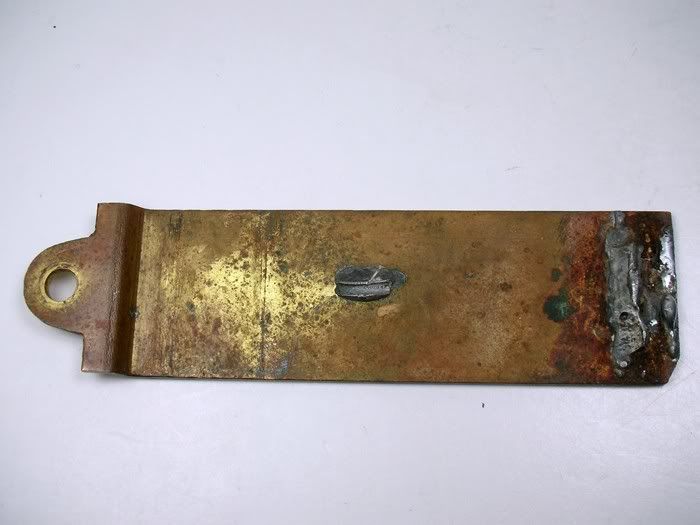
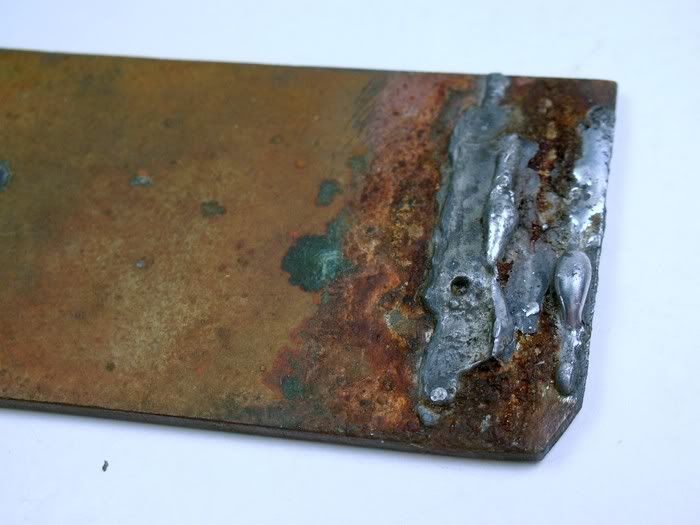
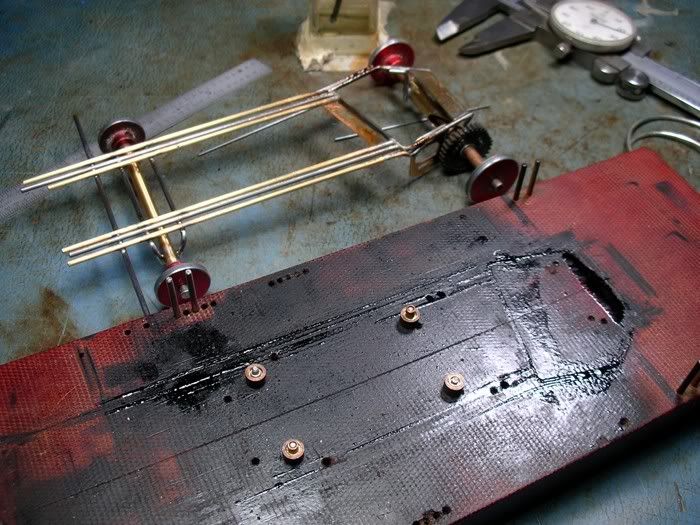
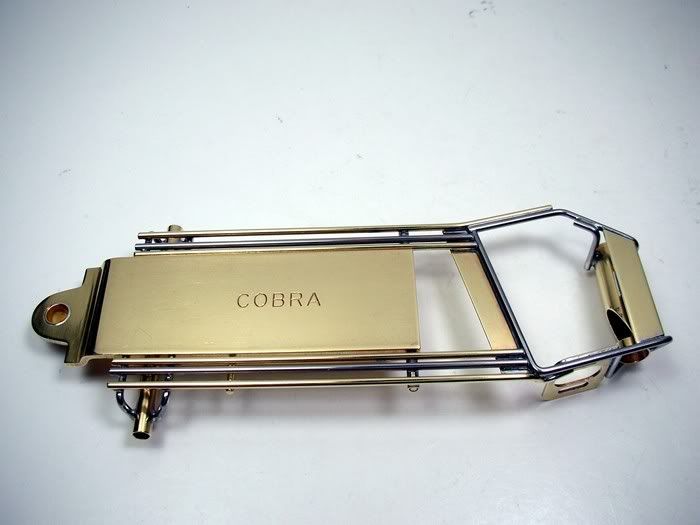
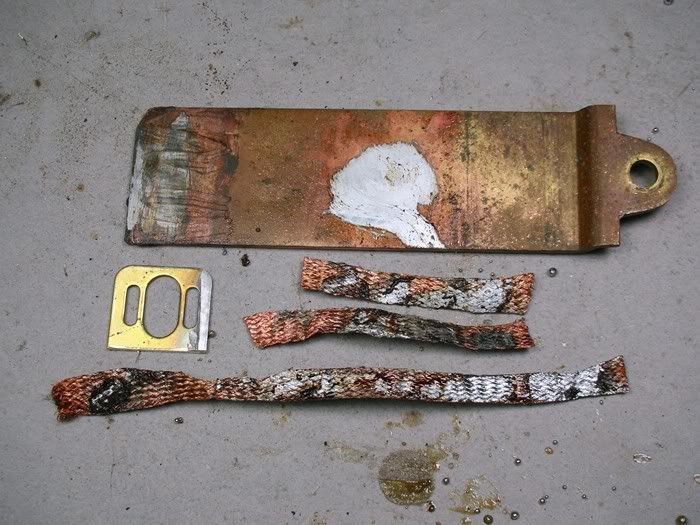
I had to do some solder sucking on the motor bracket so I might as well go after the old drop arm as well. Tony used a 1" Cobra arm and I took one off an old eBay junk chassis (junk except for the drop arm :) ). Here it is in all it's glory... or horror :shok: :

Posted Image

I was worried what I'd find under this mess:

Posted Image

Every time I have a mess like this to clean up I think of our own Greg Wells who turned me on to solder sucking braid. Thanks, Greg. :D :

Posted Image

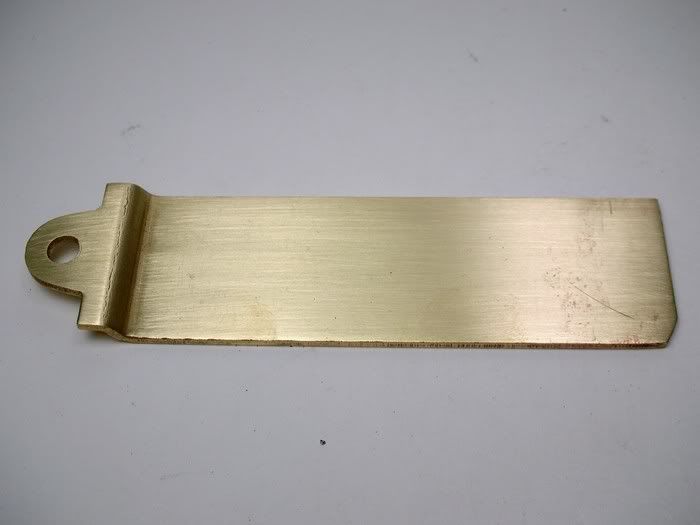
I double back taped the arm down to a piece of cardboard and sanded the pee out of it. It turned out better than I thought it would. I still need to saw 1/4" off the end per Tony P's directions:

Posted Image

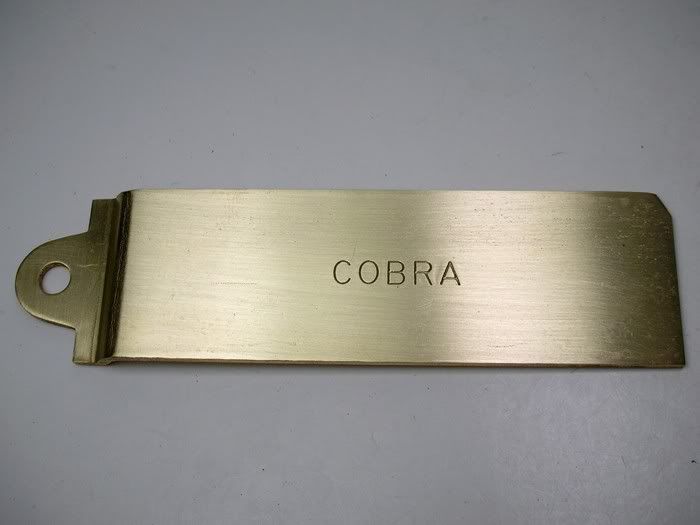
Hmmmmmmmmmmmm... COBRA goodness:

Posted Image

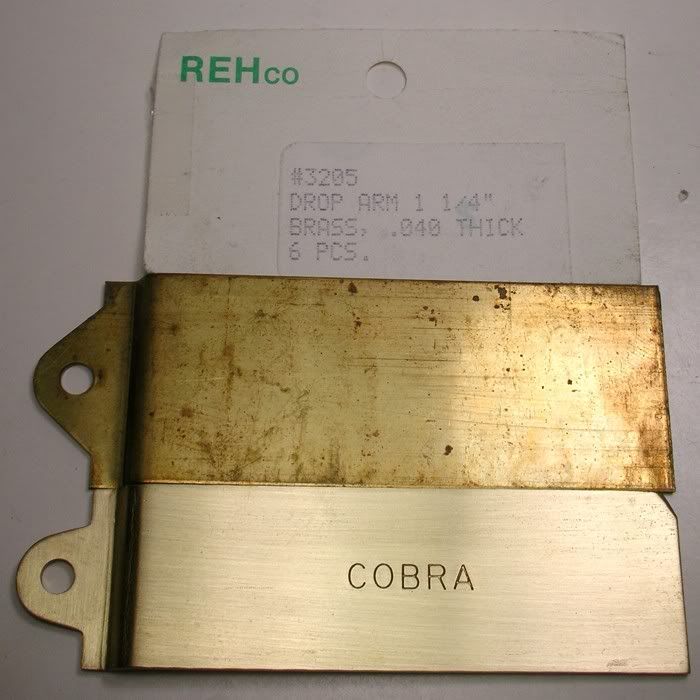
REH still has some similar drop arms today:

Posted Image

You can try to order them with these part numbers for 1/16" thick by the following widths:

7/8" = 3200

15/16" = 3201

1" = 3203

1-1/8" = 3202

1-1/4" = 3204

Onward...

Rick Thigpen
Check out Steve Okeefe's great web site at its new home here at Slotblog:
The Independent Scratchbuilder
There's much more to come...


#10 dc-65x

dc-65x

    Grand Champion Poster

  • Subscriber
  • PipPipPipPipPipPipPipPip
  • 6,972 posts
  • Joined: 14-February 06
  • Gender:Male
  • Location:Captain Rick: The only vintage slot car nut in SW Oregon?

Posted 07 June 2008 - 09:36 PM

I finished through step 7 in Tony's How To article. I spent 6 enjoyable hours absorbed in the project. I must have put that first motor box piece on and off a half a dozen times until I was happy with it:

Posted Image

If you decide to build one for yourself watch out for the motor box measurements in the drawings. They show overall dimensions while the text describes dimensions between bend locations. The first pieces I made from the drawings were too small. Following the text dimensions bend to bend worked fine:

Posted Image


Posted Image

Posted Image

Next up is laying in the main rails.........and all but two are BRASS...........UMMMMMM.....golden goodness :)

Rick Thigpen
Check out Steve Okeefe's great web site at its new home here at Slotblog:
The Independent Scratchbuilder
There's much more to come...


#11 dc-65x

dc-65x

    Grand Champion Poster

  • Subscriber
  • PipPipPipPipPipPipPipPip
  • 6,972 posts
  • Joined: 14-February 06
  • Gender:Male
  • Location:Captain Rick: The only vintage slot car nut in SW Oregon?

Posted 08 June 2008 - 06:38 PM

As I was soldering today visions of the Mike Steube chassis building video kept popping into my head. This chassis is coming together better than any I can remember. Every time he touched the iron to the chassis he added more acid flux. Mike also does a lot of tacking things together and coming back later to resolder. Today, I did too. Here's what the jig looked like when I took the chassis out :shok: ;) :

Posted Image

After scrubbing the chassis with soap and water I hit it with a Dremel and a wire wheel and it cleaned up "real perdy" :) :

Posted Image

Posted Image

Posted Image

So, I'm through step 13 in the how to article. I've got about 16 hours in it so far. I bet Tony P would have 16 chassis done by now :blink: :laugh2: . Oh well, I know I'm slow but I'm having fun :) and I can't recommend Mike's video highly enough. If you scratch build you should own it ;) .

Onward to step 14..............

Rick Thigpen
Check out Steve Okeefe's great web site at its new home here at Slotblog:
The Independent Scratchbuilder
There's much more to come...


#12 TSR

TSR

    The Dokktor is IN

  • Full Member
  • PipPipPipPipPipPipPipPip
  • 42,299 posts
  • Joined: 02-February 06
  • Gender:Male
  • Location:Marxifornia

Posted 08 June 2008 - 07:38 PM

Lovely stuff... :)

Philippe de Lespinay


#13 JerseyJohn

JerseyJohn

    Jersey John

  • Subscriber
  • PipPipPipPipPipPipPip
  • 4,196 posts
  • Joined: 05-September 07
  • Gender:Male
  • Location:Northern NJ

Posted 08 June 2008 - 09:11 PM

I finished through step 7 in Tony's How To article. I spent 6 enjoyable hours absorbed in the project. I must have put that first motor box piece on and off a half a dozen times until I was happy with it:
Posted Image

And you're selling the motor boxes for how much? :laugh2: :laugh2:
 

John Chas Molnar

"Certified Newark Wise Guy since 1984" (retired)
"Certified Tony P Chassis God 2007.2023

Retro Chassis Designer-Builder

Jerseyjohnchassis

blog.jpg


#14 dc-65x

dc-65x

    Grand Champion Poster

  • Subscriber
  • PipPipPipPipPipPipPipPip
  • 6,972 posts
  • Joined: 14-February 06
  • Gender:Male
  • Location:Captain Rick: The only vintage slot car nut in SW Oregon?

Posted 08 June 2008 - 09:12 PM

Hi Philippe,

Thank you. Mike's video is really a help. Images of what he was doing kept popping into my head as I was building.

Rick

Rick Thigpen
Check out Steve Okeefe's great web site at its new home here at Slotblog:
The Independent Scratchbuilder
There's much more to come...


#15 dc-65x

dc-65x

    Grand Champion Poster

  • Subscriber
  • PipPipPipPipPipPipPipPip
  • 6,972 posts
  • Joined: 14-February 06
  • Gender:Male
  • Location:Captain Rick: The only vintage slot car nut in SW Oregon?

Posted 08 June 2008 - 09:17 PM

And you're selling the motor boxes for how much? :laugh2: :laugh2:

Hi John,

Nothing for sale yet. When I retire in a few years, we'll see. For now it's

MINE! :D :D :D :D WEEEEEEEEEEEEE!!!!!!!!!

Rick Thigpen
Check out Steve Okeefe's great web site at its new home here at Slotblog:
The Independent Scratchbuilder
There's much more to come...


#16 dc-65x

dc-65x

    Grand Champion Poster

  • Subscriber
  • PipPipPipPipPipPipPipPip
  • 6,972 posts
  • Joined: 14-February 06
  • Gender:Male
  • Location:Captain Rick: The only vintage slot car nut in SW Oregon?

Posted 22 June 2008 - 07:42 PM

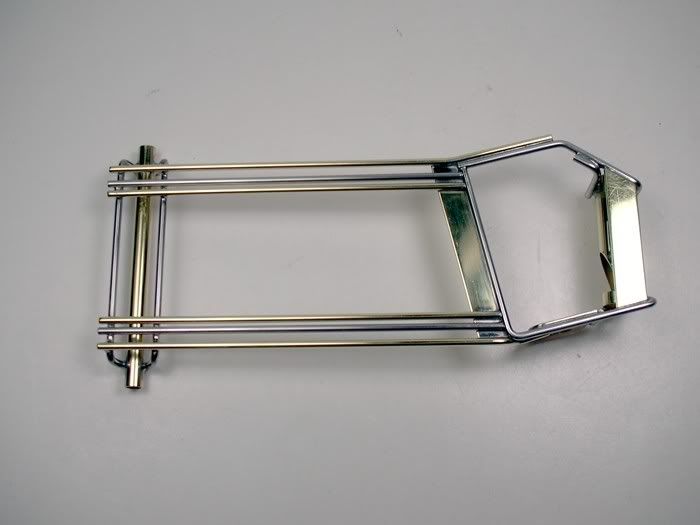
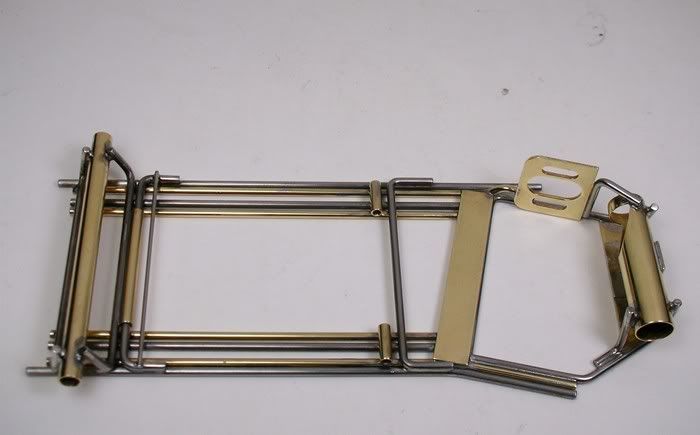
Progress so far is a drop arm:

Posted Image

Posted Image

The plumber rails:

Posted Image

Posted Image

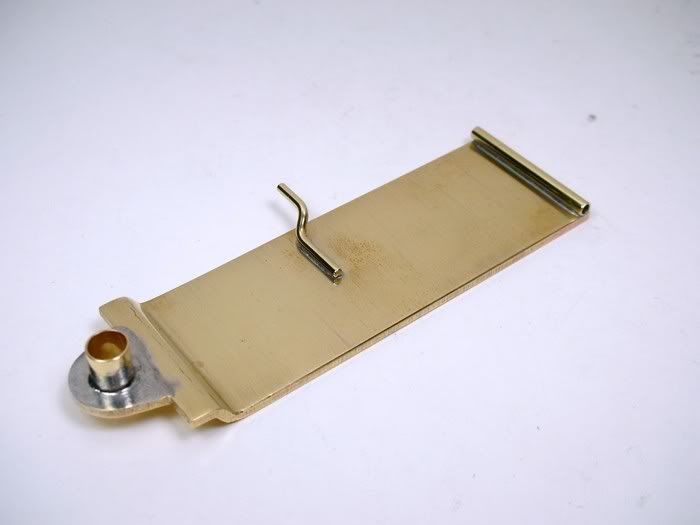
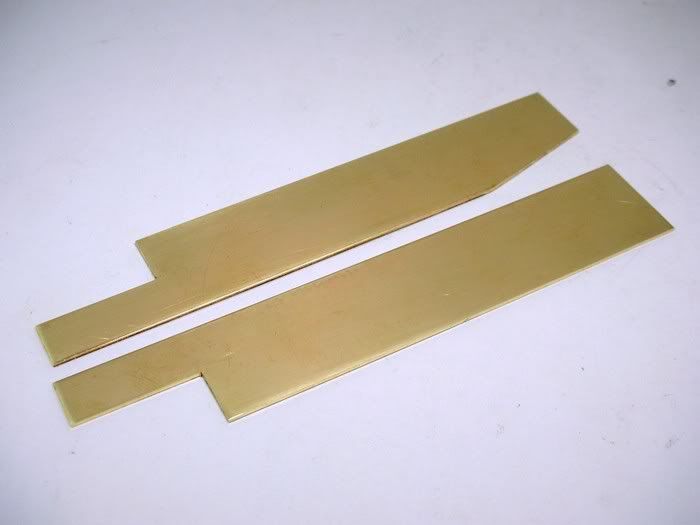
And pans cut from K&S brass sheet:

Posted Image

I'm up to step number 26 in Tony's article and getting close to finishing the chassis. Baby steps...."Inch by inch life's a cinch, mile by mile life's a pile" :) .

Rick Thigpen
Check out Steve Okeefe's great web site at its new home here at Slotblog:
The Independent Scratchbuilder
There's much more to come...


#17 dc-65x

dc-65x

    Grand Champion Poster

  • Subscriber
  • PipPipPipPipPipPipPipPip
  • 6,972 posts
  • Joined: 14-February 06
  • Gender:Male
  • Location:Captain Rick: The only vintage slot car nut in SW Oregon?

Posted 27 June 2008 - 06:16 PM

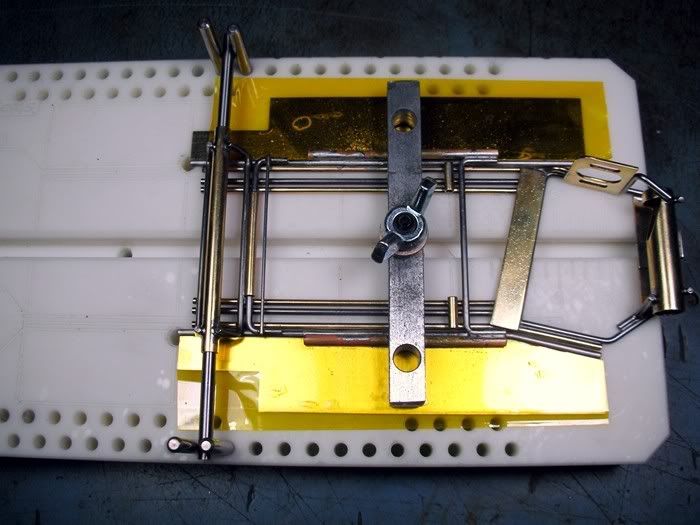
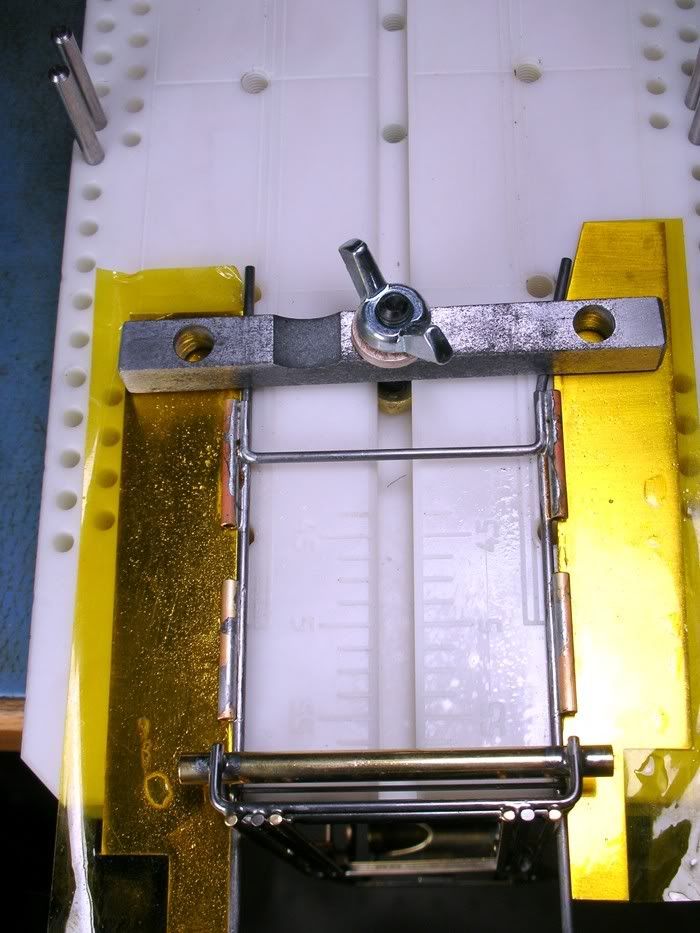
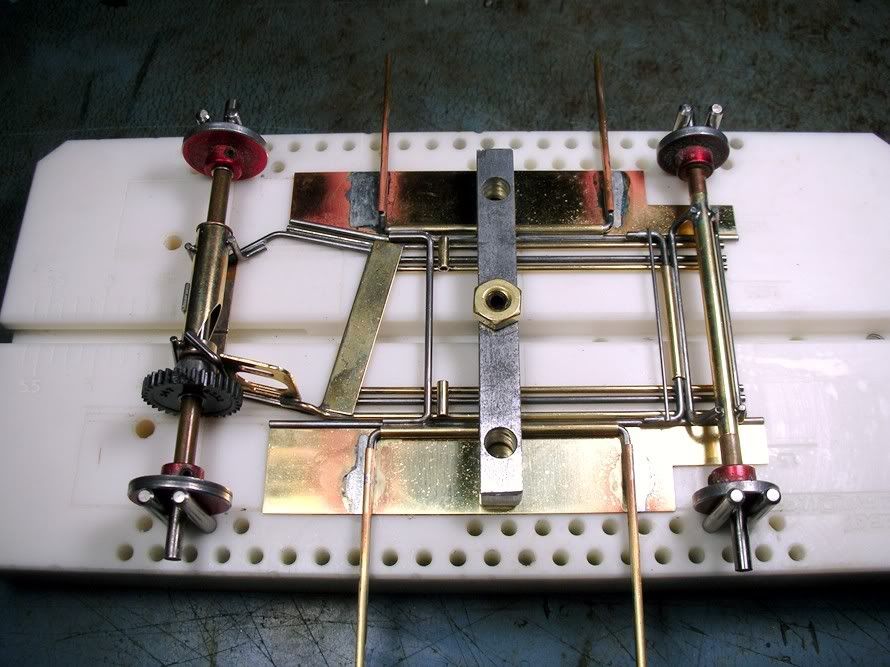
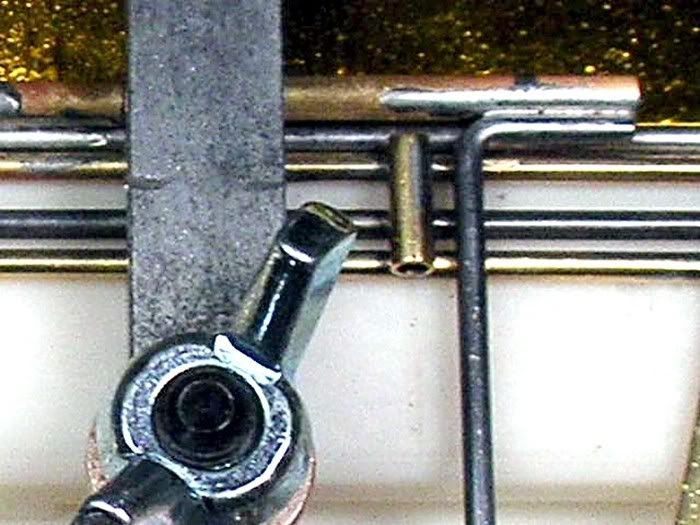
I'm trying out my new Rick's chassis jig. I need to clamp the chassis center section and plumber rails down flat against the block. Then slide the pans against the plumber rails and set the pan hinge tubes ON TOP of the pans. I'm using Rick's guide tongue stud and wing nut and a 5/16" wide clamp I made. The clamp also sets the space between the tubes (notice the funny transparent amber colored tape on the pans :blink: more on that later ):

Posted Image

I couldn't get the tip of the iron between the clamp and drop arm pivot tubes so I just soldered the pan tubes to the plumber cross piece for now:
Posted Image

To solder the rest of the pan tube I clamped the plumber rails only and let center section hang down off the end of the bench (This new jig is coming in handy :) ).

Posted Image

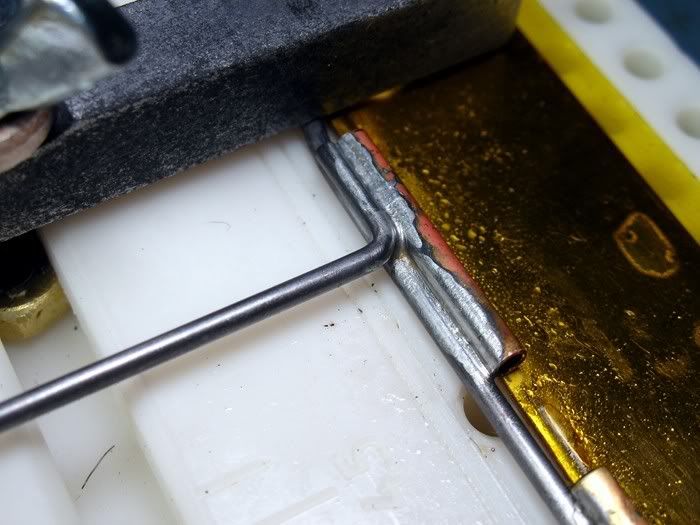
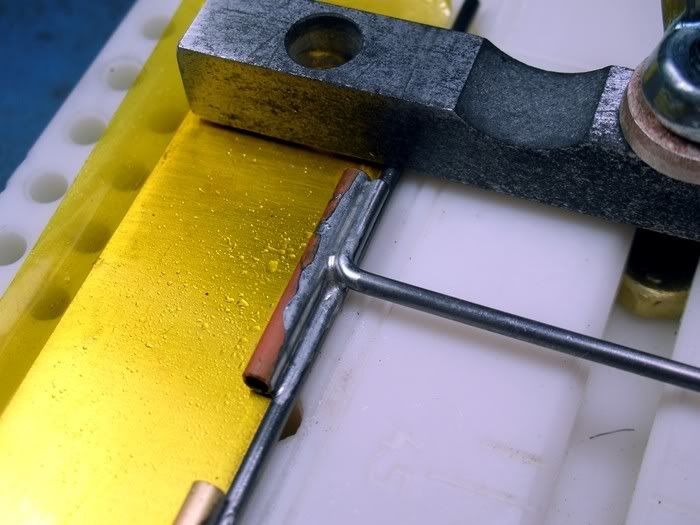
I used Mike Steube's technique of soldering the tube in halves, watching the color of the solder so that it didn't melt the full length of the joint. It worked great. THANKS MIKE! :) ( You do have Mike's chassis building video right?)
Posted Image

Posted Image

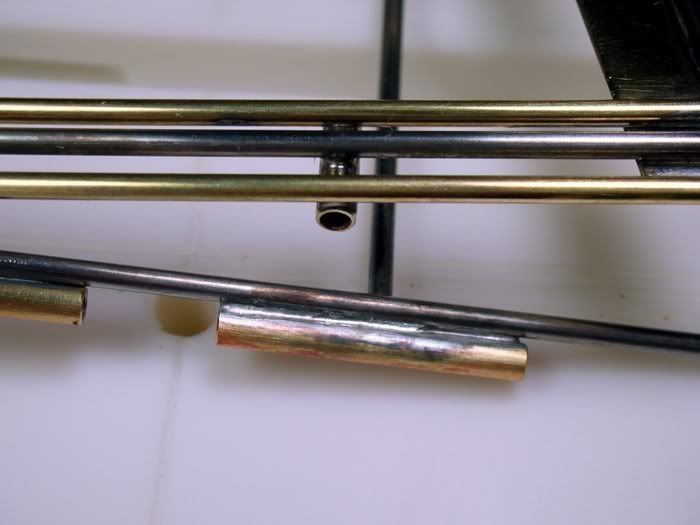
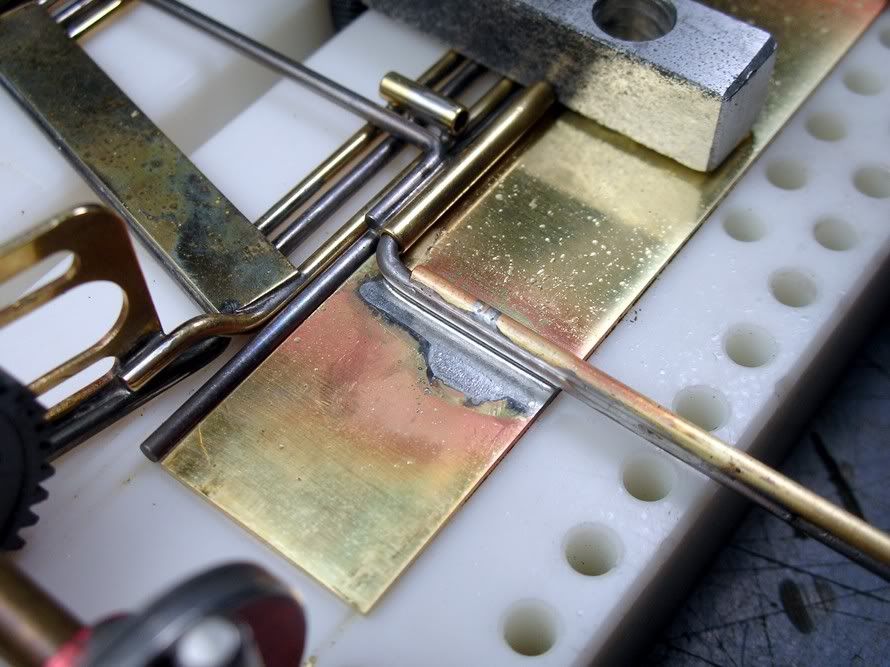
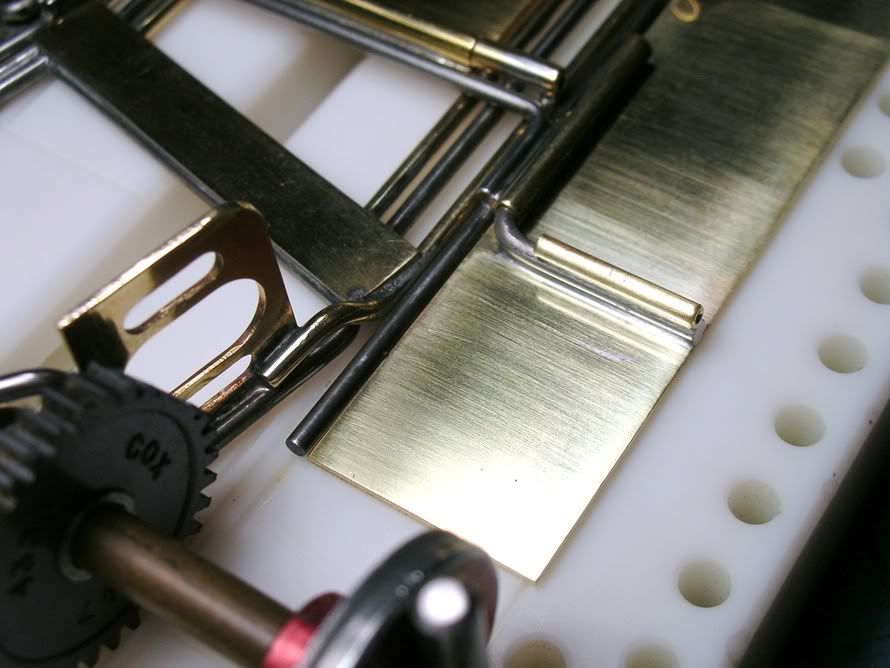
The pans do not have a cut out for the hinge tubes, they sit on top of the pans. The first time I soldered the pan tubes onto the plumber rails some solder wicked down and also soldered the tubes onto the pans :shok: :blush: . I hate it when that happens :rolleyes: . Now for the funny colored tape. It goes by a trade name of Kapton and is very high temperature and very thin. You can Google Kapton and find out were to get it cheapest. It is somewhat expensive but I think the one roll I bought should last the rest of my life. Here is a link to one source:

Kapton Tape

Here is the bottom of the pan hinge tube. See where the solder wicked down? It would have soldered the tube to the pan again for sure. The Kapton tape didn't even have any marks in it from the heat of soldering :) :

Posted Image

Time to spiff up the collateral damage with some sanding and polishing :shok: :laugh2: ;)

Rick Thigpen
Check out Steve Okeefe's great web site at its new home here at Slotblog:
The Independent Scratchbuilder
There's much more to come...


#18 Jairus

Jairus

    Body Painter Extraordinaire

  • Subscriber
  • PipPipPipPipPipPipPipPip
  • 10,174 posts
  • Joined: 16-February 06
  • Gender:Male
  • Location:Salem, OR

Posted 27 June 2008 - 06:44 PM

Excellent idea... but would it not have been a simpler route to have used a strip of K&S aluminum? ;)

Jairus H Watson - Artist
Need something painted, soldered, carved, or killed? - jairuswtsn@aol.com
www.slotcarsmag.com

www.jairuswatson.net
http://www.ratholecustoms.com
Check out some of the cool stuff on my Fotki!


#19 dc-65x

dc-65x

    Grand Champion Poster

  • Subscriber
  • PipPipPipPipPipPipPipPip
  • 6,972 posts
  • Joined: 14-February 06
  • Gender:Male
  • Location:Captain Rick: The only vintage slot car nut in SW Oregon?

Posted 27 June 2008 - 07:08 PM

Hi Jairus,

For me, I perfer to put a layer of tape on the actual part I'm going to be using. It also gives me a .003" spacing between the pan and hinge tube. There are lots of different ways to do the same job ;) . I've seen people use grease or oil on the pan to keep the solder from sticking but I've never seen anyone use Kapton tape so I thought I'd share it :) .
Rick Thigpen
Check out Steve Okeefe's great web site at its new home here at Slotblog:
The Independent Scratchbuilder
There's much more to come...


#20 68Caddy

68Caddy

    The Direktor

  • Full Member
  • PipPipPipPipPipPipPipPip
  • 10,546 posts
  • Joined: 17-March 07
  • Gender:Male
  • Location:CA, by the beach of course

Posted 27 June 2008 - 09:27 PM

dc-65x

Have to say every time I look at your projects makes me sick, love all your projects makes me want to crawl into a box and cry. :wub:
I so happy you are doing this cars you are a Master . ;)
Thank you.


Nesta aka 68CadPosted Imagedy
- Gabriel
Nesta Szabo

In this bright future you can't forget your past.
BMW (Bob Marley and the Wailers)

United we stand and divided we fall, the Legends are complete.
I'm racing the best here at BP but Father time is much better then all of us united.
Not a snob in this hobby, after all it will be gone, if we keep on going like we do, and I have nothing to prove so I keep on posting because I have nothing to gain.
It's our duty to remember the past so we can have a future.

Pistol Pete you will always be in my memory.

#21 dc-65x

dc-65x

    Grand Champion Poster

  • Subscriber
  • PipPipPipPipPipPipPipPip
  • 6,972 posts
  • Joined: 14-February 06
  • Gender:Male
  • Location:Captain Rick: The only vintage slot car nut in SW Oregon?

Posted 28 June 2008 - 12:07 PM

Thanks you Nesta but I'm just an enthusiast :) . The real "Masters" are the Pro's that built the originals. I'm just trying to do their original creations justice.........and having fun trying! :D

Rick Thigpen
Check out Steve Okeefe's great web site at its new home here at Slotblog:
The Independent Scratchbuilder
There's much more to come...


#22 68Caddy

68Caddy

    The Direktor

  • Full Member
  • PipPipPipPipPipPipPipPip
  • 10,546 posts
  • Joined: 17-March 07
  • Gender:Male
  • Location:CA, by the beach of course

Posted 28 June 2008 - 01:25 PM

dc-65x

Still, I always enjoy your care for detail and craftsmanship, still makes me crawl into my little box. :blush:
Love to drive up the cost and to see how you create this wonderful cars, maybe you will grant me to come and visit you one day? ;)

Thanks

Nesta aka 68CadPosted Imagedy
- Gabriel
Nesta Szabo

In this bright future you can't forget your past.
BMW (Bob Marley and the Wailers)

United we stand and divided we fall, the Legends are complete.
I'm racing the best here at BP but Father time is much better then all of us united.
Not a snob in this hobby, after all it will be gone, if we keep on going like we do, and I have nothing to prove so I keep on posting because I have nothing to gain.
It's our duty to remember the past so we can have a future.

Pistol Pete you will always be in my memory.

#23 dc-65x

dc-65x

    Grand Champion Poster

  • Subscriber
  • PipPipPipPipPipPipPipPip
  • 6,972 posts
  • Joined: 14-February 06
  • Gender:Male
  • Location:Captain Rick: The only vintage slot car nut in SW Oregon?

Posted 29 June 2008 - 06:40 PM

Back into my handy Rick's jig to hang the pans:

Posted Image

I made some extra long L-shaped piano wire pan mounts and soldered the body mount pin tubes on top first lined up in a vise. Then I soldered the pan mounts to the pans. I could heat everything up together on the pan and the extra length kept the pin tubes from falling off. Here it is right after soldering:

Posted Image

and spiffed up a bit:

Posted Image

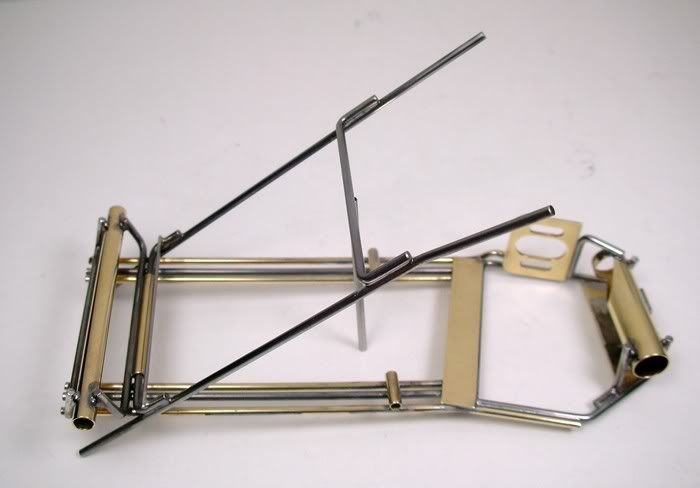
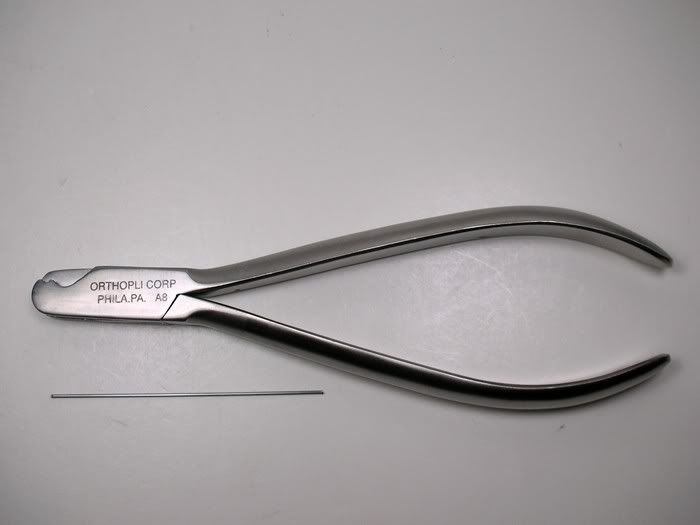
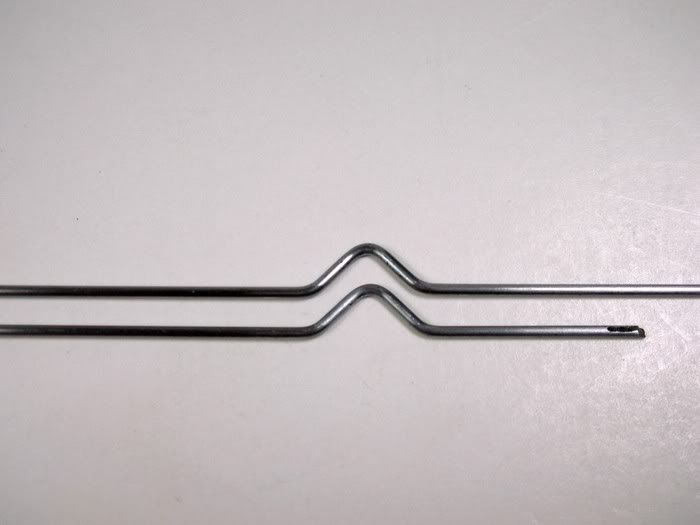
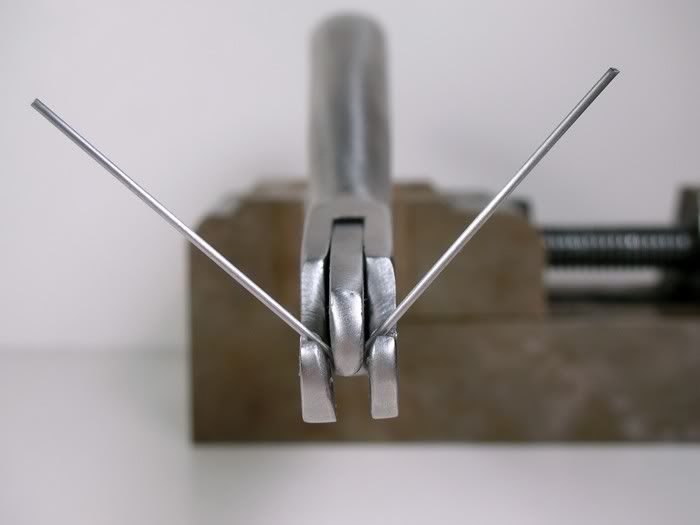
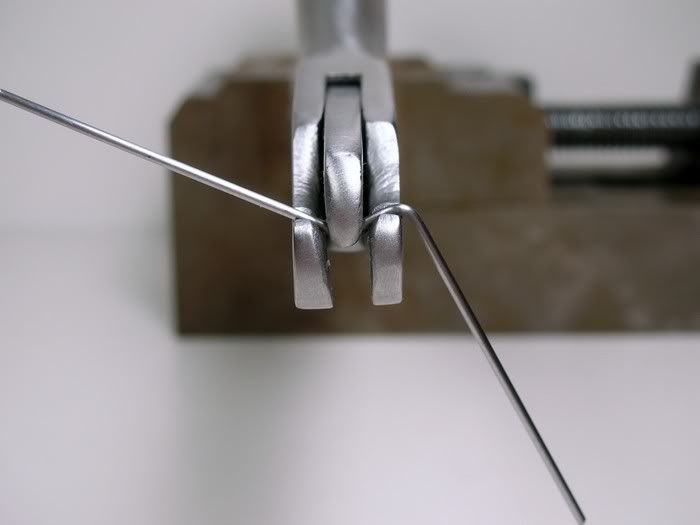
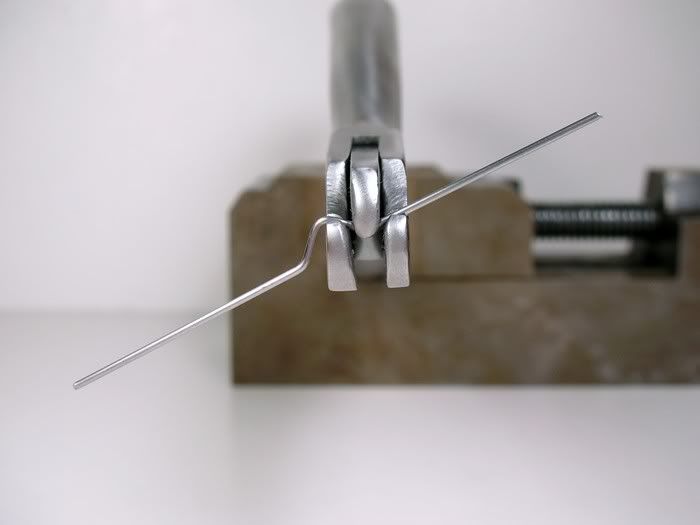
All that's left are the plumber up and down stops and the pan down stops. For the pan down stops I bought a neato tool that I heard Bob Emott used to use, orthrodontic lingual bar pliers:

Posted Image

I made these up in three quick simple bends:

Posted Image

Posted Image

Posted Image

Posted Image

I've seen this type of plier on Ebay for $14.95. I bought my made in the USA pliers here:

#067 - Lingual Bar and Face Bow Bending Plier

They list for $70 or something but the VP Bill Jr. says he will sell them to hobby crazy slot car guys for $29.

You can also just make a mark on your needle nose pliers and make all the bends there if that works for you ;) . It doesn't for me so :blink: I'm out $29 for these fancy lad pliers :laugh2: .

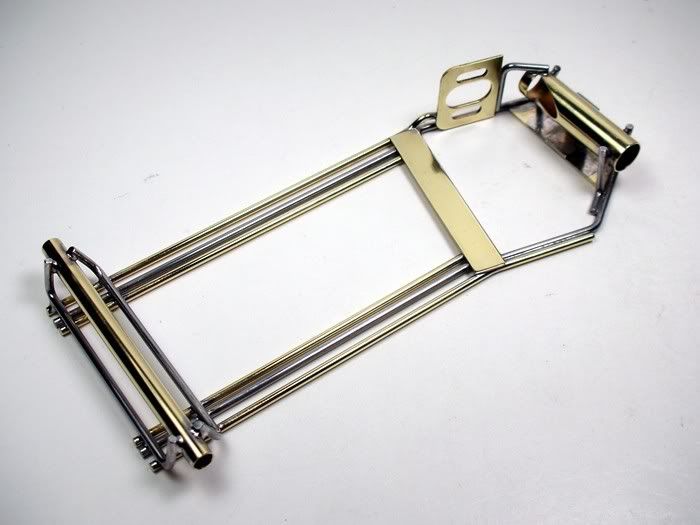
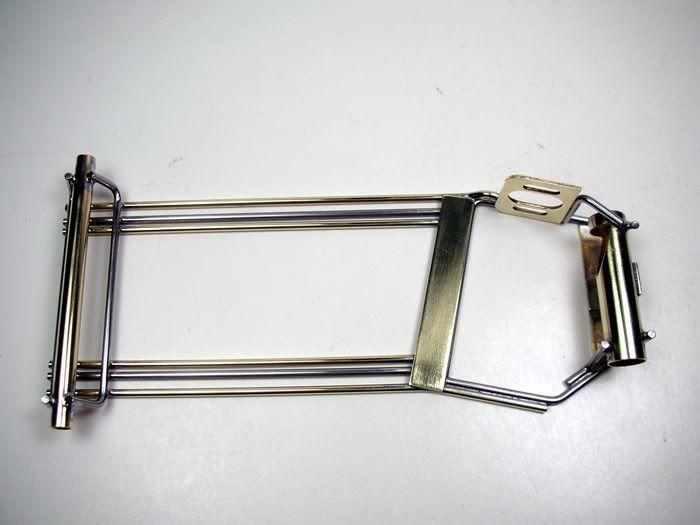
The finished chassis is in the tumbler to put the buff to it. Hmmmmmmmmmmm shiny brass :) .

Onward.........

Rick Thigpen
Check out Steve Okeefe's great web site at its new home here at Slotblog:
The Independent Scratchbuilder
There's much more to come...


#24 edworth

edworth

    Race Leader

  • Full Member
  • PipPipPipPipPip
  • 760 posts
  • Joined: 29-June 06
  • Gender:Male
  • Location:Virginia

Posted 29 June 2008 - 06:56 PM

Beautiful work as always and thx for the tip on those cool (Made in U.S.A.) pliers. A number of items in their line could prove helpful for a serious hobbyist.
Ed Worthington
C.A.R.S. Vintage Club
“We don't stop playing because we grow old; we grow old because we stop playing.”

#25 tonyp

tonyp

    Grand Champion Poster

  • Member at Peace
  • PipPipPipPipPipPipPipPip
  • 15,325 posts
  • Joined: 12-February 07
  • Gender:Male
  • Location:Sanford, FL, land of lizards and big roaches

Posted 30 June 2008 - 06:57 AM

I have the same pliers, I asked my dentist about them and he had an old pair he gave me.

Rick yu are going to give me that chassis when it is done I hope. LOL.....

Anthony 'Tonyp' Przybylowicz

5/28/50-12/20/21
Requiescat in Pace


Electric Dreams Online Shop