Jump to content


Photo

Part 2: A tale of two Harveys


  • Please log in to reply
52 replies to this topic

#1 dc-65x

dc-65x

    Grand Champion Poster

  • Subscriber
  • PipPipPipPipPipPipPipPip
  • 6,976 posts
  • Joined: 14-February 06
  • Gender:Male
  • Location:Captain Rick: The only vintage slot car nut in SW Oregon?

Posted 05 November 2017 - 09:26 PM

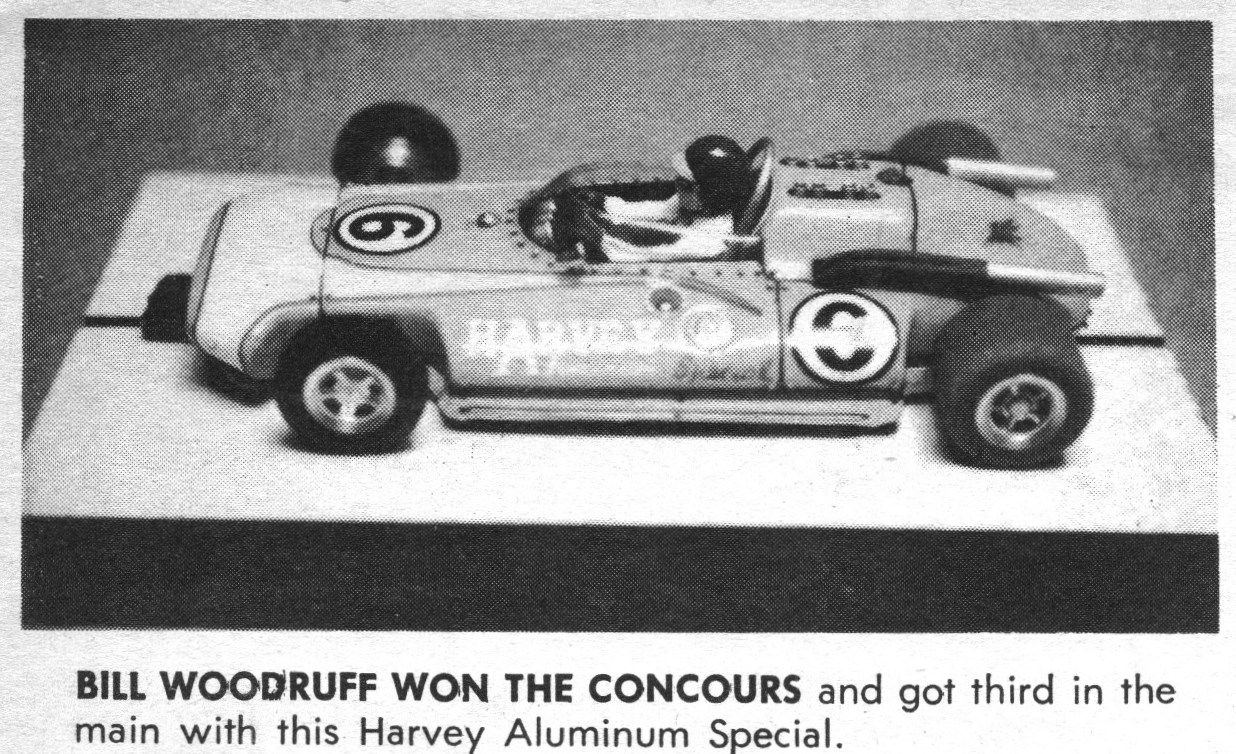
The "A tale of two Harveys" saga began when I acquired a Lancer and Dynamic version of the iconic Harvey Aluminum Special body. They are among my favorite 1960's bodies but they were in sad shape.


The link below shows the the bodies "reincarnation" and lots of cool period article about the full size racer:


A tale of two Harveys


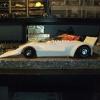
I've been waffling on how to build up each of these bodies. The Lancer is pretty much a scale body and the Dynamic is a "Low and Wide" racer version. Then I found this period Dynamic bodied racer:


Harvey%20eBay%20Find%2016.jpg


Harvey%20eBay%20Find%2015.jpg


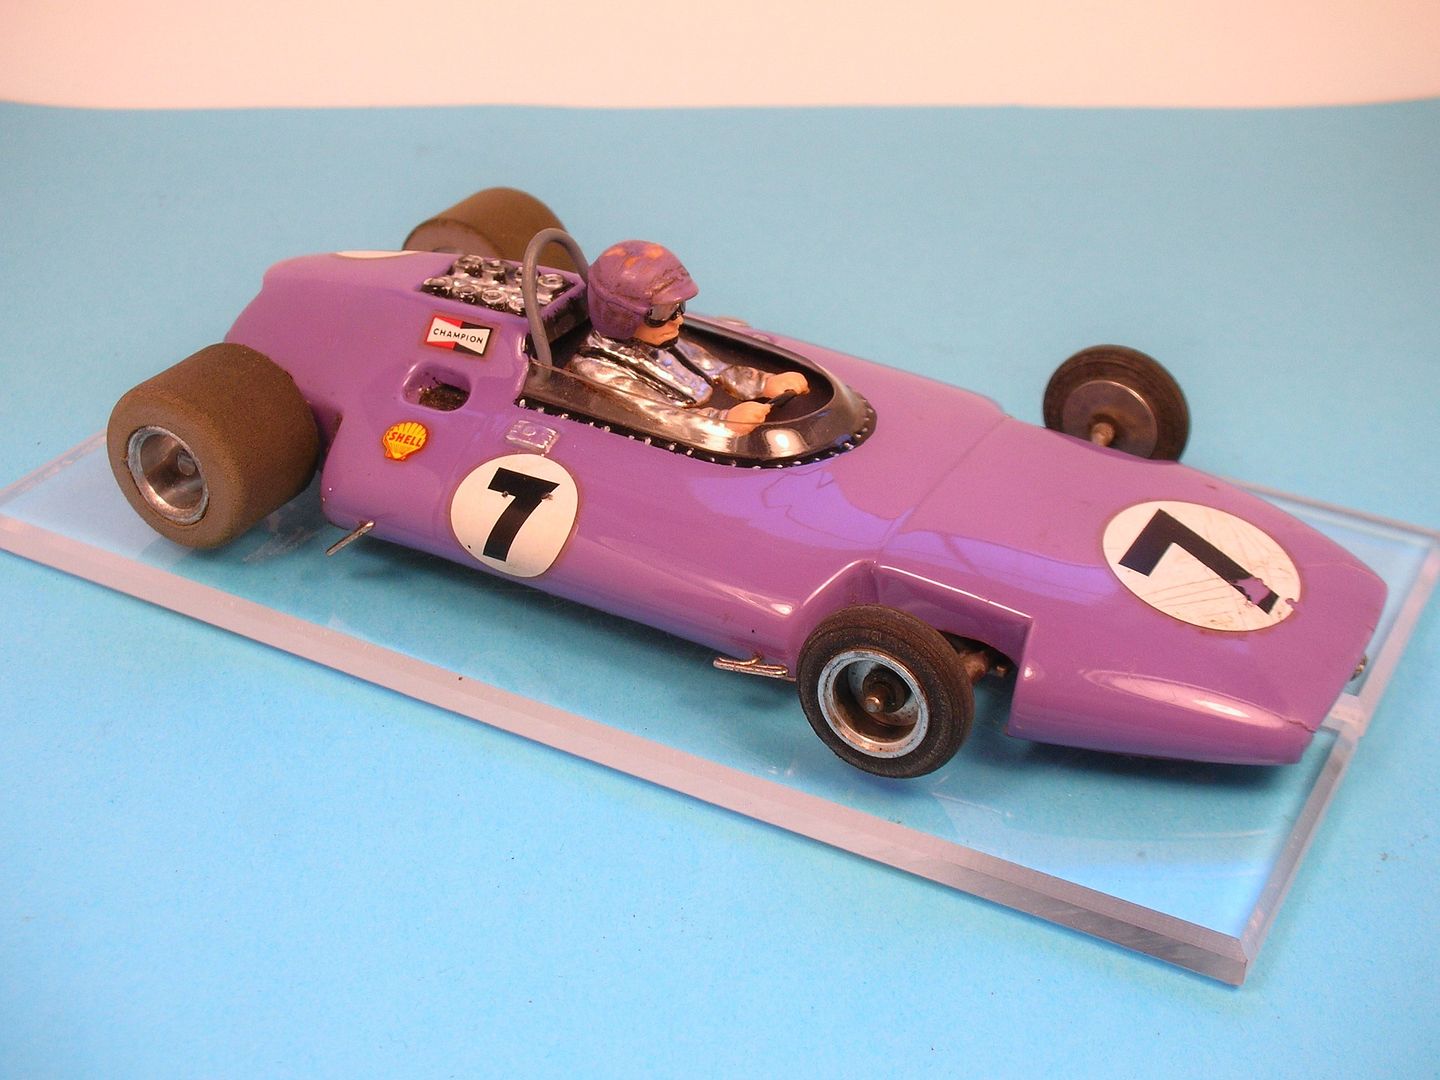
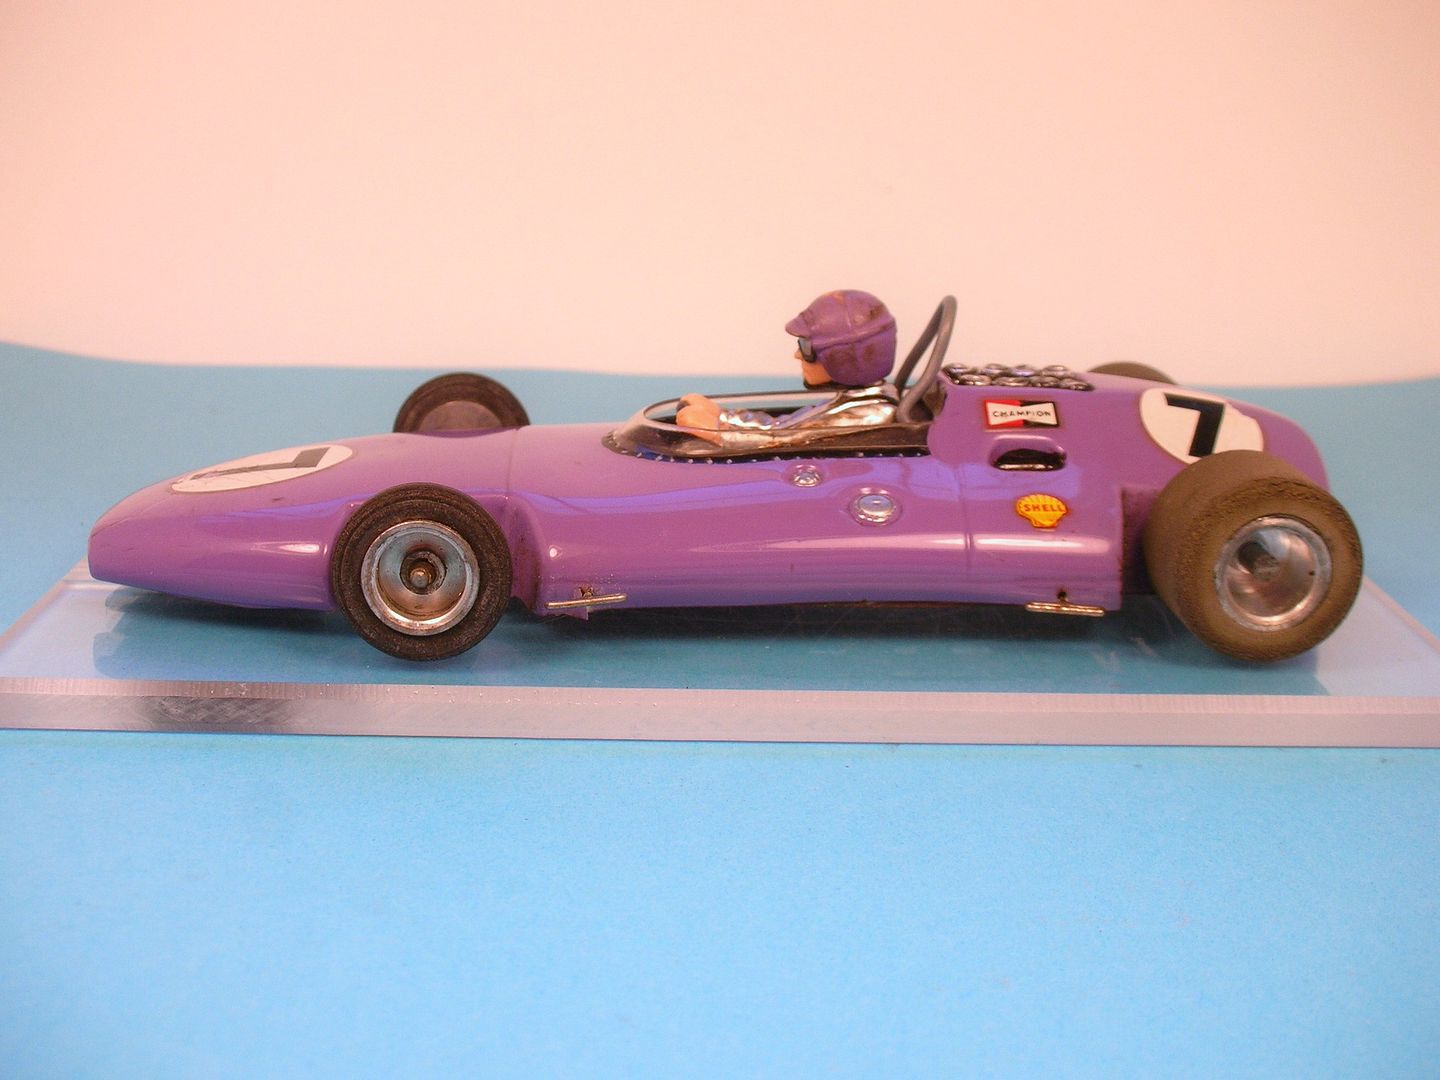
"Floating pans", wide grey rear tires and a Champion powerhouse motor:


Harvey%20eBay%20Find%2010.jpg


Harvey%20eBay%20Find%2011.jpg


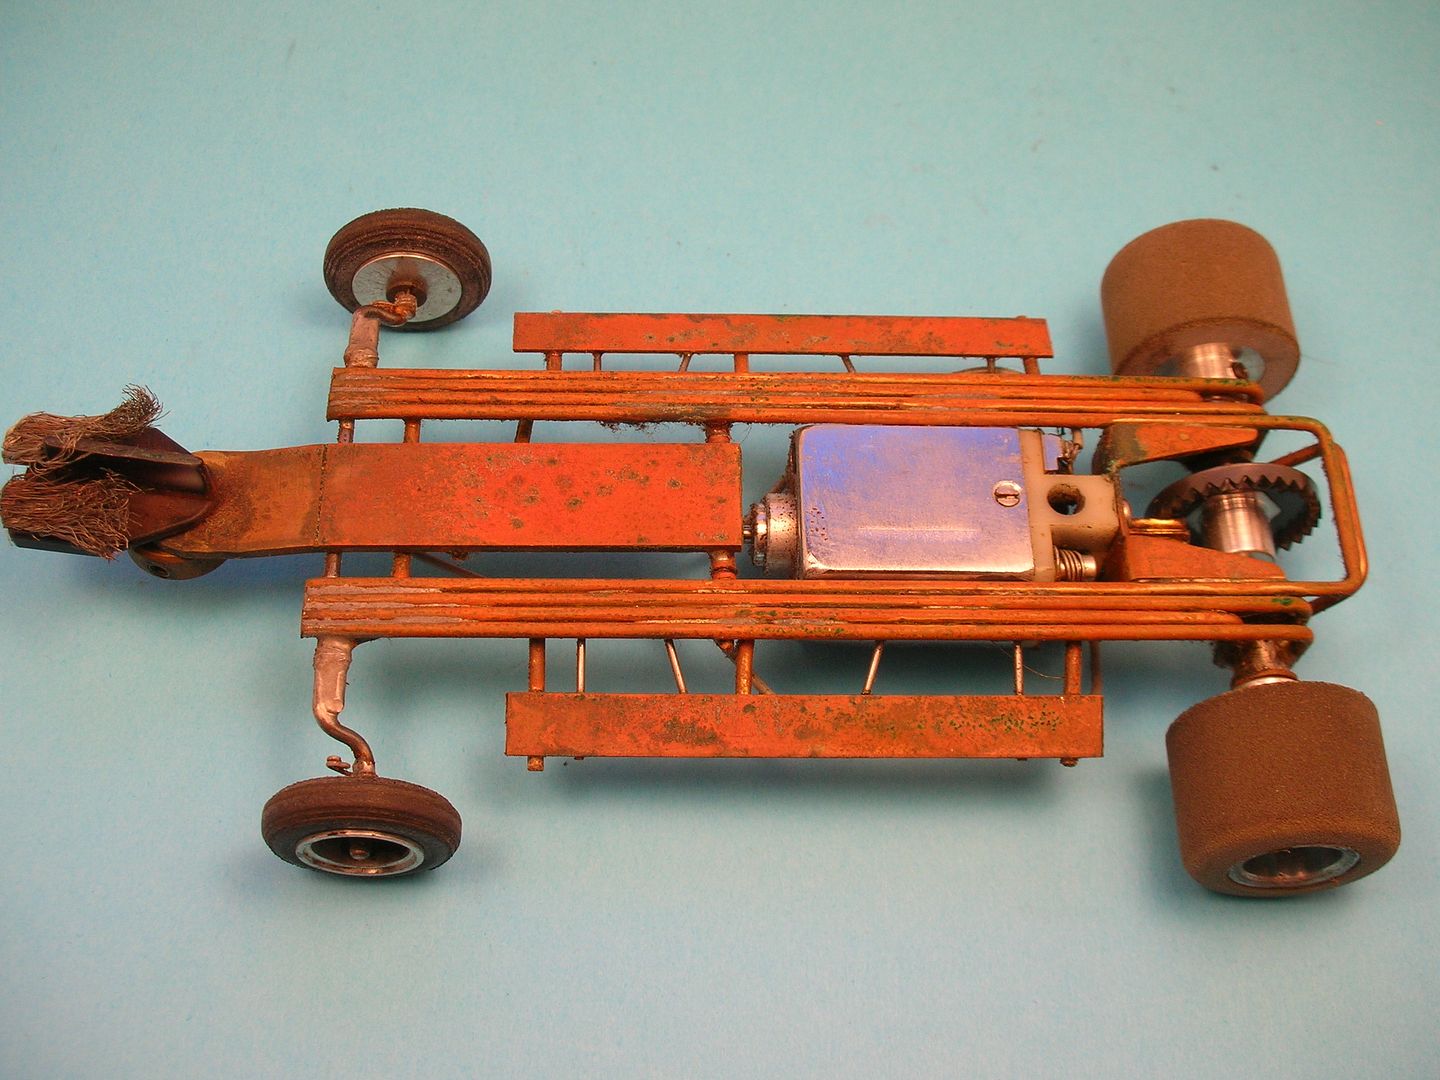
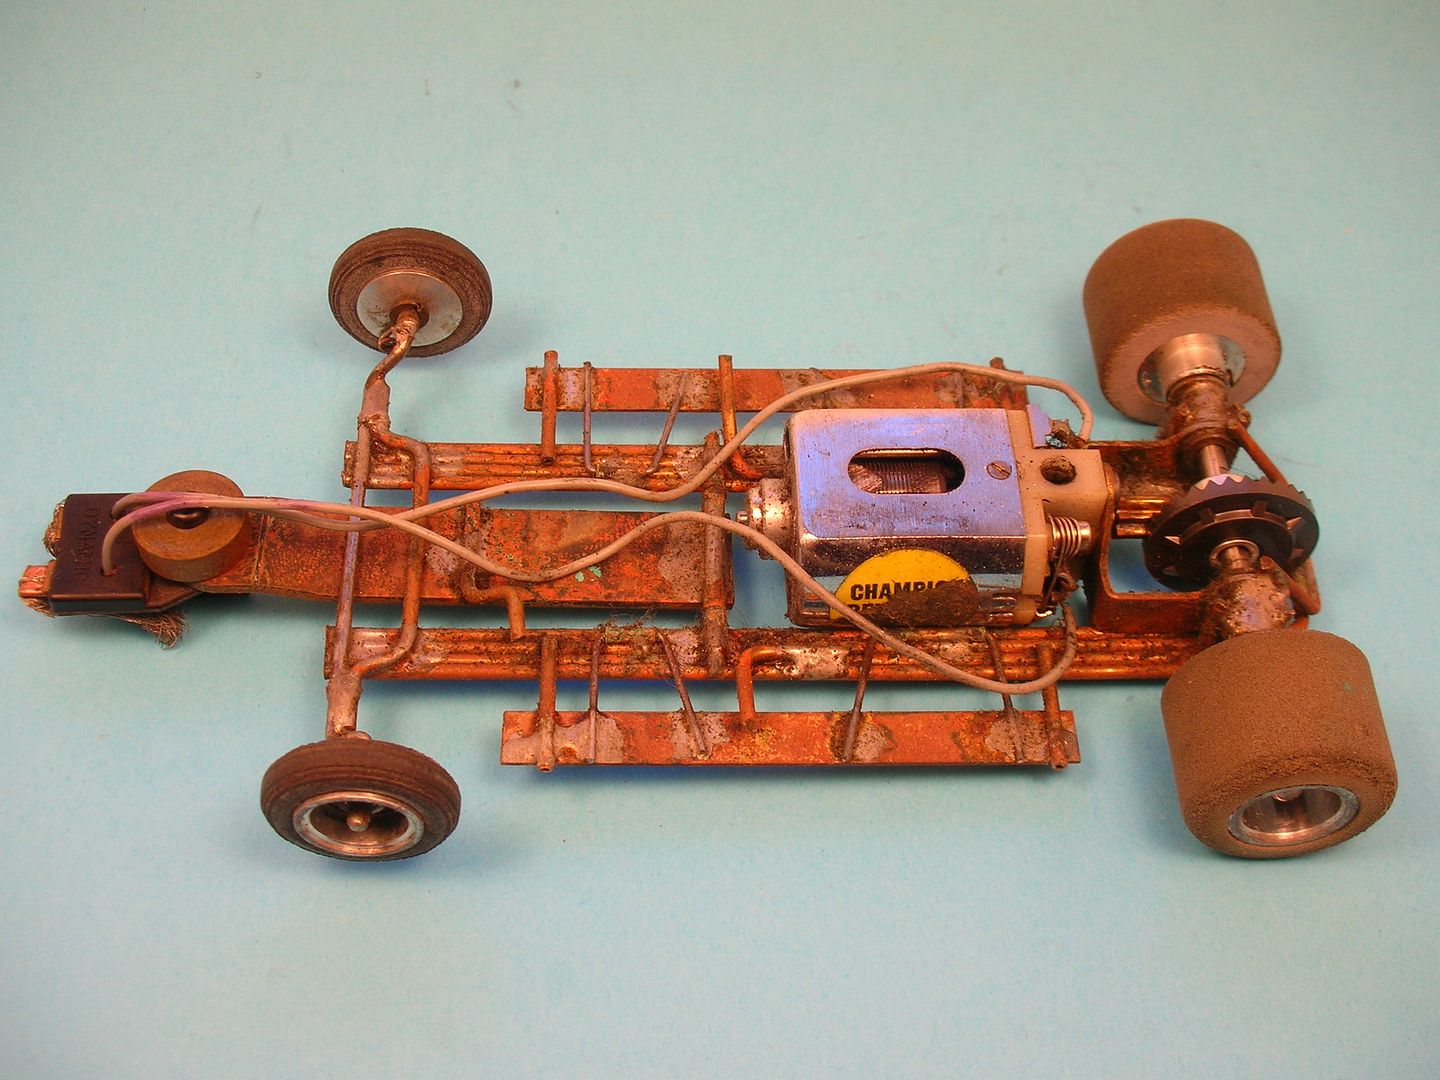
This little period "shop car" has become my inspiration for my Dynamic Harvey build and the Champion 517 motor will be rebuilt and power my new build. The roller then goes to my buddy Rodney for a restoration so it will live again.


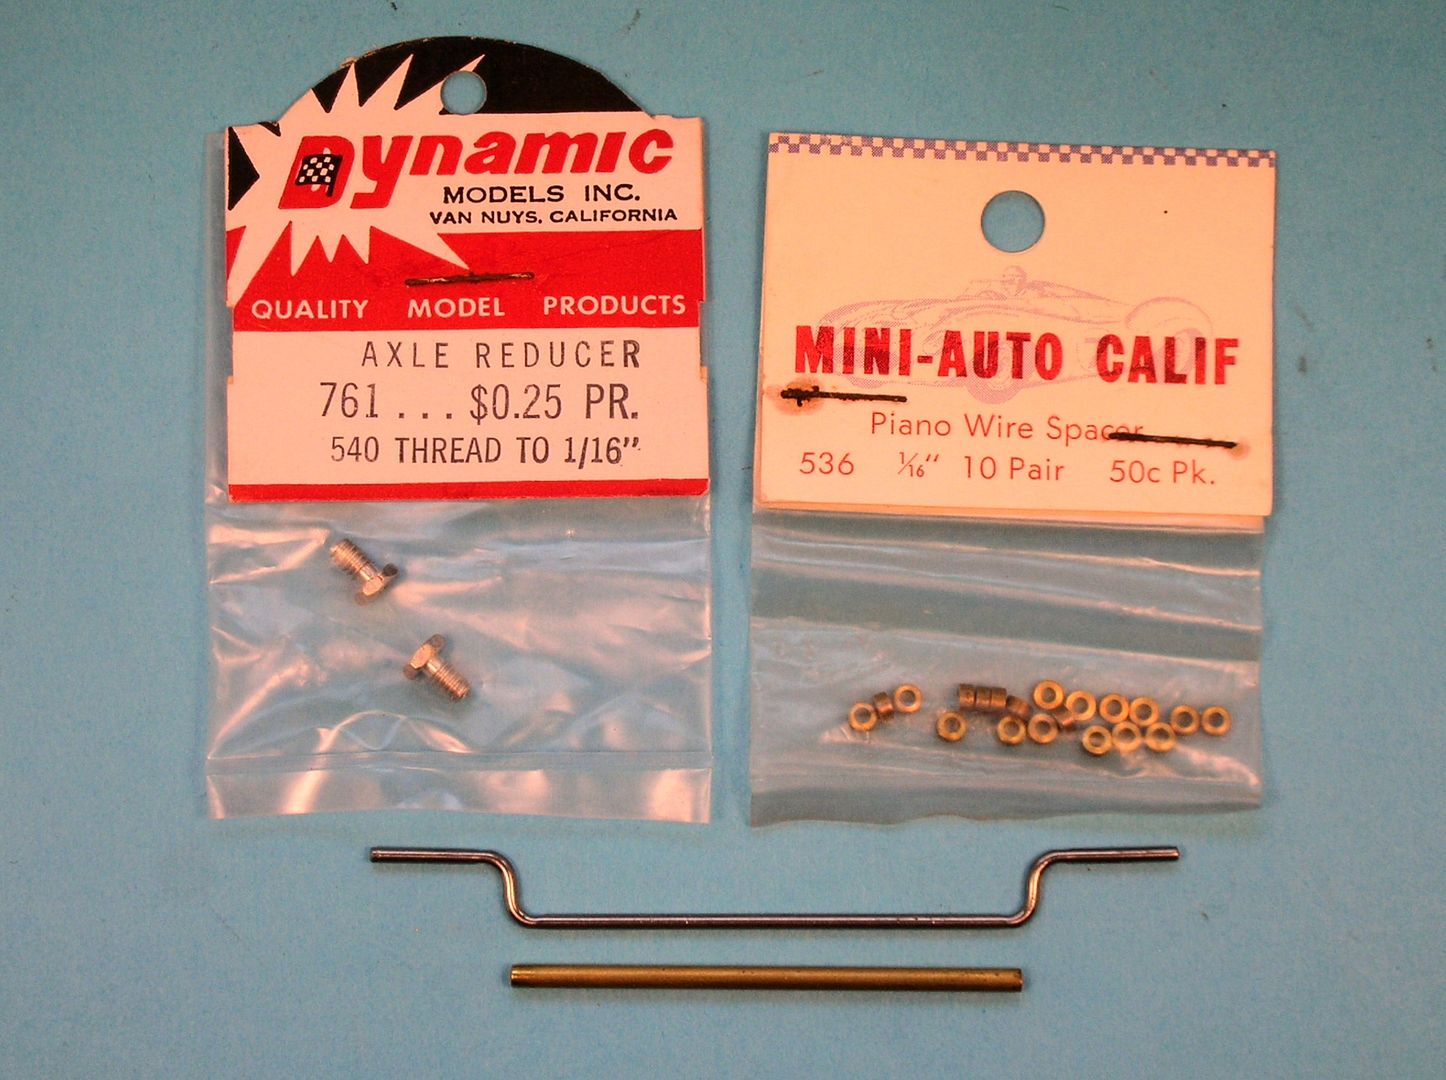
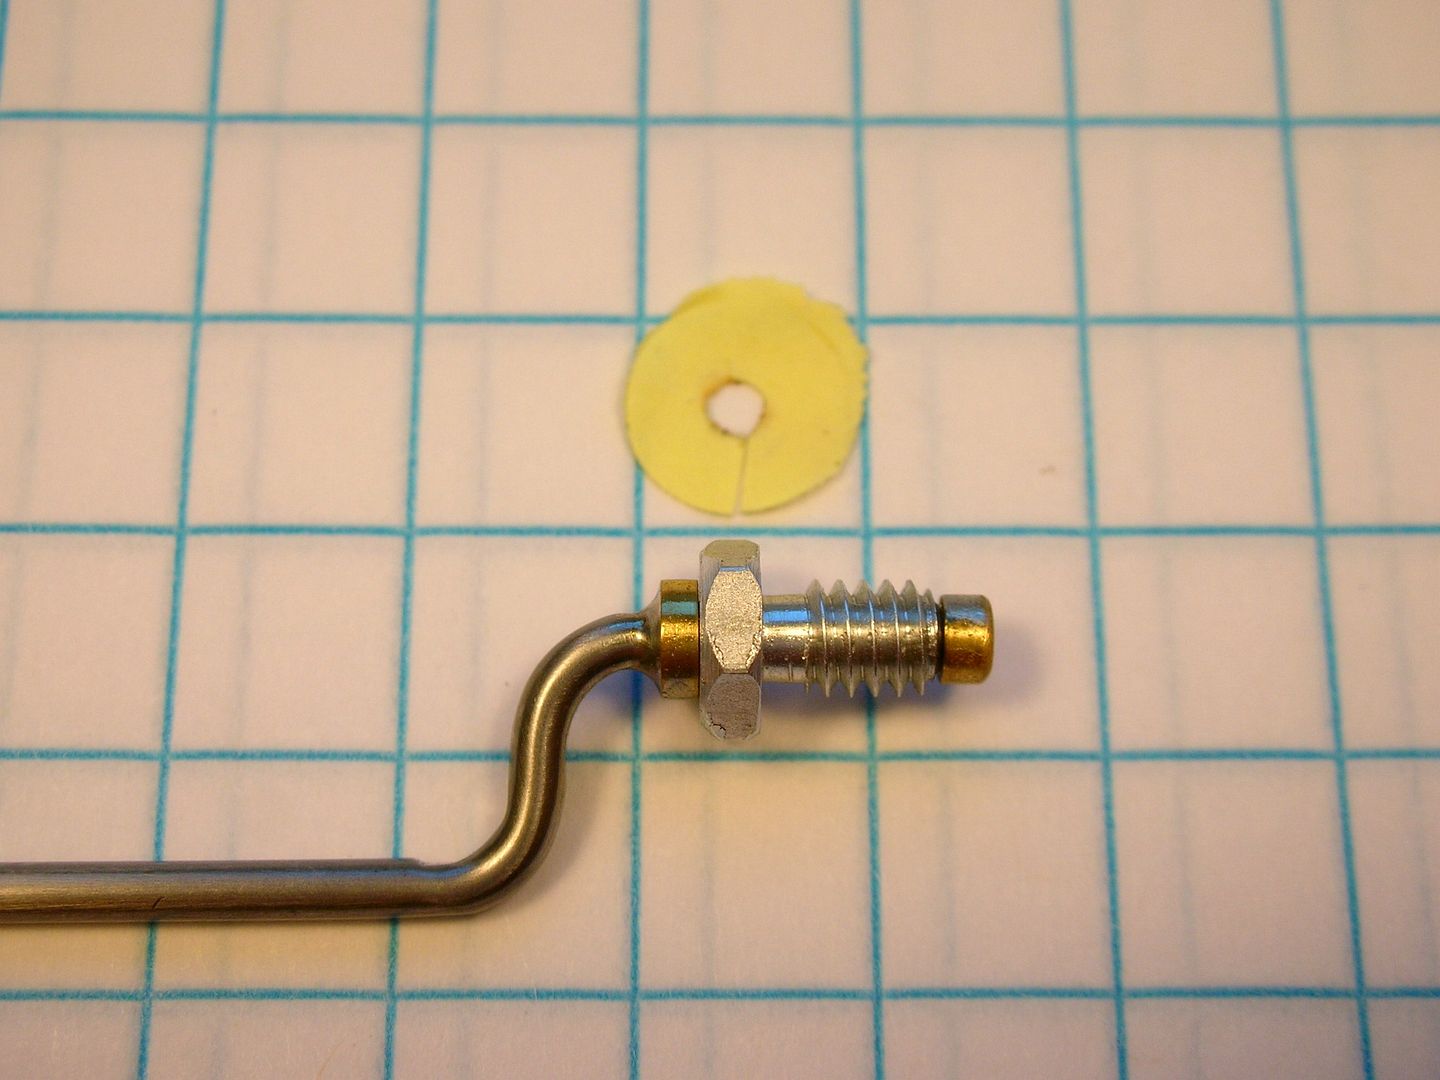
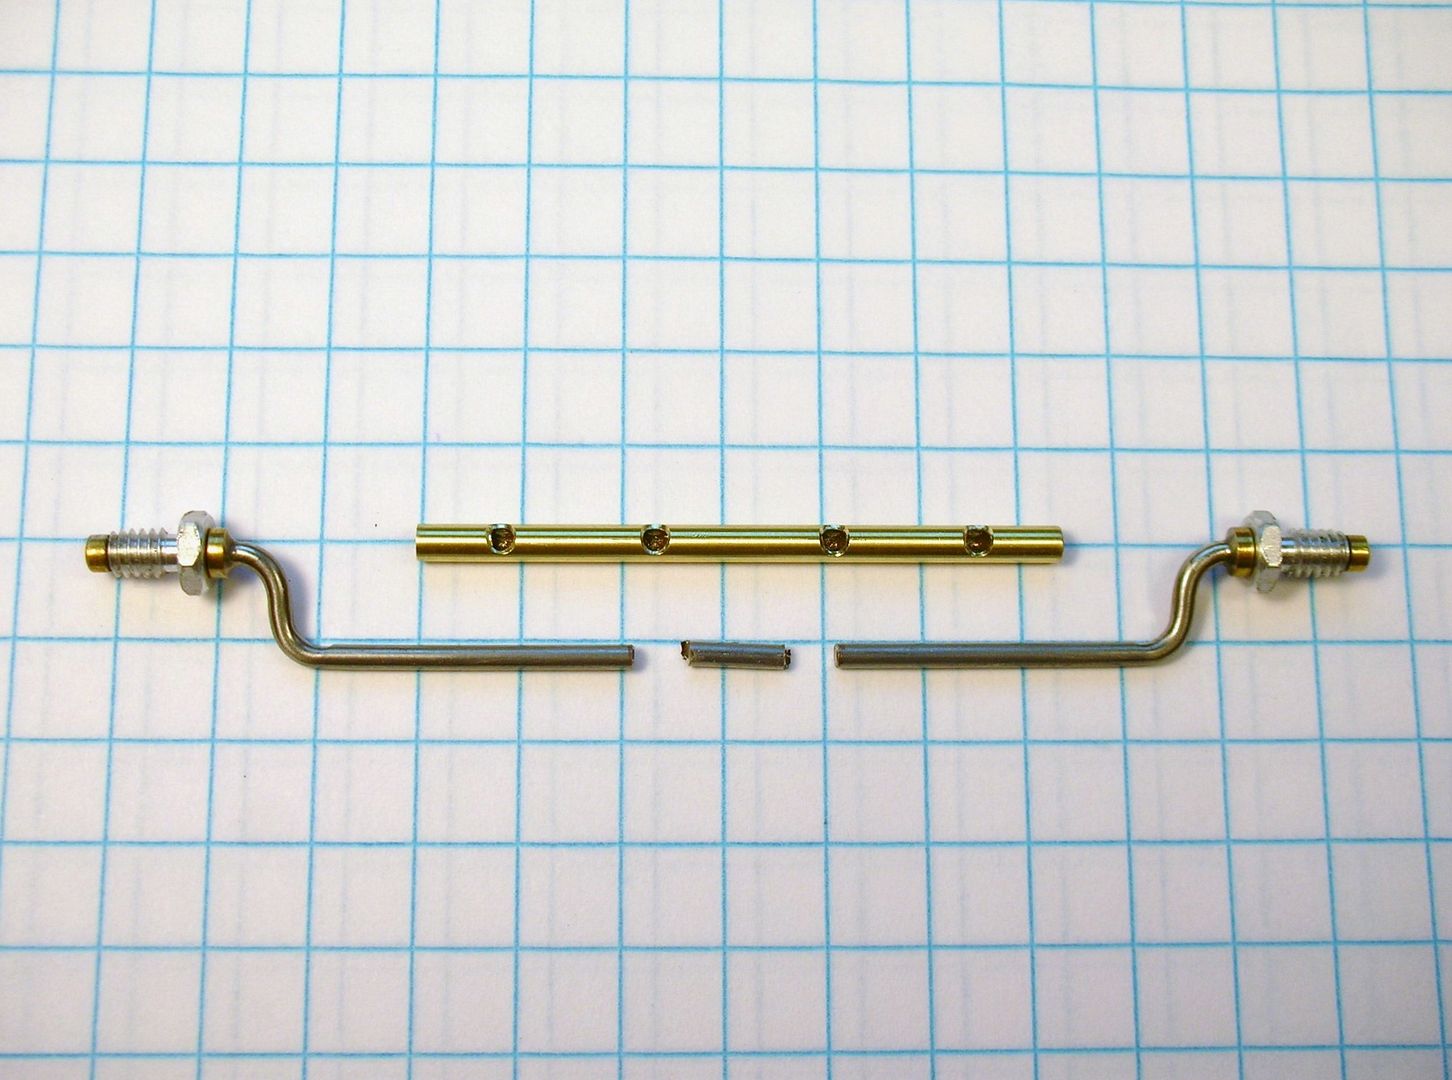
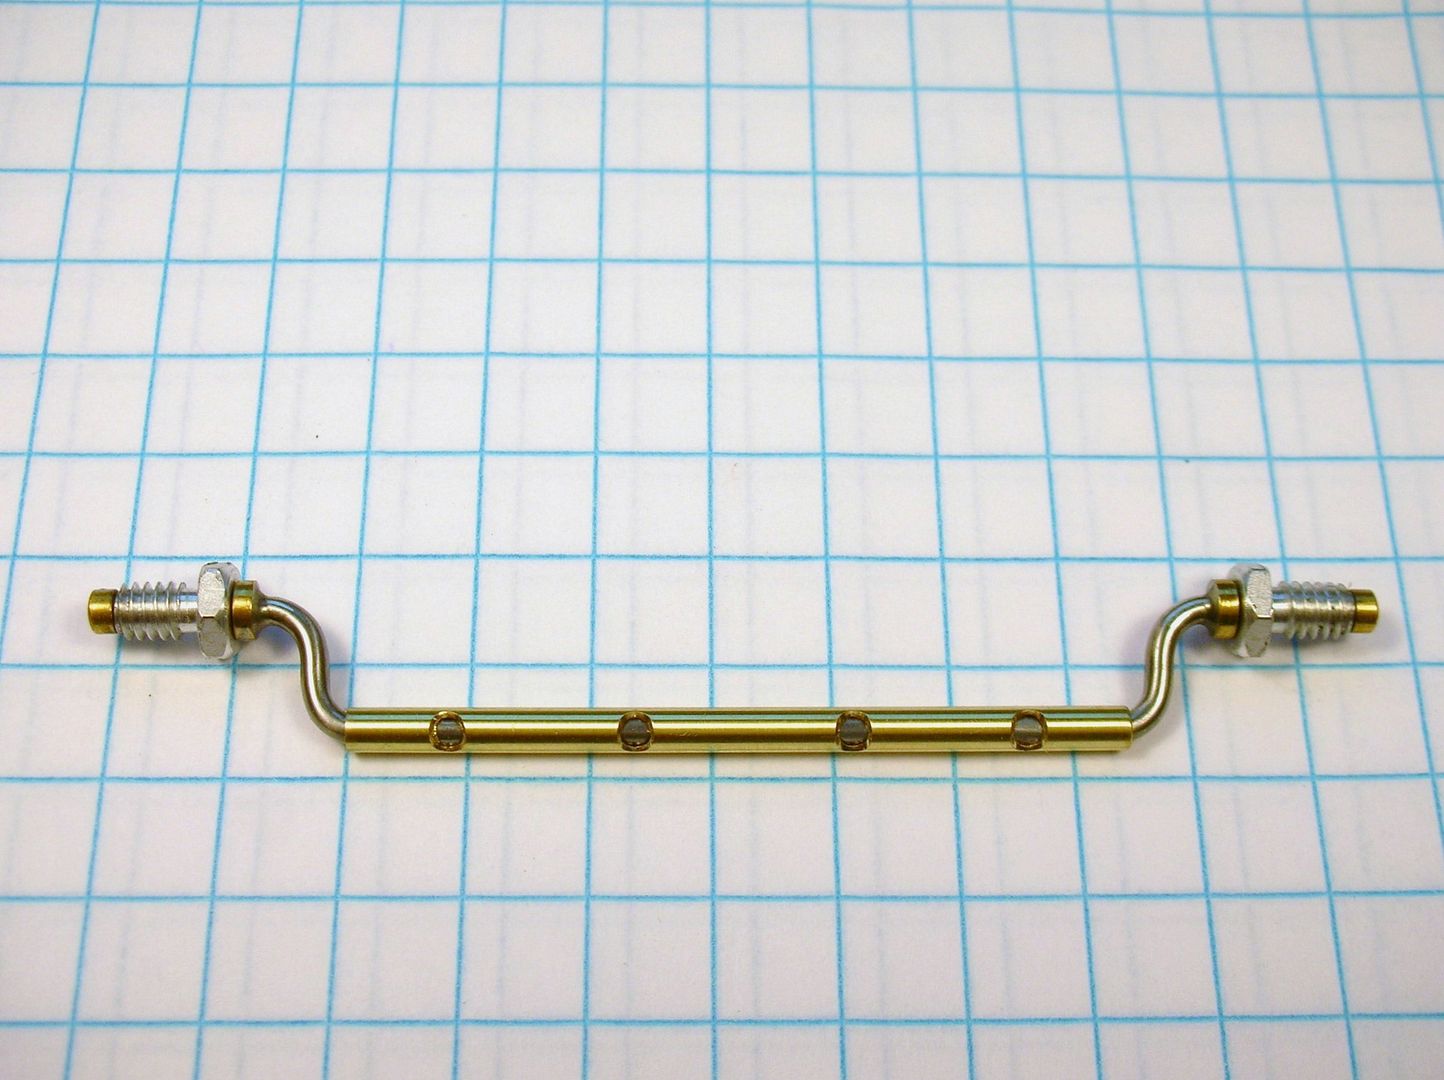
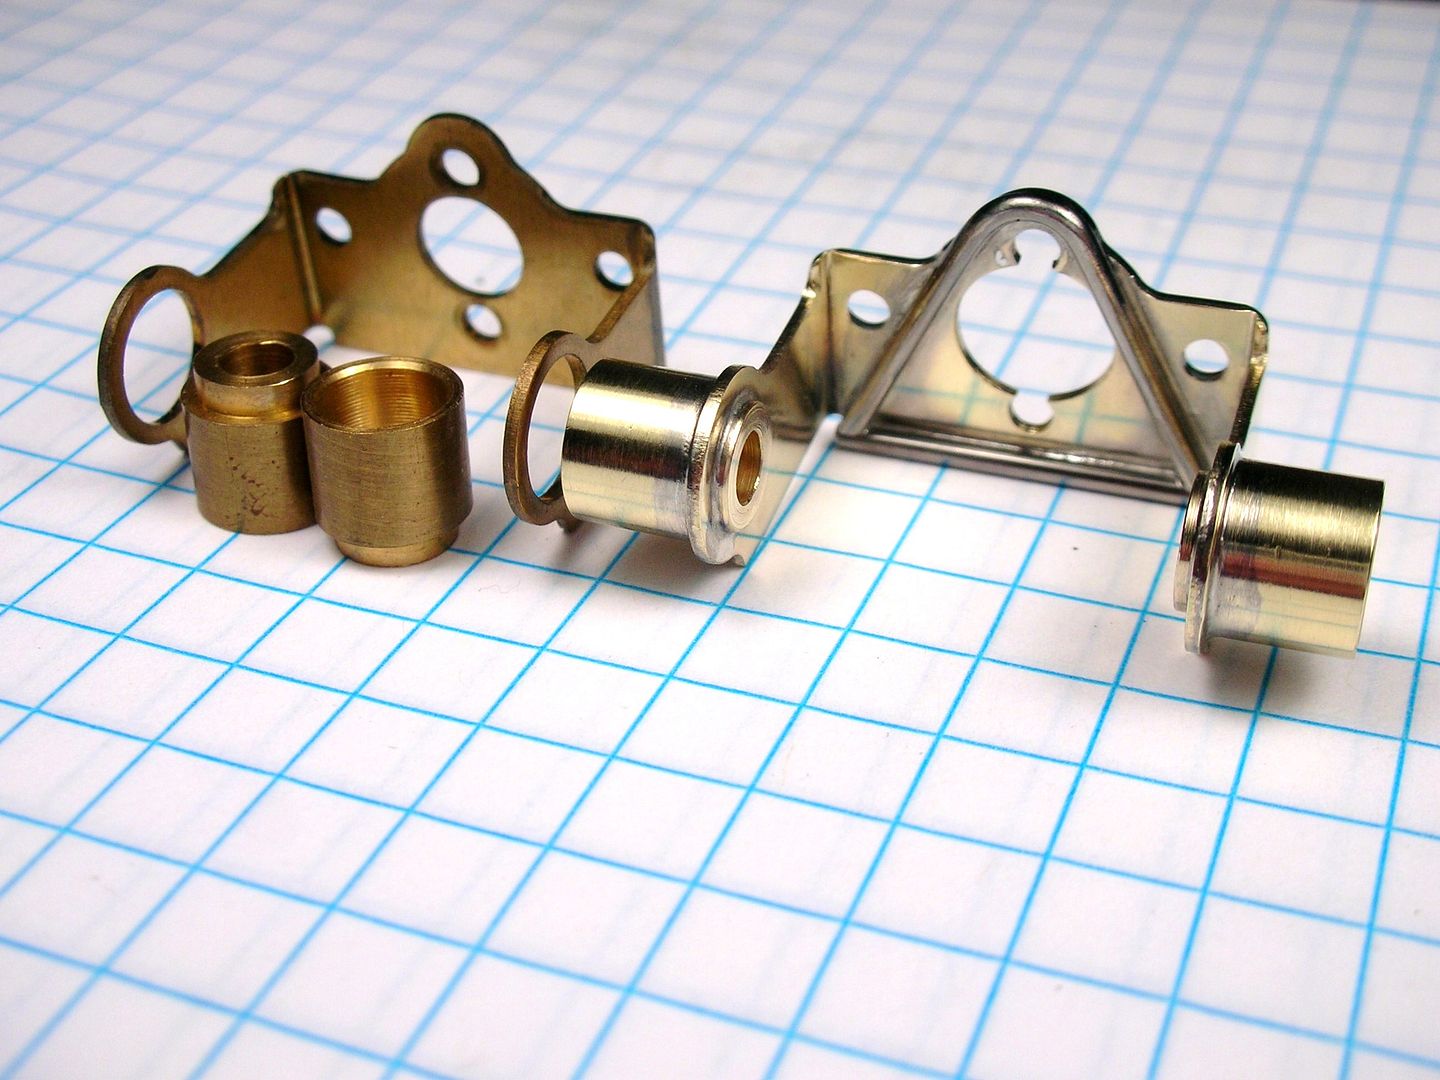
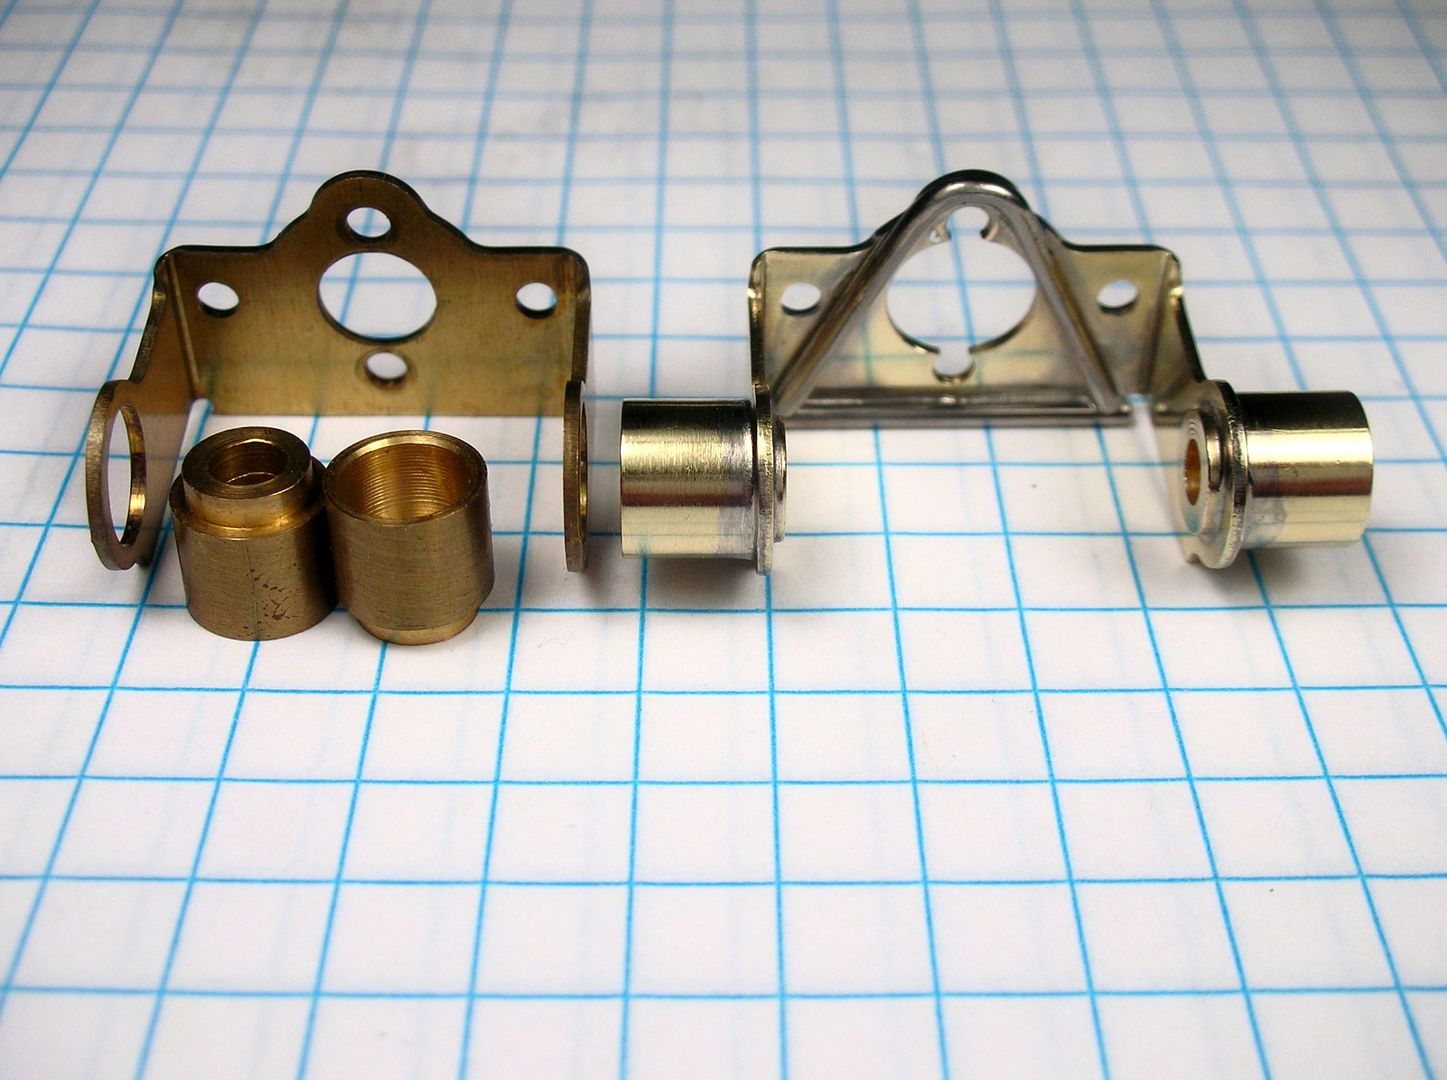
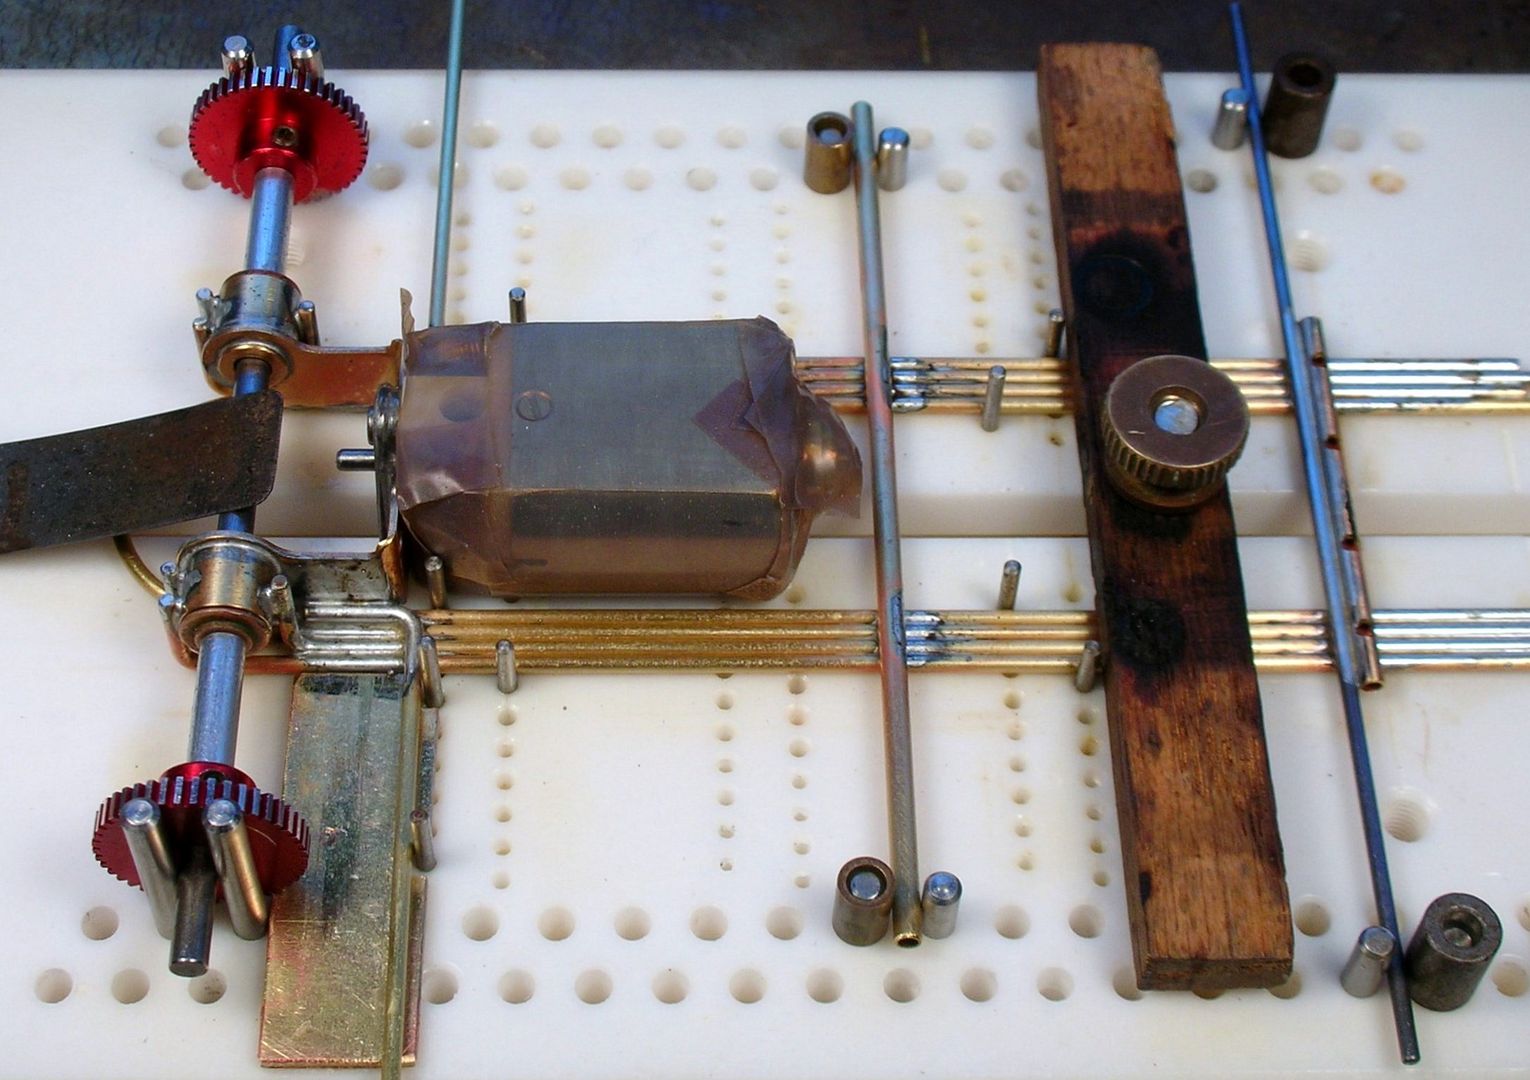
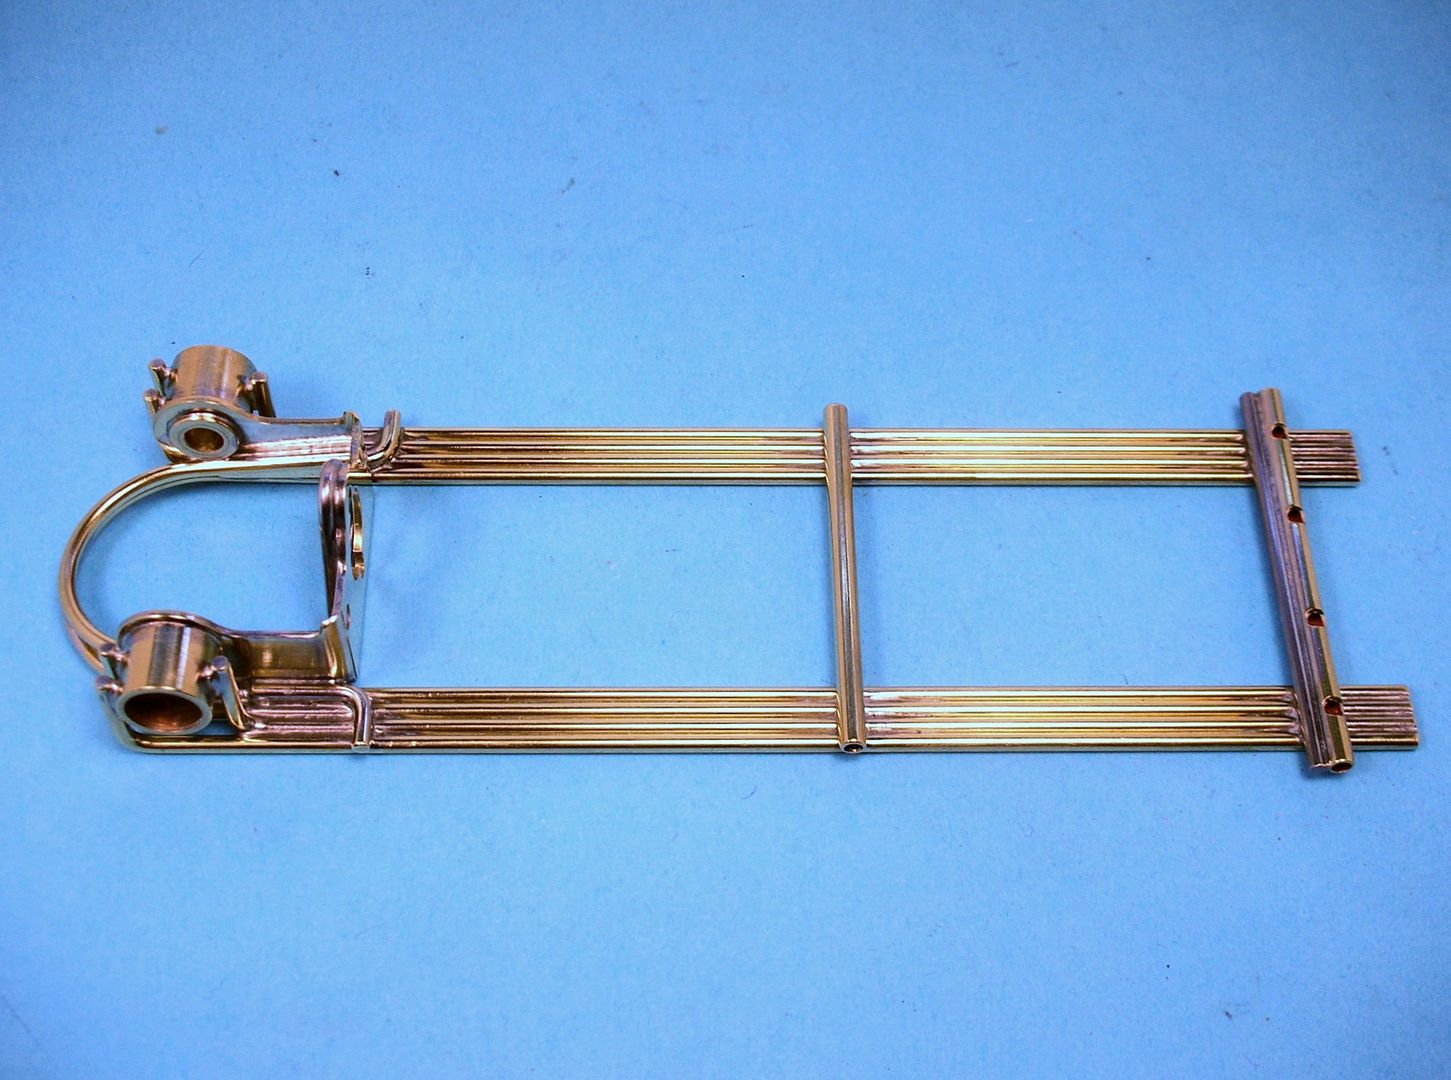
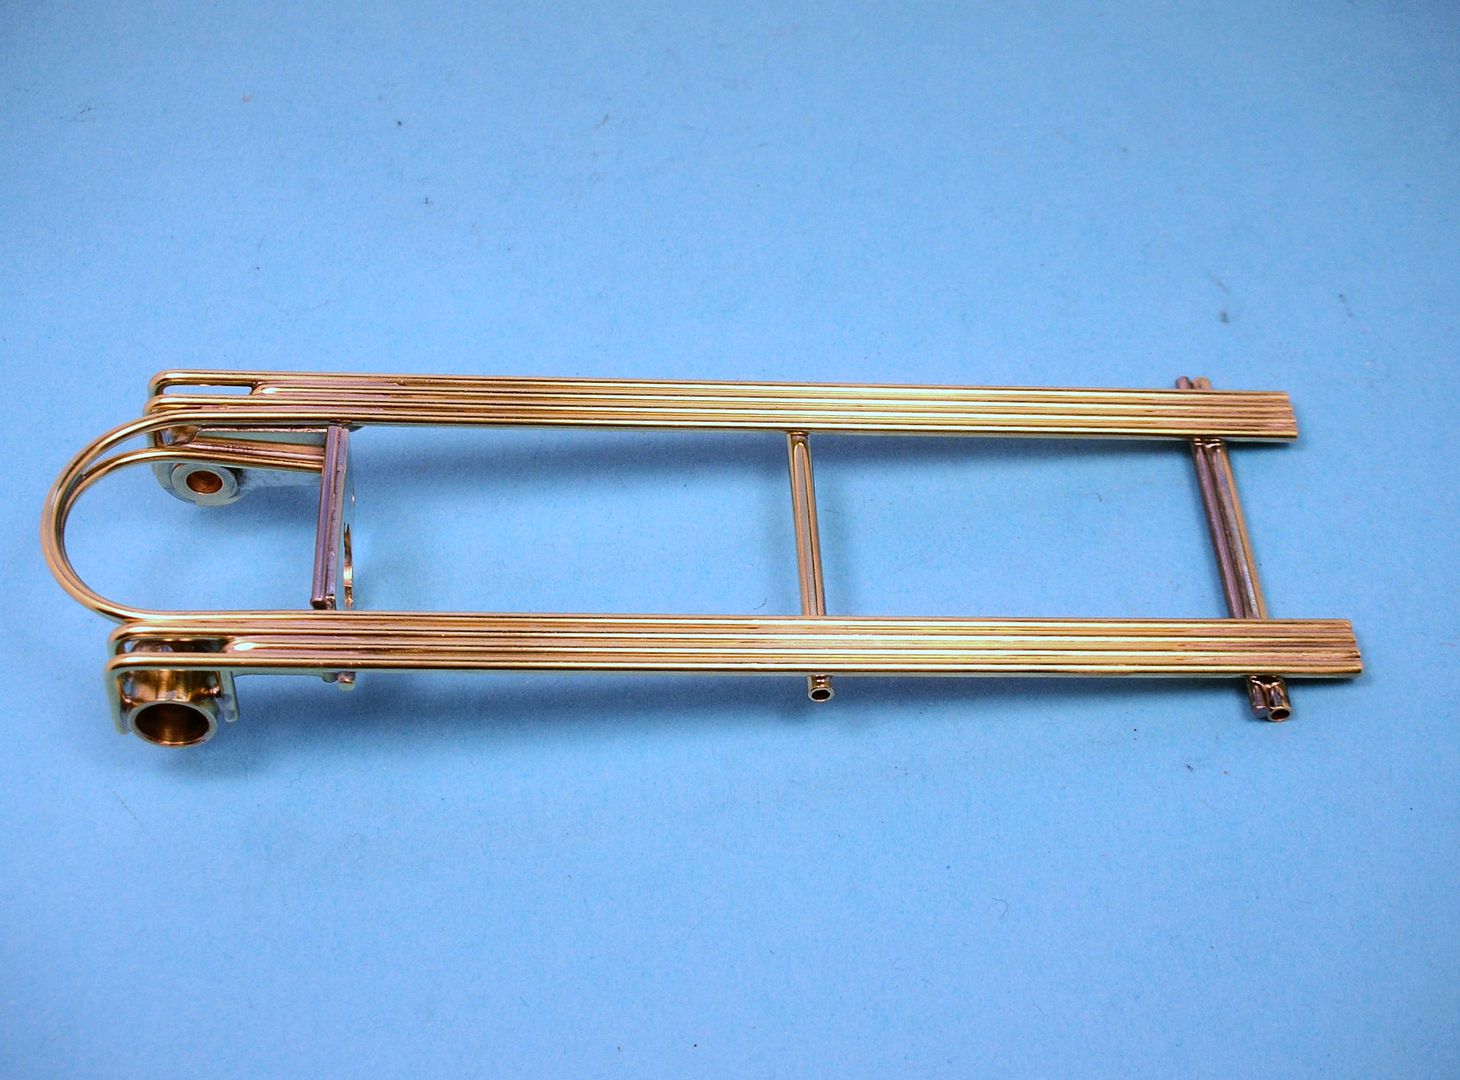
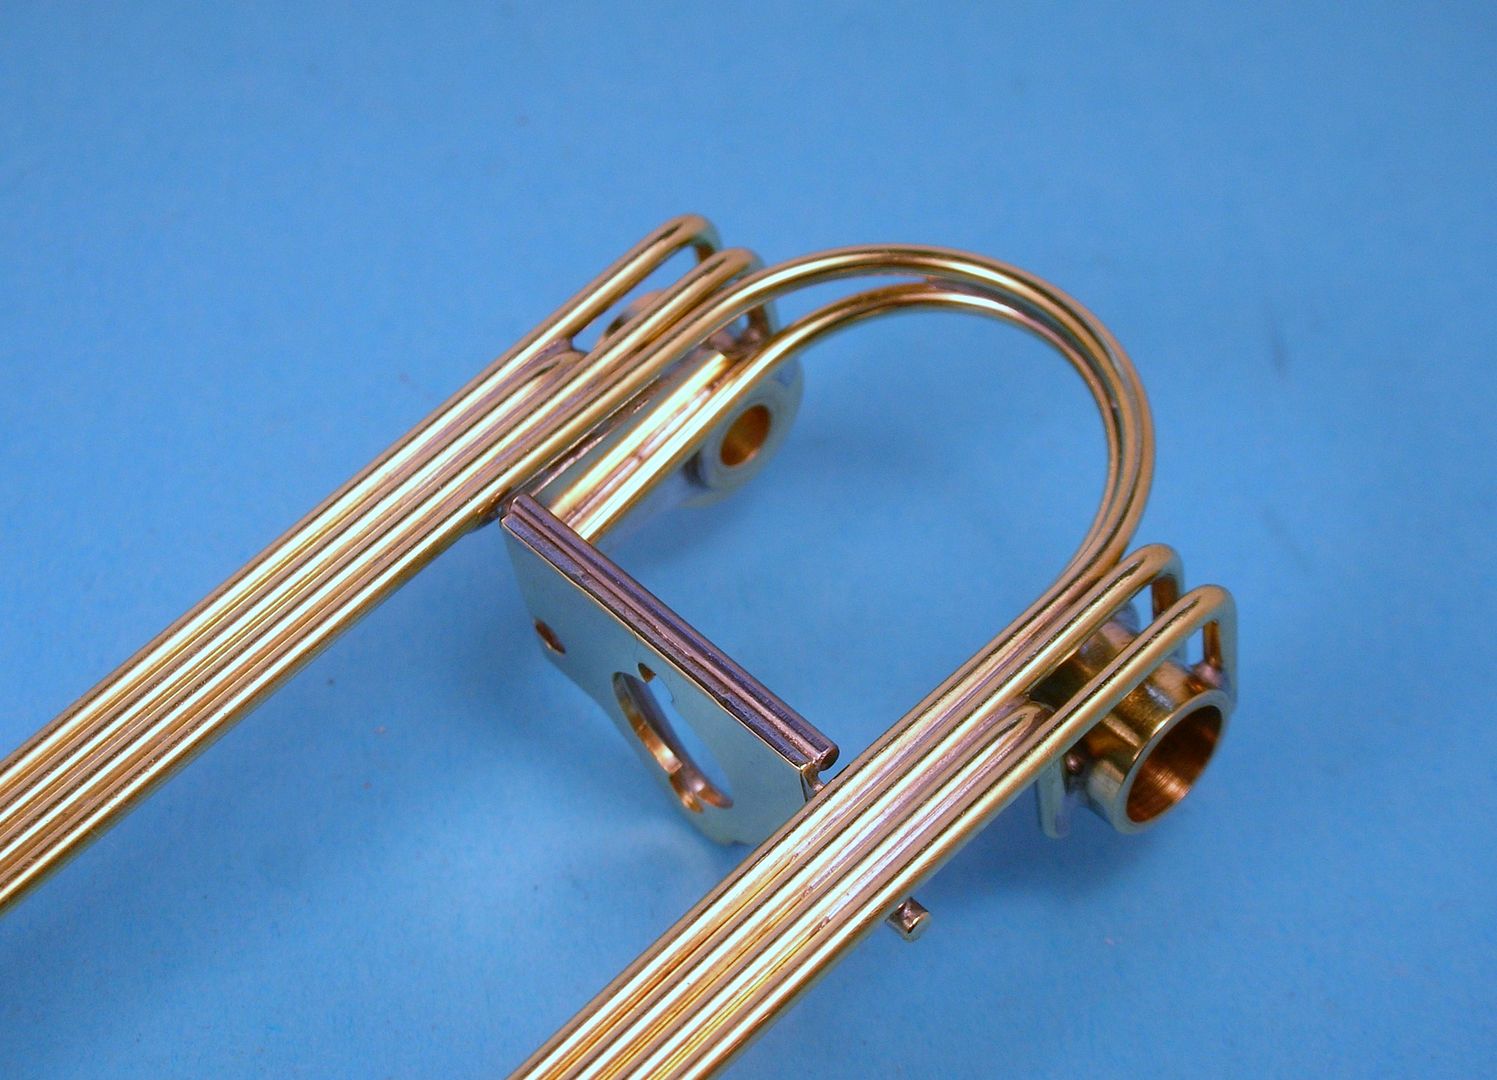
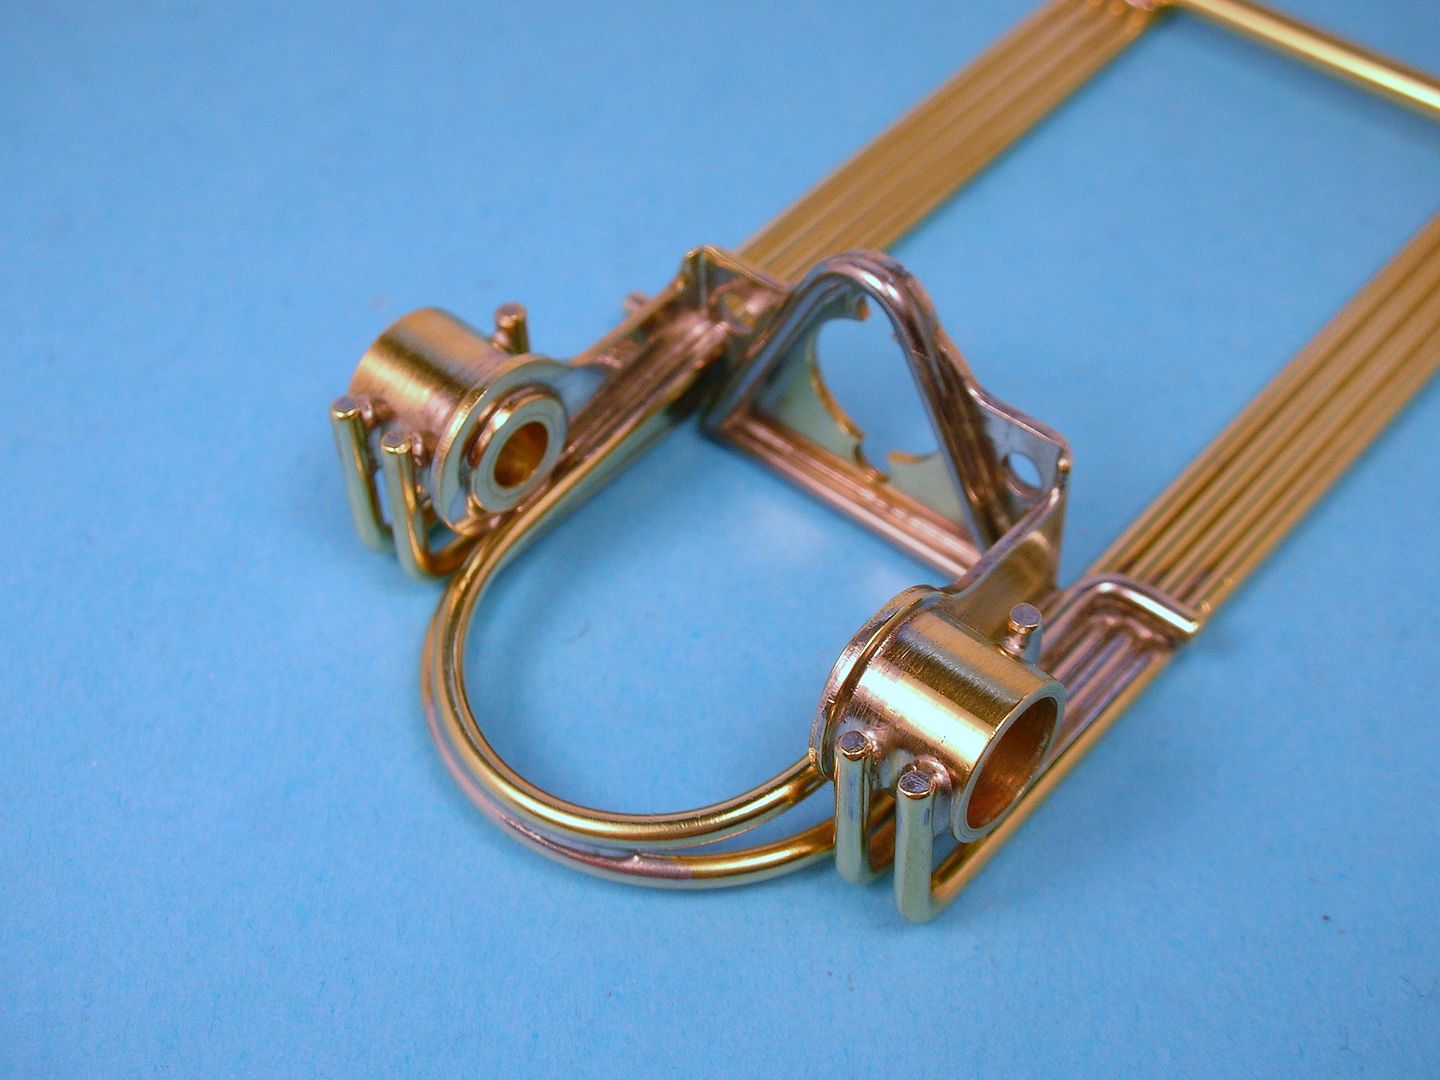
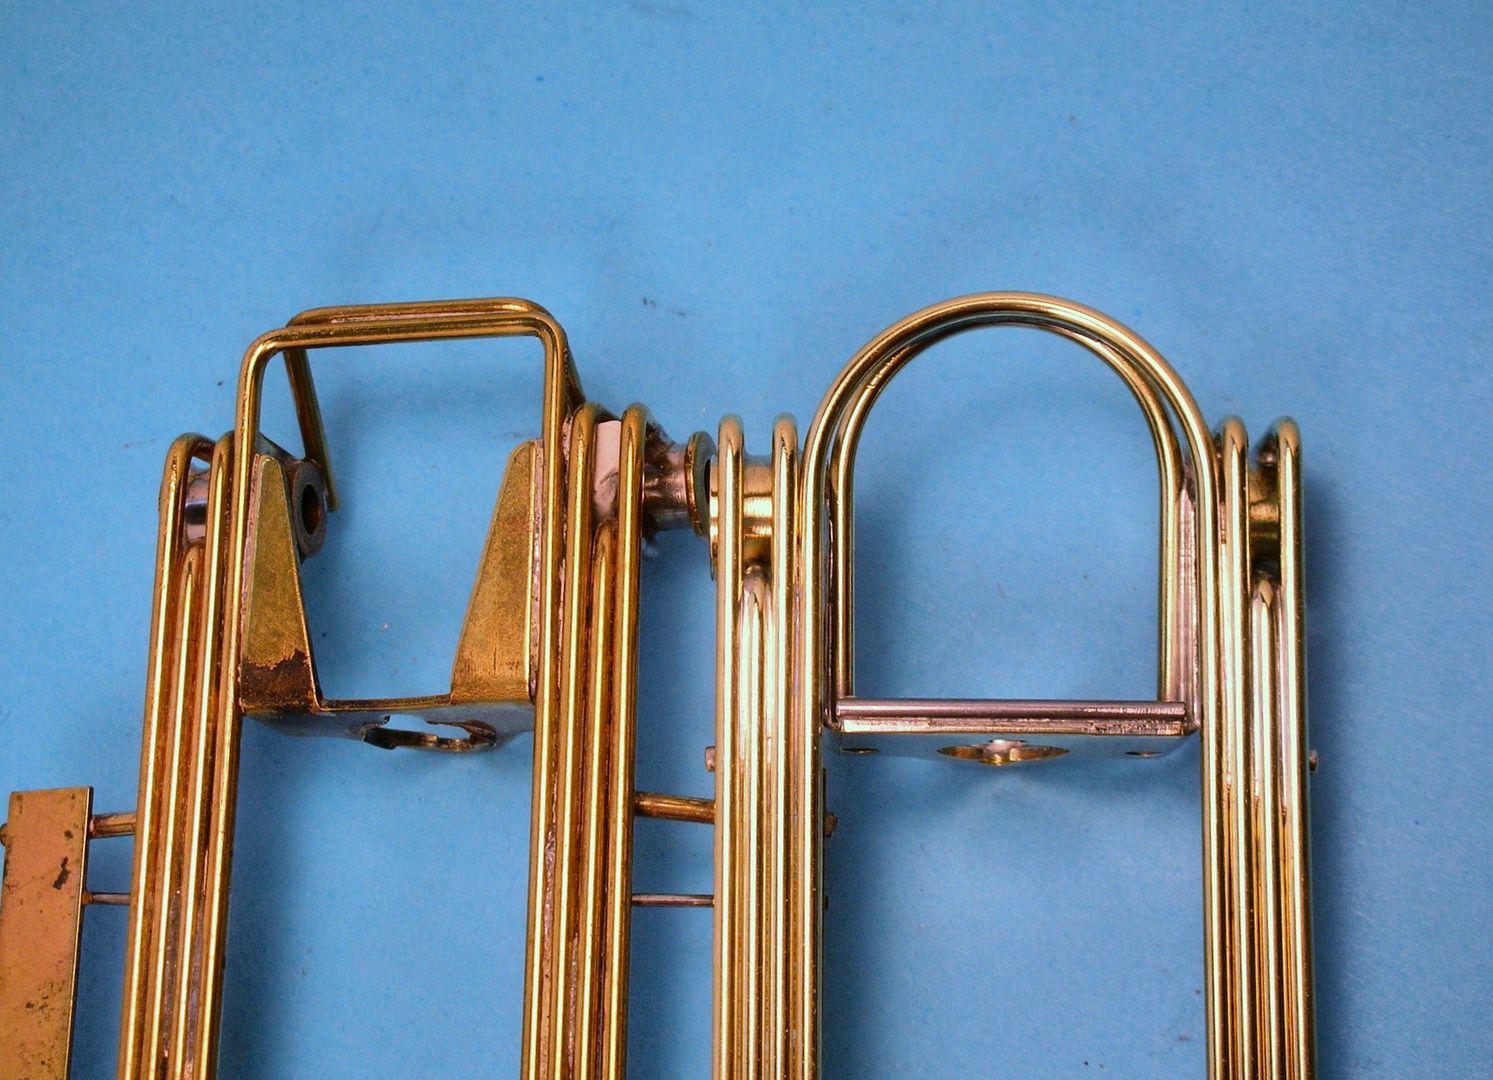
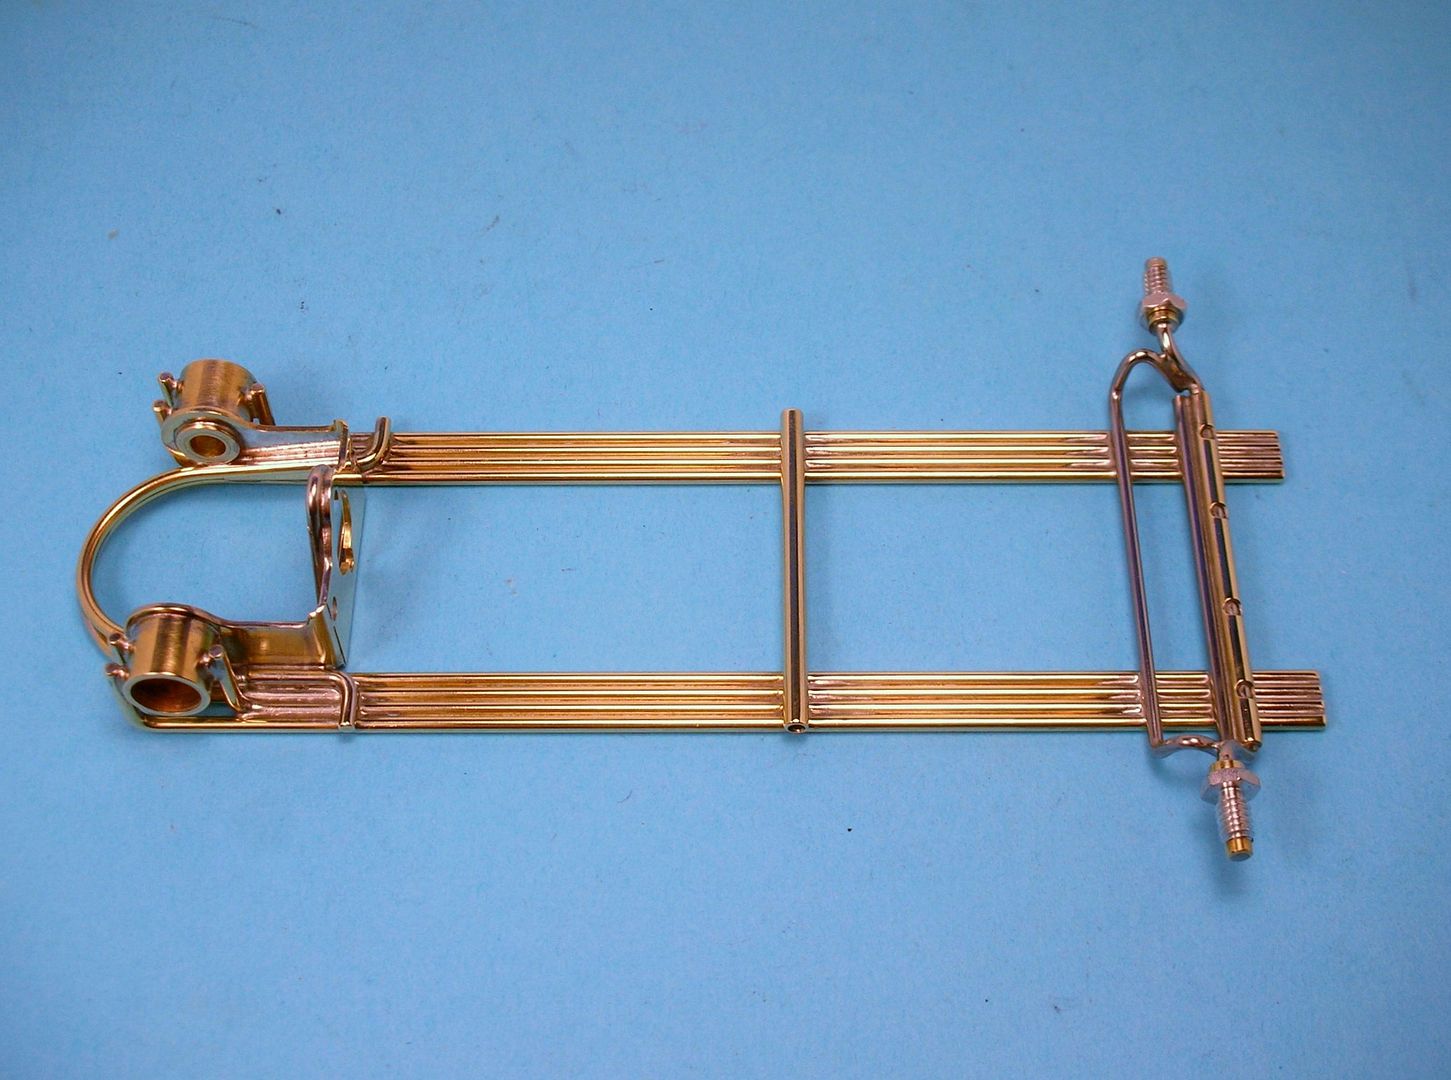
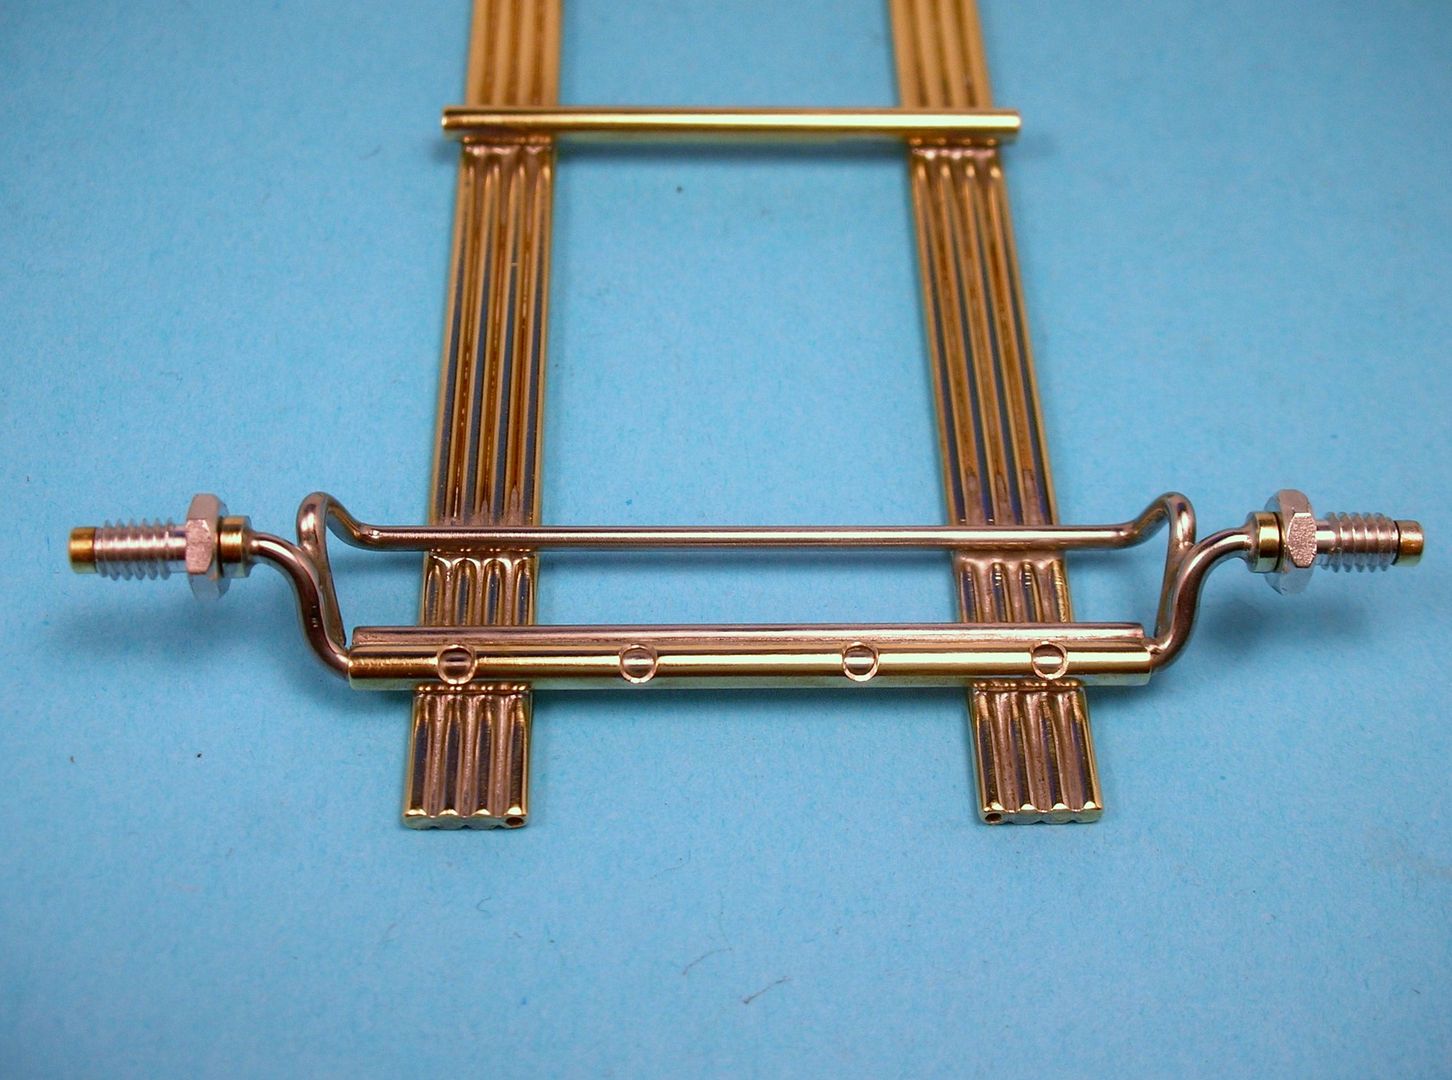
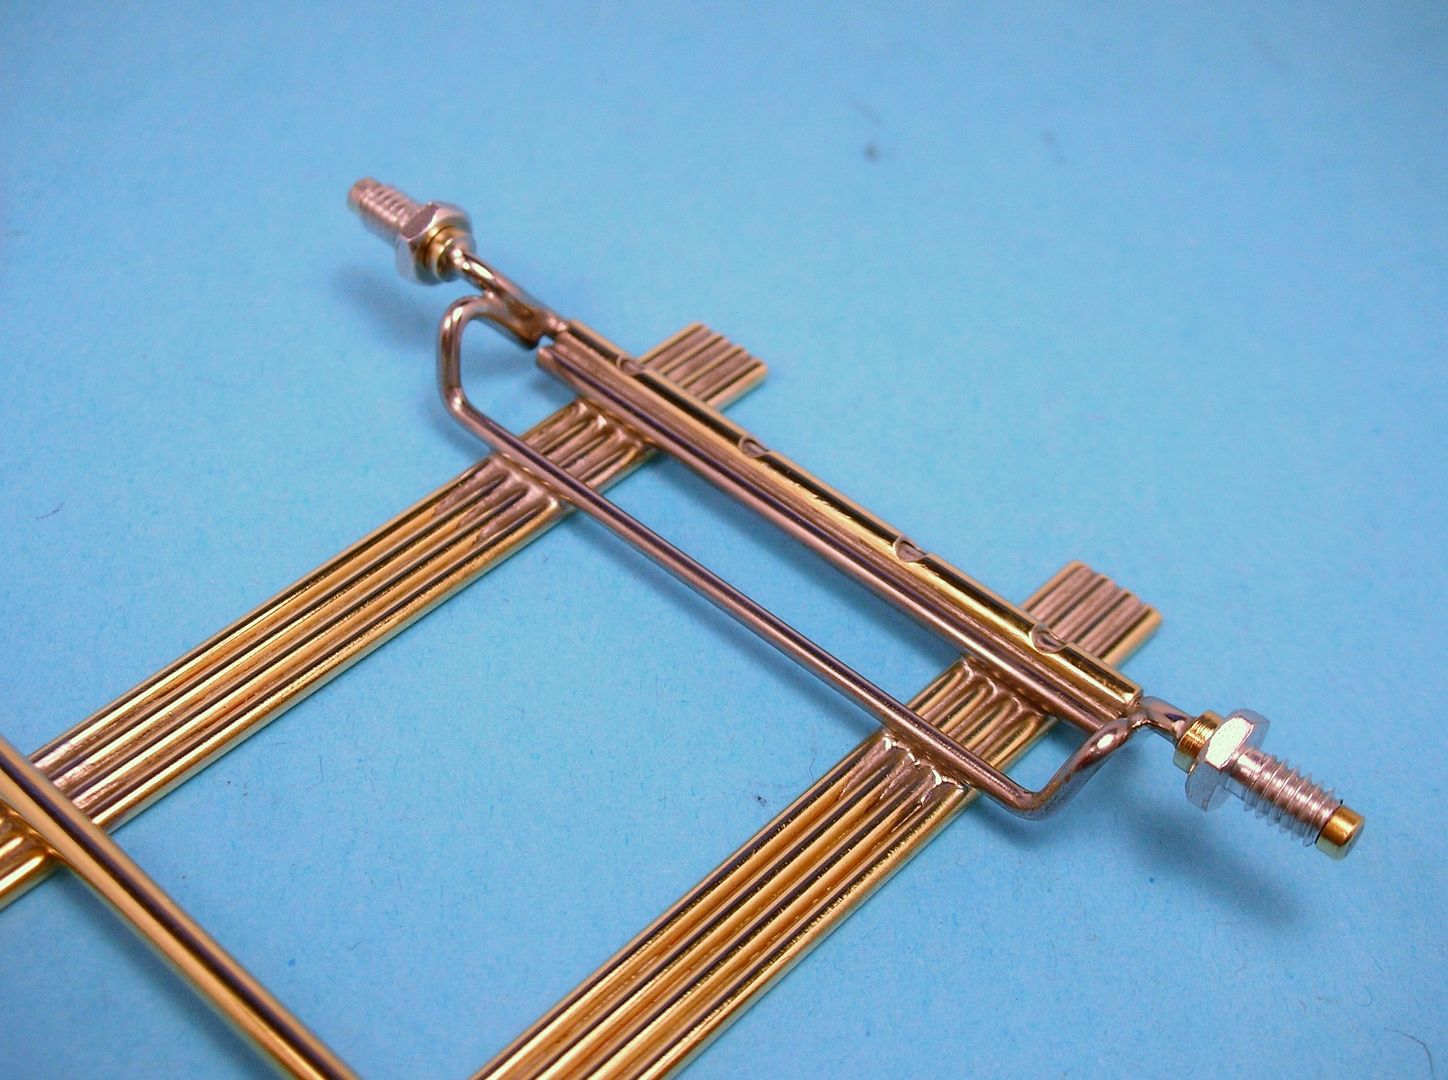
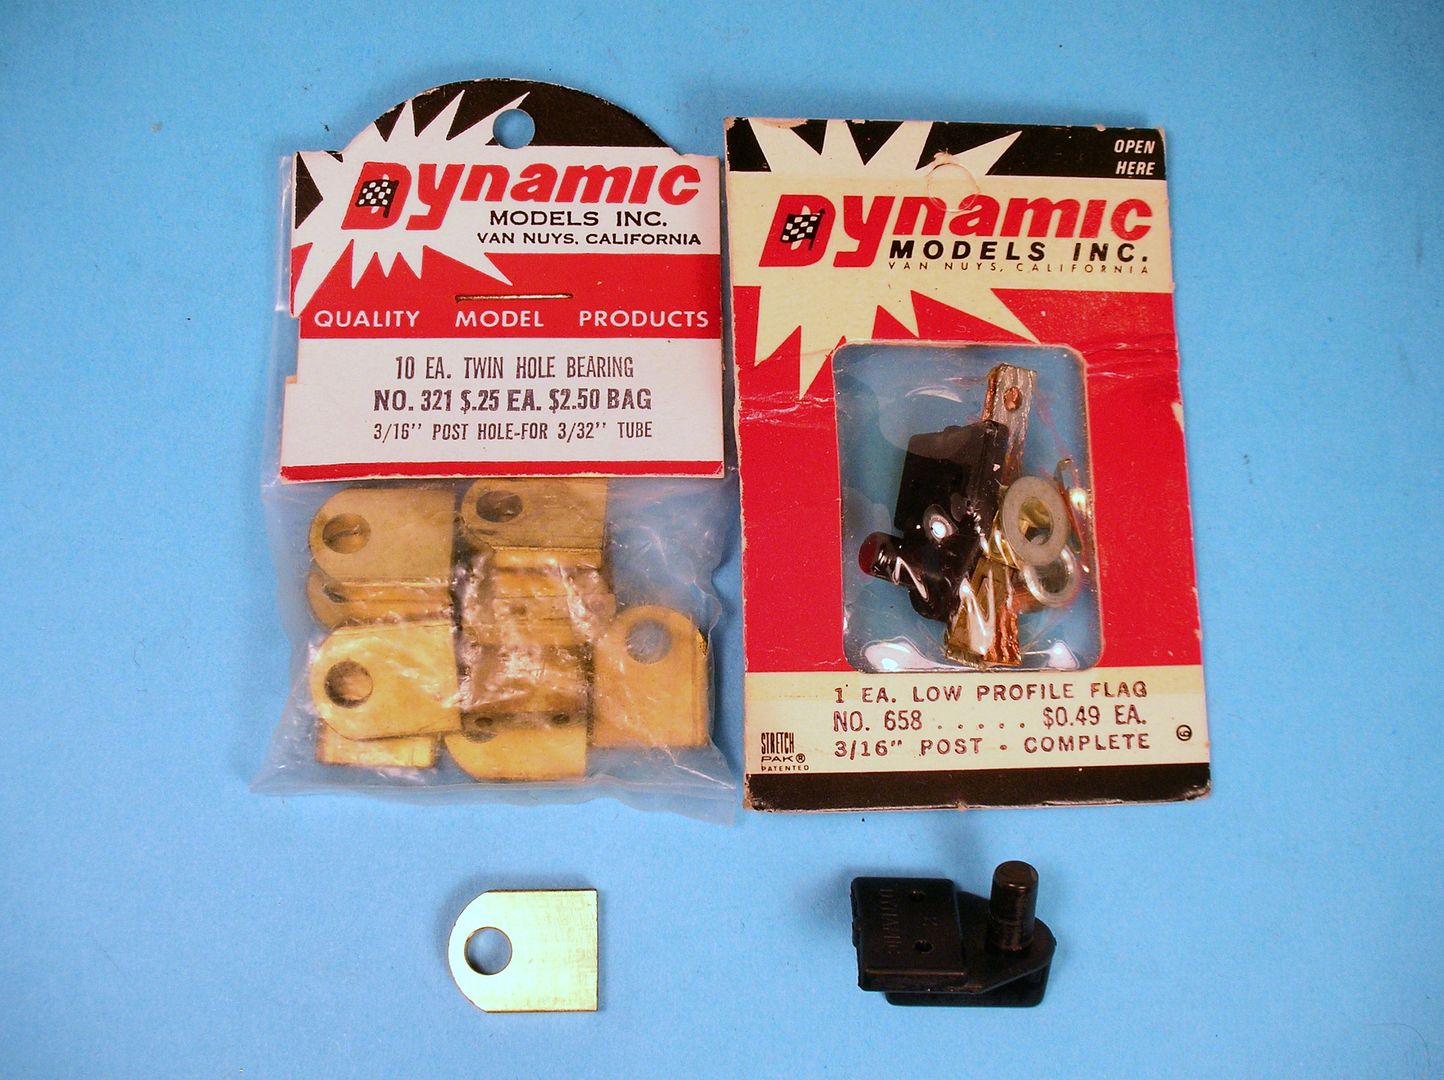
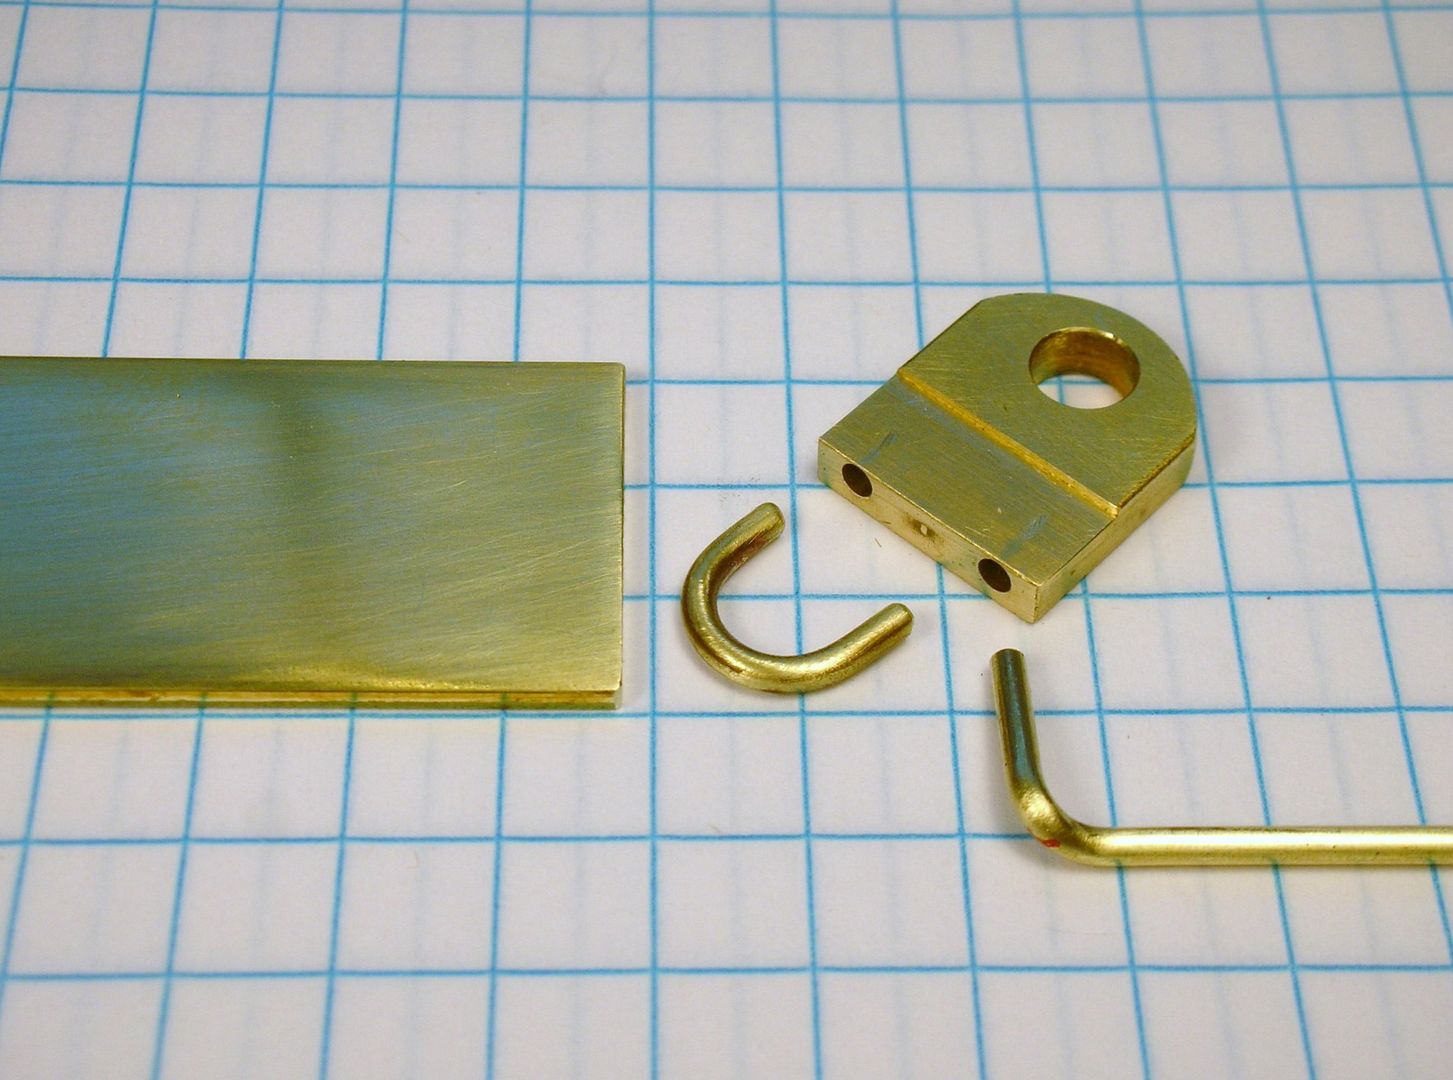
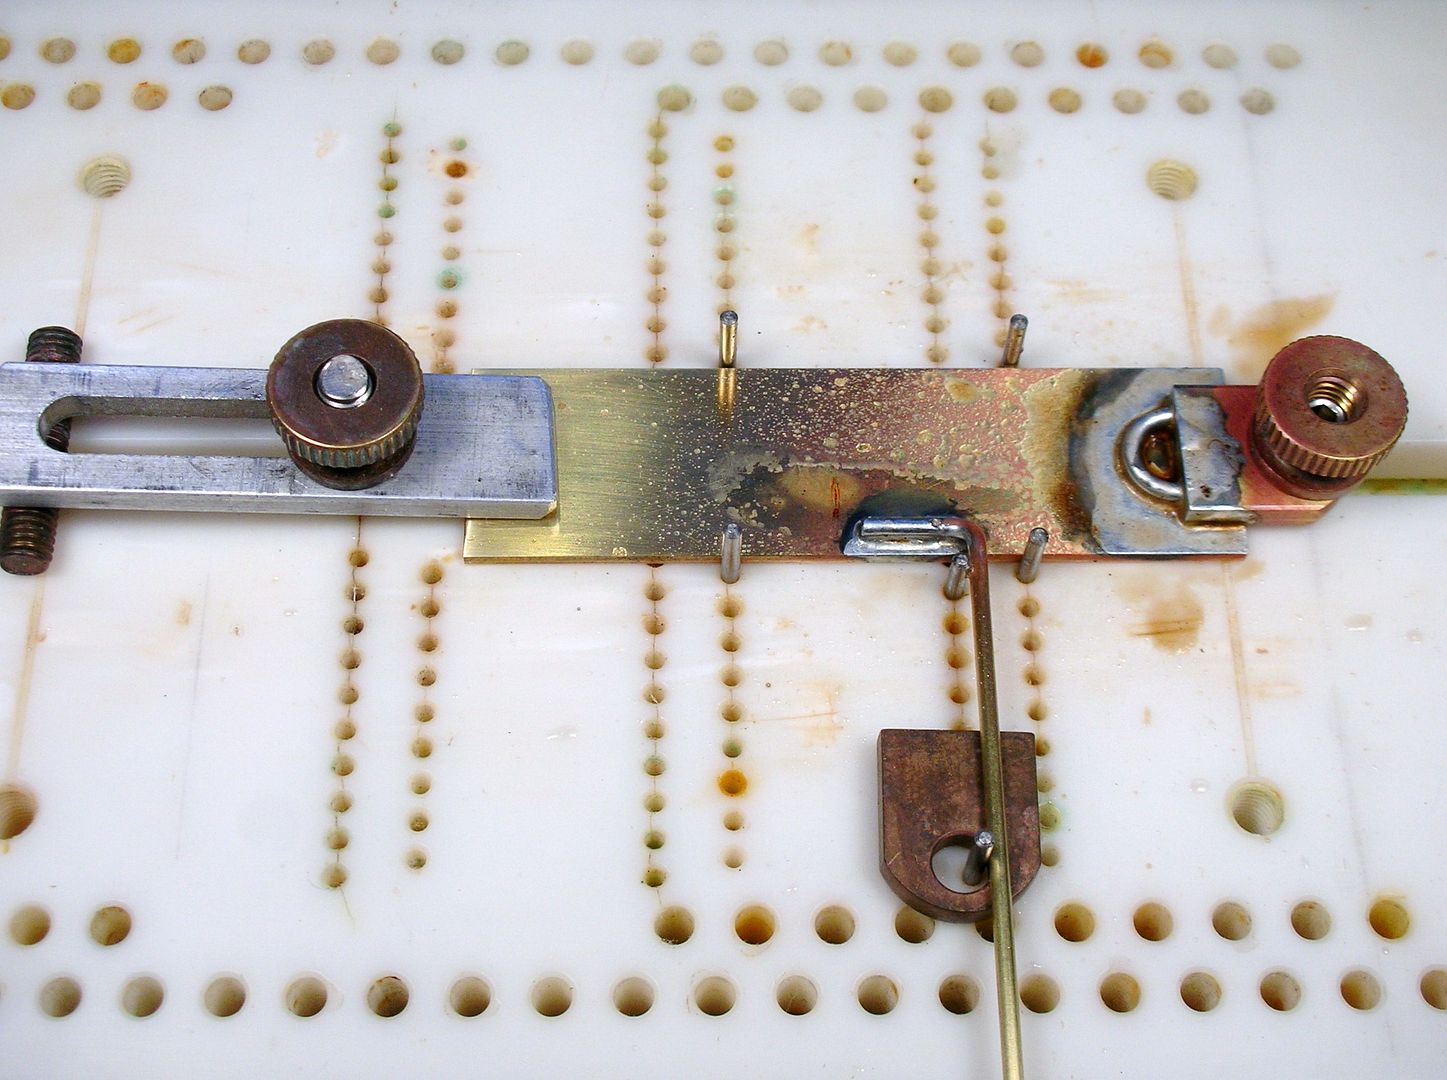
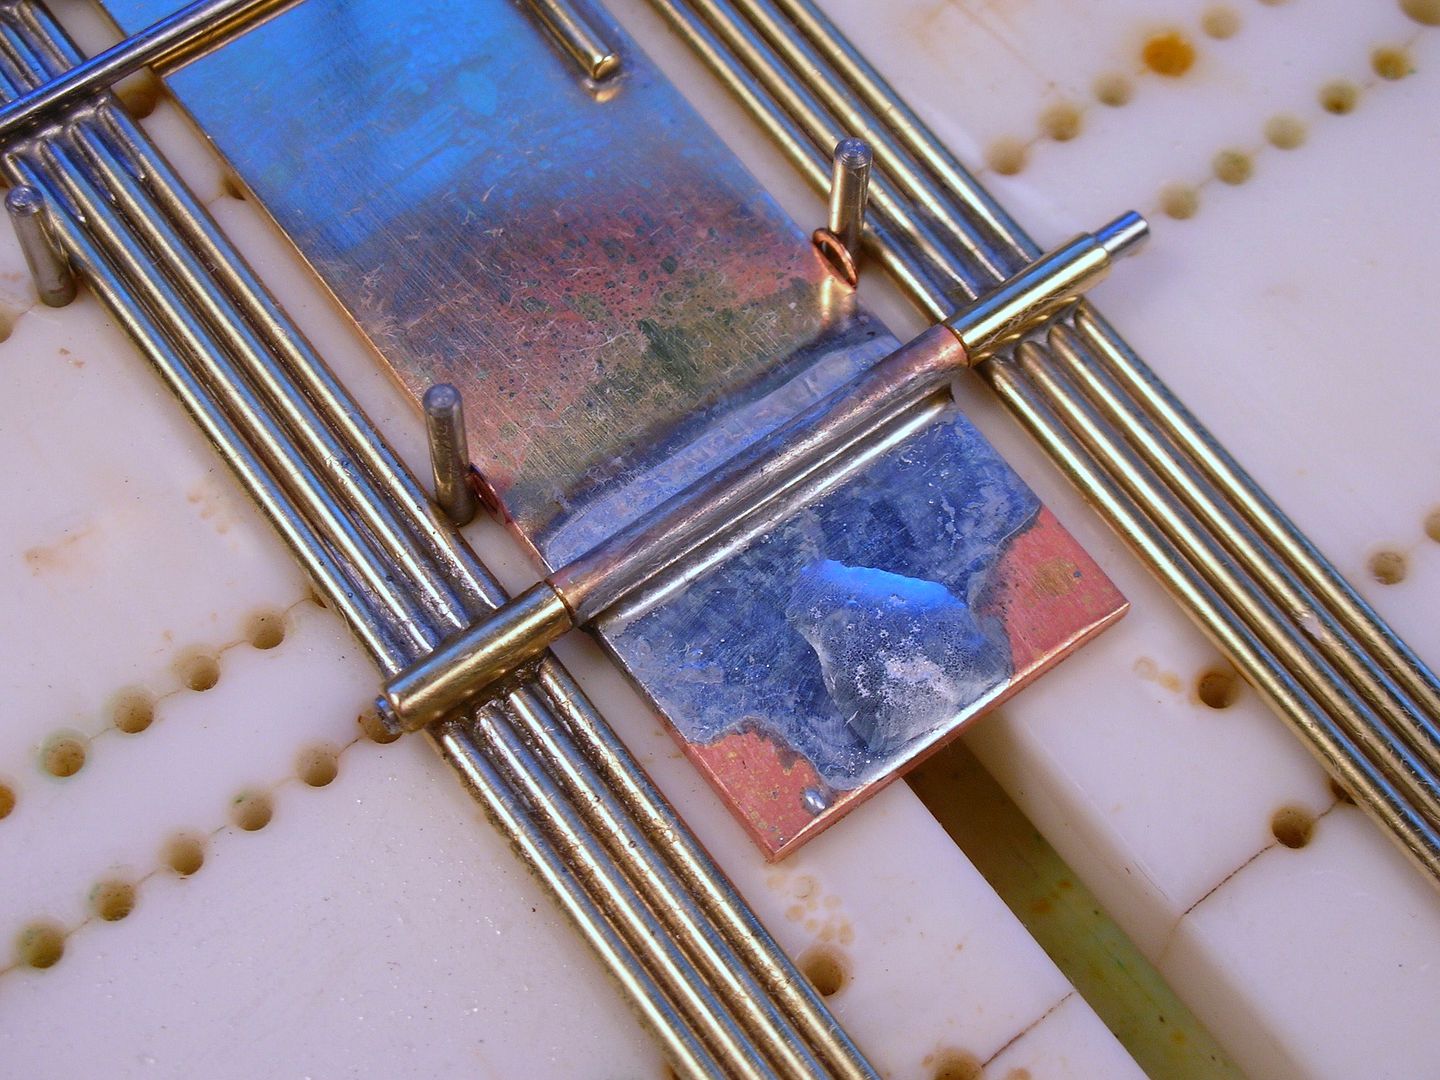
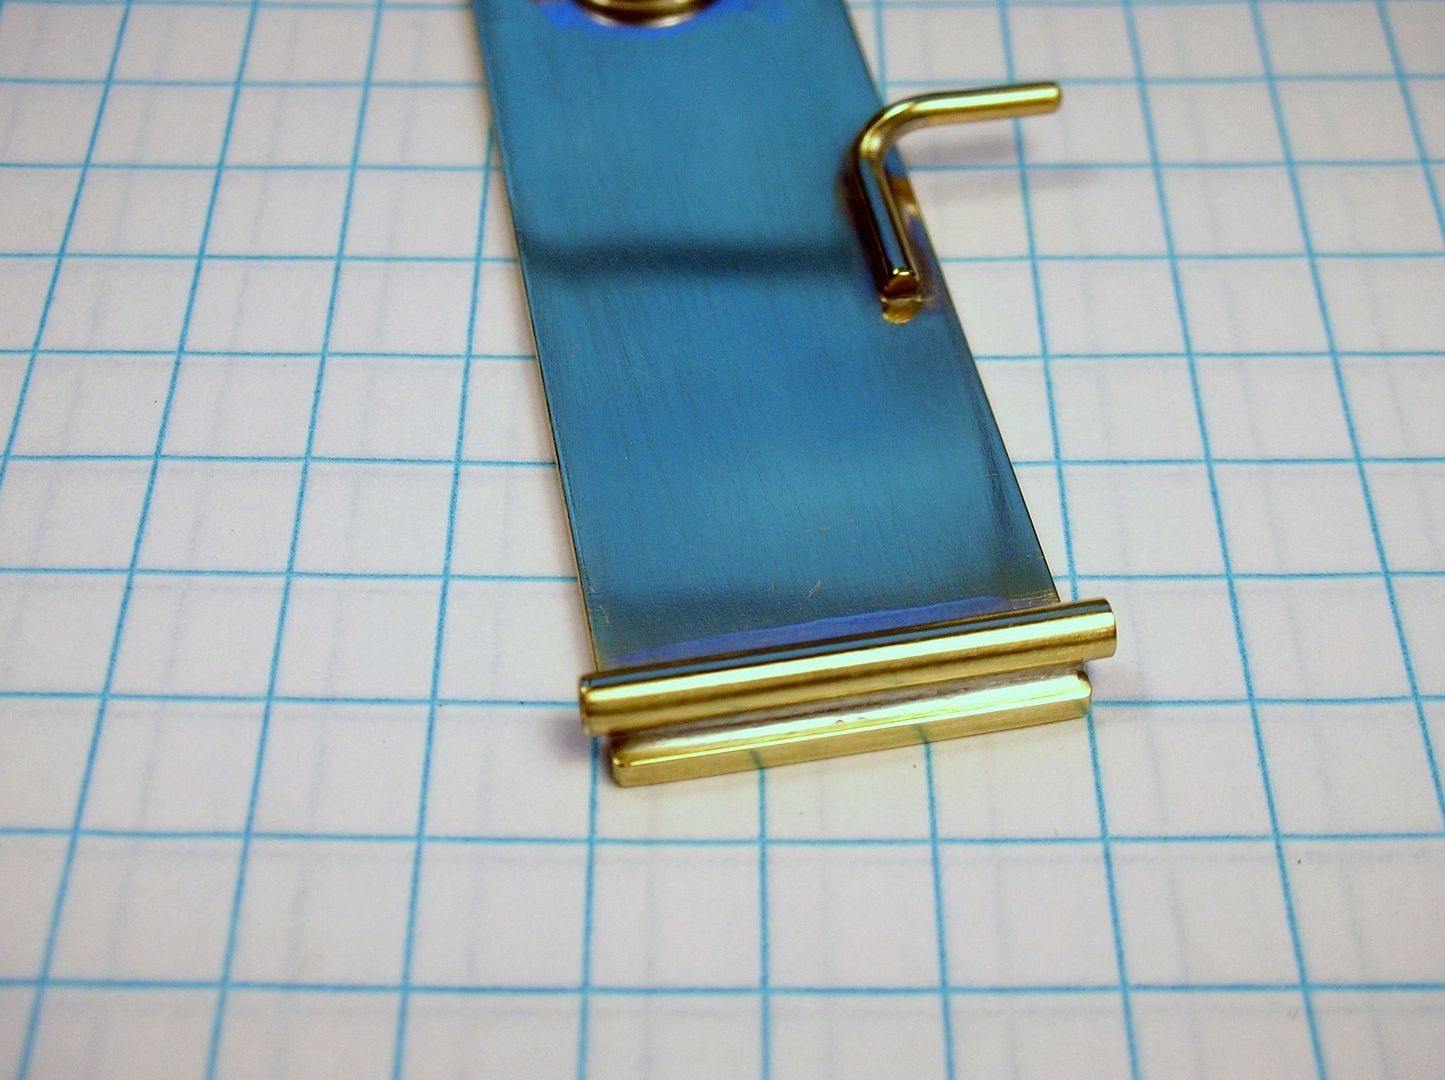
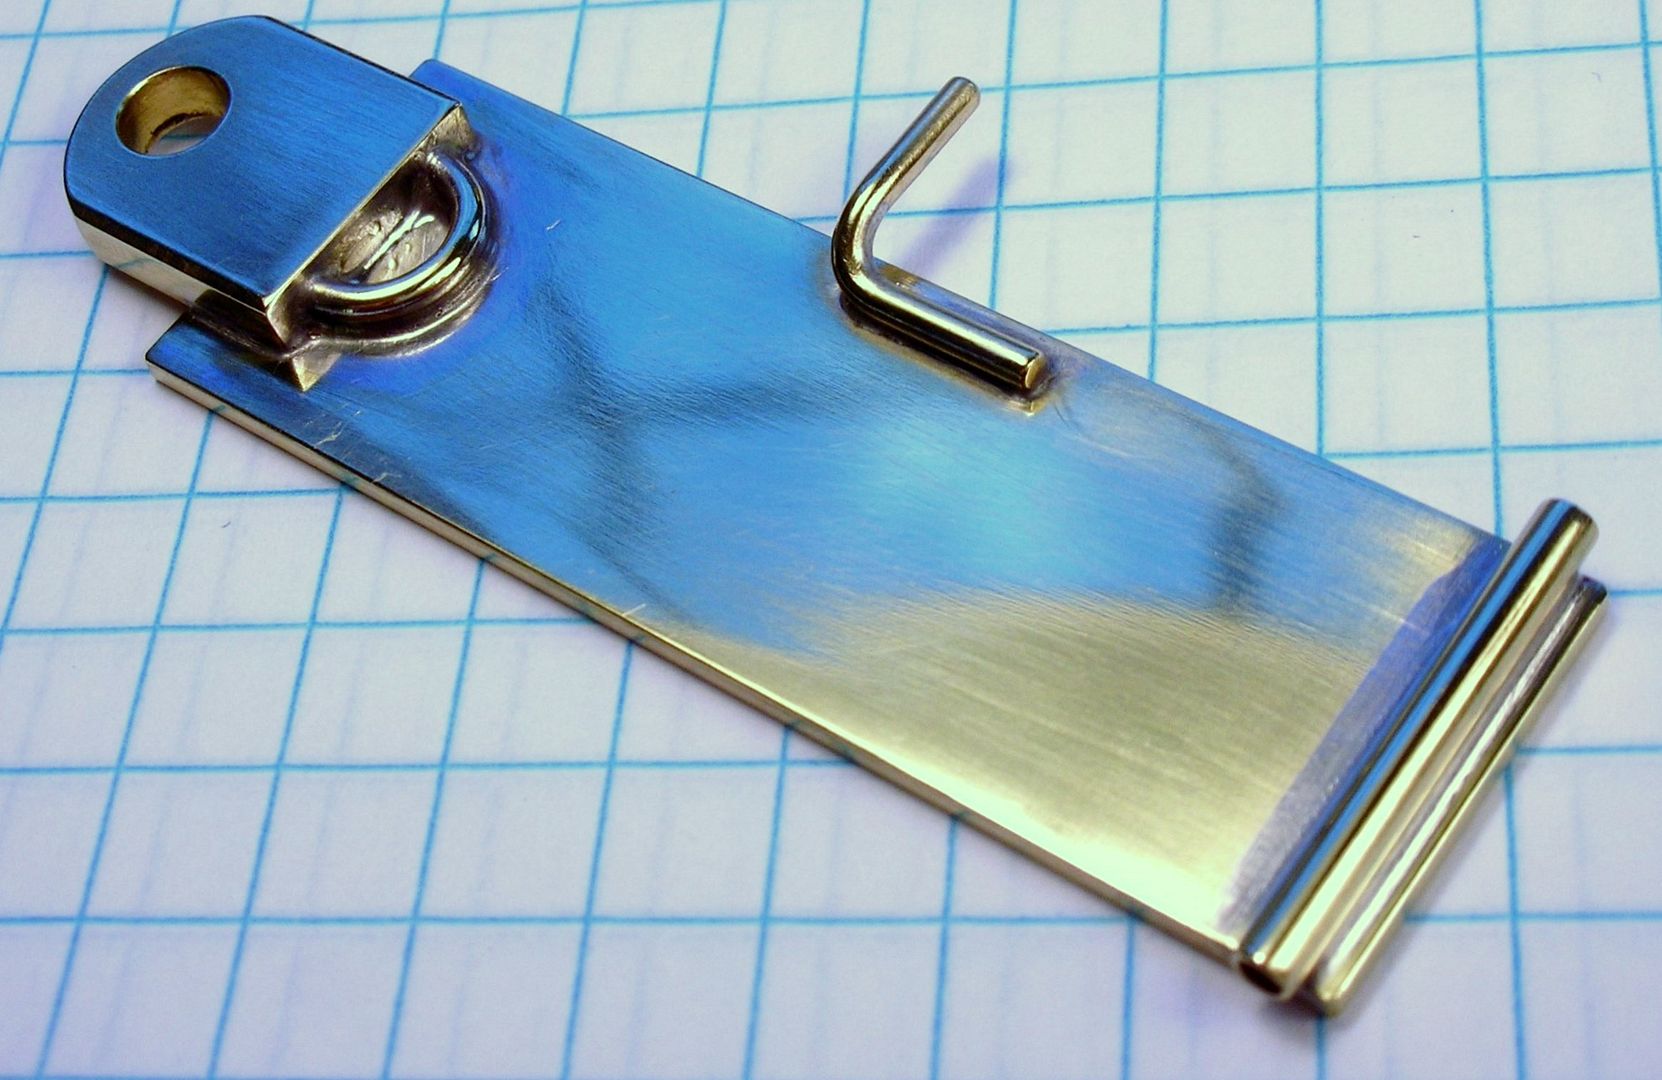
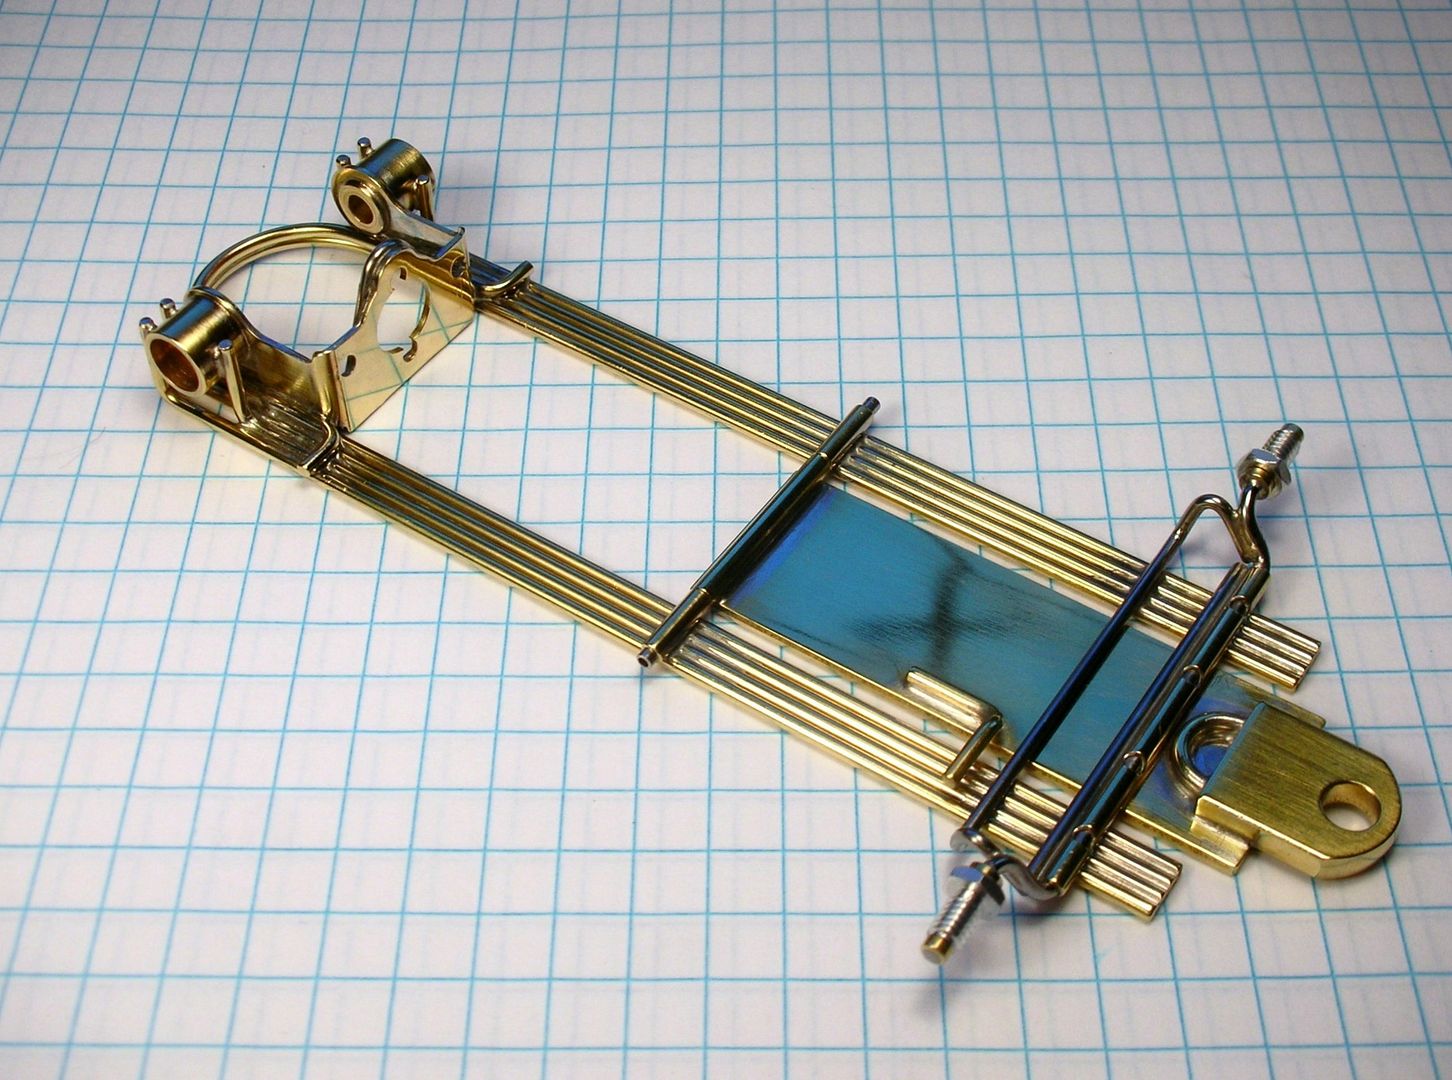
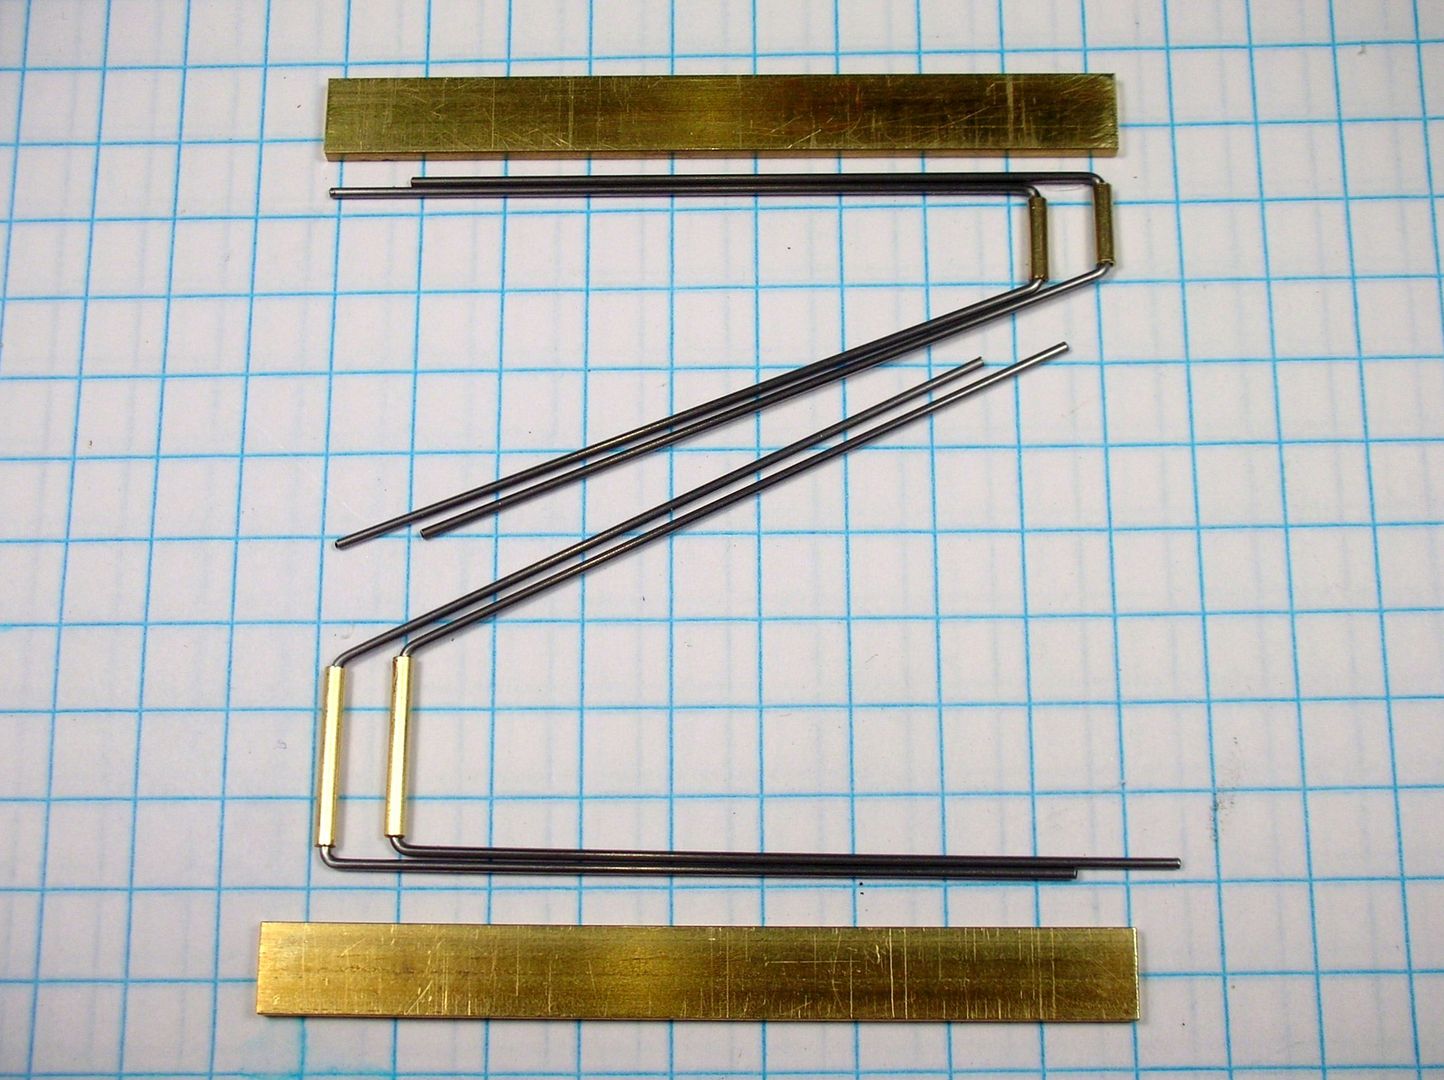
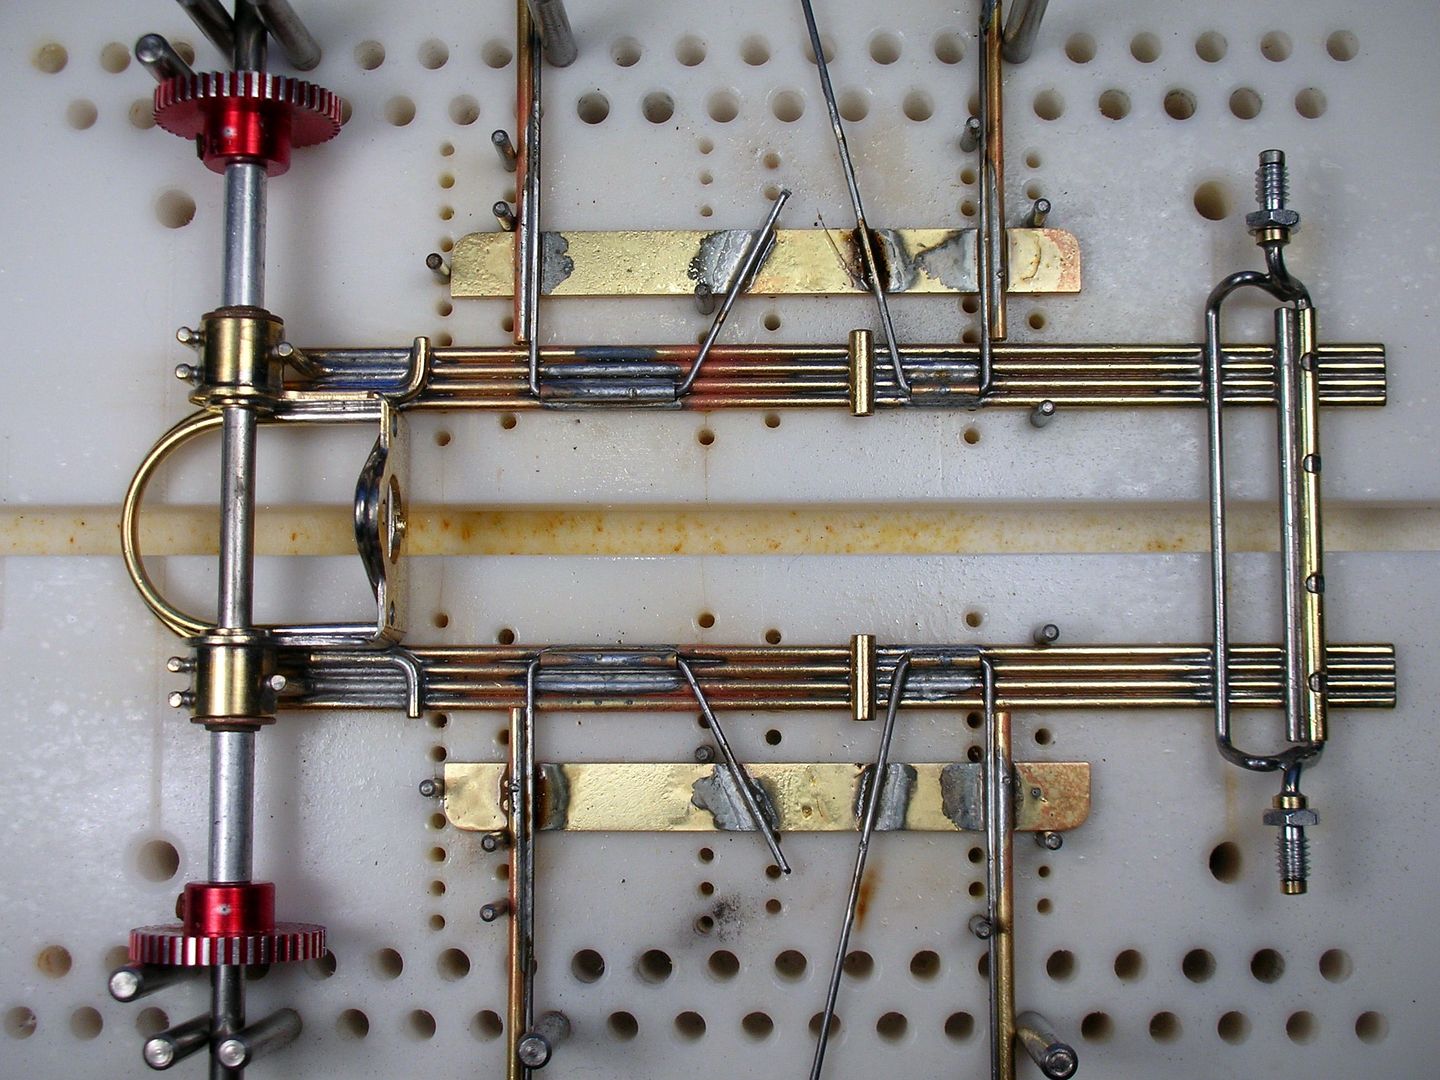
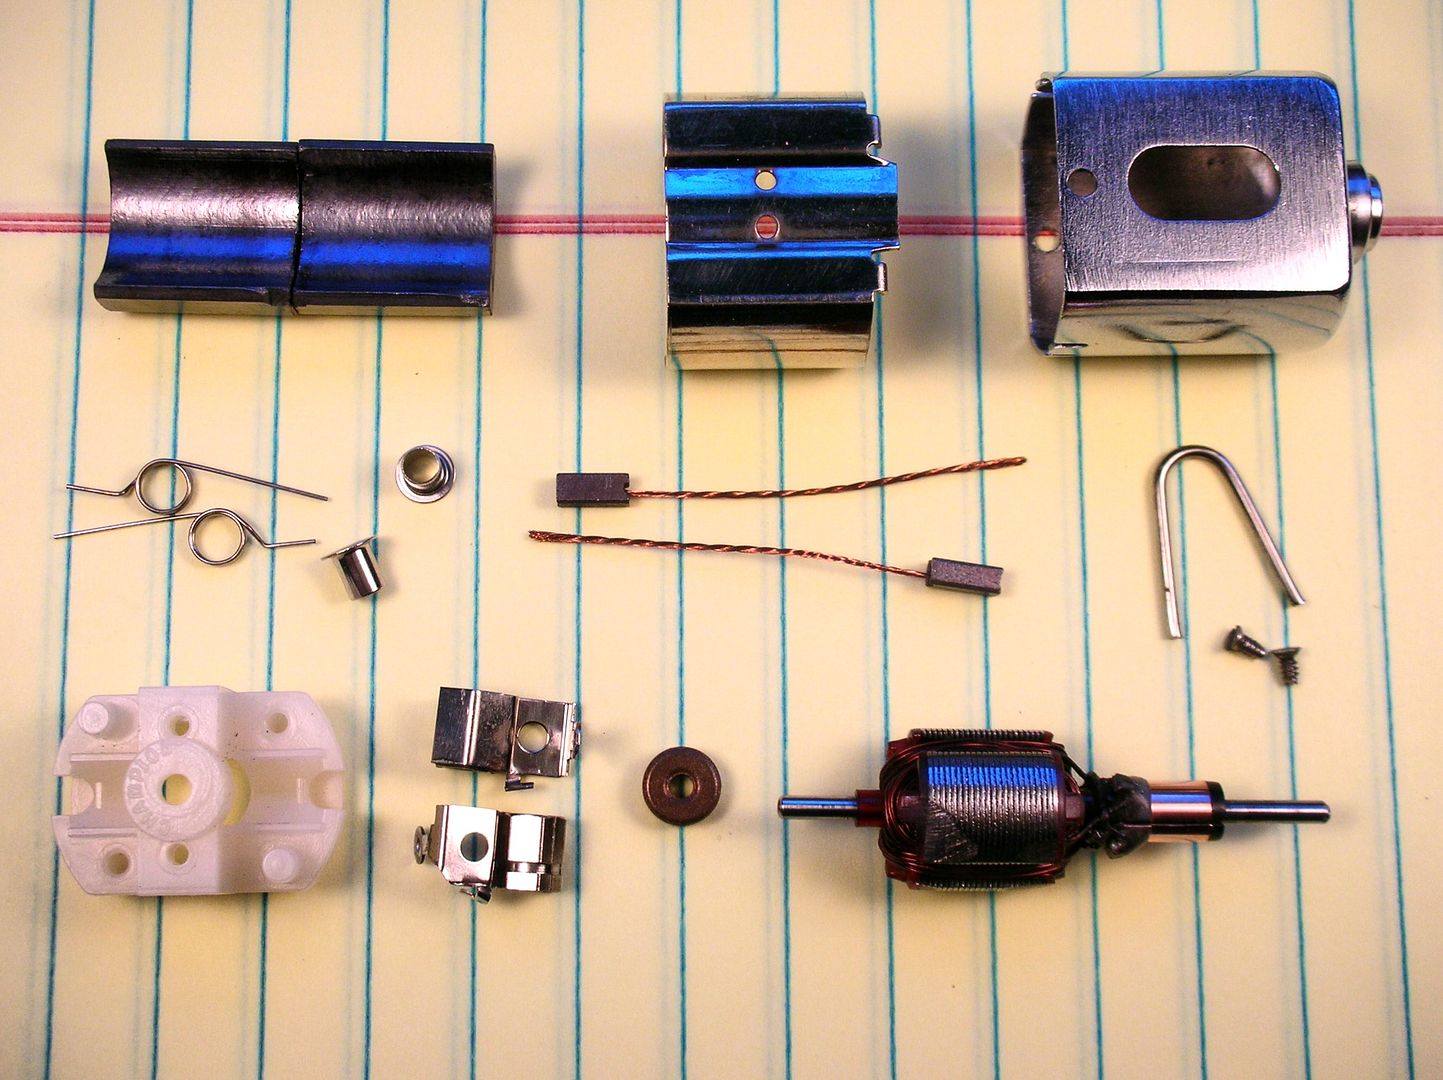
Here are all the bits and pieces of the original car:


Harvey%20eBay%20Find%209.jpg


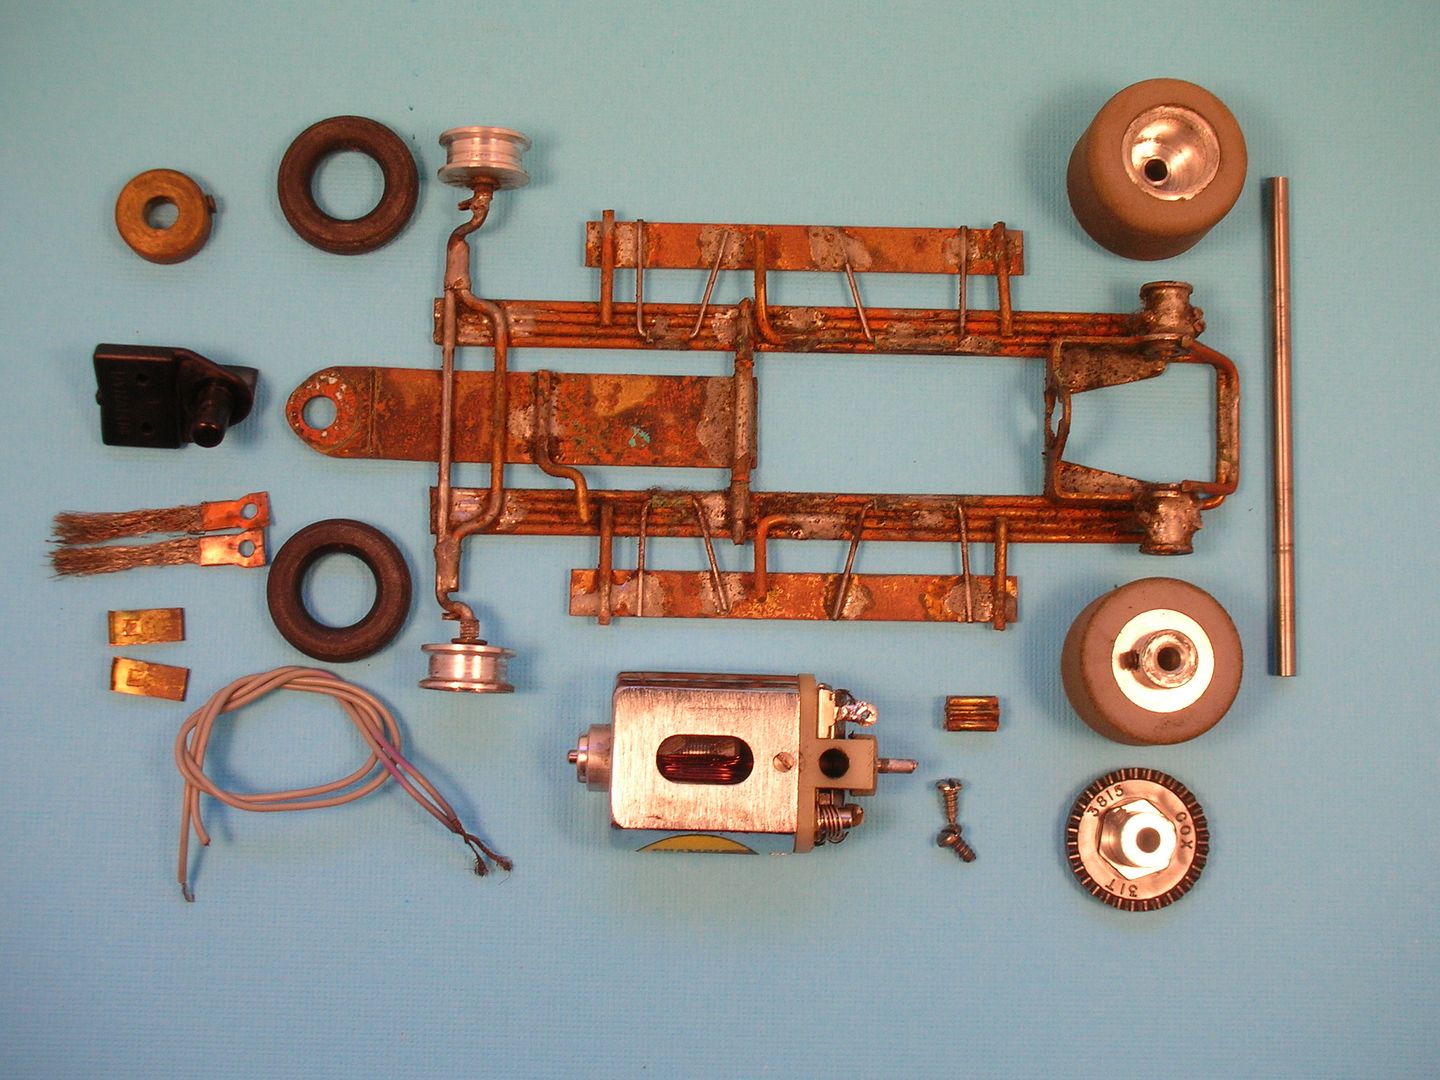
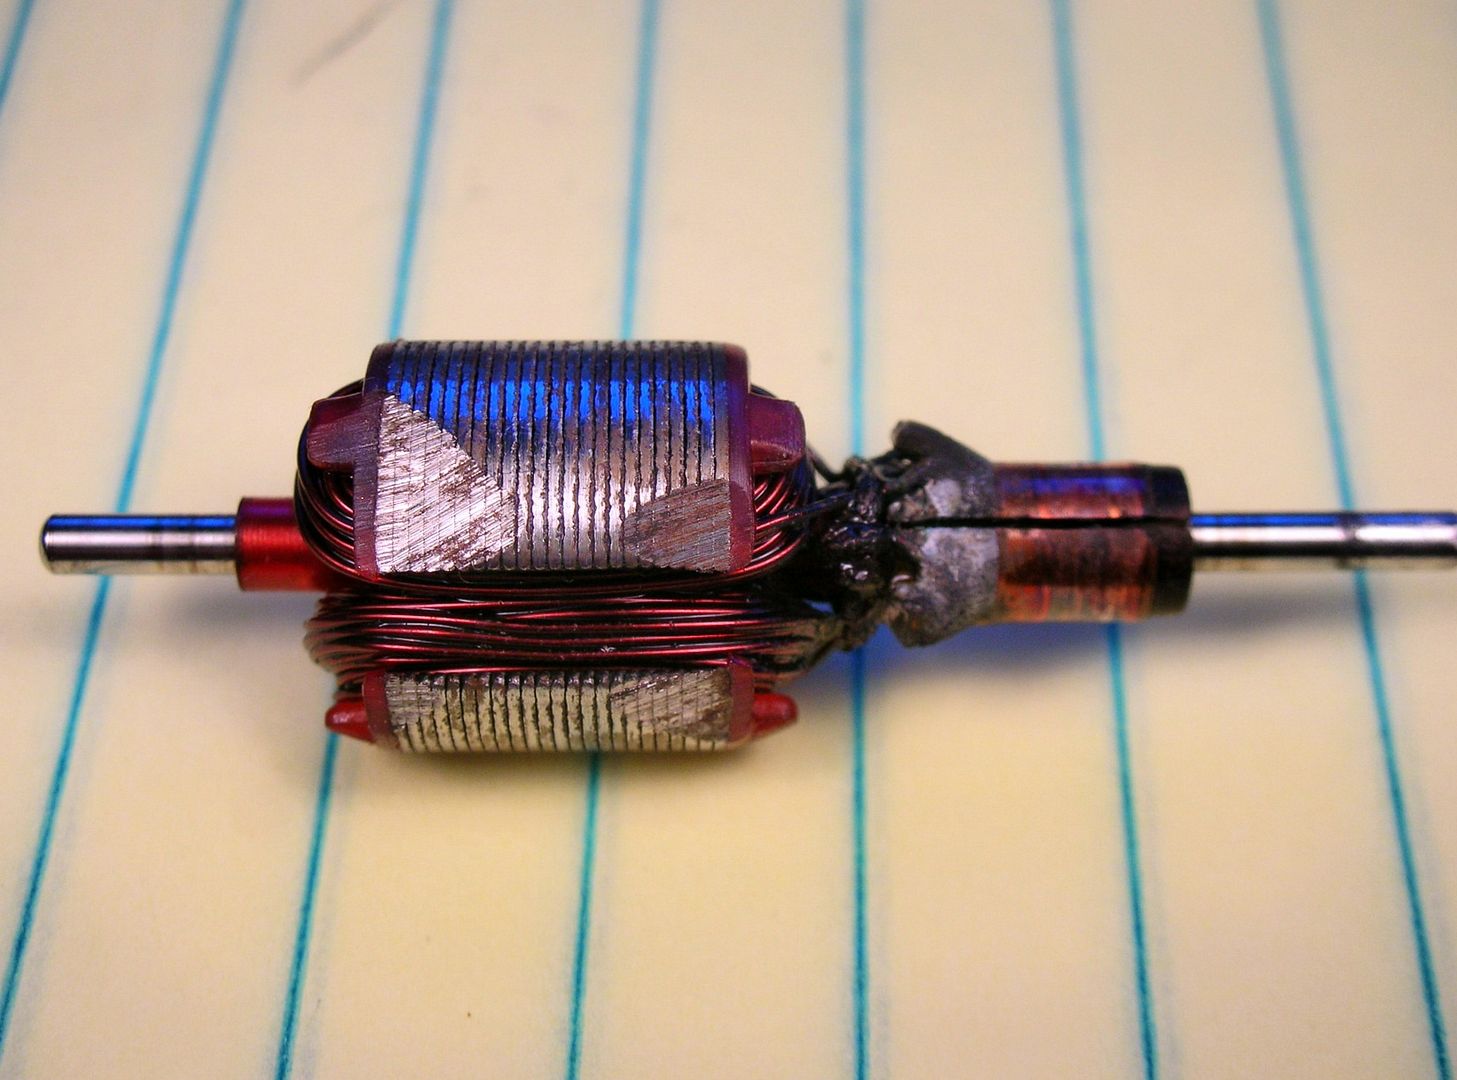
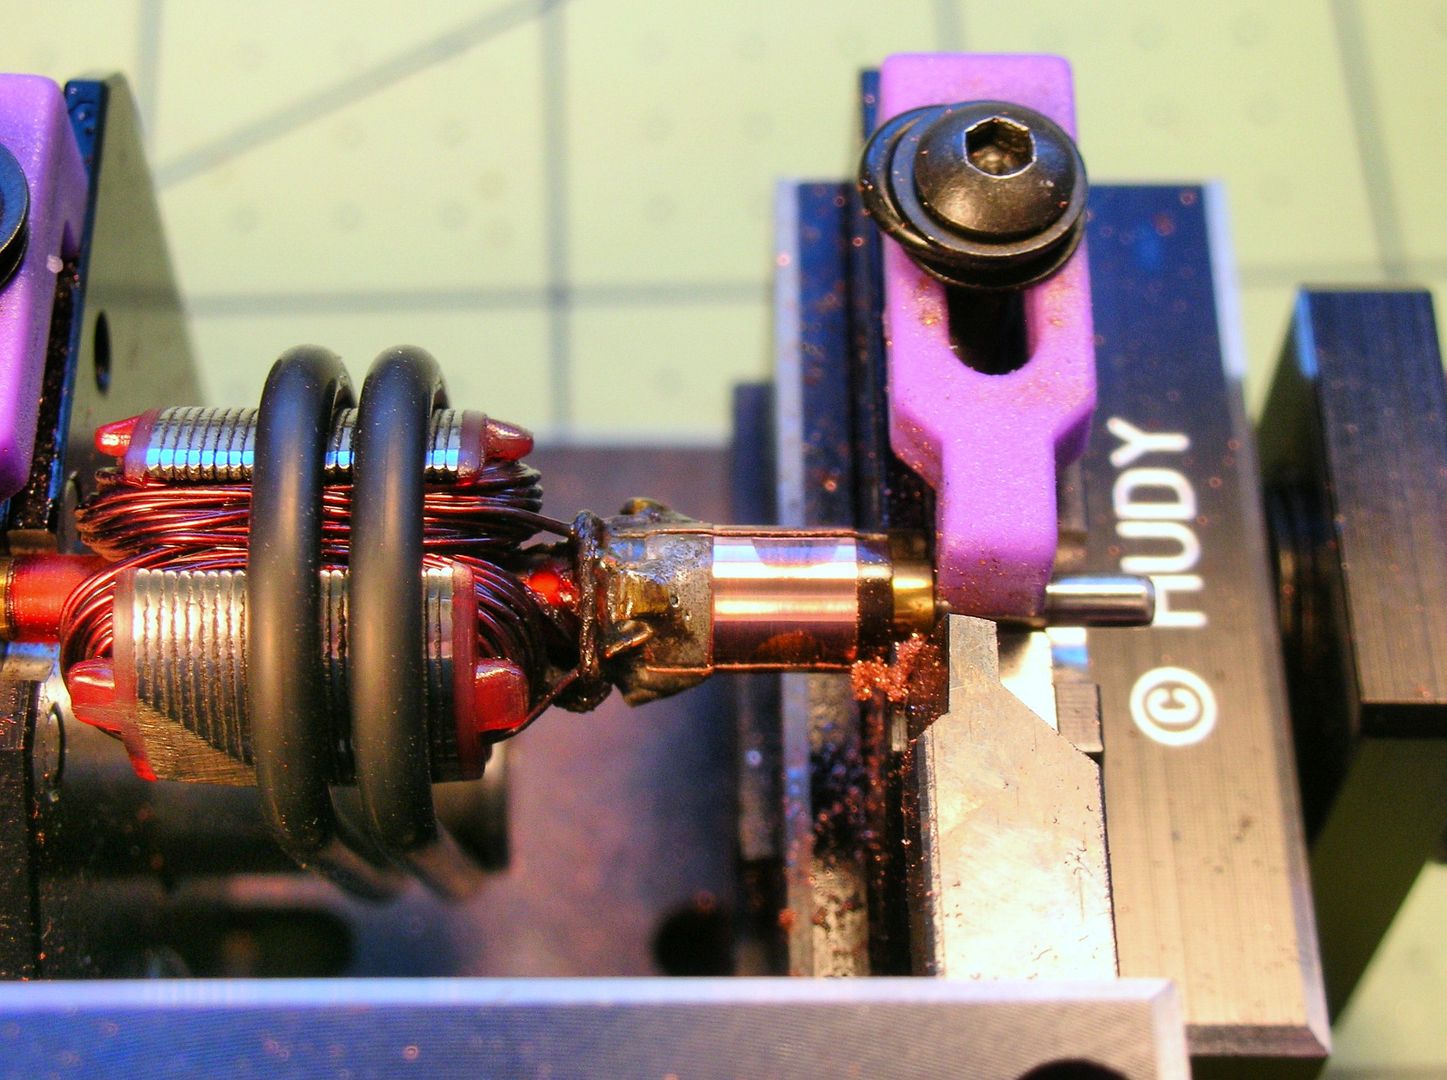
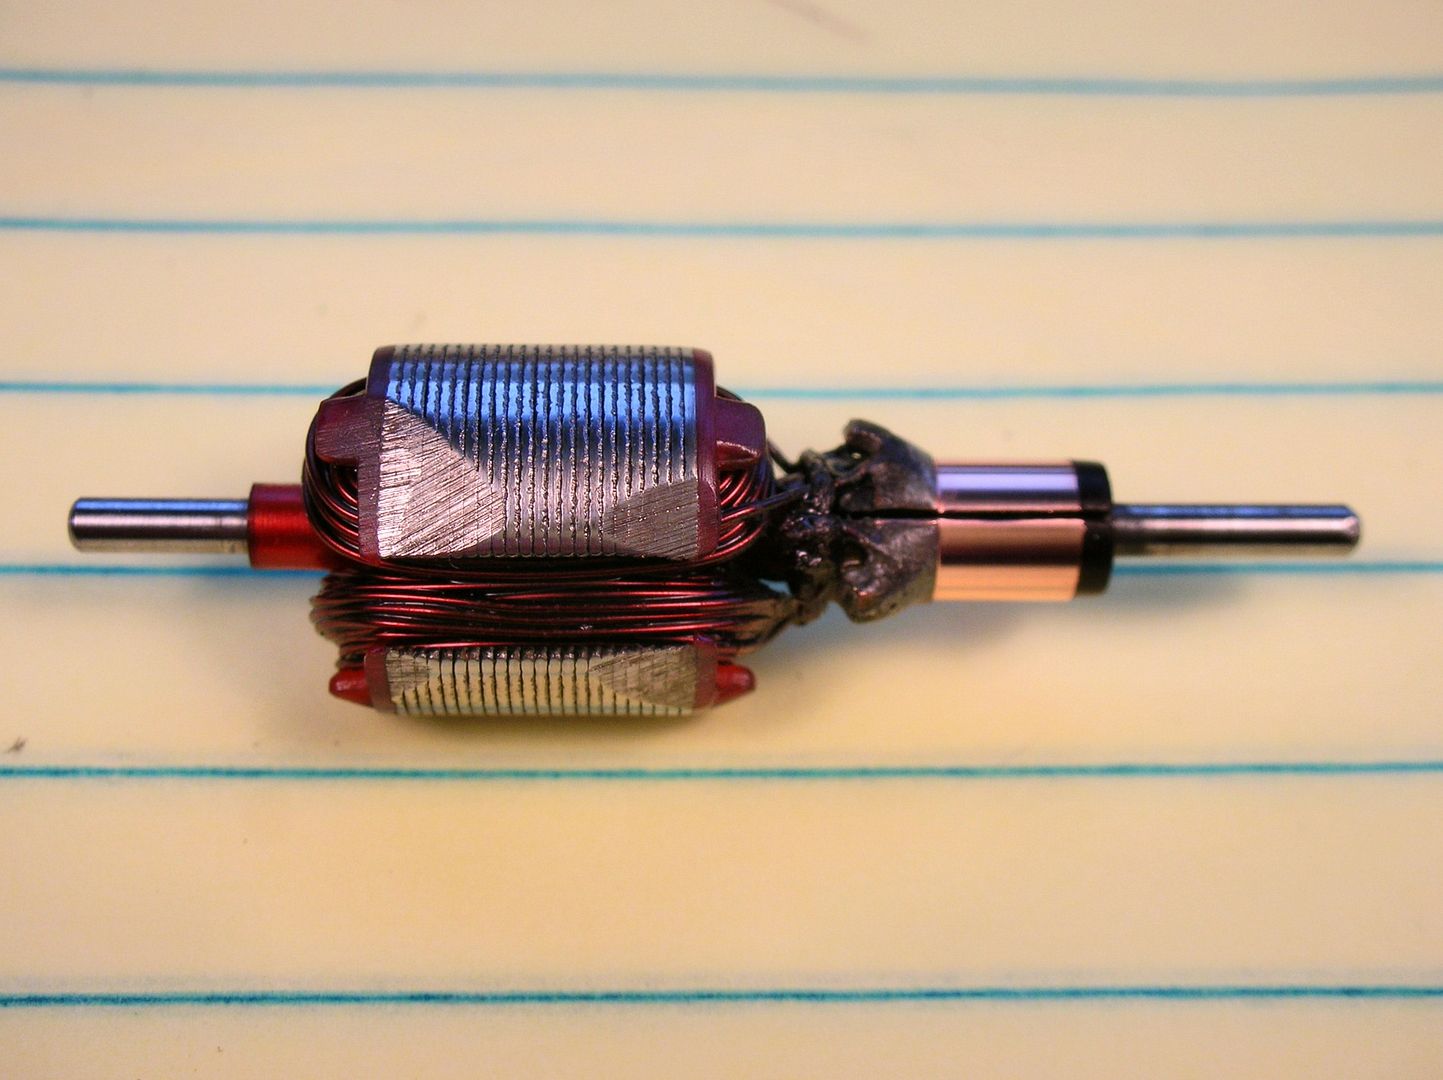
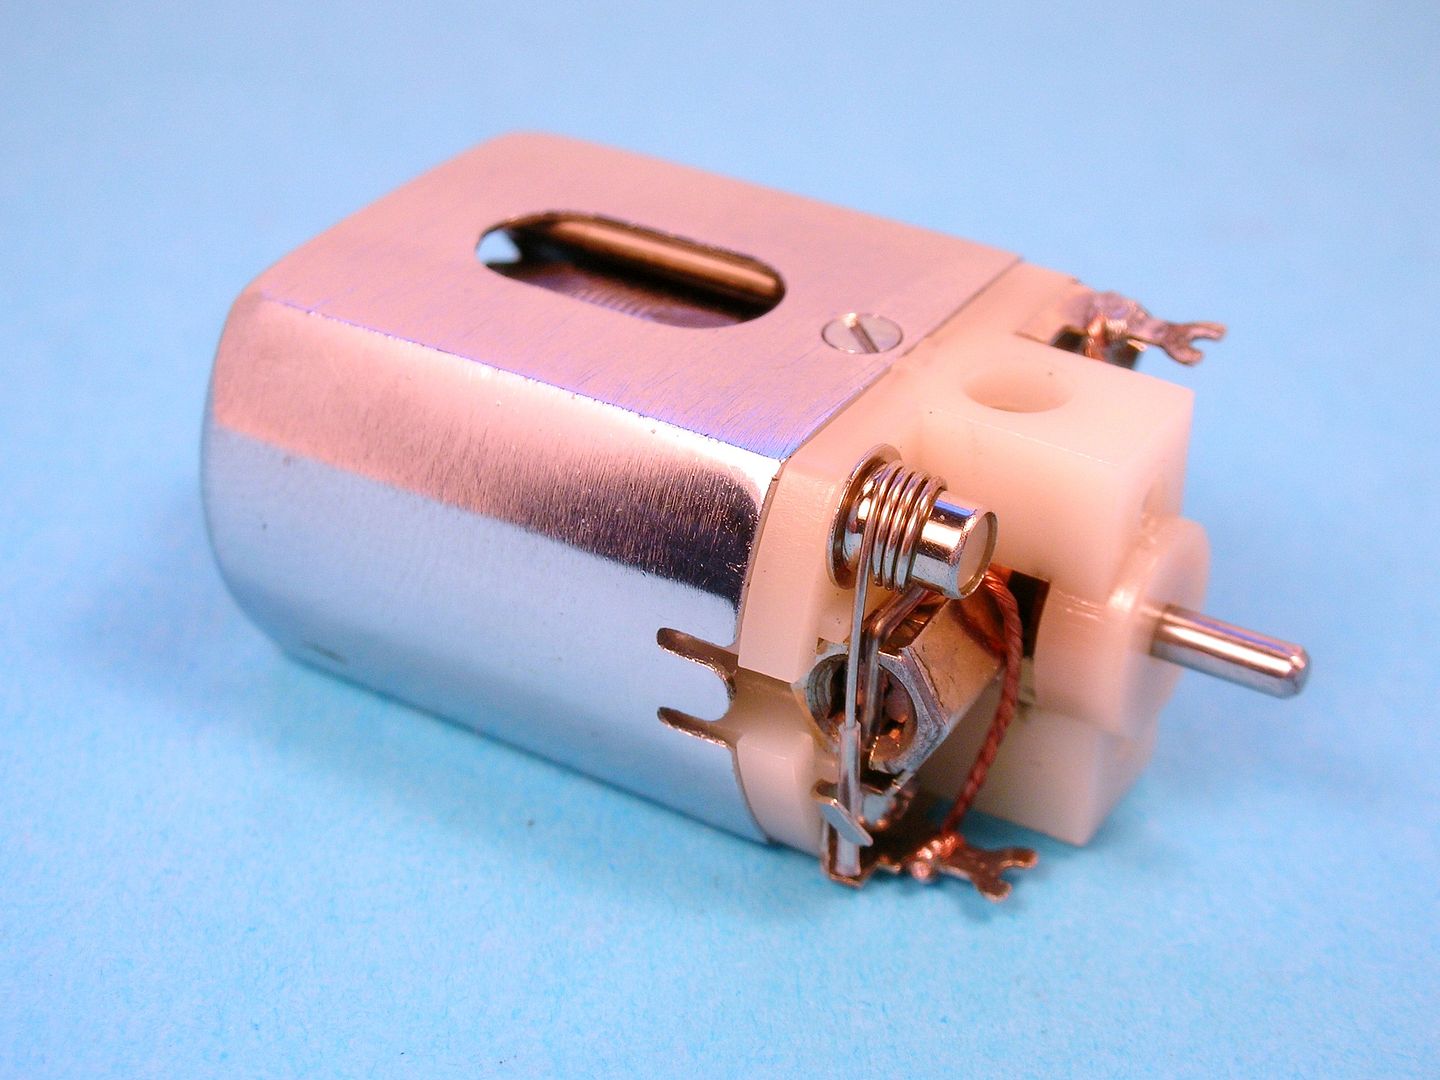
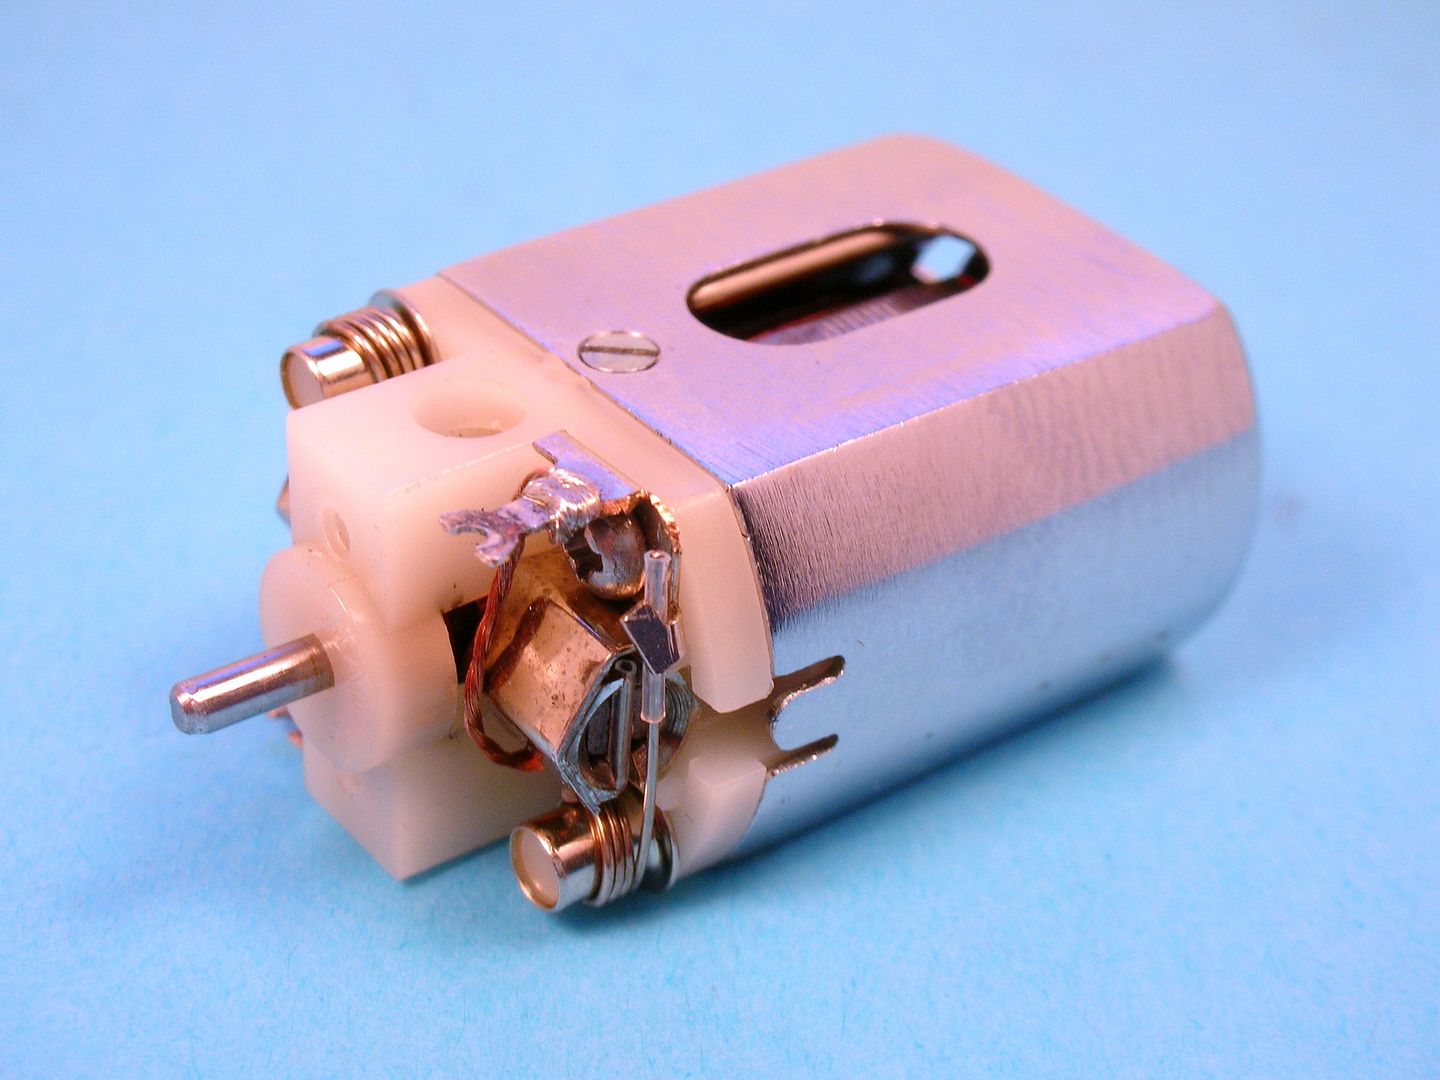
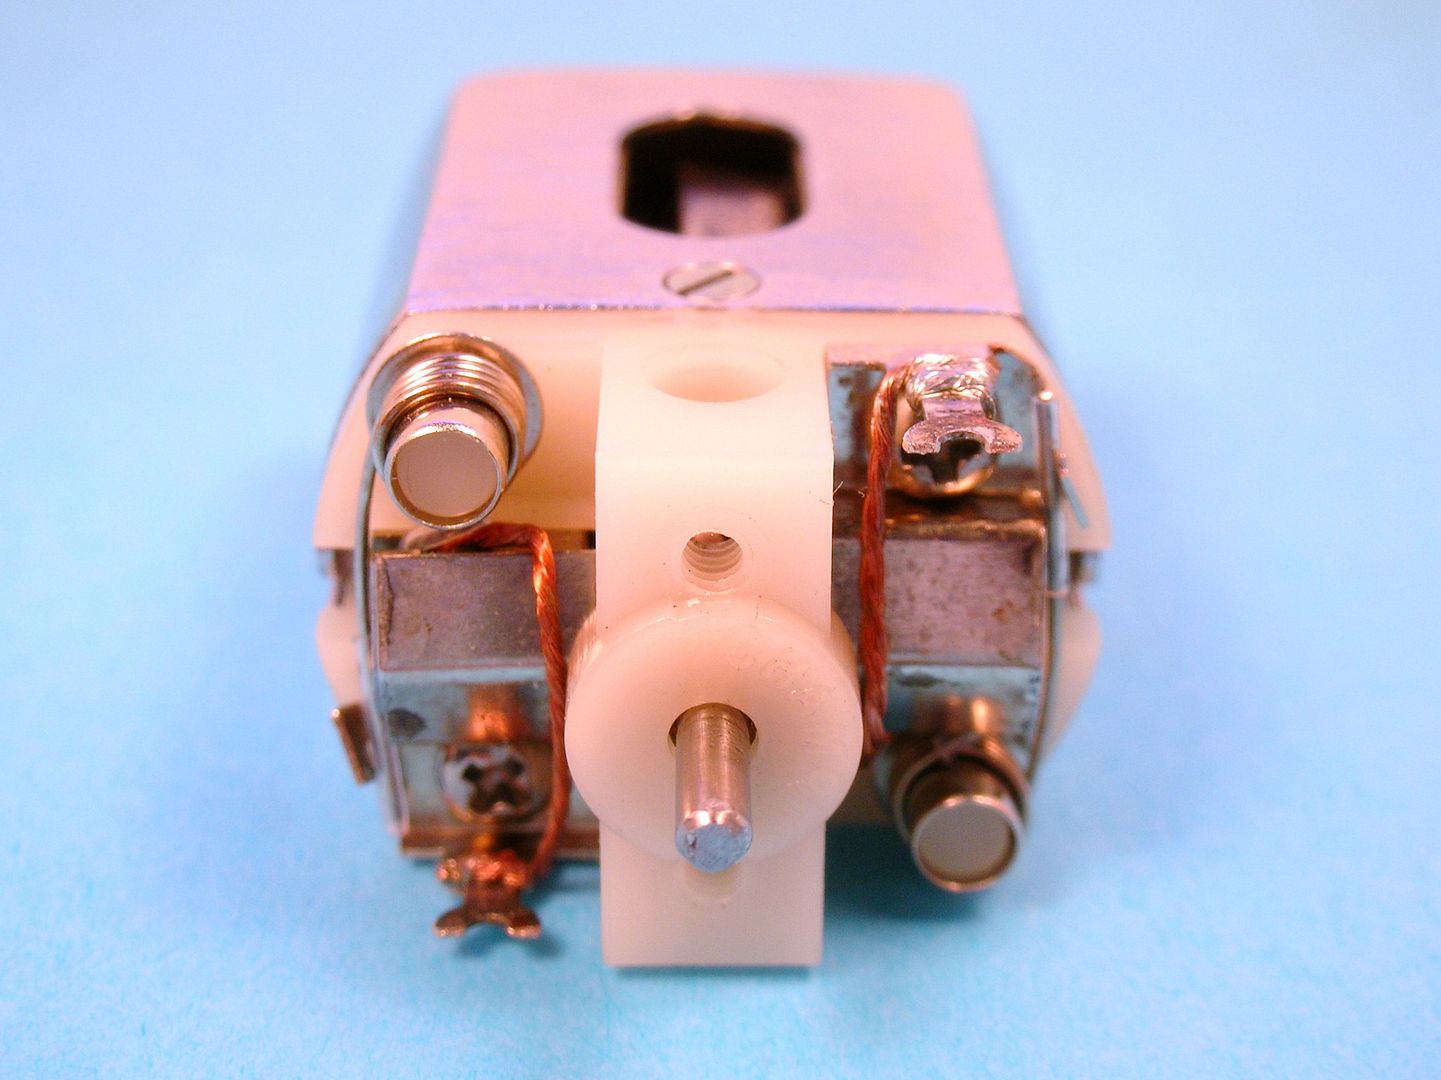
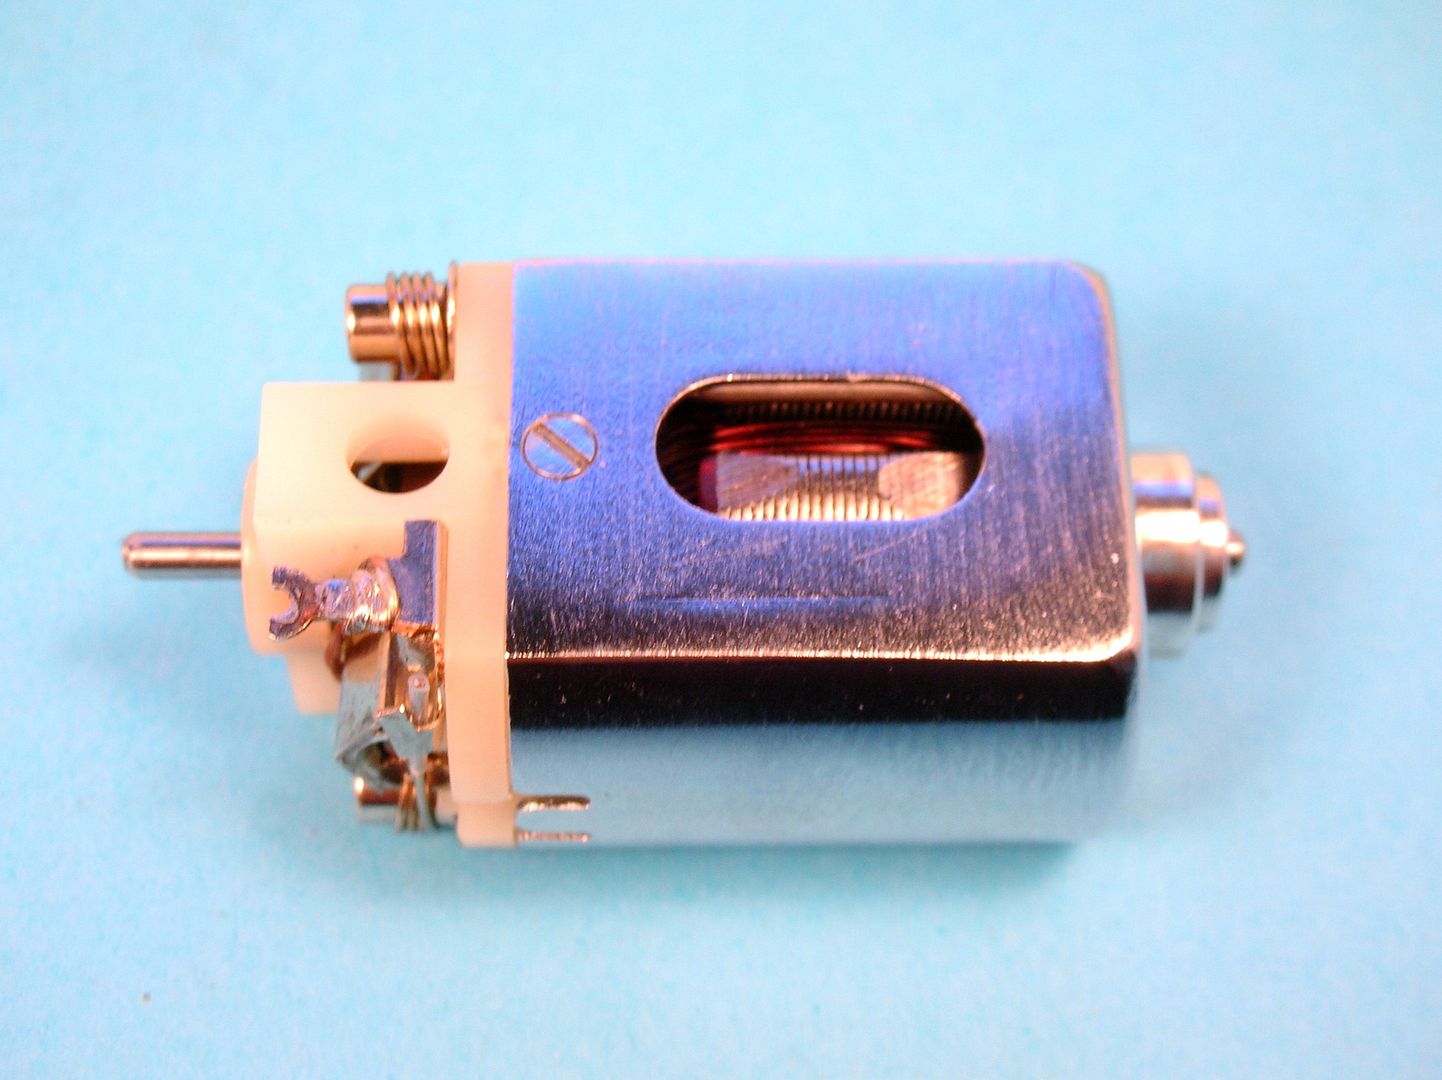
Here's the Champion powerhouse:


Harvey%20eBay%20Find%202.jpg


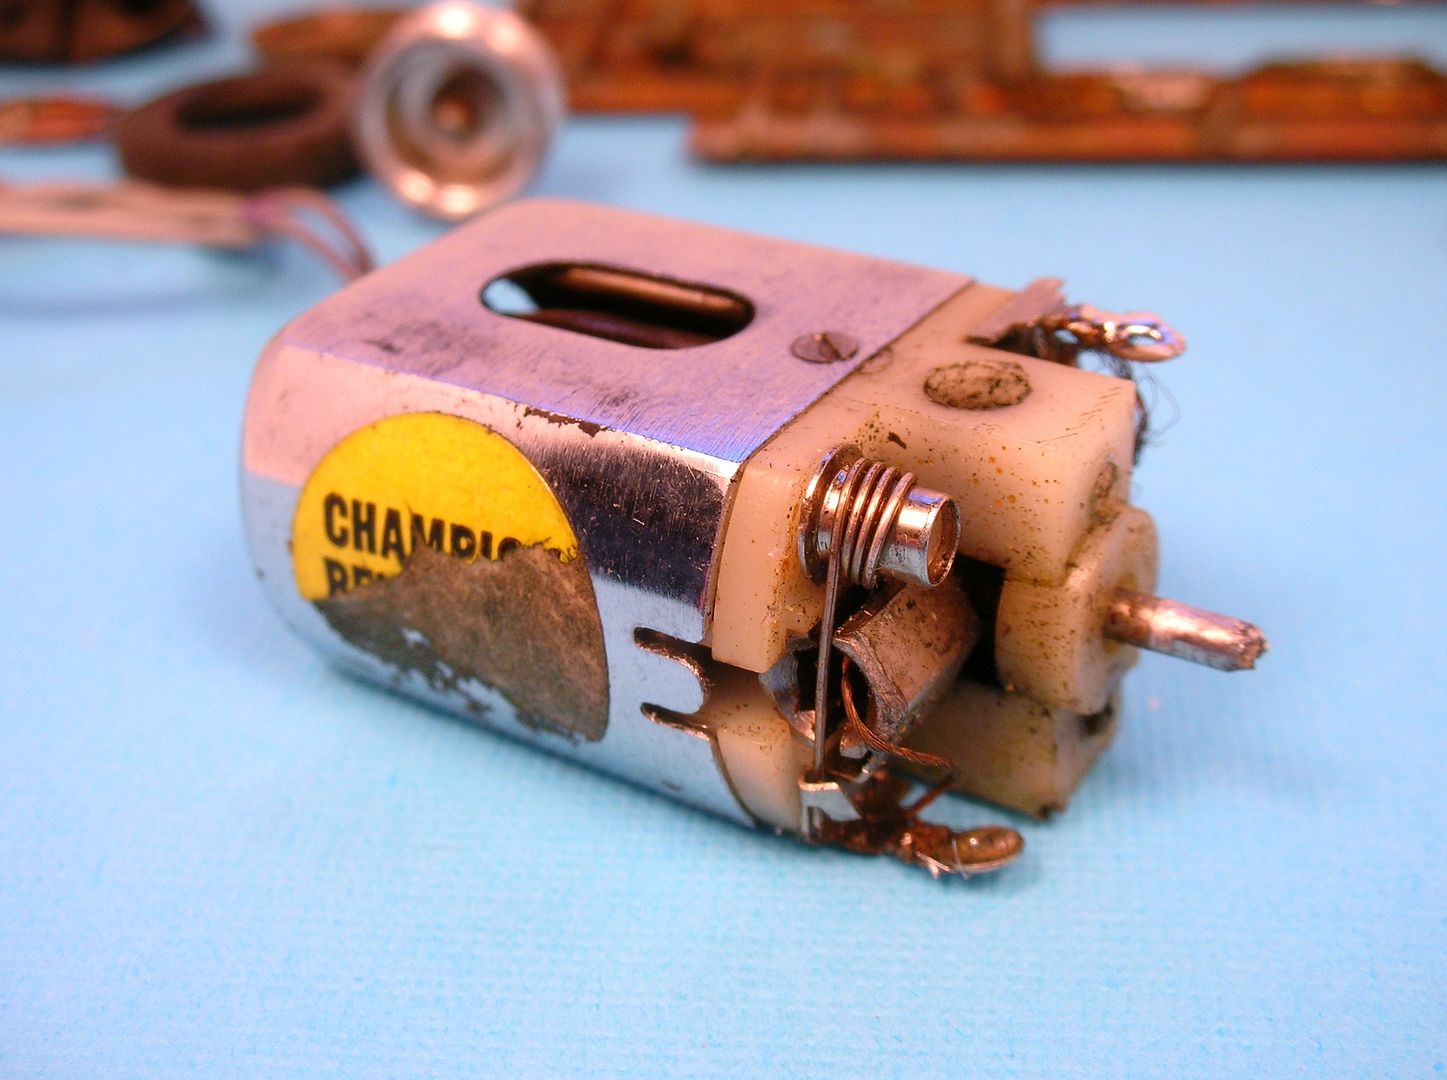
Looks a bit rough on the outside:


Harvey%20eBay%20Find%201.jpg


Harvey%20eBay%20Find%2013.jpg


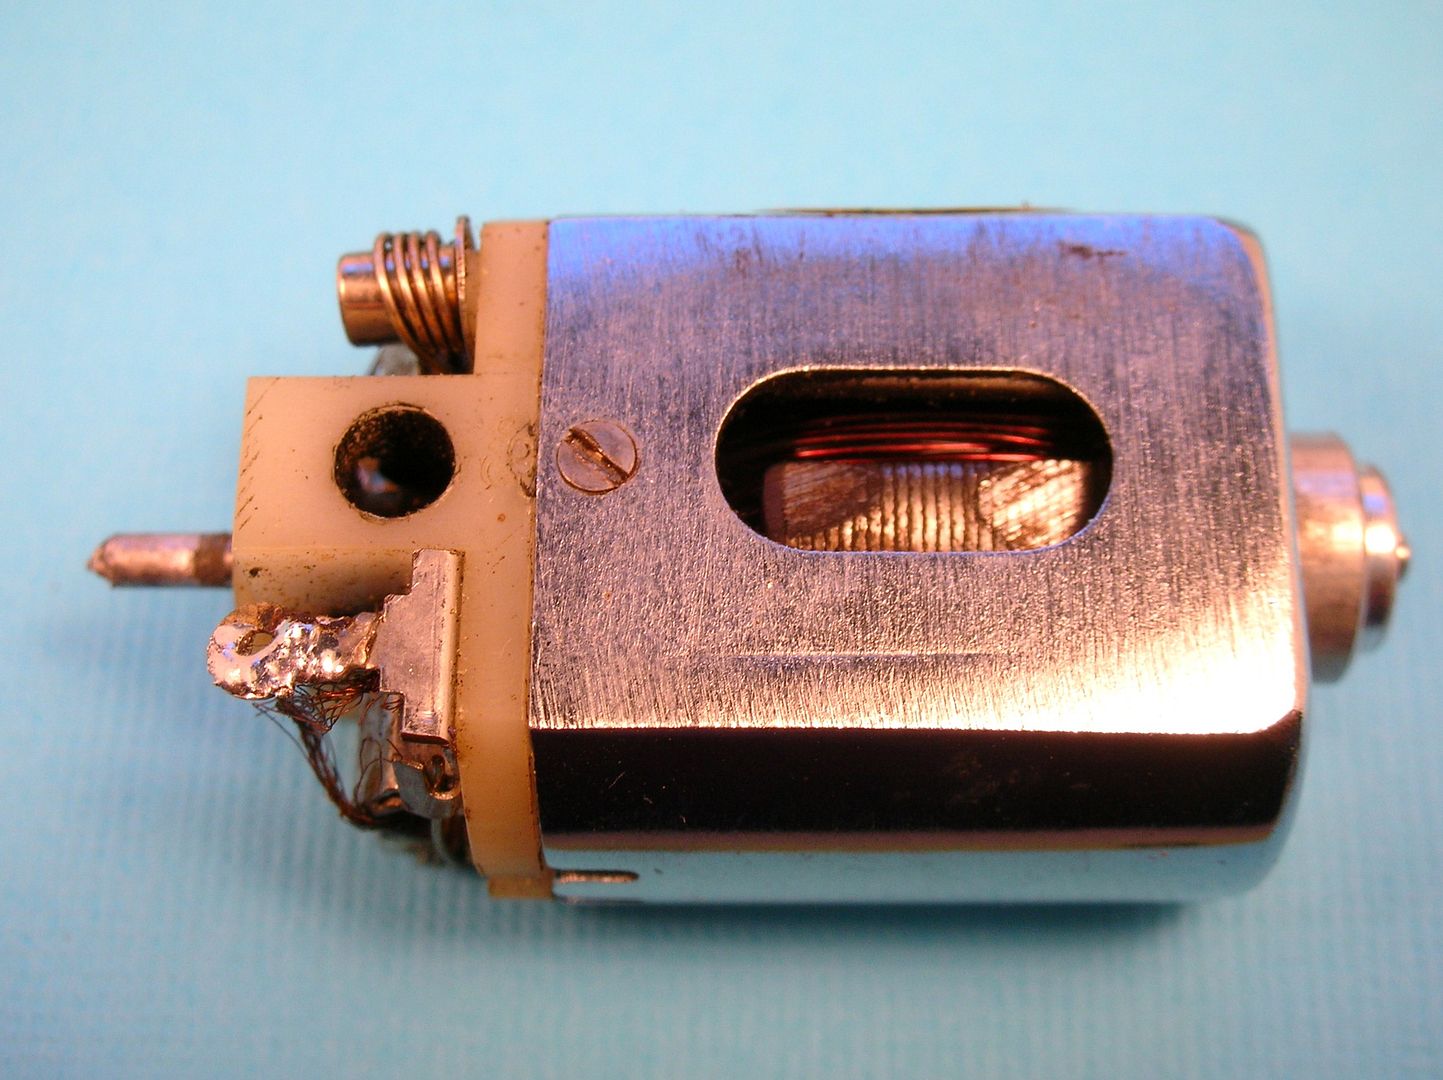
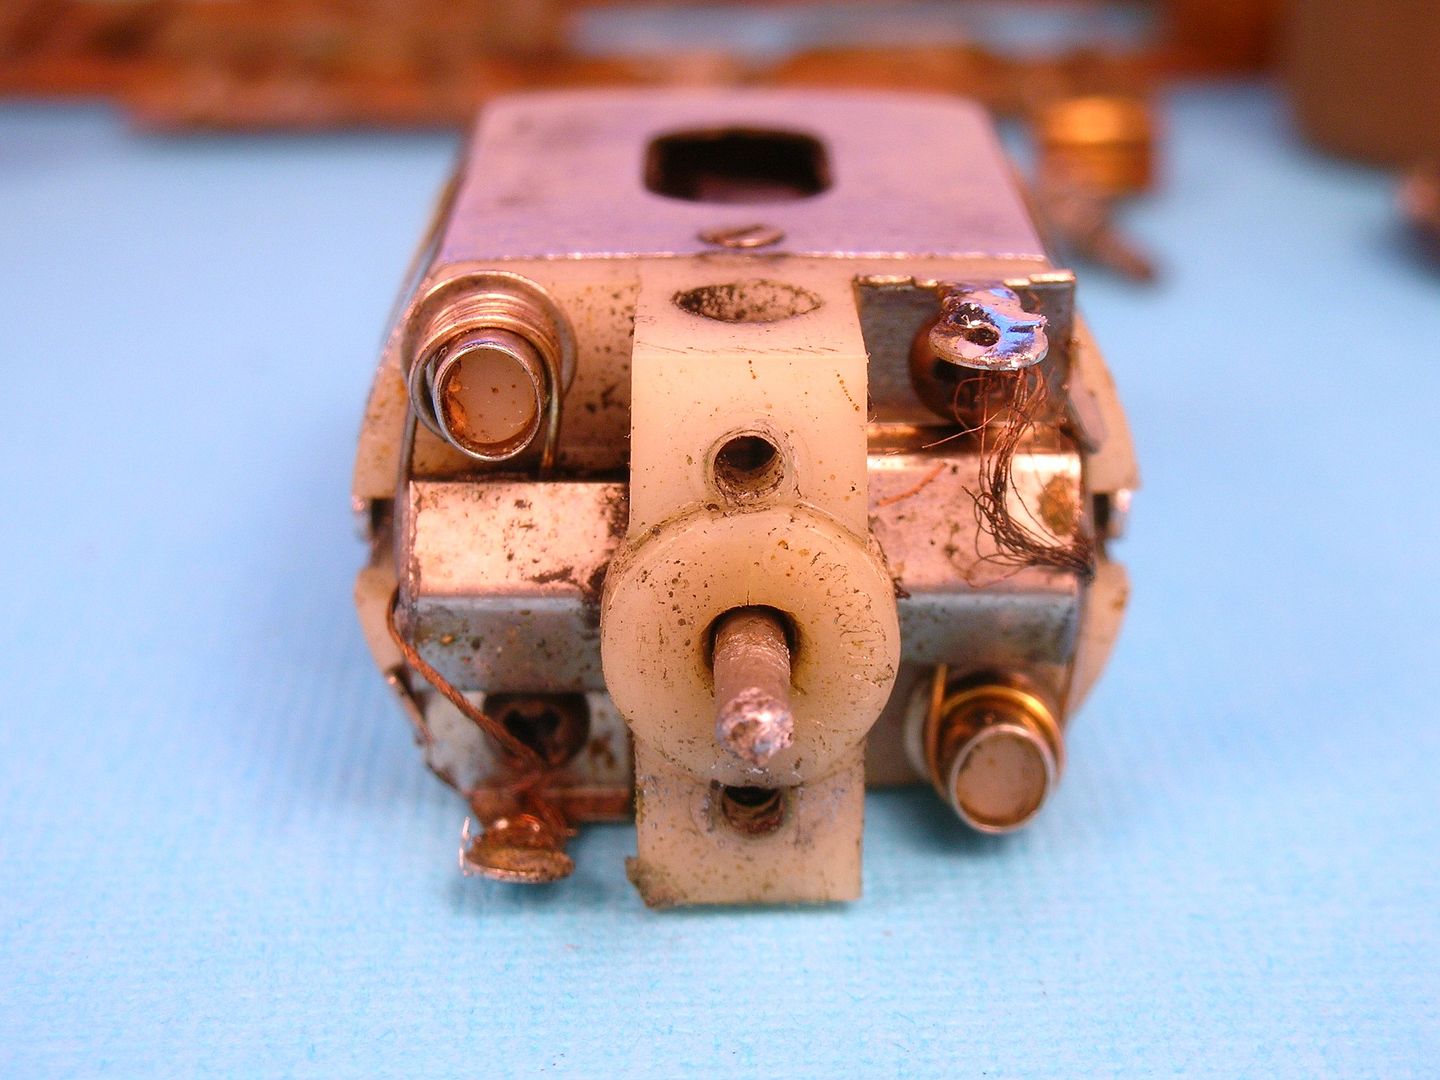
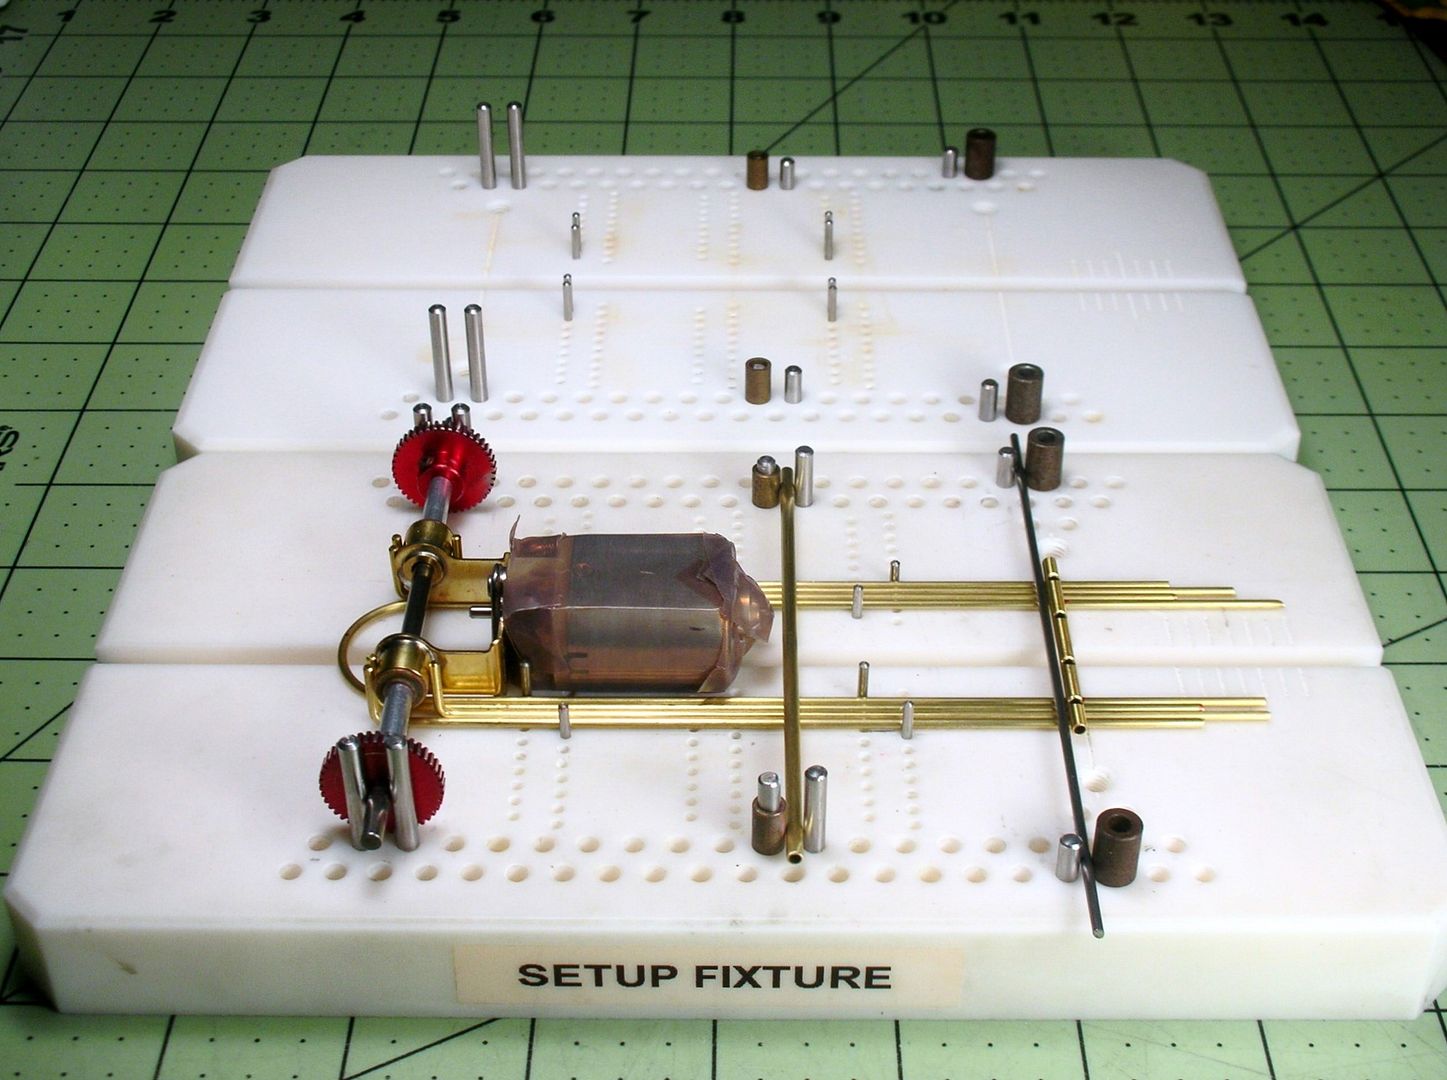
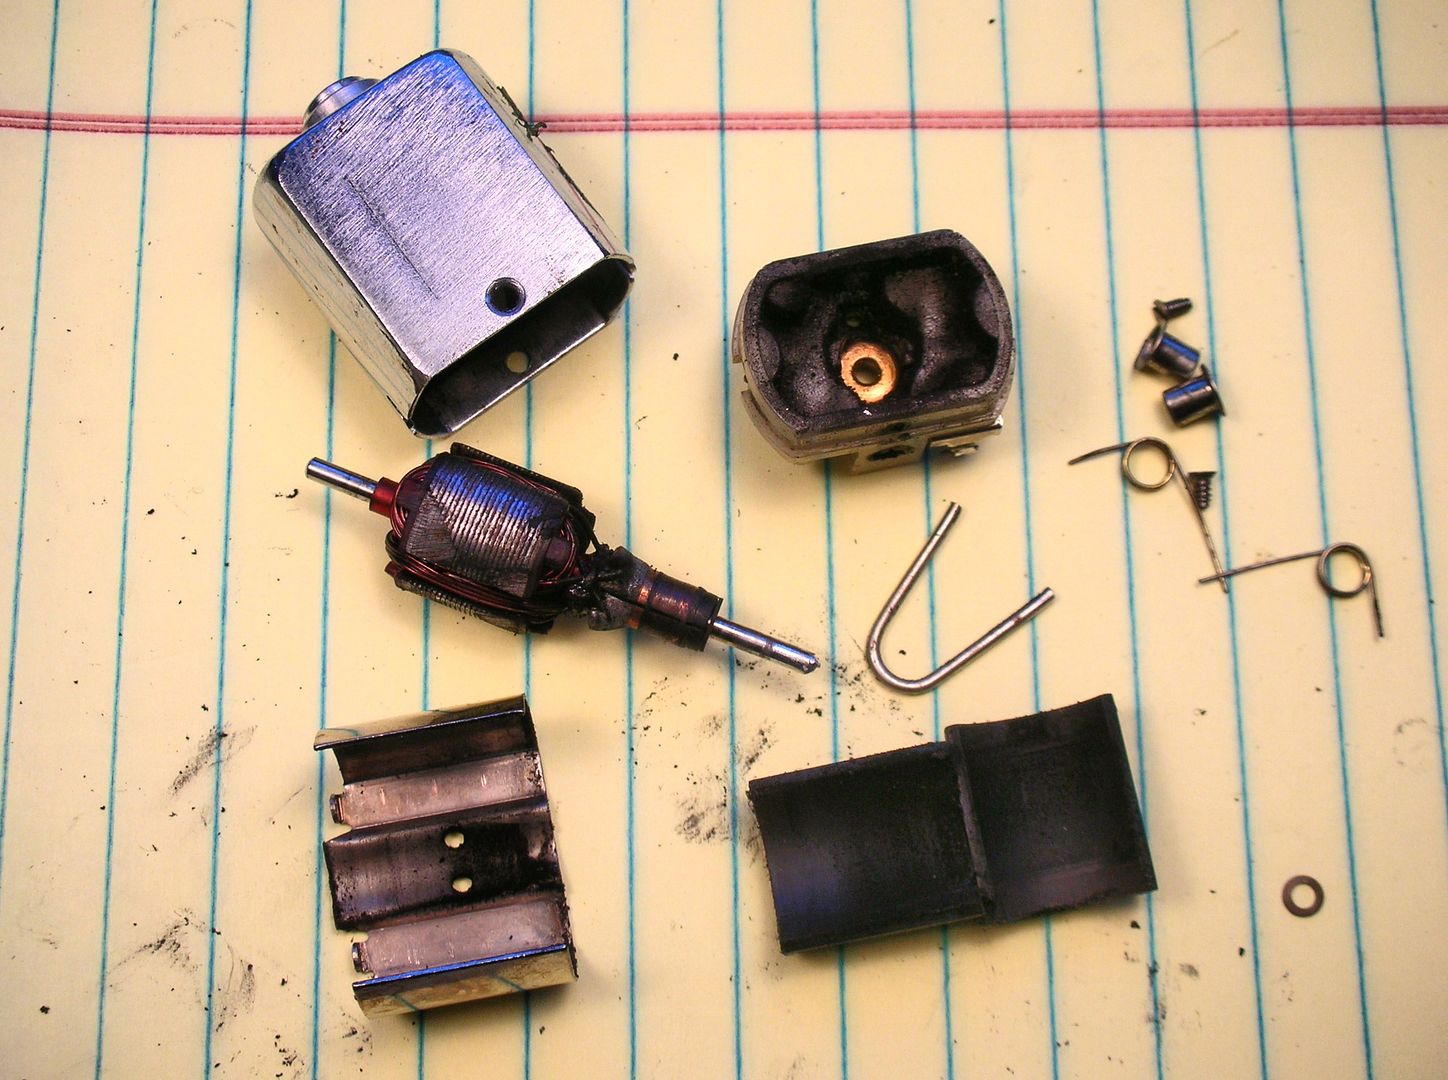
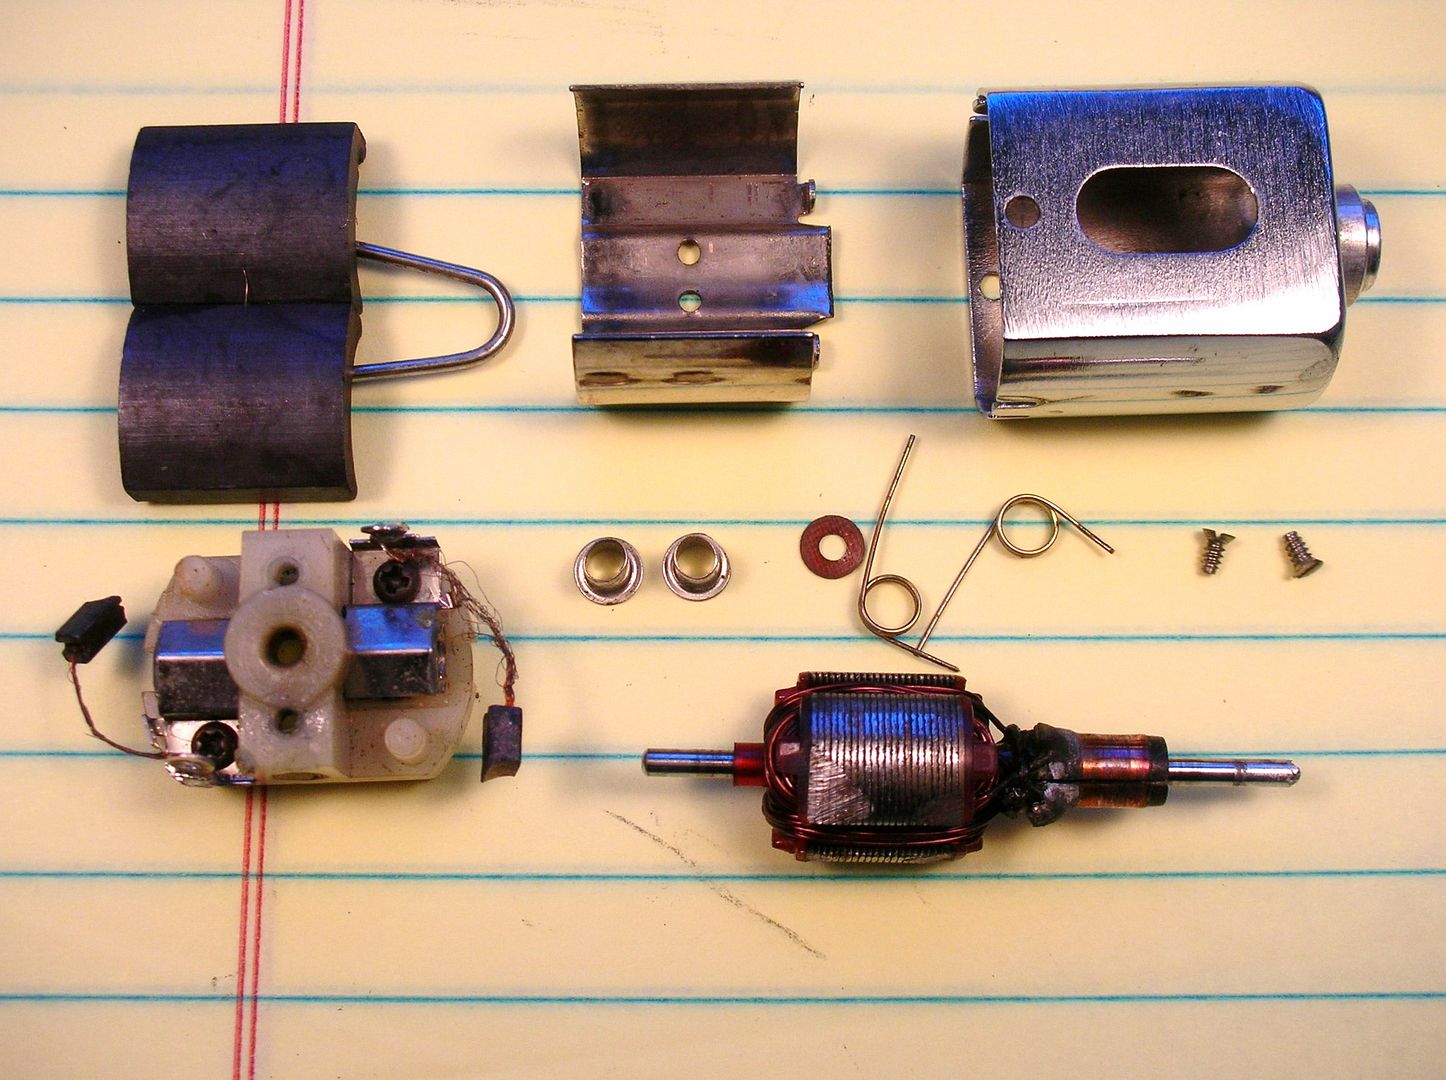
Next the motor comes apart to see what awaits me inside........... :victory:


  • slotbaker, Jencar17, Tex and 5 others like this

Rick Thigpen
Check out Steve Okeefe's great web site at its new home here at Slotblog:
The Independent Scratchbuilder
There's much more to come...


#2 Pablo

Pablo

    Builder

  • Administrator
  • PipPipPipPipPipPipPipPip
  • 18,454 posts
  • Joined: 20-February 06
  • Gender:Male
  • Location:Cleveland, Tennessee

Posted 06 November 2017 - 07:16 AM

:popcorm1: :D


Paul Wolcott


#3 Bill from NH

Bill from NH

    Age scrubs away speed!

  • Full Member
  • PipPipPipPipPipPipPipPip
  • 14,761 posts
  • Joined: 02-August 07
  • Gender:Male
  • Location:New Boston, NH

Posted 06 November 2017 - 08:02 AM

Rick, I've got a factory painted Lancer that I built up in 1967-68 & two REHCO repops that are labeled as Lancer. Both of these repops have extended noses like a Dynamic, so I assume they were pulled using a Dynamic mold rather than a Lancer.. Someday I will build a clone of my 67-68 Lancer bodied car, but build it better. :)


Bill Fernald
 
I intend to live forever!  So far, so good.  :laugh2:  :laugh2: 

#4 dc-65x

dc-65x

    Grand Champion Poster

  • Subscriber
  • PipPipPipPipPipPipPipPip
  • 6,976 posts
  • Joined: 14-February 06
  • Gender:Male
  • Location:Captain Rick: The only vintage slot car nut in SW Oregon?

Posted 06 November 2017 - 11:45 AM

Hi Pablo   :bye:


Someday I will build a clone of my 67-68 Lancer bodied car, but build it better.


Me too Bill. I'm building the cool early cars I've always liked as best I can.....fun stuff!  :D


Rick Thigpen
Check out Steve Okeefe's great web site at its new home here at Slotblog:
The Independent Scratchbuilder
There's much more to come...


#5 dc-65x

dc-65x

    Grand Champion Poster

  • Subscriber
  • PipPipPipPipPipPipPipPip
  • 6,976 posts
  • Joined: 14-February 06
  • Gender:Male
  • Location:Captain Rick: The only vintage slot car nut in SW Oregon?

Posted 06 November 2017 - 09:19 PM

Here's the motor torn down to all its grungy components:
 
Harvey%20eBay%20Find%205.jpg
 
The parts are degreased for inspection:
 
Harvey%20eBay%20Find%203.jpg
 
The armature need attention:
 
Harvey%20eBay%20Find%207.jpg
 
You can see the low spots on the comm as it's being trued up:
 
Harvey%20eBay%20Find%208.jpg
 
The arm is ready for action. It was discussed in an earlier thread on Champion motors that these particular armature insulators were color coded to identify the wire size. Red is 26 ga. and this are does have a heavier wire than other 28's and 29's I have:
 
Harvey%20eBay%20Find%206.jpg
 
The parts ready to reassemble. The only parts I'm replacing are the shunted brushes, bare endbell, endbell bearing.................


Harvey%20eBay%20Find%204.jpg


.......and the loosey goosey crapo ball bearing in the can. I pressed it out of the can bearing holder. The first time I tried to remove the ball bearing from a test can, it popped right out. On this can it came out in pieces shown on the right.


Here's the crapo ball bearing and its oilite replacement:


Harvey%20eBay%20Find%2017.jpg


The rebuilt motor cleaned up nicely:


Harvey%20eBay%20Find%2019.jpg


I added my clear Teflon brush spring insulators. Now the brush spring and therefore the endbell spring post are completely insulated from the current and heat:


Harvey%20eBay%20Find%2022.jpg


The new endbell is tapped for 2-56 machine screws:


Harvey%20eBay%20Find%2020.jpg


She looks like new and is ready to roll:


Harvey%20eBay%20Find%2018.jpg


There is always a risk with these old arms that corrosion got inside the comm. It could blow at any time but it will be fun to see it run again. :D


  • slotbaker, Pablo, Jencar17 and 6 others like this

Rick Thigpen
Check out Steve Okeefe's great web site at its new home here at Slotblog:
The Independent Scratchbuilder
There's much more to come...


#6 dc-65x

dc-65x

    Grand Champion Poster

  • Subscriber
  • PipPipPipPipPipPipPipPip
  • 6,976 posts
  • Joined: 14-February 06
  • Gender:Male
  • Location:Captain Rick: The only vintage slot car nut in SW Oregon?

Posted 09 November 2017 - 07:53 PM

I've always like this car from a 1968 issue of Model Car Racing Journal. The 5-spoke American Mag style wheels aren't "scale" but I think they really pop on this slot car:


MCJ%20V1N5%20p3.jpg


I decided to go with the threaded version these period Cox wheels on the front and turn down a pair of set screw versions to make wheel inserts for my Riggen rear wheels:


MCJ%20V1N1%20p3.jpg


Here what I used for the fronts...........


Harvey%20eBay%20Find%2026.jpg


............and for the rears:


Harvey%20eBay%20Find%2027.jpg


I've got the Cox mags for wheel inserts, crispy critter 50 year old grey donuts, and some first generation Riggen set screw wheels with black tires. I hated to remove those new old stock black tires from the rims........ :unknw:..........so I checked out there later production Riggen AA wheels. All I had to do was trim down the flange on the AA wheels and they're almost identical to the earlier Riggen wheels.
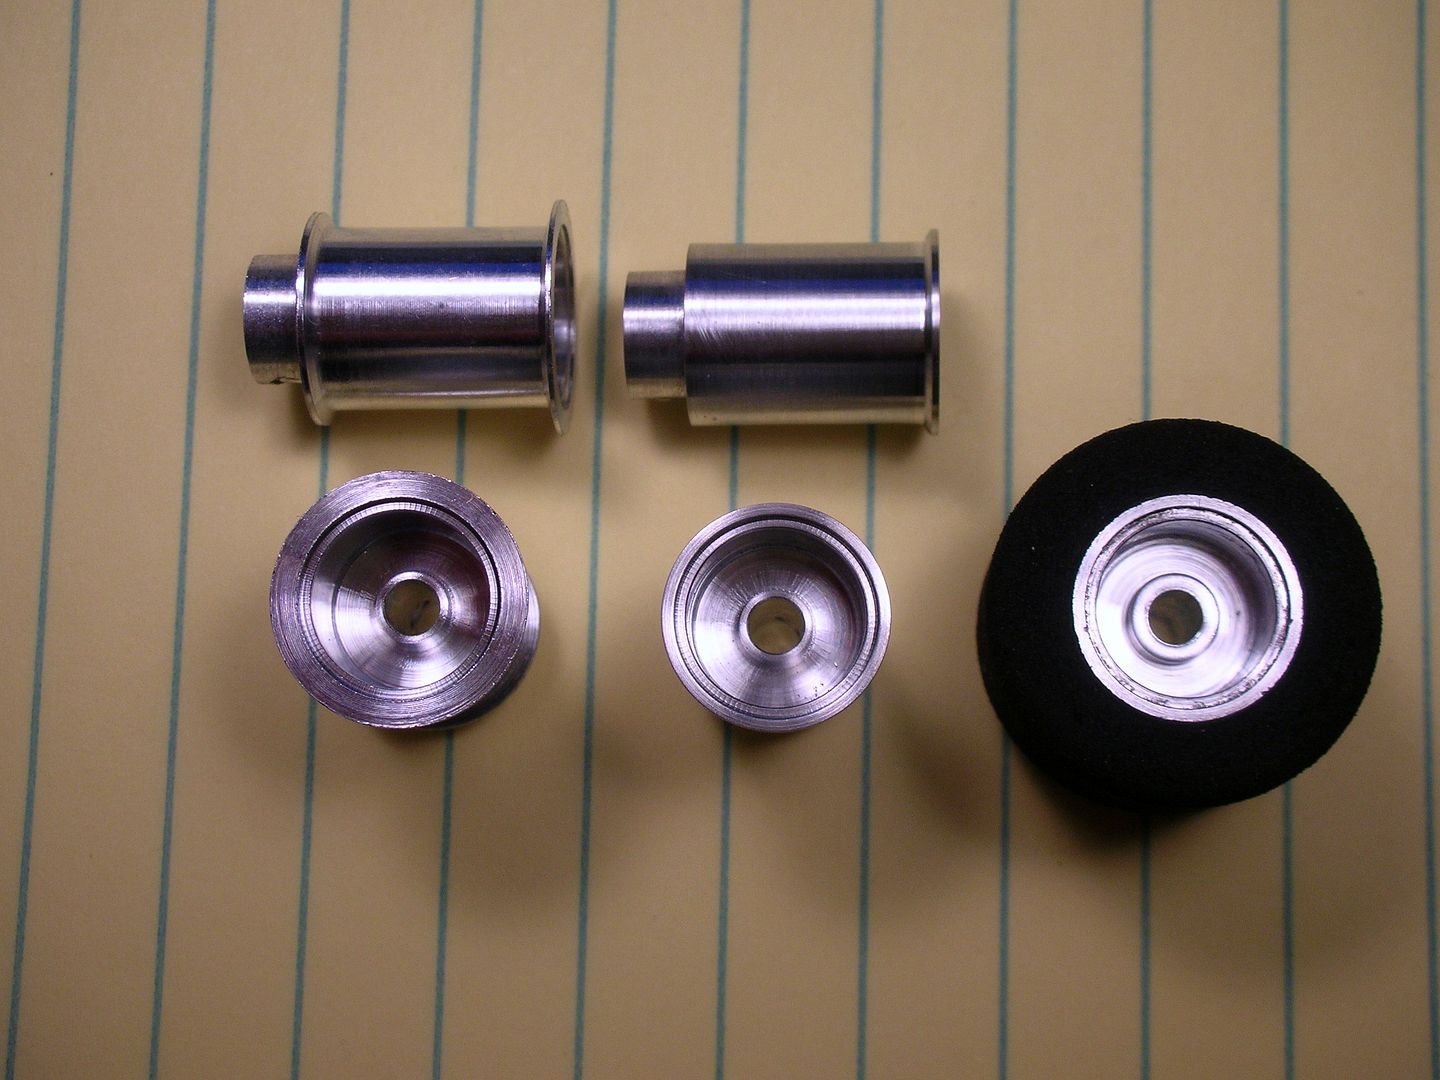
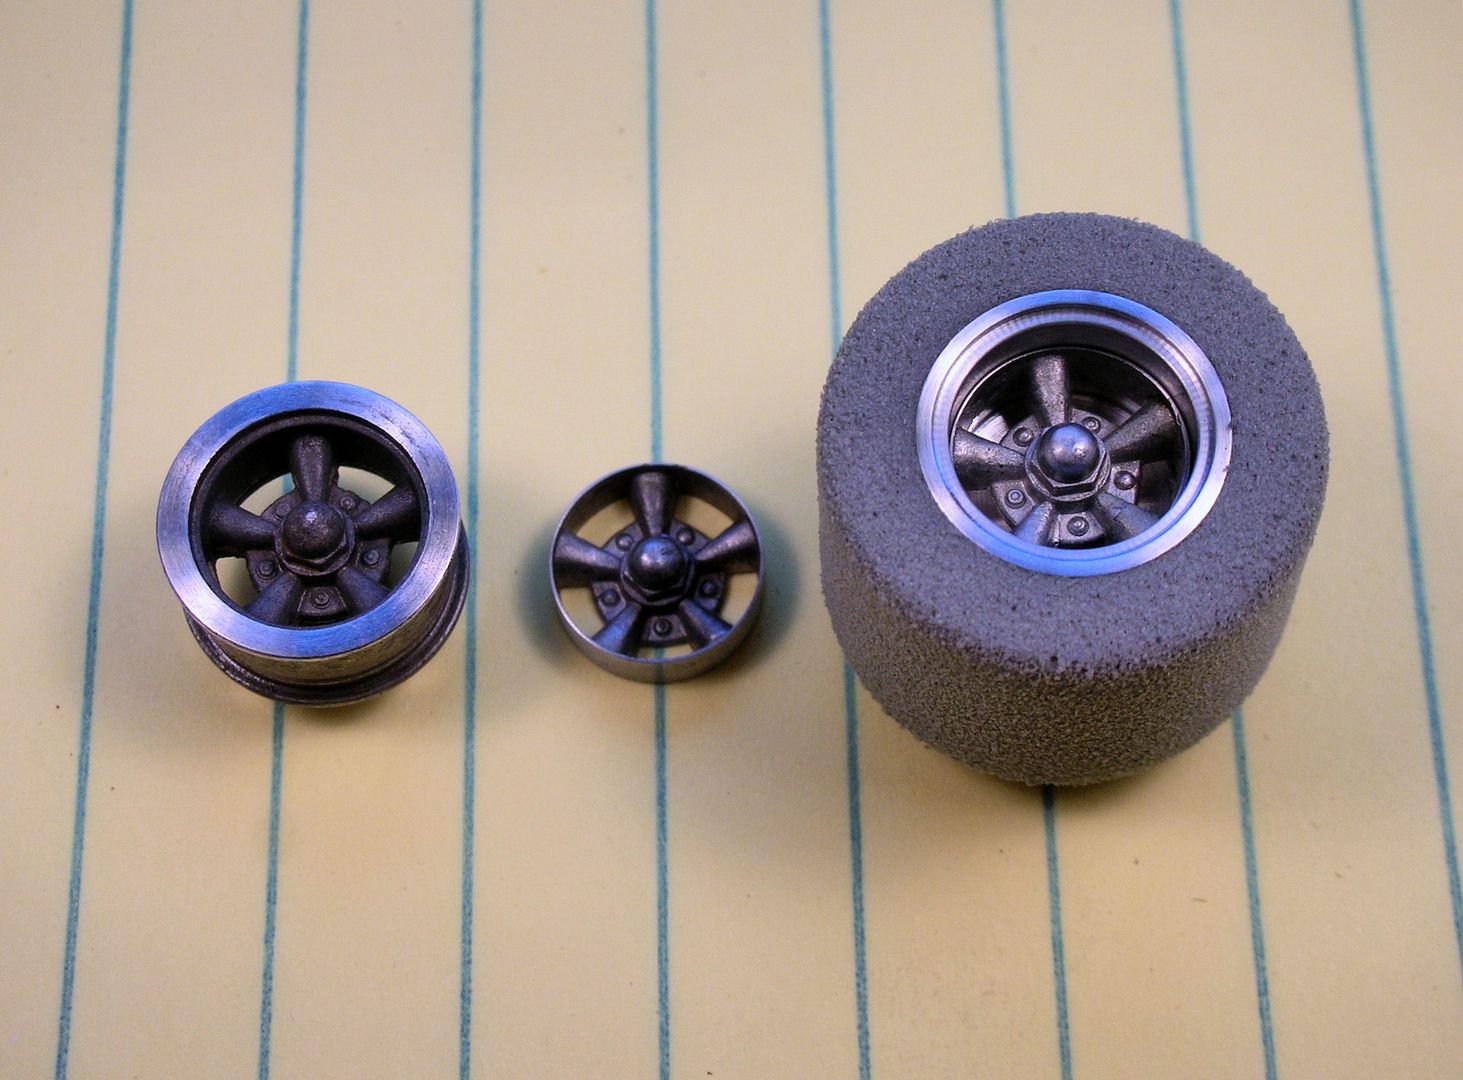
 

Riggen AA wheel on the left, modified AA wheel in the center and first generation Riggen set screw wheel on the right:


Harvey%20eBay%20Find%2024.jpg


I was really worried about the crispy grey donuts busting apart when I tried to mount them. I lucked out and they mounted and trued up nicely:


Harvey%20eBay%20Find%2028.jpg


Here's the Cox wheel's transformation into a super cool wheel insert for the Riggen rear's:


Harvey%20eBay%20Find%2032.jpg


The finished front and rear wheels/tires, 3/4" fronts and 13/16' X 5/8" rears :


Harvey%20eBay%20Find%2033.jpg


The front axle is next....


  • MarcusPHagen, slotbaker, Jencar17 and 8 others like this

Rick Thigpen
Check out Steve Okeefe's great web site at its new home here at Slotblog:
The Independent Scratchbuilder
There's much more to come...


#7 Pablo

Pablo

    Builder

  • Administrator
  • PipPipPipPipPipPipPipPip
  • 18,454 posts
  • Joined: 20-February 06
  • Gender:Male
  • Location:Cleveland, Tennessee

Posted 09 November 2017 - 09:52 PM

:shok: Perfection :shok: :heart: :heart: :heart:


Paul Wolcott


#8 SlotStox#53

SlotStox#53

    Posting Leader

  • Full Member
  • PipPipPipPipPipPipPip
  • 4,084 posts
  • Joined: 13-March 13
  • Gender:Male
  • Location:TX

Posted 09 November 2017 - 10:11 PM

Never get tired of watching your turn wheels into inserts :heart:

Love the choice of car to build & the finished wheels will suit it perfectly :D

#9 dc-65x

dc-65x

    Grand Champion Poster

  • Subscriber
  • PipPipPipPipPipPipPipPip
  • 6,976 posts
  • Joined: 14-February 06
  • Gender:Male
  • Location:Captain Rick: The only vintage slot car nut in SW Oregon?

Posted 10 November 2017 - 12:01 PM

Thanks guys. I have an assortment of Cox wheels which are beautiful but I avoid using threaded wheels whenever possible. I'm glad I can give them life on a car as a wheel insert to dress up a plain aluminum set screw wheel.


Rick Thigpen
Check out Steve Okeefe's great web site at its new home here at Slotblog:
The Independent Scratchbuilder
There's much more to come...


#10 dc-65x

dc-65x

    Grand Champion Poster

  • Subscriber
  • PipPipPipPipPipPipPipPip
  • 6,976 posts
  • Joined: 14-February 06
  • Gender:Male
  • Location:Captain Rick: The only vintage slot car nut in SW Oregon?

Posted 13 November 2017 - 12:37 PM

For an independent front wheel setup I tried a go to standard Riggen wire drop front axle, Dynamic axle reducers, Mini-Auto piano wire spacers and some 3/32" brass tube:


Harvey%20eBay%20Find%2025.jpg


The Cox wheels are a blind thread so there's no simply soldering a washer on the front of the wheel to retain it to the axle.


A short piece of that 3/32" tube retains the axle reducer and the Cox wheel simply threads over it.


A paper spacer made sure the axle reducer would spin freely after soldering the retainer on.


Harvey%20eBay%20Find%2029.jpg


The Riggen axle is the perfect height for the 3/4" tires but it's too wide for the Cox wheels. Rather than bending up a new axle I decided to simply cut out a section of the axle and insert it in a piece of 3/32" tube:


Harvey%20eBay%20Find%2030.jpg


The 2 ends of the axle will butt up against each other in the tube and the tube's notches will allow solder to flow along the full length:


Harvey%20eBay%20Find%2031.jpg


I'm using a REHco rear bracket and one of my last pair of "duffies" for the axle bearings:


Harvey%20eBay%20Find%2034.jpg


The bracket's motor bearing hole was opened up from .250" to .320" and some piano wire bracing added:


Harvey%20eBay%20Find%2035.jpg


Time to get everything in the Rick's Jig..........


  • MarcusPHagen, slotbaker, Pablo and 6 others like this

Rick Thigpen
Check out Steve Okeefe's great web site at its new home here at Slotblog:
The Independent Scratchbuilder
There's much more to come...


#11 Regis4446

Regis4446

    On The Lead Lap

  • Full Member
  • PipPipPipPip
  • 444 posts
  • Joined: 24-March 10
  • Gender:Male
  • Location:France

Posted 13 November 2017 - 02:11 PM

Thank you Rick for these explanations, it is very clear and very precise with the photos.
Regis Baron

#12 olescratch

olescratch

    olescratch

  • Subscriber
  • PipPipPipPipPip
  • 977 posts
  • Joined: 19-July 13
  • Gender:Male
  • Location:Ravenna, OH

Posted 14 November 2017 - 06:55 PM

Ideas, plenty of good ones being given here!  I hope you won't mind me using some.


John Stewart

#13 dc-65x

dc-65x

    Grand Champion Poster

  • Subscriber
  • PipPipPipPipPipPipPipPip
  • 6,976 posts
  • Joined: 14-February 06
  • Gender:Male
  • Location:Captain Rick: The only vintage slot car nut in SW Oregon?

Posted 14 November 2017 - 09:03 PM

Thanks.  :)  I hope showing what I've decided to do in my projects will encourage others to dive in and start building....even if they use what I'm doing as a way not to do it!   :crazy:


Rick Thigpen
Check out Steve Okeefe's great web site at its new home here at Slotblog:
The Independent Scratchbuilder
There's much more to come...


#14 dc-65x

dc-65x

    Grand Champion Poster

  • Subscriber
  • PipPipPipPipPipPipPipPip
  • 6,976 posts
  • Joined: 14-February 06
  • Gender:Male
  • Location:Captain Rick: The only vintage slot car nut in SW Oregon?

Posted 27 November 2017 - 05:19 PM

I figured out the layout of the chassis on my "acid free" setup fixture then duplicated it on my soldering jig.


Harvey%20eBay%20Find%2036.jpg


The setup took me way longer than soldering everything up:


Harvey%20eBay%20Find%2038.jpg


The center section cleaned up:


Harvey%20eBay%20Find%2039.jpg


4 brass rails like the original chassis:


Harvey%20eBay%20Find%2040.jpg


The inner rails are one piece and soldered directly to the "arms" of the motor bracket to form the lower axle brace:


Harvey%20eBay%20Find%2042.jpg


Harvey%20eBay%20Find%2041.jpg


The original "inspirational" chassis and mine for comparison:


Harvey%20eBay%20Find%2043.jpg


On to the front axle.........


  • slotbaker, hiline2, Jencar17 and 5 others like this

Rick Thigpen
Check out Steve Okeefe's great web site at its new home here at Slotblog:
The Independent Scratchbuilder
There's much more to come...


#15 Pablo

Pablo

    Builder

  • Administrator
  • PipPipPipPipPipPipPipPip
  • 18,454 posts
  • Joined: 20-February 06
  • Gender:Male
  • Location:Cleveland, Tennessee

Posted 27 November 2017 - 05:42 PM

:clapping:Just never get tired of seeing precision  :heart: 


  • miko likes this

Paul Wolcott


#16 dc-65x

dc-65x

    Grand Champion Poster

  • Subscriber
  • PipPipPipPipPipPipPipPip
  • 6,976 posts
  • Joined: 14-February 06
  • Gender:Male
  • Location:Captain Rick: The only vintage slot car nut in SW Oregon?

Posted 28 November 2017 - 08:05 PM

Thanks Pablo. Here's the center section with the front axle installed:
 

Harvey%20eBay%20Find%2047.jpg


The solder flowed like crazy into those 4 holes to lock the axles in place:


Harvey%20eBay%20Find%2045.jpg


Here's the brace behind the front axle:


Harvey%20eBay%20Find%2048.jpg


Next up is the drop arm. I'm waffling between a plate drop arm like the original chassis or building up one from a zillion rods. Hmmmmmmmmmm............


  • slotbaker, Pablo, hiline2 and 4 others like this

Rick Thigpen
Check out Steve Okeefe's great web site at its new home here at Slotblog:
The Independent Scratchbuilder
There's much more to come...


#17 dc-65x

dc-65x

    Grand Champion Poster

  • Subscriber
  • PipPipPipPipPipPipPipPip
  • 6,976 posts
  • Joined: 14-February 06
  • Gender:Male
  • Location:Captain Rick: The only vintage slot car nut in SW Oregon?

Posted 03 December 2017 - 07:48 PM

I decided on a plate style drop arm and a Dynamic Low Profile guide like the original chassis. Here's the guide flag and Dynamic pillow block to mount it:


Harvey%20eBay%20Find%2058.jpg


Here are the parts before soldering. Note the .018" deep cut I milled into the Dynamic pillow block. This provides a nice "stop" for it to butt up and align against the plate drop arm:


Harvey%20eBay%20Find%2055.jpg


Everything soldered up using the jig for alignment:


Harvey%20eBay%20Find%2056.jpg


The drop arm was left long. This allows the right amount of solder to create a nice fillet to stay in the joint and the excess to be dragged back (note the puddle of solder).


Harvey%20eBay%20Find%2057.jpg


The excess plate is cut off and a nice solder joint is left:


Harvey%20eBay%20Find%2052.jpg


The finished drop arm:


Harvey%20eBay%20Find%2054.jpg


The chassis ready for the "floating pans":


Harvey%20eBay%20Find%2051.jpg


A comparison with the original "inspirational" chassis with my wider drop arm version:


Harvey%20eBay%20Find%2049.jpg


Time for the pans..............


  • MarcusPHagen, slotbaker, Jencar17 and 12 others like this

Rick Thigpen
Check out Steve Okeefe's great web site at its new home here at Slotblog:
The Independent Scratchbuilder
There's much more to come...


#18 Pablo

Pablo

    Builder

  • Administrator
  • PipPipPipPipPipPipPipPip
  • 18,454 posts
  • Joined: 20-February 06
  • Gender:Male
  • Location:Cleveland, Tennessee

Posted 04 December 2017 - 08:32 AM

:dance3: :clapping: :heart: :heart: :heart:


Paul Wolcott


#19 olescratch

olescratch

    olescratch

  • Subscriber
  • PipPipPipPipPip
  • 977 posts
  • Joined: 19-July 13
  • Gender:Male
  • Location:Ravenna, OH

Posted 04 December 2017 - 10:25 PM

Like the drop arm tutorial!  Definitely gonna locate some of those pillow blocks to try it! 


John Stewart

#20 dc-65x

dc-65x

    Grand Champion Poster

  • Subscriber
  • PipPipPipPipPipPipPipPip
  • 6,976 posts
  • Joined: 14-February 06
  • Gender:Male
  • Location:Captain Rick: The only vintage slot car nut in SW Oregon?

Posted 06 December 2017 - 09:31 PM

Hey John, PM me your mailing address and I'll send you a Dynamic pillow block to try. :victory:


  • grooverunner likes this

Rick Thigpen
Check out Steve Okeefe's great web site at its new home here at Slotblog:
The Independent Scratchbuilder
There's much more to come...


#21 Bruce Wayne

Bruce Wayne

    Mid-Pack Racer

  • Full Member
  • PipPipPip
  • 197 posts
  • Joined: 02-September 11
  • Gender:Male
  • Location:Maryland Heights, MO

Posted 06 December 2017 - 10:16 PM

Yummy, that's a big and beefy guide tongue!
It's got the fat where you want it ☺

Outstanding spit and polish too Rick, can't tell the brass from the solder joints!

As an aside, may I please ask how you maintain that finish with your cars in storage?
Is it with an oil or wax coating?


Bruce W. Frye

#22 dc-65x

dc-65x

    Grand Champion Poster

  • Subscriber
  • PipPipPipPipPipPipPipPip
  • 6,976 posts
  • Joined: 14-February 06
  • Gender:Male
  • Location:Captain Rick: The only vintage slot car nut in SW Oregon?

Posted 08 December 2017 - 11:15 AM

Hi Bruce,


PdL once mentioned he used liquid spray automotive wax to preserve the finish on chassis.


I finish polish the chassis with Flitz metal polish that is supposed to have some preservative properties. Then I just wipe any fingerprints and other crap-O-la of the chassis after I handle it and let it take on a natural patina.


  • Bruce Wayne likes this

Rick Thigpen
Check out Steve Okeefe's great web site at its new home here at Slotblog:
The Independent Scratchbuilder
There's much more to come...


#23 dc-65x

dc-65x

    Grand Champion Poster

  • Subscriber
  • PipPipPipPipPipPipPipPip
  • 6,976 posts
  • Joined: 14-February 06
  • Gender:Male
  • Location:Captain Rick: The only vintage slot car nut in SW Oregon?

Posted 10 December 2017 - 04:31 PM

I decided to follow the lead of the original car with its 1/32" piano wire pan hangers inside pin tube hinges. I did substitute heavy 1/16" thick pans for the thin original pieces:


Harvey%20eBay%20Find%2068.jpg


I like the way the original builder placed the pan hinges as far inboard on the main rails as possible. If mounted on the outside of the main rails, the pans would hinge like short little flippers.


Harvey%20eBay%20Find%2069.jpg


Nothing like 1100 degrees of heat and lots of acid flux to make a mess. Time to put the buff to it............


  • slotbaker and Jencar17 like this

Rick Thigpen
Check out Steve Okeefe's great web site at its new home here at Slotblog:
The Independent Scratchbuilder
There's much more to come...


#24 olescratch

olescratch

    olescratch

  • Subscriber
  • PipPipPipPipPip
  • 977 posts
  • Joined: 19-July 13
  • Gender:Male
  • Location:Ravenna, OH

Posted 10 December 2017 - 06:50 PM

I'd like to ask if you use an iron or mini torch when you build?


John Stewart

#25 dc-65x

dc-65x

    Grand Champion Poster

  • Subscriber
  • PipPipPipPipPipPipPipPip
  • 6,976 posts
  • Joined: 14-February 06
  • Gender:Male
  • Location:Captain Rick: The only vintage slot car nut in SW Oregon?

Posted 10 December 2017 - 07:59 PM

Hi John,


I use a Weller 50W 1100 degree iron with a temperature controller for everything from 1/16" plate to lead wires.


  • olescratch likes this

Rick Thigpen
Check out Steve Okeefe's great web site at its new home here at Slotblog:
The Independent Scratchbuilder
There's much more to come...


Electric Dreams Online Shop