Jump to content


Photo

Big block to go


  • Please log in to reply
70 replies to this topic

#1 Geary Carrier

Geary Carrier

    Race Leader

  • Full Member
  • PipPipPipPipPip
  • 614 posts
  • Joined: 23-April 16
  • Gender:Not Telling
  • Location:CT

Posted 06 December 2017 - 01:07 AM

Finally getting around to putting a big block together...


The armature was re-shafted with a 2.3mm M2 drill blank.

037.JPG


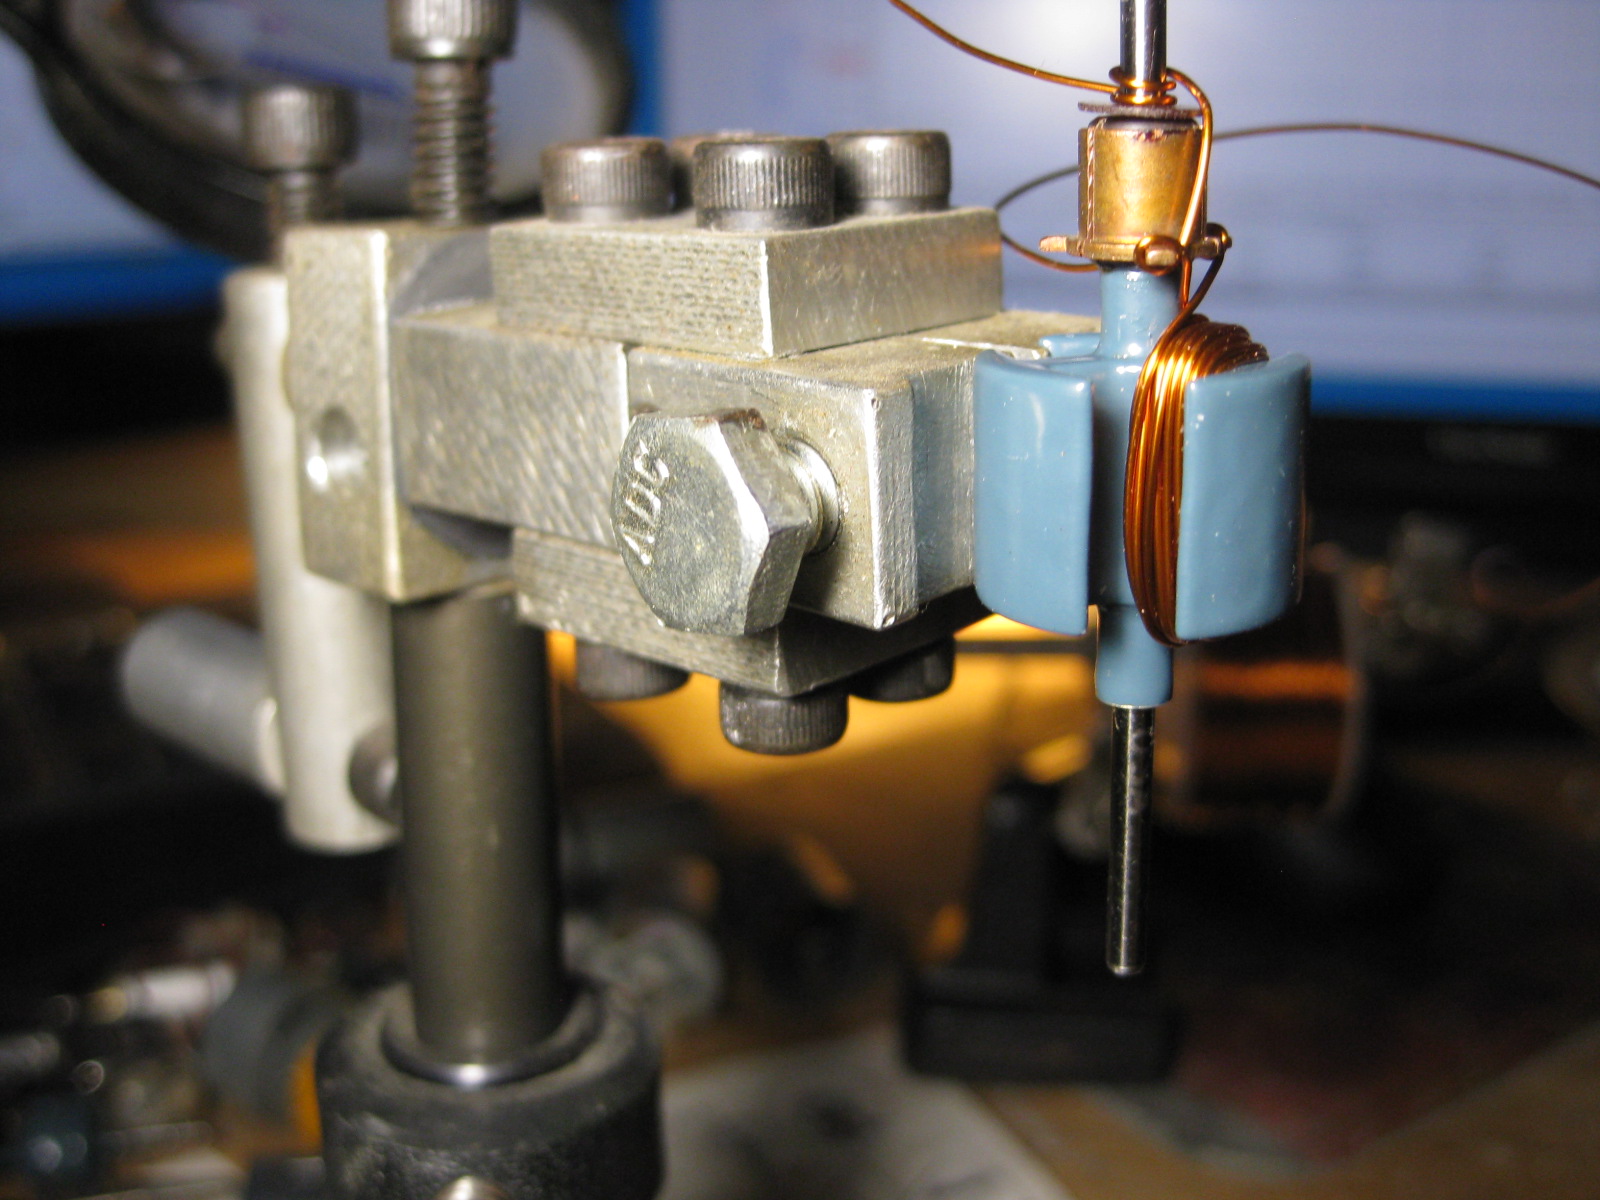
Then coated with heat fused epoxy in a fluid bed and cured in the ole toaster oven.

001.JPG

009.JPG


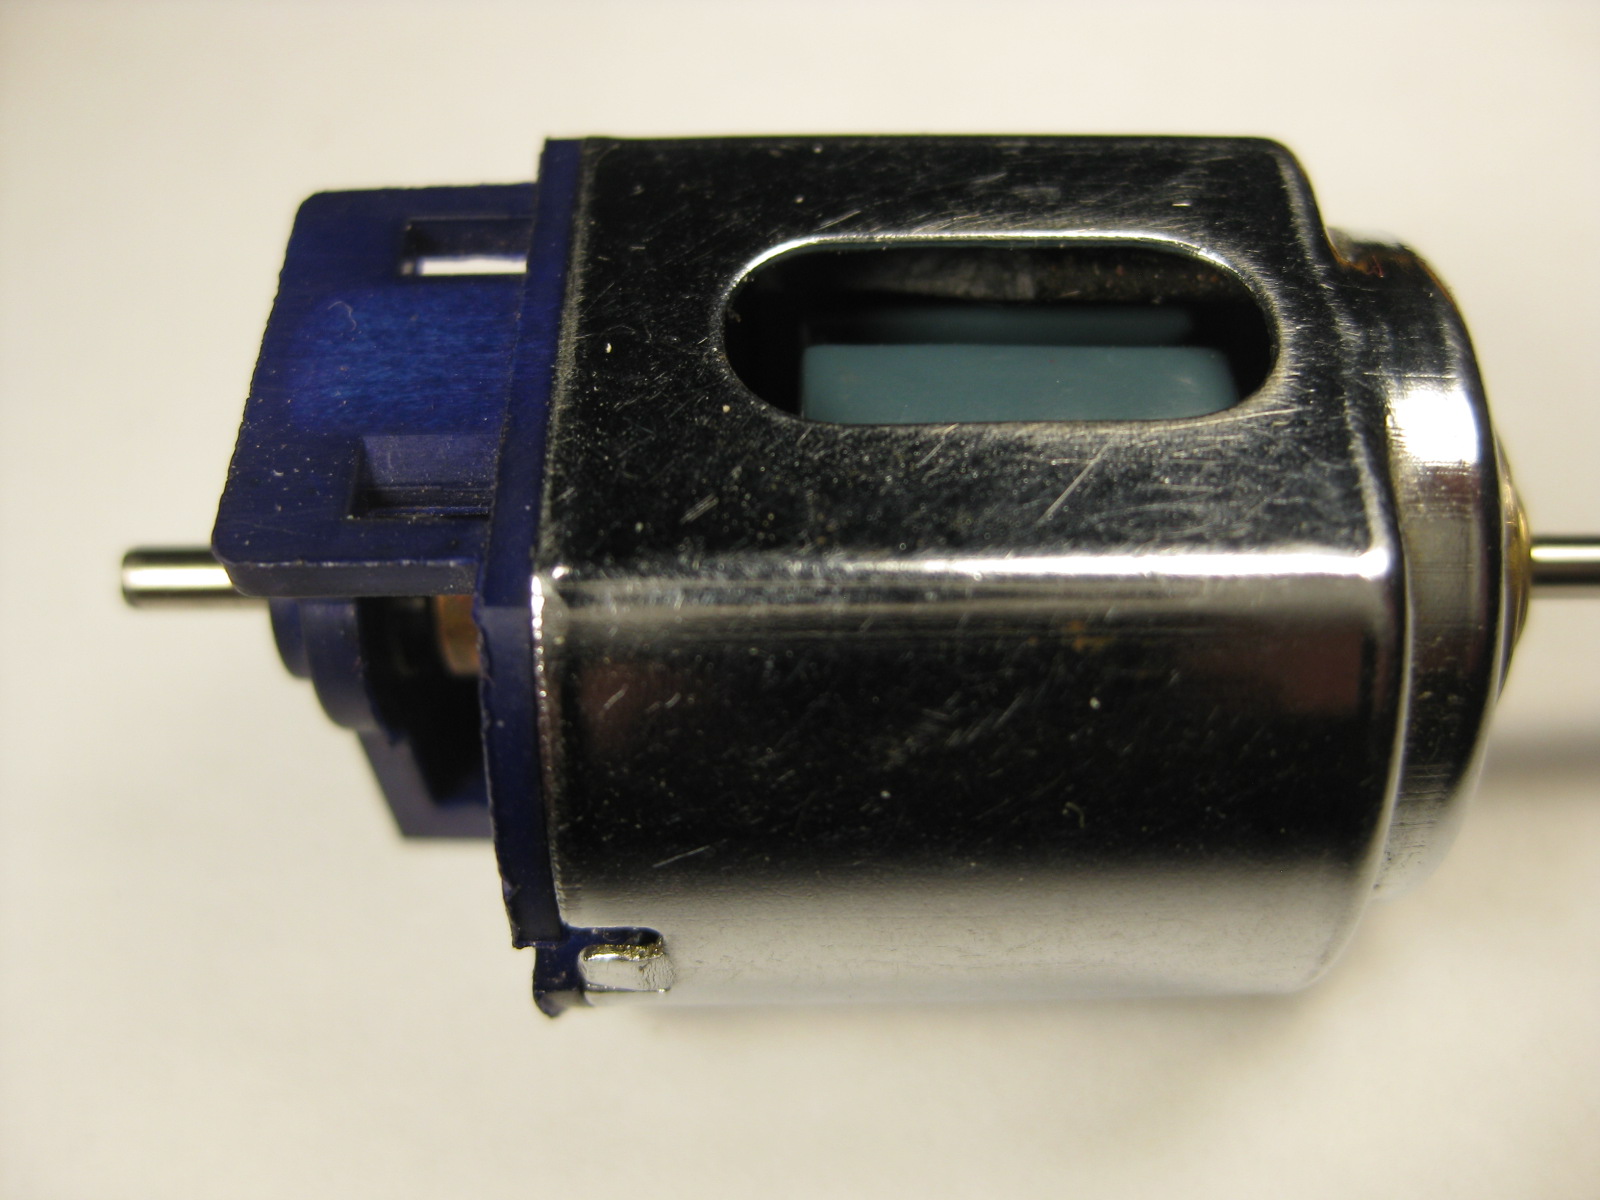
Gonna stuff this in a Cox Nascar.

021.JPG

020.JPG


Winding fixture and Comm Brazer are finished so it's on to winding (#25 single).


Guess I will need to come up with something to hold the brushes.


To be continued...


  • slotbaker, Maximo, havlicek and 5 others like this

Yes, to be sure, this is it...


#2 munter

munter

    Checkered Flag in Hand

  • Full Member
  • PipPipPipPipPipPip
  • 1,049 posts
  • Joined: 11-April 08
  • Gender:Male
  • Location:Napier, New Zealand

Posted 06 December 2017 - 03:05 AM

I like that epoxy coating


  • Geary Carrier likes this

John Warren
Slot cars are my preferred reality


#3 munter

munter

    Checkered Flag in Hand

  • Full Member
  • PipPipPipPipPipPip
  • 1,049 posts
  • Joined: 11-April 08
  • Gender:Male
  • Location:Napier, New Zealand

Posted 06 December 2017 - 03:05 AM

Impressive comm as well


  • Geary Carrier likes this

John Warren
Slot cars are my preferred reality


#4 havlicek

havlicek

    OCD Rewinder

  • Subscriber
  • PipPipPipPipPipPipPipPip
  • 11,198 posts
  • Joined: 20-August 07
  • Gender:Male
  • Location:NY

Posted 06 December 2017 - 06:09 AM

Now yer talkin!  :D


  • Geary Carrier likes this
John Havlicek

#5 olescratch

olescratch

    olescratch

  • Subscriber
  • PipPipPipPipPip
  • 977 posts
  • Joined: 19-July 13
  • Gender:Male
  • Location:Ravenna, OH

Posted 06 December 2017 - 11:50 AM

Big block looking good so far, more please! 


  • Geary Carrier likes this
John Stewart

#6 SlotStox#53

SlotStox#53

    Posting Leader

  • Full Member
  • PipPipPipPipPipPipPip
  • 4,084 posts
  • Joined: 13-March 13
  • Gender:Male
  • Location:TX

Posted 06 December 2017 - 12:02 PM

Impressive start to a big block :D
  • Geary Carrier likes this

#7 Lone Wolf

Lone Wolf

    Posting Leader

  • Full Member
  • PipPipPipPipPipPipPip
  • 2,734 posts
  • Joined: 03-March 08
  • Gender:Male
  • Location:New York

Posted 06 December 2017 - 01:06 PM

Very cool so far. 


Here is the brush spring method I prefer on these types of endbells.


DSC09492.JPG


You can also use the "Pittman" style fiber "t's" with spring but that is weaker and a little frustrating to get installed.


Of course, if you go with this style make sure the spring is insulated from the brushes. 


Lastly, if there is not one in there you may want to consider a bearing in the bell.


  • Maximo, havlicek, boxerdog and 1 other like this

Joe Lupo


#8 havlicek

havlicek

    OCD Rewinder

  • Subscriber
  • PipPipPipPipPipPipPipPip
  • 11,198 posts
  • Joined: 20-August 07
  • Gender:Male
  • Location:NY

Posted 06 December 2017 - 04:13 PM

Joe's suggestion regarding the spring is...or should be a definite Geary.  The little fiber "T's" are really fragile and a PIA to install, but even more importantly, that setup doesn't offer nearly enough spring pressure, even for a mild wind.  For this motor, the ONLY way to go is with Joe's suggestion.


  • Geary Carrier likes this
John Havlicek

#9 Geary Carrier

Geary Carrier

    Race Leader

  • Full Member
  • PipPipPipPipPip
  • 614 posts
  • Joined: 23-April 16
  • Gender:Not Telling
  • Location:CT

Posted 06 December 2017 - 05:54 PM

Hi Guys,


Thanks for the kind comments and suggestions...


We will see what happens as this motor evolves, got a good chunk of work to go.


g


  • havlicek likes this

Yes, to be sure, this is it...


#10 Geary Carrier

Geary Carrier

    Race Leader

  • Full Member
  • PipPipPipPipPip
  • 614 posts
  • Joined: 23-April 16
  • Gender:Not Telling
  • Location:CT

Posted 07 December 2017 - 12:30 AM

Attempt at first pole...


I realize I can't see good enough, gotta fix that.

007.JPG

004.JPG

002.JPG


This is harder than it looks on TV.

Nothing that a little persistence can't fix...


g


  • slotbaker, Maximo, havlicek and 1 other like this

Yes, to be sure, this is it...


#11 olescratch

olescratch

    olescratch

  • Subscriber
  • PipPipPipPipPip
  • 977 posts
  • Joined: 19-July 13
  • Gender:Male
  • Location:Ravenna, OH

Posted 07 December 2017 - 01:12 AM

Looks good to me.  How many turns did you do?  You mentioned your com welder, do you use the same method as John H?


John Stewart

#12 Geary Carrier

Geary Carrier

    Race Leader

  • Full Member
  • PipPipPipPipPip
  • 614 posts
  • Joined: 23-April 16
  • Gender:Not Telling
  • Location:CT

Posted 07 December 2017 - 01:28 AM

Hi John,


I didn't even count the turns as I went, just wanted to get a feel for the winding and see how things worked.


Yes I use the same welding method as John H.


Thanks,

g


Yes, to be sure, this is it...


#13 olescratch

olescratch

    olescratch

  • Subscriber
  • PipPipPipPipPip
  • 977 posts
  • Joined: 19-July 13
  • Gender:Male
  • Location:Ravenna, OH

Posted 07 December 2017 - 01:34 AM

I recall seeing a winder similar to that one before, how did it work?


  • Geary Carrier likes this
John Stewart

#14 Mark Johnson

Mark Johnson

    On The Lead Lap

  • Full Member
  • PipPipPipPip
  • 499 posts
  • Joined: 27-March 08
  • Gender:Male
  • Location:Minneapolis

Posted 07 December 2017 - 03:27 AM

NICE!!!!


  • Geary Carrier likes this

#15 havlicek

havlicek

    OCD Rewinder

  • Subscriber
  • PipPipPipPipPipPipPipPip
  • 11,198 posts
  • Joined: 20-August 07
  • Gender:Male
  • Location:NY

Posted 07 December 2017 - 07:43 AM

Very nice Geary!  A lot of folks mention wanting to get into this, but very few actually do!  Just some things to consider (I know I'm probably repeating myself)

1)The first, and to a lesser degree the second, layers will greatly determine how the whole coil comes out.  Use a good amount of tension on the wire as you make each turn...more on the bottom layers and a little less as you get near the top to avoid the coil collapsing.  Tension is as important as anything.

2)Don't be afraid to waste wire.  Getting a handle on how to wind up with the number of turns you want...how to "pattern" the wind is important.  Once you figure out a pattern, write notes and try to duplicate that on the two subsequent poles.  In other words, "10 turns/first layer, one turn behind" would mean, when you come back on top of the first layer towards the shaft/com, go one turn PAST where you started.  BTW, that one turn past the starting turn is how you can help strengthen the first layer's turns and help to keep them from spreading apart because of pressure from the layers above.

3)Try to be aware of how far "out" from the poles (how "fat") your coils are. With some laminations like the Mabuchis, and even more so the old Mura .007 lams, you can get through the first two poles and have a devil of a time fitting your coil on the third/last pole.

4)In general, "stacking" the coil layers so the winds on top sit "between" the winds below will give you consistent, sturdy and neat poles.  While you CAN go past the ends of the winds below back at the shaft end of each layer, try and avoid doing that out by the crown end.

5)Try and work your coil patterns so the number of turns you're going after leaves you back at...or near the shaft/com and not out at the crown.

6)Consistency is actually more important than "beauty".  Even if the coils don't "look" gorgeous, having electrically and physically consistent coils will generally produce a better armature than one that looks great, but where there are significant differences between the poles.  Some awfully "ugly" armatures run surprisingly well, and some "beauties" run like doody.  Good-looking coils MIGHT be a measure of consistency because it can be easier to duplicate a nice coil on the other poles.  Good looking coils MIGHT also be more stable physically but, tensioning and how you handle the ends of the coil layers (at the shaft end and the crown end) will make for more solid coils than don't tend to fall apart.  Epoxy isn't always enough to prevent the coils from shifting around if you don't go for physically stable coils.

7)The Kirkwood/Champion com you're using is a good one for the big Mabuchis.  They're old at this point though, so make sure the com tabs are clean before welding or soldering.  Any old corrosion on there may change the conductivity of the tabs and each pole.

***You're doing great!


  • Half Fast, olescratch and Geary Carrier like this
John Havlicek

#16 Geary Carrier

Geary Carrier

    Race Leader

  • Full Member
  • PipPipPipPipPip
  • 614 posts
  • Joined: 23-April 16
  • Gender:Not Telling
  • Location:CT

Posted 07 December 2017 - 11:03 AM

Hi John,


Thanks for the winding info, I will add this to all the other info of yours that I've been following...


Thank you much,

g


Yes, to be sure, this is it...


#17 Lone Wolf

Lone Wolf

    Posting Leader

  • Full Member
  • PipPipPipPipPipPipPip
  • 2,734 posts
  • Joined: 03-March 08
  • Gender:Male
  • Location:New York

Posted 07 December 2017 - 12:07 PM

If you do not have one of Johns arms on hand pick one up for inspiration. True Jewelry.


Getting advice on winding from John is like getting hitting advice from Babe Ruth.


Simply the best out there. 


  • Geary Carrier likes this

Joe Lupo


#18 Geary Carrier

Geary Carrier

    Race Leader

  • Full Member
  • PipPipPipPipPip
  • 614 posts
  • Joined: 23-April 16
  • Gender:Not Telling
  • Location:CT

Posted 07 December 2017 - 12:33 PM


I recall seeing a winder similar to that one before, how did it work?


The winder clamp holds the armature between the crown tips on the side opposite the one you're winding. You just tighten the two hex head bolts evenly against each other and the jaws expand to lock the armature in place.

Door Motor 031.jpg


  • Maximo and havlicek like this

Yes, to be sure, this is it...


#19 Half Fast

Half Fast

    Keeper Of Odd Knowledge

  • Subscriber
  • PipPipPipPipPipPipPip
  • 2,628 posts
  • Joined: 02-May 07
  • Gender:Male
  • Location:NYC, Long Island

Posted 07 December 2017 - 01:52 PM

Geary-
 
How did you get the epoxy not to stick to the shaft?
 
Cheers

  • Geary Carrier likes this

Bill Botjer

Faster then, wiser now.

The most dangerous form of ignorance is not knowing that you don't know anything!

Never attribute to malice that which is adequately explained by stupidity


#20 Geary Carrier

Geary Carrier

    Race Leader

  • Full Member
  • PipPipPipPipPip
  • 614 posts
  • Joined: 23-April 16
  • Gender:Not Telling
  • Location:CT

Posted 07 December 2017 - 02:08 PM

Hi Bill,


In this instance I slipped silicone tubing over each end of the shaft right up to the brass spacers and then dipped in the fluid bed of epoxy powder. Just remove the tubing from the shaft before curing and you're good to go.


Thanks,

g


  • havlicek likes this

Yes, to be sure, this is it...


#21 havlicek

havlicek

    OCD Rewinder

  • Subscriber
  • PipPipPipPipPipPipPipPip
  • 11,198 posts
  • Joined: 20-August 07
  • Gender:Male
  • Location:NY

Posted 07 December 2017 - 09:11 PM

Geary, you're taking winding to another level here...by using a clamp YOU designed and built.  Now that's what I call cool!


  • olescratch and Geary Carrier like this
John Havlicek

#22 olescratch

olescratch

    olescratch

  • Subscriber
  • PipPipPipPipPip
  • 977 posts
  • Joined: 19-July 13
  • Gender:Male
  • Location:Ravenna, OH

Posted 07 December 2017 - 11:48 PM

Bringing true meaning to DIY or try!  Will you be removing the powder coating from the arm after winding, if so, how?


  • Geary Carrier likes this
John Stewart

#23 Geary Carrier

Geary Carrier

    Race Leader

  • Full Member
  • PipPipPipPipPip
  • 614 posts
  • Joined: 23-April 16
  • Gender:Not Telling
  • Location:CT

Posted 08 December 2017 - 12:22 AM


Will you be removing the powder coating from the arm after winding, if so, how?


 I will sand off the epoxy leaving a minimal amount on the armature OD. The remainder will be removed when the armature OD is ground true before dynamic balancing.


Yes, to be sure, this is it...


#24 Geary Carrier

Geary Carrier

    Race Leader

  • Full Member
  • PipPipPipPipPip
  • 614 posts
  • Joined: 23-April 16
  • Gender:Not Telling
  • Location:CT

Posted 11 December 2017 - 12:05 AM

Put a 9mm oilite from a Mabuchi 380 in the Nascar can. Left the oilite full size figuring more oil capacity couldn't hurt.

050.JPG


Sliced a bearing and retainer from the can end of the same 380 on the right side. On the left side is the can end of a 360 Mabuchi for a sort of before and after view.

061.JPG


Here is the sliced bearing and retainer that will be mounted to the end bell. Should provide a bit of extra cooling and will be removable for bearing replacement down the road.

054.JPG


Thanks,

g


  • Maximo, havlicek, C. J. Bupgoo and 1 other like this

Yes, to be sure, this is it...


#25 havlicek

havlicek

    OCD Rewinder

  • Subscriber
  • PipPipPipPipPipPipPipPip
  • 11,198 posts
  • Joined: 20-August 07
  • Gender:Male
  • Location:NY

Posted 11 December 2017 - 06:33 AM

Those new Mabuchi oilites are THE way to go Geary.  Not only are they a much better fit for the shaft than the original bushings, but they will wear better also, as they are made from a tougher material than some other oilites.  Having them on both ends of the motor can only be a good thing.


  • Geary Carrier likes this
John Havlicek


Electric Dreams Online Shop