I have an indexing & dividing attachment to use with the Unimat I've had since the early 70's.

1963 Shelby Cooper Monaco King Cobra
#26

Posted 24 October 2020 - 09:33 AM
I intend to live forever! So far, so good.
#27

Posted 25 October 2020 - 05:51 PM
Time to build a chassis for this motor. I've build both pin tube and piano wire versions for 705/706 motors but I wanted to do something different.
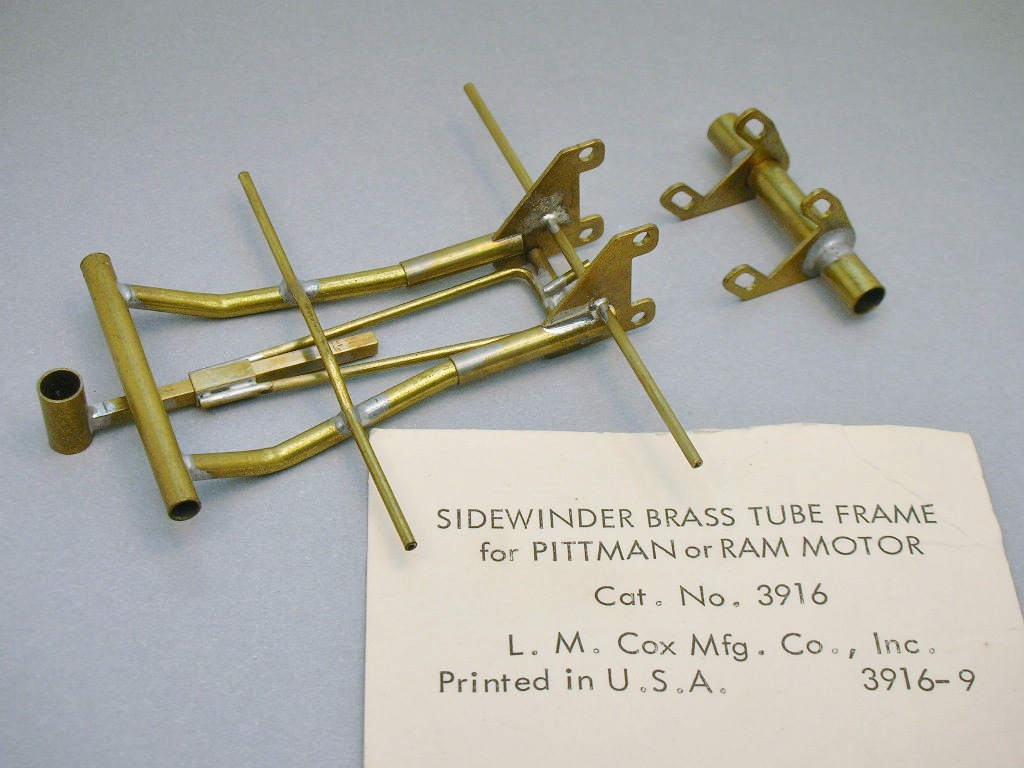
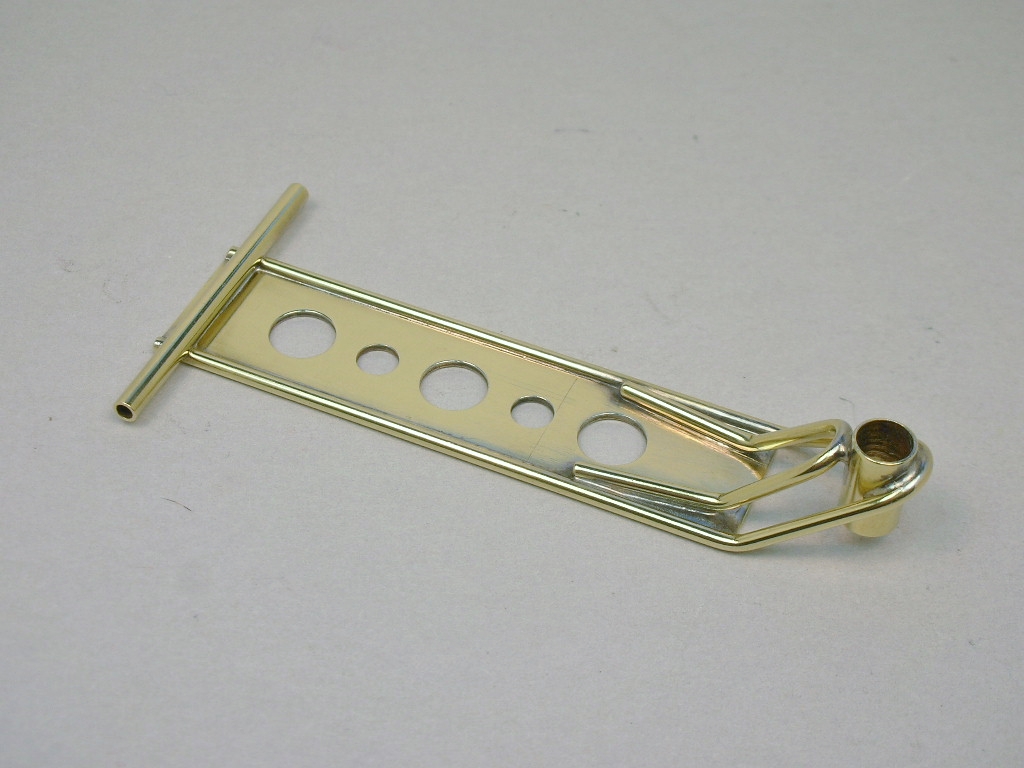
I've always thought this Cox brand brass chassis for the Pittman DC-65 looked cool:
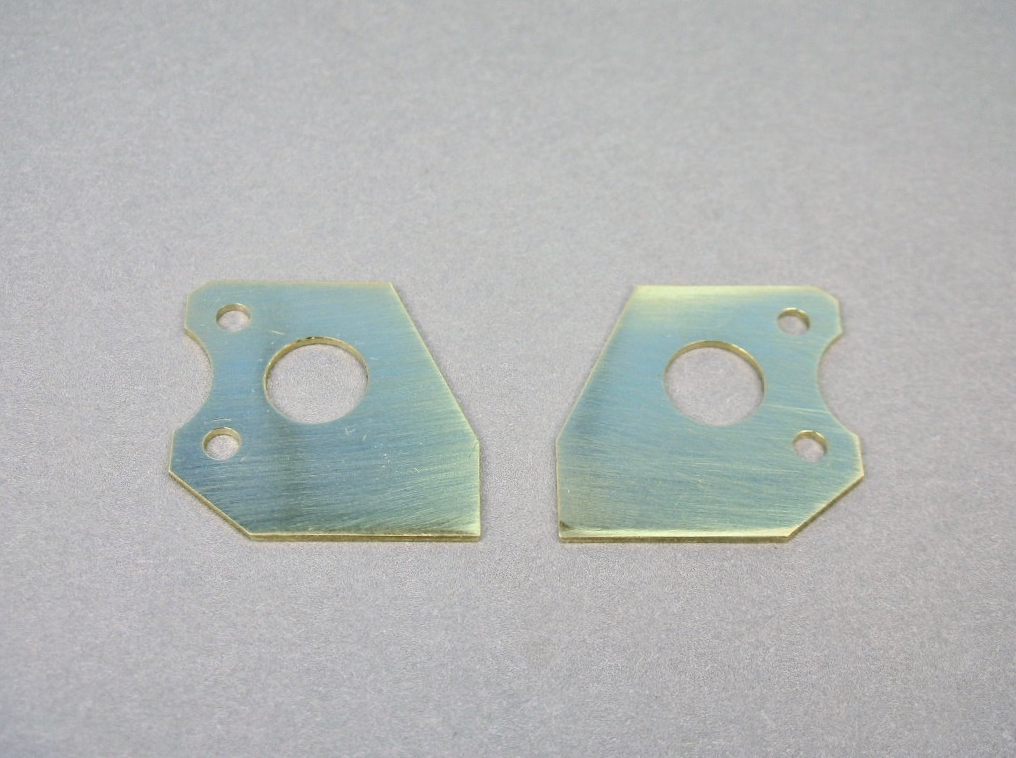
I've decided to pattern (NOT clone) my chassis main elements after it. My milling machine was used again to make the motor mounting brackets. These will be screwed into the holes I drilled and tapped into the motor side plates:
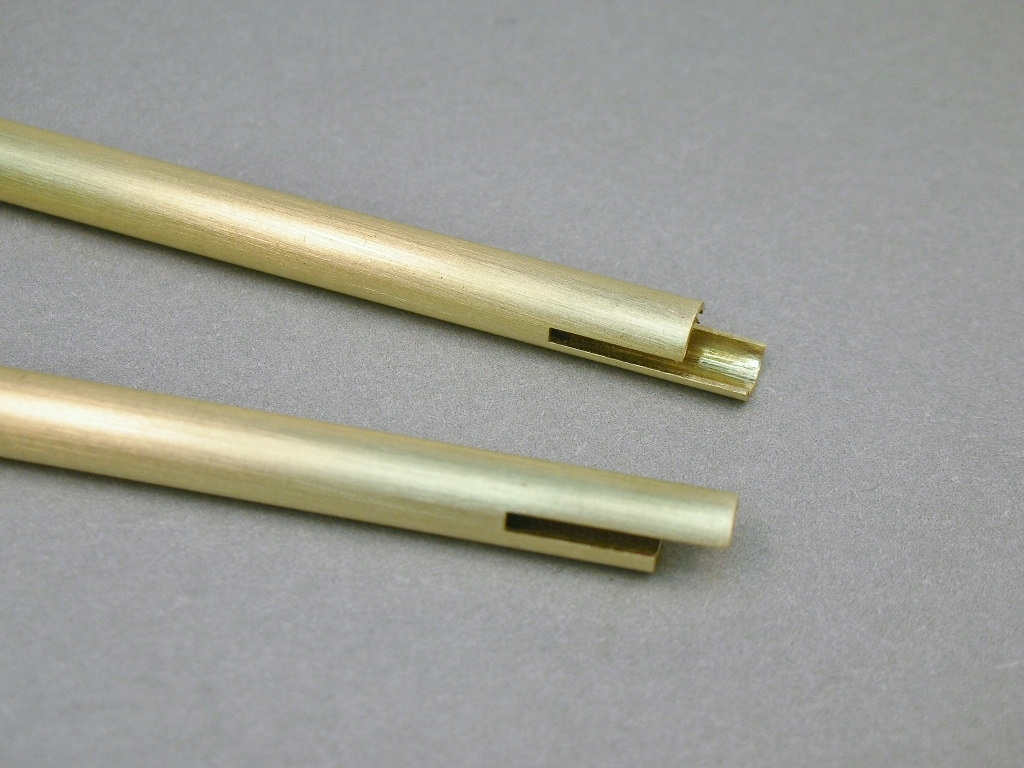
The Cox chassis has slots cut into 5/32" brass tubes that are soldered to the side plates. I'm did the same thing:
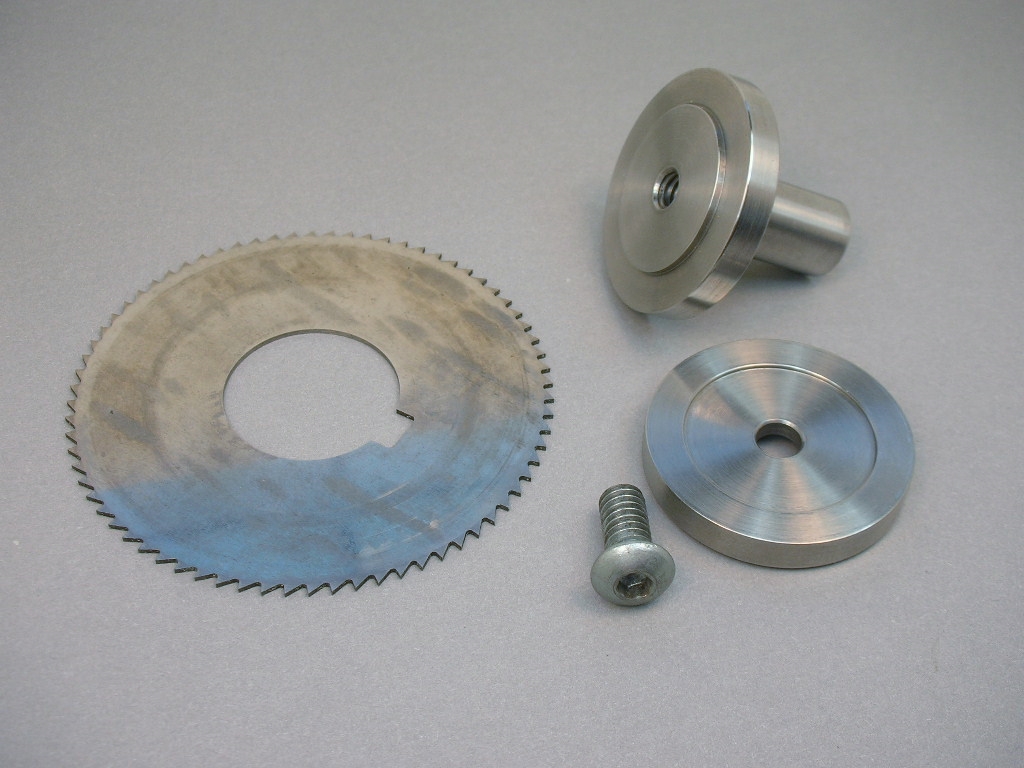
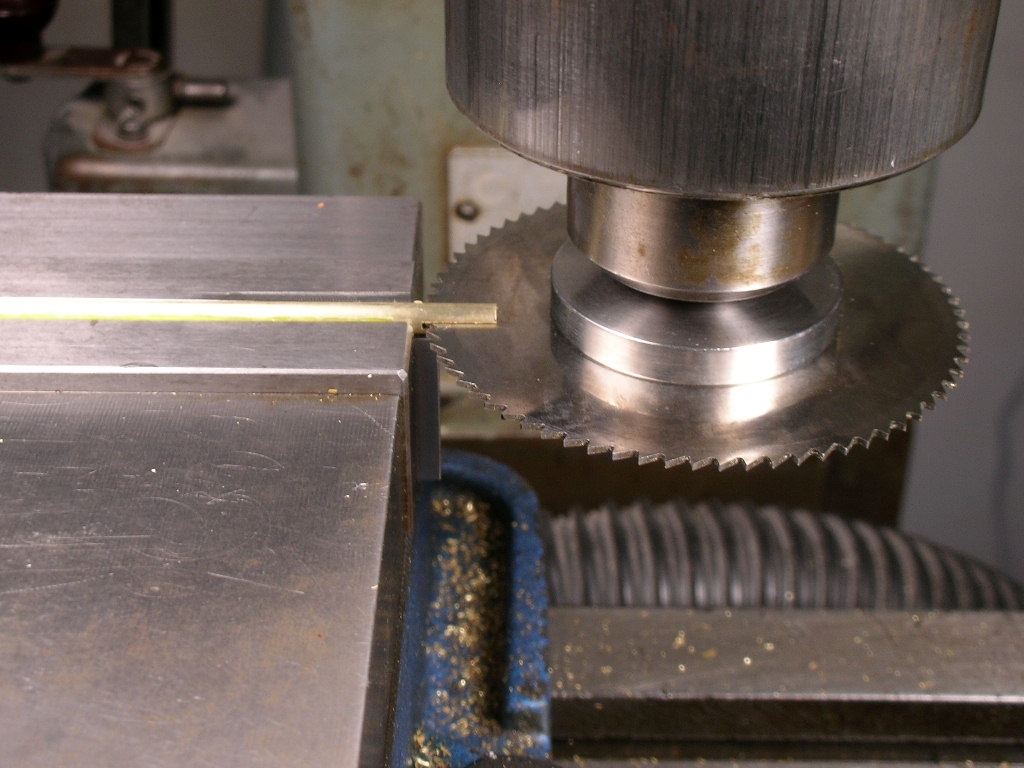
A hand saw, band saw or cut off disc could be used for the slot but I used my milling machine again. I made this slitting saw mandrel when I was an apprentice. A keyway with a key isn't needed to keep the blade from slipping in light applications):
Here's the slitting saw in action. It made a perfect cut dead center in the tube:
- Peter Horvath likes this
Rick Thigpen
Check out Steve Okeefe's great web site at its new home here at Slotblog:
The Independent Scratchbuilder
There's much more to come...
#28

Posted 26 October 2020 - 05:20 PM
nice setup! i'd forgotten about those tubes slit for the plates.
Steve Lang
#29

Posted 26 October 2020 - 06:30 PM
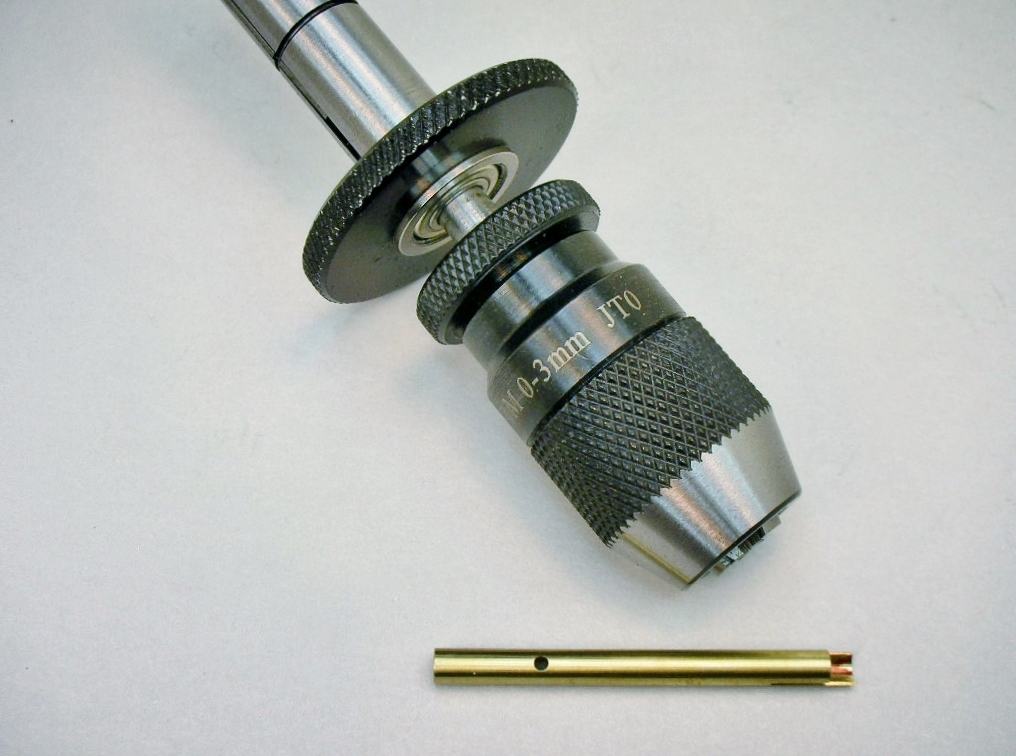
Thanks Steve. I also needed to drill a hole in those tubes for the drop arm hinge. I used that as an excuse to buy a sensitive feed drill chuck that I've been wanting from the Little Machine Shop.
Here's a link:
The chuck uses your finger tips to grab the large ring and pulling down to feed in the drill:
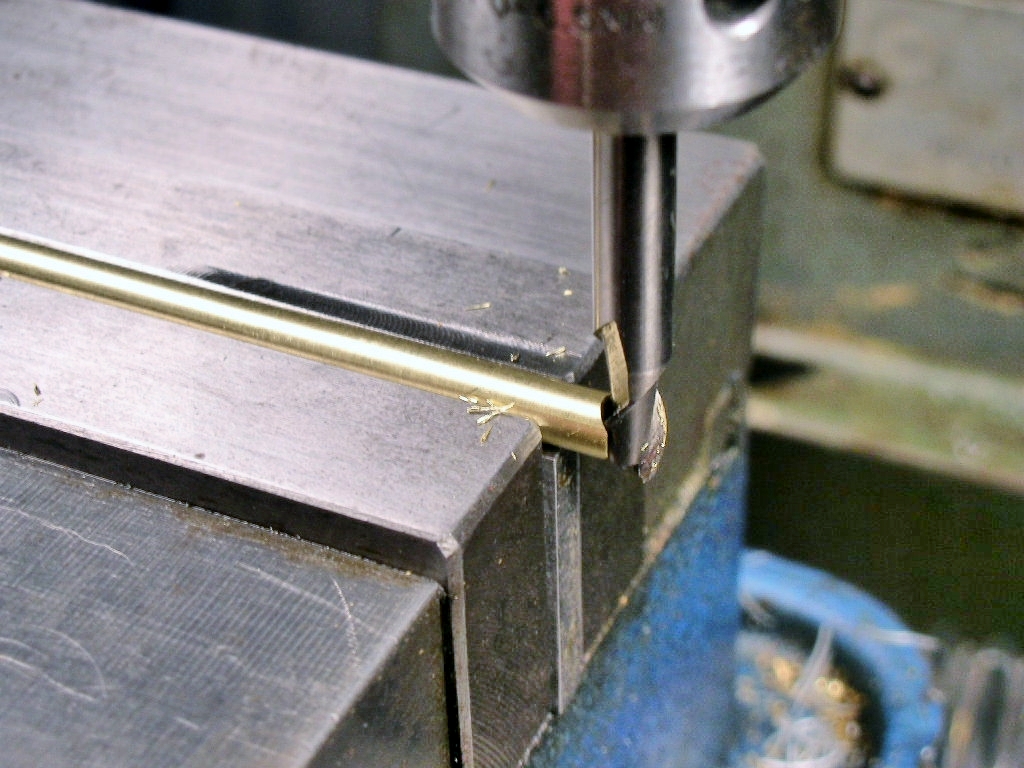
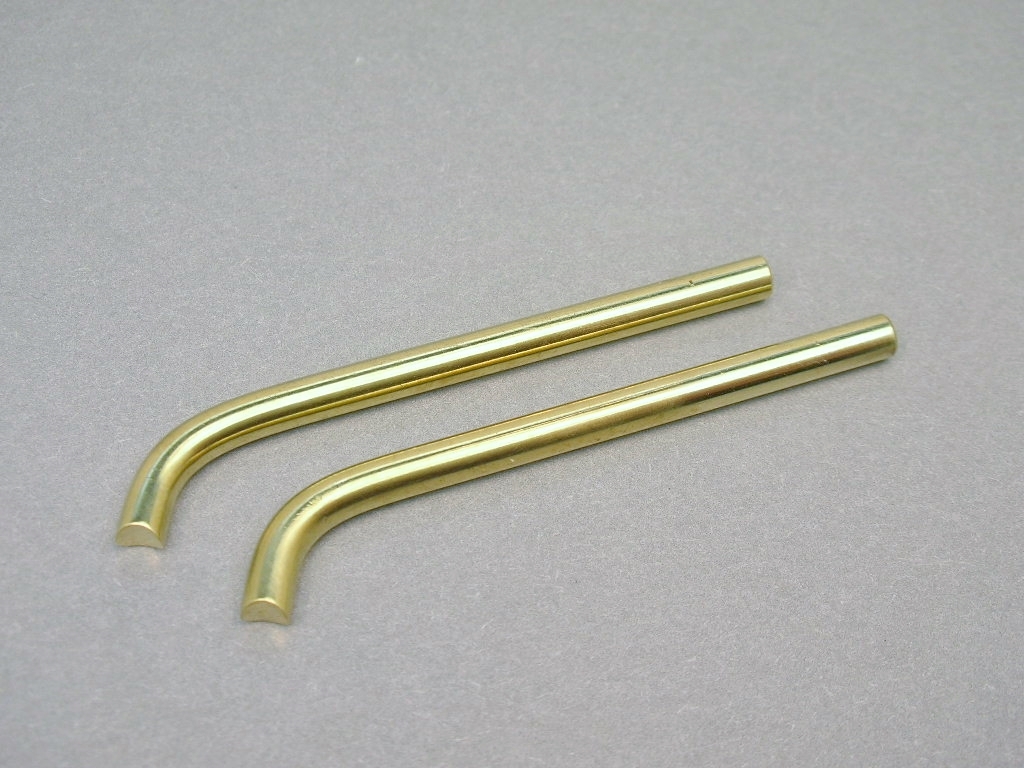
Because the wider rail spacing I decided to add a 5/32" tube brace the Cox chassis doesn't have. I used a 5/32" end mill to cut the birds mouth notch to fit the main rails:
Then I changed my mind and went with a square tube:
I also had to cut a birds mouth notch into the 1/8" main rails that attach to the axle tube. This time I used a round file:
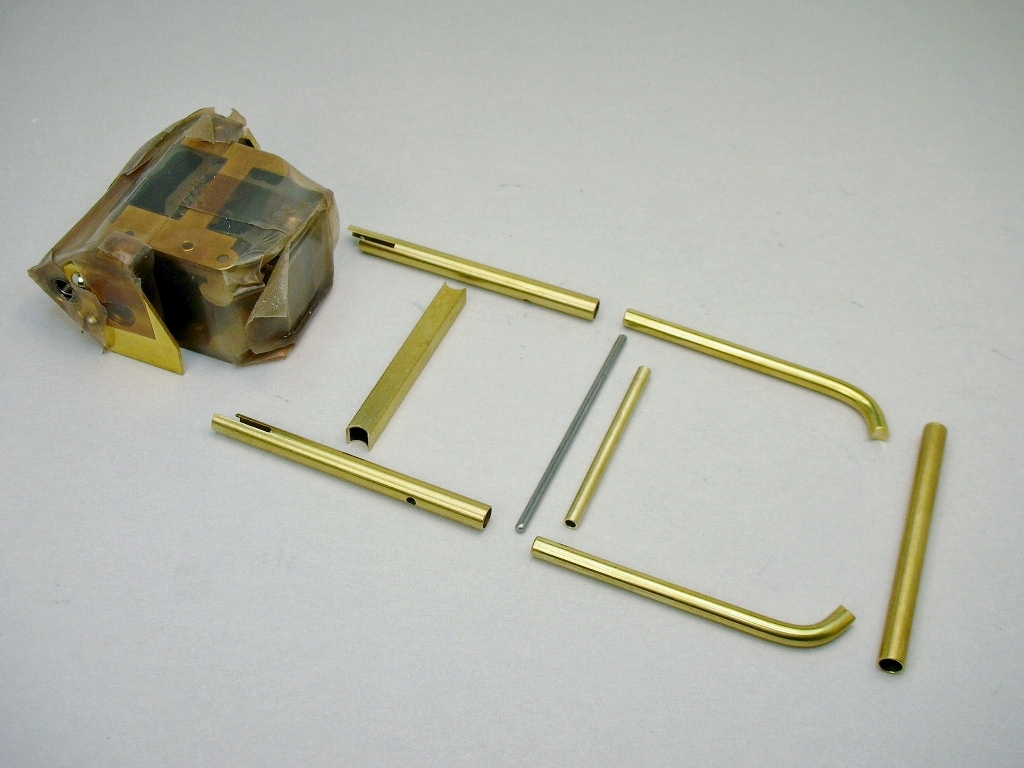
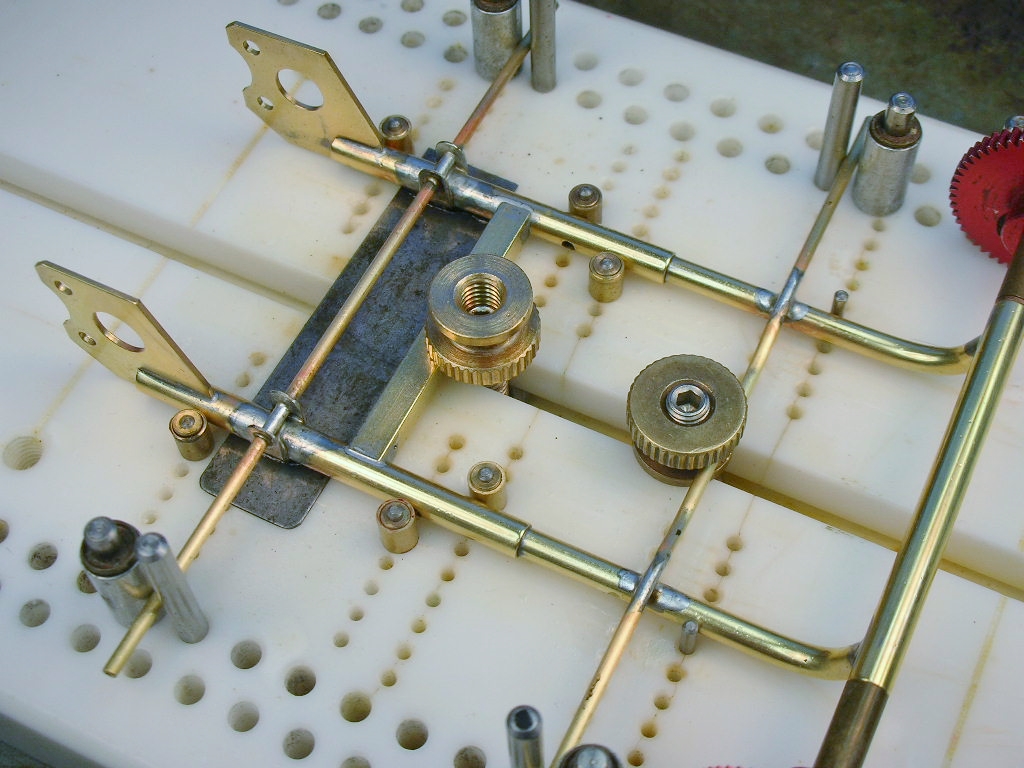
Here are the main chassis parts along with the taped up motor:
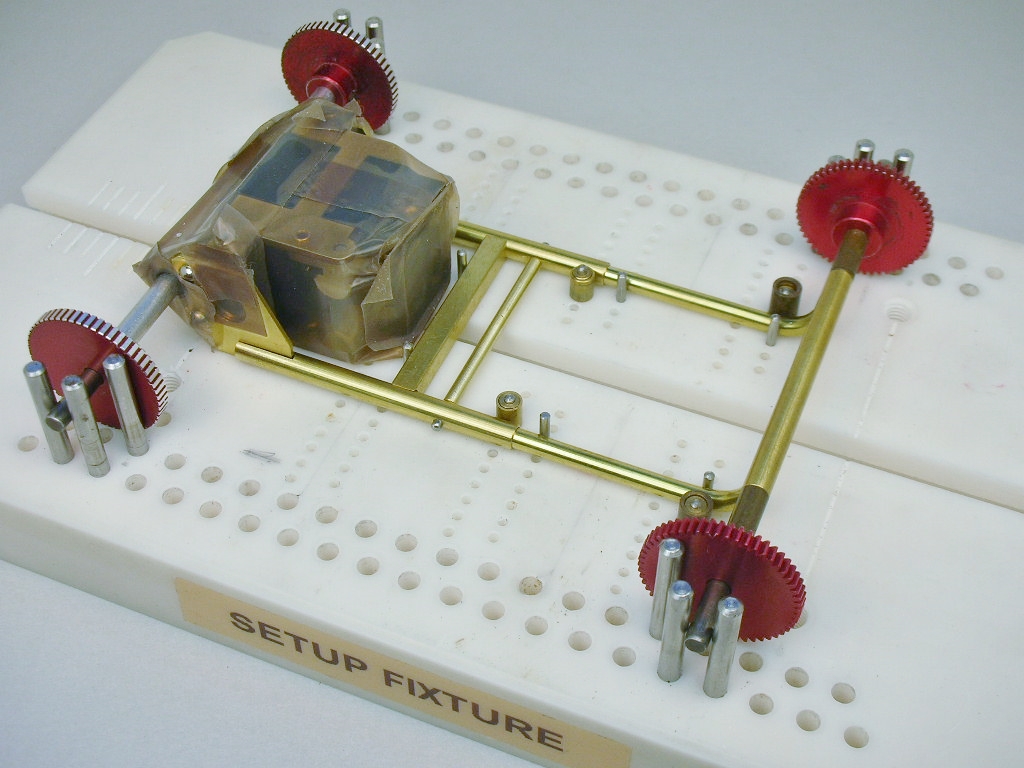
Final test fitting in my Rick's setup jig:
- slotbaker, Alchemist and Peter Horvath like this
Rick Thigpen
Check out Steve Okeefe's great web site at its new home here at Slotblog:
The Independent Scratchbuilder
There's much more to come...
#30

Posted 27 October 2020 - 06:53 PM
yeah, i want one of those feeding chucks too.
nice work, as always.
Steve Lang
#31

Posted 28 October 2020 - 04:56 PM
- slotbaker, Alchemist and Peter Horvath like this
Rick Thigpen
Check out Steve Okeefe's great web site at its new home here at Slotblog:
The Independent Scratchbuilder
There's much more to come...
#32

Posted 29 October 2020 - 01:53 PM
Simply amazing as usual! ![]() Can't wait to see it with the uber cool motor installed.
Can't wait to see it with the uber cool motor installed.
Rick, someday you need to do a post strictly on your cleanup techniques. No matter how hard I try, I still end up with a few file marks and your's always come out pretty much perfect every time. How do you do that?
#33

Posted 29 October 2020 - 02:44 PM
Thanks Larry, I'm looking forward to getting the roller together and testing it too.
Filing, done "korrectly", is really an art and since I'm not an artist I try to avoid it. ![]() File marks can run pretty deep especially if the file gets clogged (called "pinning").
File marks can run pretty deep especially if the file gets clogged (called "pinning").
Instead of filing I most often wrap sandpaper around a file or a 6" machinist scale. The coarsest I use is 320 grit then finish with 400 and 600 grit.
- Rotorranch likes this
Rick Thigpen
Check out Steve Okeefe's great web site at its new home here at Slotblog:
The Independent Scratchbuilder
There's much more to come...
#34

Posted 30 October 2020 - 12:07 PM
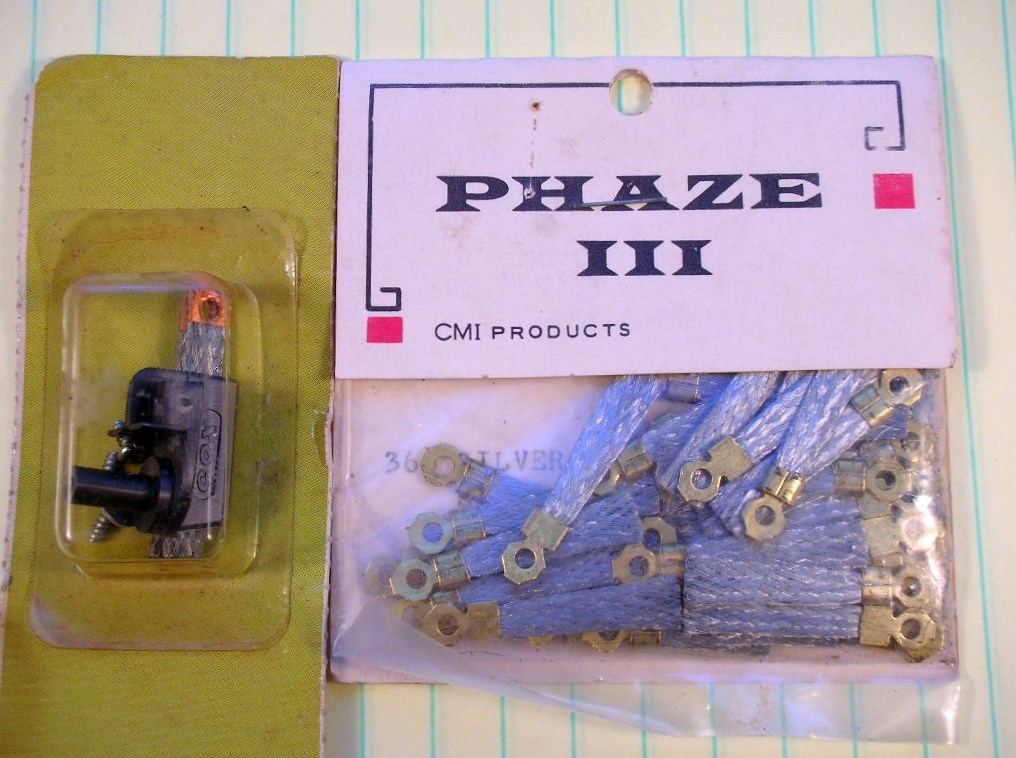
I've been scratching my head to come up with a drop arm design. ![]() I know I'm going to use an early Cox guide and instead of "combing out" the stiff braid I'm cheating and using some softer stuff:
I know I'm going to use an early Cox guide and instead of "combing out" the stiff braid I'm cheating and using some softer stuff:
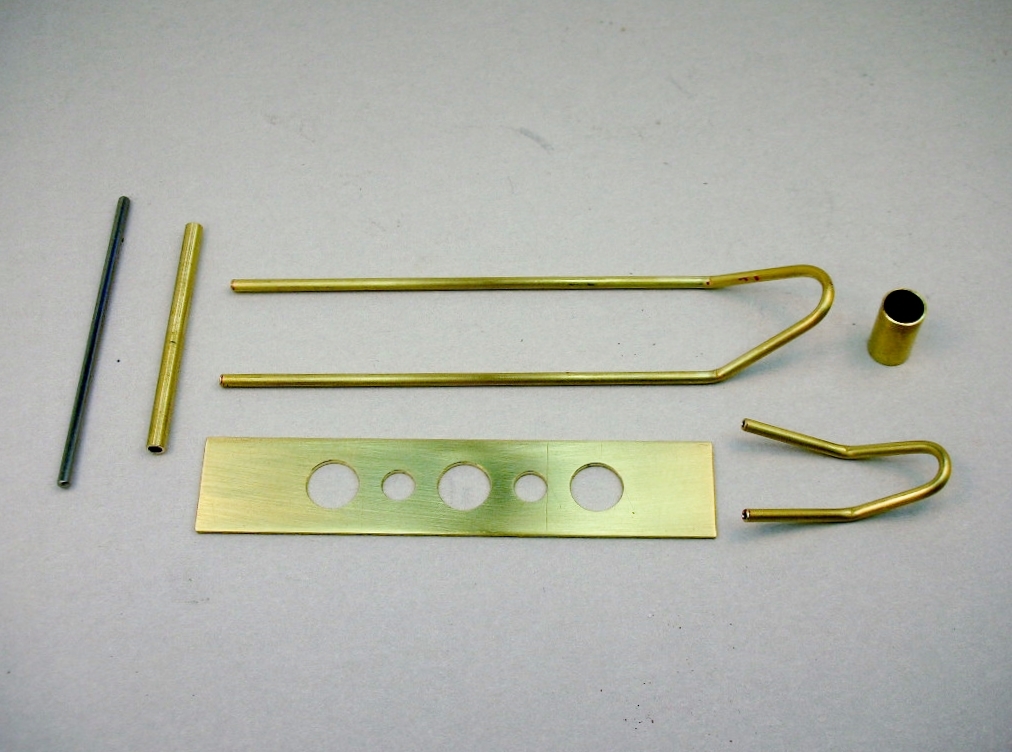
Finally I decided to combine brass strip and brass pin tube. I drilled holes in the strip because the builders in the old magazines were always drill holes in things ![]() and I think it looks cool
and I think it looks cool ![]() Here are all the parts ready to go into my Rick's jig:
Here are all the parts ready to go into my Rick's jig:
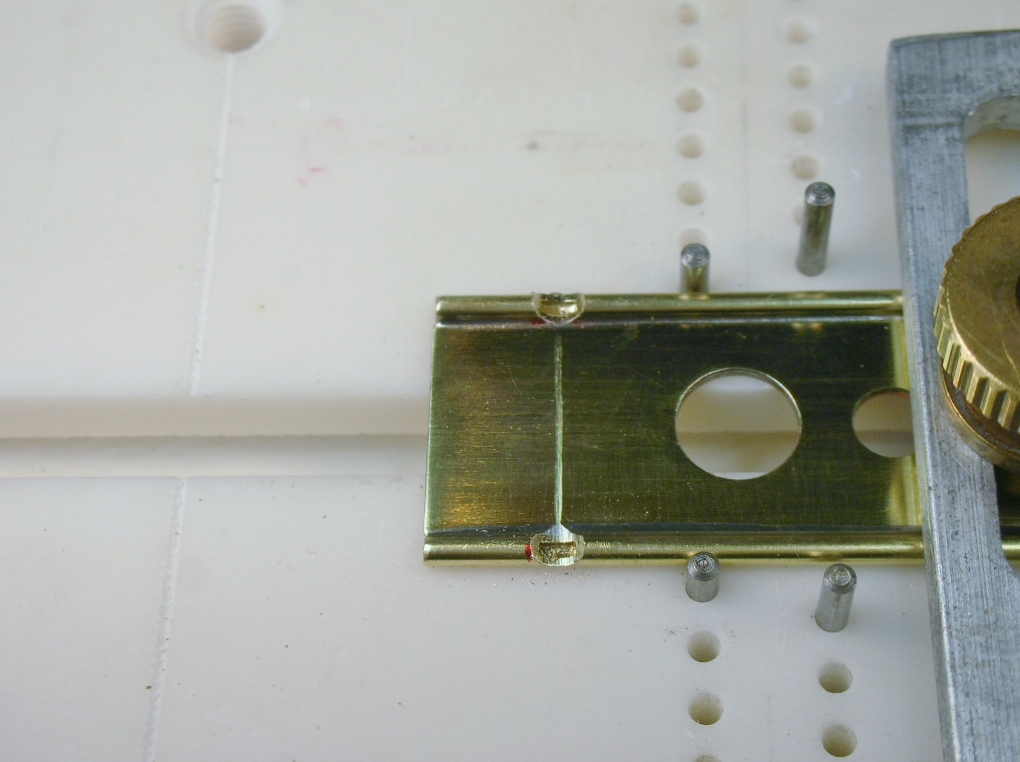
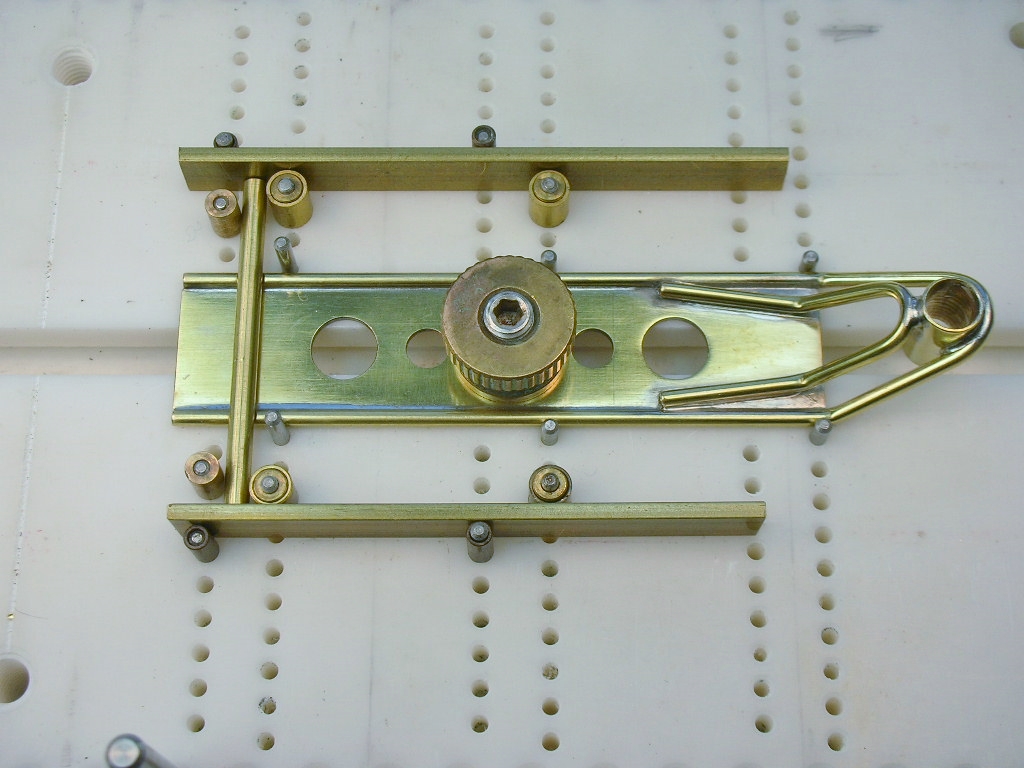
And all soldered up except for the hinge tube. That needs another step:
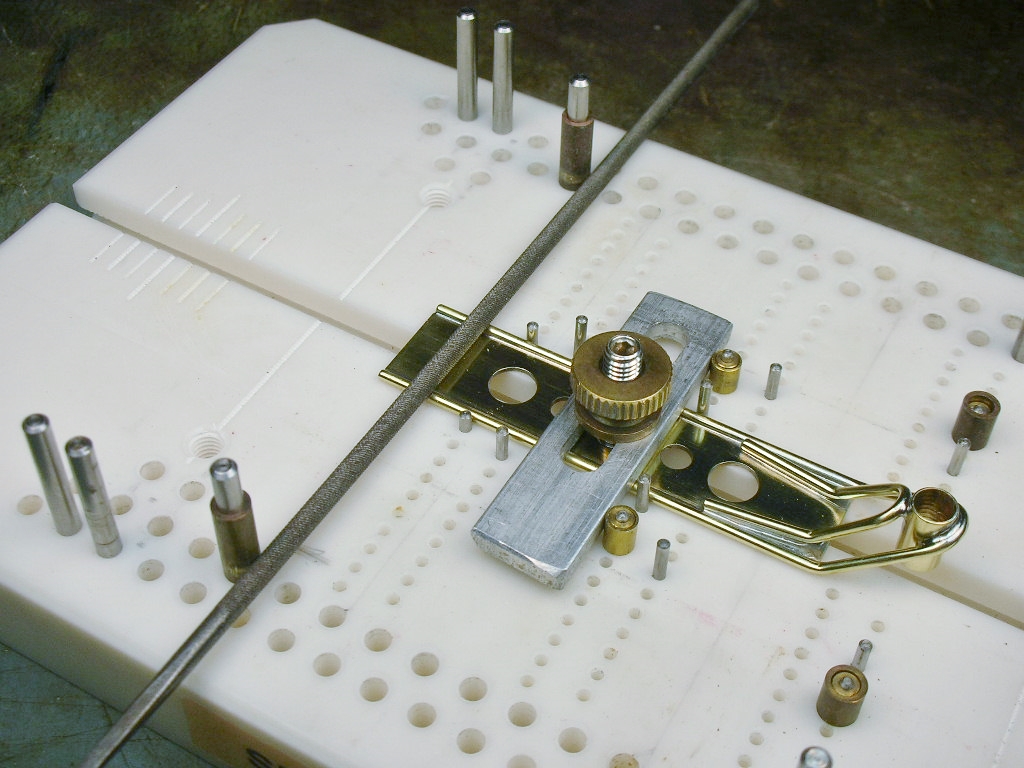
The cleaned up arm needed a notch cut into the pin tubes so the hinge tube would be flush with the brass strip. I used my jig's dowel pins with some axle spacers slipped over them to act as a bearing/guide for a round file to cut the notch:
As soon as the file kissed the brass strip it's done:
The hinge tube and drop arm in the jig for soldering:
All finished up except for a down stop. I'm still not sure about that. Lots of older cars just used the lead wires. ![]() I'll come up with something:
I'll come up with something:
- slotbaker, Jencar17, Phil Smith and 3 others like this
Rick Thigpen
Check out Steve Okeefe's great web site at its new home here at Slotblog:
The Independent Scratchbuilder
There's much more to come...
#36

Posted 30 October 2020 - 03:45 PM
Thanks for the suggestion Isaac, that would look cool. I haven't posted a picture of the drop arm in the chassis yet. But it won't work on this chassis because my drop arm is flush with the bottom of the chassis. It's not sitting above the main rails like the Cox Gurney Stocker. A stop that would allow some drop arm movement would drag on the track. ![]()
Rick Thigpen
Check out Steve Okeefe's great web site at its new home here at Slotblog:
The Independent Scratchbuilder
There's much more to come...
#37

Posted 30 October 2020 - 03:55 PM
Okay, that would make a ton of sense.
#38

Posted 01 November 2020 - 12:26 PM
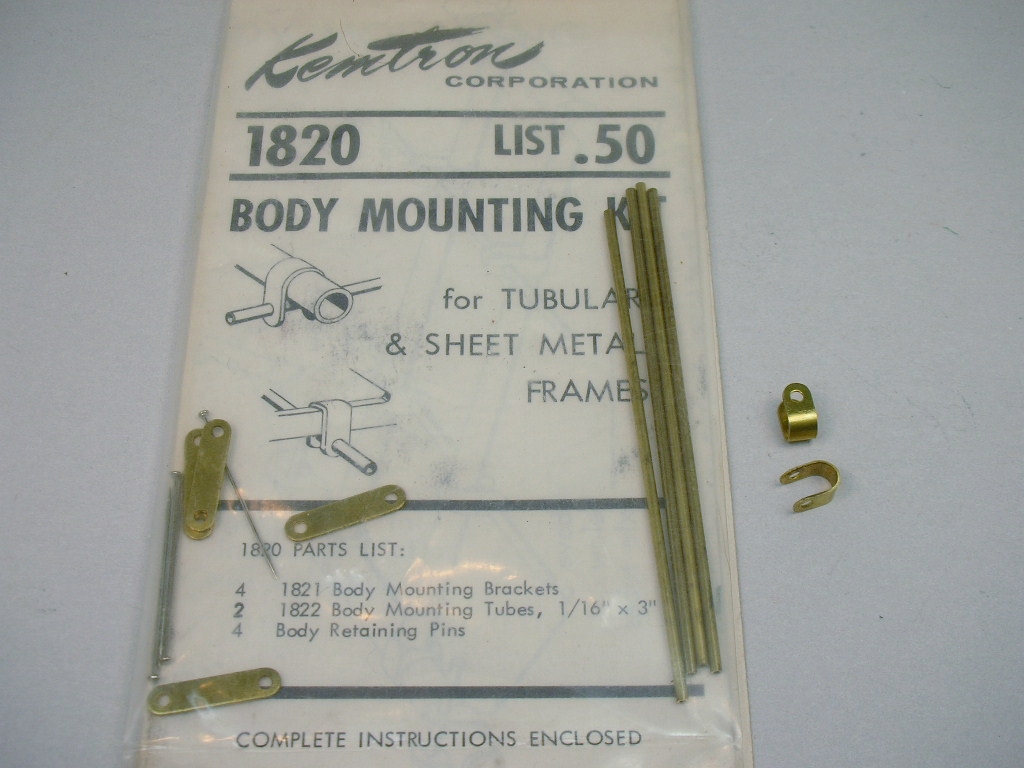
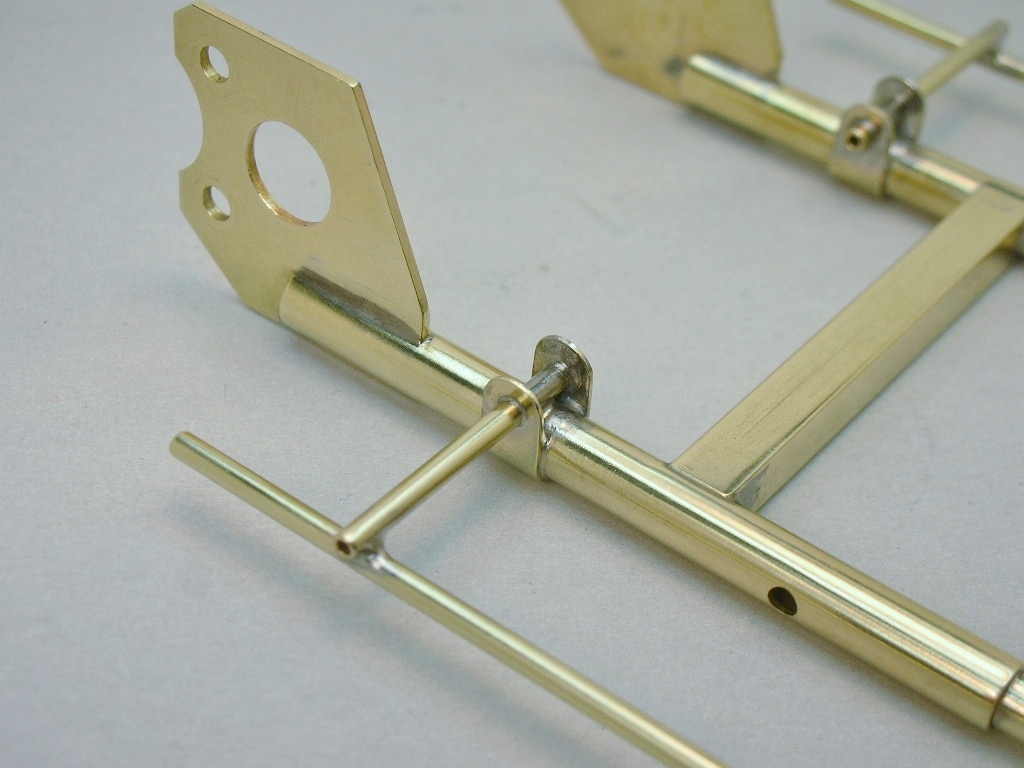
While ruminating on the drop arm down stop I went ahead with the body mounts. I'm using the cool Kemtron "body mounting brackets" on the rear. They wrap around the frame rail to strengthen the 2-piece rear pin tubes:
All soldered up in the jig. The front pin tube was bend downward to act as the drop arm upward stop:
The chassis all buffed up and ready for that drop arm:
Here's that Kemtron piece in place:
- Tex, Alchemist and Peter Horvath like this
Rick Thigpen
Check out Steve Okeefe's great web site at its new home here at Slotblog:
The Independent Scratchbuilder
There's much more to come...
#39

Posted 01 November 2020 - 02:31 PM
Wait, a strange Kemtron accessory I've never heard of?? Where do you find these things Rick?
Excellent idea in fact, and it looks very good.
Don
#40

Posted 01 November 2020 - 03:23 PM
Nice solution to the body mount pin tube U brackets, they look strong. ![]()
Is the wheelbase still adjustable at this point or does the hinge hole lock it in to a fixed position?
#41

Posted 01 November 2020 - 05:54 PM
The wheelbase was fixed early on back at this step Martin ![]() :
:
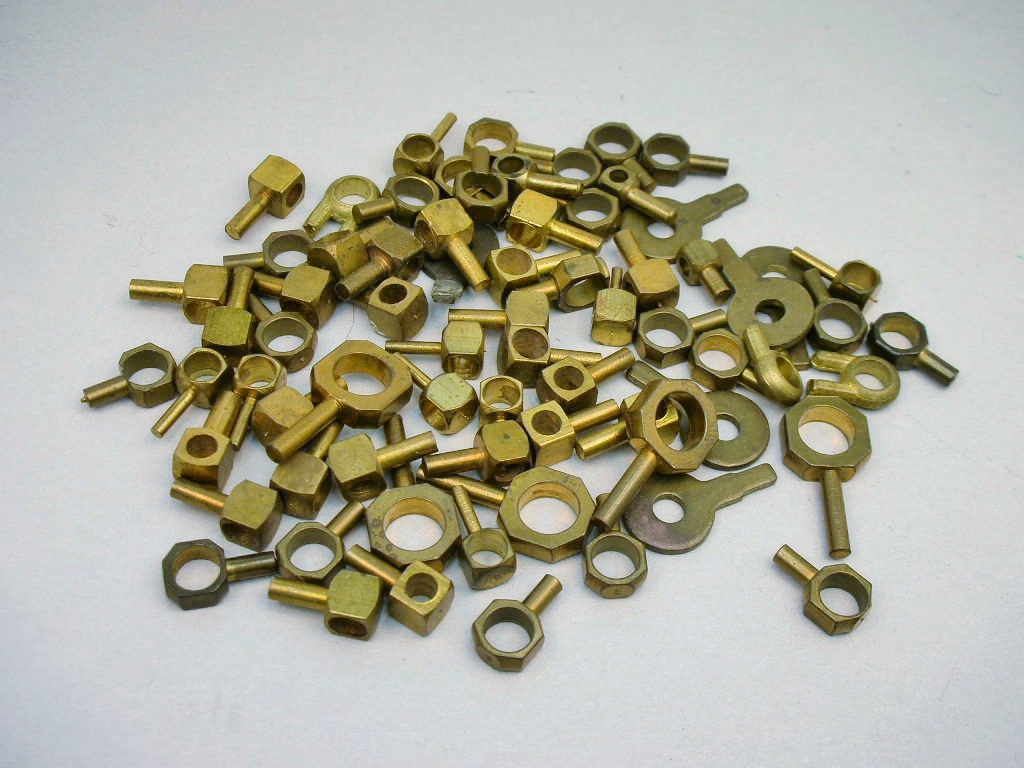
You know I like the weirdo old stuff Don. ![]() In fact in my quest for a drop arm stop that didn't look like it came off of a rewound Mabuchi era "jail door" chassis, I turned to the old stuff for inspiration............a pile of vintage doodads, doohickeys and gizmos:
In fact in my quest for a drop arm stop that didn't look like it came off of a rewound Mabuchi era "jail door" chassis, I turned to the old stuff for inspiration............a pile of vintage doodads, doohickeys and gizmos:
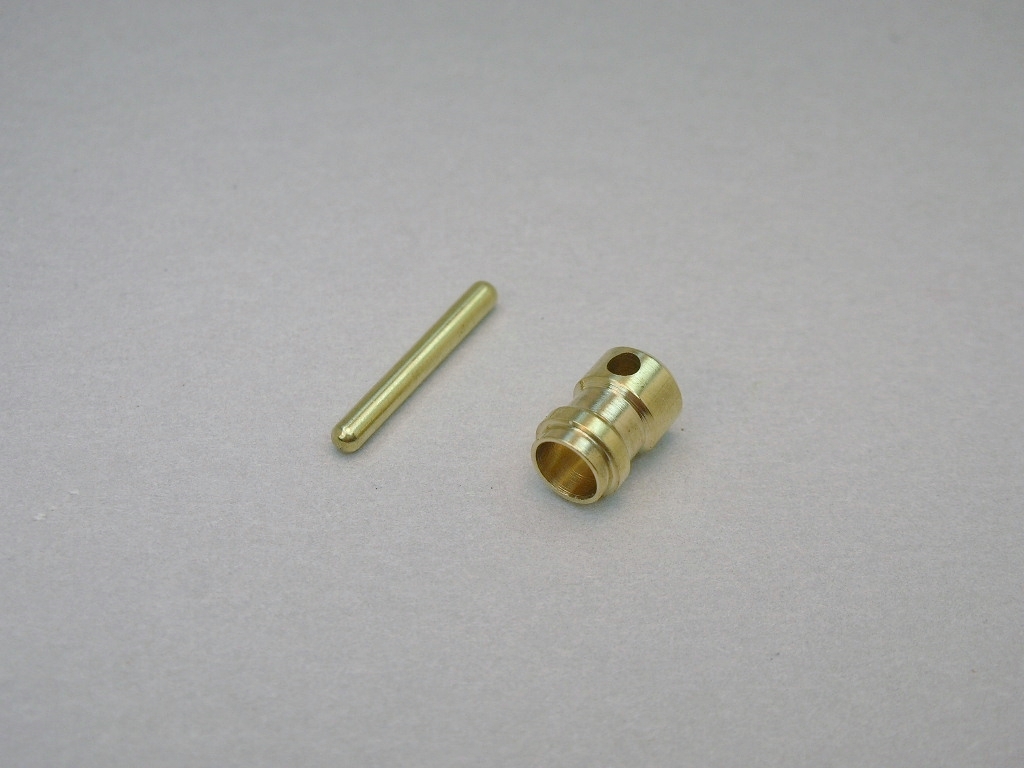
I couldn't find anything I liked for the task so I made something up on my hobby lathe out of 3/16" bar stock:
Now to solder it on the drop arm........
- Lou E, Alchemist and Peter Horvath like this
Rick Thigpen
Check out Steve Okeefe's great web site at its new home here at Slotblog:
The Independent Scratchbuilder
There's much more to come...
#42

Posted 01 November 2020 - 06:42 PM
I should off seen that. ![]() Your slip joint is so clean it did not look soldered.
Your slip joint is so clean it did not look soldered. ![]()
#43

Posted 01 November 2020 - 08:35 PM
Don, I agree absolutely! I thought had seen most everything but I have not seen that! ![]()
Rick, you teach me so much here is a thank you. ![]()
#44

Posted 03 November 2020 - 12:00 PM
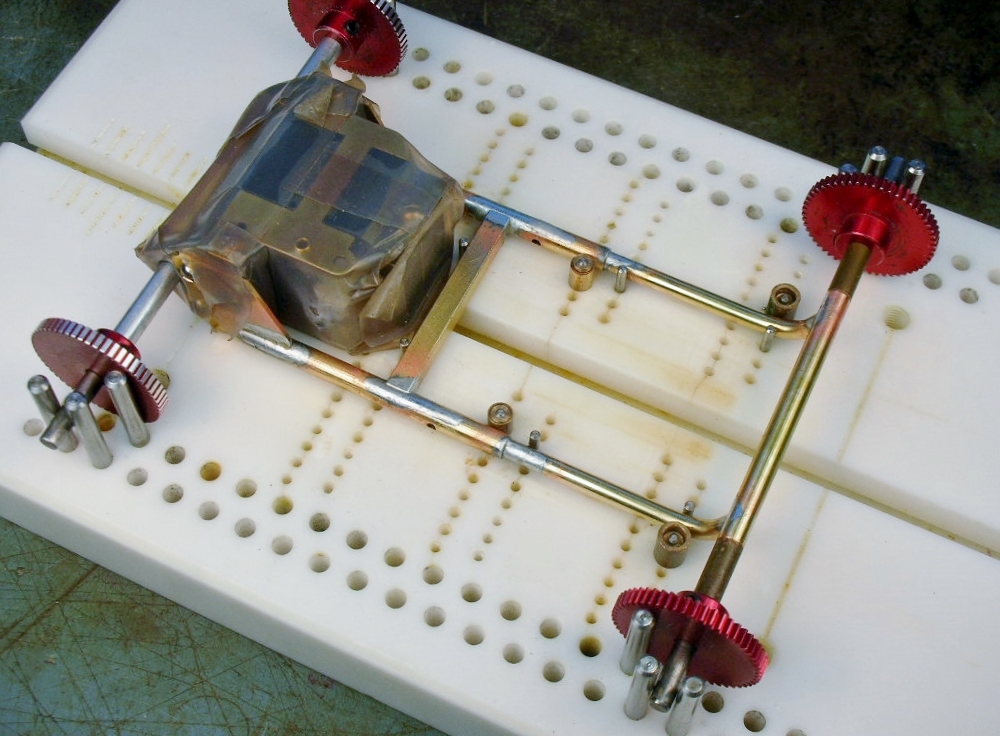
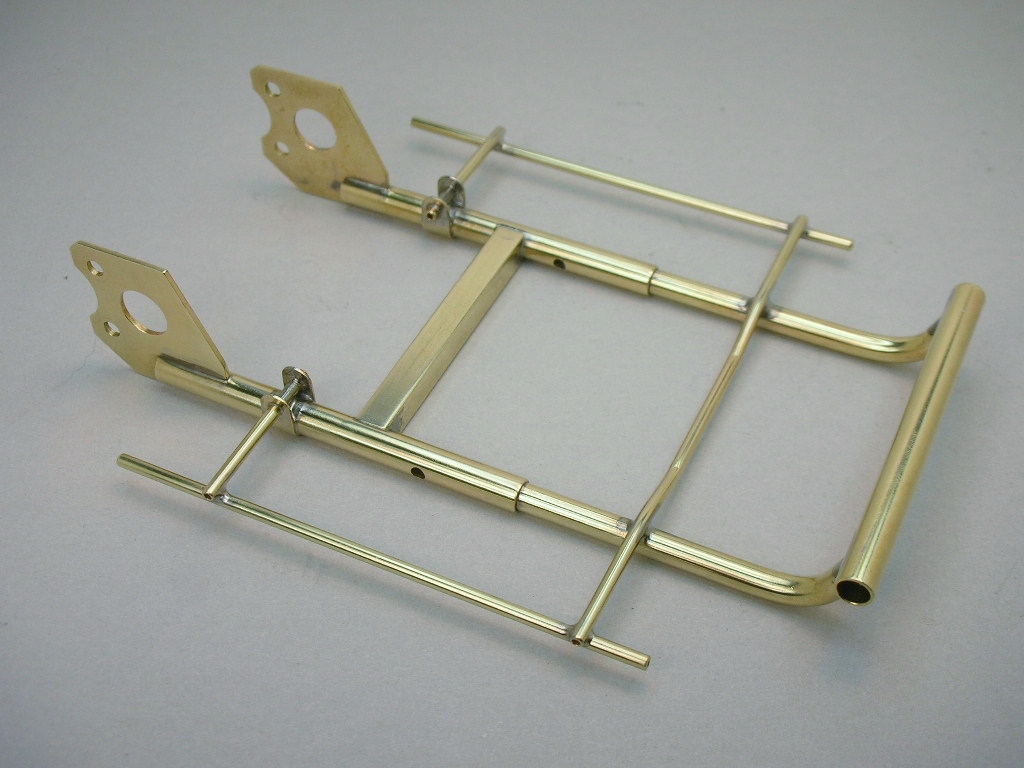
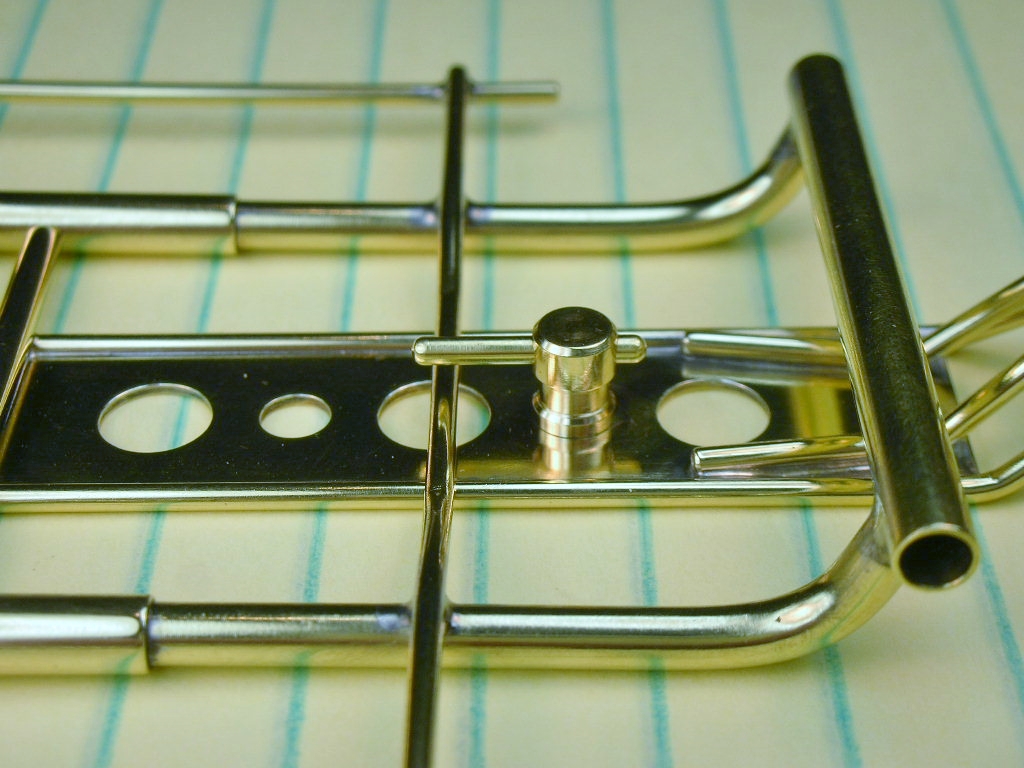
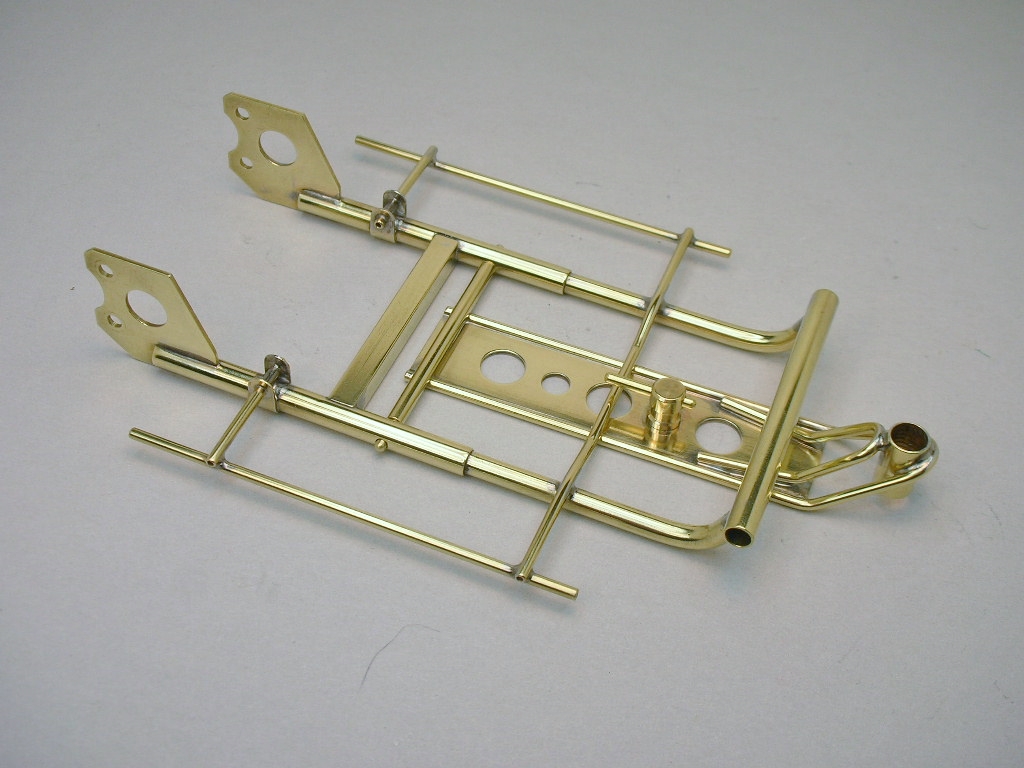
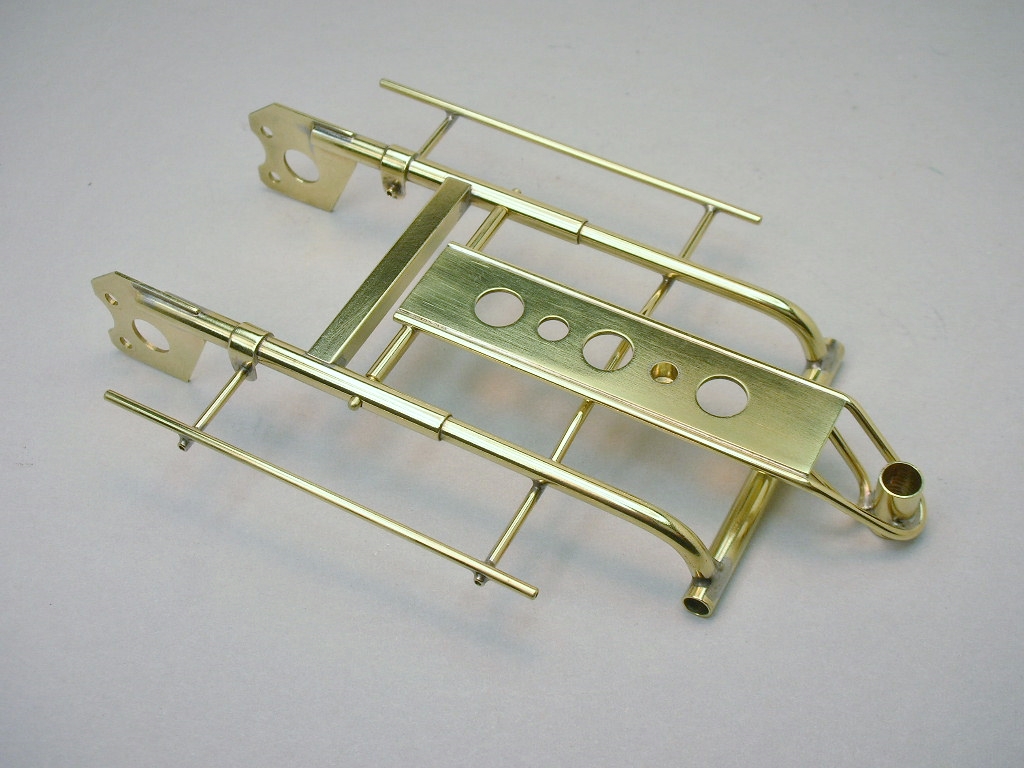
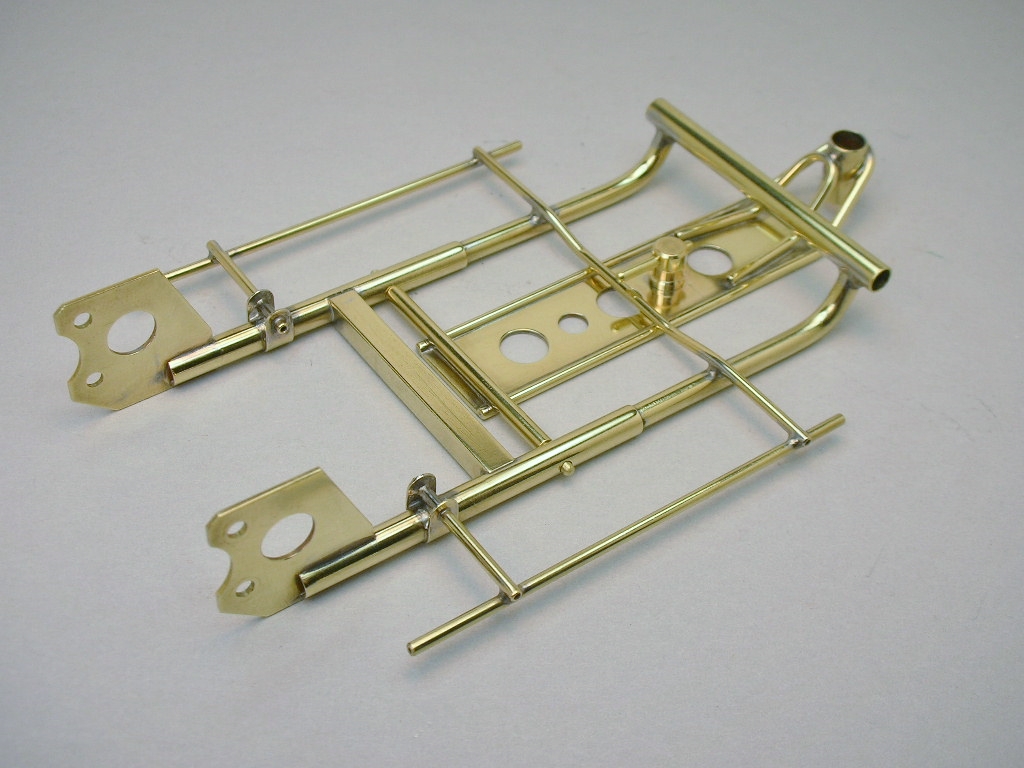
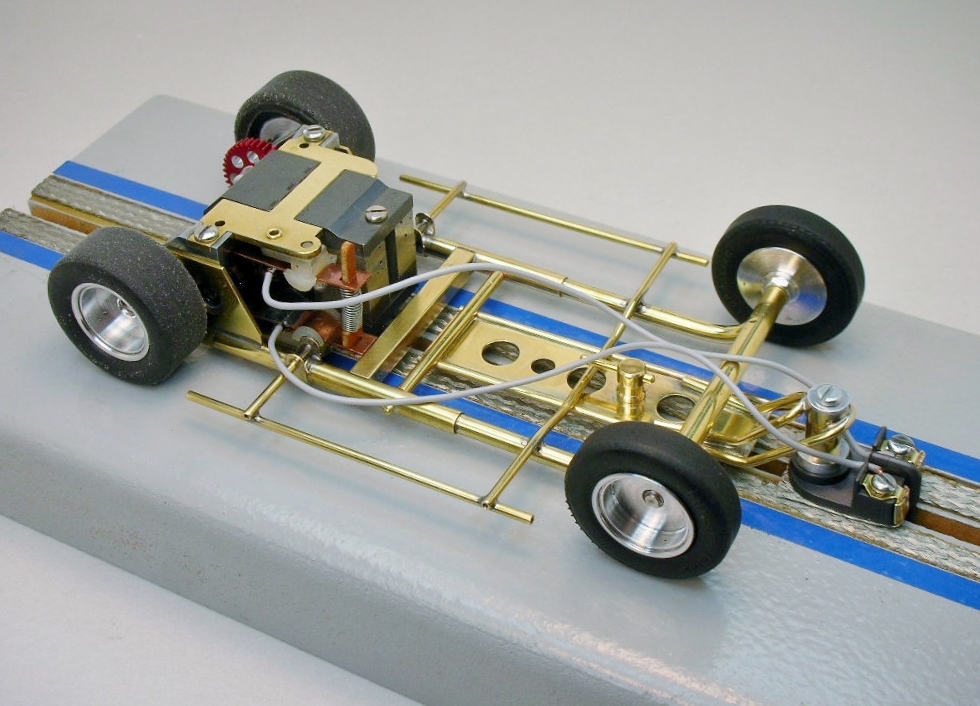
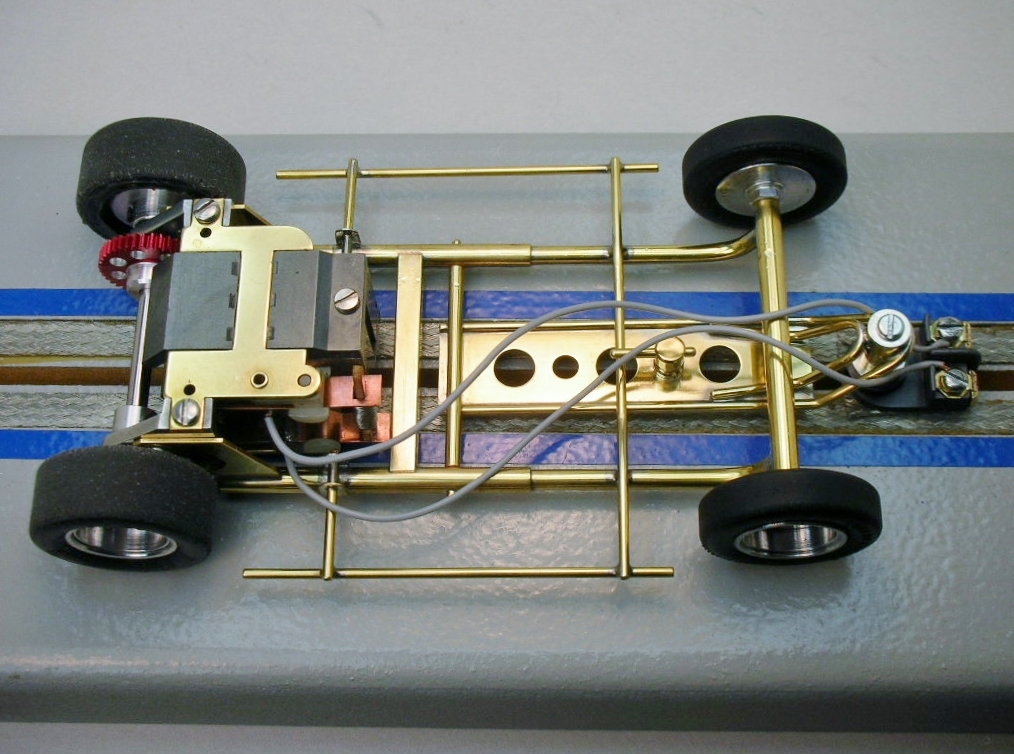
We all learn from each other's builds Isaac. This is a great forum to build and share our projects. Here's that installed drop arm stop and my finished chassis:
It looks so simple but it took me forever to figure it out. ![]()
![]()
- slotbaker, Tex, Lou E and 3 others like this
Rick Thigpen
Check out Steve Okeefe's great web site at its new home here at Slotblog:
The Independent Scratchbuilder
There's much more to come...
#45

Posted 03 November 2020 - 12:10 PM
Beautiful job Rick... as usual!
I see what Martin meant by asking if you forget to solder the adjustable wheelbase part - really looks like no solder in there yet!
And your drop stop looks very Art Deco!
Don
#46

Posted 03 November 2020 - 06:24 PM
Great! Looks really strong and that can be a very good trait. But also fairly light.
#47

Posted 04 November 2020 - 04:41 PM
I like coming here, you see unfamiliar tools , slot parts that I have never seen elsewhere.
And in addition there are beautiful constructions and beautiful photos.
Thank you Rick for sharing
- justDave likes this
#48

Posted 06 November 2020 - 02:26 PM
Thank you guys. ![]()
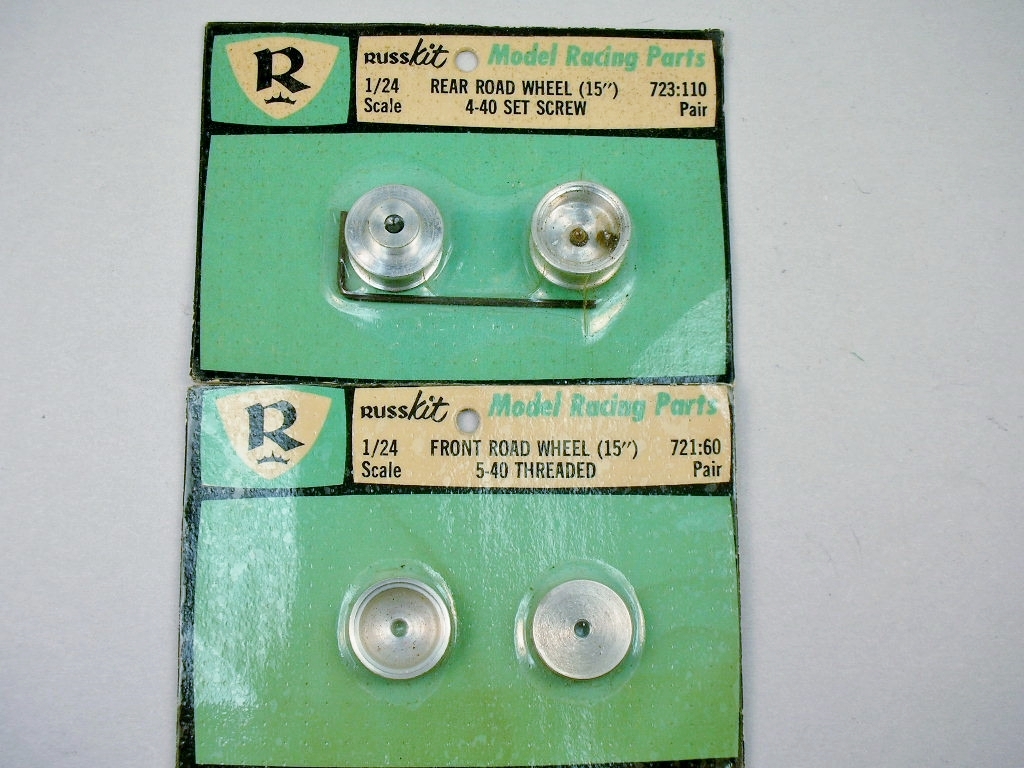
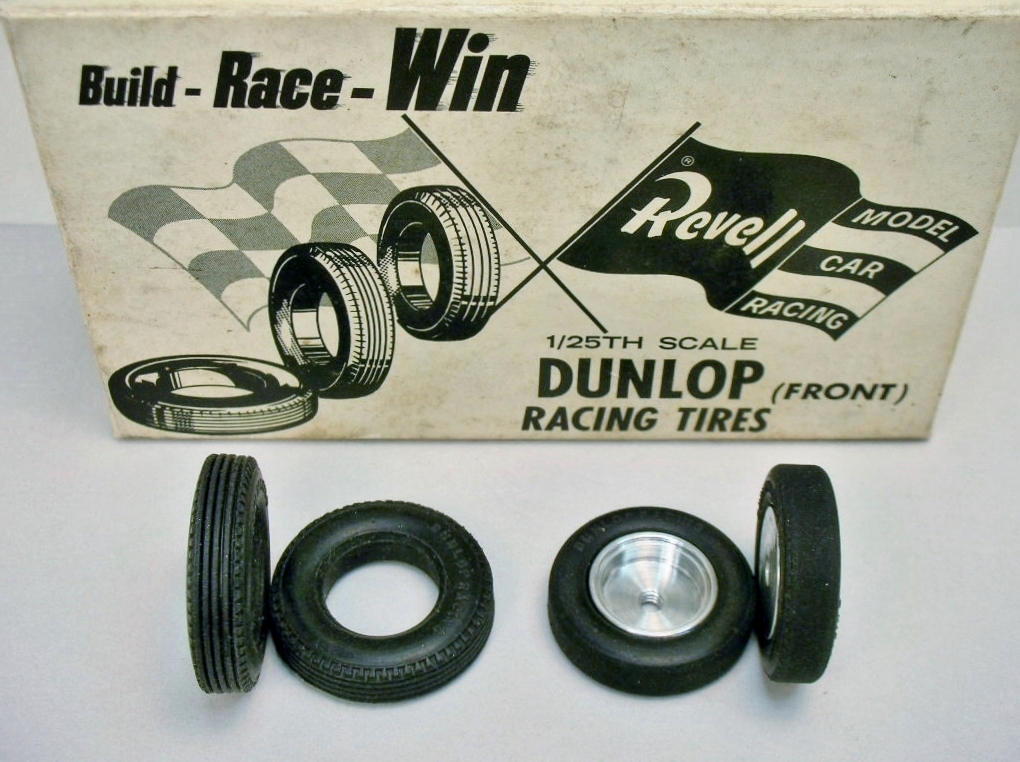
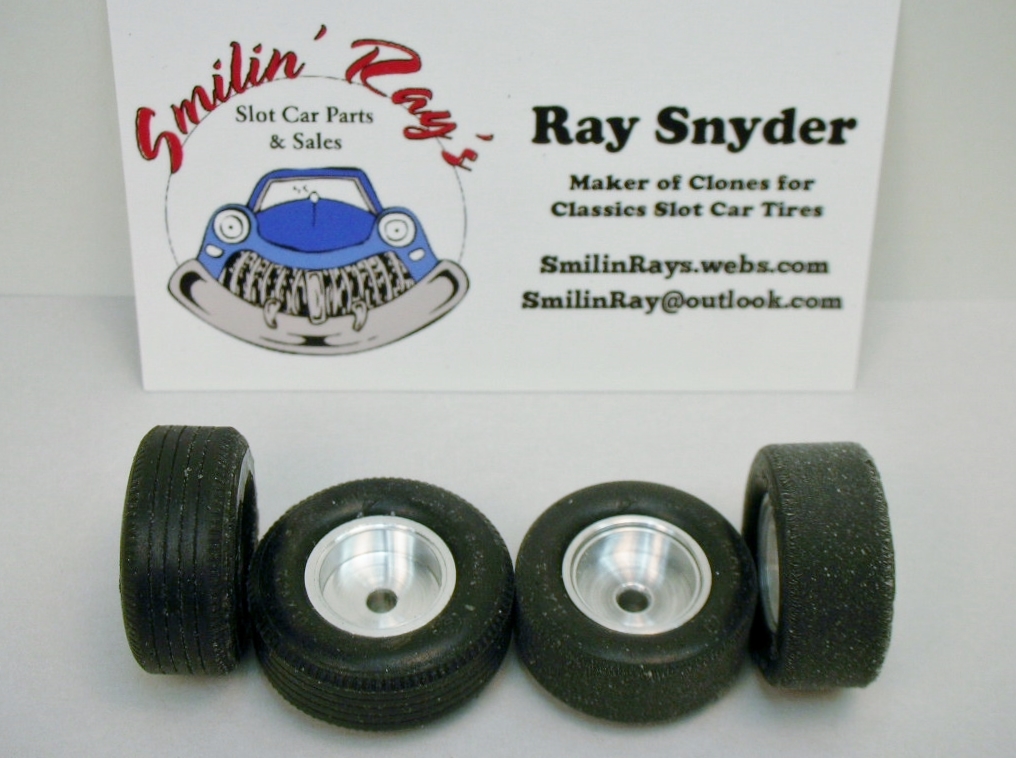
I've been a bit sidetracked but I'm back working on my King Cobra. I've decided on good old Russkit set screw rear and threaded front wheels:
For the front tires I epoxy bonded Revell Dunlop fronts and ground them to 1" :
For the rear's I'm trying Smilin' Ray's urethane repops of Russkit Dunlop tires (shown ground to 1.020" on the right):
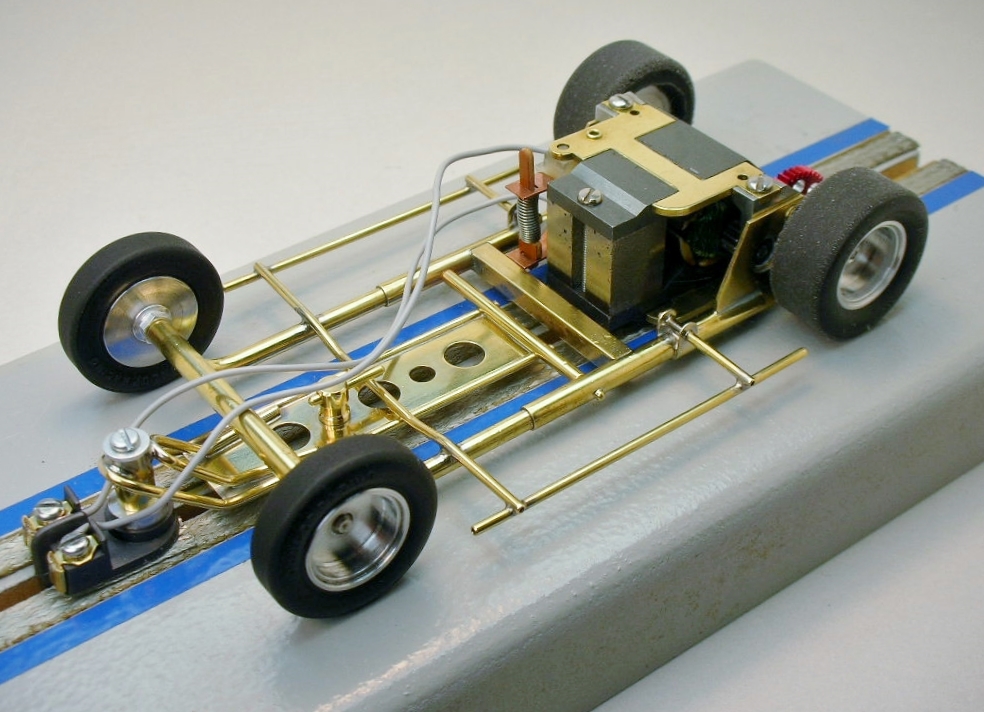
I'm still waffling between Russkit Cooper and Monogram Scarab wheel inserts while I build up the roller........
- Tex likes this
Rick Thigpen
Check out Steve Okeefe's great web site at its new home here at Slotblog:
The Independent Scratchbuilder
There's much more to come...
#49

Posted 10 November 2020 - 12:54 PM
- hiline2, Peter Horvath, Tom Katsanis and 1 other like this
Rick Thigpen
Check out Steve Okeefe's great web site at its new home here at Slotblog:
The Independent Scratchbuilder
There's much more to come...
#50

Posted 10 November 2020 - 12:58 PM
Wowie Kazowie Rick! Nice shiny brass. After all that fun, now you have to pay for it by doing the body...
Don


