Jump to content


Photo

Lancer Chaparral 2G Super Competition build


  • Please log in to reply
92 replies to this topic

#26 dc-65x

dc-65x

    Grand Champion Poster

  • Subscriber
  • PipPipPipPipPipPipPipPip
  • 6,943 posts
  • Joined: 14-February 06
  • Gender:Male
  • Location:Captain Rick: The only vintage slot car nut in SW Oregon?

Posted 29 November 2022 - 07:48 PM

Thanks Regis, I'm a big Lancer fan too.


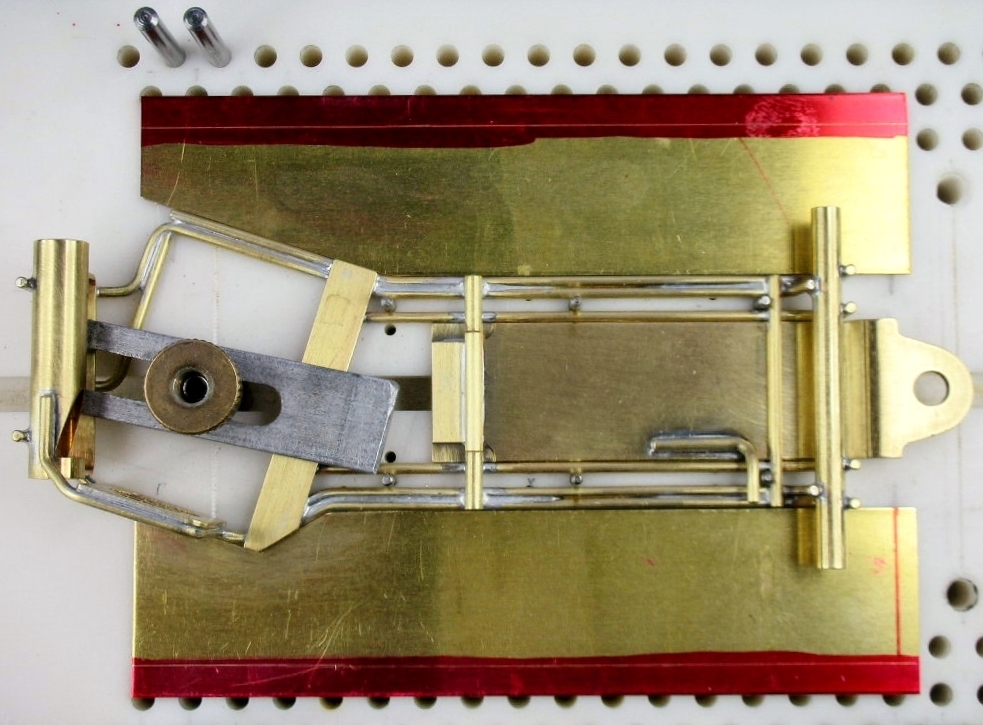
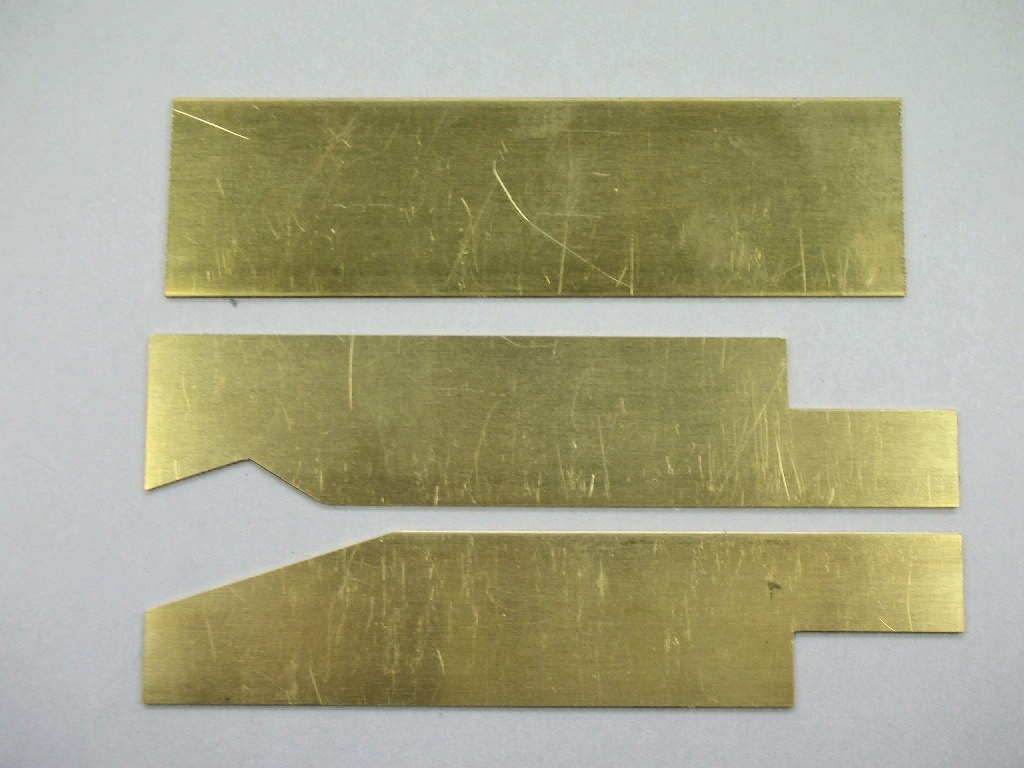
I started my pans with 1" X 1/32" thick brass strip and fit them to the center sections bends first:


chassis (27).JPG


After much band sawing and filing they started to look like something:


chassis (28).JPG


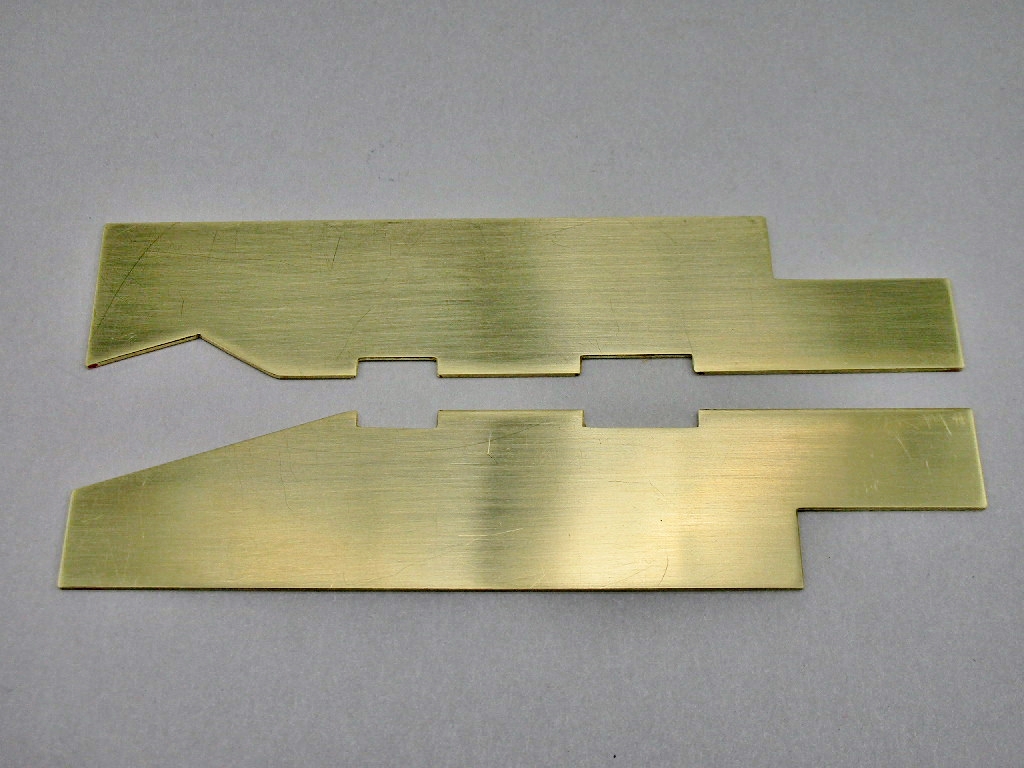
I did finish them off with the milling machine to cut the hinge notches. It just does such a neat and precise job:


chassis (29).JPG


I love big honk'n bat pans.   :crazy:


  • Pablo, Tex, Phil Smith and 3 others like this

Rick Thigpen
Check out Steve Okeefe's great web site at its new home here at Slotblog:
The Independent Scratchbuilder
There's much more to come...


#27 Mike Patterson

Mike Patterson

    Village Luddite

  • Subscriber
  • PipPipPipPipPipPipPip
  • 2,557 posts
  • Joined: 14-October 07
  • Gender:Male
  • Location:Zanesville, OH

Posted 30 November 2022 - 10:47 AM

This body has a short nose compared to vintage offerings too Mike. With a Cox quick change guide (under the body) the lead will come in well under the mythical ideal 7/8" at about 5/8".  I'm sure that's one reason we've haven't seen a 2G in the tech charts of a major period race report.

Thank you for the reply. I was just wondering.


Carry on!


I am not a doctor, but I played one as a child with the girl next door.


#28 dc-65x

dc-65x

    Grand Champion Poster

  • Subscriber
  • PipPipPipPipPipPipPipPip
  • 6,943 posts
  • Joined: 14-February 06
  • Gender:Male
  • Location:Captain Rick: The only vintage slot car nut in SW Oregon?

Posted 06 December 2022 - 08:53 PM

Thanks Mike. 


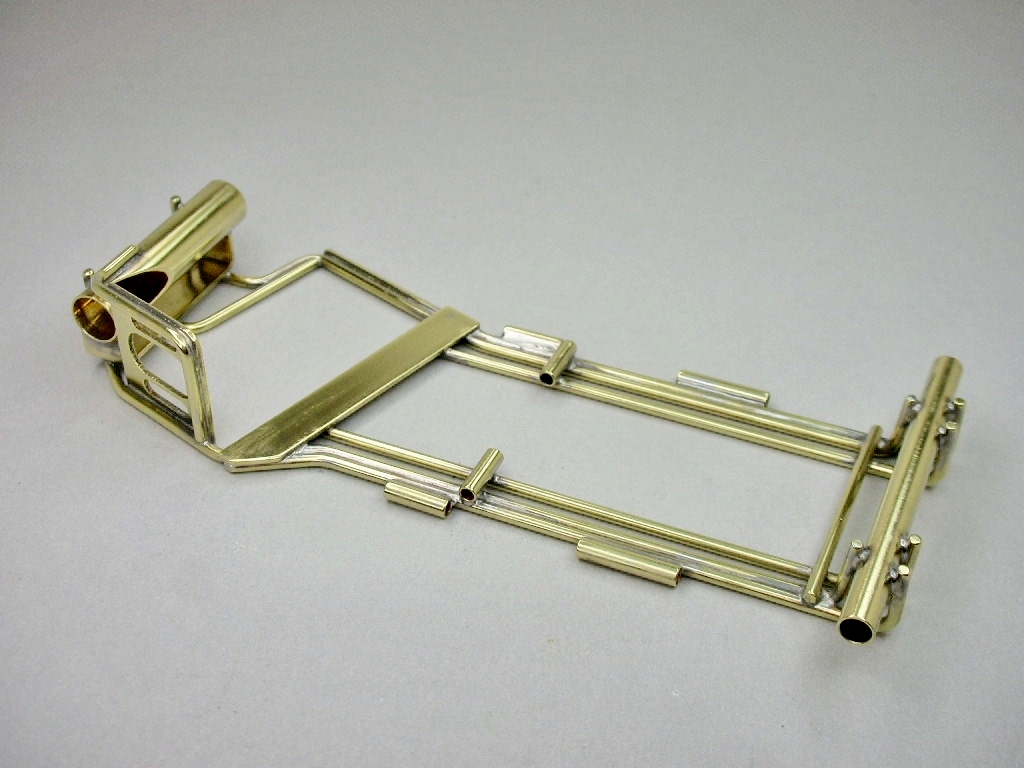
With the pans finished I could use them to locate the pan hinge tubes and get them soldered on:


chassis (32).JPG


chassis (33).JPG


The pan hinges and the pin tube body mounts are installed. I put a "dog leg" bend in the rear hinge so I could mount the body mount pin tube on top of the hinge instead of elsewhere on the pans surface:


chassis (35).JPG


After washing the chassis with Dawn and blowing it dry the excess rod and tube was trimmed off. The pans were hand polished with 320 through 12000 grit sand paper and finished with Semichrome paste metal polish:


chassis (37).JPG


chassis (39).JPG


The pan down stops will finish the chassis. I've been waffling on what style to use..........


  • Pablo, Tex, Chris Stemman and 5 others like this

Rick Thigpen
Check out Steve Okeefe's great web site at its new home here at Slotblog:
The Independent Scratchbuilder
There's much more to come...


#29 Alchemist

Alchemist

    Posting Leader

  • Full Member
  • PipPipPipPipPipPipPip
  • 2,692 posts
  • Joined: 11-November 09
  • Gender:Male
  • Location:Far, far away

Posted 06 December 2022 - 11:04 PM

Hi Rick,


Your chassis, to me, looks like jewelry!


Incredible.


Thanks for sharing, Rick.


Hope all is well!


Ernie


Ernie Layacan

#30 don.siegel

don.siegel

    Grand Champion Poster

  • Subscriber
  • PipPipPipPipPipPipPipPip
  • 5,816 posts
  • Joined: 17-February 06
  • Gender:Male
  • Location:Paris, France

Posted 07 December 2022 - 04:15 AM

Beautiful chassis Rick! 


Is that a typo on the sandpaper, or really 12000 grit and not 1200? 


In the immortal words of Maynard G Krebs, that sounds like a lot of WORK! 


Don 


#31 Larry Horner

Larry Horner

    On The Lead Lap

  • Full Member
  • PipPipPipPip
  • 455 posts
  • Joined: 18-March 17
  • Gender:Male
  • Location:San Francisco

Posted 07 December 2022 - 11:49 AM

Simply gorgeous! Just out of curiosity, what's the final weight with drop arm?


#32 Martin

Martin

    Posting Leader

  • Full Member
  • PipPipPipPipPipPipPip
  • 4,180 posts
  • Joined: 22-February 09
  • Gender:Male
  • Location:US

Posted 07 December 2022 - 12:44 PM

Very shinny Rick :sun_bespectacled:

Hey Don, 12000 is available. I manly use such fine grits on windshields. I have a range I bought many years ago like this.

These look like they will do the job.

https://www.amazon.c...d_rd_w=EaicO


Troubled with polishing those hard to reach areas, or smaller turnings? Not any longer, micro-mesh has solved that problem with the sanding sticks. The smaller size will now allow you to polish those smaller and more detailed areas. These 1/2" x 5- 3/4" foam backed sticks are coated with an abrasive crystal that will last up to 15 times longer than normal abrasives. Kit includes one each of 1500, 1800, 2400, 3200, 3600, 4000, 6000, 8000, and 12,000 grit sticks.

Attached Images

  • Screenshot (1052).png

Martin Windmill

#33 dc-65x

dc-65x

    Grand Champion Poster

  • Subscriber
  • PipPipPipPipPipPipPipPip
  • 6,943 posts
  • Joined: 14-February 06
  • Gender:Male
  • Location:Captain Rick: The only vintage slot car nut in SW Oregon?

Posted 07 December 2022 - 01:25 PM

Thanks for following along with me Ernie.


Hi Don. Up to 1200 grit is pretty much just reducing the depth of the scratch marks the coarser sandpaper leaves. I'm getting rid of the solder track marks as the soldering iron tip moves along the joint. Bob Emott could make those "square solder joints" of his look great.    :wub:     Mine look like grunt.....  :laugh2:  ......so I get rid of them.   :D


From 1200 on the finer grits start the actual polishing and things get easier. 


The bare drop arm weighs 18 grams Larry.


For polishing pans, drop arms and other flat surfaces I'm using cloth sheets from 4000 grit and up Martin. I wrap it around something hard and flat like a 6" machinist scale to keep the surface flat and not round off corners.


Rick Thigpen
Check out Steve Okeefe's great web site at its new home here at Slotblog:
The Independent Scratchbuilder
There's much more to come...


#34 Larry Horner

Larry Horner

    On The Lead Lap

  • Full Member
  • PipPipPipPip
  • 455 posts
  • Joined: 18-March 17
  • Gender:Male
  • Location:San Francisco

Posted 07 December 2022 - 02:09 PM

Learn something new every day ... I have a 3000 sanding pad but had no idea they go all the way to 12000!


Rick, I meant the weight of the complete chassis. But I just realized the pans don't have any stops as yet so I will be patient.


#35 dc-65x

dc-65x

    Grand Champion Poster

  • Subscriber
  • PipPipPipPipPipPipPipPip
  • 6,943 posts
  • Joined: 14-February 06
  • Gender:Male
  • Location:Captain Rick: The only vintage slot car nut in SW Oregon?

Posted 07 December 2022 - 02:17 PM

".......with the drop arm."     Sorry Larry!   I'll weigh it when it's finished and post the weight.


Rick Thigpen
Check out Steve Okeefe's great web site at its new home here at Slotblog:
The Independent Scratchbuilder
There's much more to come...


#36 dc-65x

dc-65x

    Grand Champion Poster

  • Subscriber
  • PipPipPipPipPipPipPipPip
  • 6,943 posts
  • Joined: 14-February 06
  • Gender:Male
  • Location:Captain Rick: The only vintage slot car nut in SW Oregon?

Posted 09 December 2022 - 08:59 PM

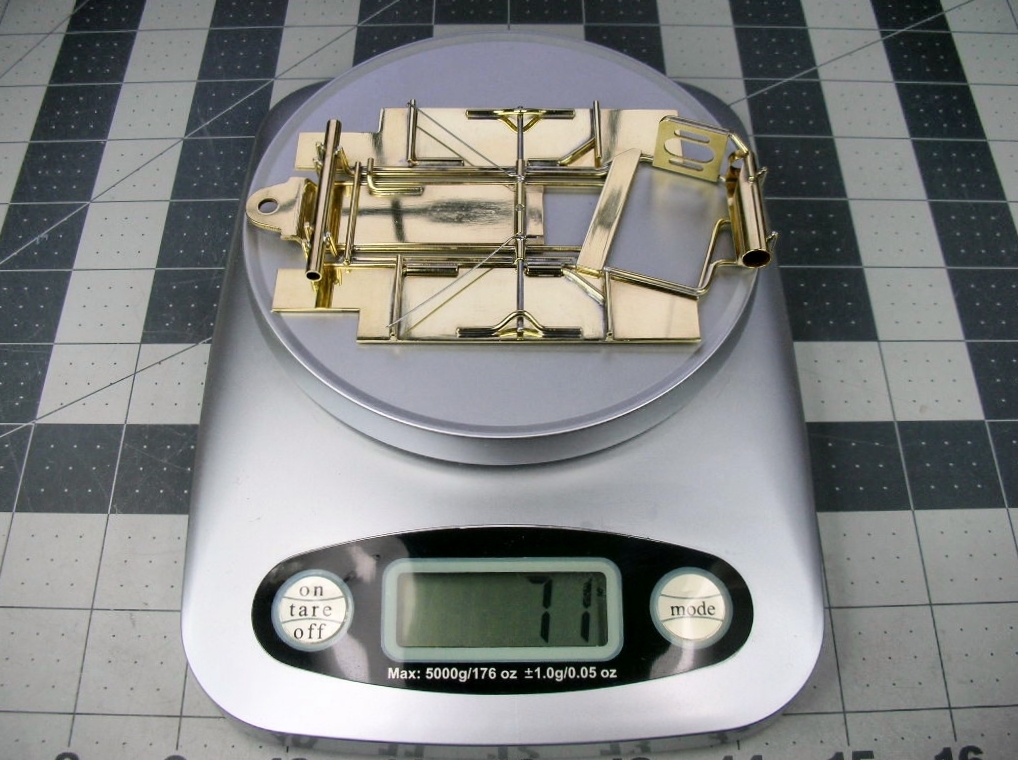
Here's the weight of the finished chassis Larry. For people from "olden times" like me in ounces.........


chassis (48).JPG


.........and for the more modern hipsters in grams:


chassis (49).JPG


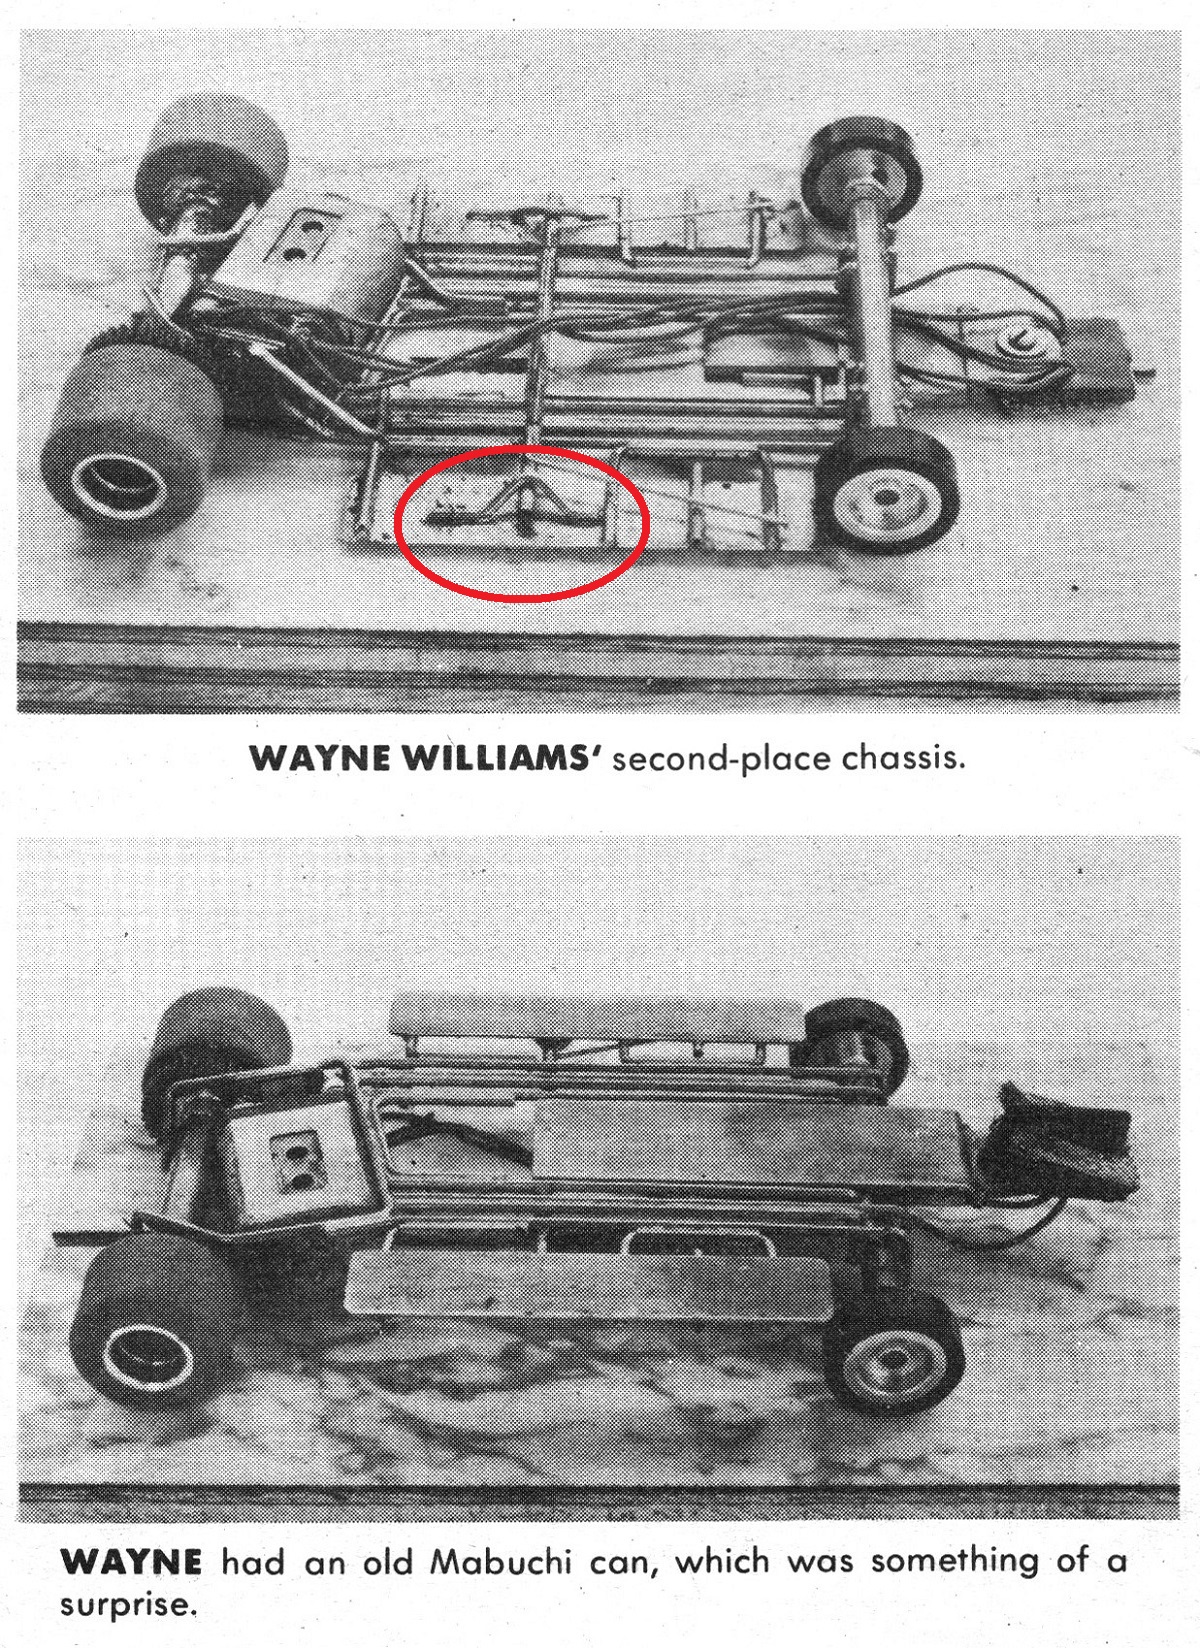
I found my favorite style of pan down stop was used by Wayne Williams in a June 1968 race:


MCJ V1N15 p5 6-15-68.jpg


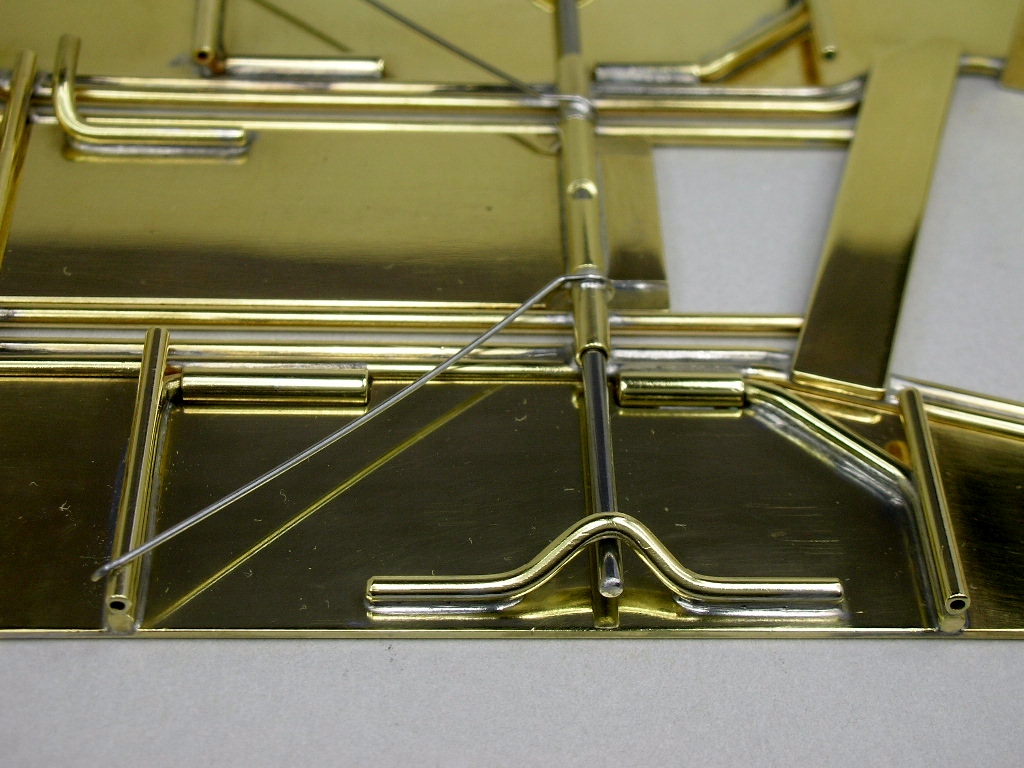
Easy to make and install cleanly near the outer edge of the pan:


chassis (41).JPG


I also use a similar location of a pan spring wire:


chassis (42).JPG


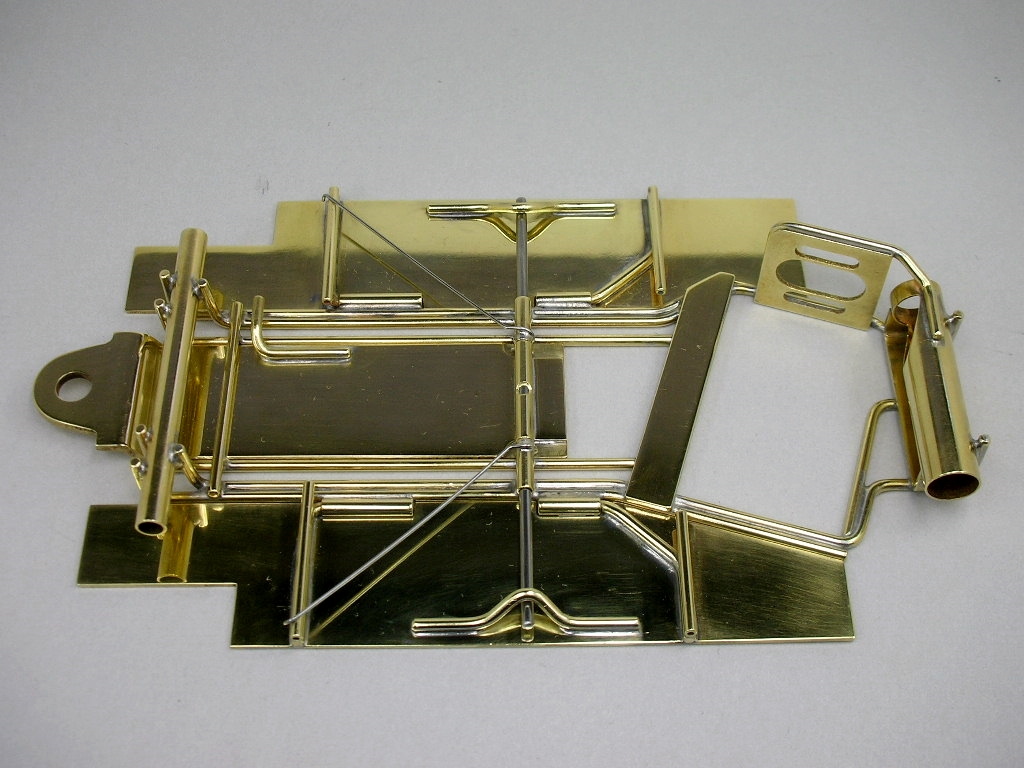
The finished chassis (finally!):


chassis (46).JPG


chassis (43).JPG


chassis (47).JPG


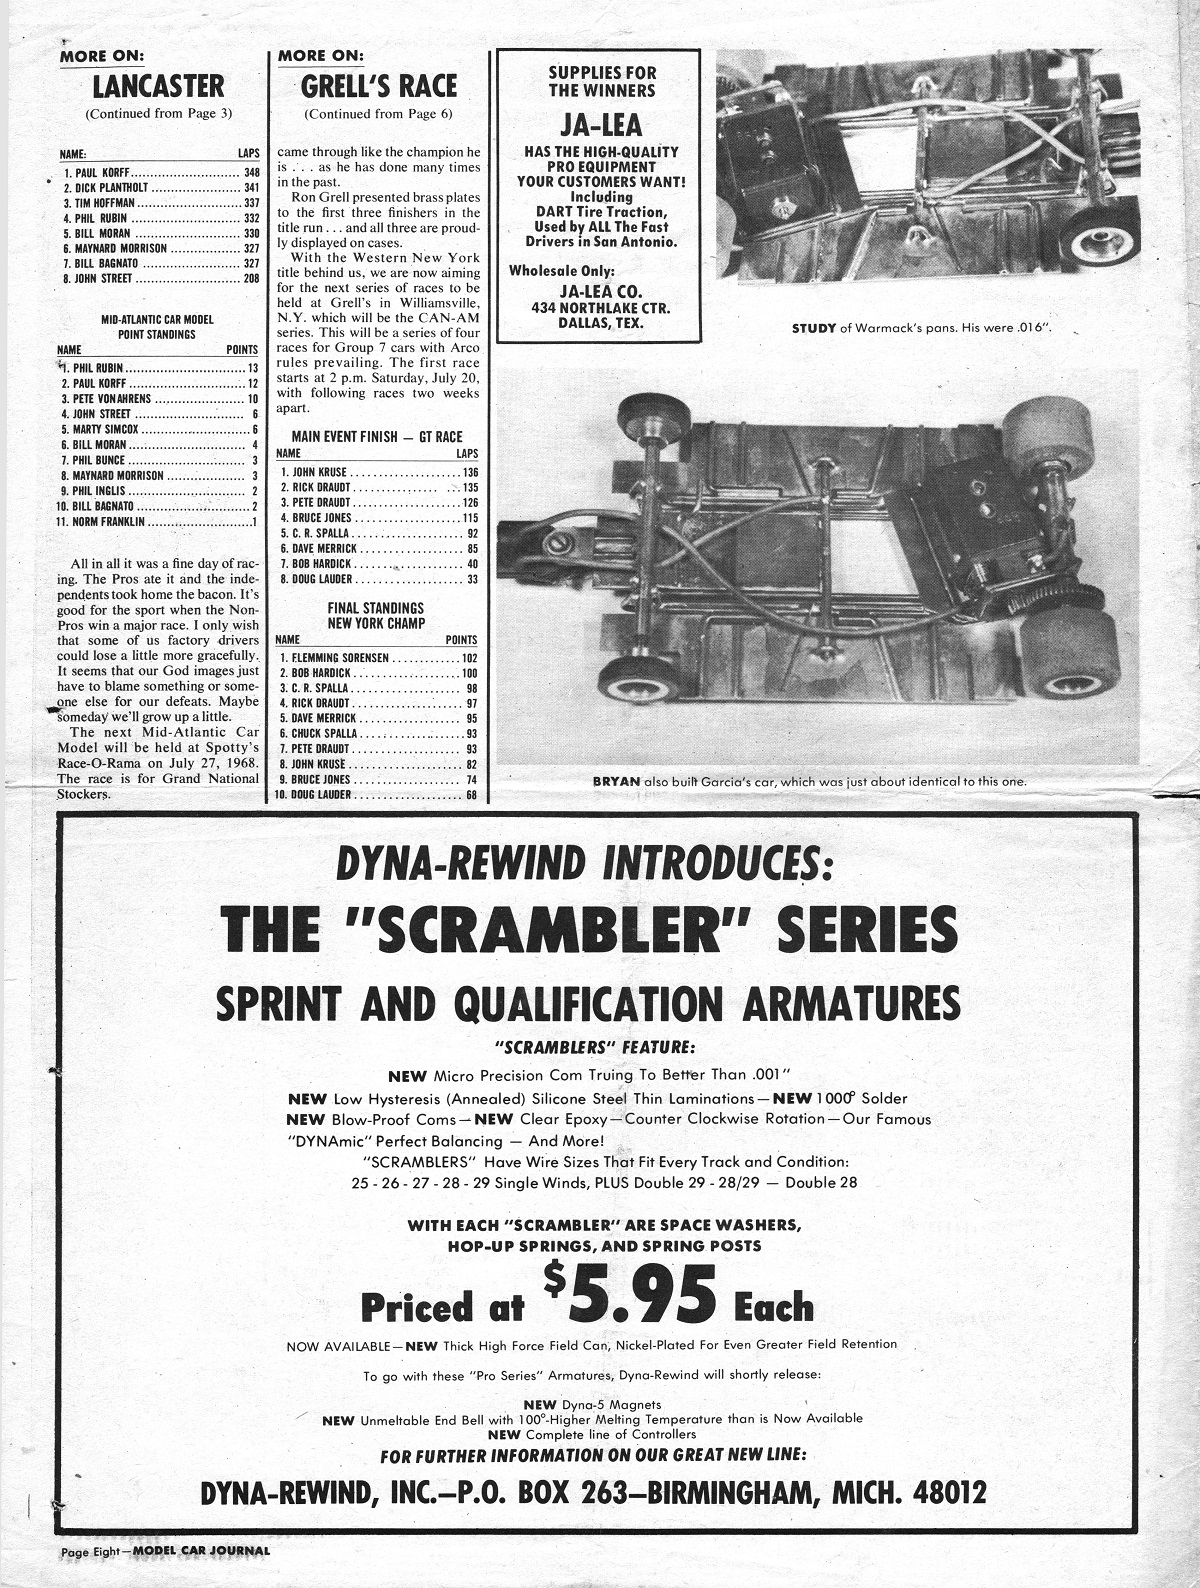
Next up is a motor. Since the ad below appeared with Bryan Warmack's inspirational car for this build a Dyna-Rewind "parts build up" motor will be going in my car    :dance3:


MCJ V1N16 p8 7-68 - Copy (3).jpg


  • Pablo, Tex, Phil Smith and 4 others like this

Rick Thigpen
Check out Steve Okeefe's great web site at its new home here at Slotblog:
The Independent Scratchbuilder
There's much more to come...


#37 Phil Smith

Phil Smith

    Posting Leader

  • Member at Peace
  • PipPipPipPipPipPipPip
  • 3,582 posts
  • Joined: 03-November 07
  • Gender:Male
  • Location:Irving, TX

Posted 09 December 2022 - 09:22 PM

Wow! That chassis shines like a mirror. :shok:


Phil Smith
???-2/31/23
Requiescat in Pace

#38 Bill from NH

Bill from NH

    Age scrubs away speed!

  • Full Member
  • PipPipPipPipPipPipPipPip
  • 14,710 posts
  • Joined: 02-August 07
  • Gender:Male
  • Location:New Boston, NH

Posted 09 December 2022 - 09:50 PM

You can comb your hair in all of Rick's chassis.  :victory:


  • Pablo likes this
Bill Fernald
 
I intend to live forever!  So far, so good.  :laugh2:  :laugh2: 

#39 Pablo

Pablo

    Builder

  • Administrator
  • PipPipPipPipPipPipPipPip
  • 18,438 posts
  • Joined: 20-February 06
  • Gender:Male
  • Location:Cleveland, Tennessee

Posted 09 December 2022 - 09:55 PM

Or shave  :D


  • Bill from NH likes this

Paul Wolcott


#40 don.siegel

don.siegel

    Grand Champion Poster

  • Subscriber
  • PipPipPipPipPipPipPipPip
  • 5,816 posts
  • Joined: 17-February 06
  • Gender:Male
  • Location:Paris, France

Posted 10 December 2022 - 05:13 AM

Here's the weight of the finished chassis Larry. For people from "olden times" like me in ounces.........


Rick, 


Something I noticed going through the old magazines: while most weights were given in ounces, including for chassis, the smaller weights were already being given in grams, even back in the 60s. Classic sold 10, 20 and 30 gram guide weights for instance, and that was pretty standard for small items, even at the time. Guess it sounded more elegant than saying 3/17 of an ounce. 


So we were all hipsters even before there was such a thing. (but I still use a US ruler to build my chassis, even after 40 years in Europe!)


Don 


  • Samiam and Geary Carrier like this

#41 Lone Wolf

Lone Wolf

    Posting Leader

  • Full Member
  • PipPipPipPipPipPipPip
  • 2,732 posts
  • Joined: 03-March 08
  • Gender:Male
  • Location:New York

Posted 10 December 2022 - 07:56 AM

Absolutely beautiful.


Incredible workmanship. 


That chassis should be hung around someones neck on a chain.


Speaking of scales, I had this exact scale in the 70's but I used it to weigh something other than slot car chassis if you get my drift  :smoking:  :smoking:  :smoking:  :smoking:


https://ogtstore.com...ge-ohaus-scale/


  • Samiam and Geary Carrier like this

Joe Lupo


#42 Mark Onofri

Mark Onofri

    Posting Leader

  • Full Member
  • PipPipPipPipPipPipPip
  • 2,416 posts
  • Joined: 18-November 20
  • Gender:Male
  • Location:Syracuse, NY

Posted 10 December 2022 - 06:52 PM

I'm hoping that with all of your mechanical prowess, you will have a working wing?

#43 dc-65x

dc-65x

    Grand Champion Poster

  • Subscriber
  • PipPipPipPipPipPipPipPip
  • 6,943 posts
  • Joined: 14-February 06
  • Gender:Male
  • Location:Captain Rick: The only vintage slot car nut in SW Oregon?

Posted 12 December 2022 - 10:03 PM

I'm glad you guys like the chassis too, thanks!     :)


I know I said I was going to start on the motor but first I just had to see the chassis and body come together. To make that happen I needed the wheels, tires and wheel inserts.


For fronts I'm using a mid '68 favorite, the 3/4" RVM magnesium wheel and tire. I'm told that this is a REHco version and not an actual RVM wheel but it sure looks the part:


wheels (3).JPG


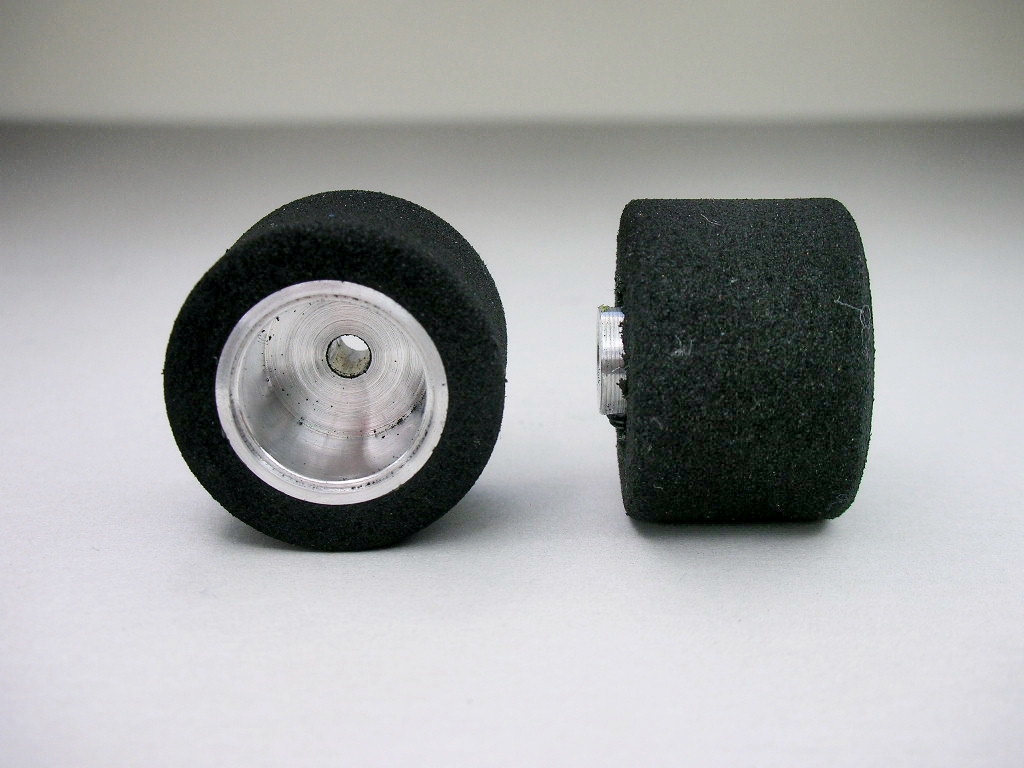
The rears are extra wide Russkit style repop wheel. The tires are Alpha Humongous black donuts finished to 7/8" X 5/8":


wheels-tires (3).JPG


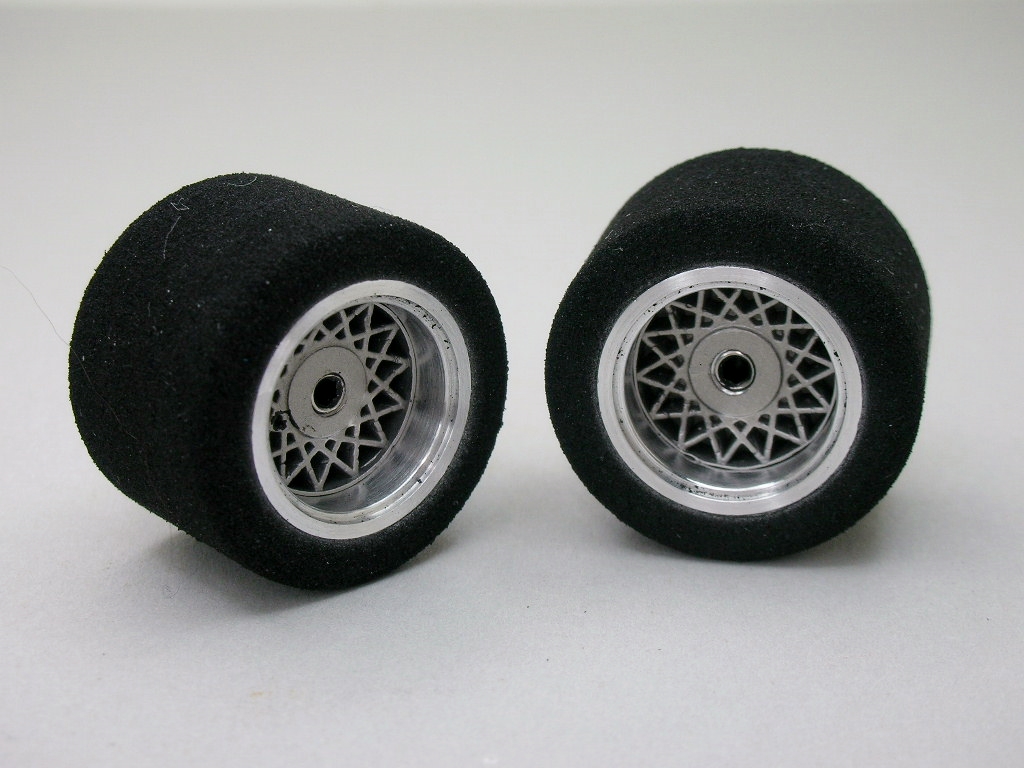
A bitch'n body needs bitch'n looking wheels......   :crazy: ......and Cox magnesium Chaparral wheels are just the ticket. Below are the stock wheels, turned down to 1/2" wheel inserts, micro bead blasted and clear coated:


wheels (1).JPG


I'm really happy with these:


wheels (5).JPG


wheels (7).JPG


wheels (4).JPG


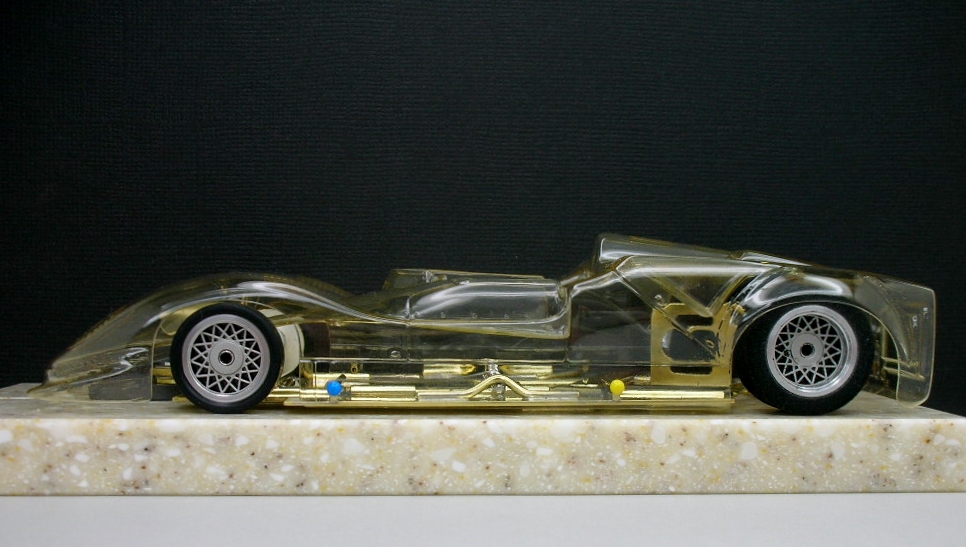
Here's body mounted down low on the chassis with those cool wheels:


Lancer 2G body (8).JPG


OK, now I'm motivated for sure. Time to build that motor.........


  • slotbaker, Pablo, Tex and 4 others like this

Rick Thigpen
Check out Steve Okeefe's great web site at its new home here at Slotblog:
The Independent Scratchbuilder
There's much more to come...


#44 Bill from NH

Bill from NH

    Age scrubs away speed!

  • Full Member
  • PipPipPipPipPipPipPipPip
  • 14,710 posts
  • Joined: 02-August 07
  • Gender:Male
  • Location:New Boston, NH

Posted 12 December 2022 - 11:38 PM

I always thought the REHCO RVMs had aluminum hubs while the originals were magnesium. The rubber might have been a little different too.


Bill Fernald
 
I intend to live forever!  So far, so good.  :laugh2:  :laugh2: 

#45 dc-65x

dc-65x

    Grand Champion Poster

  • Subscriber
  • PipPipPipPipPipPipPipPip
  • 6,943 posts
  • Joined: 14-February 06
  • Gender:Male
  • Location:Captain Rick: The only vintage slot car nut in SW Oregon?

Posted 13 December 2022 - 11:26 AM

Maybe so Bill. I have some that are oxidized like magnesium but ?????????

TonyP said the "real" RVM's had flush with the rim, sharp shouldered rubber unlike cool looking tires on the wheels I'm using.


Whatever they are, I really like them.   :victory:


  • Pablo likes this

Rick Thigpen
Check out Steve Okeefe's great web site at its new home here at Slotblog:
The Independent Scratchbuilder
There's much more to come...


#46 Bill from NH

Bill from NH

    Age scrubs away speed!

  • Full Member
  • PipPipPipPipPipPipPipPip
  • 14,710 posts
  • Joined: 02-August 07
  • Gender:Male
  • Location:New Boston, NH

Posted 13 December 2022 - 12:58 PM

I haven't seen mine in over 40 yrs., about time i dig them out for a good look. I do recall drilling them out with an indexing head, just for looks & shimming them for 3/32 axles. If I remember correctly, RVMs were first created by Lou del Rosario. who owned Elmsford Raceway.


Bill Fernald
 
I intend to live forever!  So far, so good.  :laugh2:  :laugh2: 

#47 dc-65x

dc-65x

    Grand Champion Poster

  • Subscriber
  • PipPipPipPipPipPipPipPip
  • 6,943 posts
  • Joined: 14-February 06
  • Gender:Male
  • Location:Captain Rick: The only vintage slot car nut in SW Oregon?

Posted 14 December 2022 - 05:10 PM

Here's a picture I found with Google of the period Dyna-Rewind motors and armatures for this build:


dyna-rewind.jpg


This ad I showed earlier describes the motors and component parts they offered in mid 1968:


MCJ V1N16 p8 - Copy.jpg


I'm building my motor up from Dyna-Rewind and other period parts. Here's the heart of the beast:


dyna-rewind motor (6).JPG


All cleaned, polished and with the comm lightly cut:
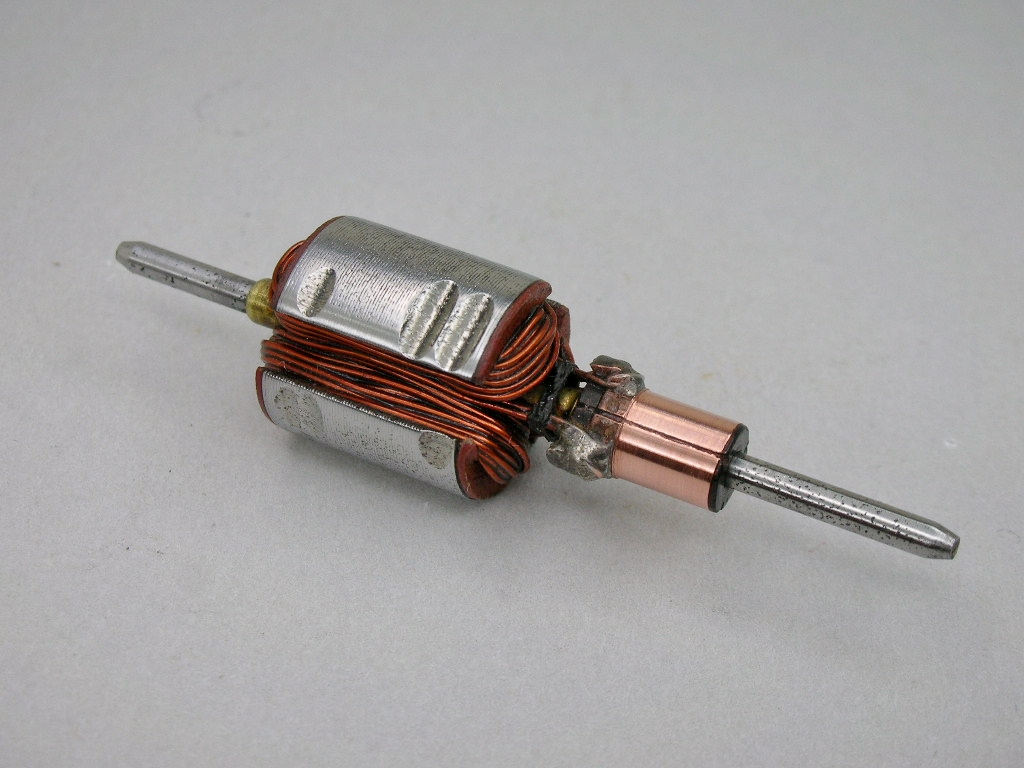
 

dyna-rewind motor (7).JPG


Dyna rewind brush springs, post protectors and period shunted brushes:
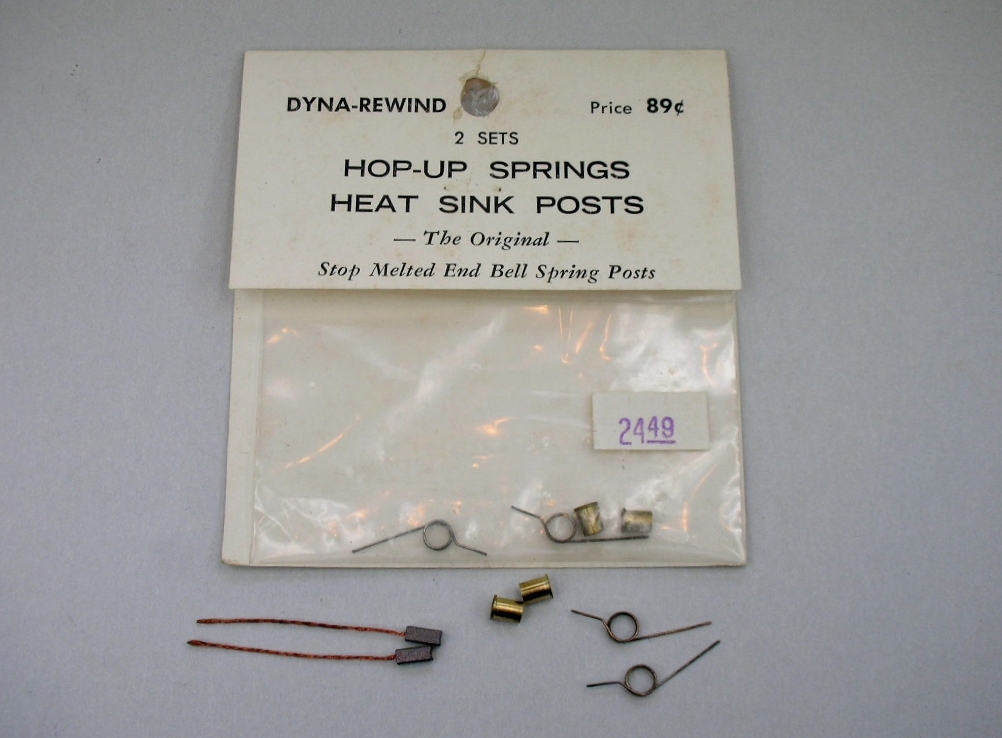
 

dyna-rewind motor (10).JPG


I've been saving this beautiful plated NOS French Motor Co. can used in Dyna-Rewind motors:


dyna-rewind motor (4).JPG


I don't have the Dyna-5 magnets mentioned in the ad so I'm going with Versitec magnets with a Dynamic packaged Mura Semi Can shim:


dyna-rewind motor (2).JPG


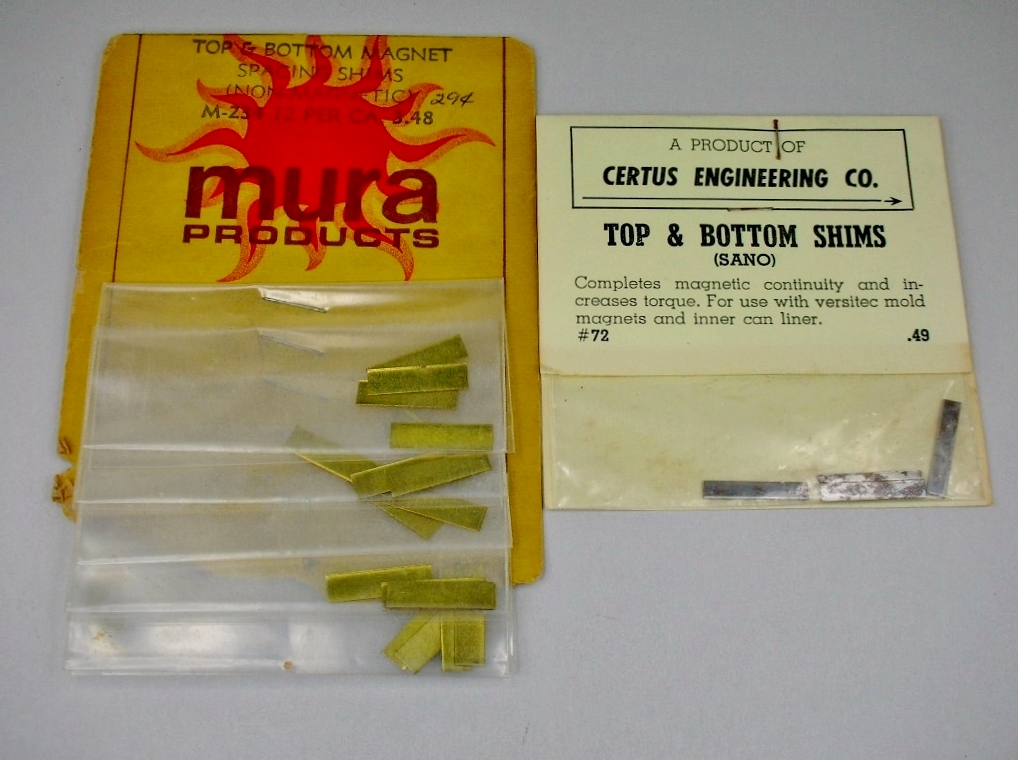
To lock the magnets in place vertically I'm using either Mura or Certus magnet shims:
 

dyna-rewind motor (3).JPG


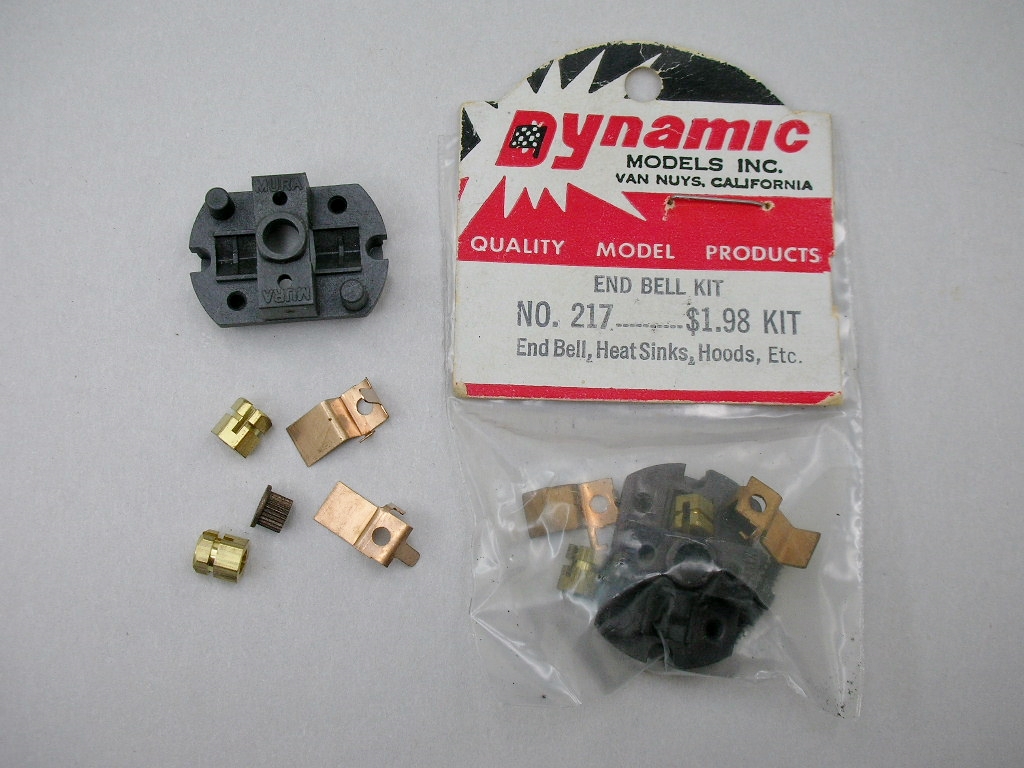
And lastly, for the end bell, I've going with a Dynamic packaged first generation Mura melt-able "Unmeltable" end bell kit:
 

dyna-rewind motor (9).JPG


Motor building time........


  • slotbaker, Phil Smith, Alchemist and 2 others like this

Rick Thigpen
Check out Steve Okeefe's great web site at its new home here at Slotblog:
The Independent Scratchbuilder
There's much more to come...


#48 don.siegel

don.siegel

    Grand Champion Poster

  • Subscriber
  • PipPipPipPipPipPipPipPip
  • 5,816 posts
  • Joined: 17-February 06
  • Gender:Male
  • Location:Paris, France

Posted 14 December 2022 - 05:20 PM

Yea! 


#49 dc-65x

dc-65x

    Grand Champion Poster

  • Subscriber
  • PipPipPipPipPipPipPipPip
  • 6,943 posts
  • Joined: 14-February 06
  • Gender:Male
  • Location:Captain Rick: The only vintage slot car nut in SW Oregon?

Posted 17 December 2022 - 01:14 PM

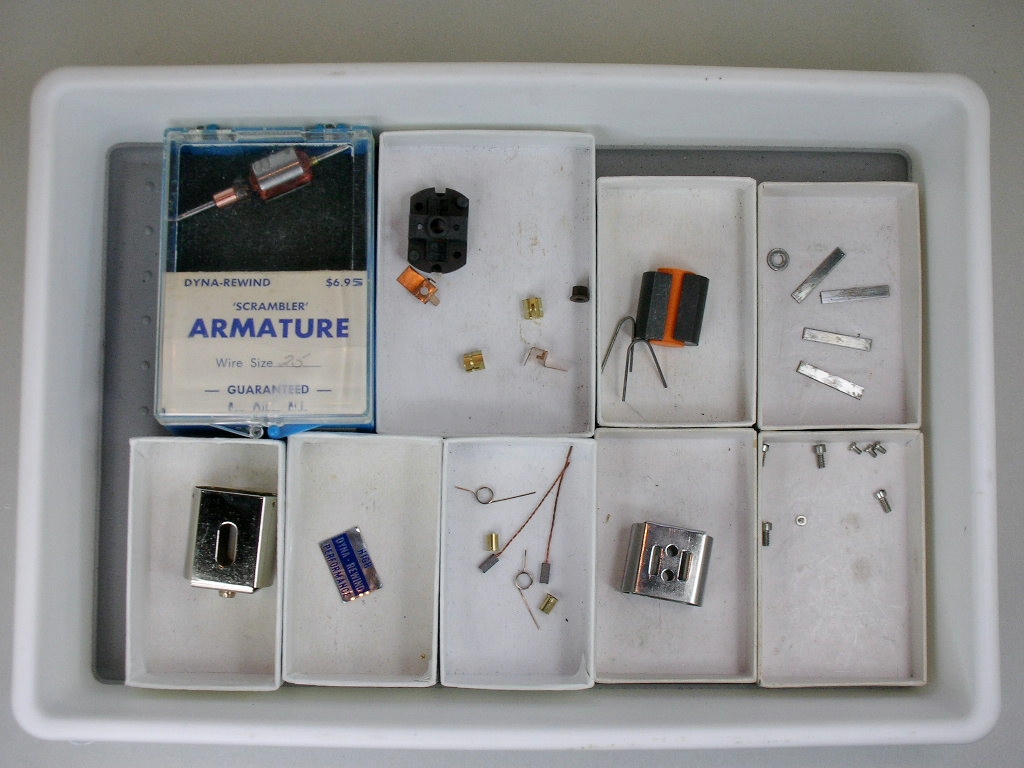
I like to go through all the components and make sure they are ready to go. Then put them in a "build box":


dyna-rewind motor (11).JPG


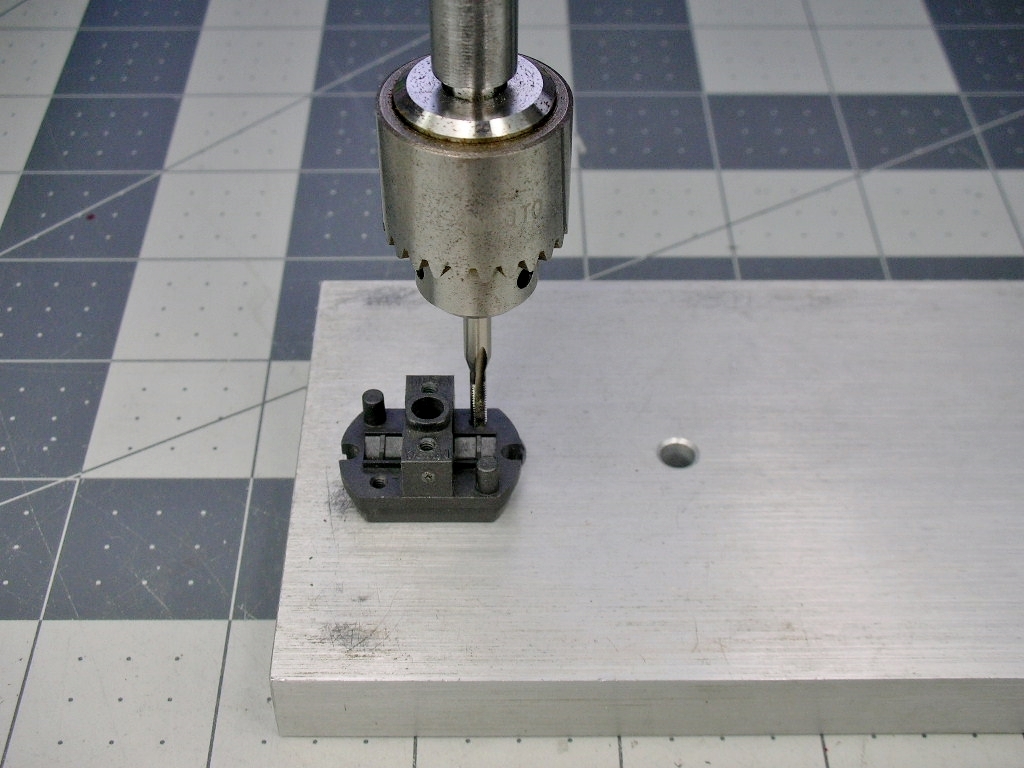
First up the end bell gets all the screw holes tapped for 2-56 stainless steel machine screws. A little tapping fixture like this Micro-Mark makes this quick, easy and everything correctly aligned:


dyna-rewind motor (12).JPG


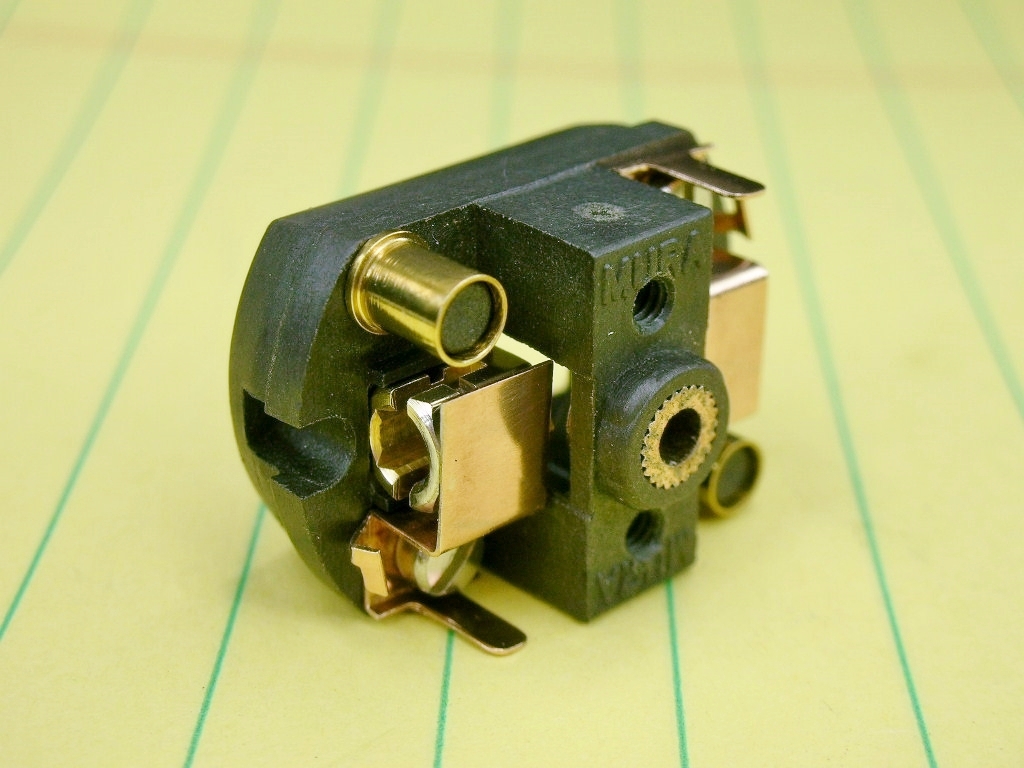
I have a dedicated Mura end bell I use to solder the brush hood to the hex brush holder. It only takes a second and then I quickly drop the end bell in water with baking soda, blow it dry and repeat for the other side:


dyna-rewind motor (18).JPG


The finished end bell gets a new bearing pressed in place, spring post protectors and it's ready to be mounted to the motor can:


dyna-rewind motor (14).JPG


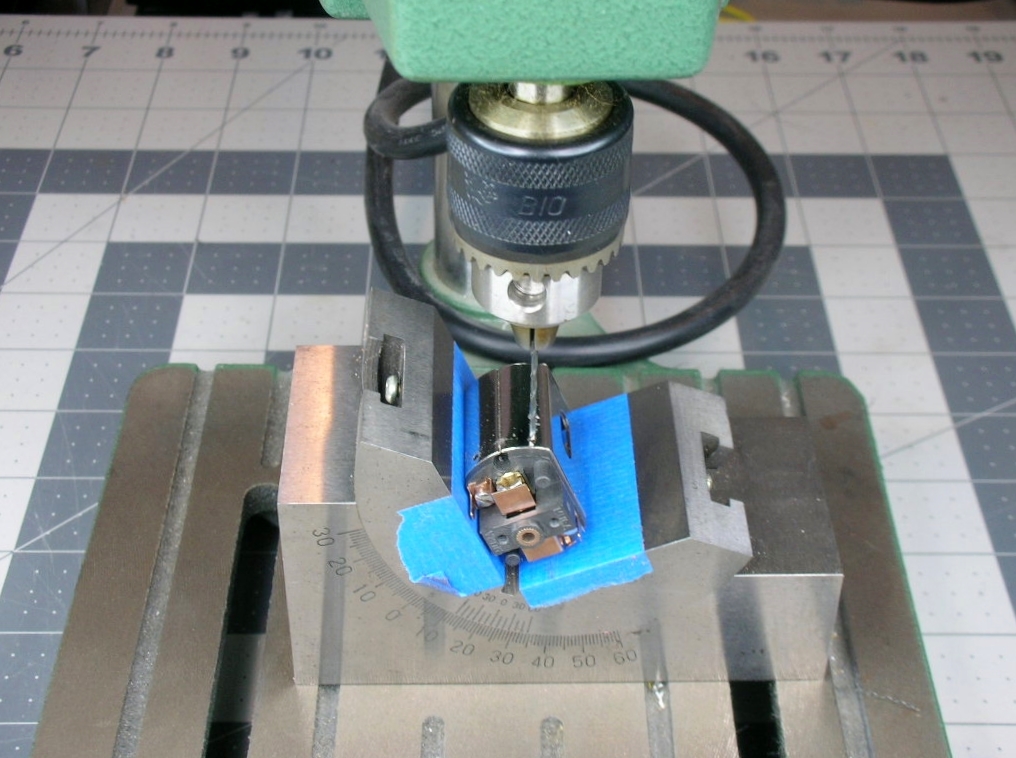
A tiny cheapo benchtop drill press and an adjustable angle v-block set at 24 degrees makes drilling the end bell mounting holes easy:


dyna-rewind motor (15).JPG


That same v-block and tapping fixture gets the holes threaded at the correct angle:


dyna-rewind motor (16).JPG


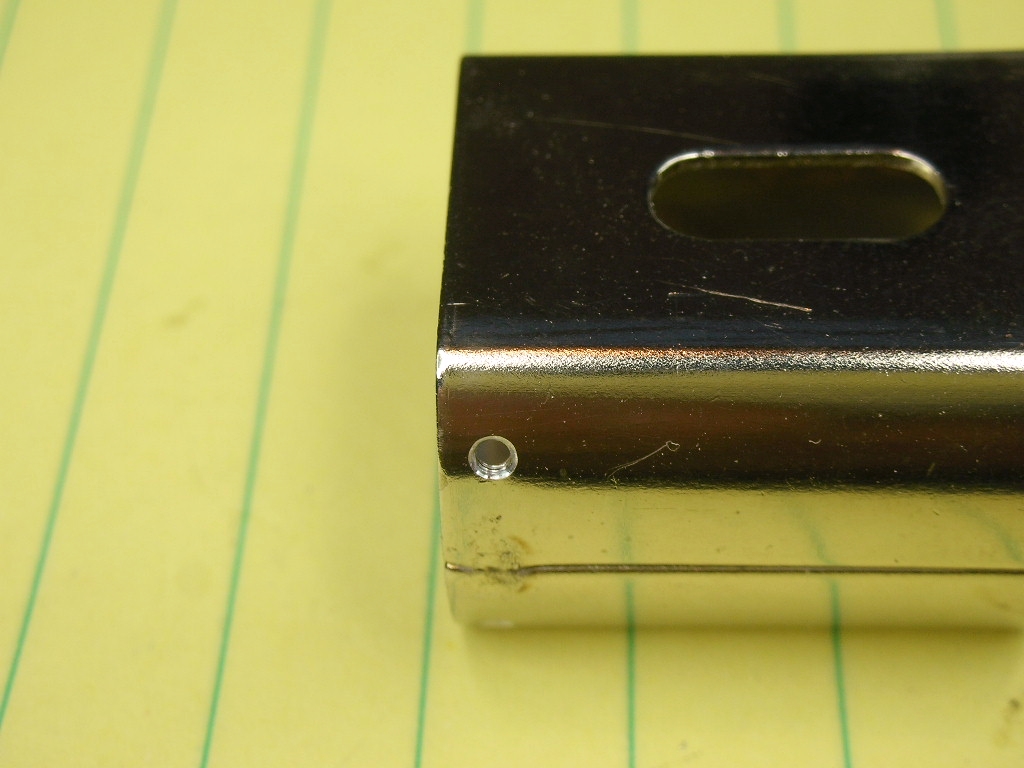
These cans are made from thick steel. The holes can be deeply chamfered so the screws will sit flush with the surface......


dyna-rewind motor (17).JPG


.......like so:


dyna-rewind motor (20).JPG


Assembly and testing time.


  • slotbaker, don.siegel, Jencar17 and 6 others like this

Rick Thigpen
Check out Steve Okeefe's great web site at its new home here at Slotblog:
The Independent Scratchbuilder
There's much more to come...


#50 dc-65x

dc-65x

    Grand Champion Poster

  • Subscriber
  • PipPipPipPipPipPipPipPip
  • 6,943 posts
  • Joined: 14-February 06
  • Gender:Male
  • Location:Captain Rick: The only vintage slot car nut in SW Oregon?

Posted 18 December 2022 - 11:46 AM

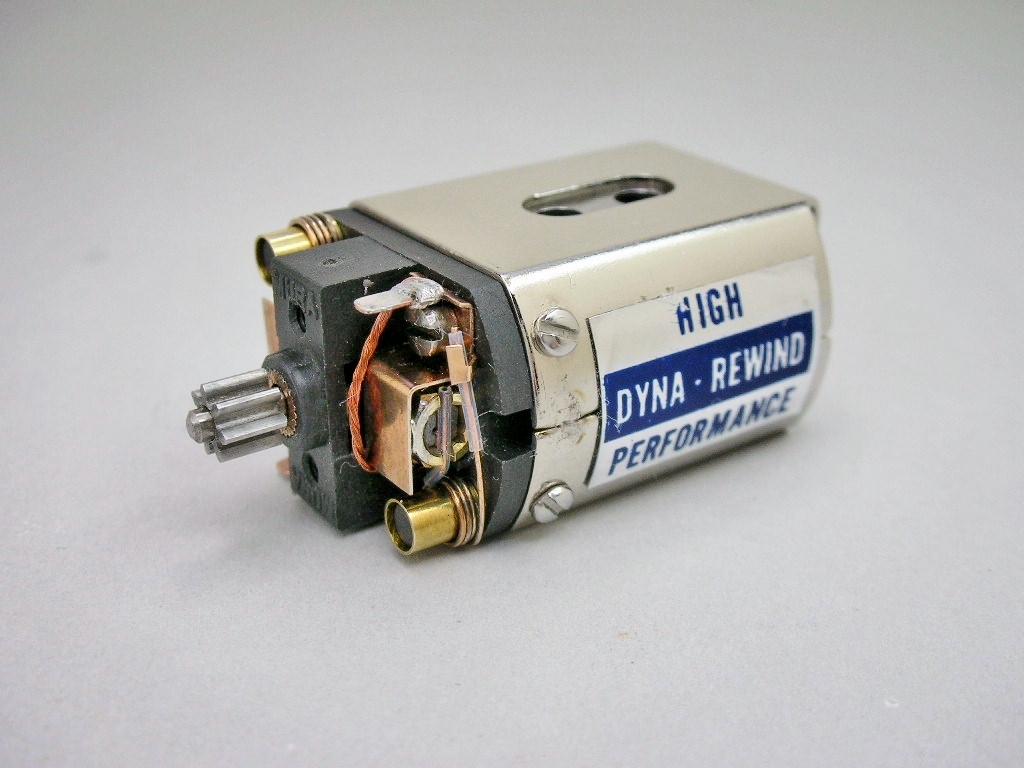
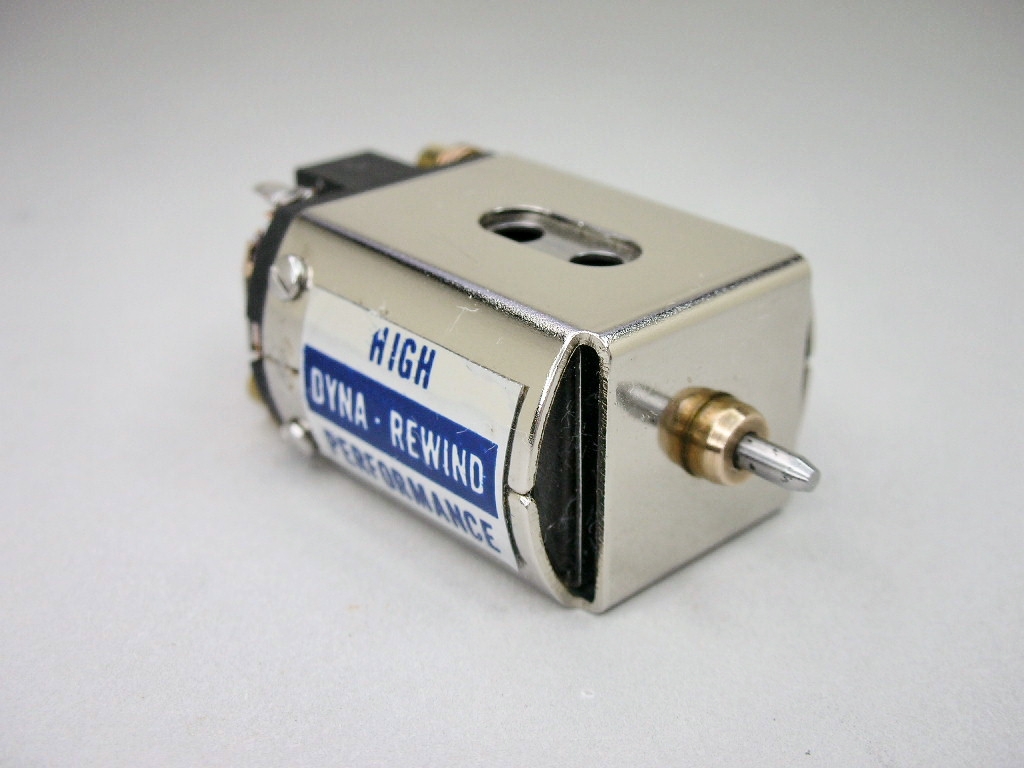
So far so good. The motor runs fine on the power supply.


dyna-rewind motor (21).JPG


dyna-rewind motor (24).JPG


dyna-rewind motor (23).JPG


Time to get the motor in the chassis and "wire it and fire it."


  • Jencar17, Tex, Phil Smith and 2 others like this

Rick Thigpen
Check out Steve Okeefe's great web site at its new home here at Slotblog:
The Independent Scratchbuilder
There's much more to come...


Electric Dreams Online Shop